This week as I put my paper piecing block together, I thought of what I have learnt this year doing these blocks… and thought I would share some of my tips.
So this week I choose another of Julie @ 627Handworks great blocks. The block, Siouxsie, is one that Julie has put up on Craftsy and is block 13 of her Block Rock’n series. At a $1.00 for the pattern is it a bargain. You can also download Julie’s free Block Rock’n blocks at Craftsy as well.

Tip #1… I always download the pattern to my desktop before I print. This is the best way to guarantee that you are printing to the correct scale. I had some fun issues printing directly from the website early on in Paper Piecing Monday’s life, which resulted in me have to remake some blocks. Also make sure that you tick the “print in original size” box in your print dialogue box.
Tip #1a… I use normal photocopy paper for printing my patterns. It is cheap and easily available.
Tip #2… If the block is complex or I am making it complex, I use coloured pens to mark up my paper pattern. This way I do not lose track of what colour goes where.

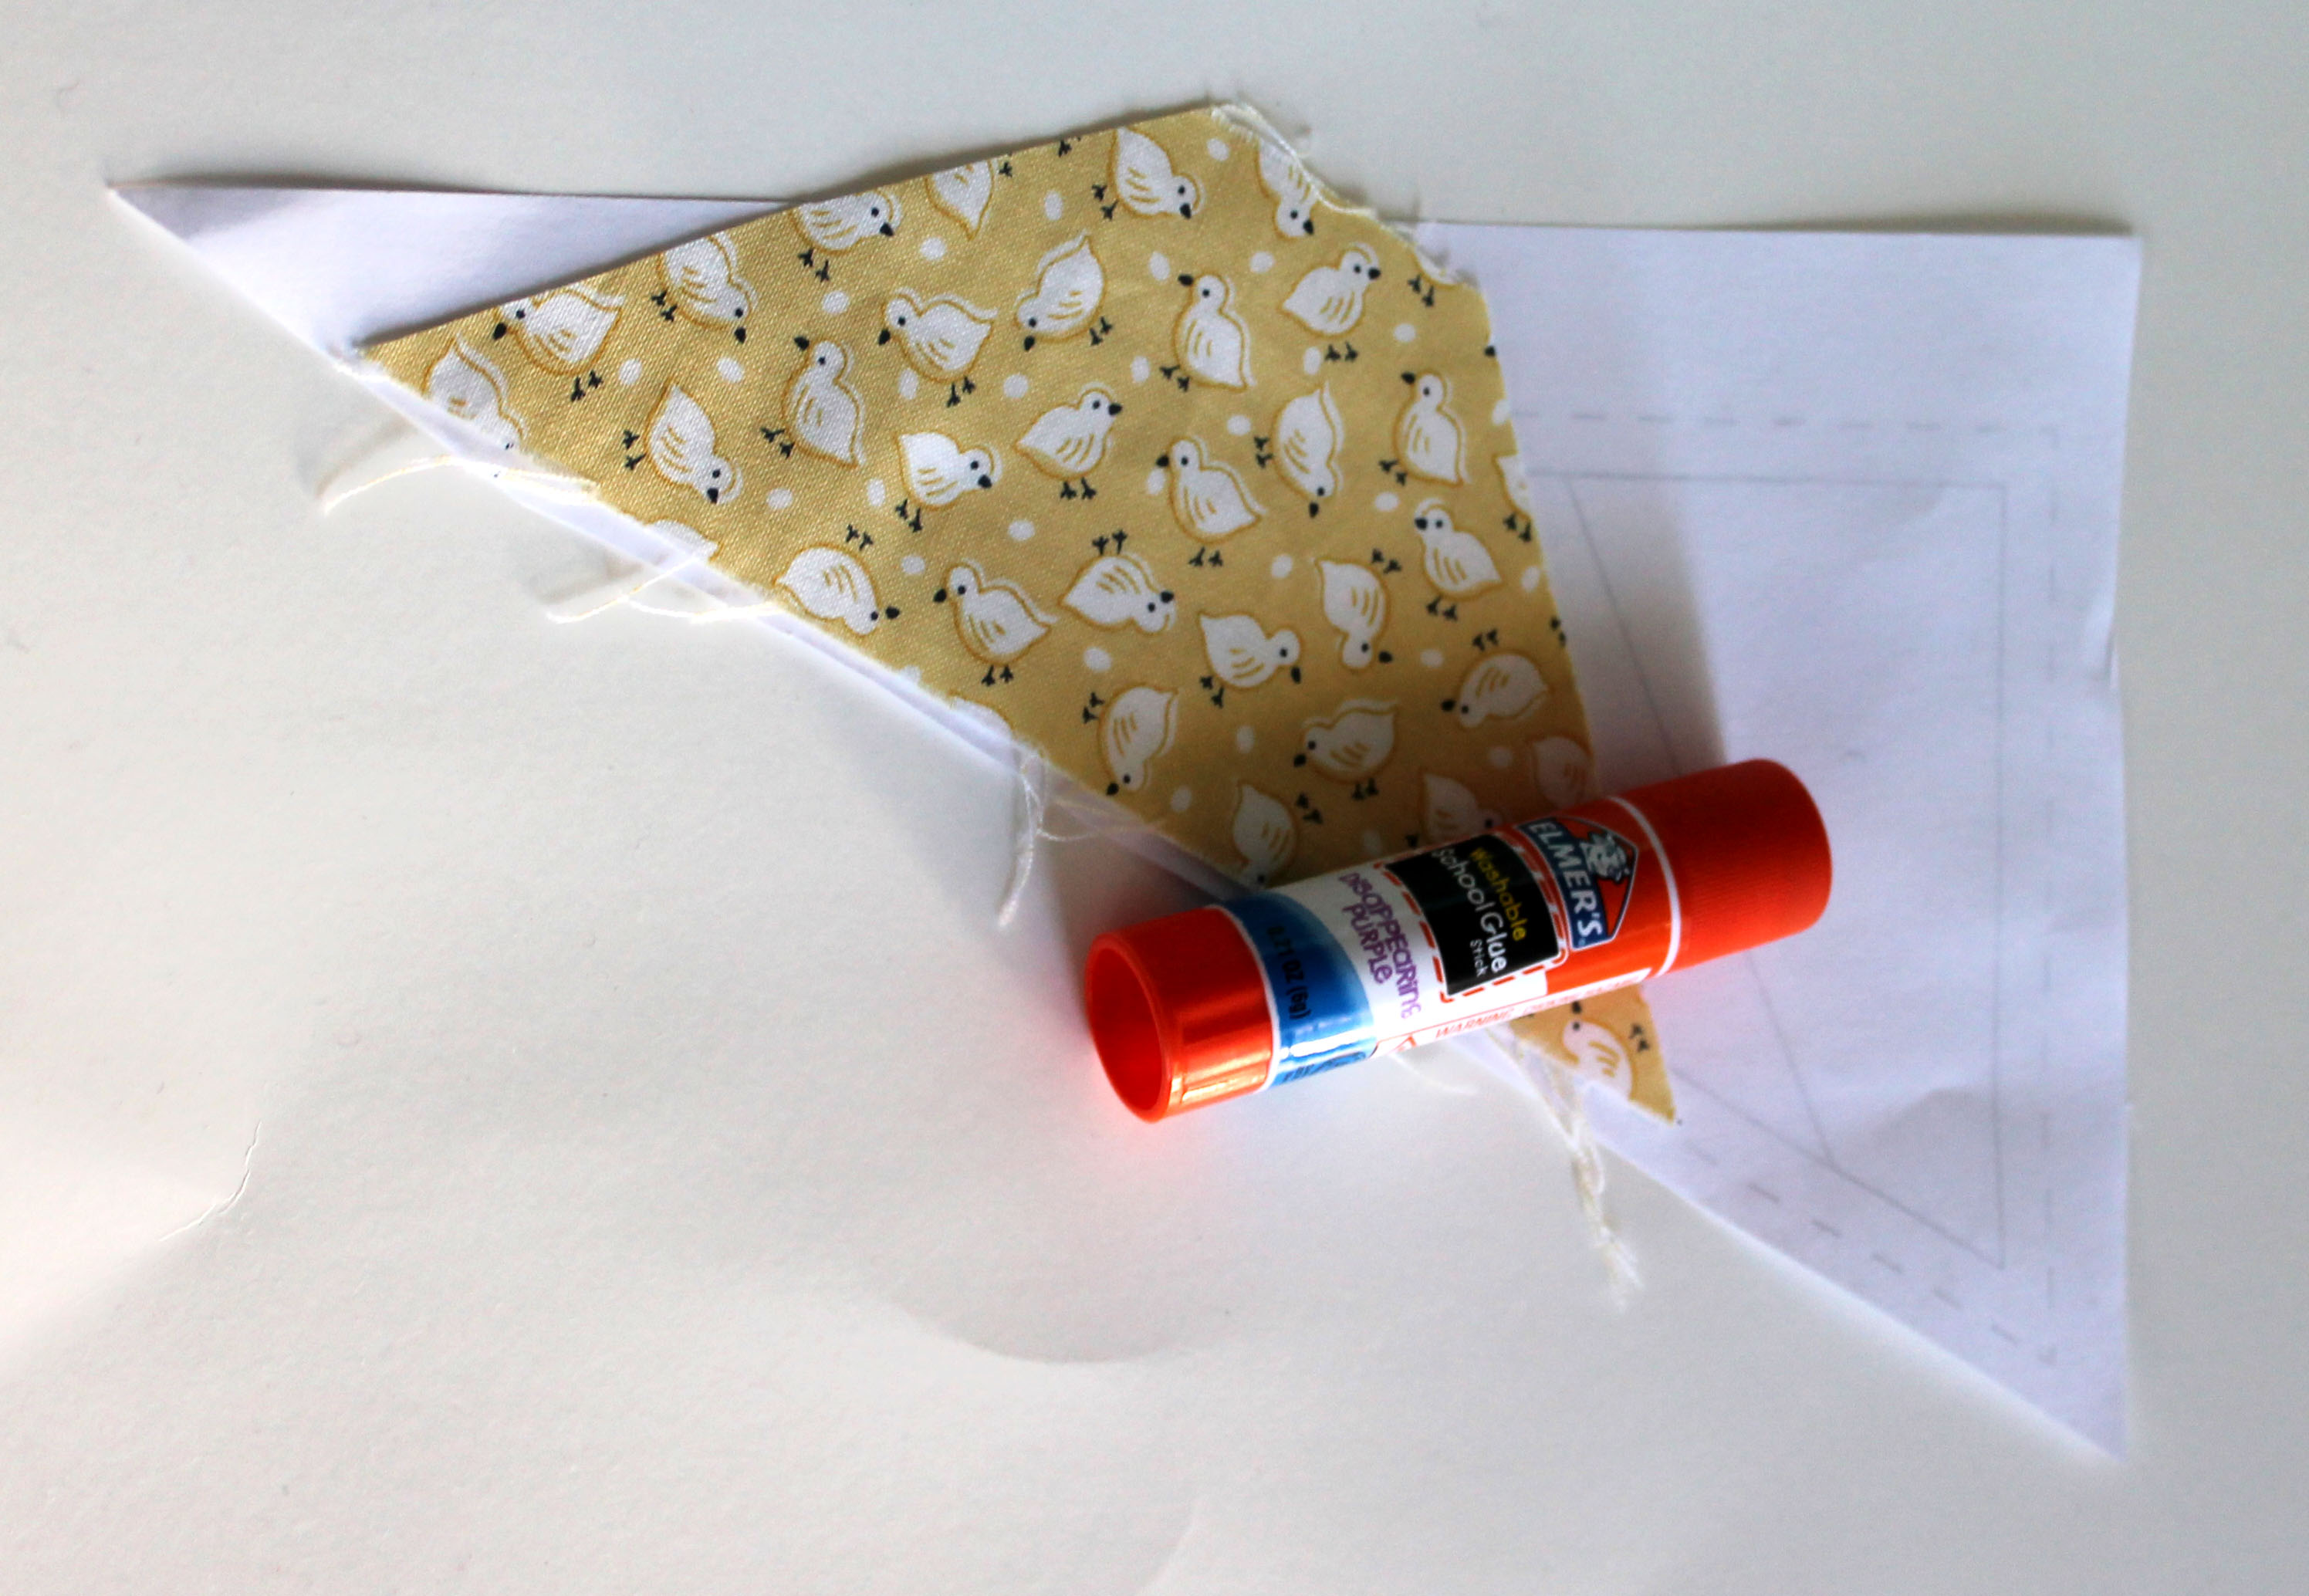
Tip #3… I always glue down my first piece of fabric. I go through so much Elmers glue it is not funny. I find it easier to align the first set of seams with one of the fabric pieces already stuck in place and pins cause fabric bunching which is annoying.
 Tip #4… I am always generous with my seam allowance on my scraps. I have found it is much easier to work with BIG scraps or pieces of fabric than it is to work with precisely cut pieces of fabric. In paper piecing you get all sorts of weird shapes and having an abundance of extra fabric means that you can get even the weirdest shapes to work, without having to re-sew the block over and over.
Tip #5… Do all sewing with a small stitch length. I usually do my paper piecing stitching on a length of 2 – 2 1/2. This helps make ripping the paper off at the end easier, but also ensures the integrity of the sewing. Ripping the paper off the block can cause stitches to loosen and the smaller stitches helps with this immensely.

Tip #6… I use scissors to trim my excess fabric, not a rotary cutter and ruler. I find it quick and easy – I can do it while still sitting beside my machine. No one ever sees the backside of the block, so I do not mind if it is a little messy.

Tip #7…. Your iron is your friend. I iron all my seams/pieces to get them to lie flat. For this block I sewed the first two fabric pieces together on all the pattern sections and then stood up, ironed all the seams and then sat down and sewed the next fabric piece to the pattern. For last week’s fox block I used my mini iron to sew as I went. Whatever way all seams get ironed.
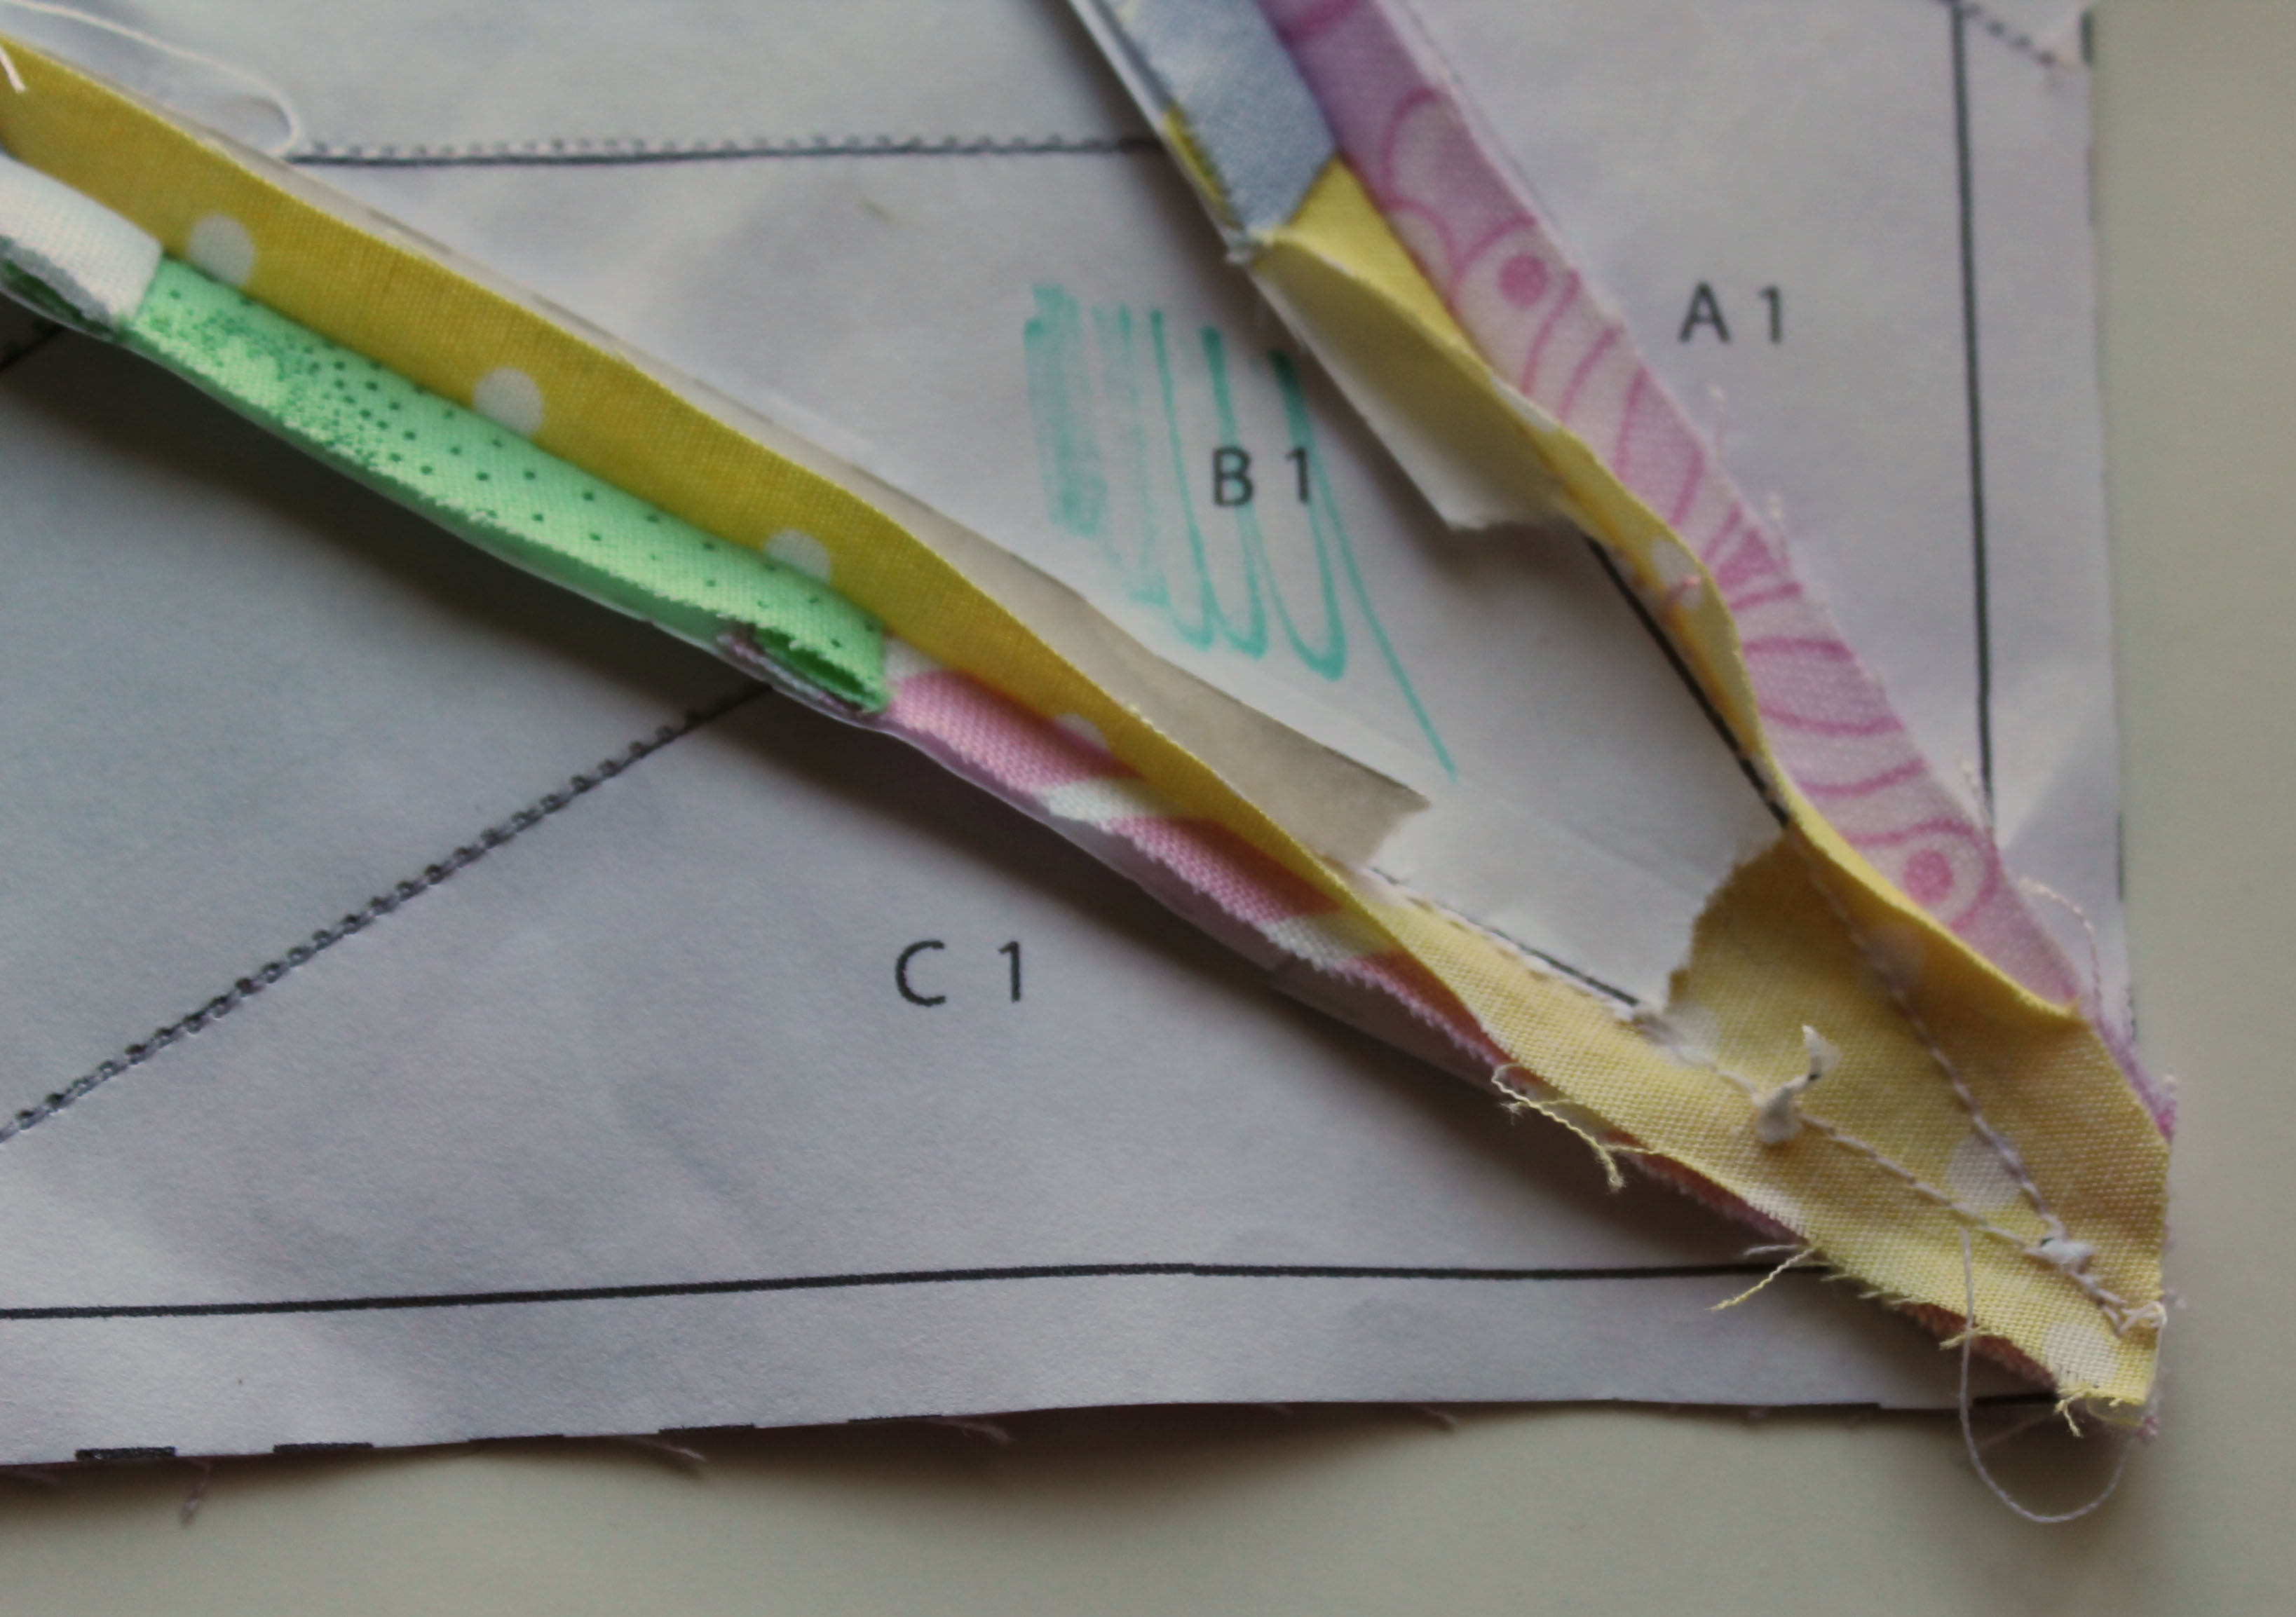
Tip #8… Before I sew together the finished paper pattern pieces, I rip the paper off any bits of the pattern that are bulky or intersect. This makes the block less chunky and means my sewing machine is less likely to hiccup when it hits the multiple layers of fabric/paper. With this pattern the center pieces of the block needed to be pulled. I leave enough of the paper so that you can still see your sewing lines.
Tip #9… Tweezers are an essential paper piecing tool. When you are removing the paper pattern at the end of the process, the big bits are easy but tweezers are the only way to get those pesky little bits of paper that are hiding in the corner of the block.

Tip #10… If at all possible train your husband, children or friend to help you pull the paper off your finished quilt top. It really does make life easier.

Thanks for sharing these incredible tips, Cath. I know that paper piecing is a technique that does not come easily to everyone. Hope you don’t mind if I share this, with a link back, on my facebook page at http://facebook.com/sewfreshquilts
Thanks Lorna for the sharing. It did not occur to me that people would find paper piecing daunting until I set a couple of easy patterns as Bee blocks. It has been an eye opening exercise.
Great post. I know these tips will come in very handy. 😄
Reblogged this on the green apricot and commented:
Love this blog about paper piecing- excellent info!
Thanks for that Angela. Glad you liked it.
I can use all of the help I can get with paper piecing so I appreciate all of the great tips! Thank you!
This is great! Thanks for the tips and the photos of them too. Hope you don’t mind I shared a link on my A Quilter’s Table fb page…
Thank you for sharing my page on Facebook.
Great tips! I found this from Diane on Facebook and I am sharing it through my blog Facebook page too.
Dah! WordPress ate my last comment! I found this post through Diane on Facebook and I am sharing this on my blog Facebook page. Great tips! I especially love #10. 🙂
Number 10 may be the hardest one to do…but it is worth it if you can pull it off.
Love these tips Cath – my hardest time always comes from a mega bulky center seam. I think it might be time for me to figure out those fancy seam fanning techniques!
Great post – and fab tips! I will definitely be training my kidlets to remove the paper for me – once they’re old enough to do it without damage! hehe!
lol, training is so important! 🙂
Thanks for sharing this, I’m really going to need it. I just started paper piecing, inspired by your blog, I never even heard of it before I came here!
I am so excited you are going to try paper piecing, it is such a great way to get precision piecing done without too much hair pulling out. I would love to see what you do, so let me know when you have posted or having something to share.
Will do definitely. Thanks for the encouraging words 🙂
I need to work on numbers three and ten. I was pleased to see that I was pretty close to you, a paper-piecing master, on all the other points, so I can’t be going too far wrong.
3 is optional and 10 is very handy. Definitely work on 10.
Great paper tips, especially the color coding. I recently had a hard time with some paper piecing and need to let it rest a bit before I do it again. Your tips will help.
Pingback: Dollhouse Furniture so far and Paper Pieced Quilting | Dearest Sultana
Thank you! I love paper piecing and can’t believe I never thought of tweezers. Seems so obvious now… 🙂
Pingback: Sew Thankful Sunday, 10.20.2013 - The Crafty Quilter
I have pp’d some–not a lot. Love the tips,especially the one about color coding the paper. That should help tremendously.
Thanks for the tips. I’m just starting PPing, think I’m going to like it. Great way to get precise intersecting points and fun way to use up some scraps. I’m going to share your tips with my quilting friends.
Tip #8 and 9 — I have no idea why these ideas never occurred to me before. Thanks for the heads up, it’ll be a big help!
The day I discovered how useful tweezers were I was kicking myself for not thinking of it sooner. They are so handy.
This is a very complete set of tips . . . and one that I wish I found much earlier, because I learned many of these the hard way 🙂 It’s okay though, I’ve also learned to love paper piecing, even though I learned the hard way!
I also learnt the hard way. The color coding the pattern I only figured out in the last year or so. There was a huge amount of unpicking before that one was realized. Lol.
Pingback: Quick links for paper piecing | stitchinggrandma
Great tips for anyone refining their pp technique! Thanks for continuing to inspire!
You rock! I love paper piecing. I appreciate these tips.
Hi, I love your site. I downloaded your blocks but I’m having a hard time to figure out how to find the sew sequence of them, especially because of triangles in the middle of the block. Could you give me a hand? Thanks a lot!
Hi Carol. What blocks are you having trouble with?
Hi, I love your site. I downloaded your blocks but I’m having a hard time to figure out how to find the sew sequence of them, especially because of triangles in the middle of the block. Could you give me a hand? Thanks a lot!
Ok, I got it…. The sequence is marked “Sec” 1, 2, 3… sorry!!
Do you iron all of your seams open when you paper piece? I was always under the impression that pressing seams open in quilting weakens the block.
Sherry on the more complex and bulky blocks I iron my seams open. It is the only wAy to deal with many of these blocks. Usually I iron my other seams to the side.
Pingback: Medallion Along: May/Round 4 | Portland Modern Quilt Guild
Pingback: Medallion Along: March/Round 2 | Portland Modern Quilt Guild
Hi love your site! I am making the Harlequin Star pattern and I am having trouble making the center 16 points join perfectly. They are a little off even when I nest the center seams and press the perfect halves. Any tips would be appreciated.
love it!
Thank you so much for these great tips; I have tried pp-ing before, but didn’t like the bulky seams to be sewn together–good tip on that. I love your little triangles especially–so cute! Hugs, Julierose
Great site and information, thanks so much! New at pp, just took a class and they suggested checking out your site…struggling with seams going to the light side and showing a shadow…how can you iron the seams open with the paper still on the block…or do you remove the paper? Seems like there is no choice on which way the seams will go? Trouble nesting the seams when the paper is covering the seam and only lets it go one way. Trying to perfect my method before doing a block “for real”! Any help is so appreciated! Best, Linda B
Hi Linda. I will always remove paper along the seams to help with ironing the seams open.
Pingback: Foundation Paper Piecing (FPP) Tutorials & Patterns – Southbay Bella Studio
Recently started paper piecing…I have fallen in love with the concept. Thanks for the tips!