Cheese & crackers – wip Wednesday

This week I have been playing with a traditional quilt pattern called “crackers”.    My first variation is a bright scrappy block, which I think will make a great boys quilt.

cheese crackers quilt block wip

The cracker pattern is a simple quilt block made up of patchwork bars with triangles at their ends.  I used a paper piecing pattern, but there is some great tutorials on how to piece this block online including at Moda Bake Shop and at Cut to Pieces.

While putting the “cheese”  blocks together (this yellow = cheese in my brain for some reason) I had the urge to use the block a little differently.  My next approach was again scrappy but not based on colour combinations.  The second variation was based on a collection of multicoloured floral fabrics sitting in my stash for ages.  I used a some of my collection in the quilt in my blog header and I have been itching to use more.  So I made these blocks.

pile of quilt blocks

I was not sure at first if this idea would work at all.  Tuesday afternoon I tentatively grabbed a fabric, cut it and made a block.  Block after block I kept  wondering if it would come together.  I often make quilt blocks to test out ideas – I do not sketch or play in Photoshop, which would probably be the sensible way to go.   It was a relief to finally lay out some of the blocks Tuesday evening and see this.

floral cracker quilt wip

I think this is going to be a fun quilt when it is finished.  I am now looking forward to pulling some more fabrics out of my stash and seeing where it all goes.  Wish me luck.

Sunburnt Country… an almost finished Friday

I was recently commissioned to do a baby quilt by a family friend.  She wanted a quilt that felt Australian without being too overtly Aussie.  After much discussions and looking at some quilt reference we settled on the idea of “A Sunburnt Country”.  There is a fabulous old Australian Poem, whose most famous stanza is:

I love a sunburnt country,
A land of sweeping plains,
Of ragged mountain ranges,
Of droughts and flooding rains.
I love her far horizons,
I love her jewel-sea,
Her beauty and her terror
The wide brown land for me!

With the inspiration in mind, I  ended up creating this…

simple colourful square quilt

I only finished the top last night, after I got back from the Portland Modern Quilting Guild.  It is made up of  378 three-inch squares and measures  45 inches wide by 52 1/2 inches tall.

I pieced this quilt together in sections, a trick I learned from a Oh Fransson’s post about her Sparkle punch quilt.  This process worked wonders and made it (a) less daunting to piece and (b) easier to align the blocks.  I worked in 6 x 6 block sections.

sewing together

As you can tell from this dodgy photo, I struggled with the darker purple fabrics.  I had to dig deep into the fabric stash to find enough appropriate fabrics to finish off the top corners of the quilt.

When laying out this quilt I did play with a couple of colour variations, including replacing the purple with browns and with adding some green into the mix.  Neither of these options worked well, particularly seeing this was a baby quilt for a girl.  In the spirit of girly fun, when I was selecting my fabric I had a great time finding novelty and fussy cuts prints.  Hidden in the quilt are elephants, dogs, chairs, boats, deer,  flags, flowers, stars, ducks, oranges, lady bugs, bees,  bears, hearts and so much more.

quilt detail 3

This weekend I will hopefully get the top basted and ready for quilting next week.  I have been so focused on completing quilt tops that I have not actually finished a quilt for over a week.  I am definitely slacking!

Jacaranda inspired wip Wednesday

This week I have been working on a quilt that was inspired by the Jacaranda tree and in particular the silk screen print my brother-in-law did.  The print has been sitting in my quilting room, waiting to be framed, and this week I thought the colours would work well for a quilt.

Jacaranda silk screen

I played with the idea of purple with black & white fabrics, but felt I have  been overusing my b/w stash.  Instead I went with greys and choose a pattern that reminded me of a tree (but ended up looking like an arrow!).  The end result of my test run was this collection of blocks.

purple & grey arrow quilt block

I think I am going to have fun with this one.  I have made some grey/grey blocks and some purple/purple blocks and can not wait to start playing with some random layouts.  My husband wanted me to put some order into the layout – he is a science geek and loves there to be pattern, even if it is hidden.  Me, I love random when I can get it.  I think that is why I love scrap quilting so much, it allows for random in amongst the pattern.

The pattern is a free paper piecing pattern from Christine Thresh which can be found here.  I just pulled the gif from the site and sized it up in Photoshop.

I also managed this weekend to finish a couple quilt tops that I had lying around.  The first one is the 1001 Peeps top I started a last week.  It was quick, easy and fun to make.  Now all I have to do is quilt it and bind it.

1001 Peeps kids quilt top

The other top I finished was not so quick and easy… I have been trying to finish it for weeks.  It was a little more fiddly than some of my other patterns but worth the effort.  I still have to pull all the paper off the back but I have trained my husband up to help with this process, so it should be quick.

blue green star quilt top

I am trying to train myself to not start a new project until I have finished one of my old ones.  The question then becomes, does finishing a top count or do I only count quilted and bound projects?

And now for something completely different…paper piecing Monday

This paper piecing Monday is dedicated to paper piecing the English way, a technique that is used for a number of great patterns including my favorite, hexagons.

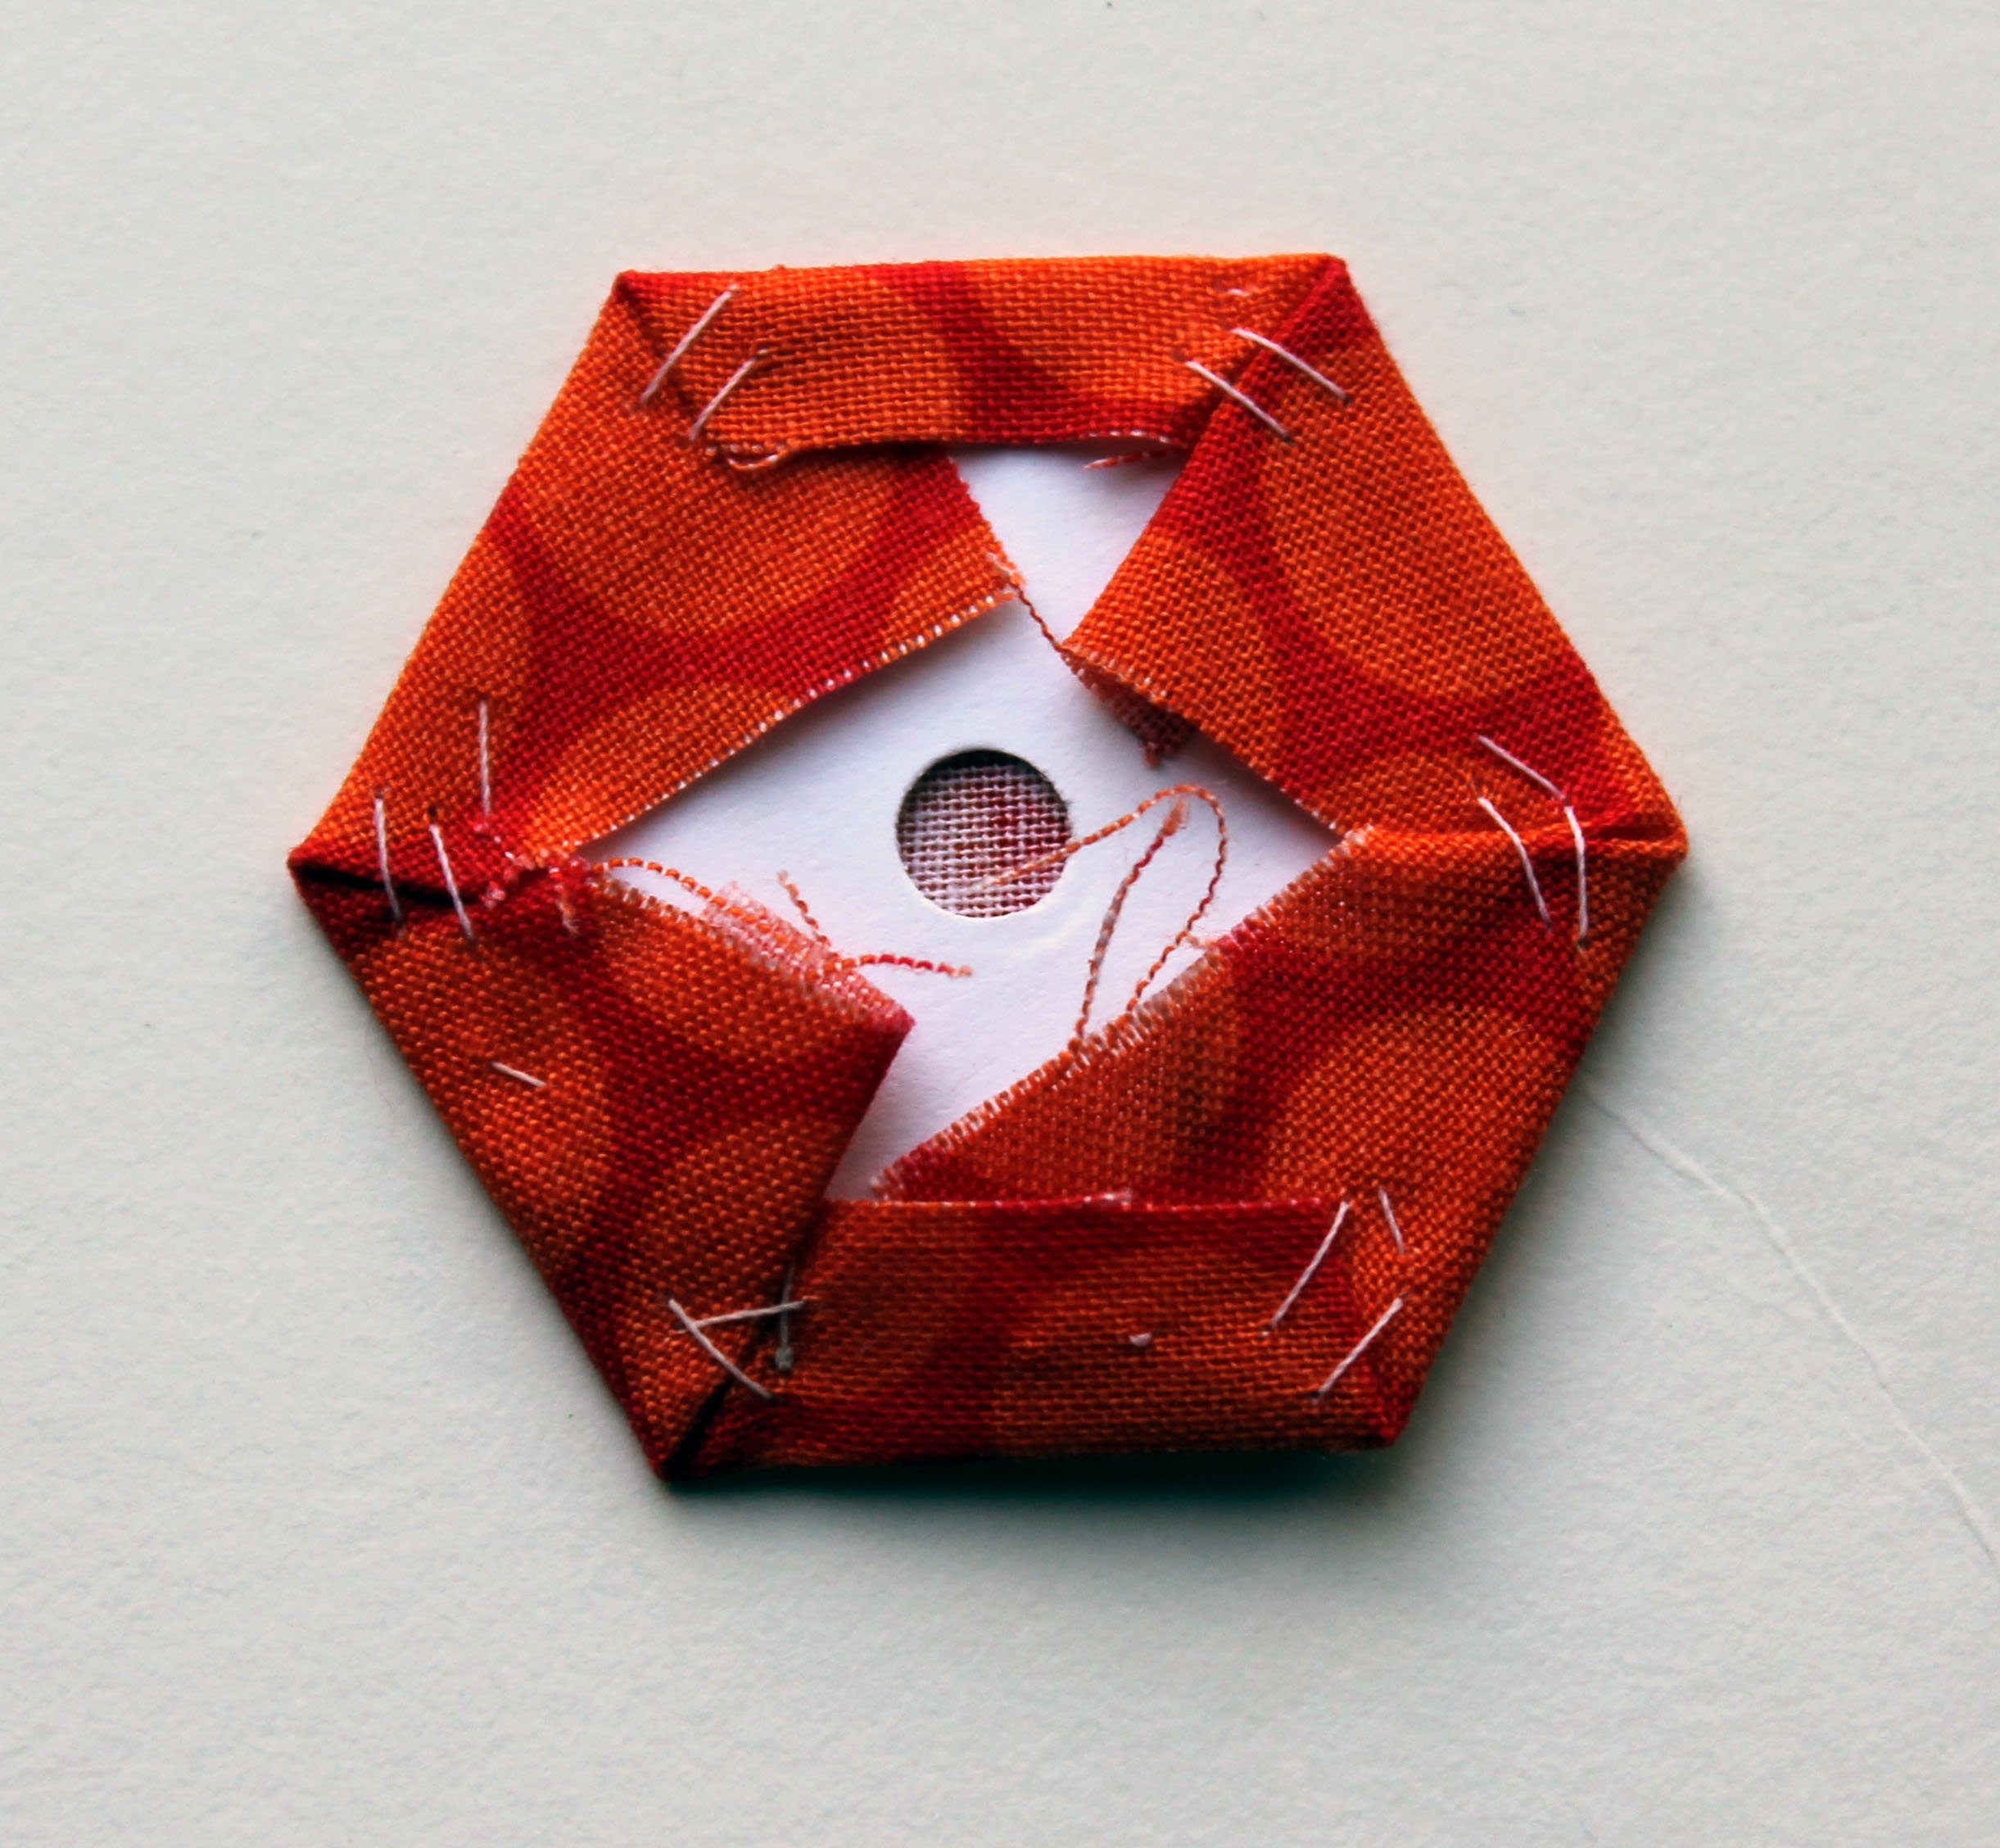
English paper piecing is the simple method of wrapping fabric around a paper/cardboard template to form shapes usually with neat crisp edges.  The process involves a lot of hand sewing starting with basting of the fabric to the paper template, followed by sewing the blocks together through to hand quilting (the preferred form of quilting with hexagon quilts in particular).

I was recently introduced to this form of paper piecing at my local Modern Quilt Guild,.  At the meeting we were given instructions, advice, some 1 inch hexagons, some 2 1/2 inch square cuts of fabric, a needle and thread and sent off to make hexies.  I did not realize it would be so addictive, and now only a month or so later I have feverishly made 400+ hexies.

hexagons completed and sored

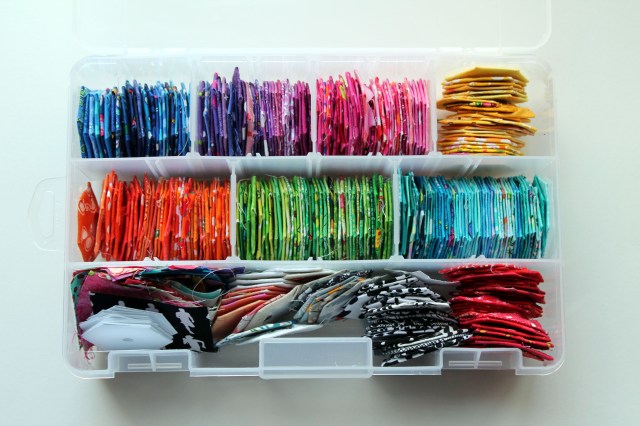
My hexagons are 1 inch (hexagons measurements are done by the length of its side) which I have found to be the perfect size for me – not so small that it is daunting and fiddly but big enough that some nice fussy cutting is possible.   I started this project using hexies that I cut out myself using a template I downloaded from the web.  There are some great hexagon templates on-line including Texas Freckles downloadable 1 inch and 1 1/2 inch templates that can be found here.

After calculating that I would need to cut out at least 400 hexagons I decided to get someone else to do it for me and went to Paper Pieces and ordered 500 of their pre cut hexies.  Paper Pieces has an array of sizes and patterns and it is worth checking out there site if your project is going to be bigger than a pillow!

hexagon packet

We got some great instructions on making hexagons at the meeting, but the internet has also been  a wonderful resource for “how to” for me.  Texas Freckles has a great video tutorial on both basting the hexagons and piecing them that you can find here.  Amy at Badskits has a great illustrated PDF tutorial  that  you can find here.  And Jaybird Quilts did a hexagon focus as part of their quilt basics series which can be found here.

hexagon back

Some of the most helpful tips we got at the Guild meeting were:

1.  Punch a hole in your paper template.  It will make removing the paper easier when the project is done.

2.  Attach your fabric as firmly as you can to the template to avoid slipping when basting, as you tend to be working with a small margin of error on pieces this smalls.  Some people used paper clips, some people used  pins, I used the paper piercers go to – Elmer’s glue stick.

3.   You can be a little messy when basting, no one will see it in the end.

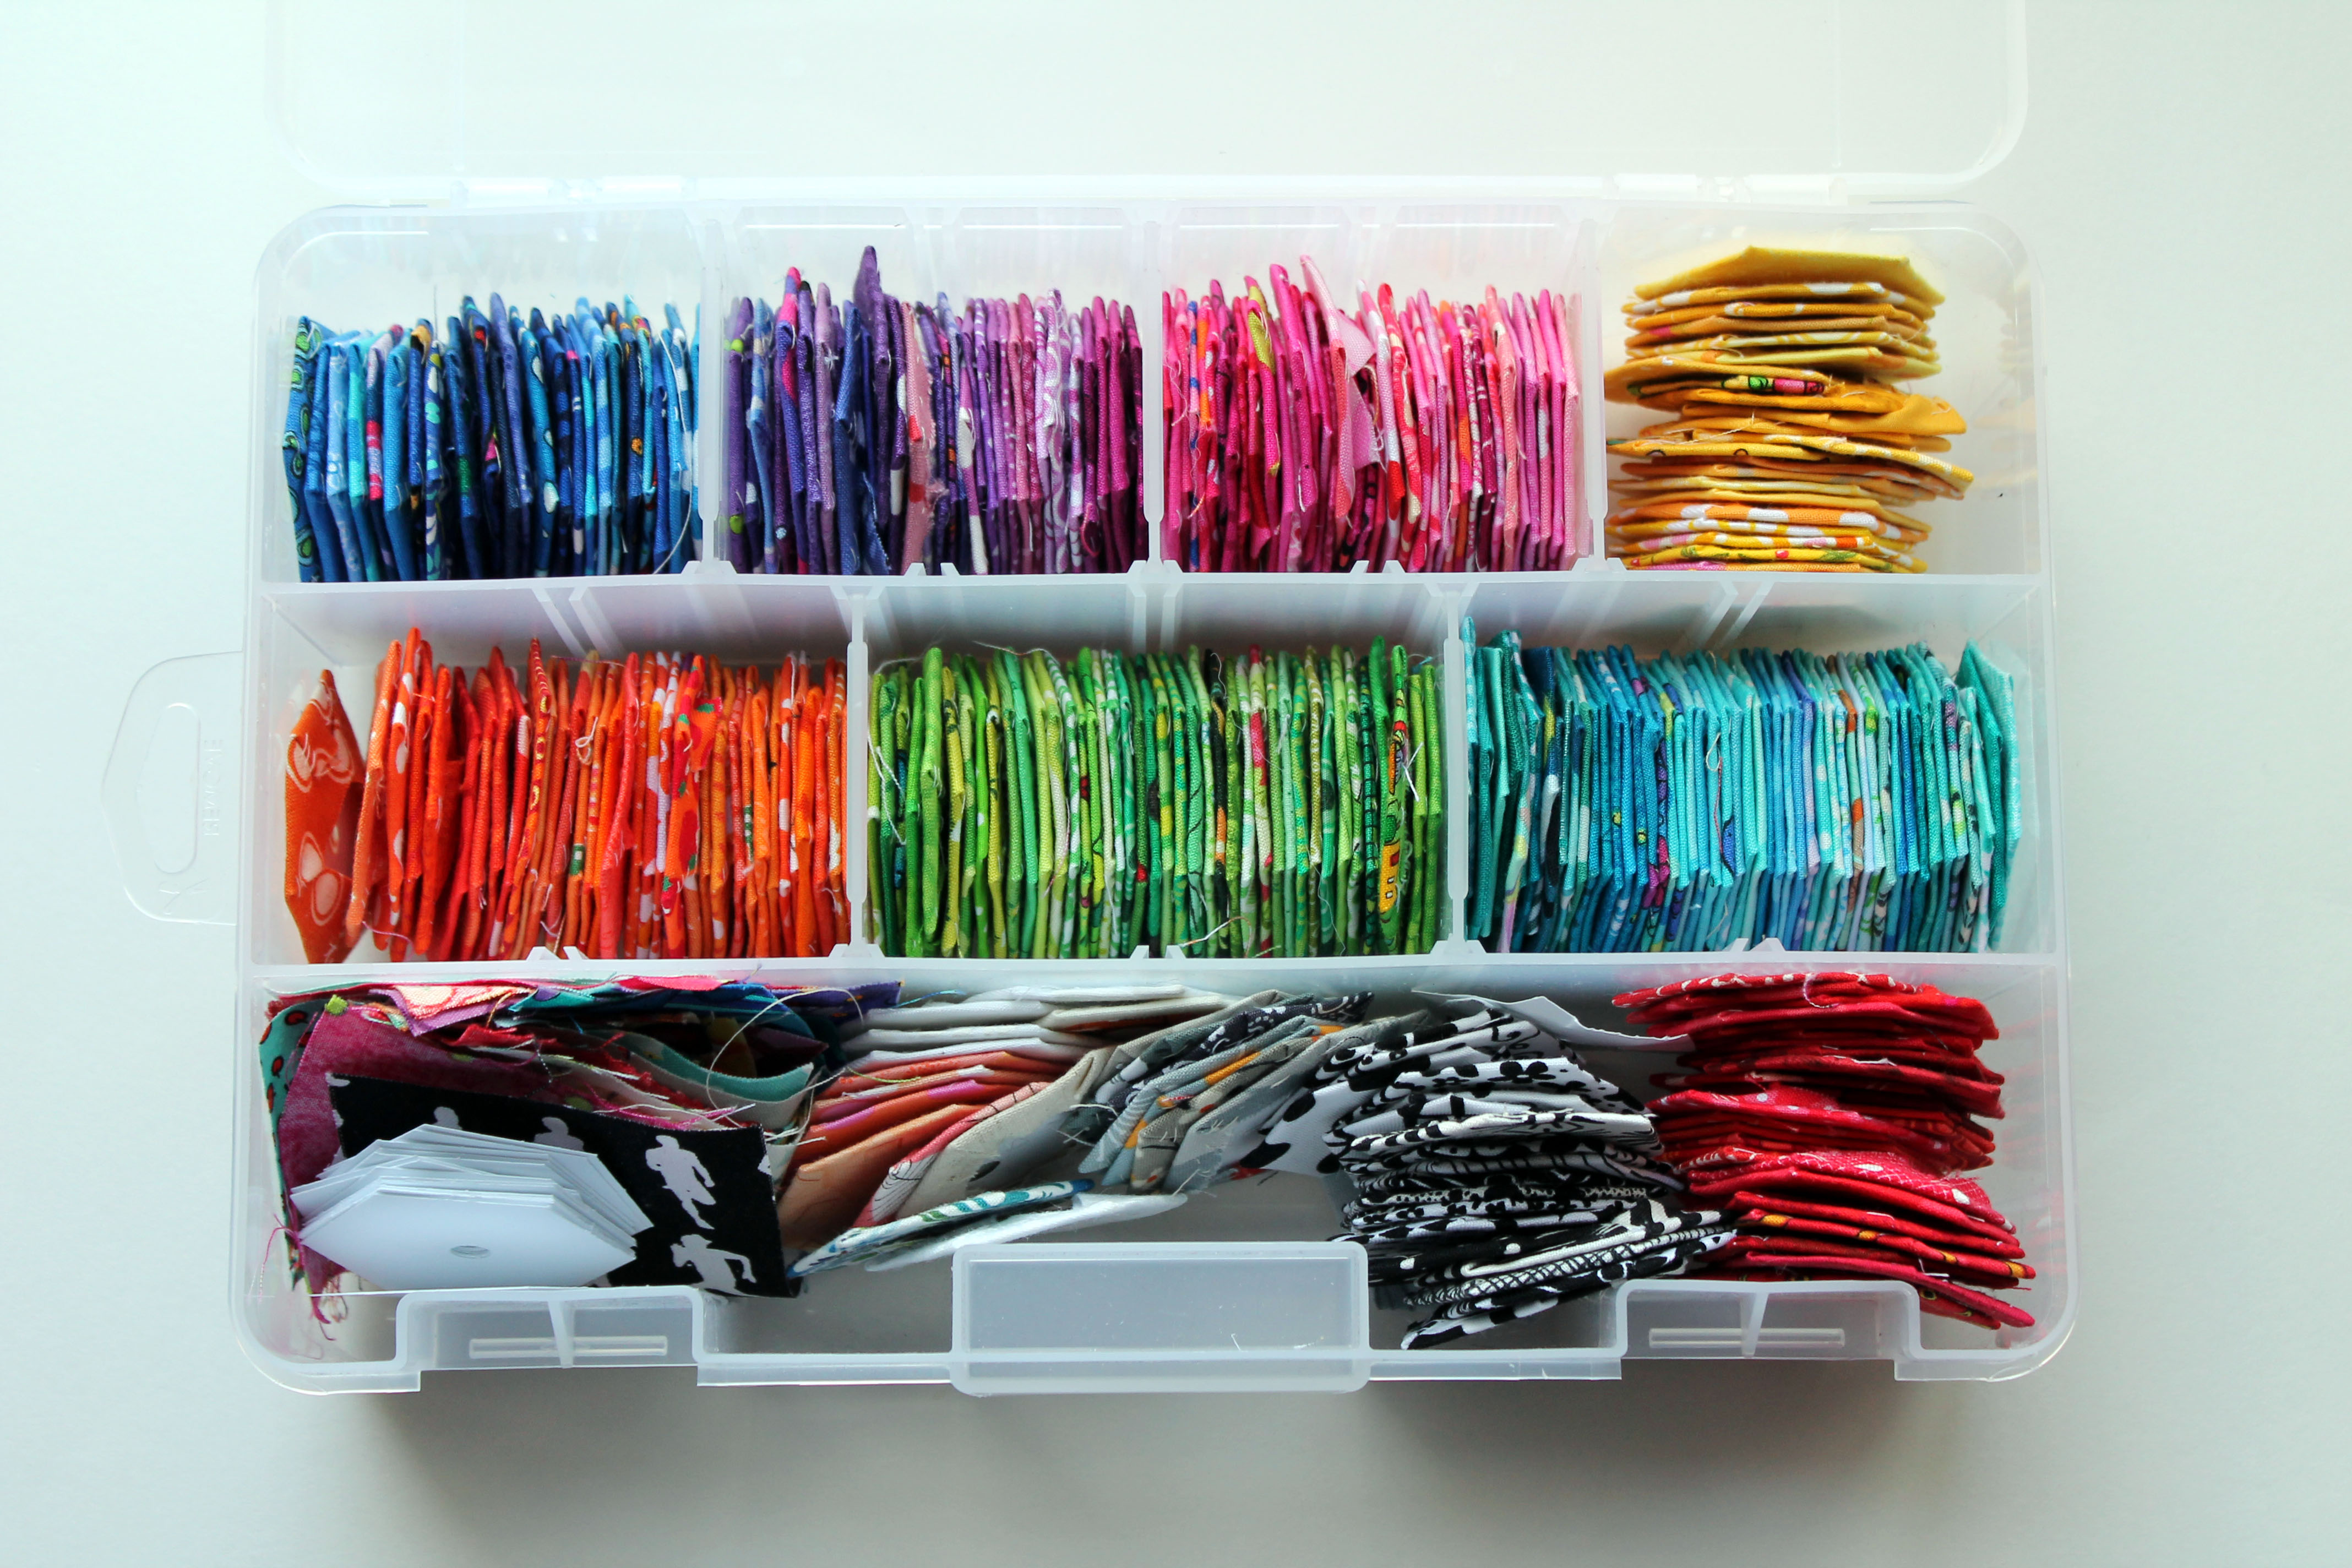
One of things I love about English Paper piecing is that it is so portable.  I made a big dent in my hexagon production during a long flight back from Australia recently.  The kit I put together for that flight has travelled with me to Guild meetings, doctors appointments, Game of Throne screenings etc.  My kit is pretty simple:
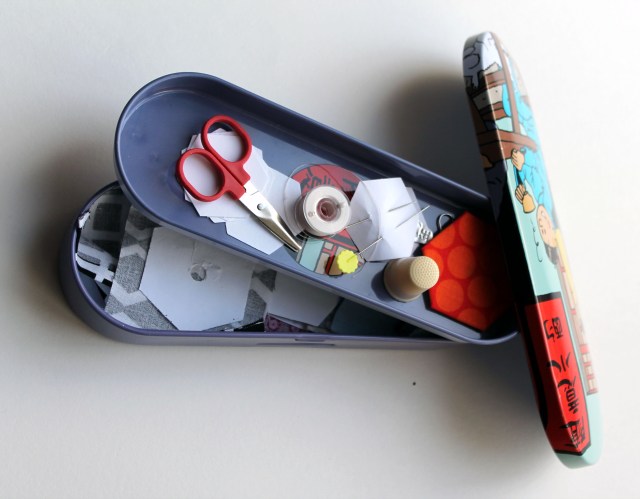
heaxagon travel kit

It includes:

  • A bobbin of white or cream cotton
  • A thimble
  • Needle and needle threader (my eyes are not what they used to be(
  • A paper clip and pins – just in case the glue does not stick
  • The smallest least threatening pair of scissors I could find (so TSA would not freak out)
  • My prepared hexies and my completed hexies are stored in the bottom compartment.

About a week ago, as my hexagon collection grew, I realized I did not know what I wanted to do with them all, so I started looking at both traditional and modern hexie quilts.  Hexagons are believed to be one of the oldest pieced patterns,  with hexagon templates for quilts having been found in England dating back to he 1770’s.   With such a long history and the modern resurgence I had a lot to think about.

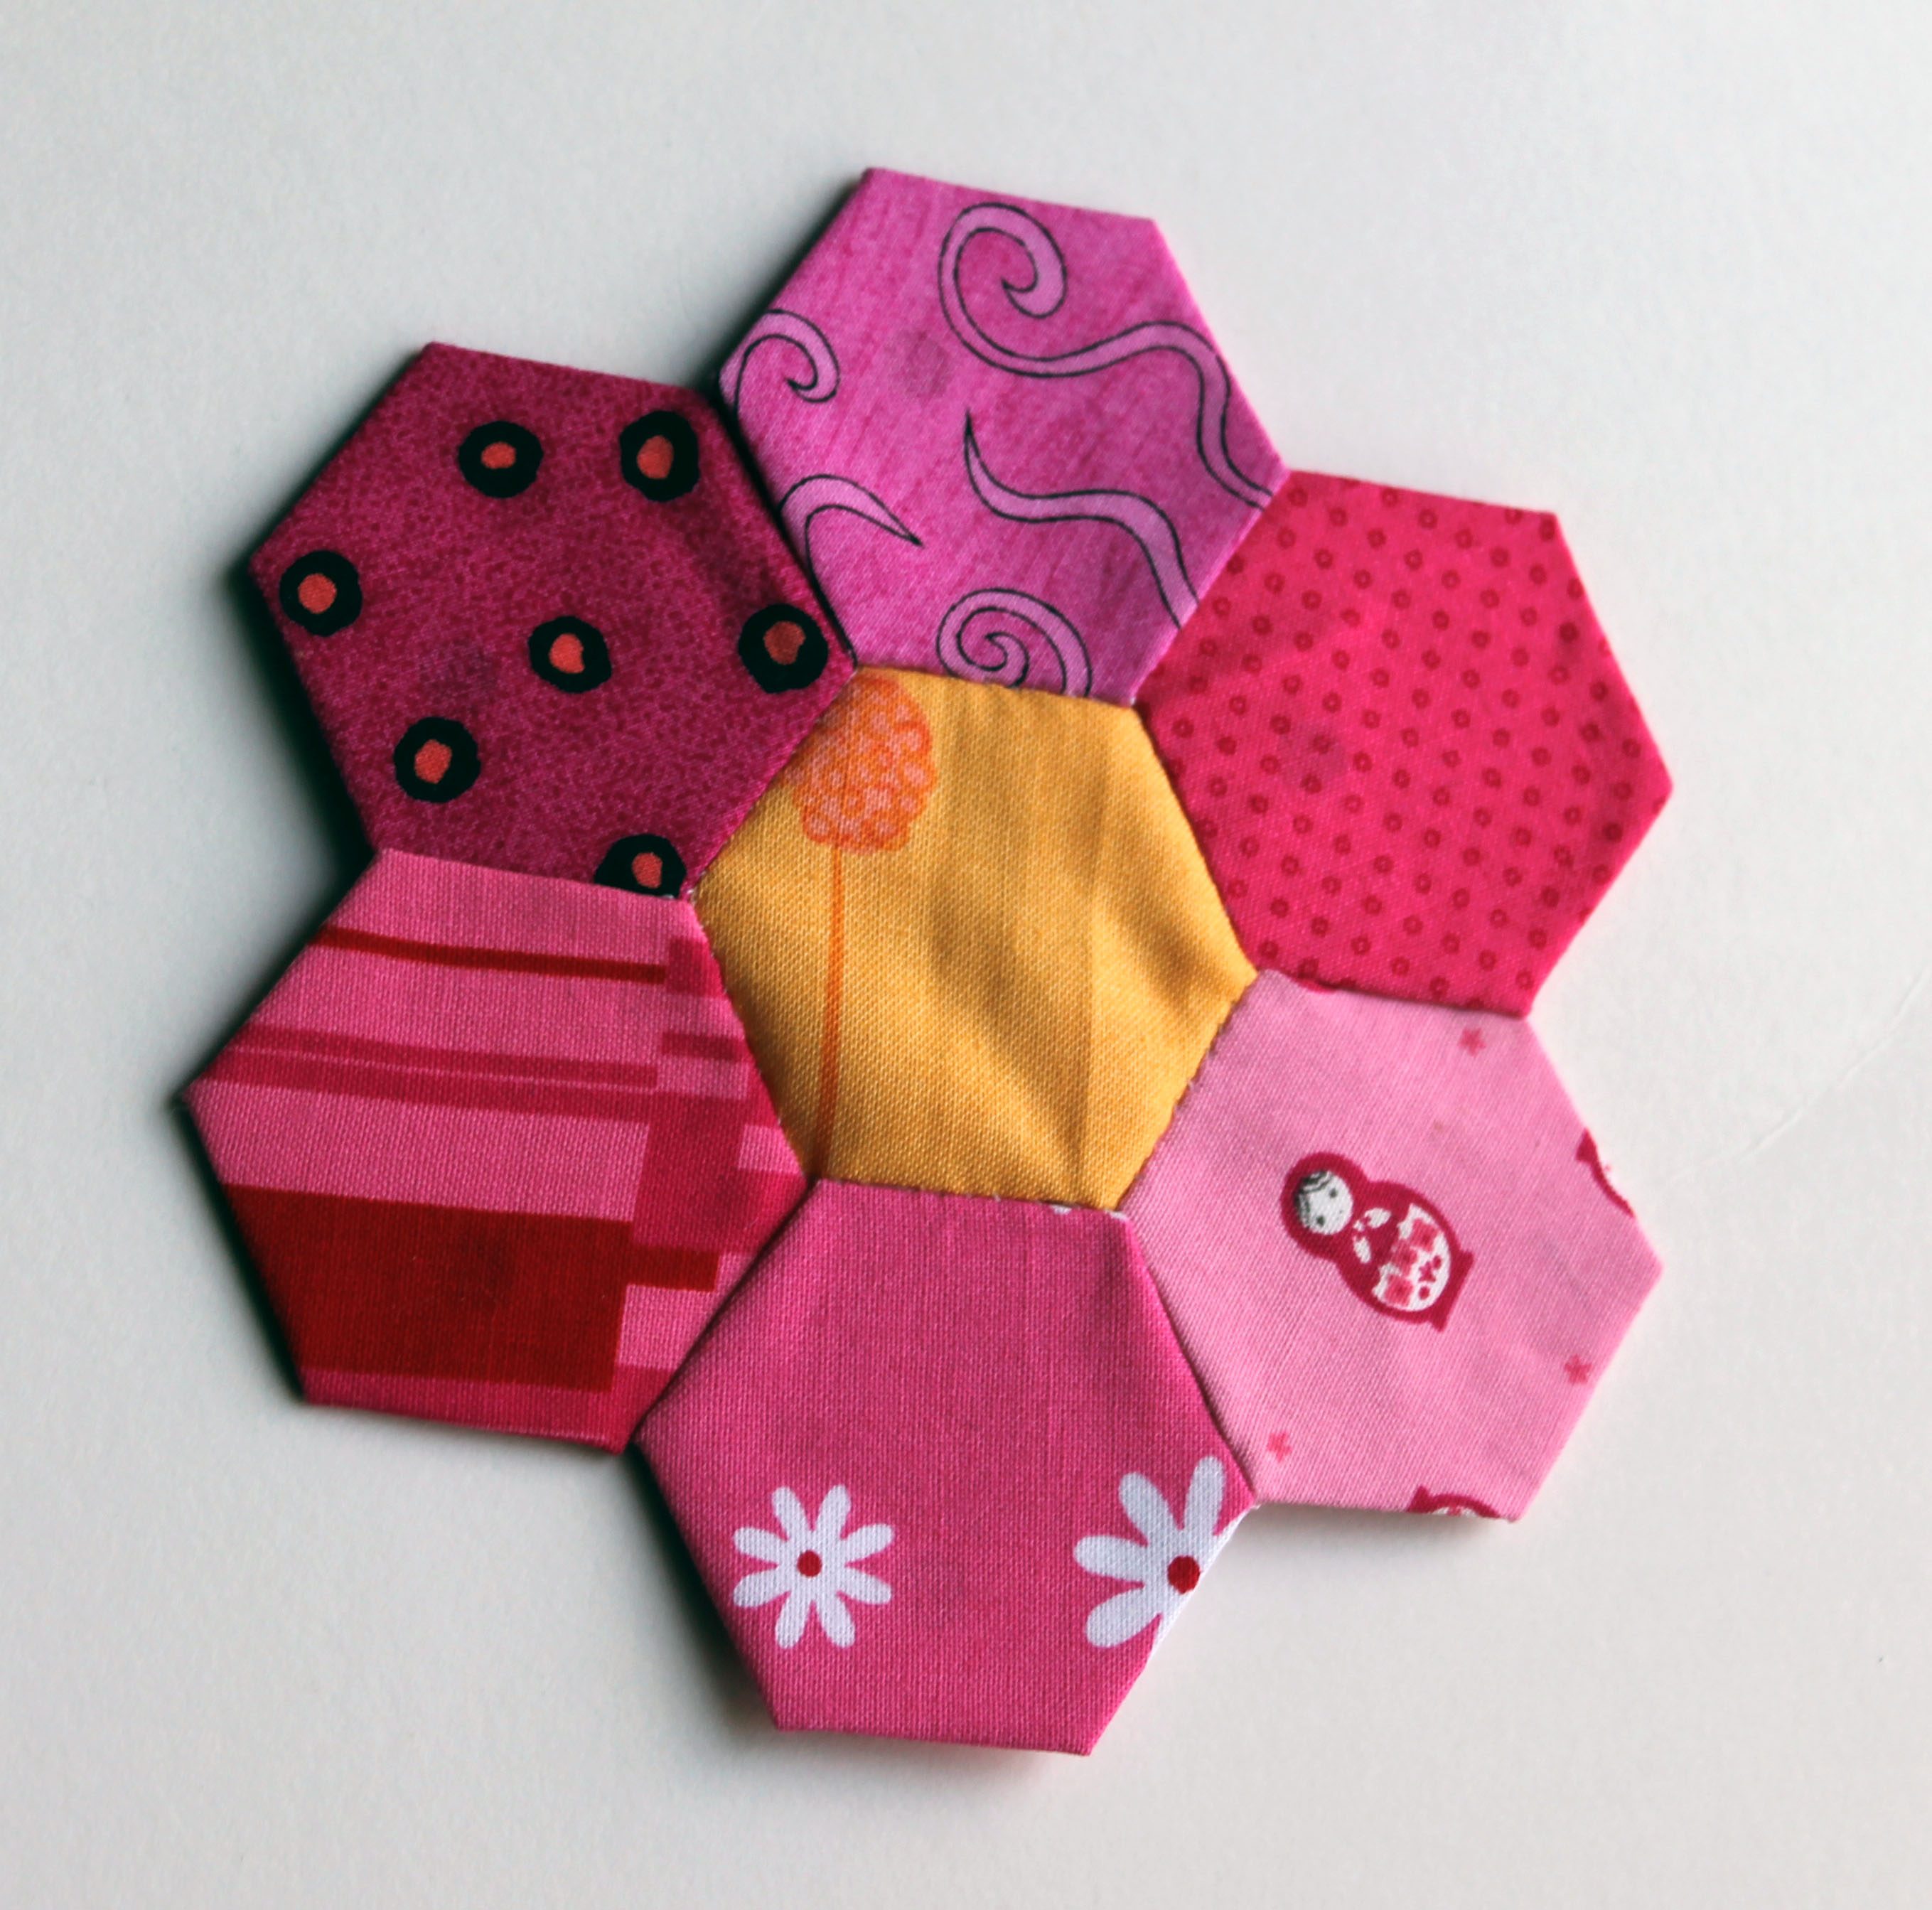
After much umming and ahhing I decided I wanted to so something modern that tipped its hat to the past.  I love the depression era hexagon quilts and in particular the flower patterns that were prevalent and so settled on doing a version of that pattern.  My first experiment was this block.

yellow fabric

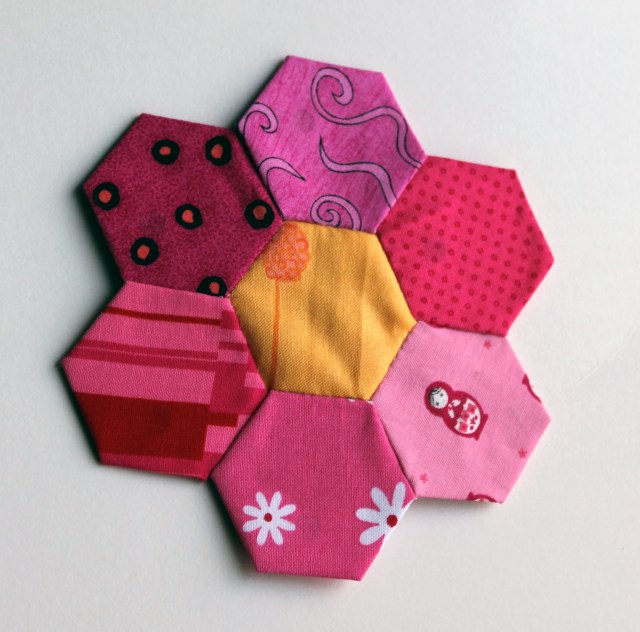
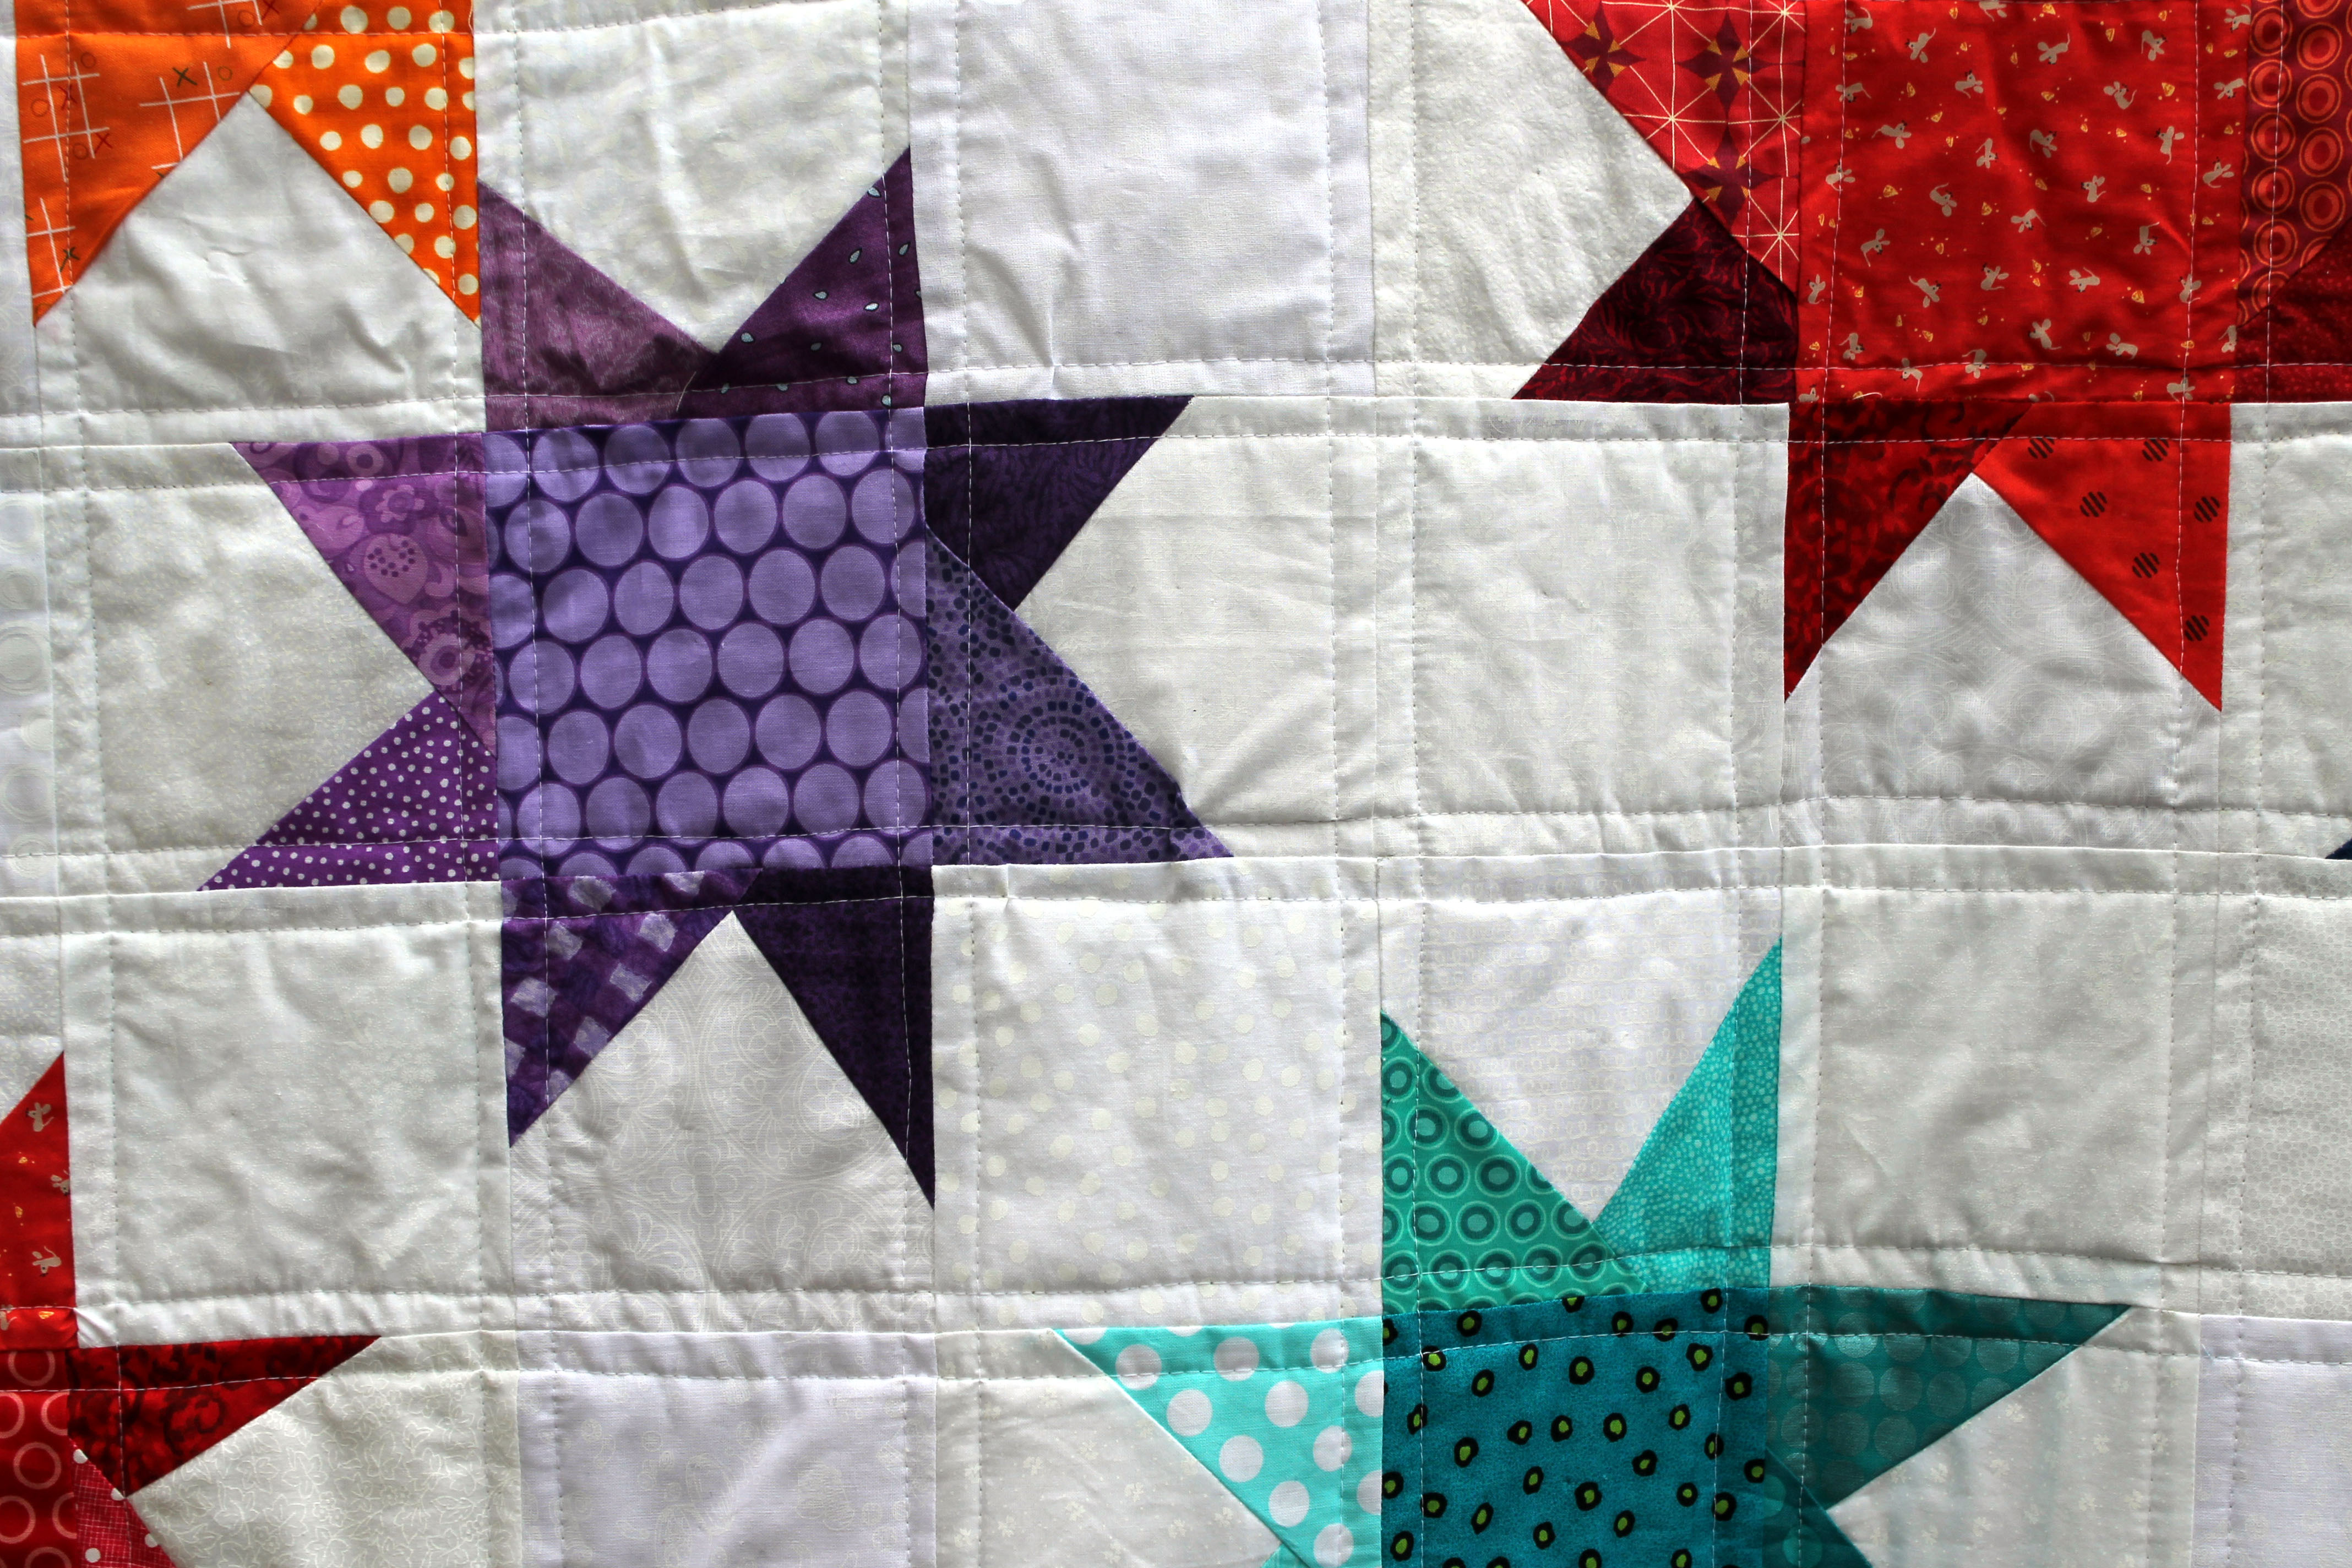
I was going to put a border of white hexies around the block (as is done in many traditional quilts)  but I thought it was not quite modern enough for me.  In the end I went with this.

hexagon work in progress

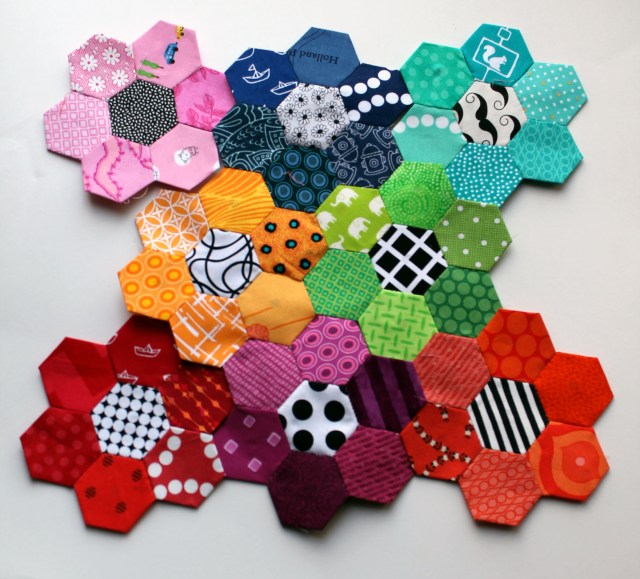
I love the black and white center.  It makes the colour of the flowers seem so much more vibrant and modern.  I have pieced together 9 flowers so far and I am loving it.  I am learning so much as I make this quilt including:

1.  That my stitches (I am using a whip stitch to piece) is what is holding these hexagons together so I have to make my stitches small.  I am trying to get about 10 stitches per 1 inch side, though I am not always successful at that.

2.  Unlike basting the hexagons, with the piecing your stitches need to be neater.

3.  It is not going to be perfect and if some stitches are showing slightly it is okay.  When you look at this quilt you will know that it is hand stitched, which is a good thing.

4.  I may only have one of these in me and this is a quilt I am keeping!


The joy of 5 inch squares.

Last year I had a brief period of time when I had some back issues that meant that sitting was not a fun thing to do.  I decided that, seeing I could not sit at a sewing machine, I would cut fabric.  For weeks I cut 5 inch squares out of my scraps and stash.  The end result was hundreds and hundreds of 5 inch squares.  Now all I had to do was find ways to use them.

My first step was to make a pile of simple baby quilts for Project Linus which played with colour (please excuse the dodgy i-phone photos).

simple bright kids quilts

This year I have got a little more creative with the squares, while still keeping it simple.  First I used the squares as the basis for my wonky star quilt which you can see here.   I then used the left over bits and pieces of that quilt (plus some left over scrappy white squares) to make this.

modern simple kids quilt

The 5 inch squares were used for the center pieces of the block, the background of the quilt  plus I cut a number of  the squares diagonally and used these triangles to make the star points.  Wonky star quilts really are so ridiculously easy.

The latest quilt I used my 5 inch squares on is my extra-large granny square quilt, which I have just finished.

modern large granny square quilt

With this quilt I just lay the blocks down diagonally to make the pattern,  sewed the blocks together then trimmed the extra edges and it was ready to go. Again ridiculously easy.

With both these quilts I did a simple straight quilting, running down both sides of the “ditch”.

quilting detail

The backing for both these quilts is from Ikea.  The granny squares got the most fabulous fun lips fabric as it’s back (yes the photo is upside down!)

quilt back

And for the wonky stars I went with a simple black & white music note fabric.

quilt bindingWhat I love about Ikea fabrics is their width.  You can easily piece larger kids quilts with one piece of fabric plus their prints are really fun.  Both these quilts are now finally finished and ready for delivery this month to Project Linus.