Working through the backlog….

So I am slowly working through the backlog of photographs that I have taken but not processed and posted.  It is funny because I also have a backlog of quilts that need photographing too… all this means though I have not been posting, I have been creating.  So without further ado here is the latest belated share….

cotton steel trip around

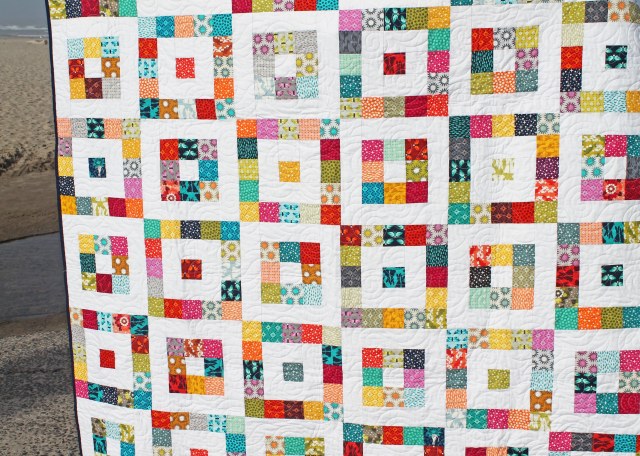
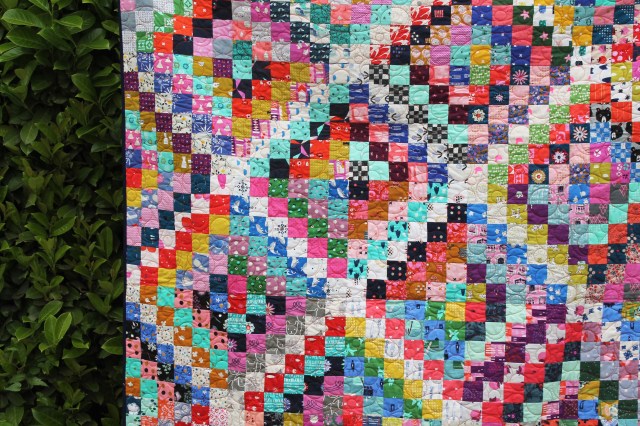
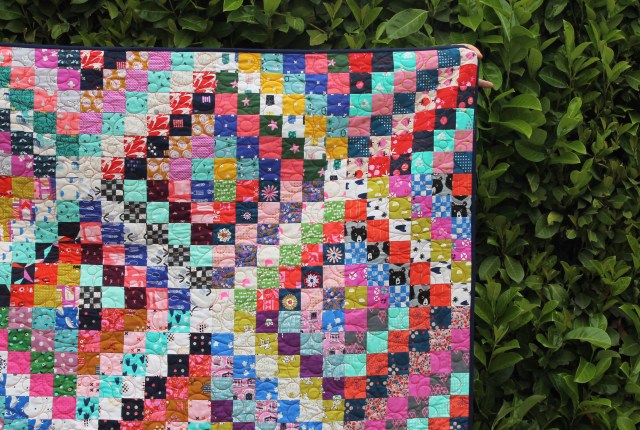
This quilt combines two of my favorites – my favorite fabric line (original Cotton & Steel) and my favorite go to pattern “Scrappy Trip Around the World” by Bonnie Hunter.   This quilt was made during my 2018/2019 Cotton & Steel phase (you can see some of the other quilts here and here).

close up 2

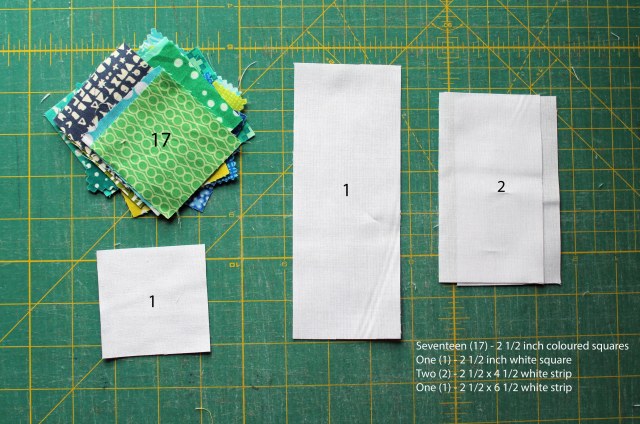
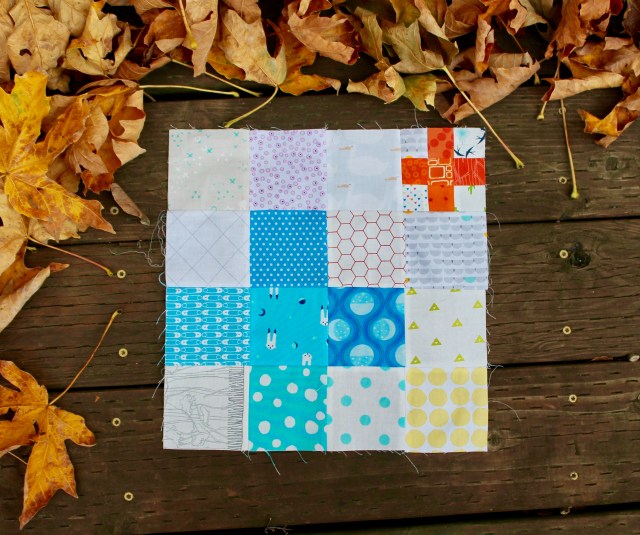
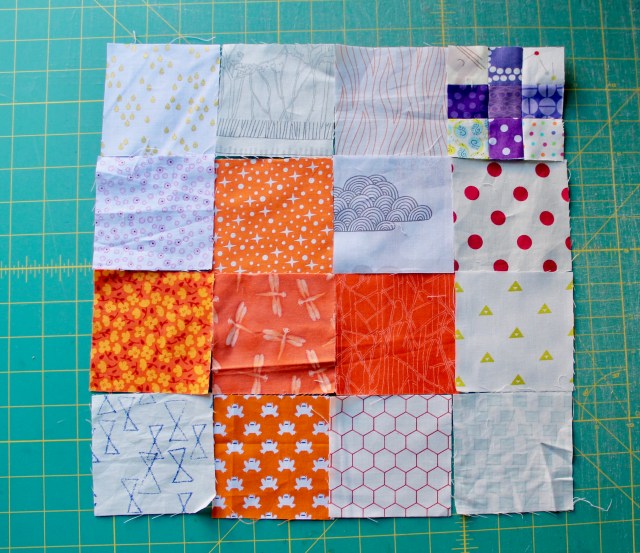
For this quilt I used lots of 2/12 inch strips of a variety of different Cotton and Steel fabrics. One of the things I love about these lines and the subsequent Ruby Star lines is that all play so nicely together.  It takes the guess work out of scrap quilting because you know it will all work.

quilt close up

And this pattern is definitely a go to for me.  I actually have another version of the scrappy trip around in my “too be photographed” pile.  The pattern is easy but so effective and it is also fat quarter friendly (you do not need to do WOF).  Actually this version saw me cut 2 1/2 inch strips off a pile of my Cotton & Steel fat quarters (I used 2 1/2 x 18 inch strips).

quilting detail

This was the first time with this pattern that I consciously tried to keep the center of the block a light strip.  It adds a nice through line to the quilt blocks and this quilt’s layout does not feel as random as some of my previous versions.  It is definitely my favorite version so far.

quilt back

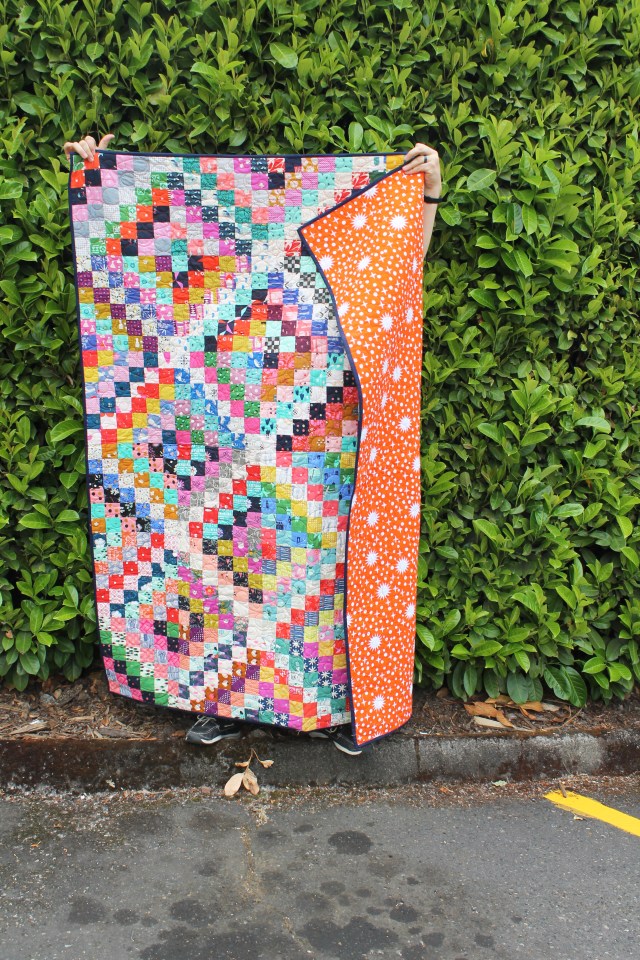
The quilt was expertly quilted by a wonderful PMQG volunteer and backed with some fabulous Elizabeth Hartman wideback.  I made the quilt because there was a need for some more teenage appropriate quilts from several of the charities we work with… and it was donated last year to Camp Erin.

pinky shot

We of course finish up with the pinky shot….

Quilt Details:

Block:  12 inch scrappy trip around the world by Bonnie Hunter
Fabric:  Cotton & Steel lines
Size:  60 x 72 inches

Back for some fun little Bear Paws…

This month I am the setting the blocks for our Do Good Stitches Bee… and I find that it is easier for me to blog the block instructions that to try and do it all on Flickr….  Of all the social media platforms I use Flickr is really the one that constantly surprises me that it has not died yet.  It is so clunky and not at all very user friendly for some things.  Anyway rant over… here is the blocks.

color bear paw

I went with a simple Bear paw section… I have a ton of little scraps and this seemed like a great way to use some of my precious little bits… I have decided to do the block in two sizes – 6 inches and 9 inches…

finished blocks

And I worked out a way to make both sized blocks at the same time… so here goes….

fabric requirments

Cutting Instructions:

Background fabric (we are using low volume or white on white):
5 (five) x 3 1/2 inch squares
1 (one) x 2 1/2 inch square

Colored fabric (we are using bright primary colors):
8 (eight) x 3 1/2 inch squares of various prints
4 (four) x 2 1/2 inch squares of various prints


Step one:

Choose four of the 3 1/2 inch squares and four of the 2 1/2 inch squares for the center part of the block .  When I was choosing these fabrics I selected the more interesting fabrics for the center squares (ie. the ones with fussy cuts).

The remaining four 3 1/2 inch squares will make the half square triangles (HST).

Step two:  Make the HSTs.

mark fabric


Mark a line down the center of the back side of your background fabric, going corner to corner.

Then mark another line 1/2 inch from that line.  These two marks are your sew lines – you will be sewing directly down these lines.


cut hst


Cut down the middle of your sew lines… you are actually cutting 1/4 inch from the center line.  You now have your two HST components.

Press your HSTs (I usually press my seams open).


trim hst Trim each of the HST components .  

Your 3 1/2 inch HST will not need much trimming (it should be almost perfect).

There is a bit of wiggle room with your 2 1/2 inch HST so you will have a little bit to trim off.


Remember to use the center diagonal line of your ruler to make sure you are trimming straight.

Step Three:  Sew it all together.

rows


Sew your block sections together in rows.

With my blocks I have been ironing my seams open… but you can also nestle the seams.  It is up to you.

iron seams


Then sew your rows together to make your blocks… and trim as needed to the finished size.

Just for fun I have made a couple of tiny versions of this block…

3 inch bear paw. Scrap quilt block

This block finishes at 3 1/2 inches… all the bits are 1 1/2 inches which is a little crazy but also kind of fun.  I have been having a blast finding little bits to fussy cut at this size.

I am having a blast with this project.  I have actual work sewing to do and I do not want to do it… all I want to do is cut my scraps up into little bits and play.

It is time for another Bee Block….

Ah yes it is that time again… I am setting another block for my fellow Do Good Stitches gang… and this month snuck up on me so I have resorted to a variation of an old faithful….the wonky star…

dgs wonky star

For this 12 inch block I used:

  • Fifteen (15) low volume 3 1/2 inch squares
  • One (1) black/dark grey 3 1/2 inch square
  • Eight (8) black grey triangles – I used scraps but you can cut a 3 inch square in half to make the triangles.

Step one is to make the star points:

To make the star points you will need 4 of your low volume squares and your triangle pieces.

step 1


Take one of the squares and sew a triangle onto one corner, making sure the pattern sides of your fabric are together and when the triangle is flipped it covers the corner of your square.


step 2


Next trim the excess low volume fabric from the corner and press the triangle over into place.


step 3


Then add another triangle of fabric to the other side of the square…. sew it down … trim the excess low volume fabric and press over.


step 4


Your next step is to trim your block back down to 3 1/2 inches square.


step 4a


The back of your block should look like this…. now repeat the process until you have 4 star point sections.


block layout

Step Two:

Lay out your block as illustrated….

sewing block together


Step Three:

Sew the block together in rows… then sew the rows together to make a completed block.


What I love about this block is that has built in negative space which allows for you to stagger the stars layout when putting the quilt top together.  You can also make a couple of blocks that are just low volume squares (no star) to break up the layout of the quilt.

In the coming months I will have two different variations of this quilt to show you, as I also used this block recently at out Guild charity sew day.   For the sew day we used a rainbow of solids and a white star which gave us a really fun bright quilt.  If you want to see a work in progress shot of that quilt head over to my Instagram account.

Mini Charm Square block

After I posted the scrappy quilt on Friday I had several requests for a  link to the block pattern, which was hard to do becauseI had not followed a pattern.  I had been inspired by some log cabin blocks I had seen and some quilts I had seen on the internet and so worked out the math and then did a step out for our charity sew group.

So on the weekend I photographed the steps just in case you want to play with your own pile of mini charm squares.  There are two blocks that make up the quilt…

Block One…

mini charm block 1

For this block you need:

mini charm block 1 cut instructions

When making these blocks I sew the mini charm squares into strips first…

block 1 construction

The block is then put together as a log cabin block would be… adding the smallest strip to the side and working my way around.  If you are using mini charm squares cut by manufacturers be aware that they do come in slightly different sizes… some cut with. straight edge and some cut with a crimped/pinked edge.  The squares with the zig zag edges can be slightly larger than 2 1/2 inch.  If in doubt trim your mini charm strips to get a clean sewing edge.

For every block 1 you make you will need a Block 2:

mini charm block 2

For this block you will need:

block 2 cut instructions

Please note that I made a mistake with this photo, so follow the words not the picture and make sure you have two strips of 2 1/2 x 8 1/2 inches.

Both finished blocks should measure 10 1/2 inches square unfinished… trim blocks as needed.  Make as many blocks as you need to get the sized quilt you want.  My quilt on Friday was 60 x 70 inches finished  and there were a lot of hands making blocks for this quilt, which made it a quick process.

Elizabeth Hartman quilt detail

Double Plus Block

After another absence I am back…this time with a block for my Do Good Stitches Bee.  It is my month to set the block and after much back and forth I came up with this block….

double plus block

To make this 12 1/2 inch block (unfinished) you will need:

5 (five) x 3 1/2 inch squares of your main color
10 (ten) x 3 1/2 inch squares of low volume prints
5 (five) x 1 1/2 inch squares of your secondary color
4 (four) x 1 1/2 inch squares of low volume prints

STEP ONE – Make the small cross

smallcross

  • Layout your 1 1/2 inch squares in the desired layout.
  • Sew the three squares in three rows.  Press seams as desired (I pressed mine open).

IMG_1596

  • Sew the rows together again pressing seams as desired (I pressed my seams open).
  • Trim the finished block to 3 1/2 inches square.

trim block

STEP TWO – Make the block

Layout your block as below…

blocklayout

  • Sew your squares into rows and then your rows into a block.
  • Iron your seam as desired – I ironed mine open to get the block to sit as flat as I could.
  • If required, trim final block to 12 1/2 inches. Repeat the process until you have as many blocks as you need….

Our quilt will be a rainbow of color, with each block having two bright colors per block… but I think it would be fun to do a block with just two colors – one for the big blocks and one for the small blocks.

As a caveat to this blog post it is the first one I have done on my new MacBook.  My old computer gave up the ghost a couple of weeks ago (one of the reasons I have not been posting) and I am still finding my way around this machine.  My hope is a new computer will encourage me to post more… heres hoping!