2020 was definitely the year of Bear Paw blocks for me. I taught a color class for Modern Domestic, a local quilt store, which was all about color in quilting. We used a fabulous book by Rachel Hauser of Stitched in Color called a Quilters Field Guide to Color as a resource… and like Rachel does in the book we workshopped color using Bear Paw blocks. What this means is I made enough bear paw blocks to finish up 8 quilts… you are going to see a lot of bear paws over the coming months.
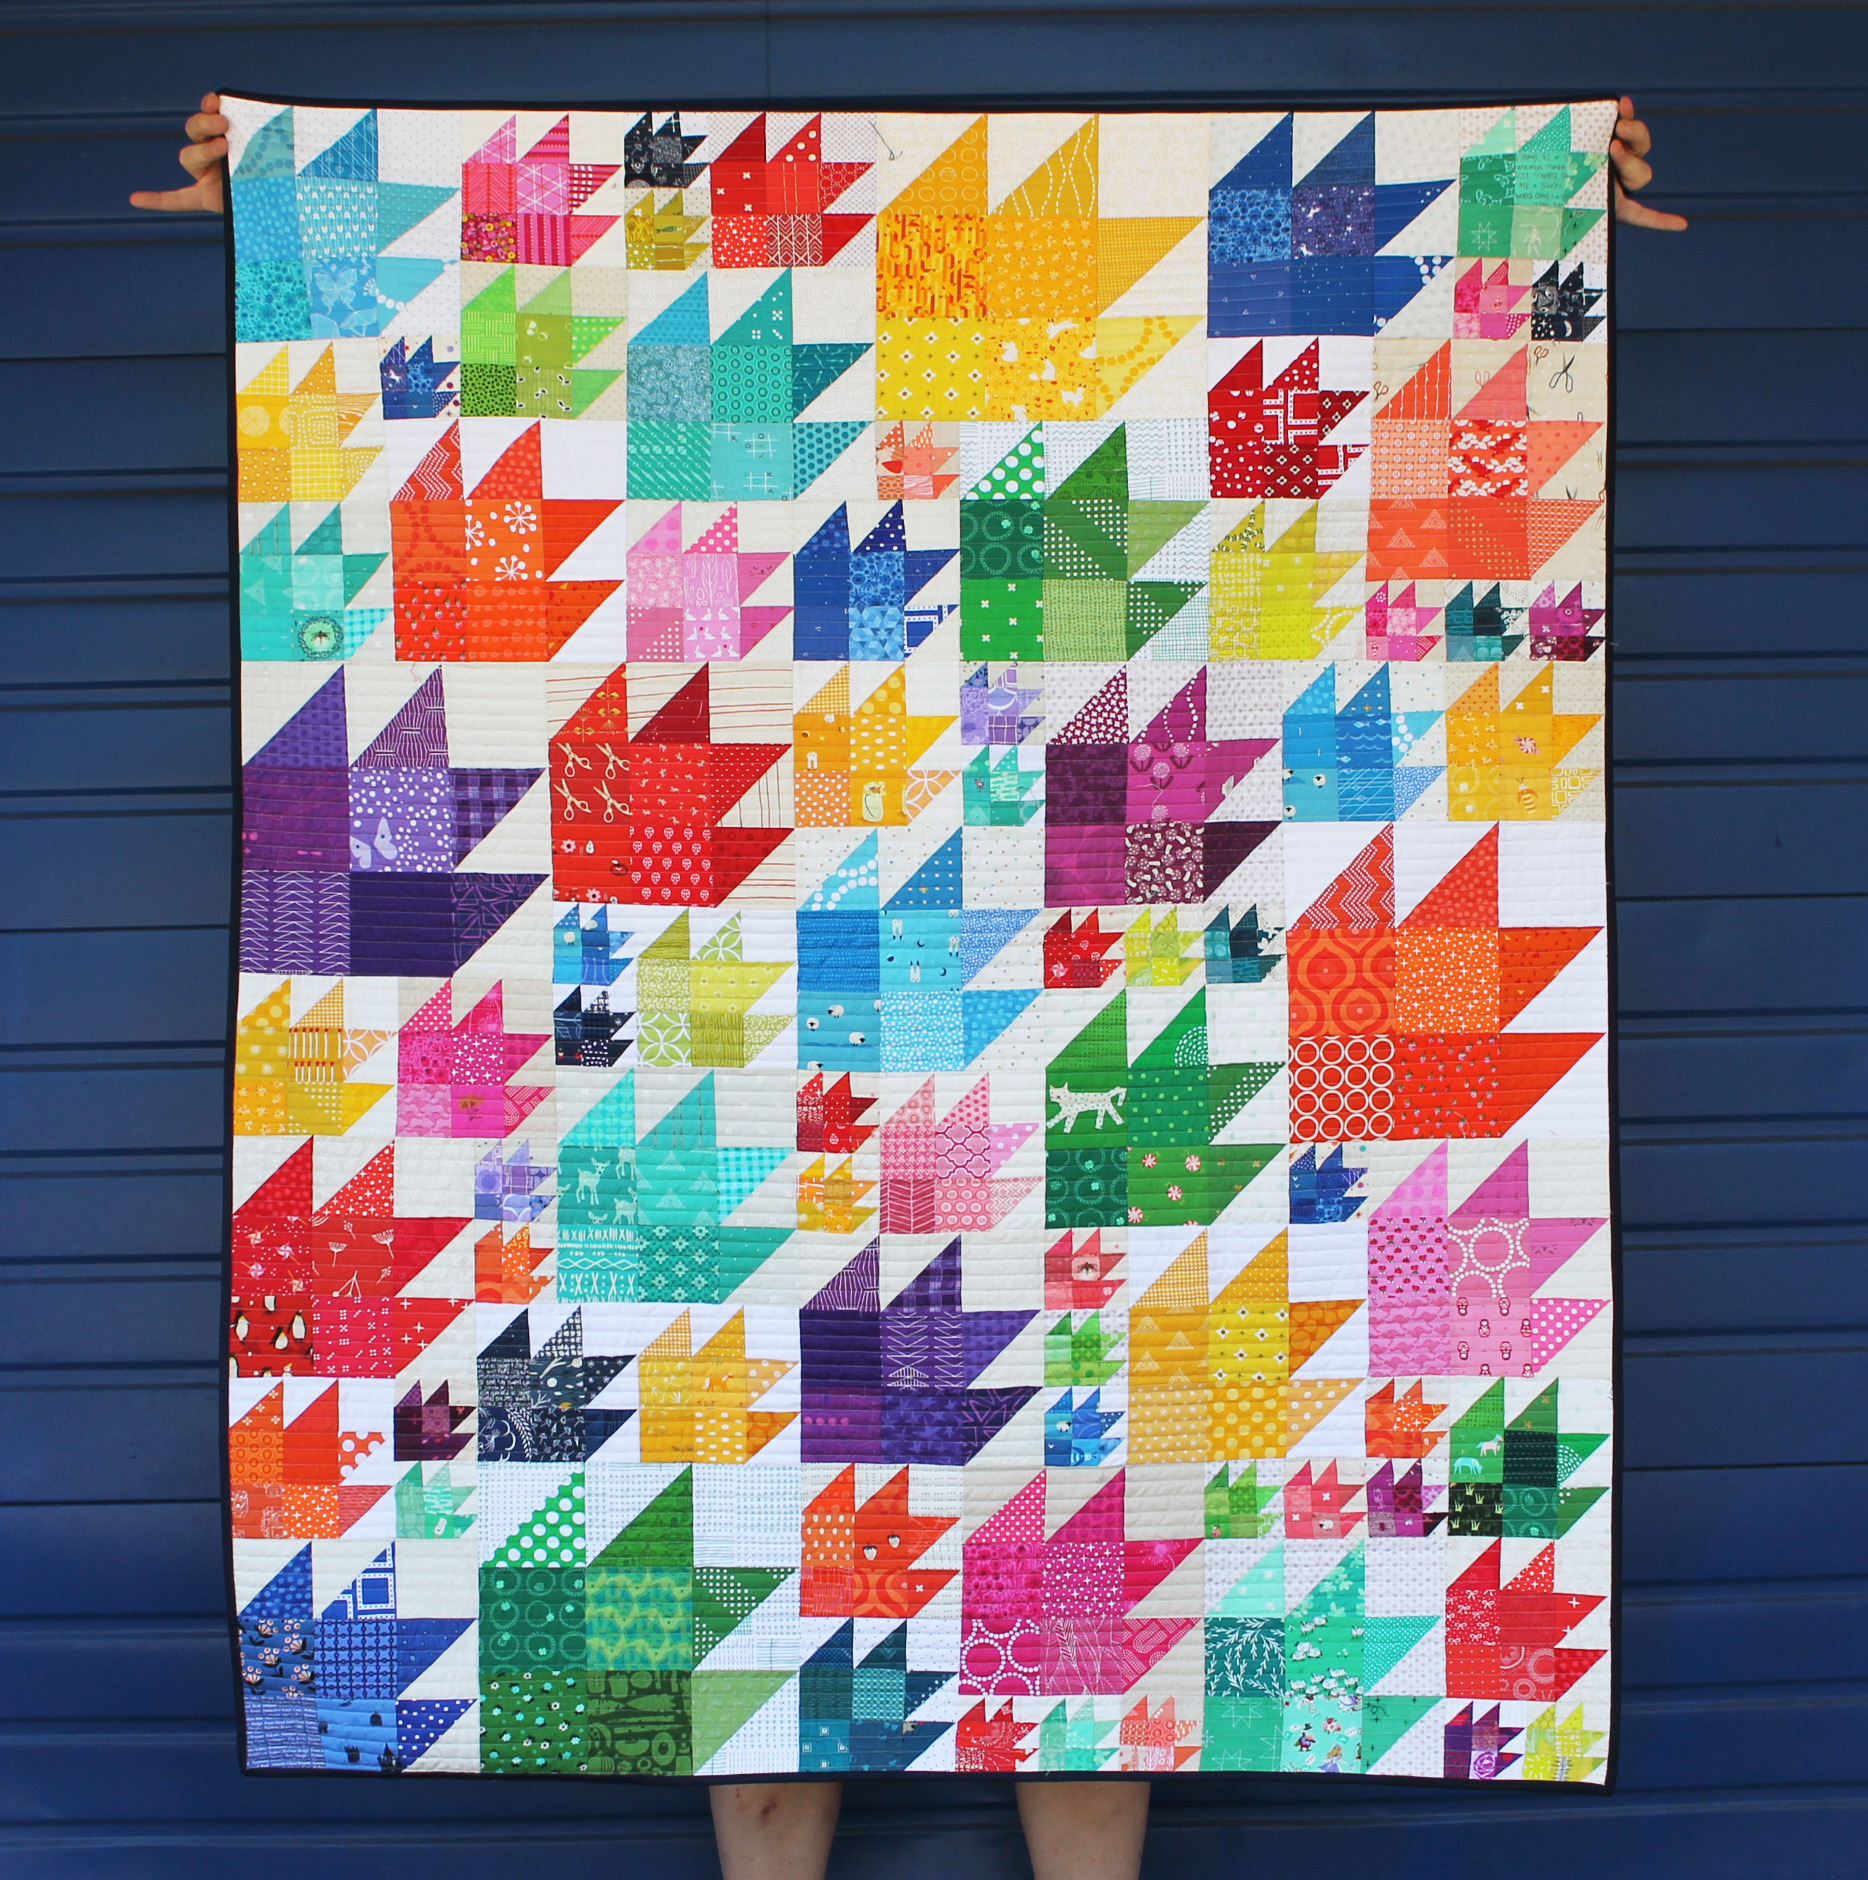
But before I started my over zealous production of bear paws for class, I set the block as my Do Good Stitches block. Actually in May 2019 I posted about making two blocks at a time in various sizes… the result of the tutuorial and my Bee mates work is this stunning quilt…
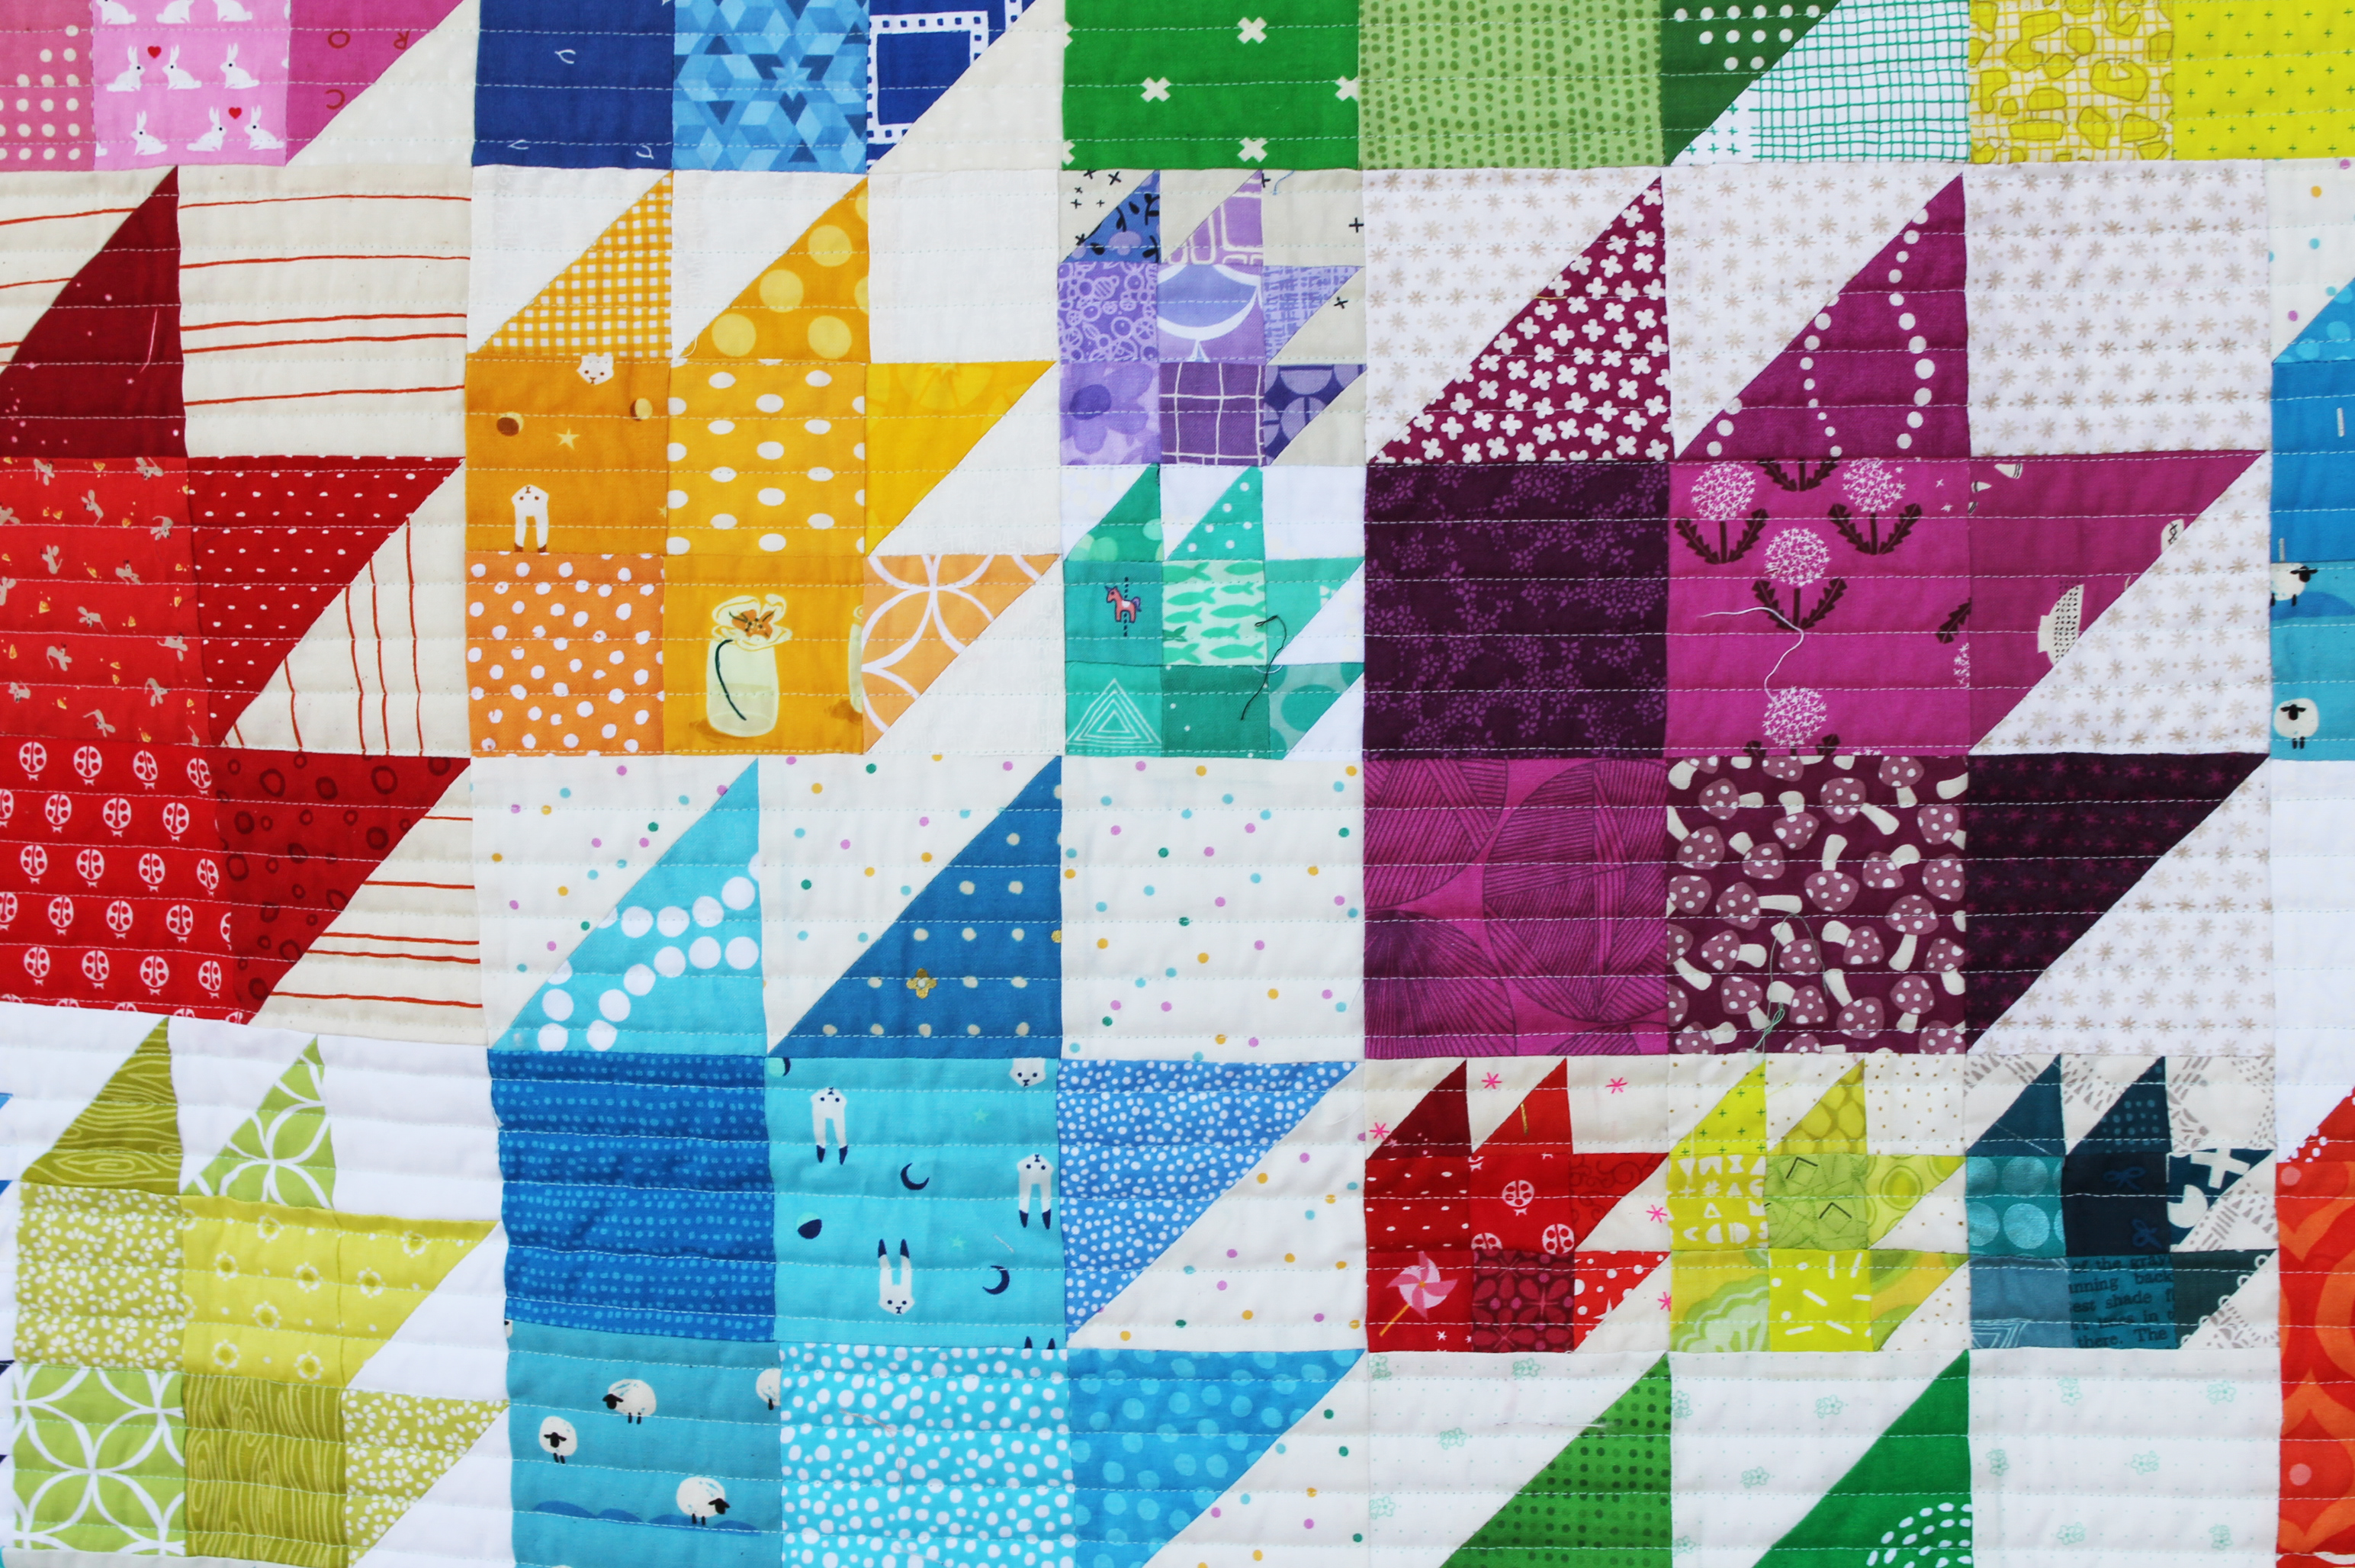
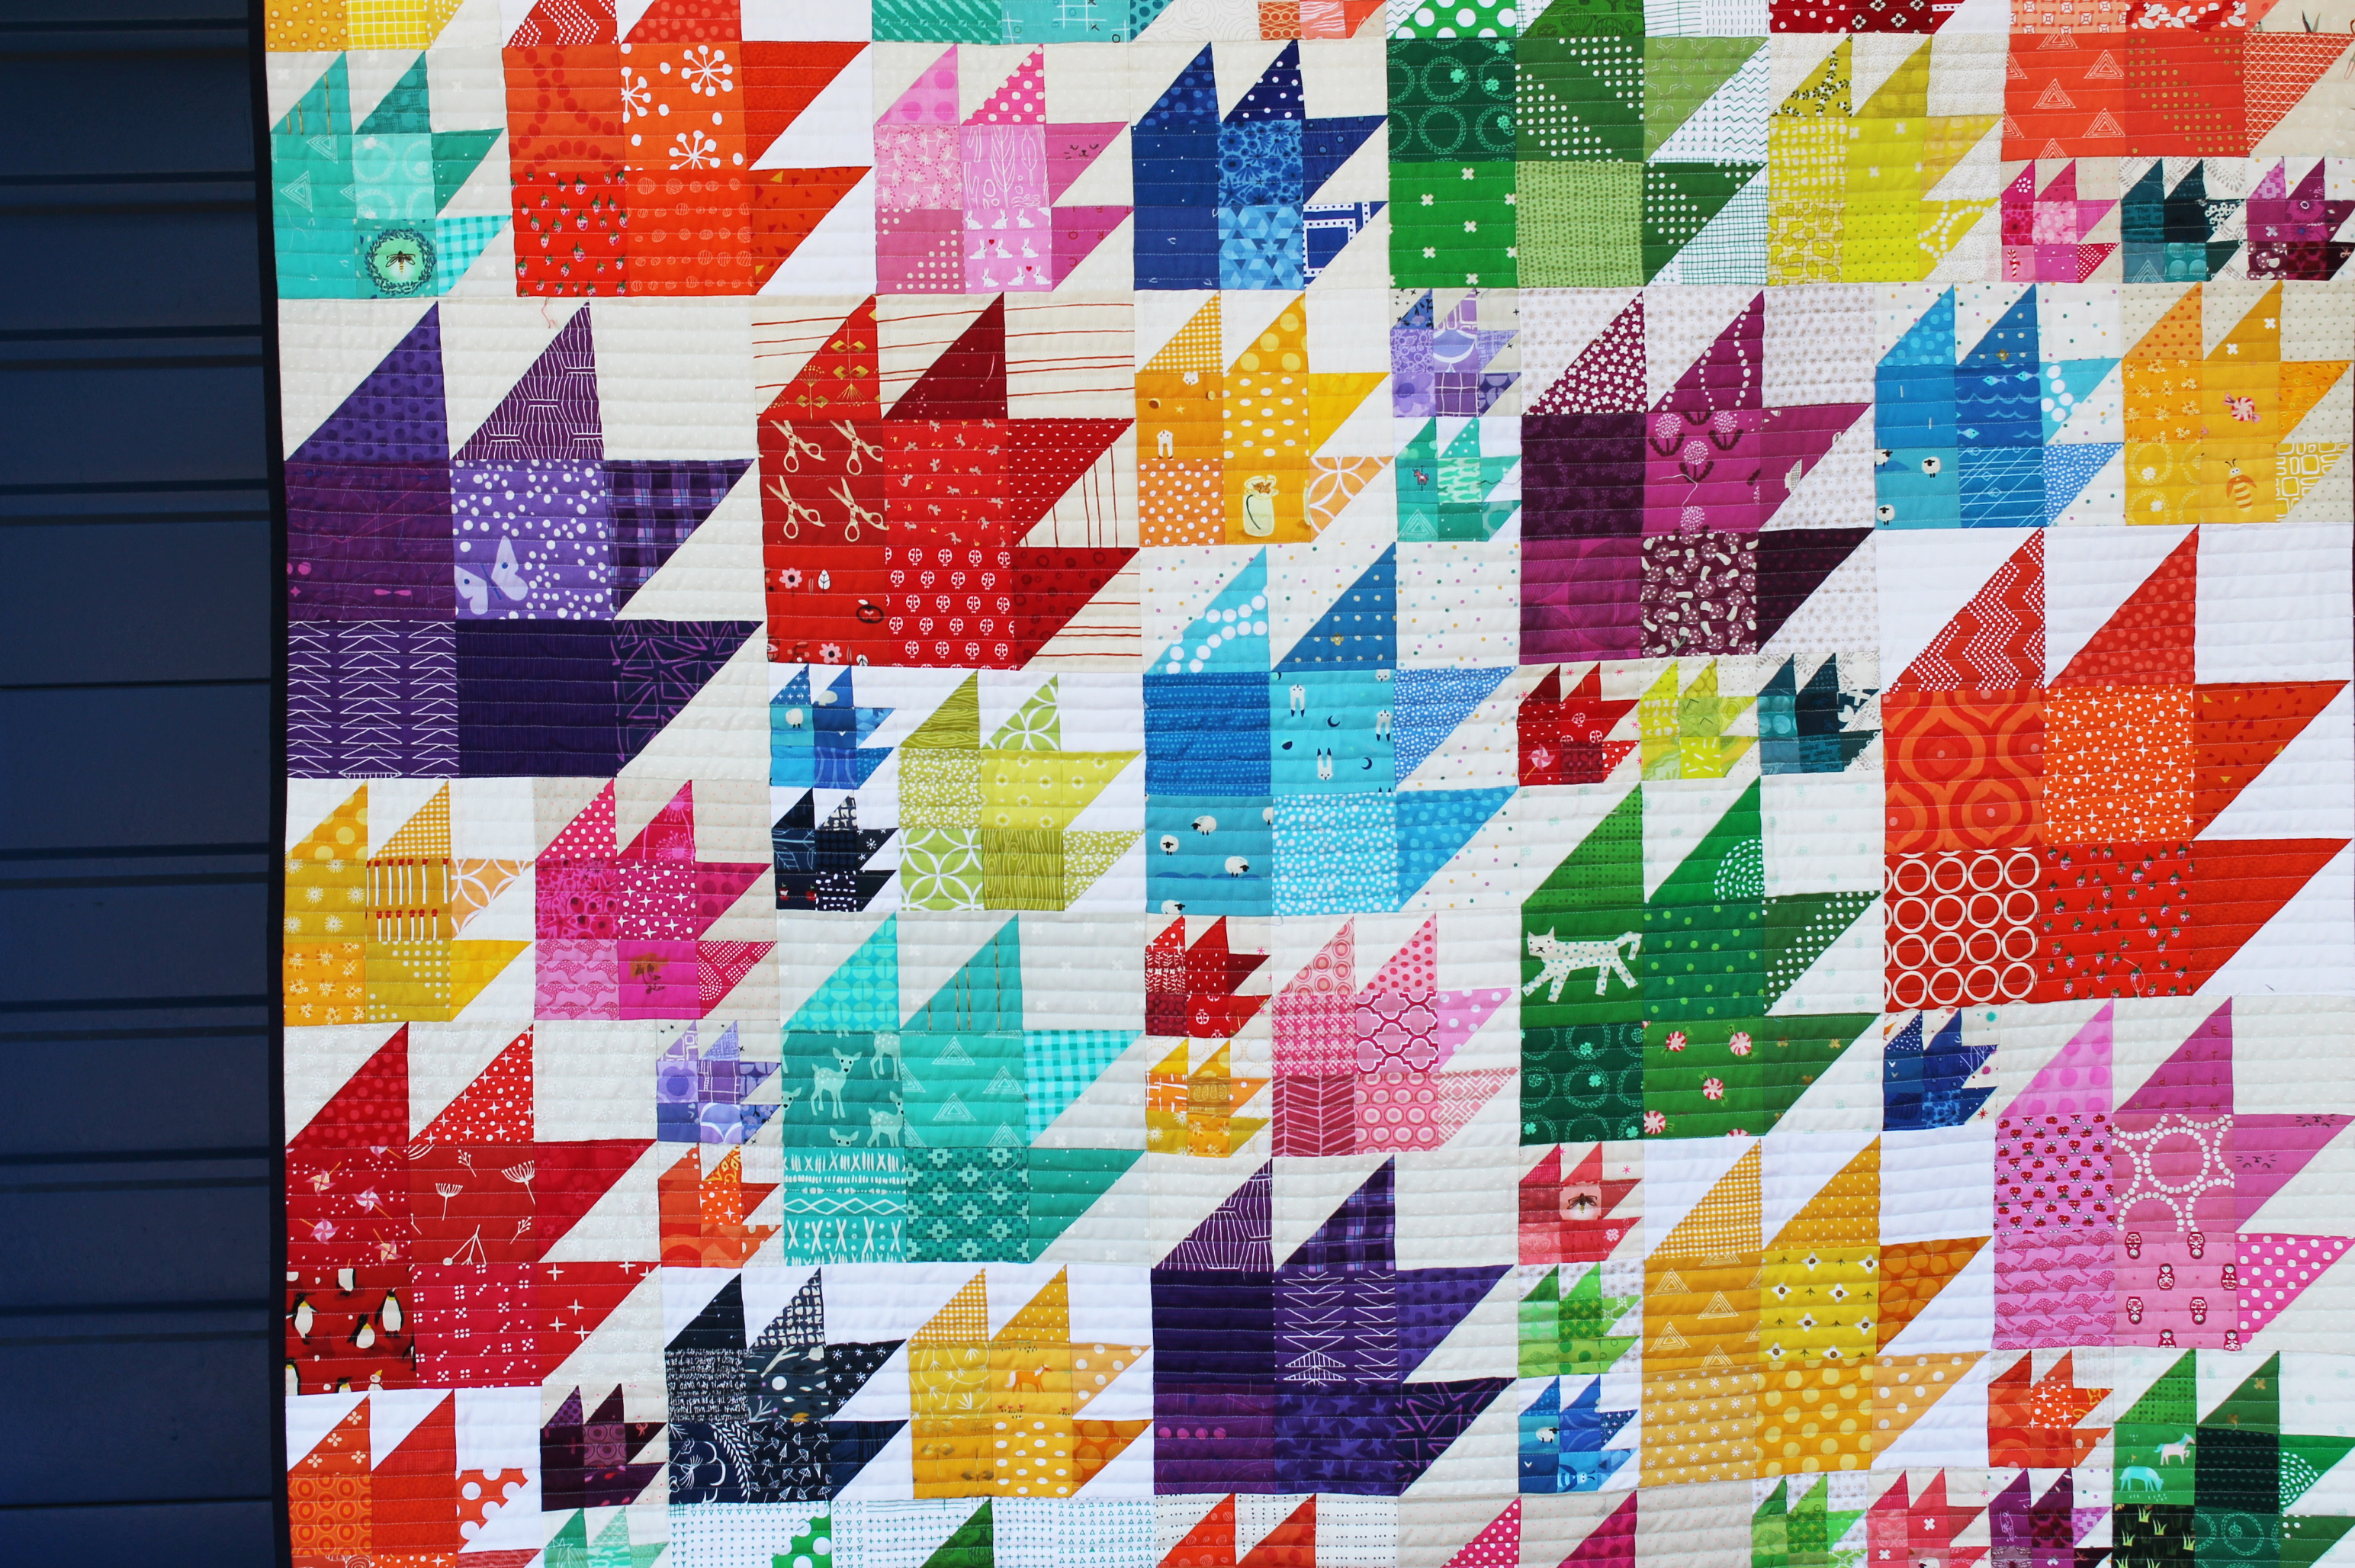
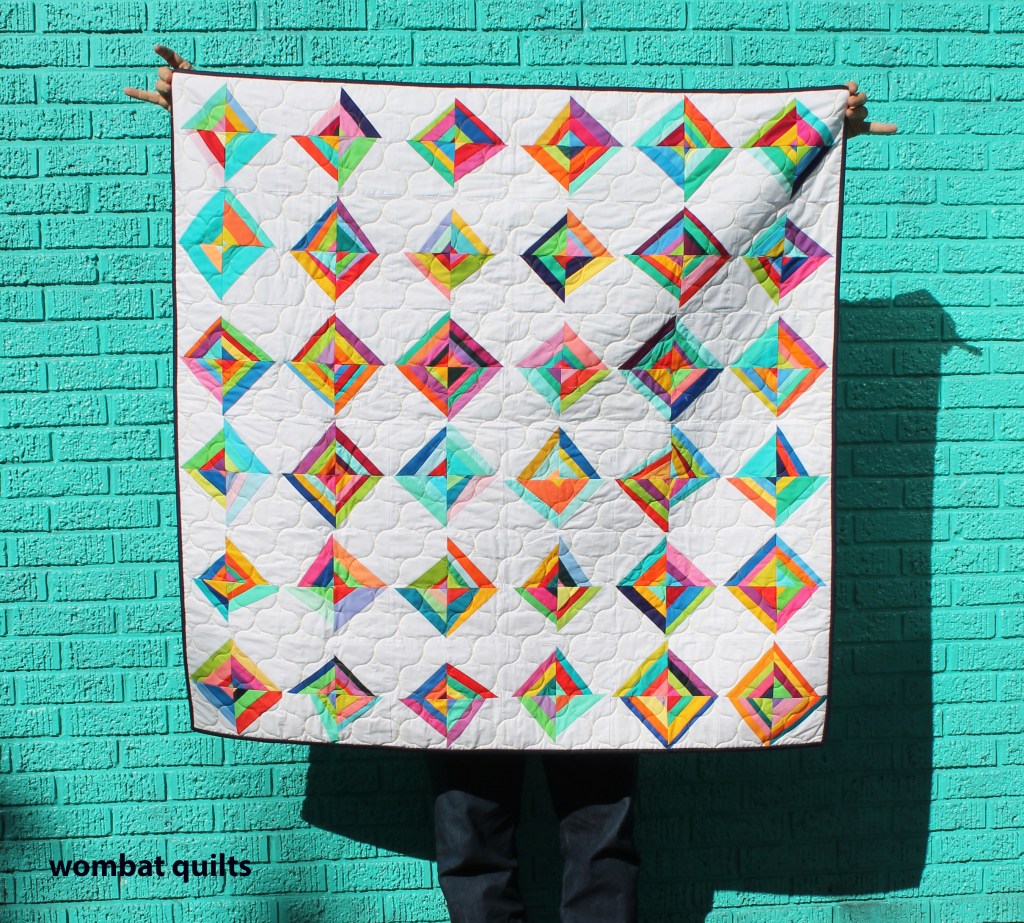
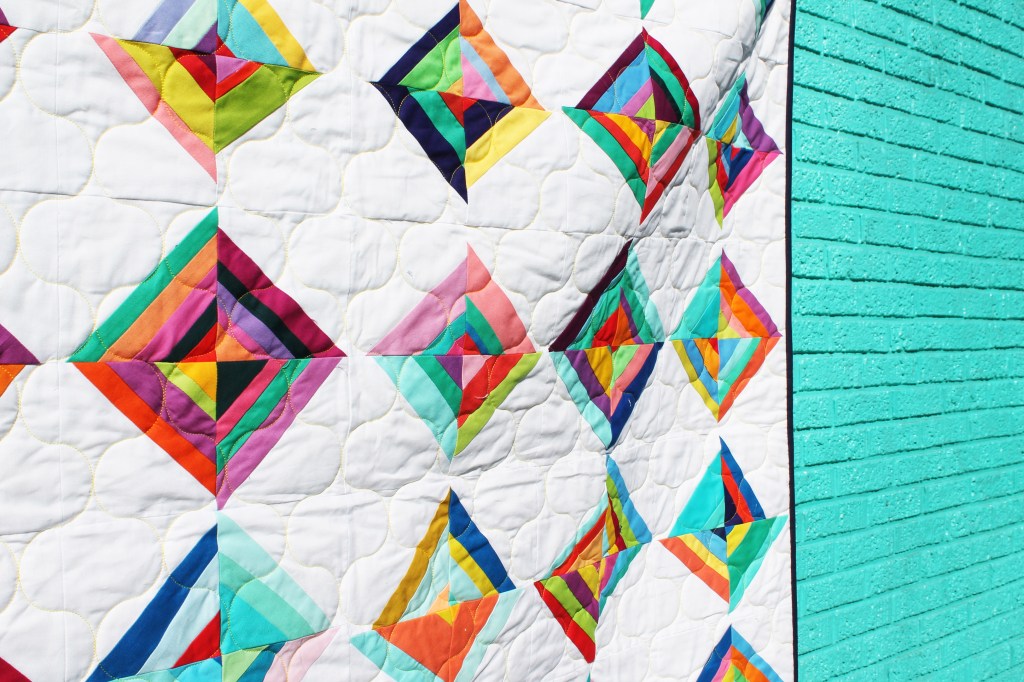
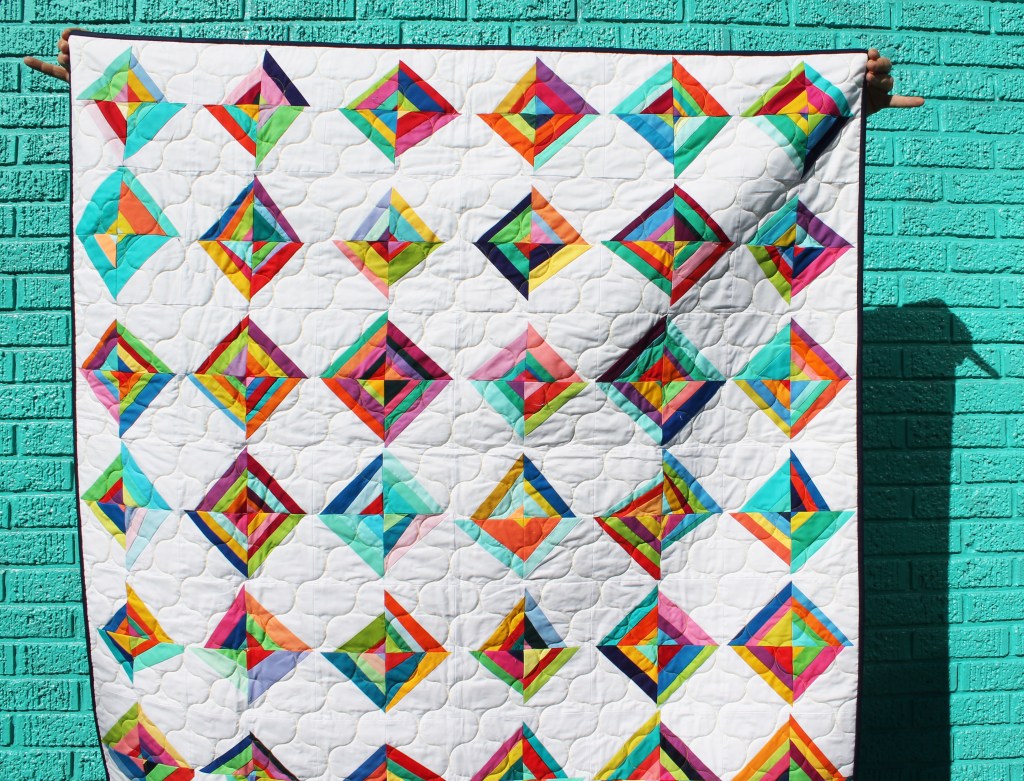
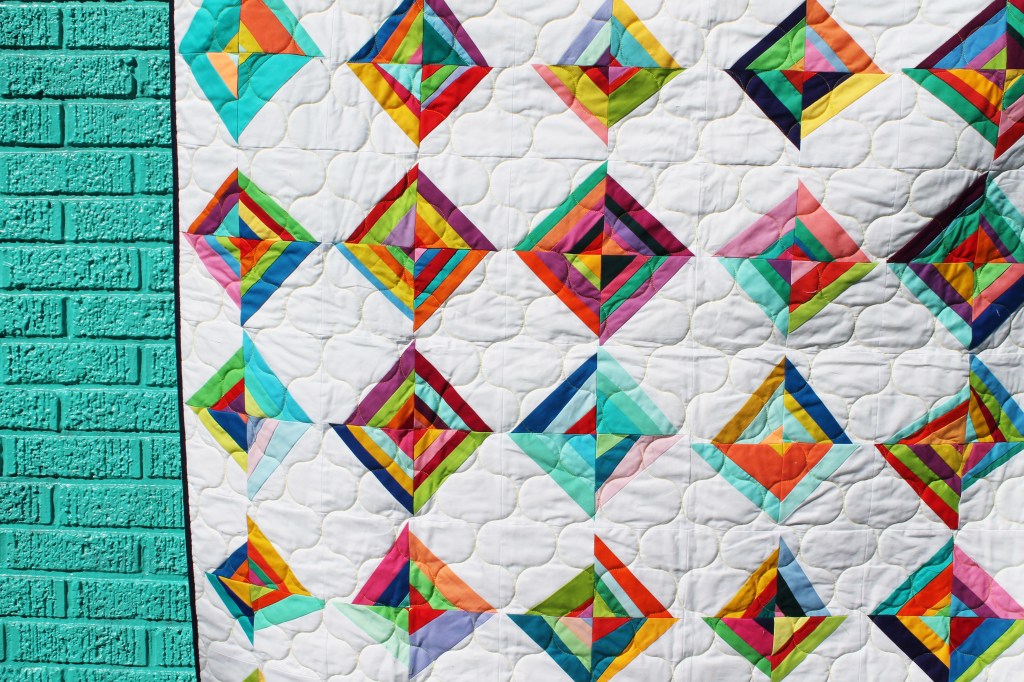
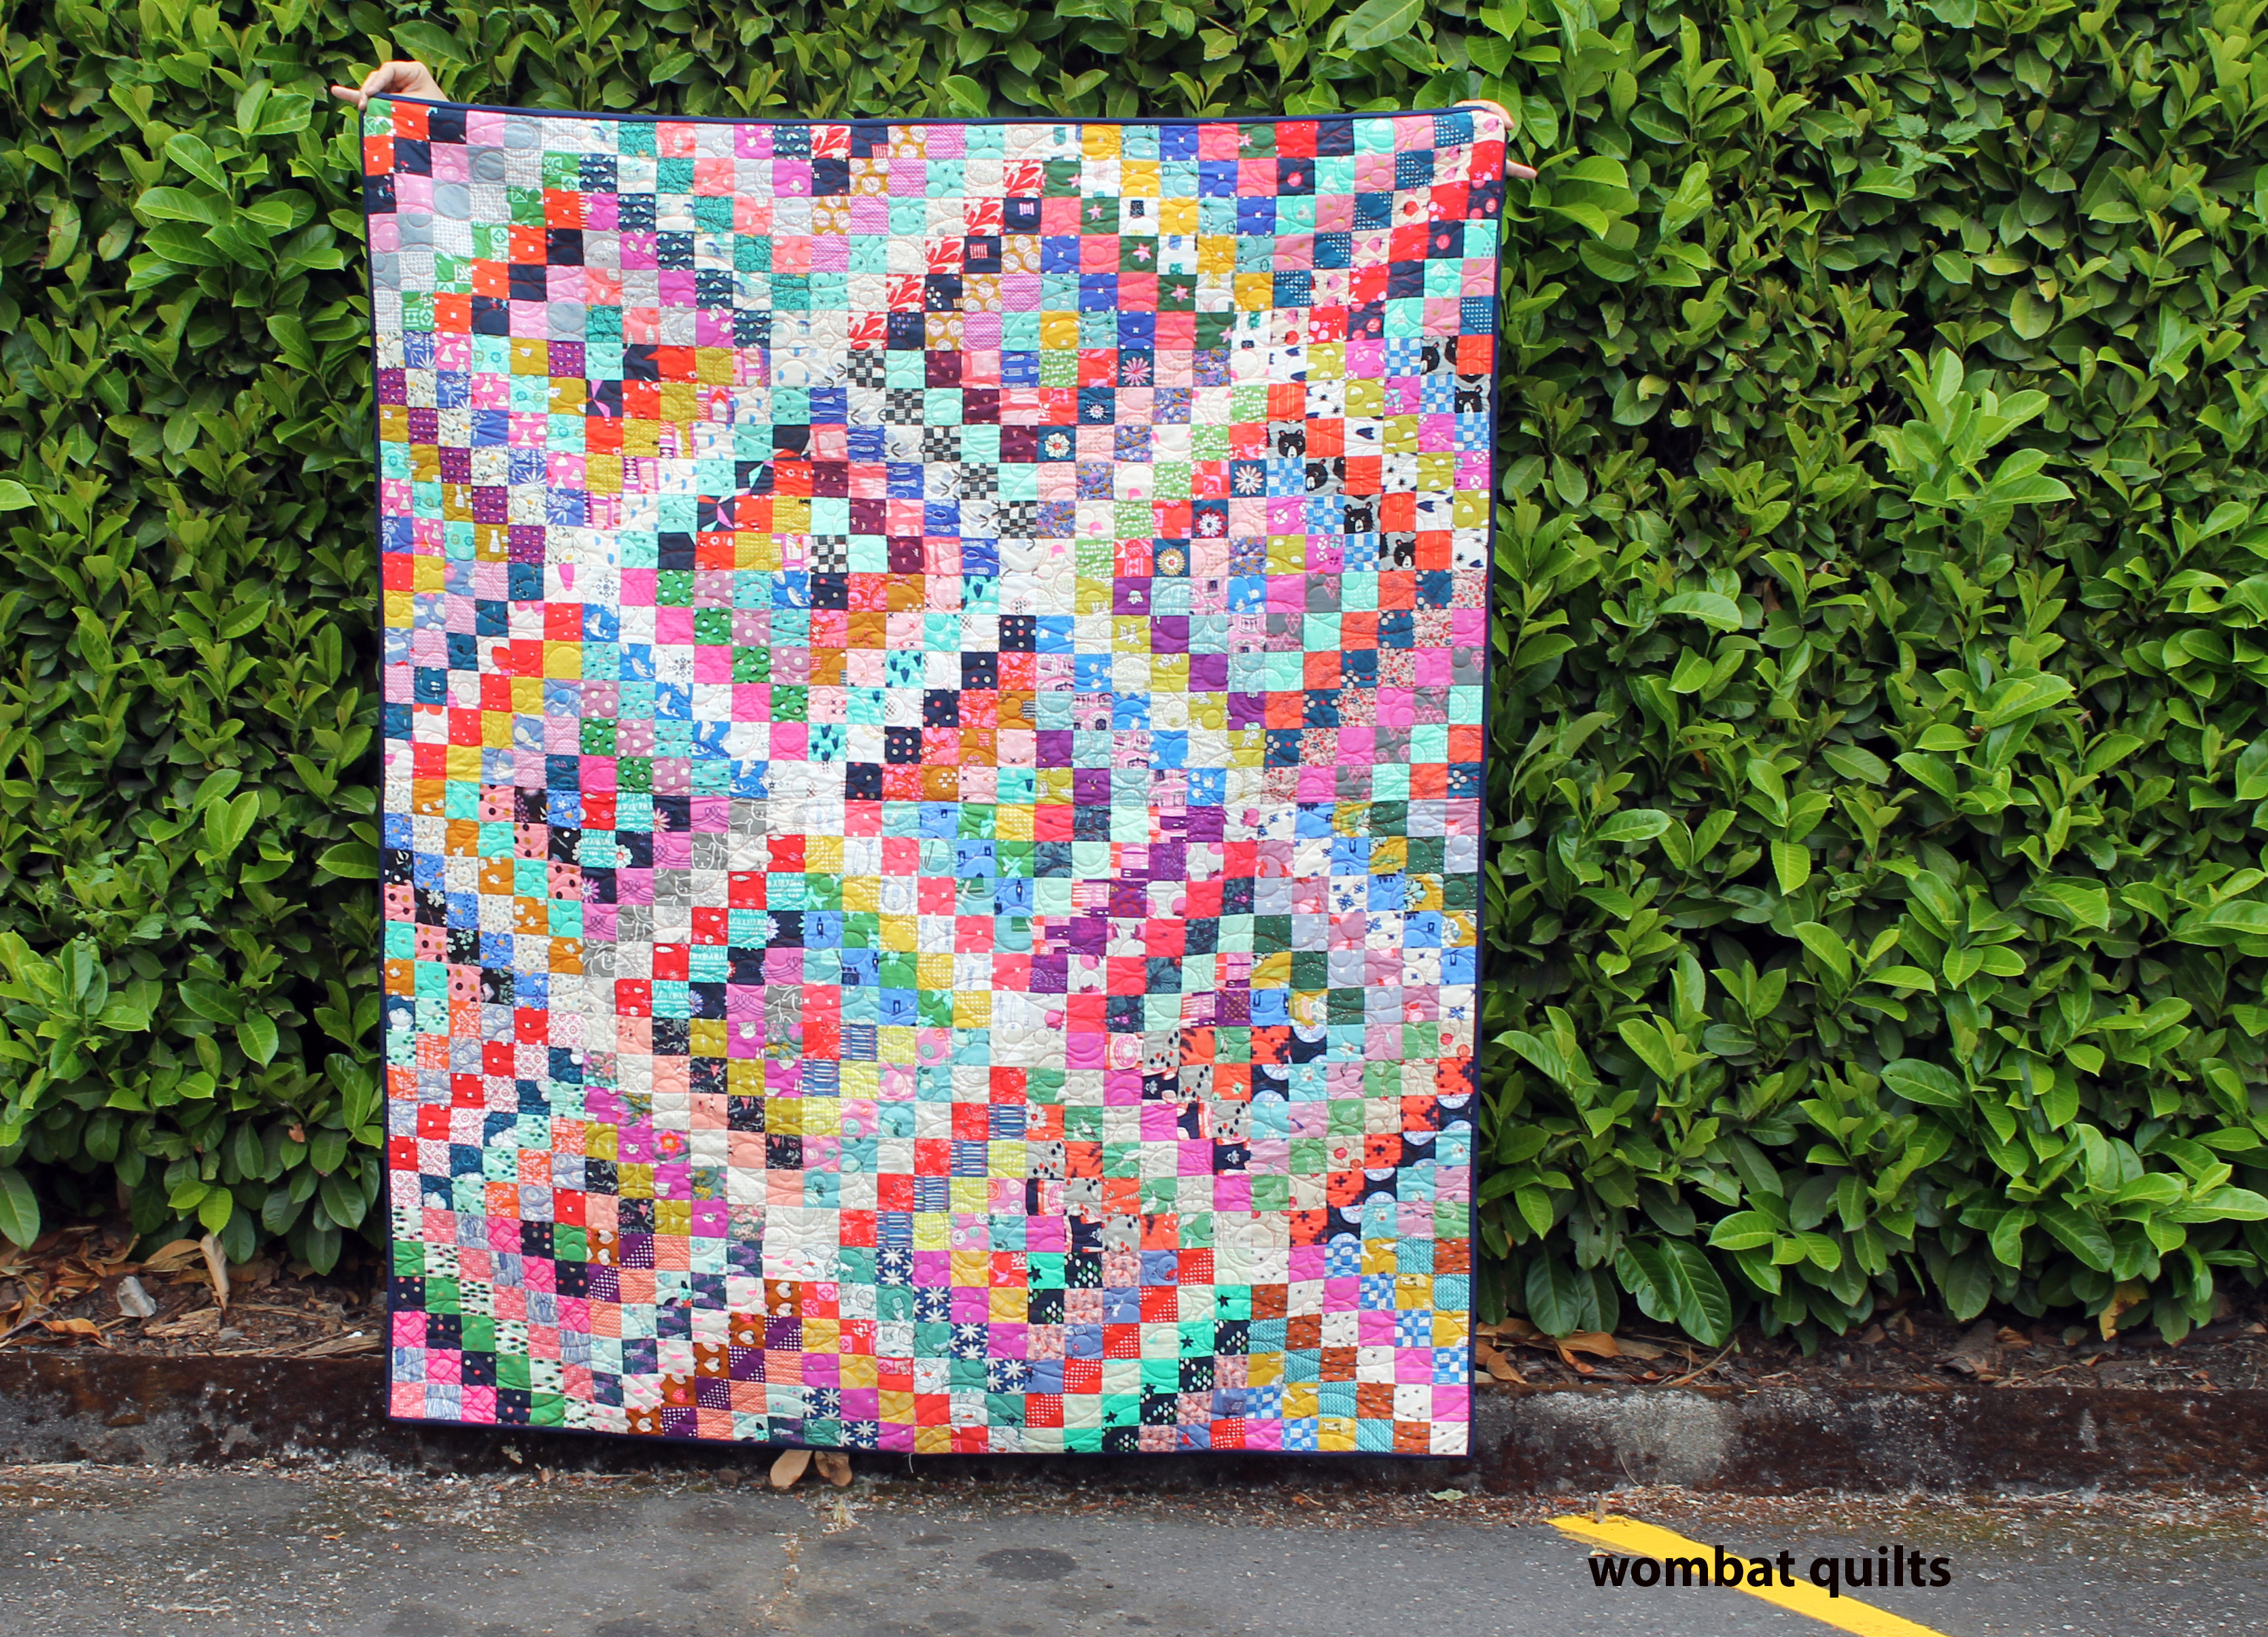
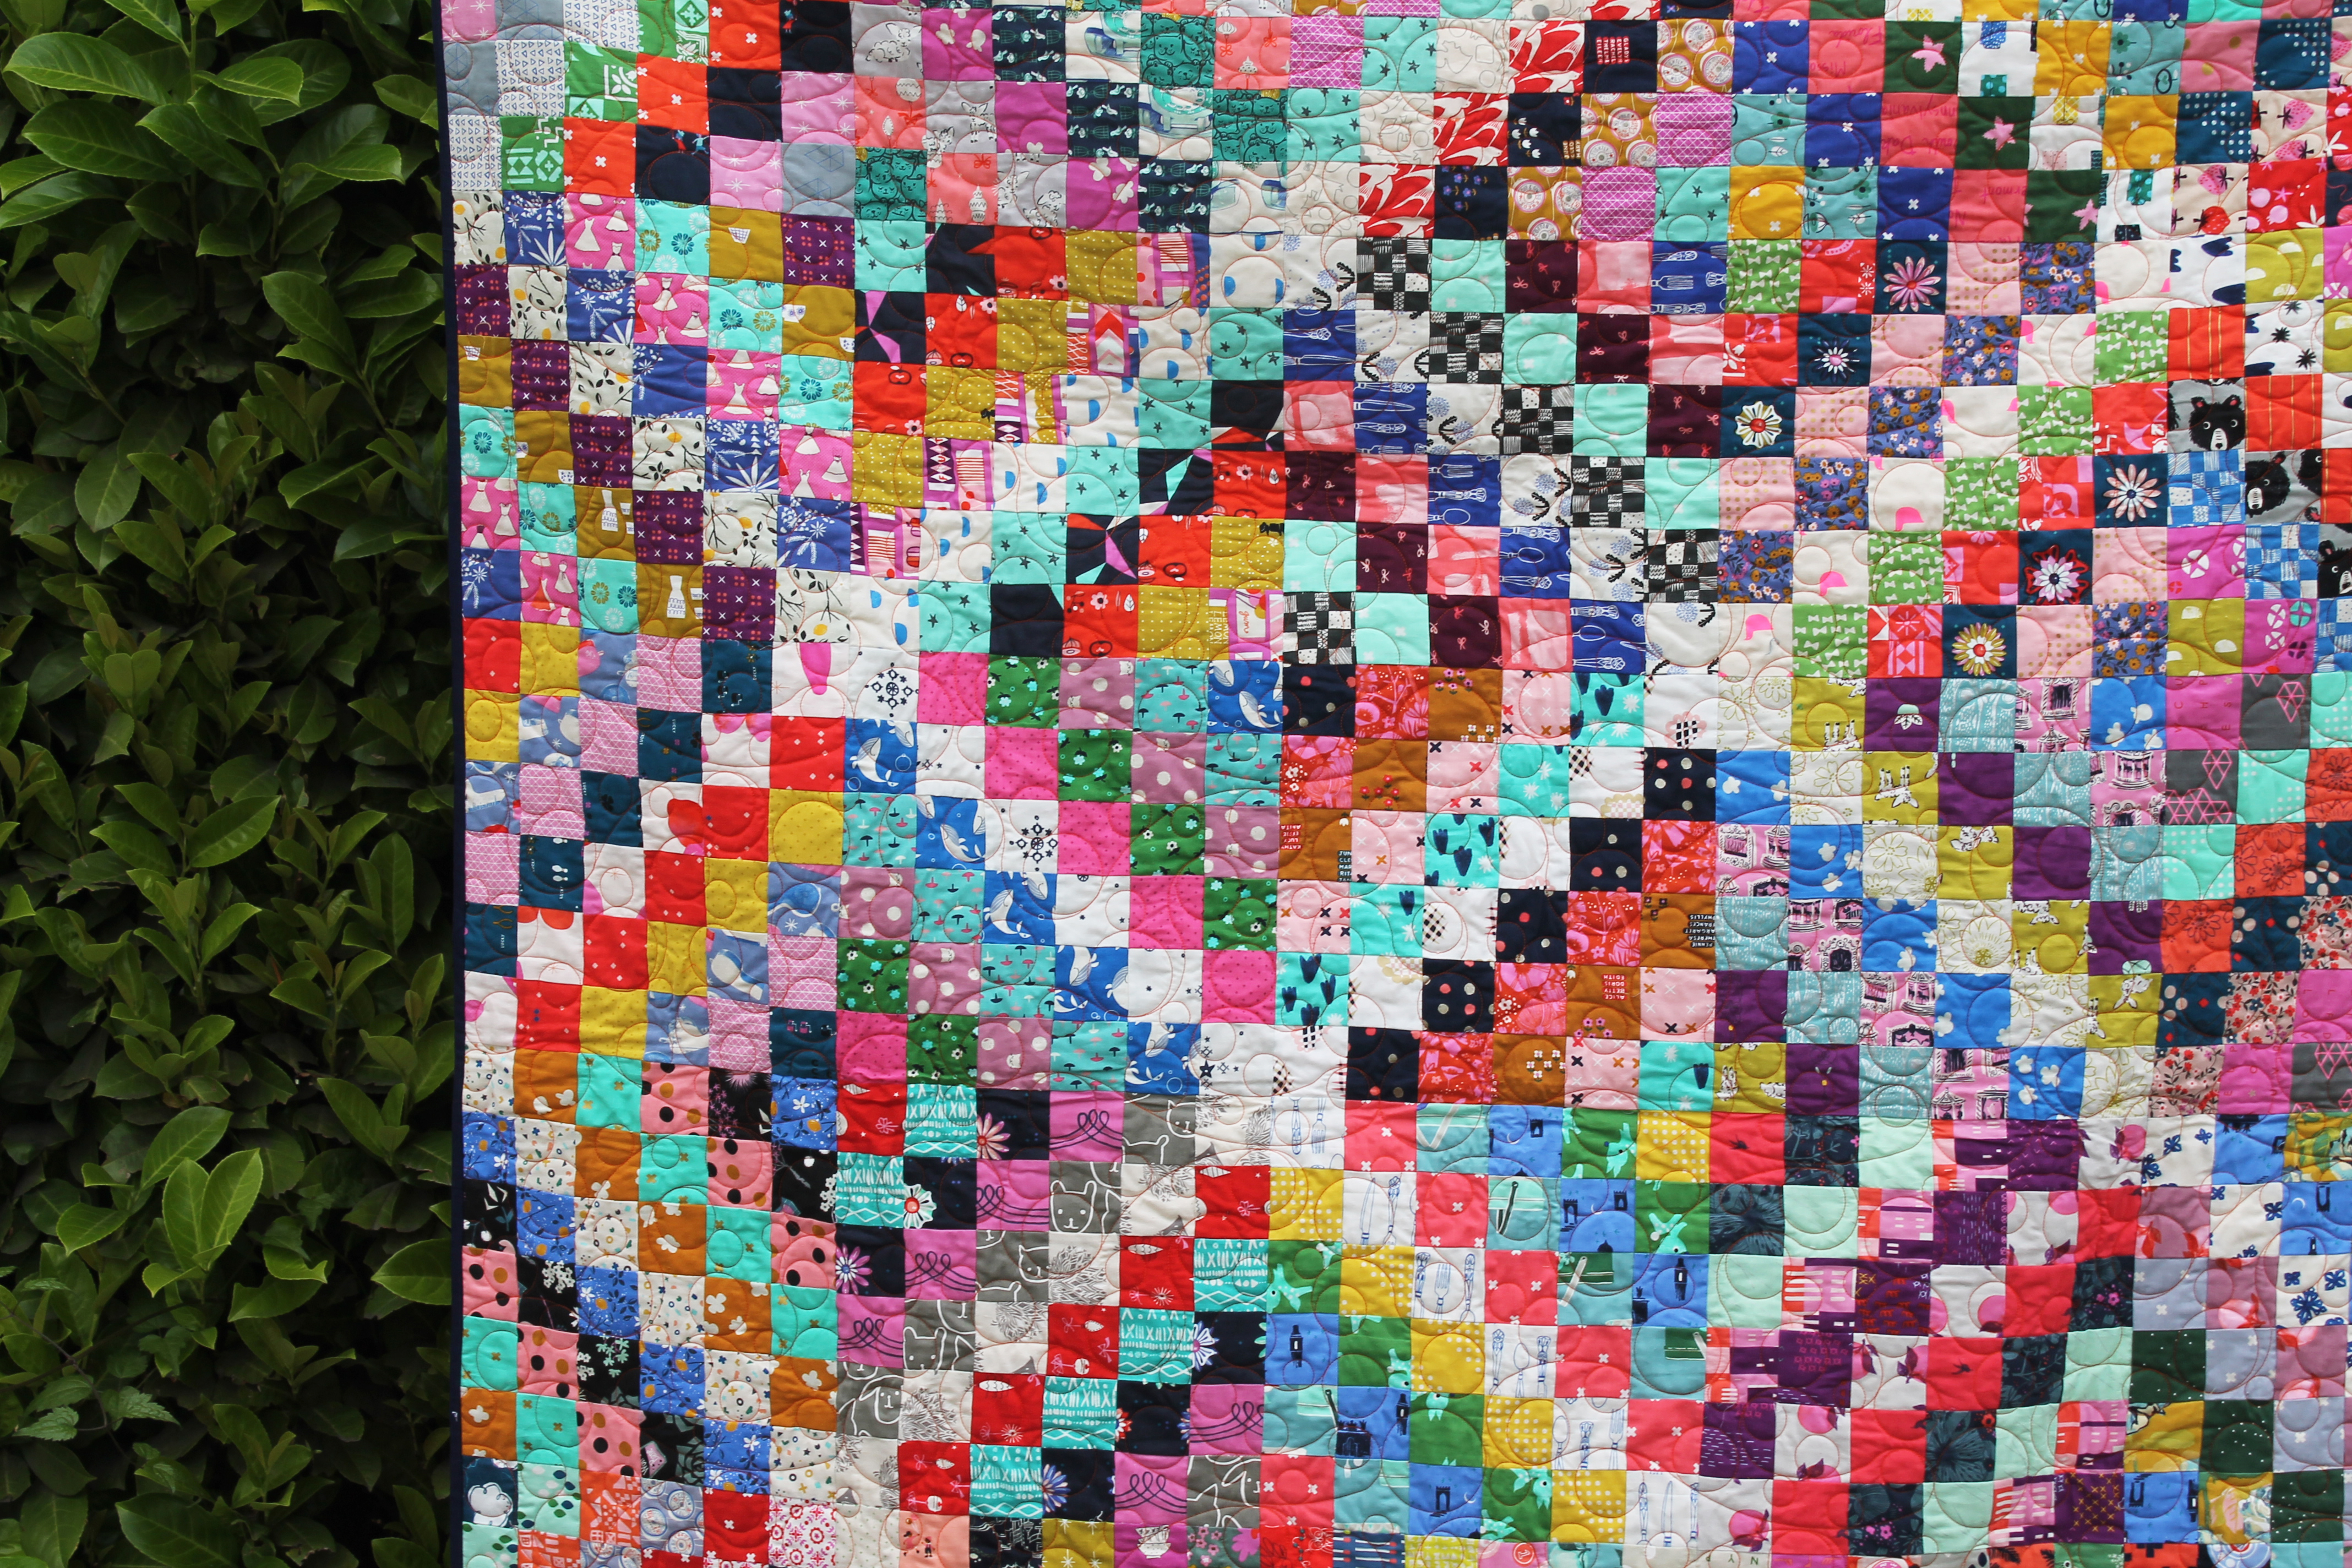
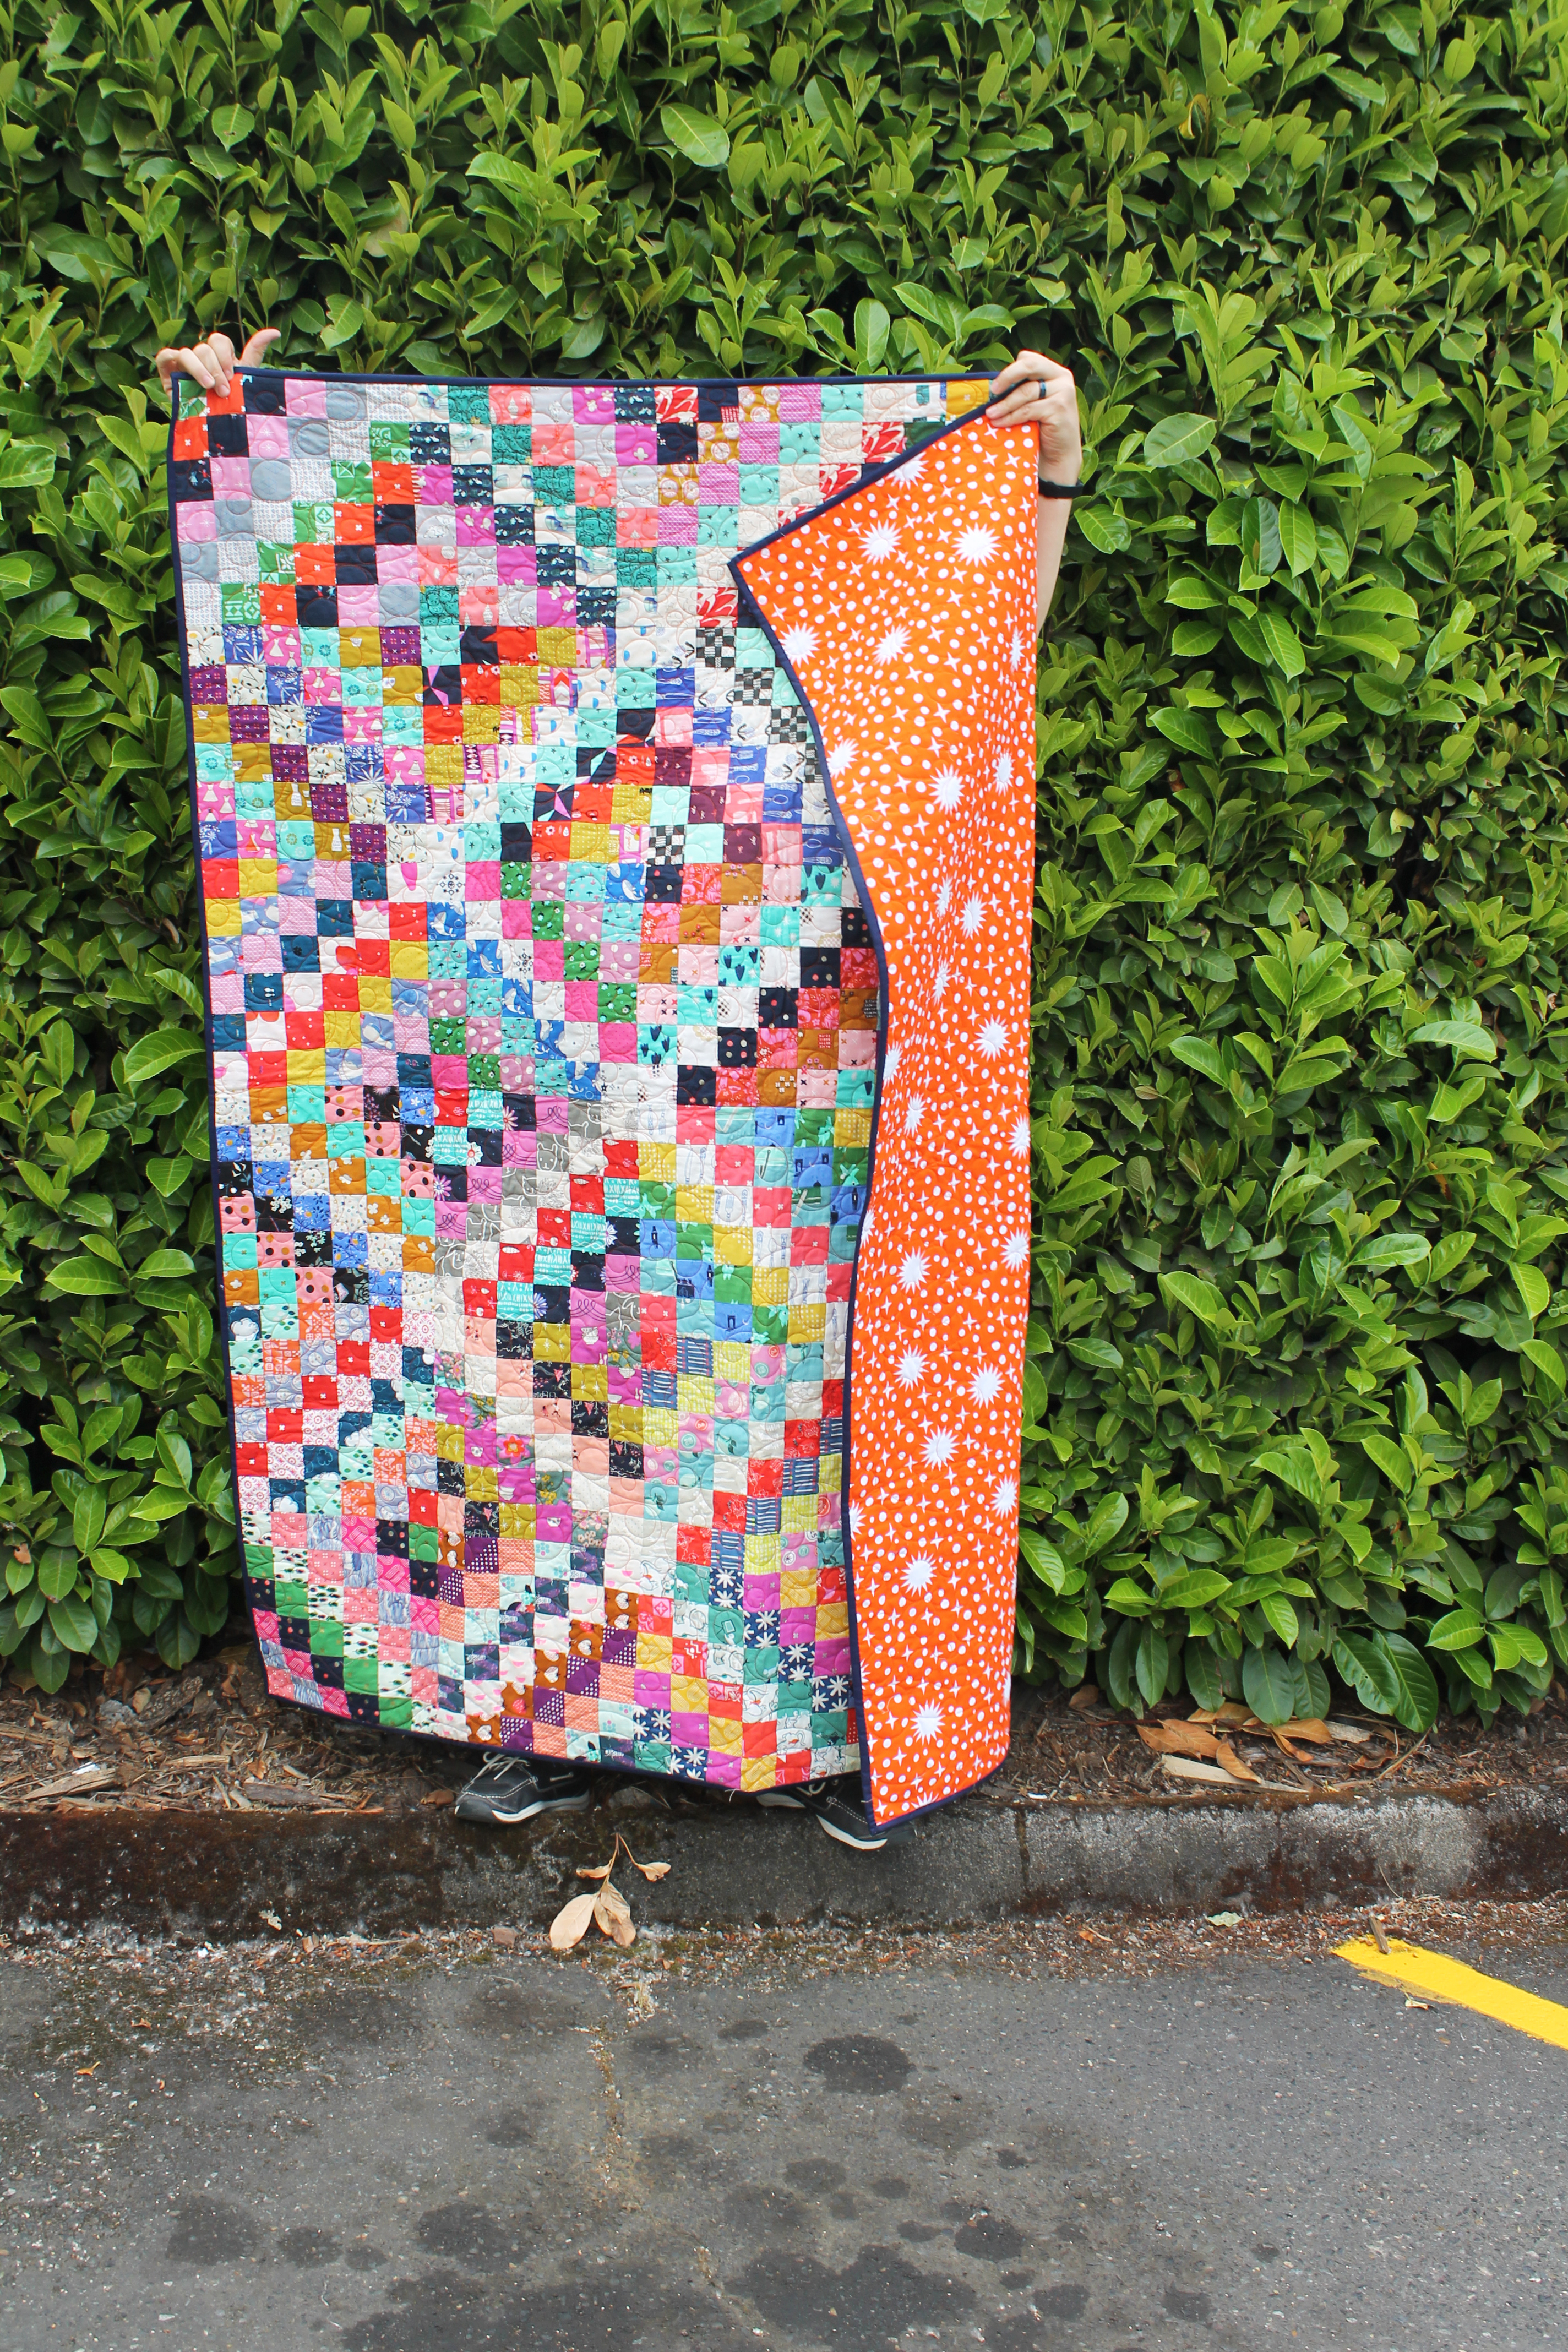
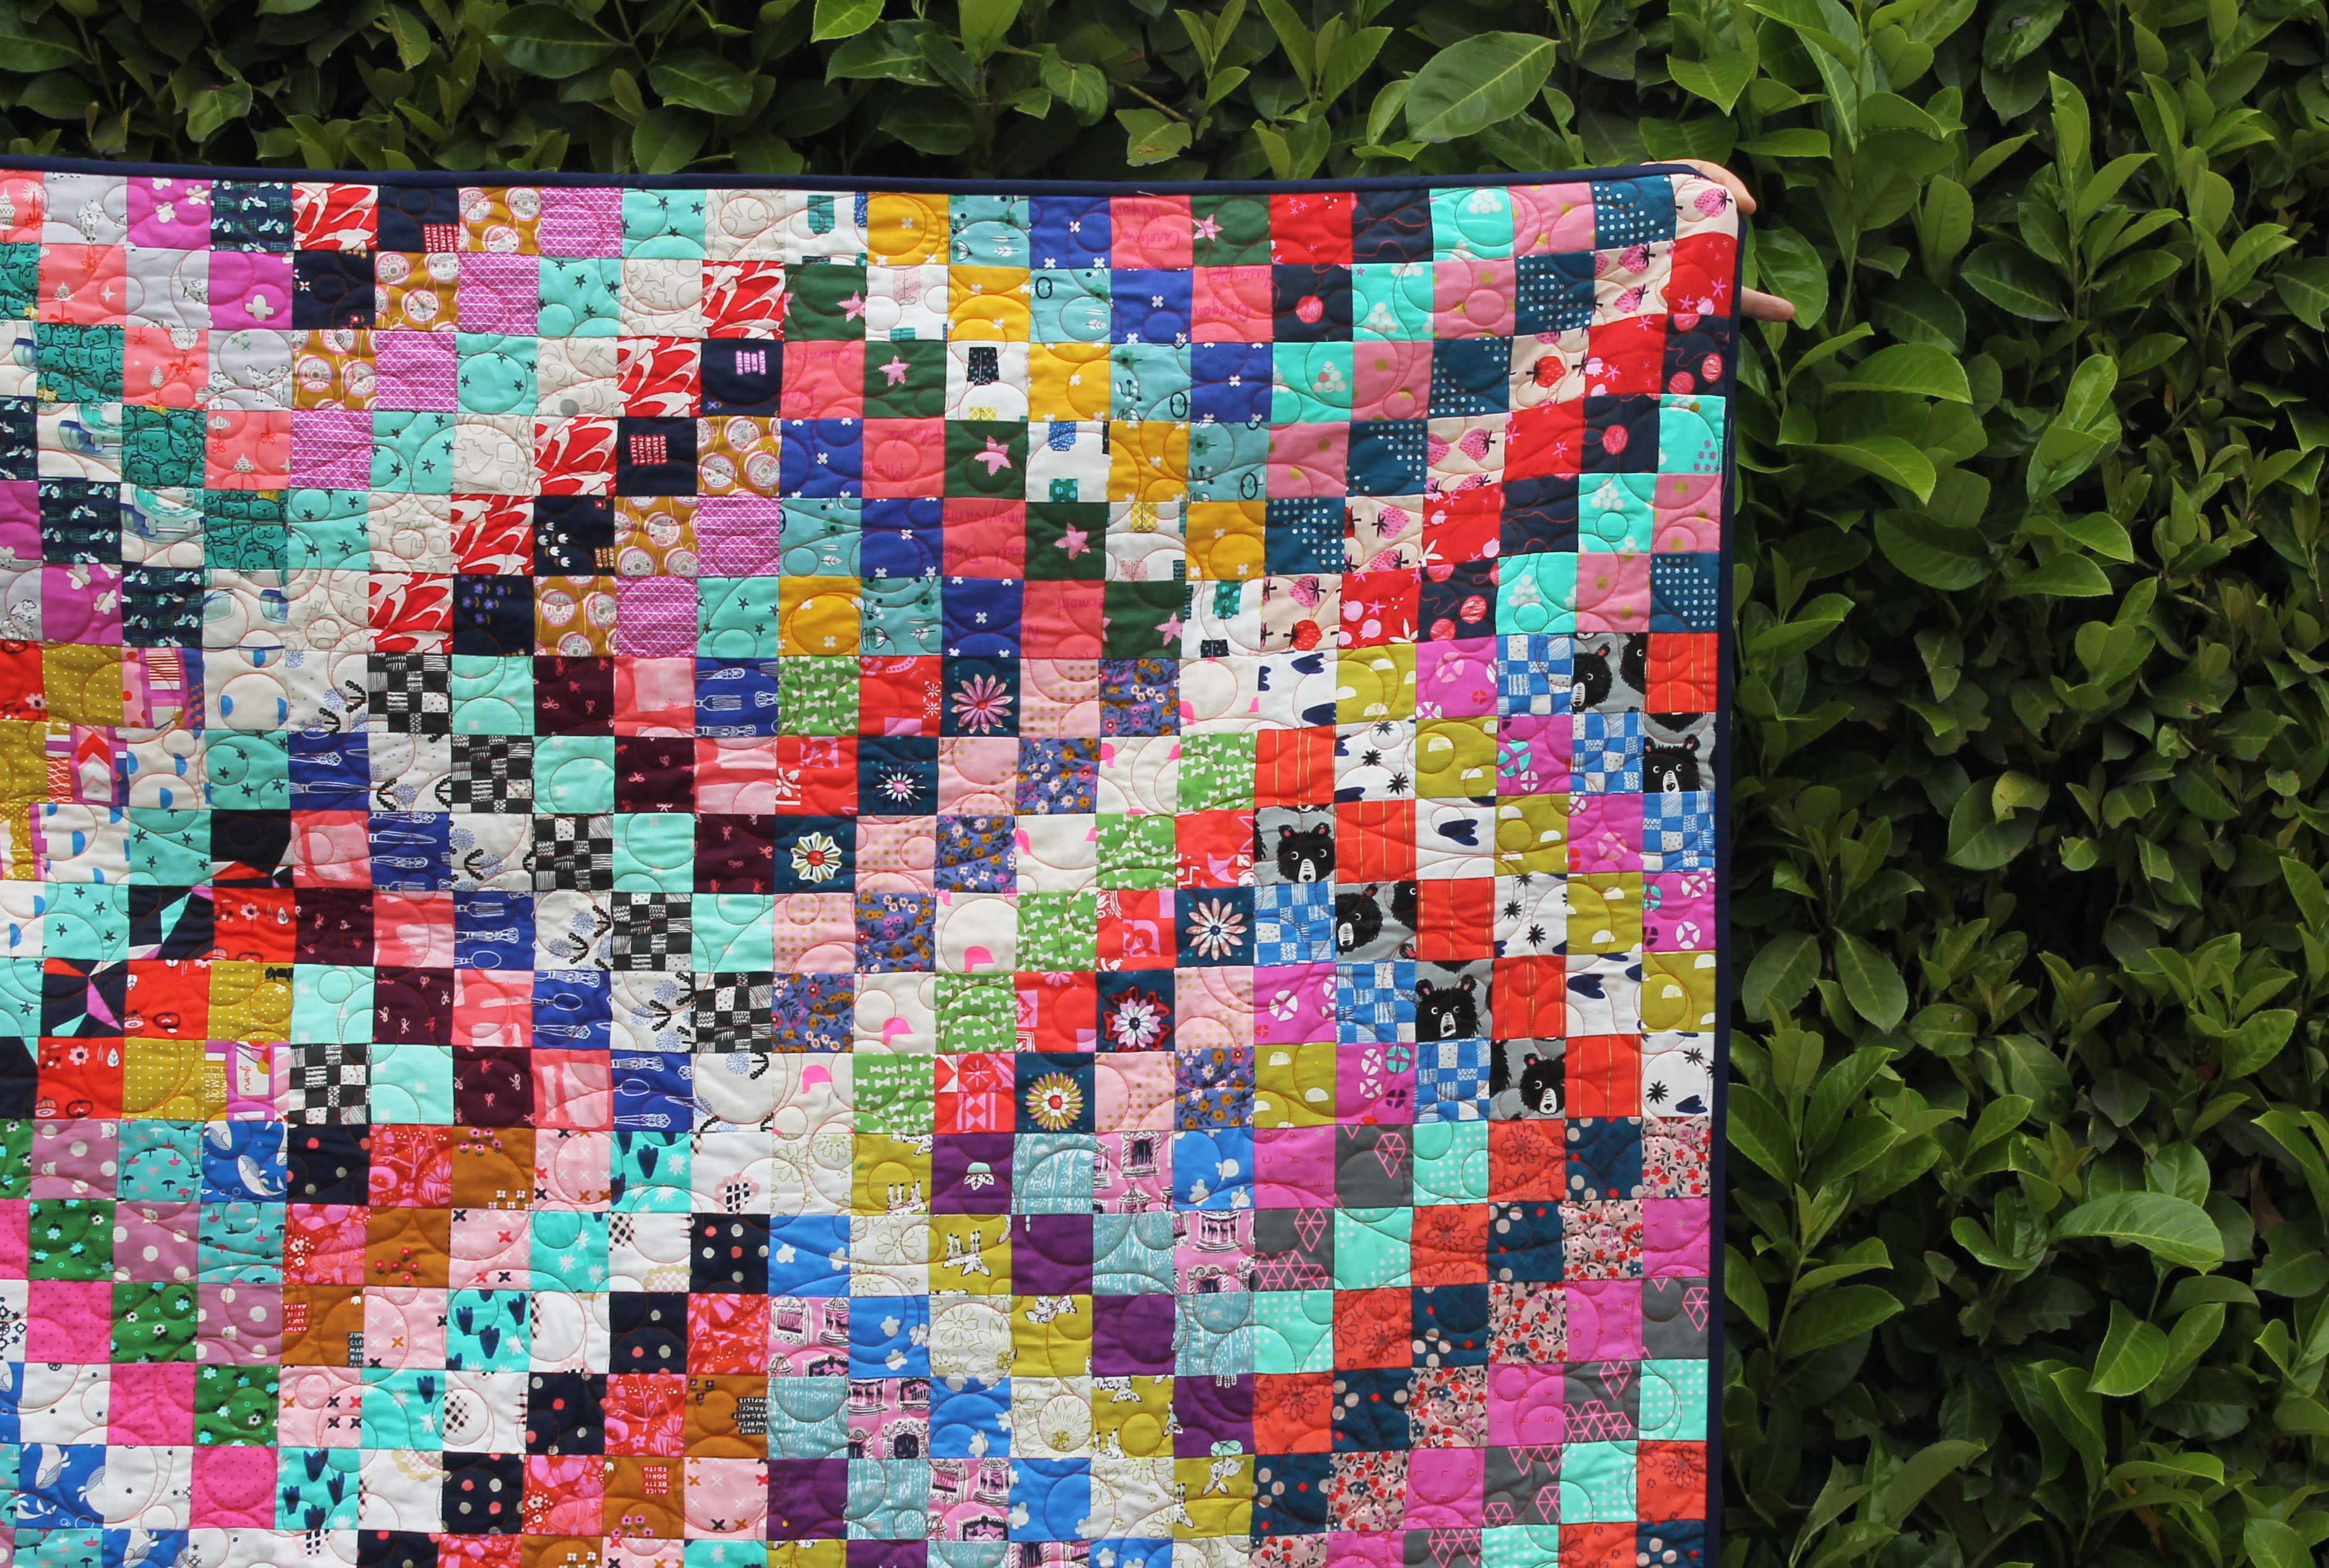
This quilt uses blocks that are 3, 6, 9 and 12 inches big… a whole rainbow of colors…. and tons and tons of scraps.
Each body of the bear paw is made up of four squares which allows for maximum fussy cutting potential and scrap usage. I know with the blocks I made I had a blast finding different novelty prints to cut up.
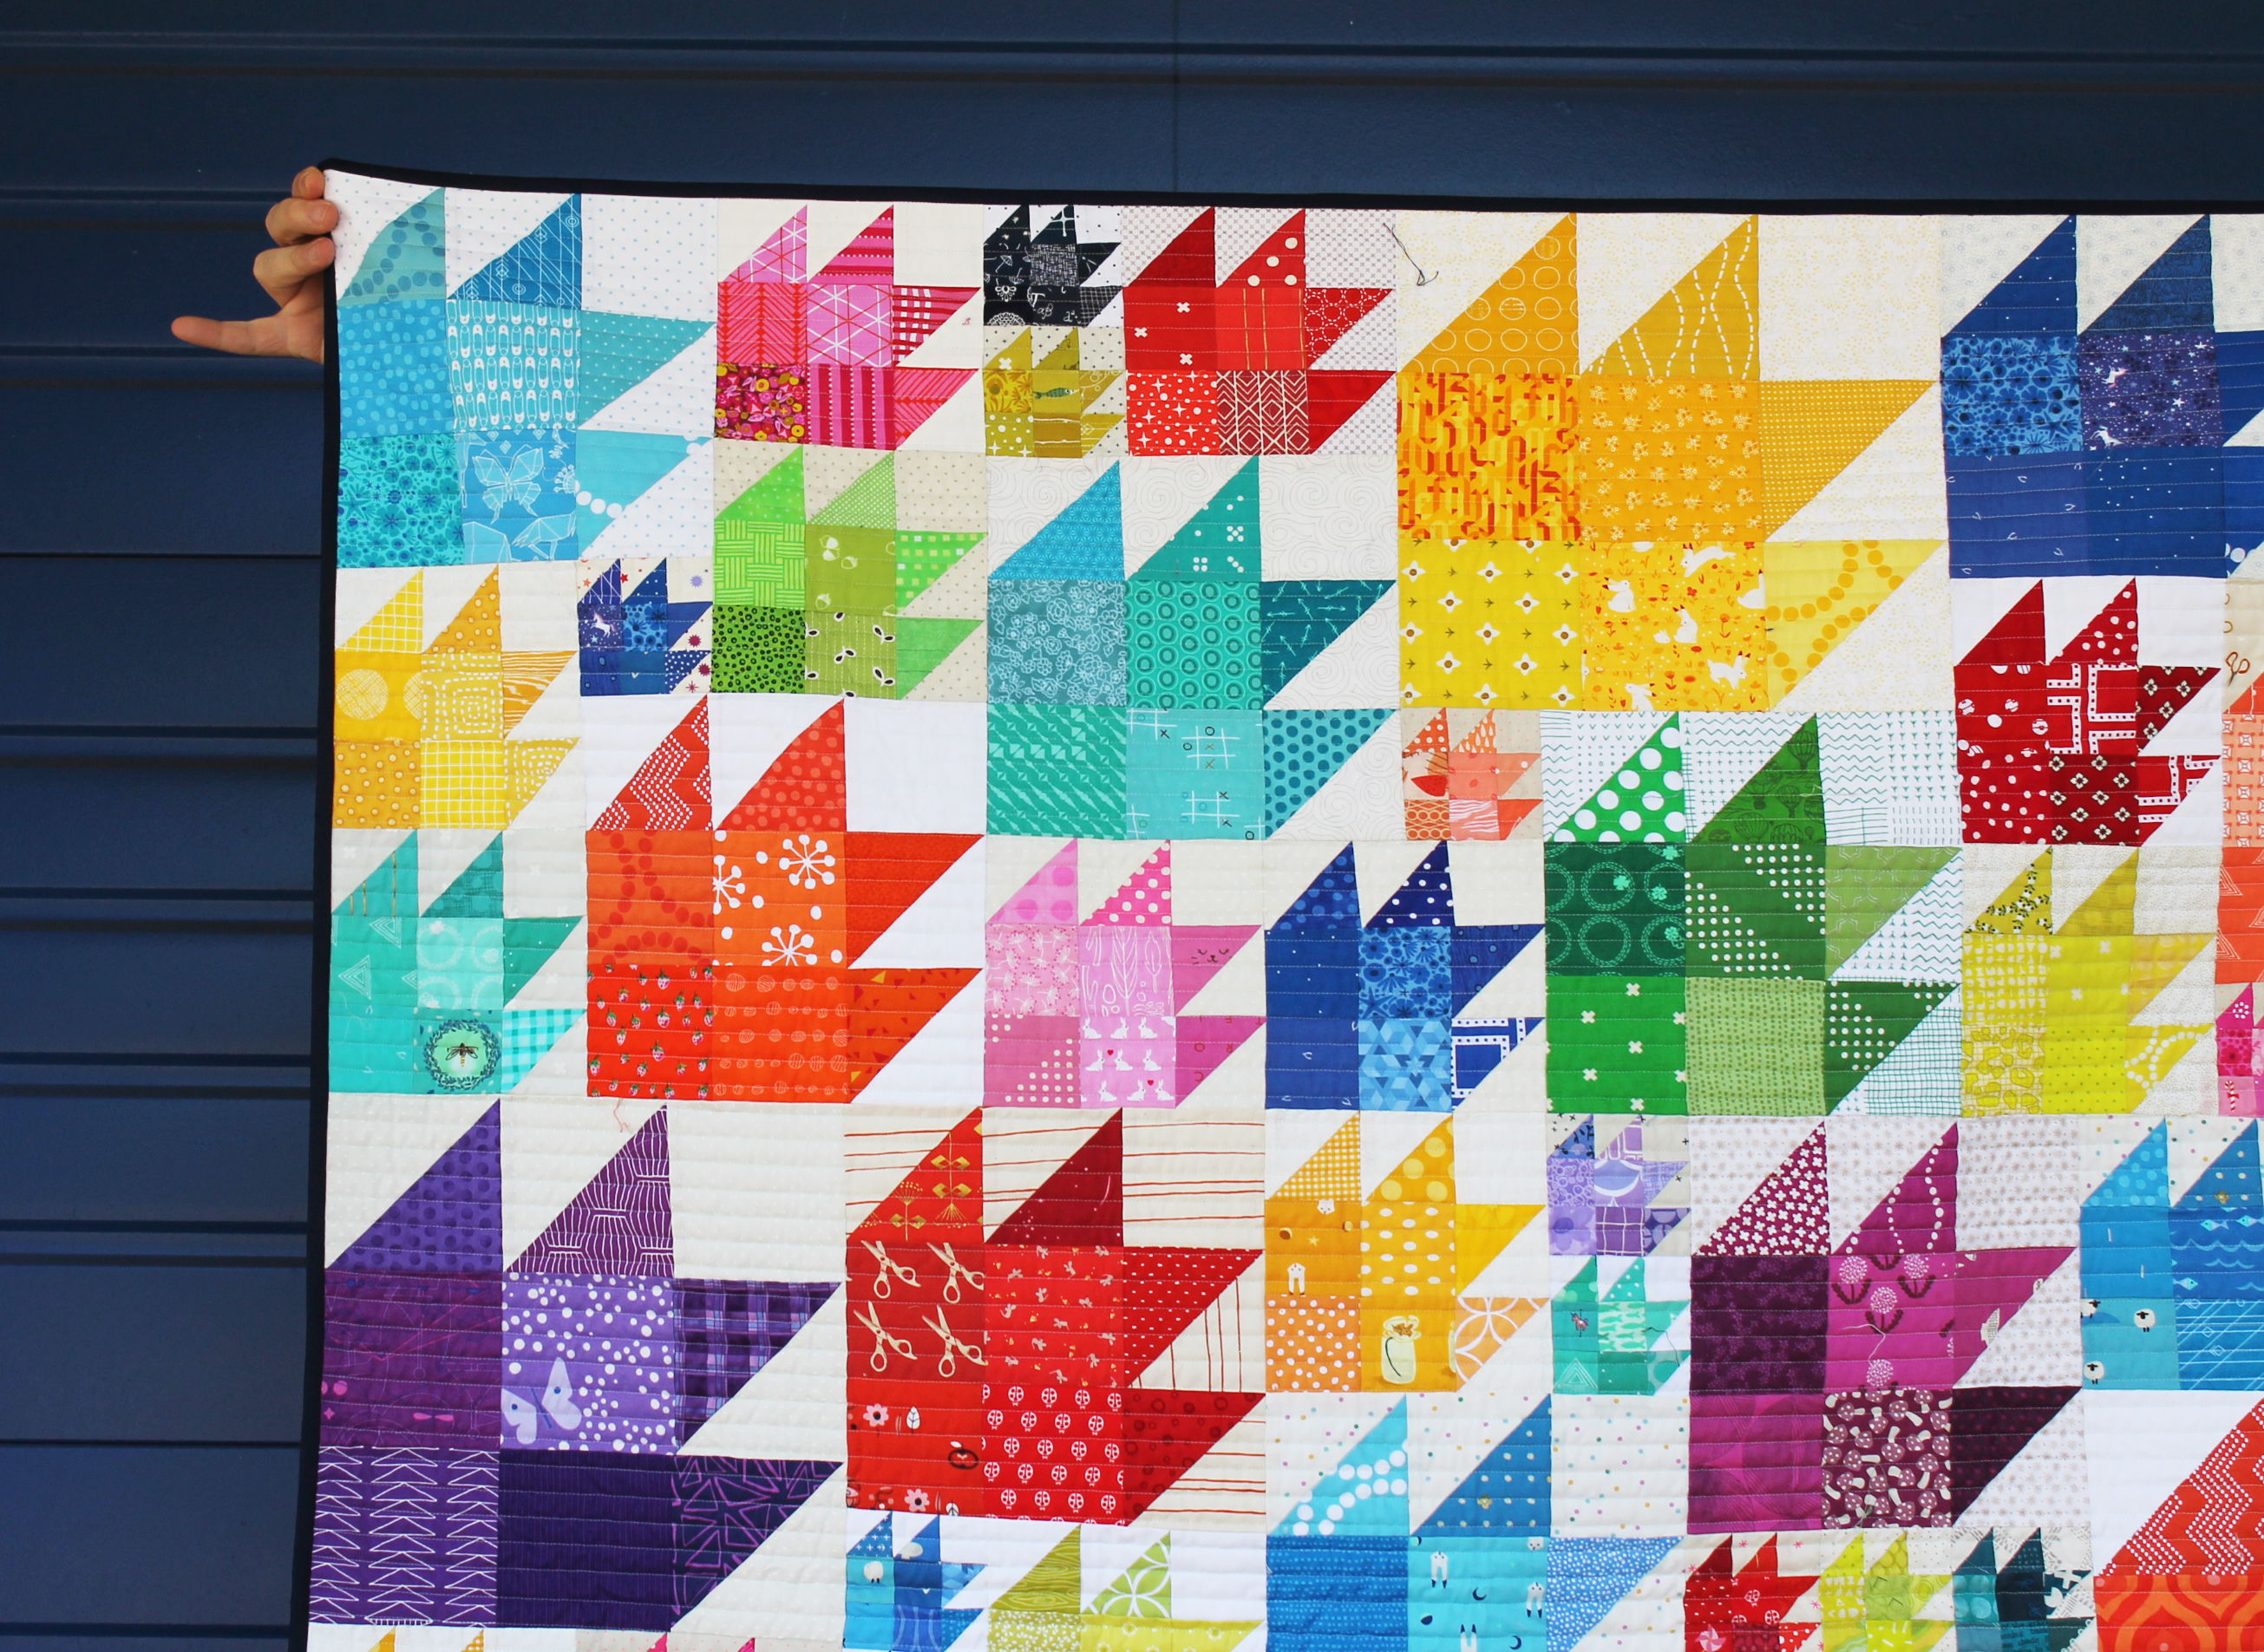
Now laying out this quilt was not to hard because there was a logic to the size blocks I chose – using a 3 inch grid…. but being a perfectionist I did um and ah about it a lot. It sat on my design wall for a bit before I was happy with it.
It was slightly tedious to sew together…. I grouped blocks together where I could and only had a few partial seams to deal with. I could have made it easier on myself and just gridded the layout so there were no difficult seams but in the end I loved the layout I had put up… it does not feel regular or predictable.
So this post I am giving you half the Nick pinkies photos to end… as well as the a full body shot. Mr Wombat is usually pretty camera shy but I snuck this picture of him. His identity is safe as he is fully masked LOL.
This quilt headed into the wild last year via the Portland Modern Quilt Guilds charity quilt program… which we somehow managed to keep going despite a world wide pandemic… actually we managed to get 15 to 20 quilts a month to our local Pediatric Intensive Care Unit which was quite a feat.
First I want to say thank you to everyone for the well wishes and kind comments on my last post. I read them all… and will slowly work through responding but know I was really touched by the reaction to my news. It was not an easy post to write but now that it is done I can start with the quilt catch up…
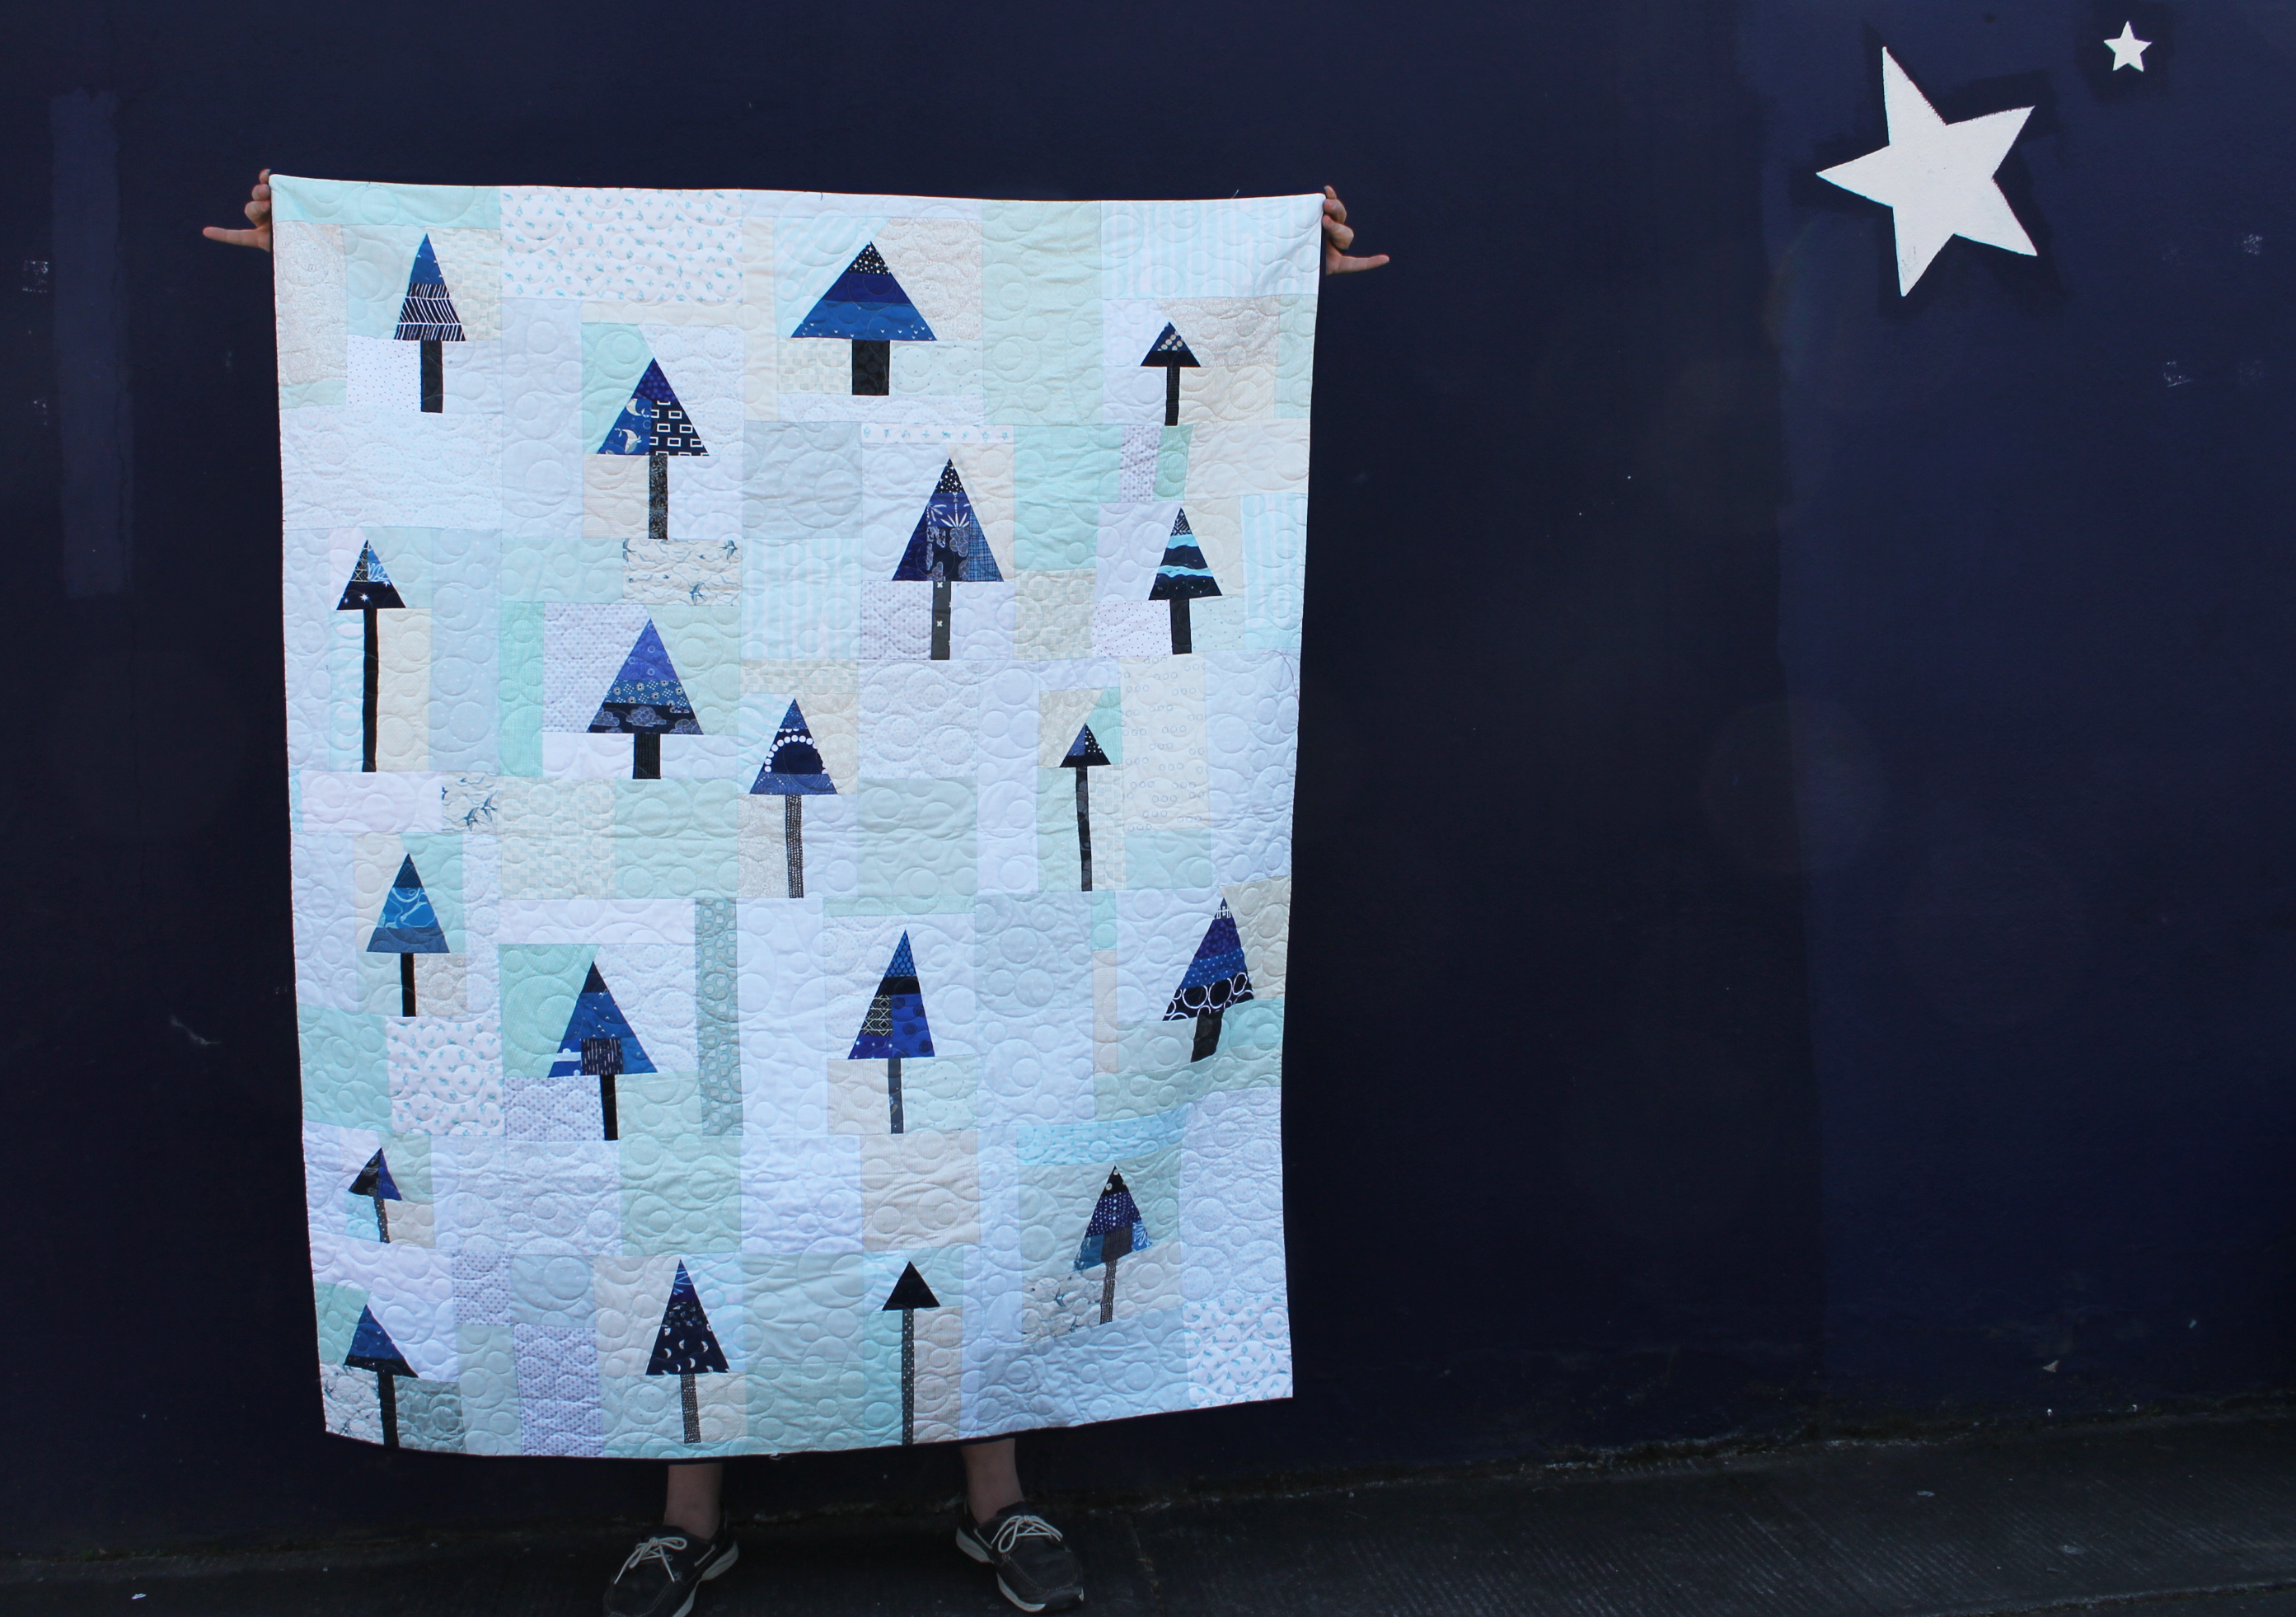
And first up is one of my favorite finishes over the last year or so… an improv cool tree quilt…
I started this top in 2019 when I was teaching Improv quilting at Modern Domestic…. I had a pile of light blue fabrics and wanted to use them…
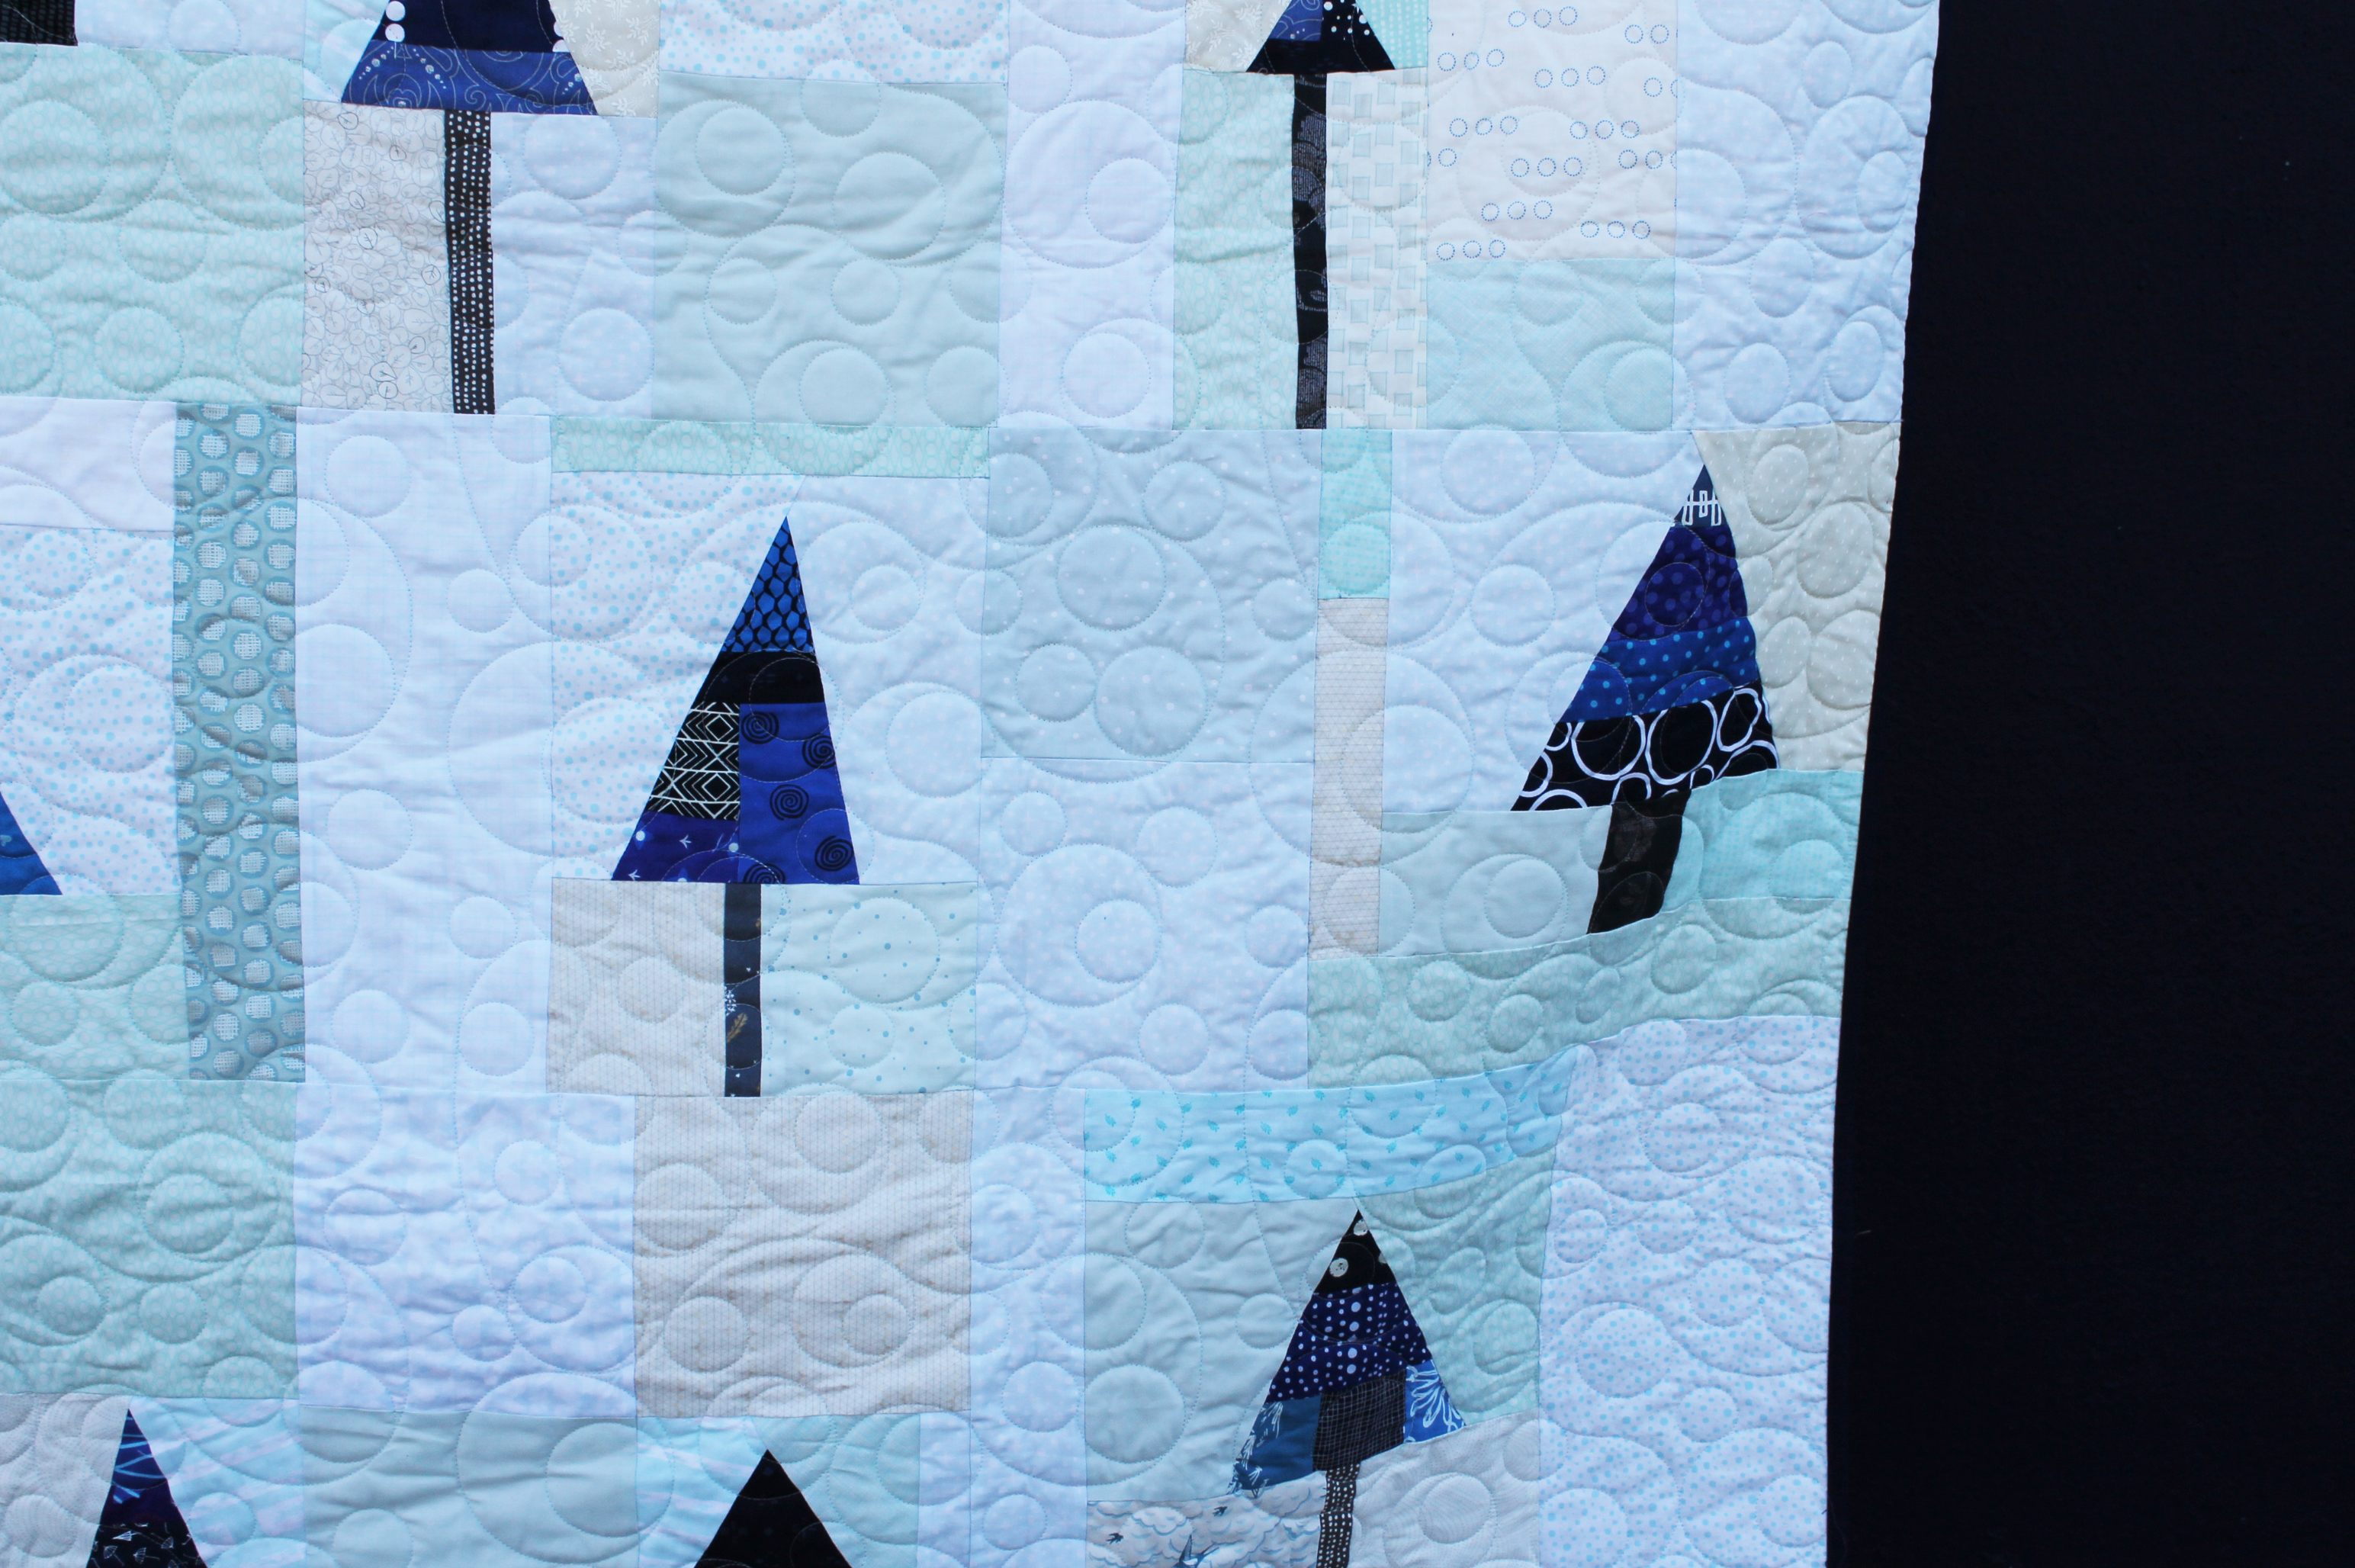
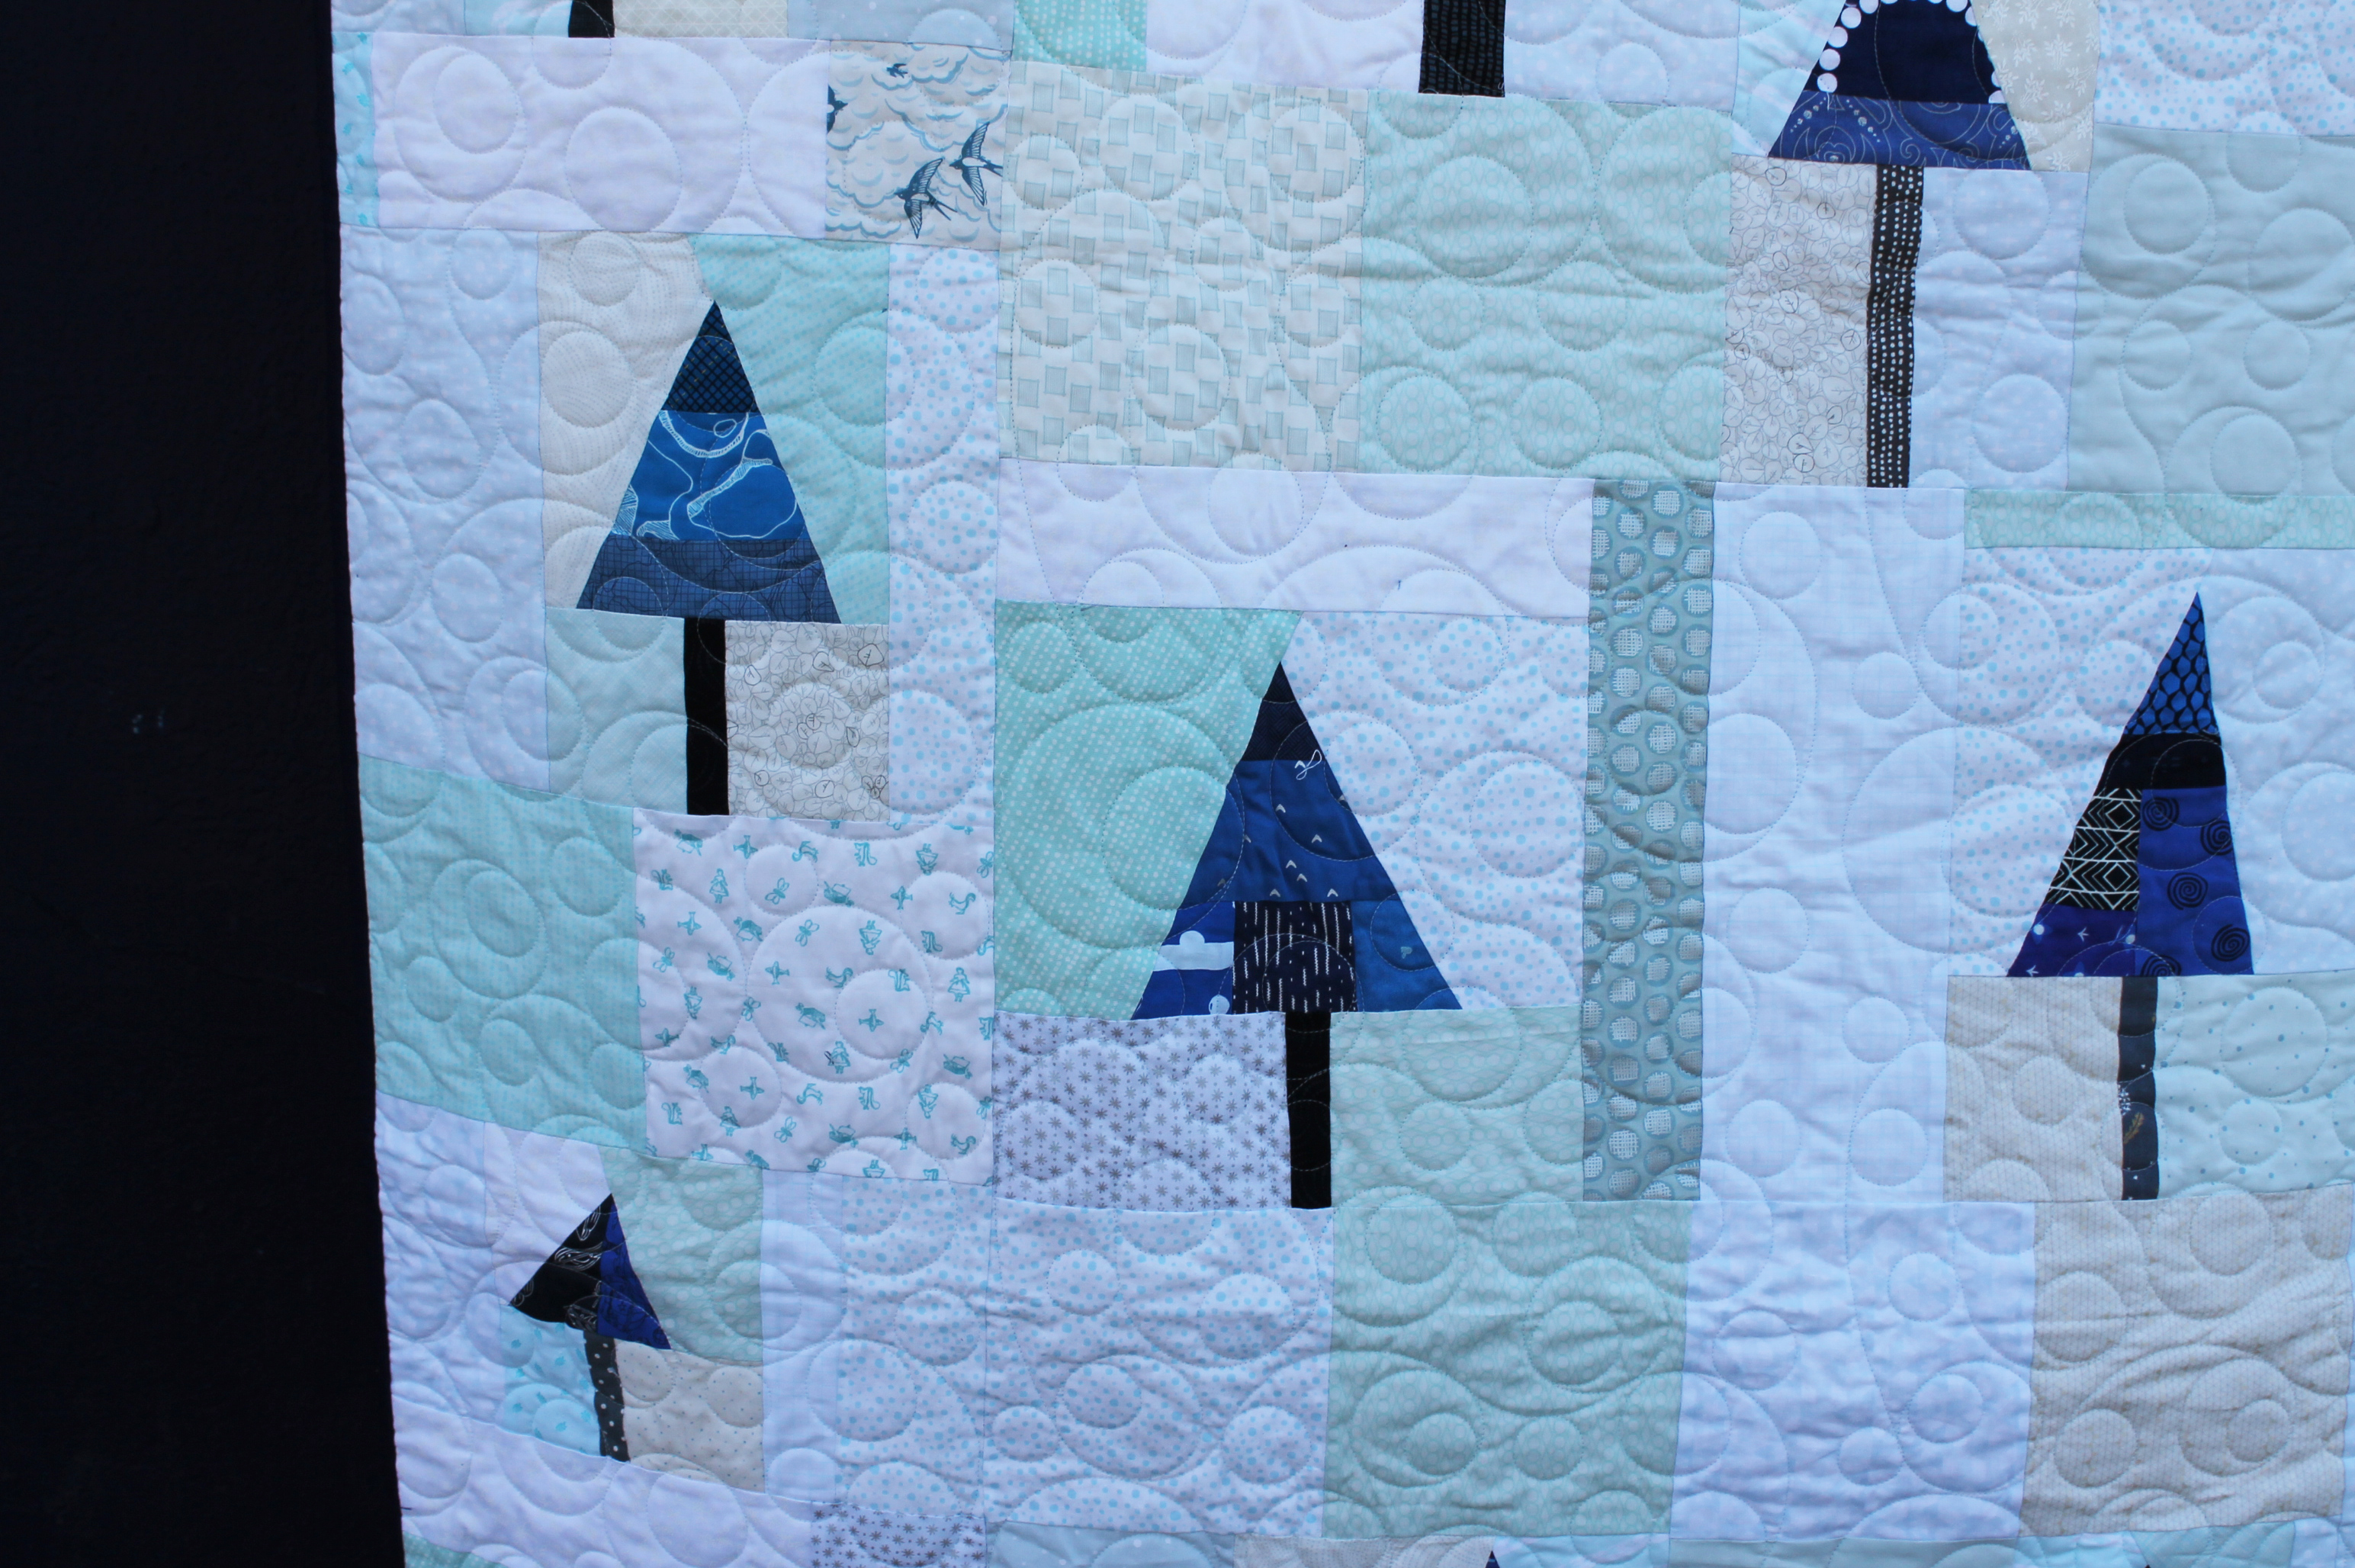
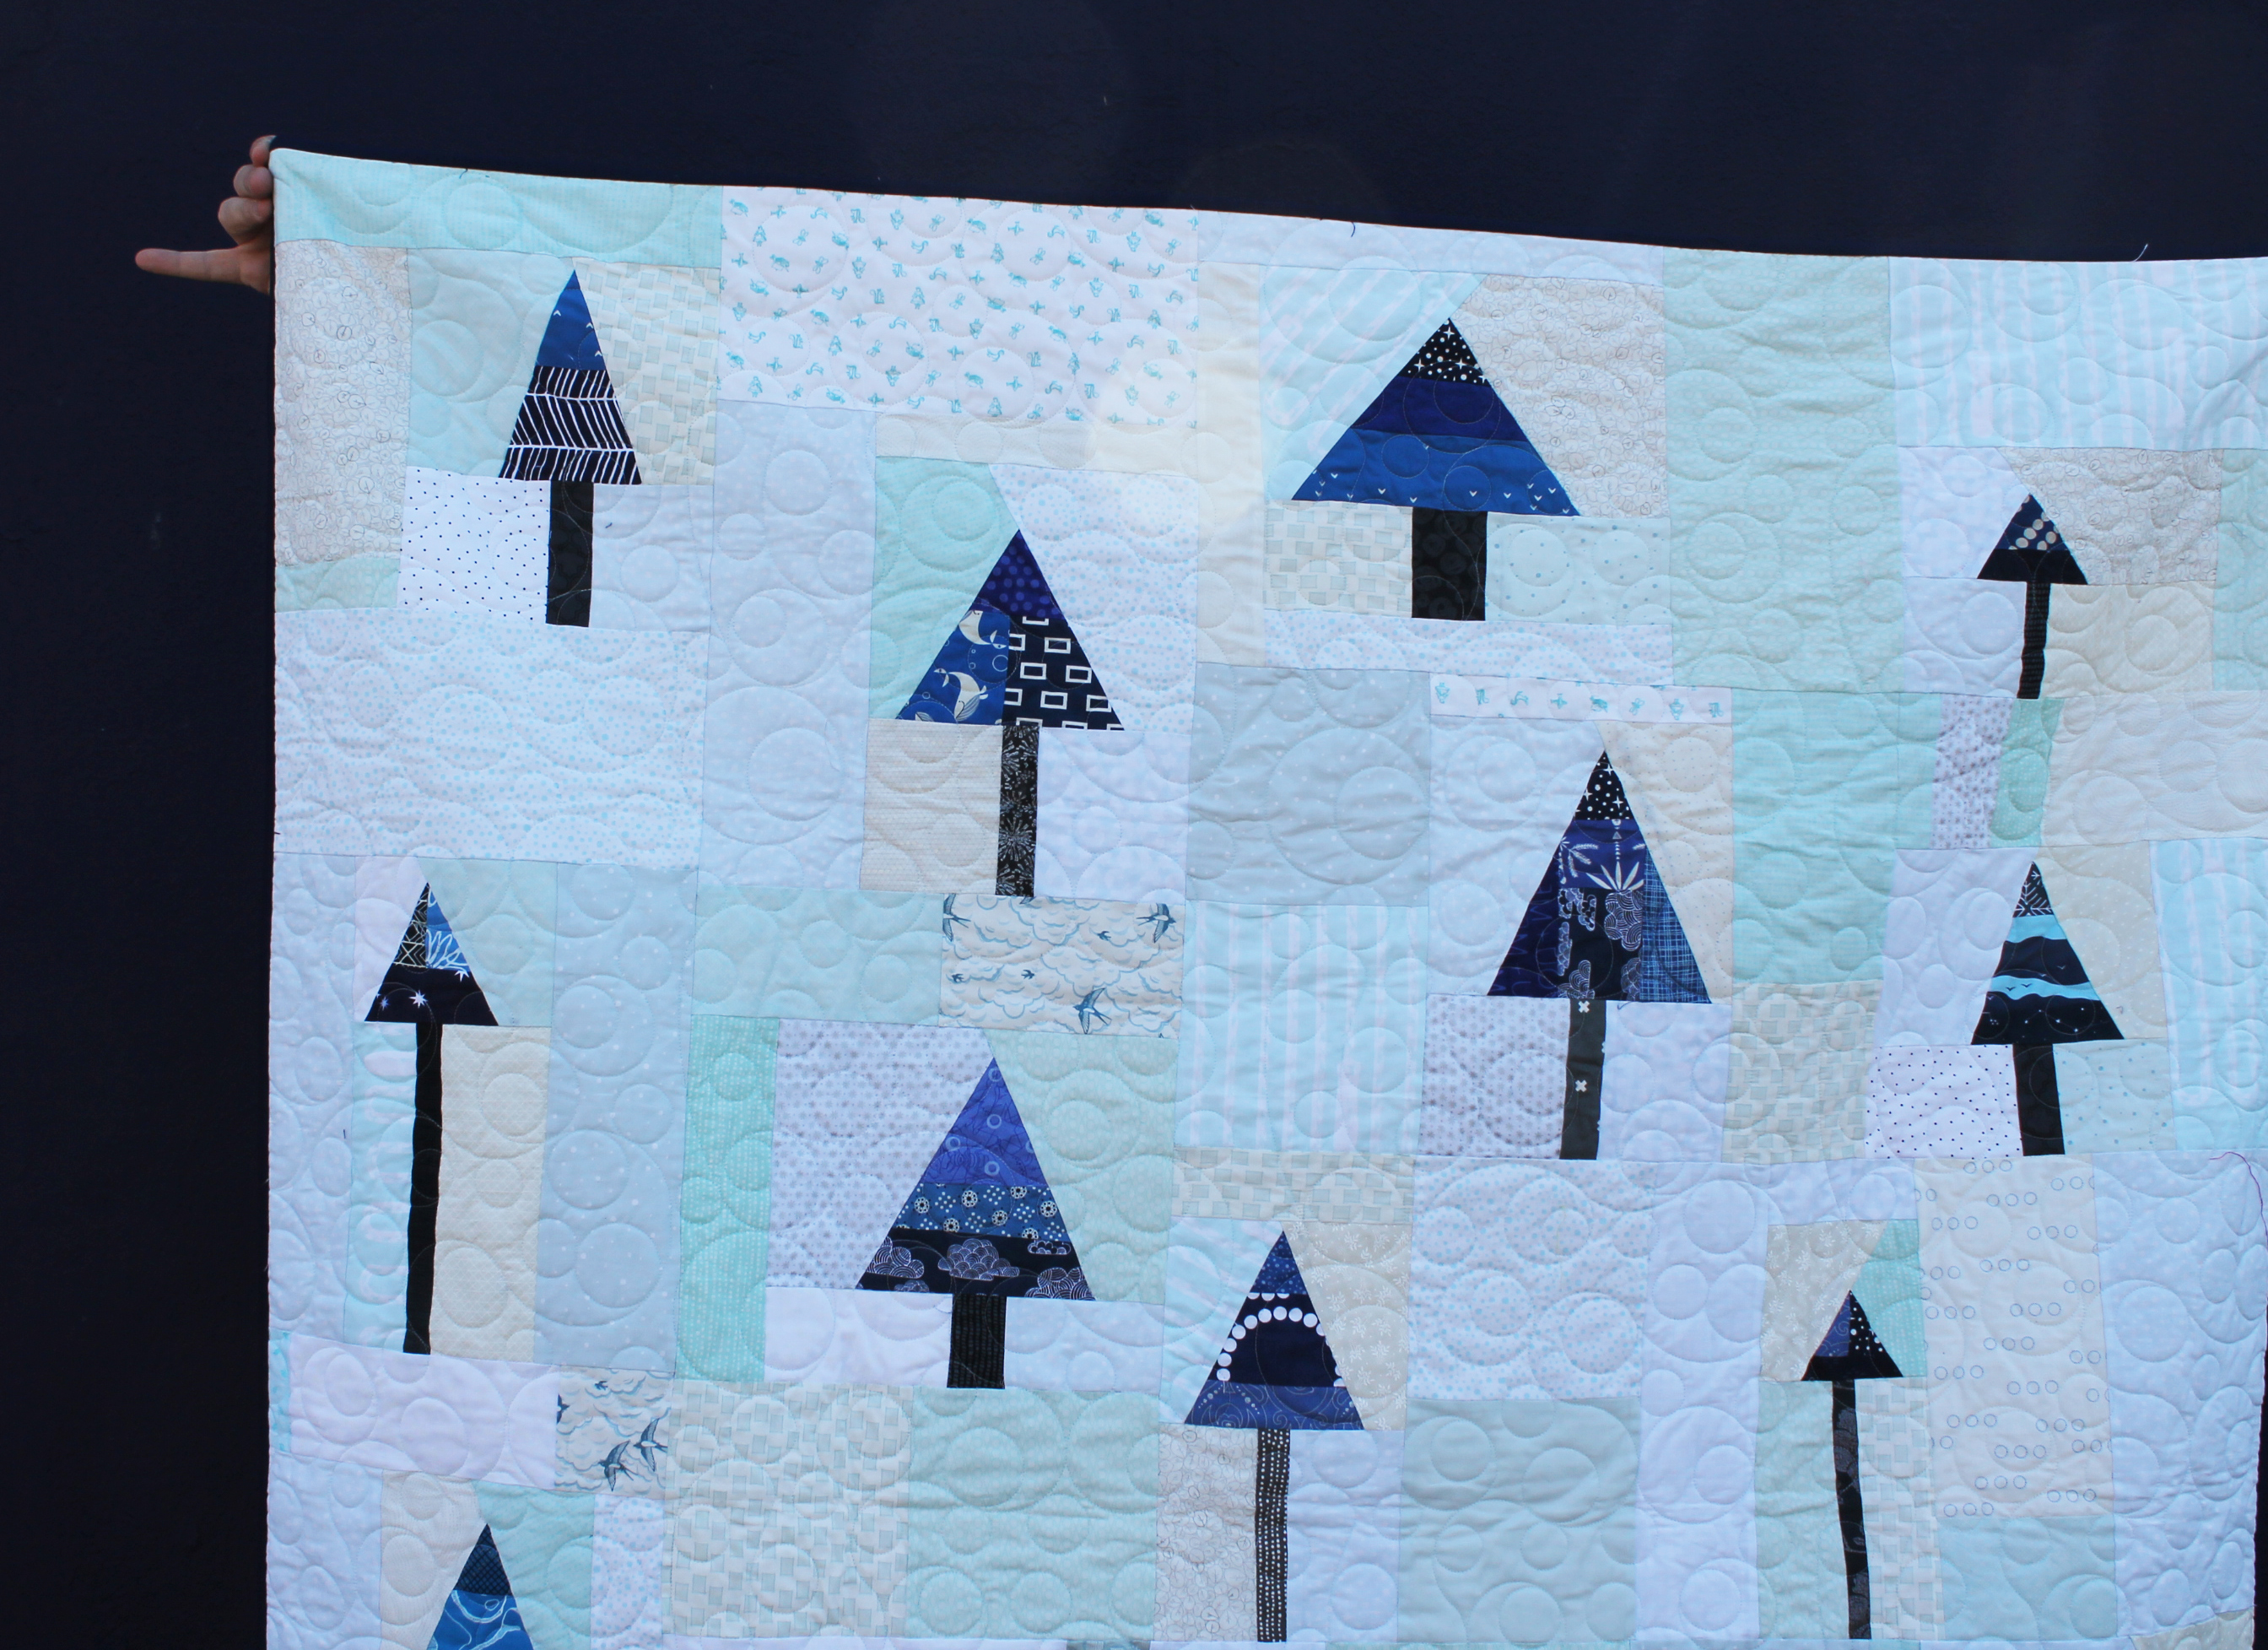
I have definitely made improv trees before usually with green follage of varying shapes and brown trunks… but with this quilt I limited myself to triangle trees in navy blue with dark grey for the trunks.
I used up a bit of my navy/blue scrap pile but really busted through my light blue/light grey stash and scraps. There is a fun “anything goes” with improv and it all seems to work… as long as you define some rules to begin.
For this quilt my parameters were for the background either light blue or light grey or low volume with blue print. I wanted the background to read overall cold. You can see from the pictures the cream based fabrics have a little warmth to them but they are not over powering.
The trees were navy or a dark blue. The touches of different shades of blue, like the royal blue add interest to the tree tops, so that they are not just a solid navy.
For the back of the quilt I used a piece of Tula Pink wide back that I was gifted by a friend. In the last couple of years I have been piecing a lot of my quilt backs….using up bigger cuts of fabric and scraps of wide back. I am not sure the long armers who help with the charity program as thrilled by my backs, but they make the quilts fun.
I have to finish with the obligatory photo of Nick’s pinkies. Mr Wombat has been such a support the last year…. not just holding up quilts but holding me up through some not so fun times.
November is once again my turn to set a block for Do Good Stitches Hope circle. As always I procrastinated and pontificated and finally landed on this block….
I decided to call it the Splodge block. It is an improv log cabin…with most of the precision coming from choosing your fabrics carefully and not from cutting. Here are the steps to making this block…
STEP ONE:
Pull out all your blue, grey and white scraps.
STEP TWO:
Sort your colored scraps. This is a really important step in all scrap quilts and I am going to give you some guidelines for these blocks. This quilt is based on a cool palette and to make the block work you need to weed out some of your scrap because they will muddy the block.
BLUES: For the blues you are going to need dark, medium and light scraps… but in fabrics that are blenders, tone on tones or solids. Any fabric that has colors other than blue needs to go. That means…
You can see from my test block that I still used novelty prints, it is just they were cool prints with no extraneous colors.
GREYS: For your grey you are going to use the same principle as blue – tone on tone or blenders and no extra colors. But with grey there is one extra step.
Did you know that not all grey are the same and that grey fabrics have an undertone to them? This is a color cast that makes grey take on the hue of another color.
Grey can have a blue, green, orange or purple undertone. For this project we want to have cool greys in our block… we want to avoid using the warmer grey because it will muddy the block. A piece or two of the warm grey will not hurt but we want to mainly use the cool grey – the ones with a green, blue or purple undertone.
WHITE: The final pile of scraps to sort is your whites. We are looking for bright whites – solid or prints. In my blocks I have used a few white fabrics that have a bright white background with a cream print on them which have worked well… but we want to avoid cream fabrics if we can. Cream is a warm version of white and can again add warmth to a block if too much of it is used. A random piece is okay though.
You should end up with a curated pile of scraps that you can work with to make these blocks.
STEP THREE:
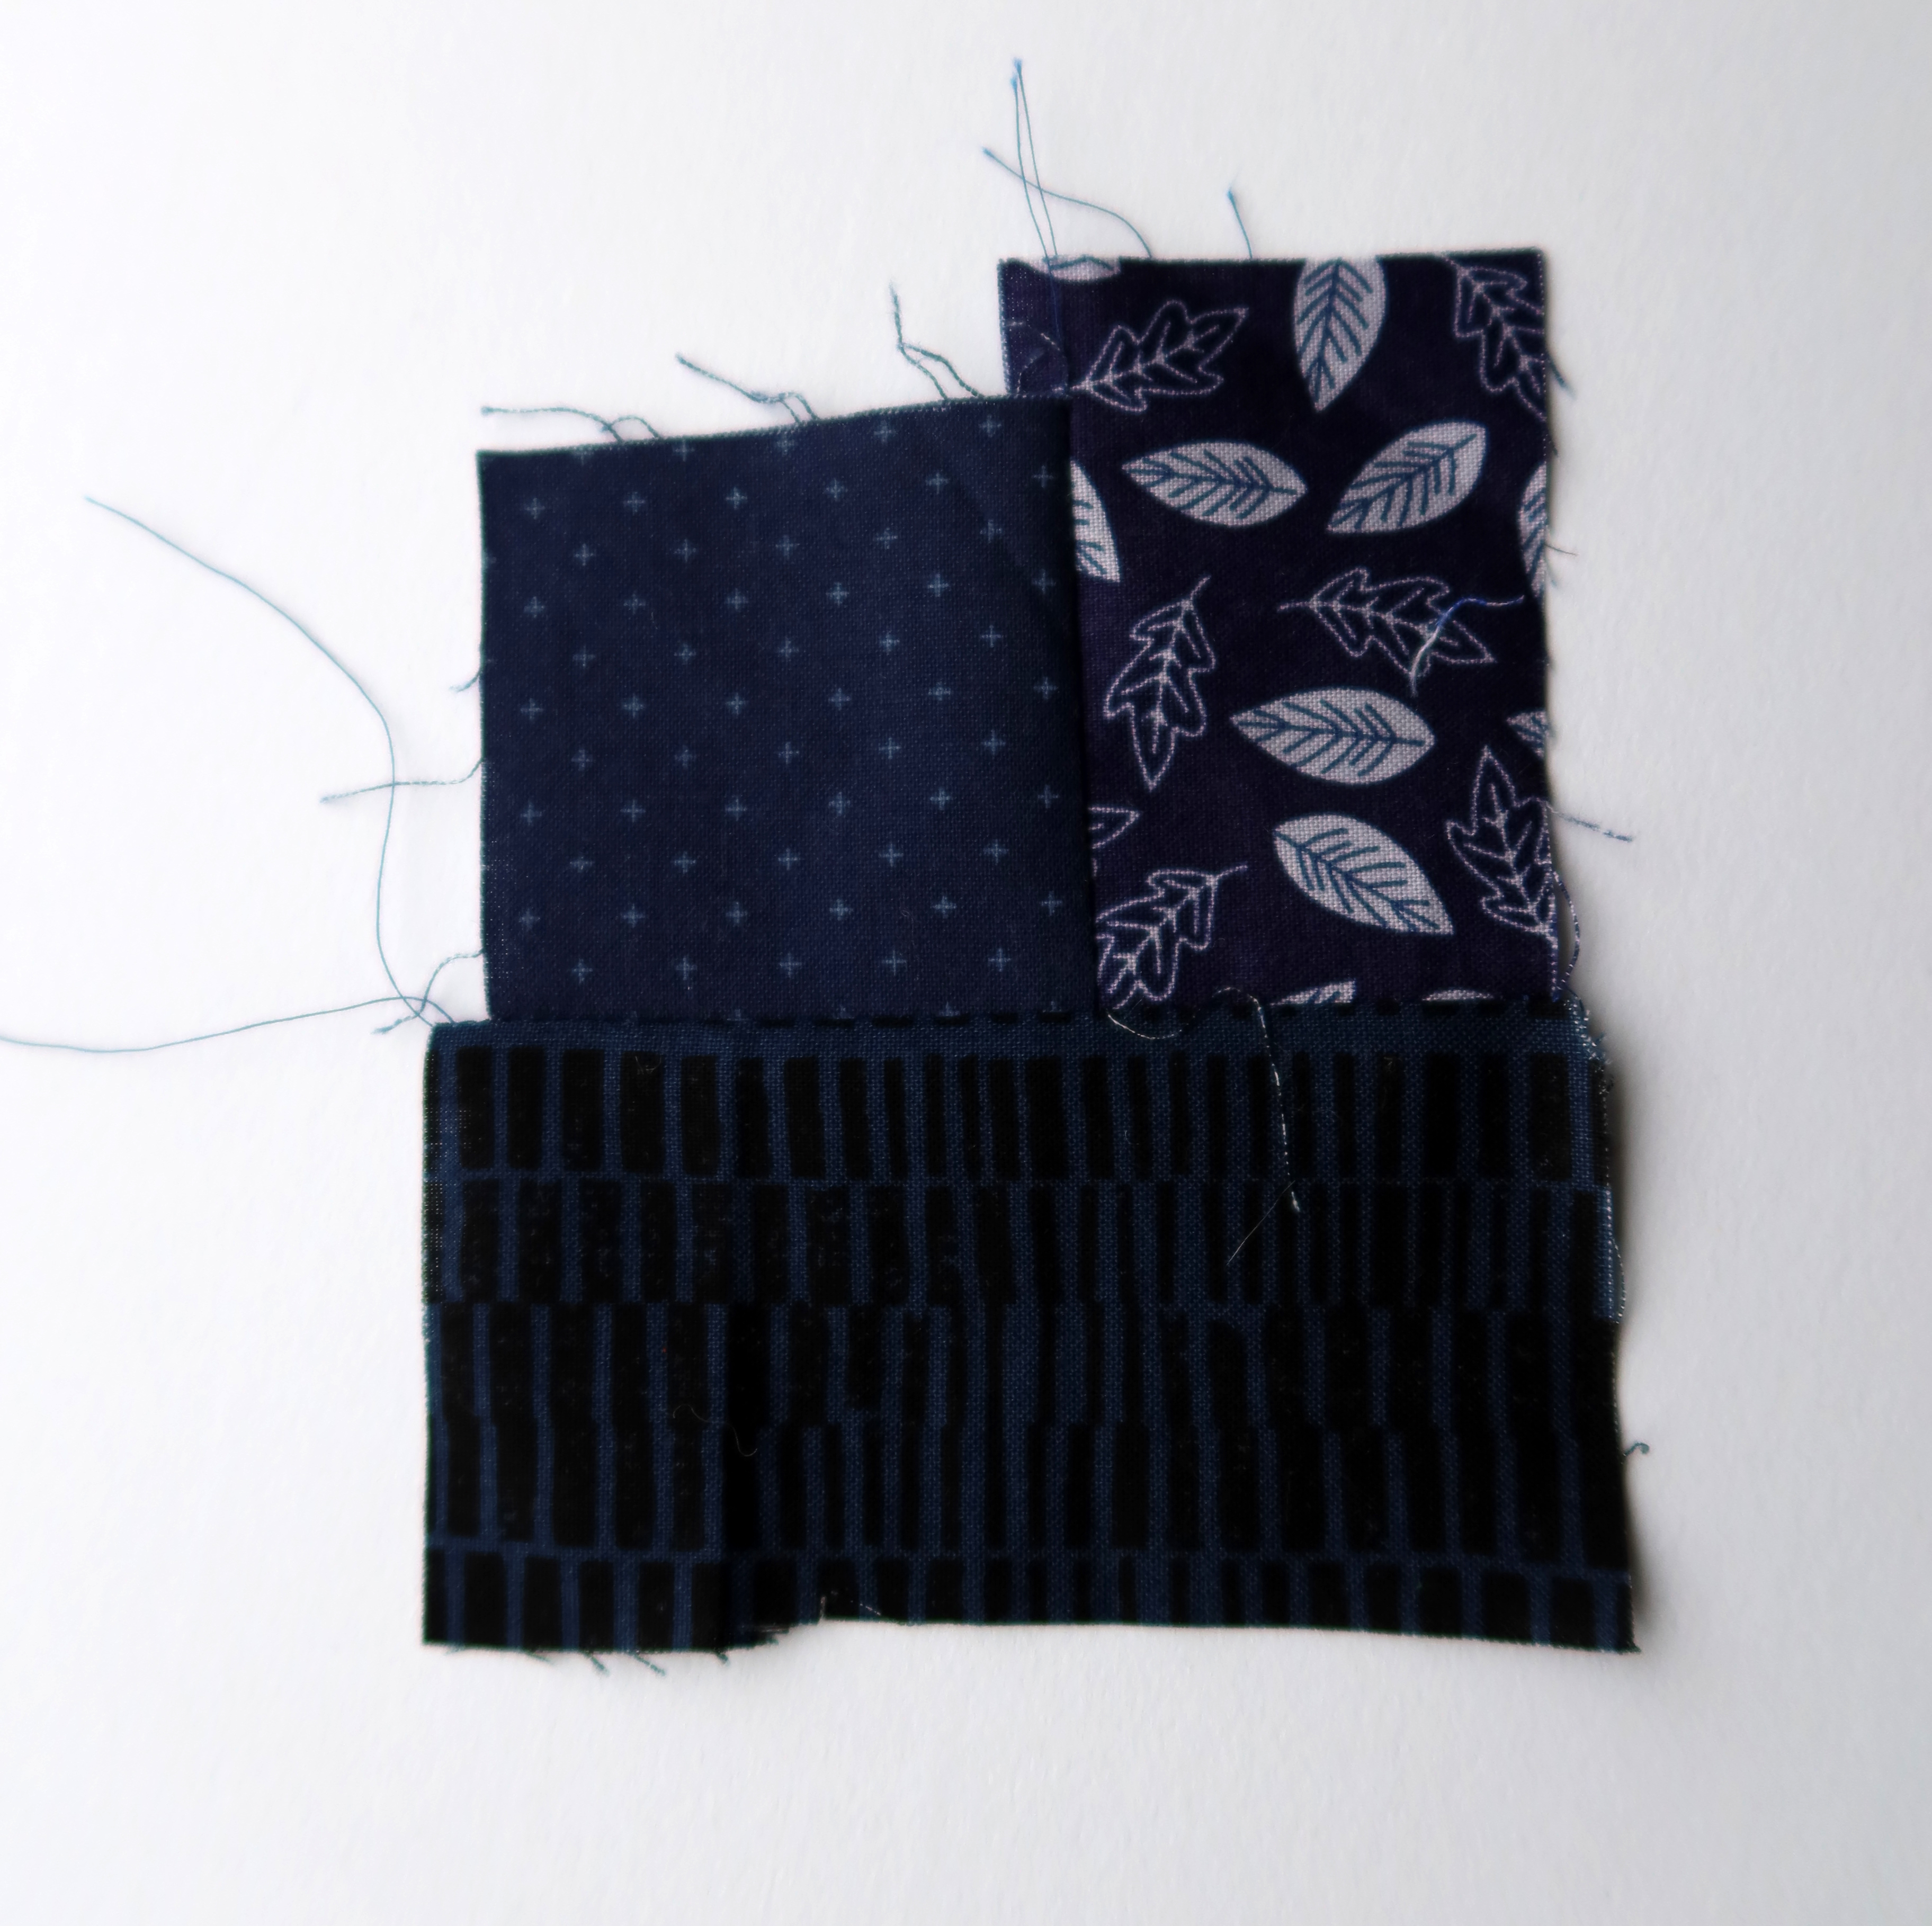
Start making your improv log cabins. The center of your log cabin is going to be your darkest navy blue fabric.
You can tell from this photo that I do not pretrim anything…. if I need to cut a piece of fabric smaller I use my scissors.
STEP FOUR:
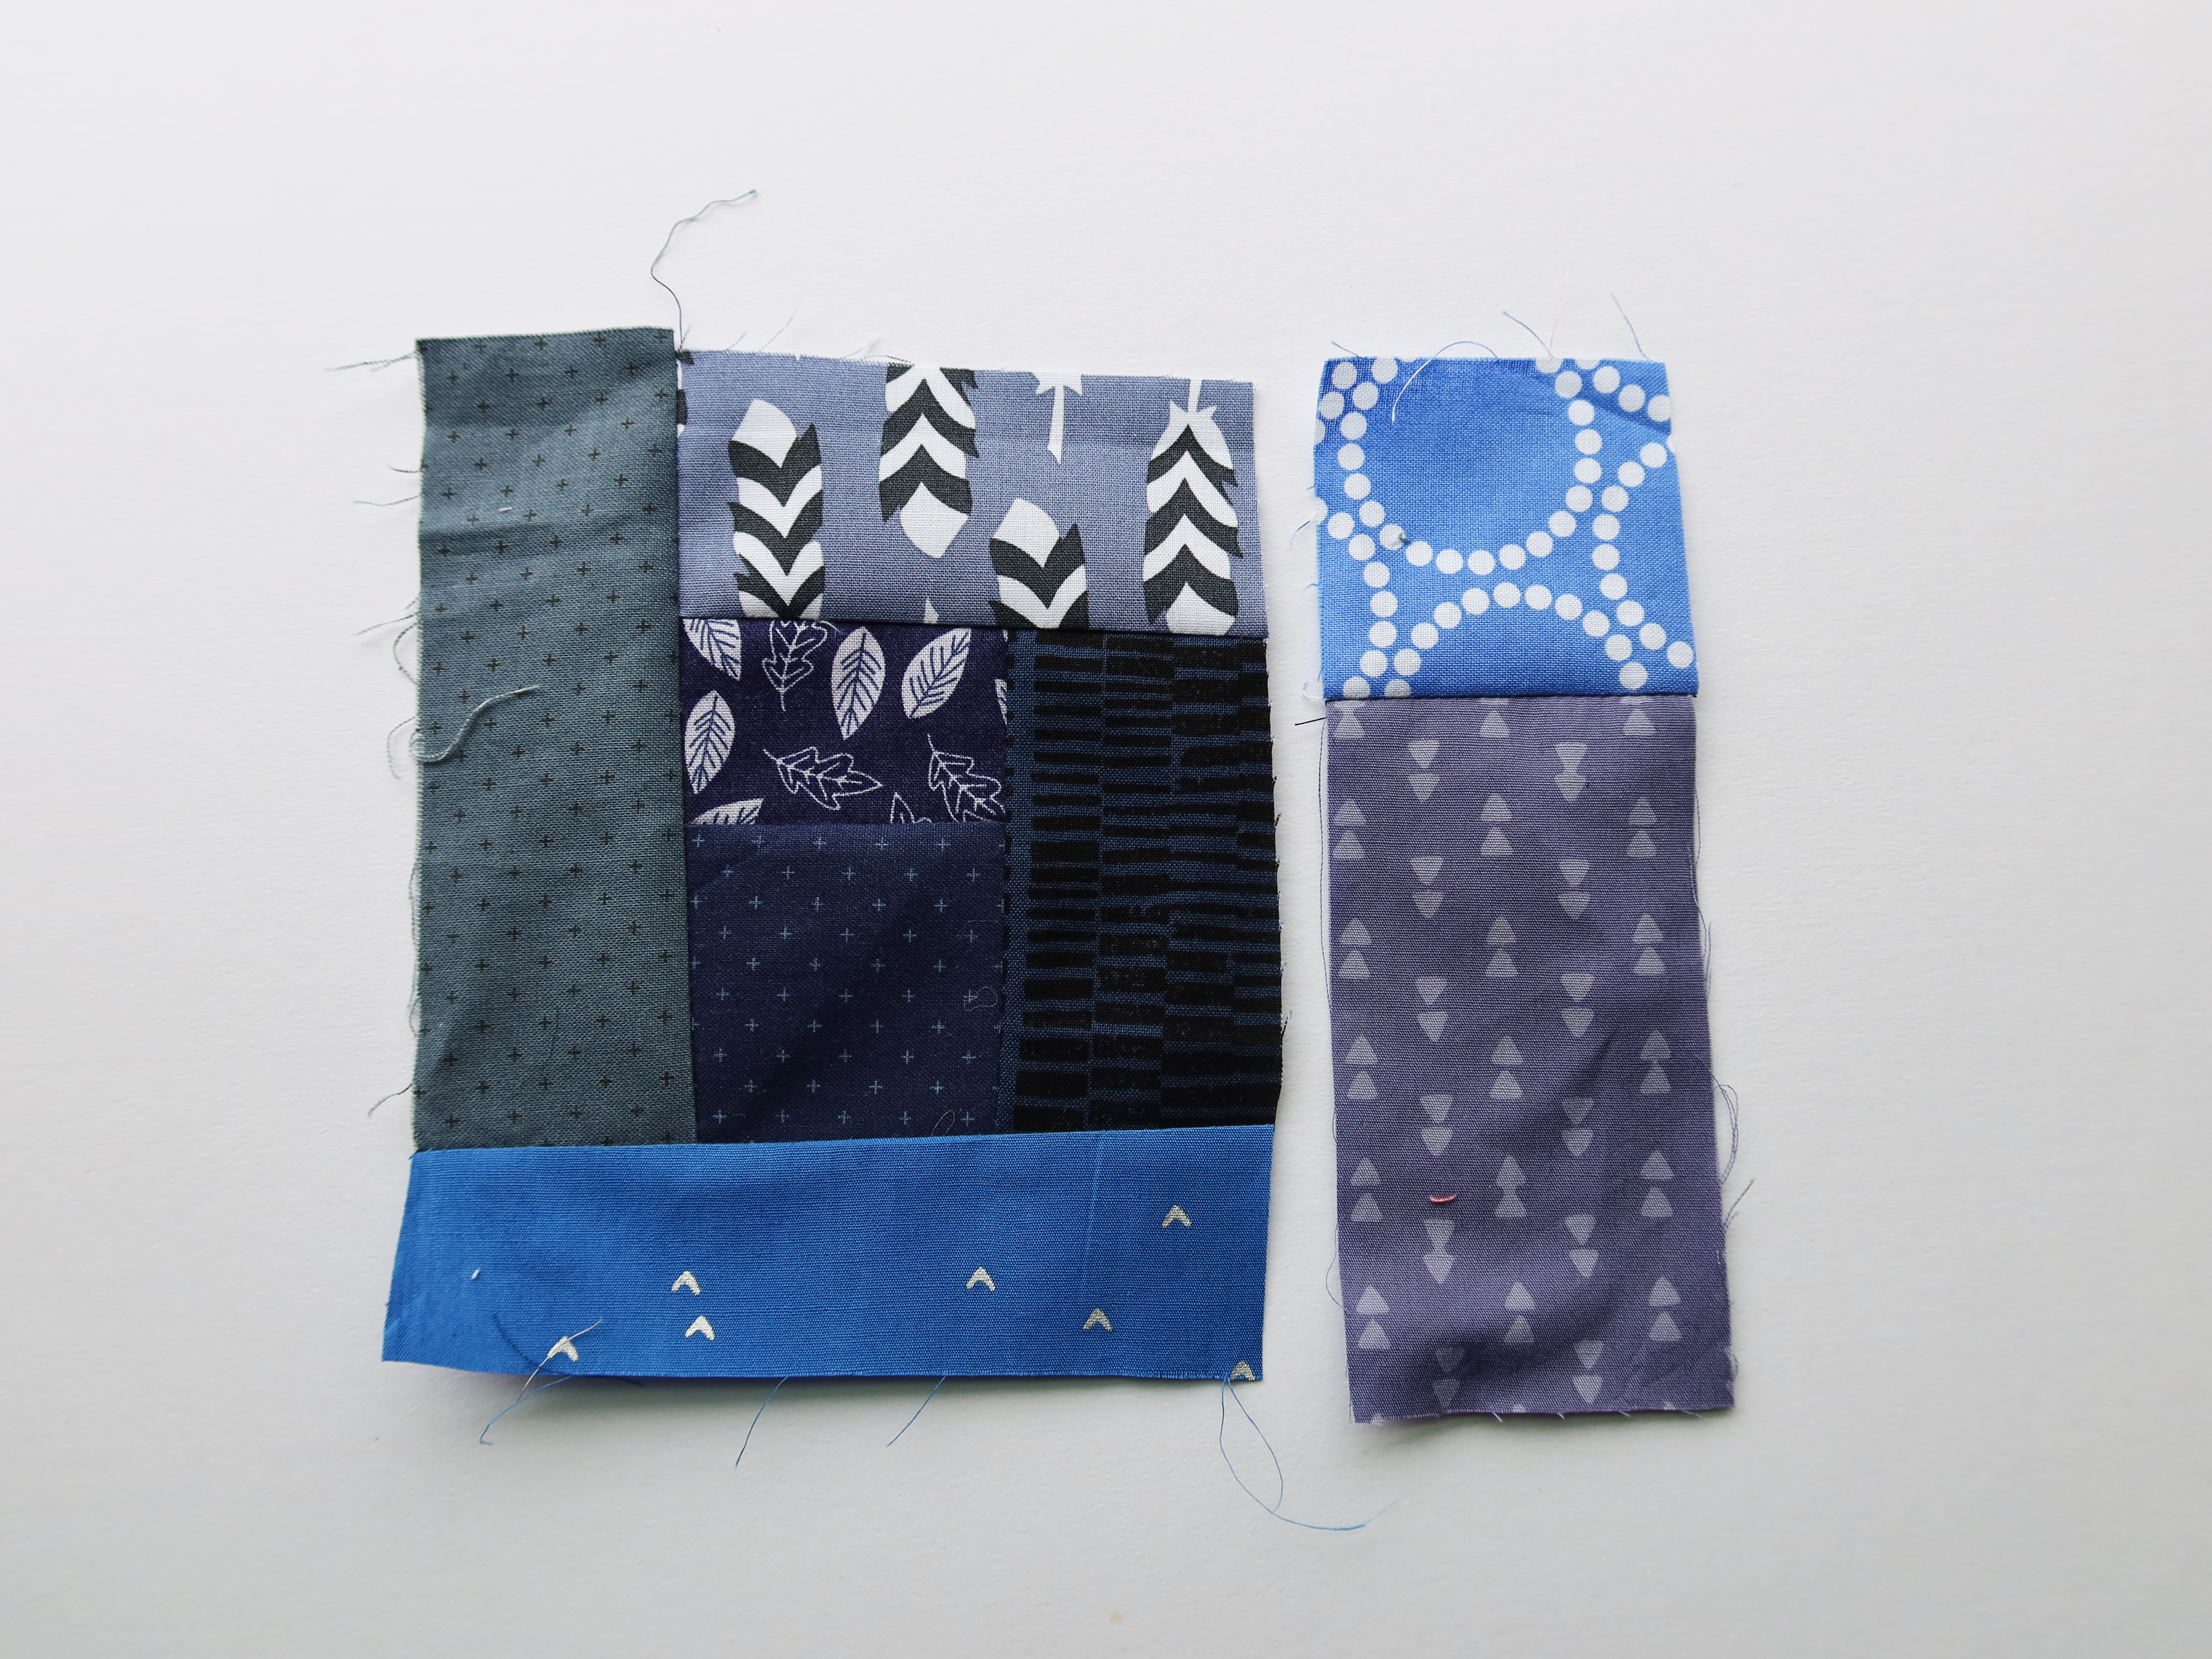
Keep building outward using lighter blues and greys as you move out from the center. Once the log cabin has started I do press as I add new pieces and I do trim the block….
…and when I say trim I mean I use a rotary blade and ruler to get a straight edge but I do not square anything up or check that anything is even. I just want a straight edge to sew my next strip too.
As you progress, I encourage you to make “logs” for your log cabin by sewing smaller pieces of fabric together to make your own strips.
These custom made strips are a great way to break up the traditional log cabin structure and give the block a more improv feel. They are also how the block becomes a splodge of color and not just a square of color.
STEP FIVE:
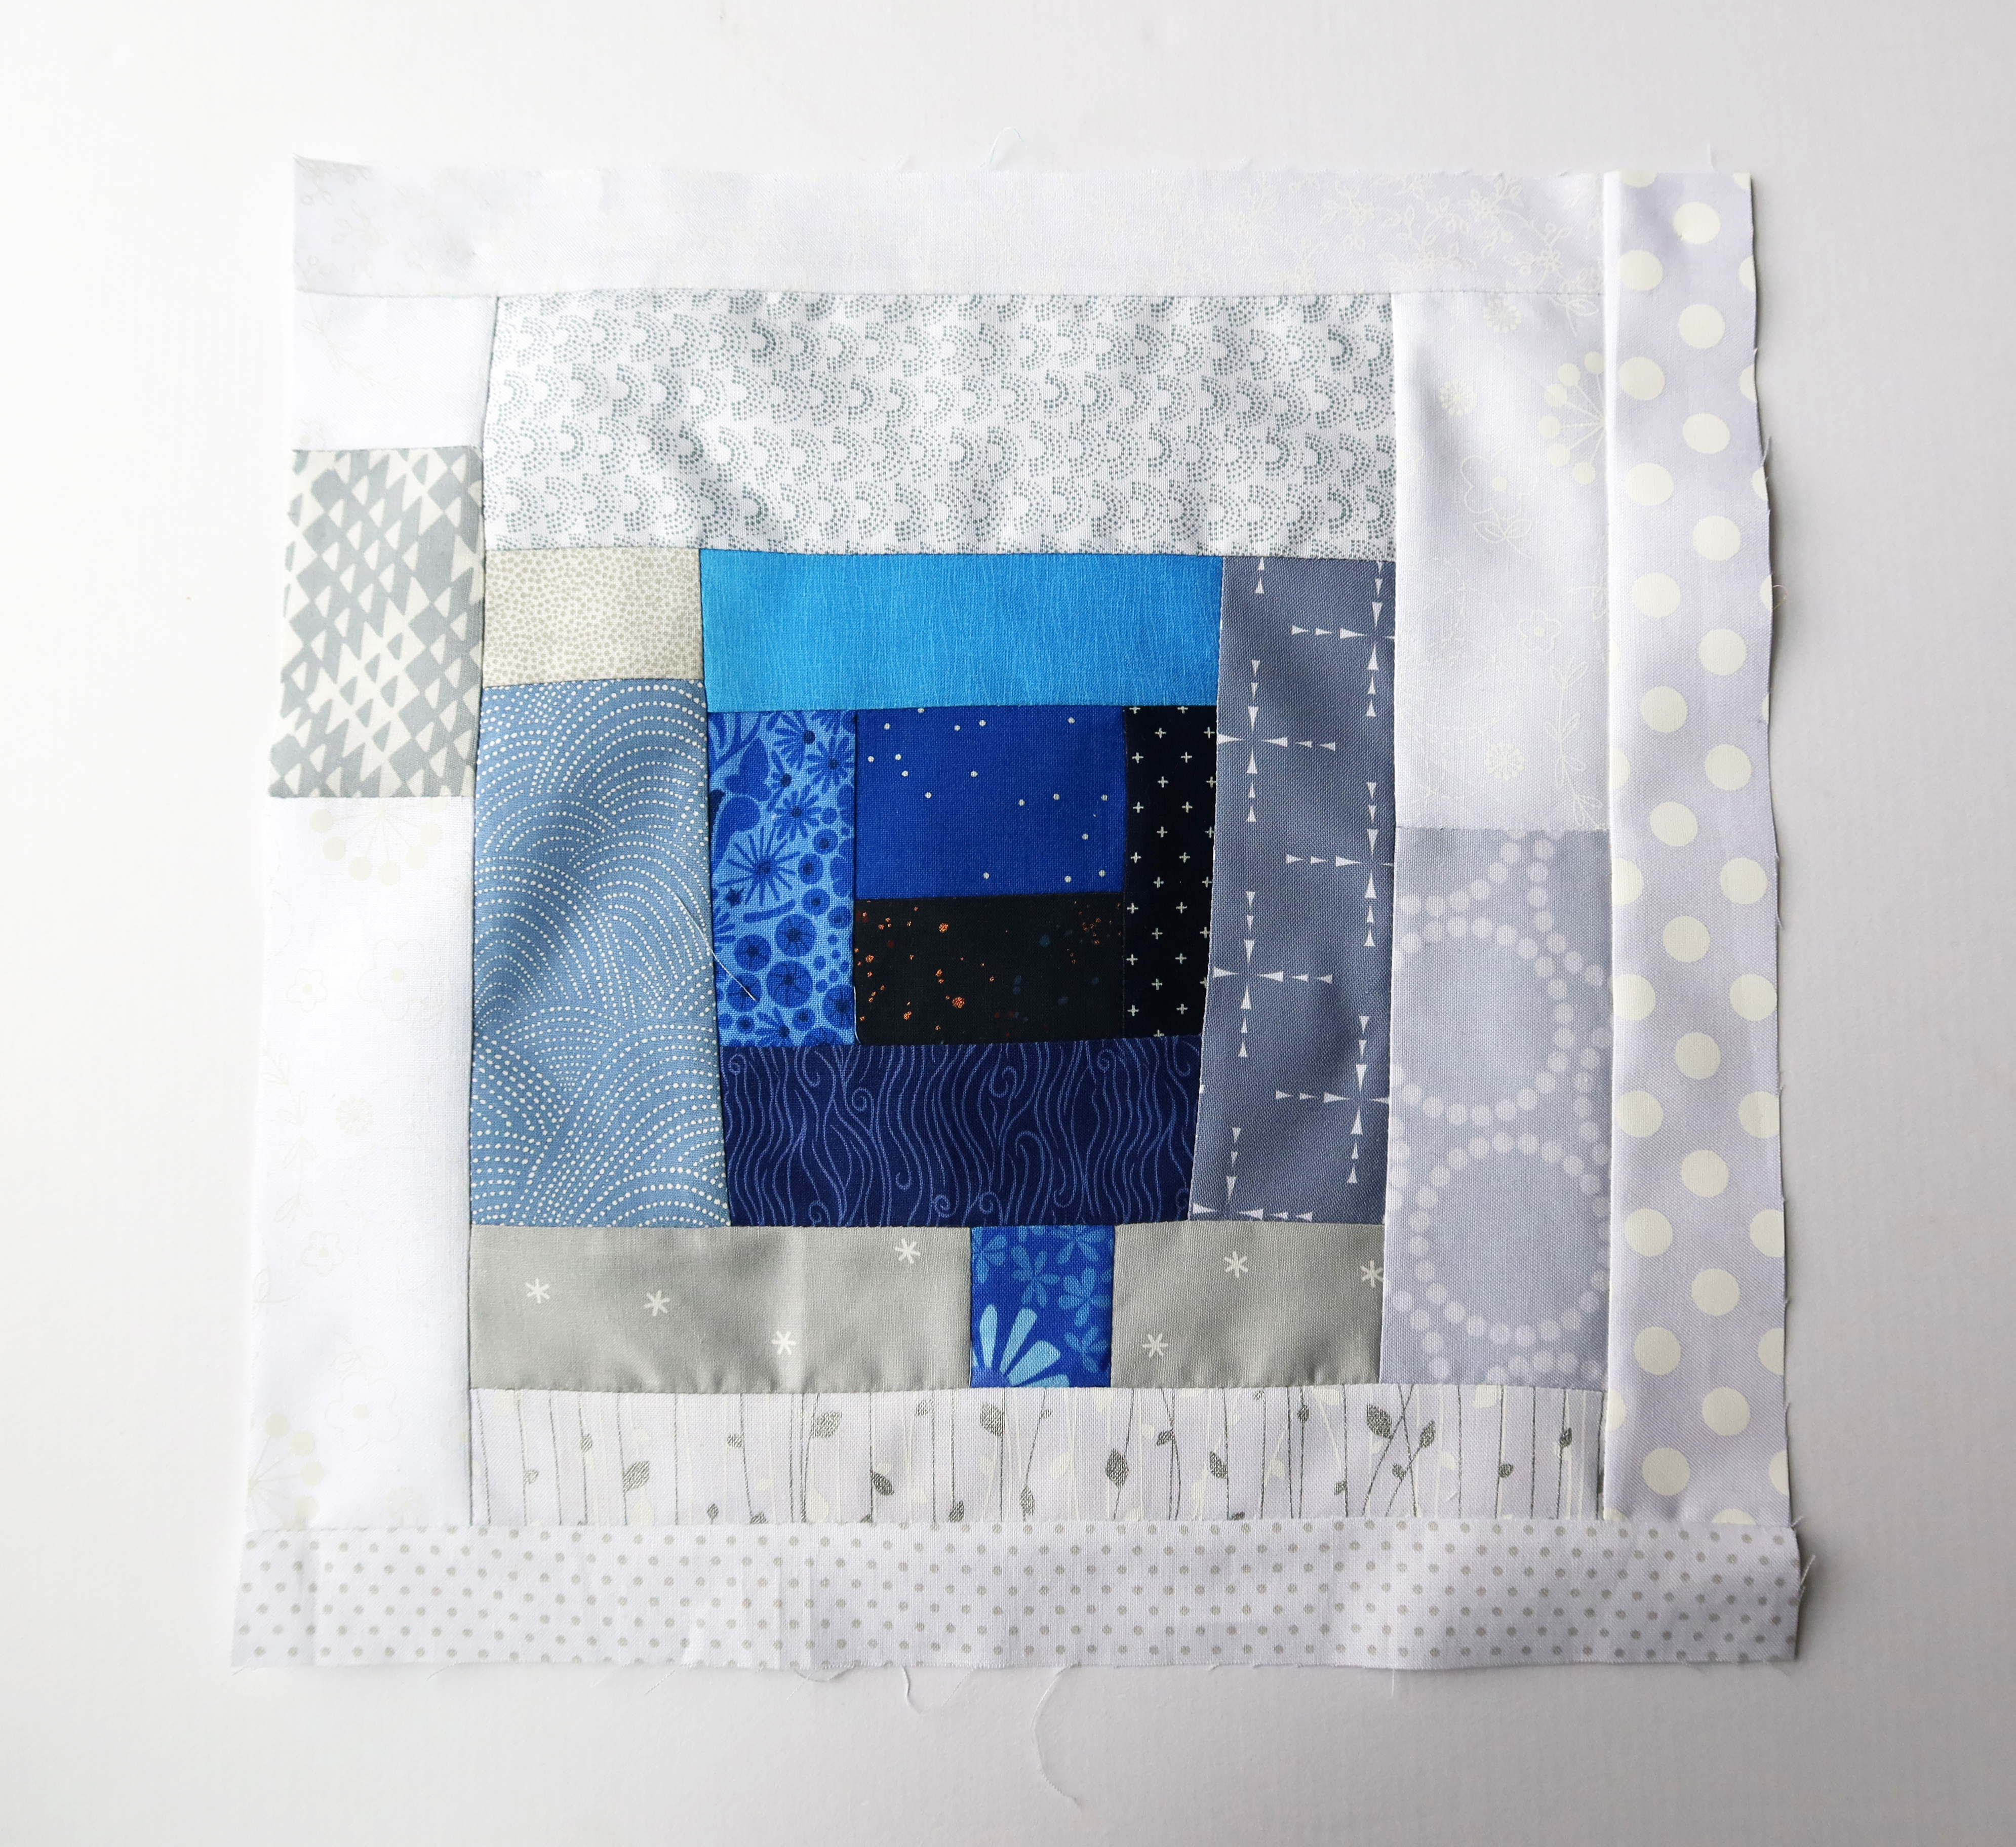
Keep building your log cabin out until you have a piece that is just larger than 12 1/2 inches square. You want to make sure the your last logs are white and/or light grey…you need a white frame around your splodge.
Once you have a large enough improv log cabin give it a final press and if you have starch (eg. Best Press) use it liberally at this stage to get your block to lay as flat as you can.
STEP SIX:
Using your 12 1/2 inch ruler trim your block to it’s finished size.
Note your splodge does not need to big. In my first block the blue splodge took up most of the block…while in this block there is a smaller lot of blue. You can make your splodge as big as you want….have fun….let go….play.
FINALLY:
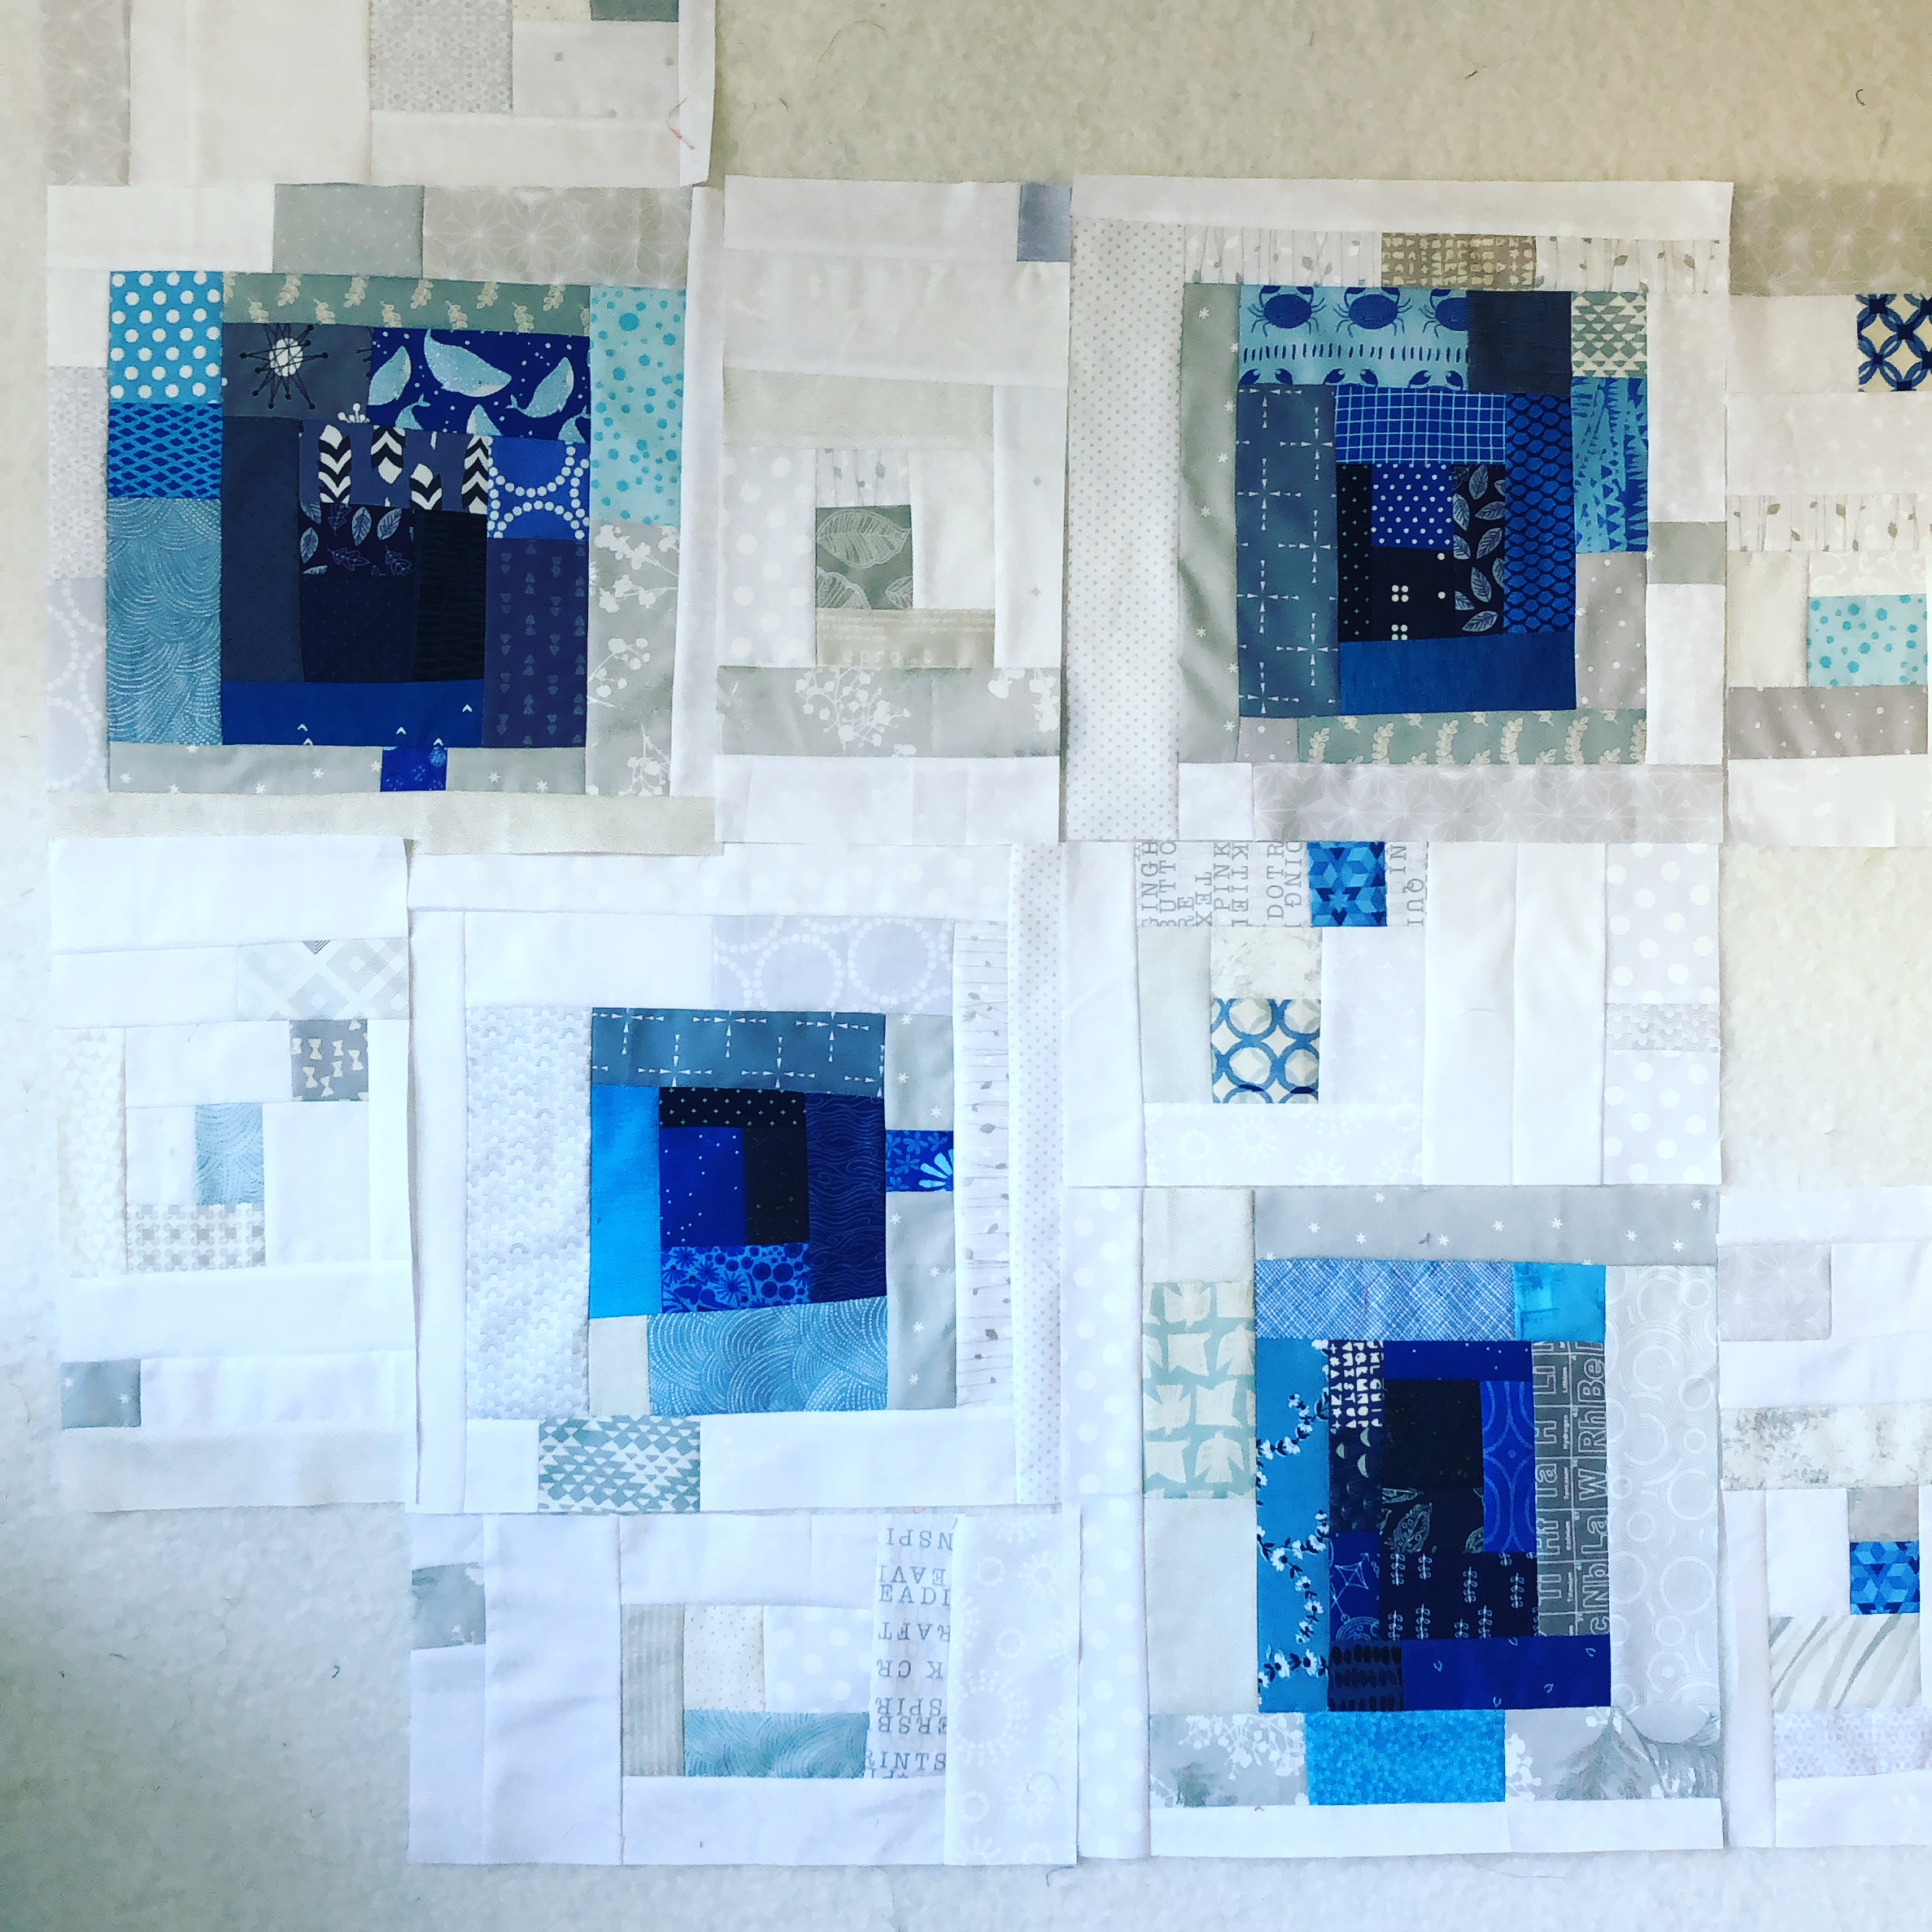
When I go to put this quilt together I decided I wanted to use filler blocks to give the splodges room to breath. These filler blocks are being made using just light grey and white fabric with the occasional blue or darker grey spot.
They are 12 1/2 inch by 6 1/2 inches unfinished and will allow me to layout the finished quilt in a irregular pattern…. the splodges will not all be neatly lined up but rather scattered around the quilt.
So there you have it… the splodge block. I am looking forward to seeing how my fellow DGS peeps interpret the splodge…and really looking forward to putting this quilt together.
As I have been going through all my old photos it has been interesting to see what I remembered to share and what I completely forgot about…. this weeks quilt is one I love and it was really fun to make, so I am not sure why I did not share it sooner….
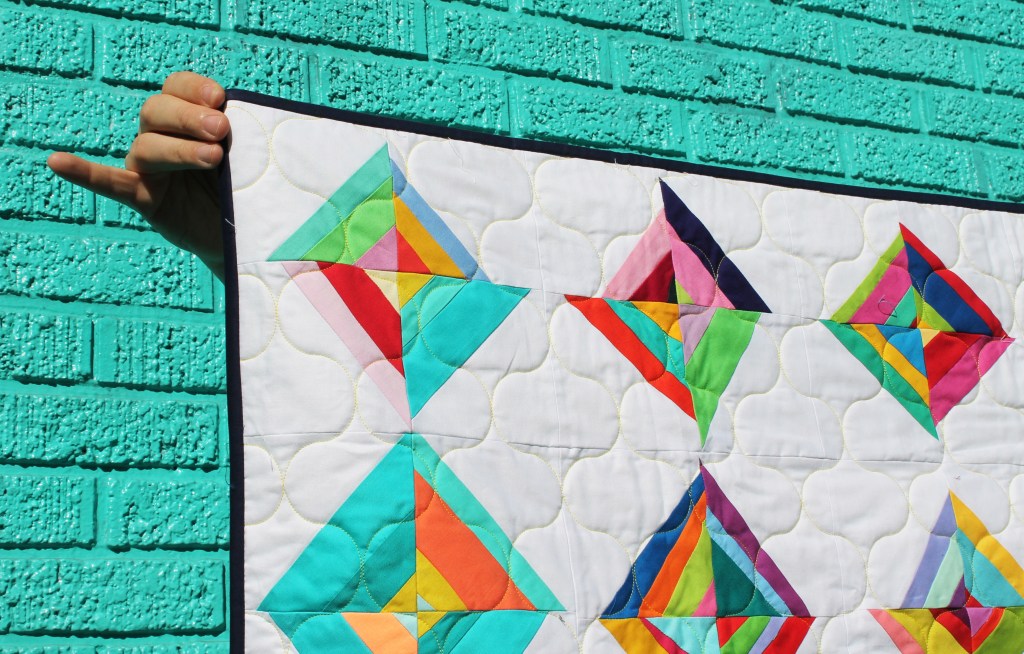
The block is a really simple improv block, using a 5 inch white square as a starting foundation and then different strips of different solid strips of fabric to one corner of the foundation square…. four of these foundation blocks are then sewn together to make a 9 1/2 inch (unfinished) block.
This quilt was made as part of the PMQG Charity Sew Days we used to hold at Modern Domestic… so the blocks for this quilt were made an army of different people which adds to the improv fun….and of course it has already winged its way to someone through Dornbechers’ Pediatric Intensive Care Unit.
It was a great way to use up the tons of solid scraps I had gathered over the years… but as usual I swear we ended up with more fabric at the end of the day than what we started with…
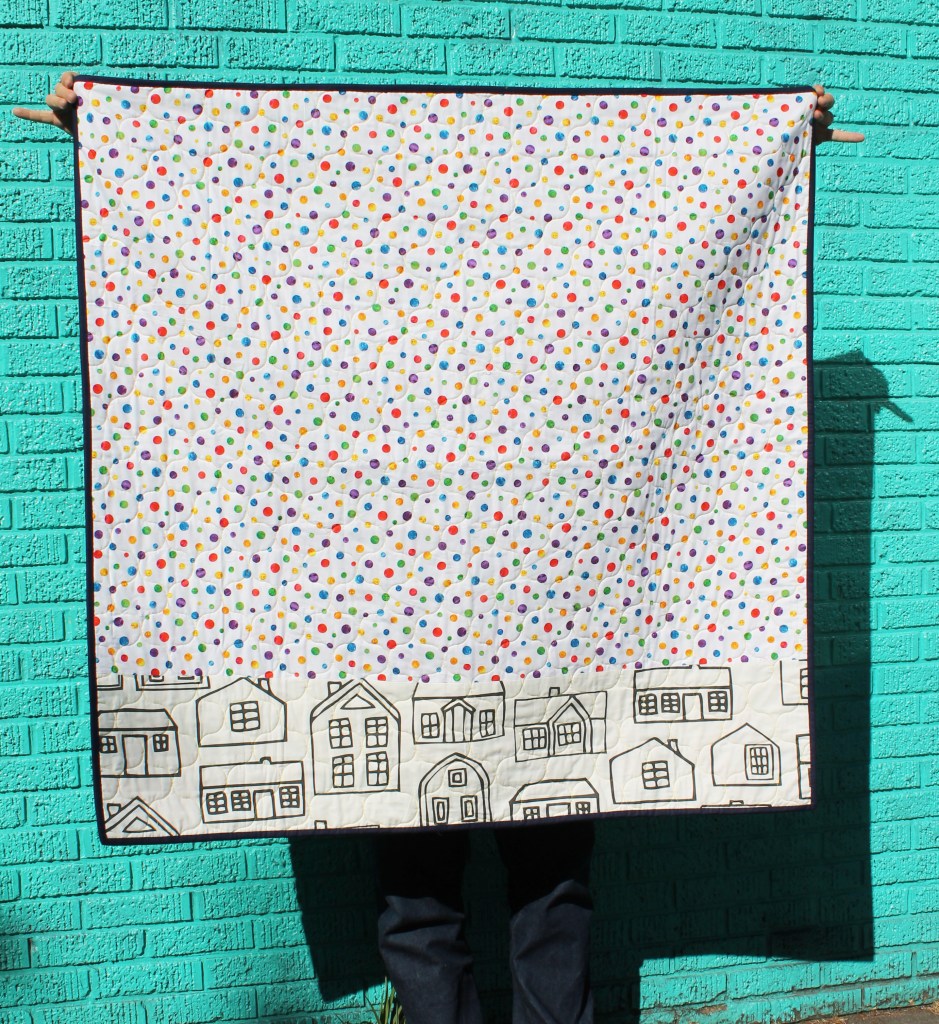
When I was pulling the scraps to be used in this project I made sure that I had scraps of every colors and that I had a good variety of lights and darks. The contrast that the different values of the fabric have give this quilt its sparkle I think.
For the back of the quilt I used the last little piece of a treasured IKEA fabric I had been hoarding for years… I regret not buying yards and yards of that house fabric when I had a chance.
And of course it would not be a Wombat quilt without the pinkies… this time I opted for a closeup so you can really see Mr Wombat’s pinkie form. He practices that pose regularly… he takes his quilt holding duties very seriously.
So I am slowly working through the backlog of photographs that I have taken but not processed and posted. It is funny because I also have a backlog of quilts that need photographing too… all this means though I have not been posting, I have been creating. So without further ado here is the latest belated share….
This quilt combines two of my favorites – my favorite fabric line (original Cotton & Steel) and my favorite go to pattern “Scrappy Trip Around the World” by Bonnie Hunter. This quilt was made during my 2018/2019 Cotton & Steel phase (you can see some of the other quilts here and here).
For this quilt I used lots of 2/12 inch strips of a variety of different Cotton and Steel fabrics. One of the things I love about these lines and the subsequent Ruby Star lines is that all play so nicely together. It takes the guess work out of scrap quilting because you know it will all work.
And this pattern is definitely a go to for me. I actually have another version of the scrappy trip around in my “too be photographed” pile. The pattern is easy but so effective and it is also fat quarter friendly (you do not need to do WOF). Actually this version saw me cut 2 1/2 inch strips off a pile of my Cotton & Steel fat quarters (I used 2 1/2 x 18 inch strips).
This was the first time with this pattern that I consciously tried to keep the center of the block a light strip. It adds a nice through line to the quilt blocks and this quilt’s layout does not feel as random as some of my previous versions. It is definitely my favorite version so far.
The quilt was expertly quilted by a wonderful PMQG volunteer and backed with some fabulous Elizabeth Hartman wideback. I made the quilt because there was a need for some more teenage appropriate quilts from several of the charities we work with… and it was donated last year to Camp Erin.
We of course finish up with the pinky shot….
Quilt Details:
Block: 12 inch scrappy trip around the world by Bonnie Hunter
Fabric: Cotton & Steel lines
Size: 60 x 72 inches