The splodge block…

November is once again my turn to set a block for Do Good Stitches Hope circle. As always I procrastinated and pontificated and finally landed on this block….

I decided to call it the Splodge block. It is an improv log cabin…with most of the precision coming from choosing your fabrics carefully and not from cutting. Here are the steps to making this block…

STEP ONE:

Pull out all your blue, grey and white scraps.

STEP TWO:

Sort your colored scraps. This is a really important step in all scrap quilts and I am going to give you some guidelines for these blocks. This quilt is based on a cool palette and to make the block work you need to weed out some of your scrap because they will muddy the block.

BLUES: For the blues you are going to need dark, medium and light scraps… but in fabrics that are blenders, tone on tones or solids. Any fabric that has colors other than blue needs to go. That means…

You can see from my test block that I still used novelty prints, it is just they were cool prints with no extraneous colors.

GREYS: For your grey you are going to use the same principle as blue – tone on tone or blenders and no extra colors. But with grey there is one extra step.

Did you know that not all grey are the same and that grey fabrics have an undertone to them? This is a color cast that makes grey take on the hue of another color.

Grey can have a blue, green, orange or purple undertone. For this project we want to have cool greys in our block… we want to avoid using the warmer grey because it will muddy the block. A piece or two of the warm grey will not hurt but we want to mainly use the cool grey – the ones with a green, blue or purple undertone.

WHITE: The final pile of scraps to sort is your whites. We are looking for bright whites – solid or prints. In my blocks I have used a few white fabrics that have a bright white background with a cream print on them which have worked well… but we want to avoid cream fabrics if we can. Cream is a warm version of white and can again add warmth to a block if too much of it is used. A random piece is okay though.

You should end up with a curated pile of scraps that you can work with to make these blocks.

STEP THREE:

Start making your improv log cabins. The center of your log cabin is going to be your darkest navy blue fabric.

You can tell from this photo that I do not pretrim anything…. if I need to cut a piece of fabric smaller I use my scissors.

STEP FOUR:

Keep building outward using lighter blues and greys as you move out from the center. Once the log cabin has started I do press as I add new pieces and I do trim the block….
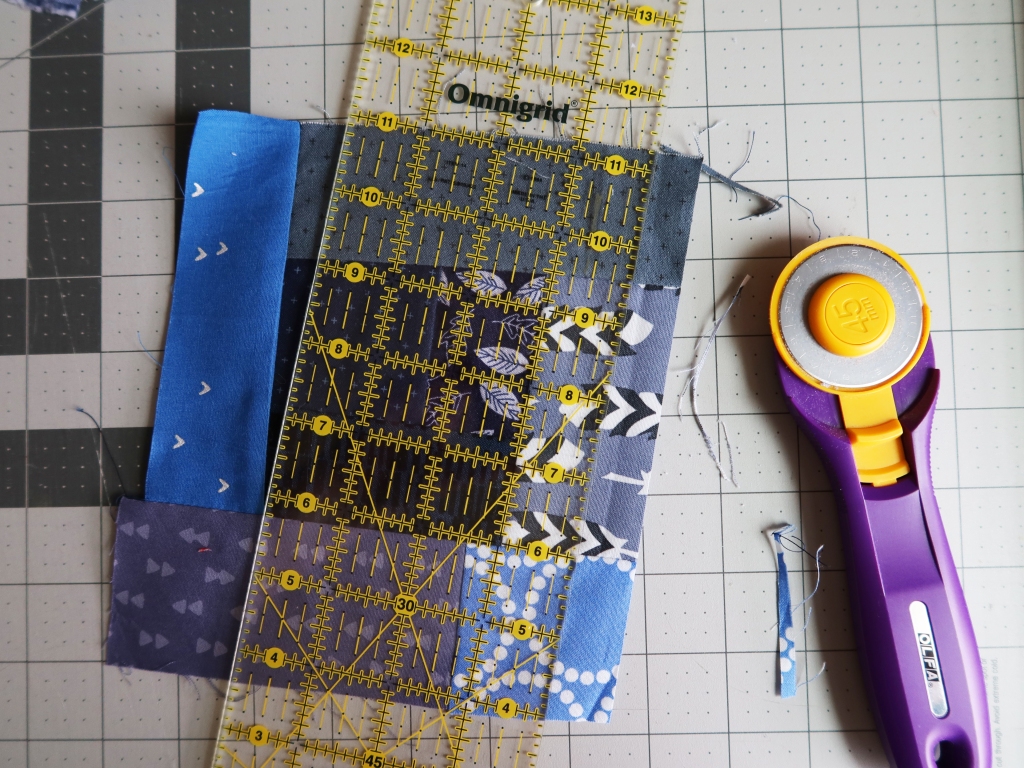
…and when I say trim I mean I use a rotary blade and ruler to get a straight edge but I do not square anything up or check that anything is even. I just want a straight edge to sew my next strip too.

As you progress, I encourage you to make “logs” for your log cabin by sewing smaller pieces of fabric together to make your own strips.
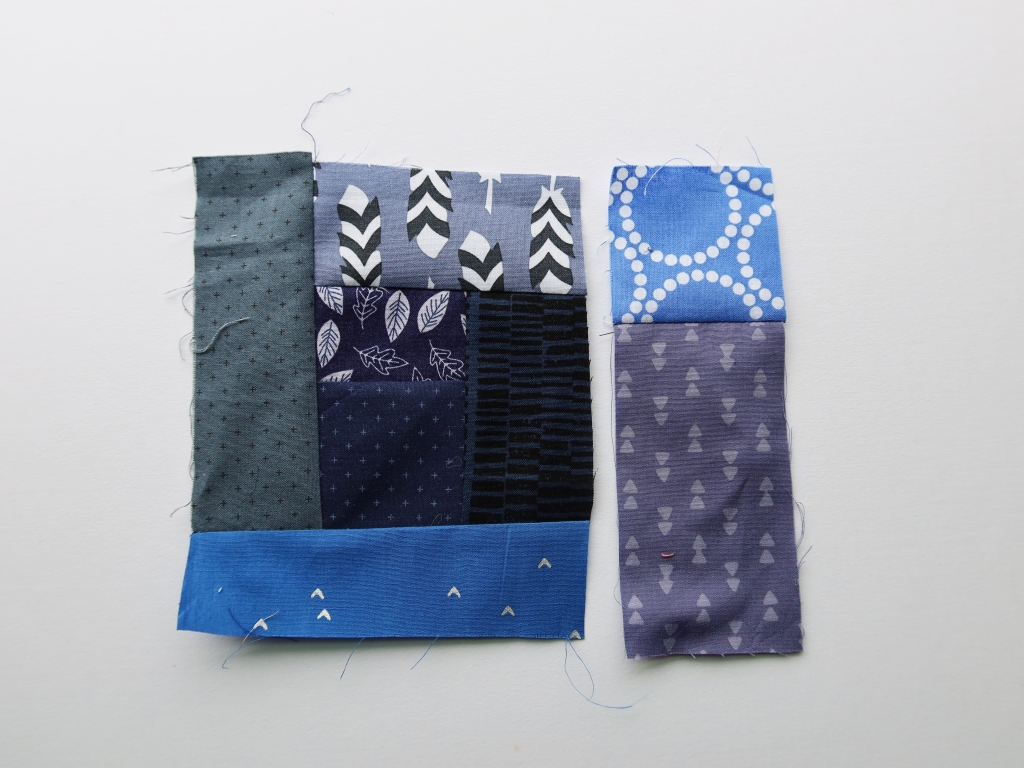
These custom made strips are a great way to break up the traditional log cabin structure and give the block a more improv feel. They are also how the block becomes a splodge of color and not just a square of color.

STEP FIVE:

Keep building your log cabin out until you have a piece that is just larger than 12 1/2 inches square. You want to make sure the your last logs are white and/or light grey…you need a white frame around your splodge.

Once you have a large enough improv log cabin give it a final press and if you have starch (eg. Best Press) use it liberally at this stage to get your block to lay as flat as you can.

STEP SIX:

Using your 12 1/2 inch ruler trim your block to it’s finished size.

Note your splodge does not need to big. In my first block the blue splodge took up most of the block…while in this block there is a smaller lot of blue. You can make your splodge as big as you want….have fun….let go….play.

FINALLY:

When I go to put this quilt together I decided I wanted to use filler blocks to give the splodges room to breath. These filler blocks are being made using just light grey and white fabric with the occasional blue or darker grey spot.

They are 12 1/2 inch by 6 1/2 inches unfinished and will allow me to layout the finished quilt in a irregular pattern…. the splodges will not all be neatly lined up but rather scattered around the quilt.

So there you have it… the splodge block. I am looking forward to seeing how my fellow DGS peeps interpret the splodge…and really looking forward to putting this quilt together.

Another Do Good finish…

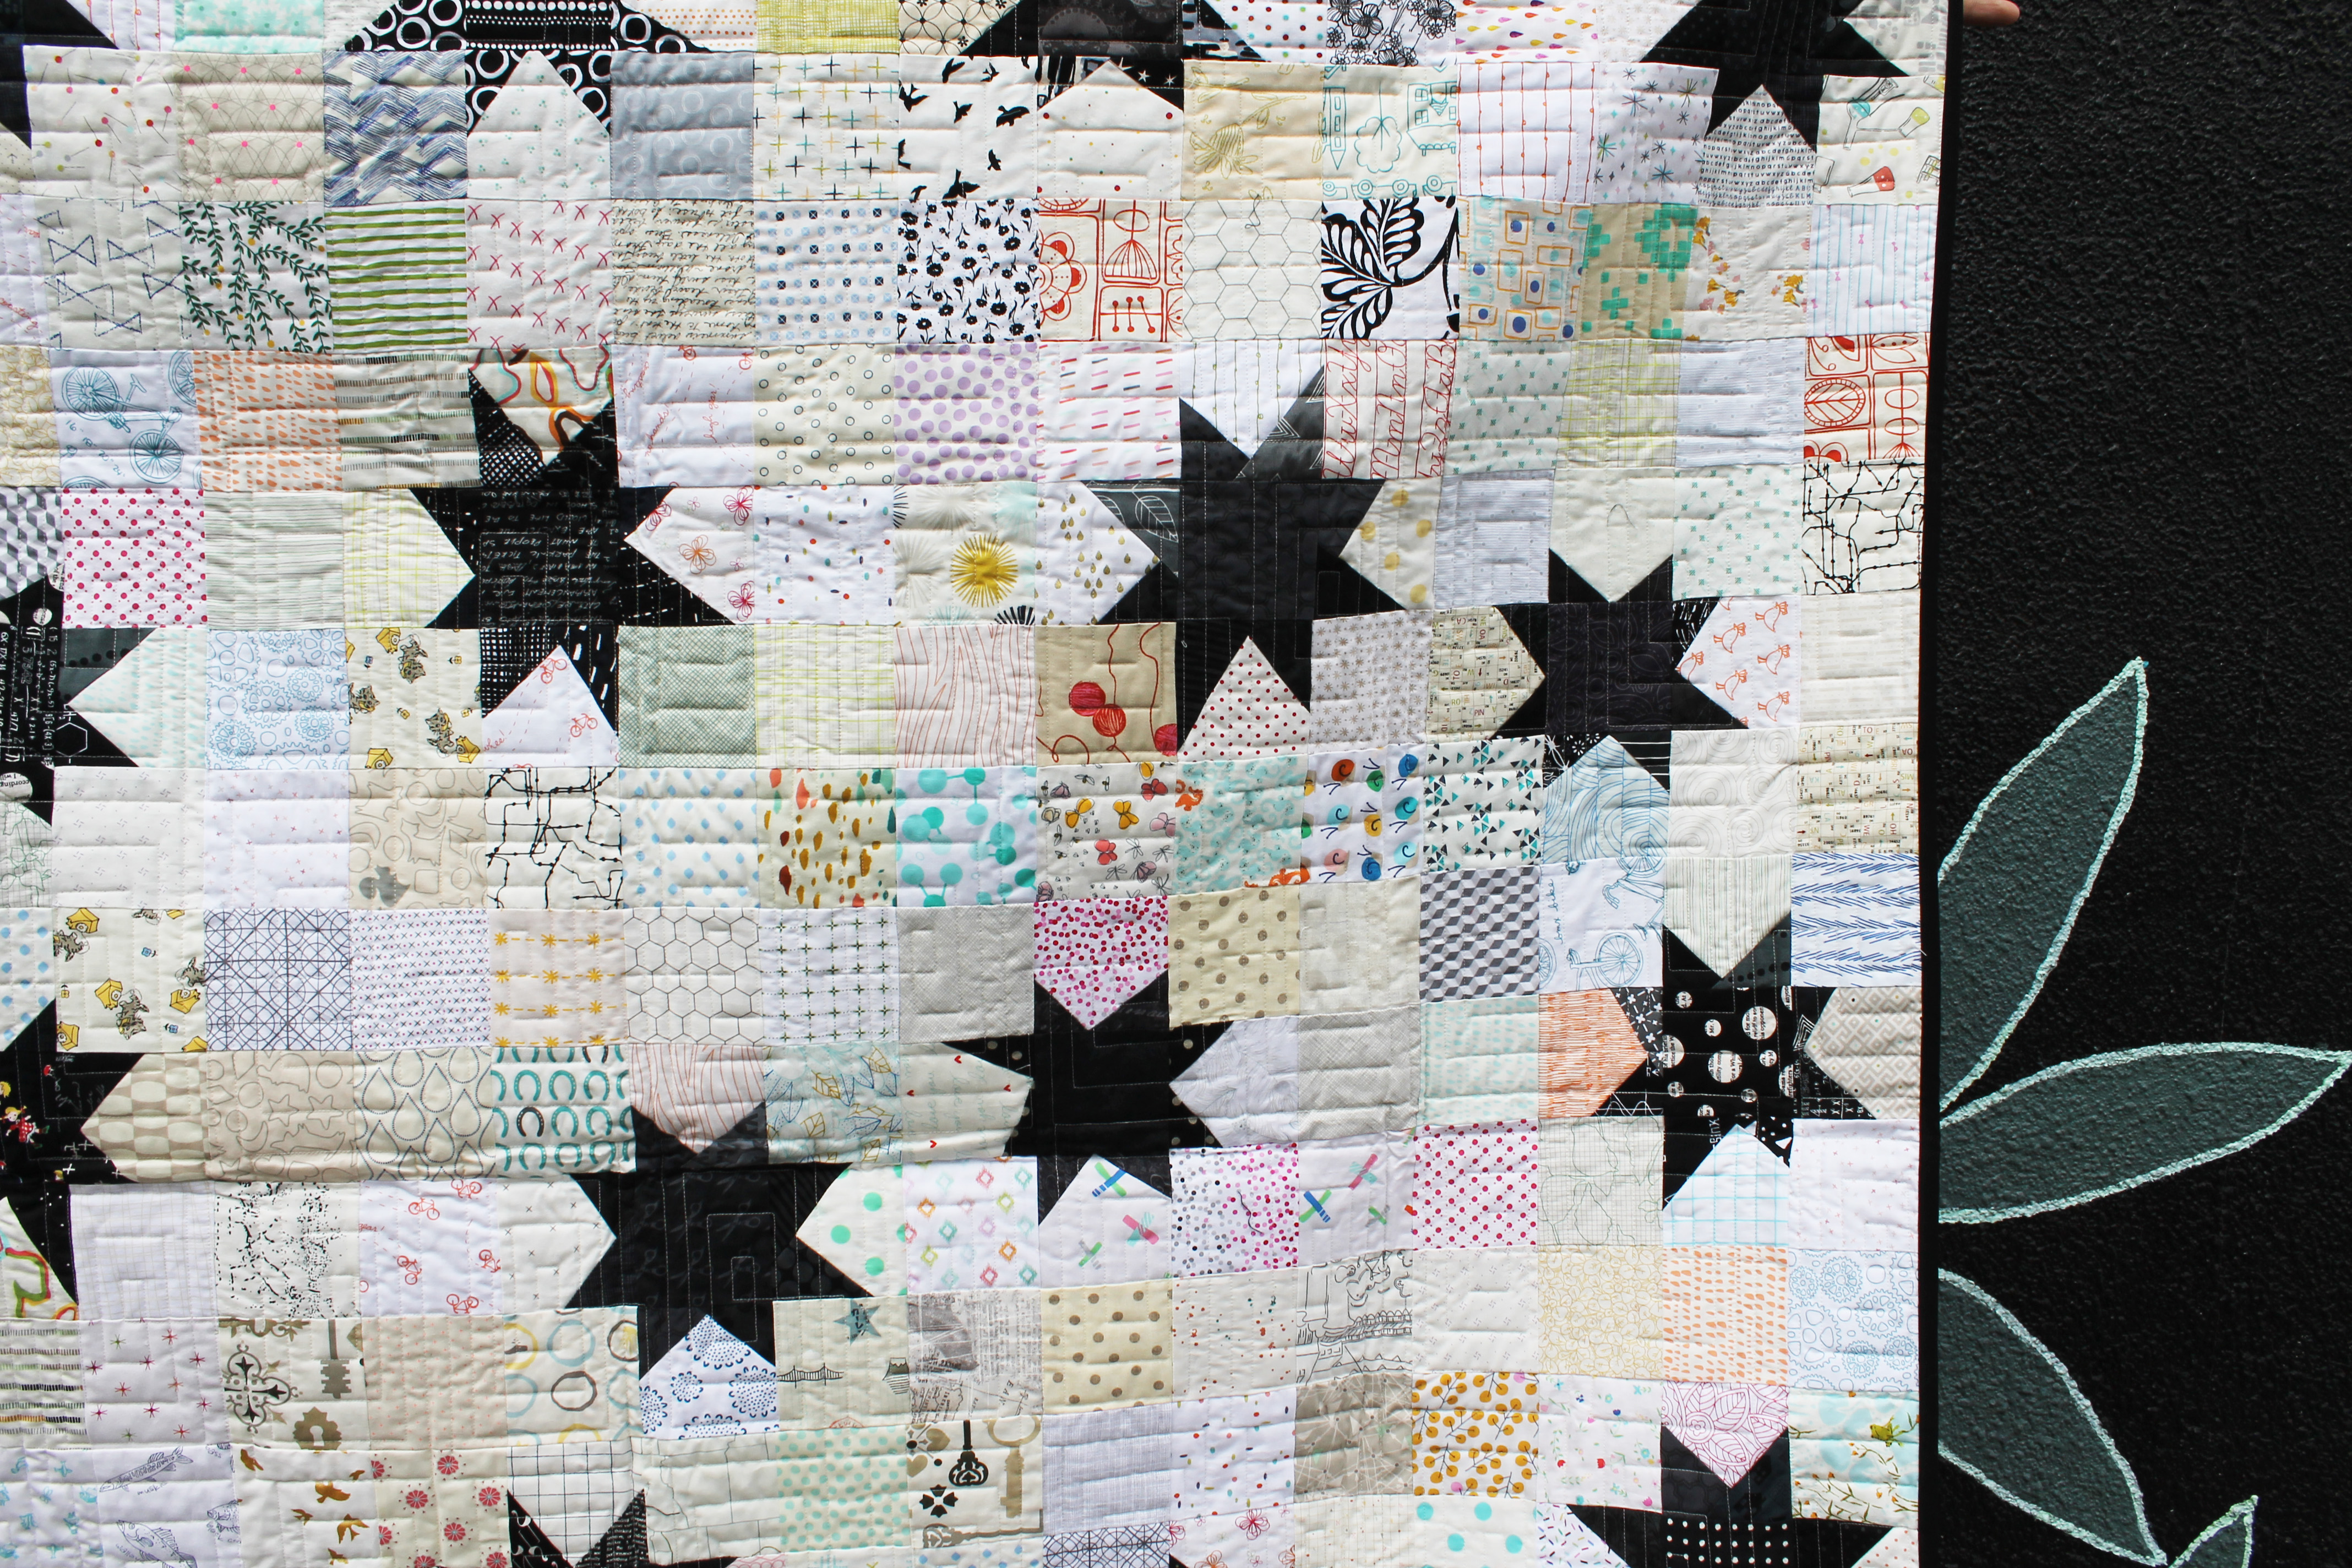
I am back with another finished Do Good Stitches quilt… actually the weather in Portland has been lovely these last couple of weeks so I had the chance to photograph a few quilts which I will share over the coming weeks… but first up…

do good stitches wonky star quilt

These blocks were made by myself and my fellow Hope Circle Bee hive members.  I love a good wonky star and this block was extra fun because of the low volume background.

modern scrap quilt

Using blacks and dark grey for the stars meant that the fabric we used as the background could have more color and interest in it.   The stars were going to stand out against just about anything we threw at them… so we went fussy cut, novelty print crazy.  The background does make for a good game of I spy.

easy kids quilt

The only low volumes that were a little problematic were the black and white ones… and only when they were used in making the star points.  When choosing your low volume fabrics for a project it is always a good idea to:

(1) double check that they read low volume…. I do this using the mono chrome setting on my phone camera.  Some low volumes can be deceiving and are tonally much darker than they appear.

(2) check that the print does not interfere or intersect with the foreground or main fabric.  I have had this happen when the low volume print have had a strong print with the same color in it as my foreground fabric (this is why the black and white prints could be problematic with this quilt).

wonky star detail 3

Because of the structure of this block you have a bit of built in negative space to play with.  The block uses 3 1/2 inch squares, so one side of the block is just negative space (you can find the directions for the block here)…

Modern scrap bee block

Scrappy wonky Star 12 inch block

This allows you to play with the layout of the stars on the finished quilt.  The layout can be uniformed or more off grid, like I did.

quilt detail

I must admit I loved the randomness of the star layout in this top… I think it gets your eye moving around the quilt in interesting ways.

As always this quilt is heading out into the world to do some good… at our local Pediatric Intensive Care Unit.  So many hands help make this beauty and I am constantly reminded how many good people there are out there in the world, trying to make a difference.

Quilt Details:

Block:    12 inch off set wonky star
Fabric:   Scraps and more scraps
Size:       60″ x 60″

Back for some fun little Bear Paws…

This month I am the setting the blocks for our Do Good Stitches Bee… and I find that it is easier for me to blog the block instructions that to try and do it all on Flickr….  Of all the social media platforms I use Flickr is really the one that constantly surprises me that it has not died yet.  It is so clunky and not at all very user friendly for some things.  Anyway rant over… here is the blocks.

color bear paw

I went with a simple Bear paw section… I have a ton of little scraps and this seemed like a great way to use some of my precious little bits… I have decided to do the block in two sizes – 6 inches and 9 inches…

finished blocks

And I worked out a way to make both sized blocks at the same time… so here goes….

fabric requirments

Cutting Instructions:

Background fabric (we are using low volume or white on white):
5 (five) x 3 1/2 inch squares
1 (one) x 2 1/2 inch square

Colored fabric (we are using bright primary colors):
8 (eight) x 3 1/2 inch squares of various prints
4 (four) x 2 1/2 inch squares of various prints


Step one:

Choose four of the 3 1/2 inch squares and four of the 2 1/2 inch squares for the center part of the block .  When I was choosing these fabrics I selected the more interesting fabrics for the center squares (ie. the ones with fussy cuts).

The remaining four 3 1/2 inch squares will make the half square triangles (HST).

Step two:  Make the HSTs.

mark fabric


Mark a line down the center of the back side of your background fabric, going corner to corner.

Then mark another line 1/2 inch from that line.  These two marks are your sew lines – you will be sewing directly down these lines.


cut hst


Cut down the middle of your sew lines… you are actually cutting 1/4 inch from the center line.  You now have your two HST components.

Press your HSTs (I usually press my seams open).


trim hst Trim each of the HST components .  

Your 3 1/2 inch HST will not need much trimming (it should be almost perfect).

There is a bit of wiggle room with your 2 1/2 inch HST so you will have a little bit to trim off.


Remember to use the center diagonal line of your ruler to make sure you are trimming straight.

Step Three:  Sew it all together.

rows


Sew your block sections together in rows.

With my blocks I have been ironing my seams open… but you can also nestle the seams.  It is up to you.

iron seams


Then sew your rows together to make your blocks… and trim as needed to the finished size.

Just for fun I have made a couple of tiny versions of this block…

3 inch bear paw. Scrap quilt block

This block finishes at 3 1/2 inches… all the bits are 1 1/2 inches which is a little crazy but also kind of fun.  I have been having a blast finding little bits to fussy cut at this size.

I am having a blast with this project.  I have actual work sewing to do and I do not want to do it… all I want to do is cut my scraps up into little bits and play.

It is time for another Bee Block….

Ah yes it is that time again… I am setting another block for my fellow Do Good Stitches gang… and this month snuck up on me so I have resorted to a variation of an old faithful….the wonky star…

dgs wonky star

For this 12 inch block I used:

  • Fifteen (15) low volume 3 1/2 inch squares
  • One (1) black/dark grey 3 1/2 inch square
  • Eight (8) black grey triangles – I used scraps but you can cut a 3 inch square in half to make the triangles.

Step one is to make the star points:

To make the star points you will need 4 of your low volume squares and your triangle pieces.

step 1


Take one of the squares and sew a triangle onto one corner, making sure the pattern sides of your fabric are together and when the triangle is flipped it covers the corner of your square.


step 2


Next trim the excess low volume fabric from the corner and press the triangle over into place.


step 3


Then add another triangle of fabric to the other side of the square…. sew it down … trim the excess low volume fabric and press over.


step 4


Your next step is to trim your block back down to 3 1/2 inches square.


step 4a


The back of your block should look like this…. now repeat the process until you have 4 star point sections.


block layout

Step Two:

Lay out your block as illustrated….

sewing block together


Step Three:

Sew the block together in rows… then sew the rows together to make a completed block.


What I love about this block is that has built in negative space which allows for you to stagger the stars layout when putting the quilt top together.  You can also make a couple of blocks that are just low volume squares (no star) to break up the layout of the quilt.

In the coming months I will have two different variations of this quilt to show you, as I also used this block recently at out Guild charity sew day.   For the sew day we used a rainbow of solids and a white star which gave us a really fun bright quilt.  If you want to see a work in progress shot of that quilt head over to my Instagram account.

Finishing up some more quilts…

I am finally getting around to finishing up and sharing some of my long over due Do Good Stitches quilts…

dgs ohio star quilt

With the Do Good Stitches quilts I do try and challenge myself to do gender neutral or boy orientated quilts.  As a card carrying pink lover it is always difficult to try and keep to a less girly palette.

ohio star quilt

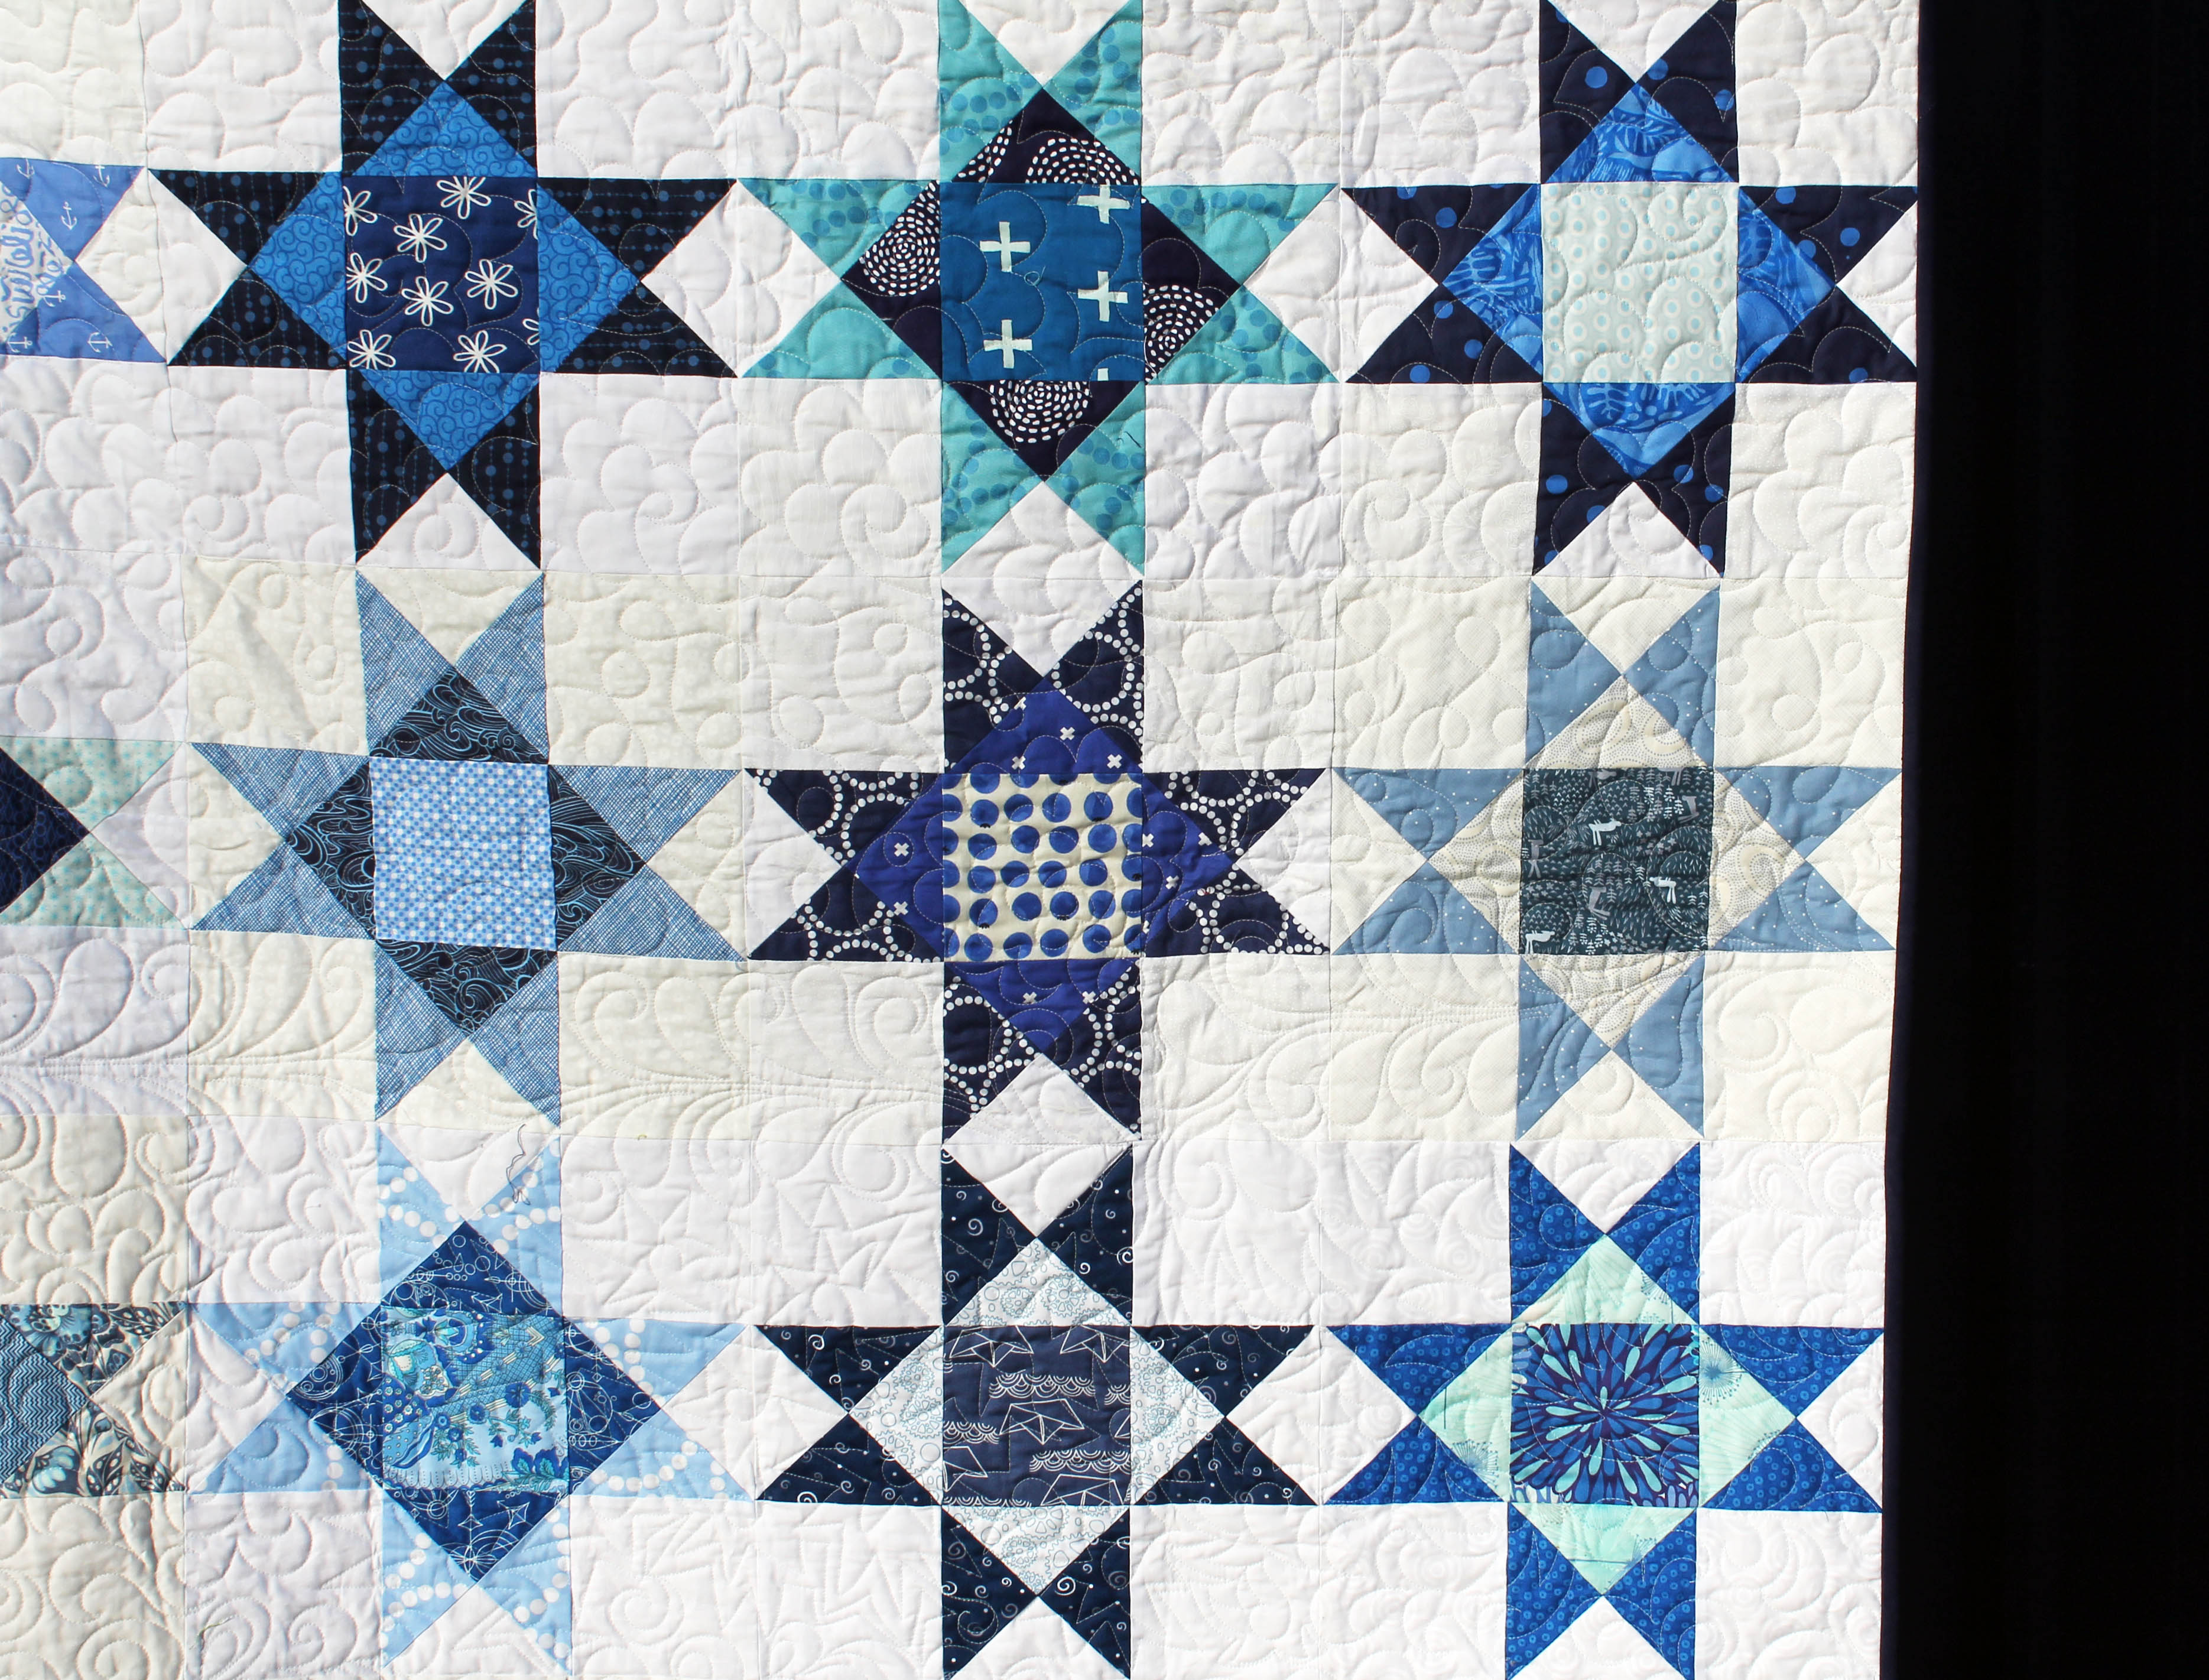
With this quilt I went with a very traditional block but got my fellow Bee members to mix up the blues and to throw in some boy based novelty prints.

ohio star quilt detail

It really like the way it turned out.  The fun quilting was done on the long arm at my local Quilt shop – Modern Domestic.  I can not tell you how much I love having a local shop…  and one that is just 5 minutes drive away.  I am very very spoiled.

pinkie detail

In the next month there are two quilt shops in town closing down, which makes me a little sad.  I love going into Modern Domestic and petting the fabric, getting advice and teaching/taking classes.  I can not imagine what I would do if my LQS shut down.   If you are lucky enough to have a local store make sure you appreciate them and frequent them – they are such an asset and it would a sadder world if we could not physically go and touch the fabric…. stepping off my soap box… and now back to the quilts…

quilt back

For the back of the quilt I used an IKEA pillow case (cut open of course).  I am having a blast using sheet sets and Doona (duvet for non-Queenslanders) covers for the back of my quilts.  Between IKEA and Martha Stewarts Whim sets the novelty print choice is too fun.

helpful helper

And it is thanks again to my trusty quilt holder and pinkie model… Mr Wombat.  He really is getting good at this quilt holding thing!

Quilt details:

Pattern:  12 inch Ohio Star blocks
Makers: Do Good Stitches Hope Circle
Fabric:  Scraptastic – blues & cream/whites
Size:  48 x 60 inches