A little more Improv…

I have done quite a bit of Improv quilting over the course of the last year or so…. for me it is a great way to dust off the cobwebs, particularly if I have lost my sewjo a little.

So this wonky log cabin was a fun project that started after I had collected a hug bag of navy scraps….

So I started with the navy scraps and as I begin putting the log cabin blocks together the navy seemed boring… it needed a little something to give it a lift. It just so happens that I had a small scrap pile of orange bits that were left over from another quilt and the navy and orange were the perfect combination.

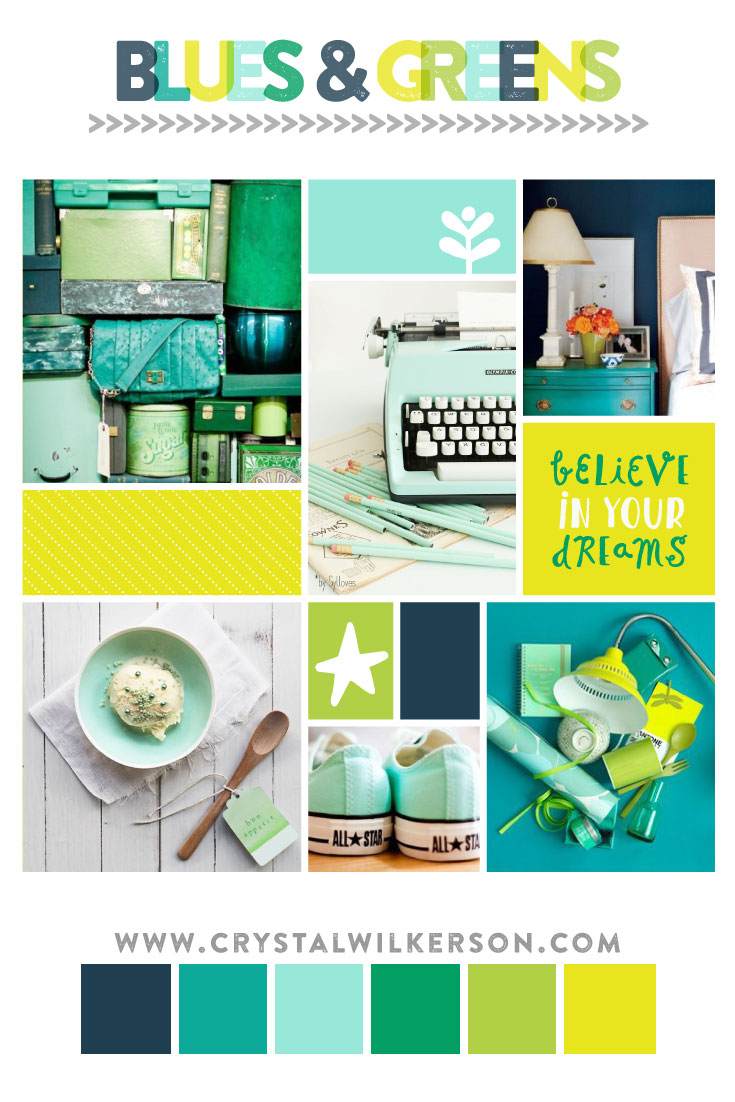
The orange is the perfect contrasting color to the blue… these two colors are actually opposite each other on the color wheel…. which just enhances the impact of the color splashes.

The trick is to only put a few pieces of the highlight color in each of the log cabin blocks…. some of the orange is a full strip and other bits of orange are only inserted into the navy strip…. and I think those little splashes are the most successful pops of color.

Because of the randomness of the orange inserts your eye moves around the quilt more… hunting out those little splashes of contrast.

This quilt is also already out in the wild. I made it after the hospital said they needed a few more quilts for older teenage boys. I am a pink girl through and through but I loved the challenge of making something not too girly.

Working through the backlog….

So I am slowly working through the backlog of photographs that I have taken but not processed and posted.  It is funny because I also have a backlog of quilts that need photographing too… all this means though I have not been posting, I have been creating.  So without further ado here is the latest belated share….

cotton steel trip around

This quilt combines two of my favorites – my favorite fabric line (original Cotton & Steel) and my favorite go to pattern “Scrappy Trip Around the World” by Bonnie Hunter.   This quilt was made during my 2018/2019 Cotton & Steel phase (you can see some of the other quilts here and here).

close up 2

For this quilt I used lots of 2/12 inch strips of a variety of different Cotton and Steel fabrics. One of the things I love about these lines and the subsequent Ruby Star lines is that all play so nicely together.  It takes the guess work out of scrap quilting because you know it will all work.

quilt close up

And this pattern is definitely a go to for me.  I actually have another version of the scrappy trip around in my “too be photographed” pile.  The pattern is easy but so effective and it is also fat quarter friendly (you do not need to do WOF).  Actually this version saw me cut 2 1/2 inch strips off a pile of my Cotton & Steel fat quarters (I used 2 1/2 x 18 inch strips).

quilting detail

This was the first time with this pattern that I consciously tried to keep the center of the block a light strip.  It adds a nice through line to the quilt blocks and this quilt’s layout does not feel as random as some of my previous versions.  It is definitely my favorite version so far.

quilt back

The quilt was expertly quilted by a wonderful PMQG volunteer and backed with some fabulous Elizabeth Hartman wideback.  I made the quilt because there was a need for some more teenage appropriate quilts from several of the charities we work with… and it was donated last year to Camp Erin.

pinky shot

We of course finish up with the pinky shot….

Quilt Details:

Block:  12 inch scrappy trip around the world by Bonnie Hunter
Fabric:  Cotton & Steel lines
Size:  60 x 72 inches

Well things have got interesting…

It has been over a year since I have blogged and what a year it has been.  Like everyone else I have hunkered down in my house, venturing out only when absolutely necessary.  You would think this would mean a flurry of quilting activity but it has not.  Like so many I have found it hard to be creative in lockdown… and I have made a LOT of masks.

So to try and break out of this rut I thought I would share a few quilts with you that have been finished in the last year.  When I actually looked at what I had shared and what I had not I realized there was quite a bit of stuff that you have not seen… so we are going to start with this beauty…

finished aqua cross quilt

This quilt was made a one of the Portland Modern Quilt Guild (PMQG) charity sew days… back when we had charity sew days… oh I miss those days and that wonderful group of ladies.  Anyway I digress…

aqua close

The block was a simple nine patch block with an extra background row on two sides of the nine patch.  I love adding the background to the block as it allows for lots of fun negative space when you lay out the quilt.  If you are not sure what I mean look at my Bee Block post from May 2018.  I used the same technique when I made the wonky star blocks.

aqua closeup

I used a ton of pre-cut 3 1/2 inch squares… I have got in the habit of  “processing” my scraps through the Accuquilt die cut machine and so have boxes and boxes of squares.  3 1/2 are my favorite size and I have made lots of charity quilts with them.

closeup 2

For this quilt we wanted to be gender neutral and a little more teen than kids – so I picked a black/dark grey printed background with white and cream prints for the cross parts.  The center squares were all solid fabrics in shades of aqua.

aqua quilting detail

The quilting on the quilt added a wonderful layer to this design, echoing the squares of the quilt in the pattern of the quilting.  I am always in awe of the amazing group of long armers who help make these charity quilts.  Their talents always add so much to the finished product.   This quilt was donated to last years Camp Erin where I hope it gave comfort to a grieving camper.

pinkies

Of course I must finish up with a the obligatory shot of Mr Wombat’s pinkies.  These photos were taken last year before lock down and he was such a good sport as we drove around town looking for interesting walls to photograph things against.  I am hoping to convince him to come with me to photograph a new batch of quilts in the coming week – of course while we wear masks and social distance.

QUILT DETAILS:

Block:  12 inch Floating nine patch
Fabric:   Scraps and selection of Kona solids.
Quilt Size:  60 x 72 inches

Back for some fun little Bear Paws…

This month I am the setting the blocks for our Do Good Stitches Bee… and I find that it is easier for me to blog the block instructions that to try and do it all on Flickr….  Of all the social media platforms I use Flickr is really the one that constantly surprises me that it has not died yet.  It is so clunky and not at all very user friendly for some things.  Anyway rant over… here is the blocks.

color bear paw

I went with a simple Bear paw section… I have a ton of little scraps and this seemed like a great way to use some of my precious little bits… I have decided to do the block in two sizes – 6 inches and 9 inches…

finished blocks

And I worked out a way to make both sized blocks at the same time… so here goes….

fabric requirments

Cutting Instructions:

Background fabric (we are using low volume or white on white):
5 (five) x 3 1/2 inch squares
1 (one) x 2 1/2 inch square

Colored fabric (we are using bright primary colors):
8 (eight) x 3 1/2 inch squares of various prints
4 (four) x 2 1/2 inch squares of various prints


Step one:

Choose four of the 3 1/2 inch squares and four of the 2 1/2 inch squares for the center part of the block .  When I was choosing these fabrics I selected the more interesting fabrics for the center squares (ie. the ones with fussy cuts).

The remaining four 3 1/2 inch squares will make the half square triangles (HST).

Step two:  Make the HSTs.

mark fabric


Mark a line down the center of the back side of your background fabric, going corner to corner.

Then mark another line 1/2 inch from that line.  These two marks are your sew lines – you will be sewing directly down these lines.


cut hst


Cut down the middle of your sew lines… you are actually cutting 1/4 inch from the center line.  You now have your two HST components.

Press your HSTs (I usually press my seams open).


trim hst Trim each of the HST components .  

Your 3 1/2 inch HST will not need much trimming (it should be almost perfect).

There is a bit of wiggle room with your 2 1/2 inch HST so you will have a little bit to trim off.


Remember to use the center diagonal line of your ruler to make sure you are trimming straight.

Step Three:  Sew it all together.

rows


Sew your block sections together in rows.

With my blocks I have been ironing my seams open… but you can also nestle the seams.  It is up to you.

iron seams


Then sew your rows together to make your blocks… and trim as needed to the finished size.

Just for fun I have made a couple of tiny versions of this block…

3 inch bear paw. Scrap quilt block

This block finishes at 3 1/2 inches… all the bits are 1 1/2 inches which is a little crazy but also kind of fun.  I have been having a blast finding little bits to fussy cut at this size.

I am having a blast with this project.  I have actual work sewing to do and I do not want to do it… all I want to do is cut my scraps up into little bits and play.

It is not easy being green…

First of all I want to thank everyone who reached out to me after my last post. I was scared to post about what was going on with me personally but you all made me feel so loved and supported… thank you… you may have even made my mum tear up a bit.

Now onto the business at hand… quilts.  Today I am sharing a recent Do Good Stitches finish.  This one was a simple block that chose for the Bee… you can see directions on making it here

DGS green quilt

This quilt top came together quickly, once I had received all the blocks from my fellow DGS peeps…

green quilt detail 3

I want to use the palette I selected for this project again… but this time I want to just use the colors with no white…it is such a fresh color scheme and I want to really get the citron to pop.

CW_MoodBoardMonday_BluesGreens

On Pinteres I have a whole folder full of color schemes and I love taking inspiration for how other people put together palettes… particularly when I am having a color block (which is a quilters equivalent to writers block).

green quilt detail

I also find it easy to point my fellow quilting bee mates in the direction of a color palette when setting a block for them to make…. and so far the results have been spot on.

green quilt detail 4

I got a wonderful mix of colors back from my team and also a variety of tones… does anyone else use other peoples colour palettes?

green quilt detail 2

I had fallen a little behind with my Do Good Stitches finishes so this quilt got an all over stipple… thanks to my darling friend Sam Hunter… and a Martha Stewart sheet for the back…

quilt back

This quilt has already headed to the local PICU and is hopefully giving a warm Quilty hug to someone.

Quilt Details:

Block:  12 inch Double T block
Made by: DGS Hope Circle
Fabric:  Green, turquoise and citron scraps
Finished size:  48 x 60 inches