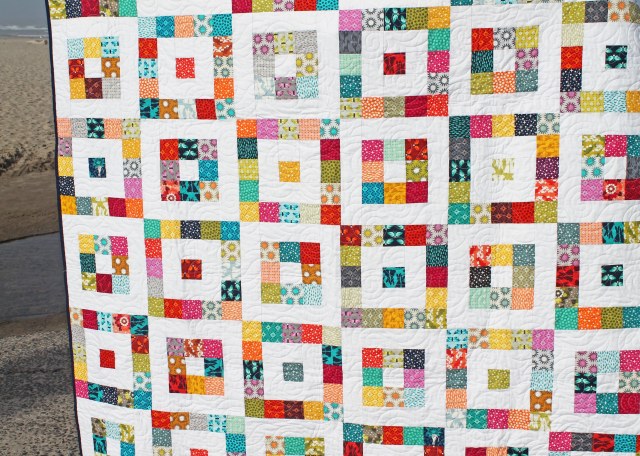
After I posted the scrappy quilt on Friday I had several requests for a link to the block pattern, which was hard to do becauseI had not followed a pattern. I had been inspired by some log cabin blocks I had seen and some quilts I had seen on the internet and so worked out the math and then did a step out for our charity sew group.
So on the weekend I photographed the steps just in case you want to play with your own pile of mini charm squares. There are two blocks that make up the quilt…
Block One…
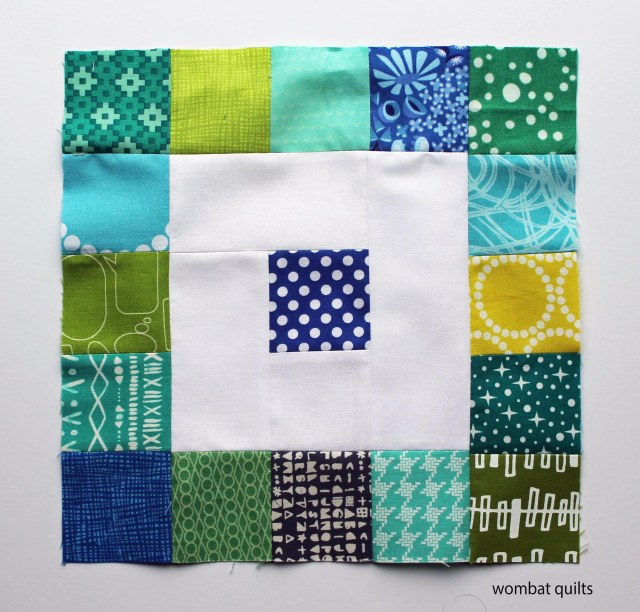
For this block you need:
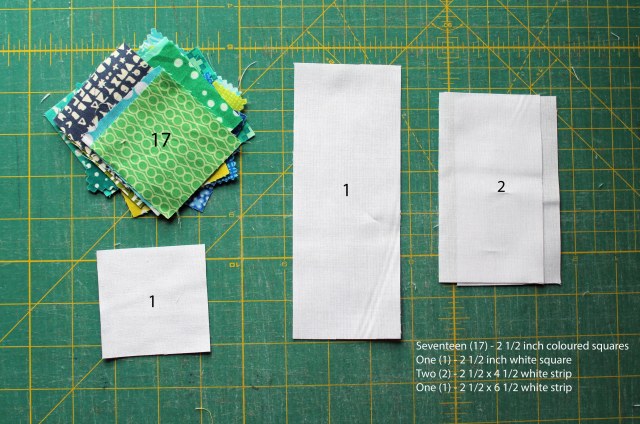
When making these blocks I sew the mini charm squares into strips first…
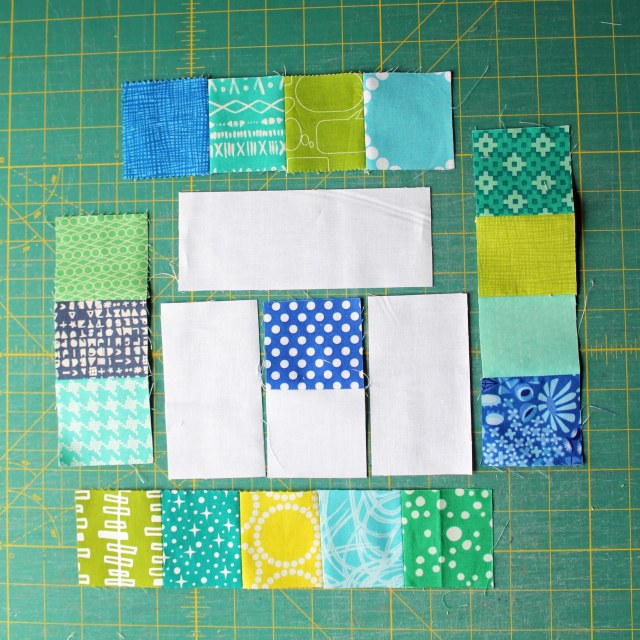
The block is then put together as a log cabin block would be… adding the smallest strip to the side and working my way around. If you are using mini charm squares cut by manufacturers be aware that they do come in slightly different sizes… some cut with. straight edge and some cut with a crimped/pinked edge. The squares with the zig zag edges can be slightly larger than 2 1/2 inch. If in doubt trim your mini charm strips to get a clean sewing edge.
For every block 1 you make you will need a Block 2:
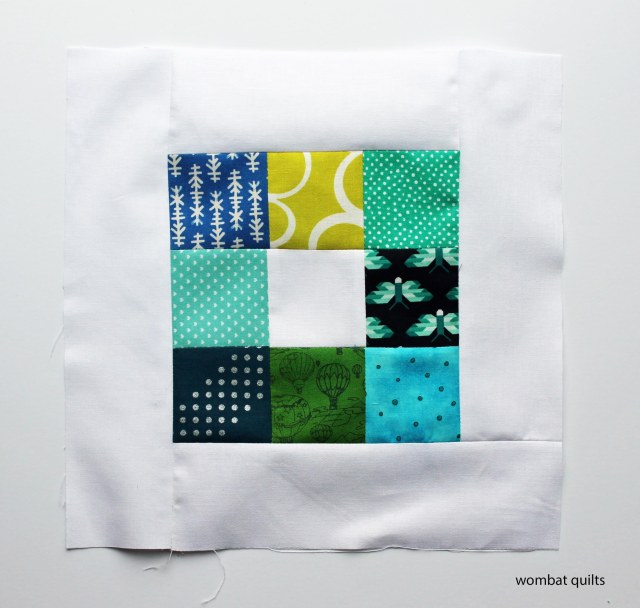
For this block you will need:
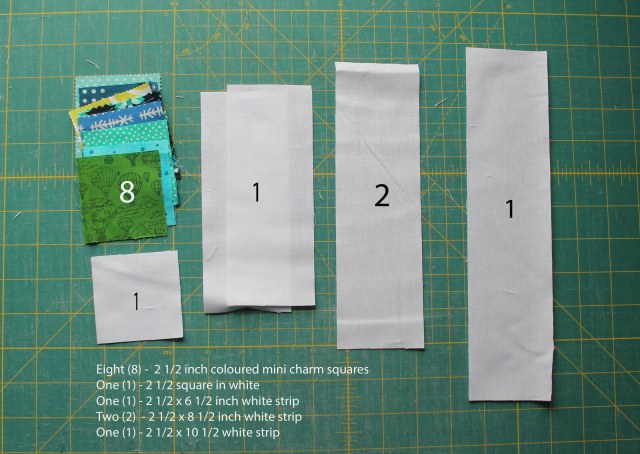
Please note that I made a mistake with this photo, so follow the words not the picture and make sure you have two strips of 2 1/2 x 8 1/2 inches.
Both finished blocks should measure 10 1/2 inches square unfinished… trim blocks as needed. Make as many blocks as you need to get the sized quilt you want. My quilt on Friday was 60 x 70 inches finished and there were a lot of hands making blocks for this quilt, which made it a quick process.

Thank you for sharing, Cath.
My pleasure. It was fun to document what I was doing… I need to get back into the habit of photographing my process more.
You’re so right about ‘standard’ cuts not being at all standard, and it’s not just charm packs. Jelly rolls are particularly bad like that, with fluctuating widths and some strips looking quite banana-shaped once opened out. But your finished result is lovely, a sparkling result from the two-tone layout.
Thanks Kate. I think I may have to finish these blocks up into a proper quilt… I now have another WIP!
Oh, good start! 🙂
Very pretty! Thank you. Hugs,
You are welcome Sandi. I hope people find it useful.
Thank you! I loved your quilt and was thinking about making one and now you have made it so easy.
I am glad I could help Robyn. I know so many people with stacks of mini charms but no idea what to do with them (I was one of those people!). This is a fun option I think.
that is lovely! it would make a small dent in the scrap pile I think.
Thanks for this. My New Year’s Goal is to use more fabric (it really isn’t as precious as I think it is). This pattern will help. Glad you are back to blogging.
Thank you for this tutorial. It’s a beautiful quilt. I pinned this.
I have to throw my THANK YOU in the ring too!!!
I just love this quilt. It looks so easy to make yet so striking. I just may have to add this one to my wish list. 🙂
It’s always a pleasure to see that you have posted. Happy New Year! I don’t have stacks of mini-charms but I certainly have stacks of 5″ charms that can be easily converted to aforementioned minis. Thanks.
Actually Pat a pile of 5 inch charms were used in the original quilt – we just sliced them into four (we added a couple more of Elizabeth’s fabrics that were not in the mini charm packs we had).
Thank you for taking the time to share your method as well as a beautiful quilt!! I love your work!
Thanks Debby. I am not always sure that people want to see how I do things, so it is nice to know that there is interest out there in me showing more work in progress and step by steps.
Hi Cath
very beautiful work
i am new to quilting
can you tell me how many mini charm pack blocks will be needed to make a
Crib size quilt
and
Twin size quilt
thanks
Anastasia
I just found this. Wowie, cutie cute and very fun
Thank you for sharing your creativity and expert instructions
Thank you for sharing. I love generous people like you. It’s a beautiful quilt.