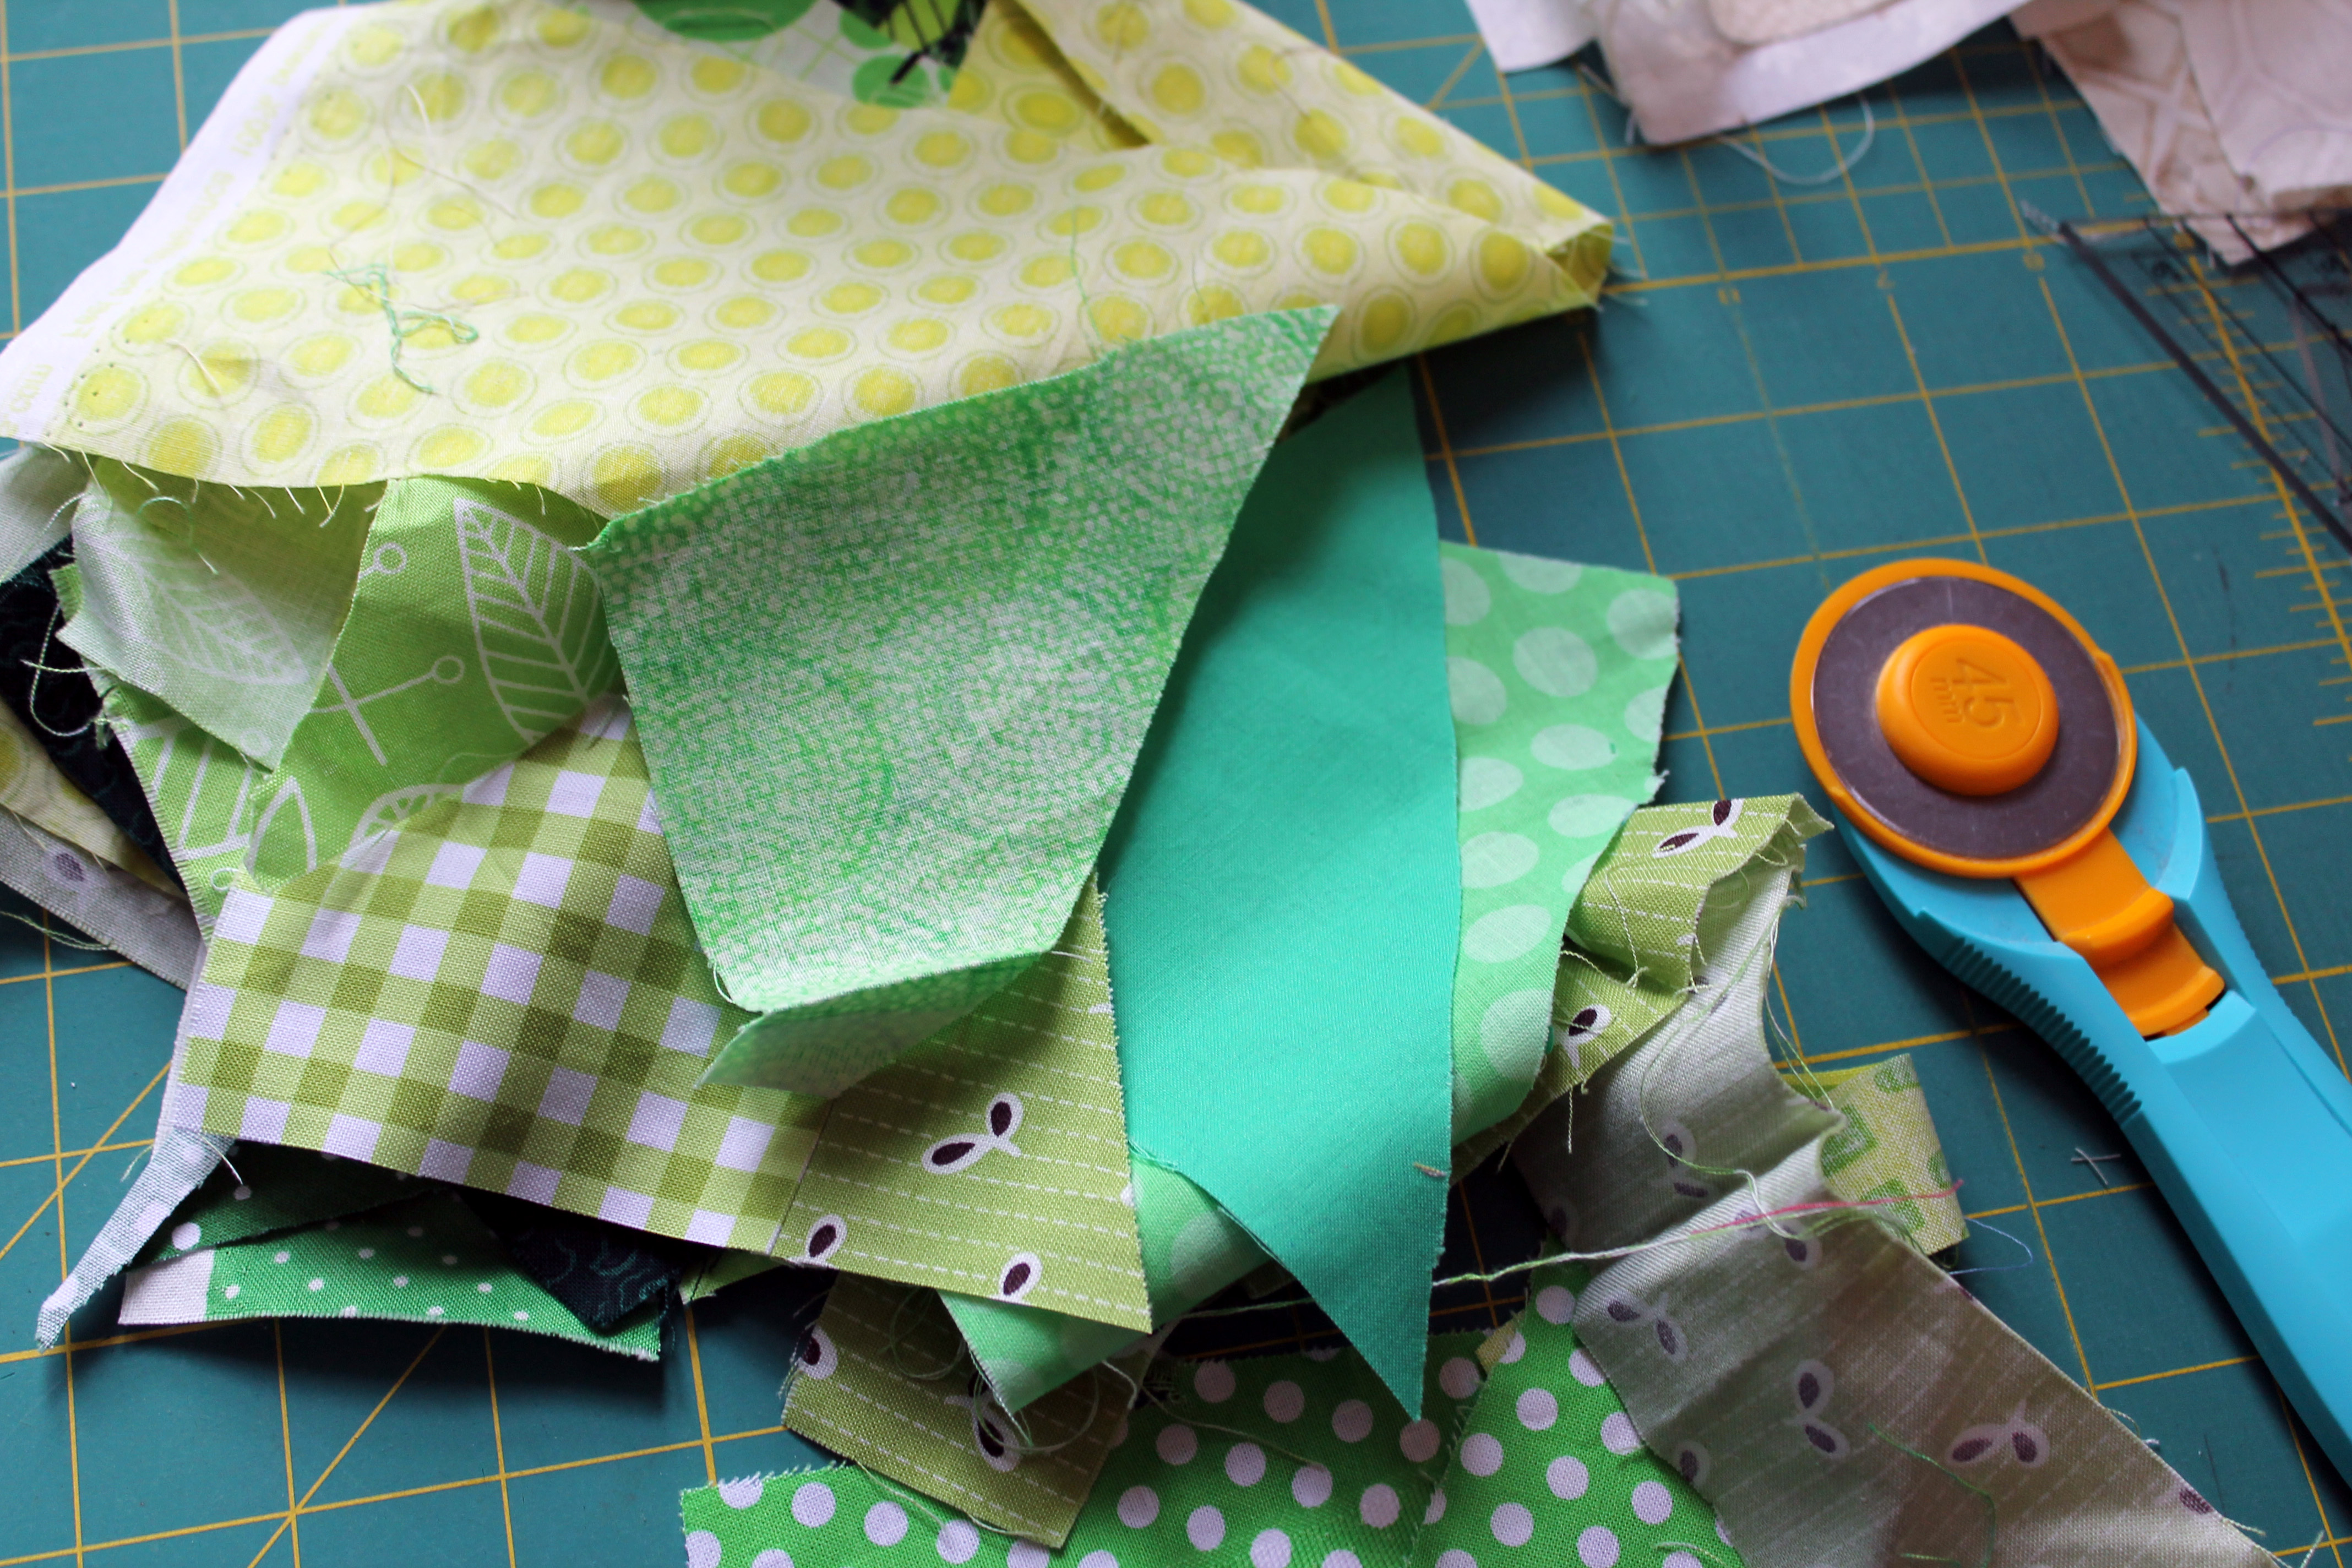
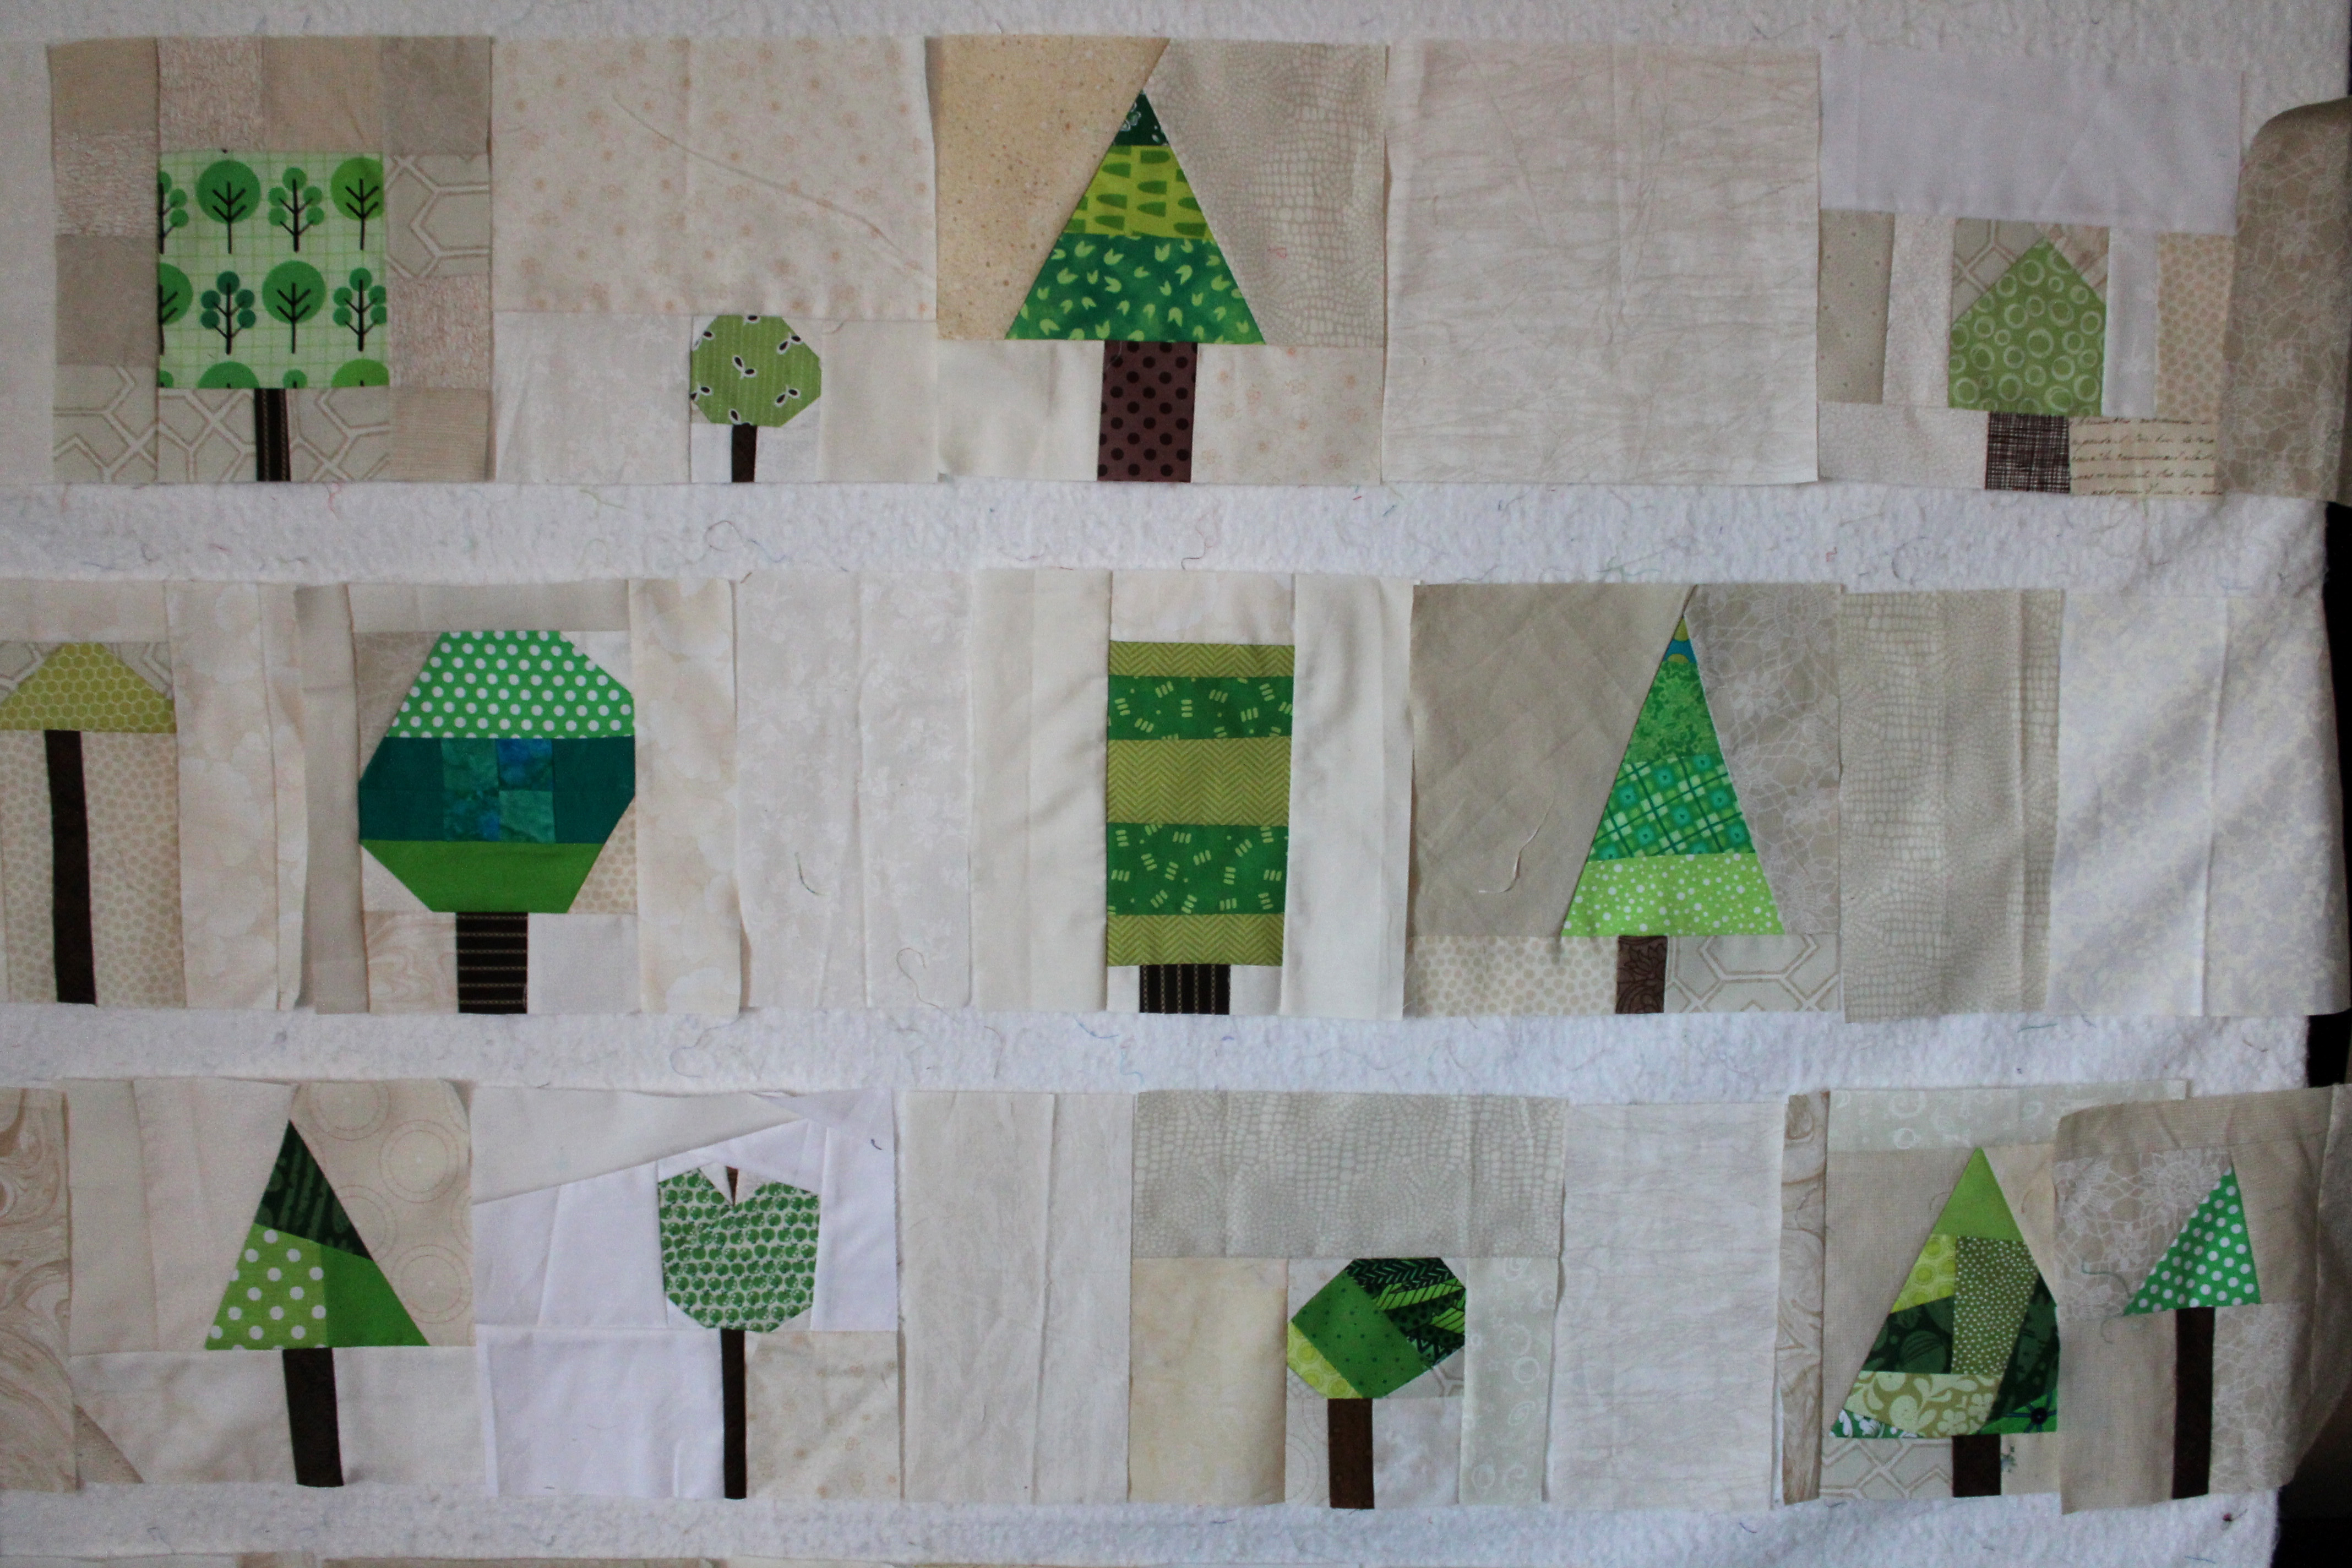
A few weeks ago I forced everyone at the PMQG Charity Sew day to make wonky trees. We had a large amount of green, brown and cream fabrics donated to the Guild and as soon as I saw the fabric I knew that we MUST make trees.
There were only two rules…. the finished block had to be 8 1/2 inches square and it had have a tree in it. What follows is the basic instructions I gave at the start of the day…
Wonky Tree Block Instructions:
Step One…. grab all your green scraps…and some of your brown scraps and either some white/cream solid or a collection of cream scraps.
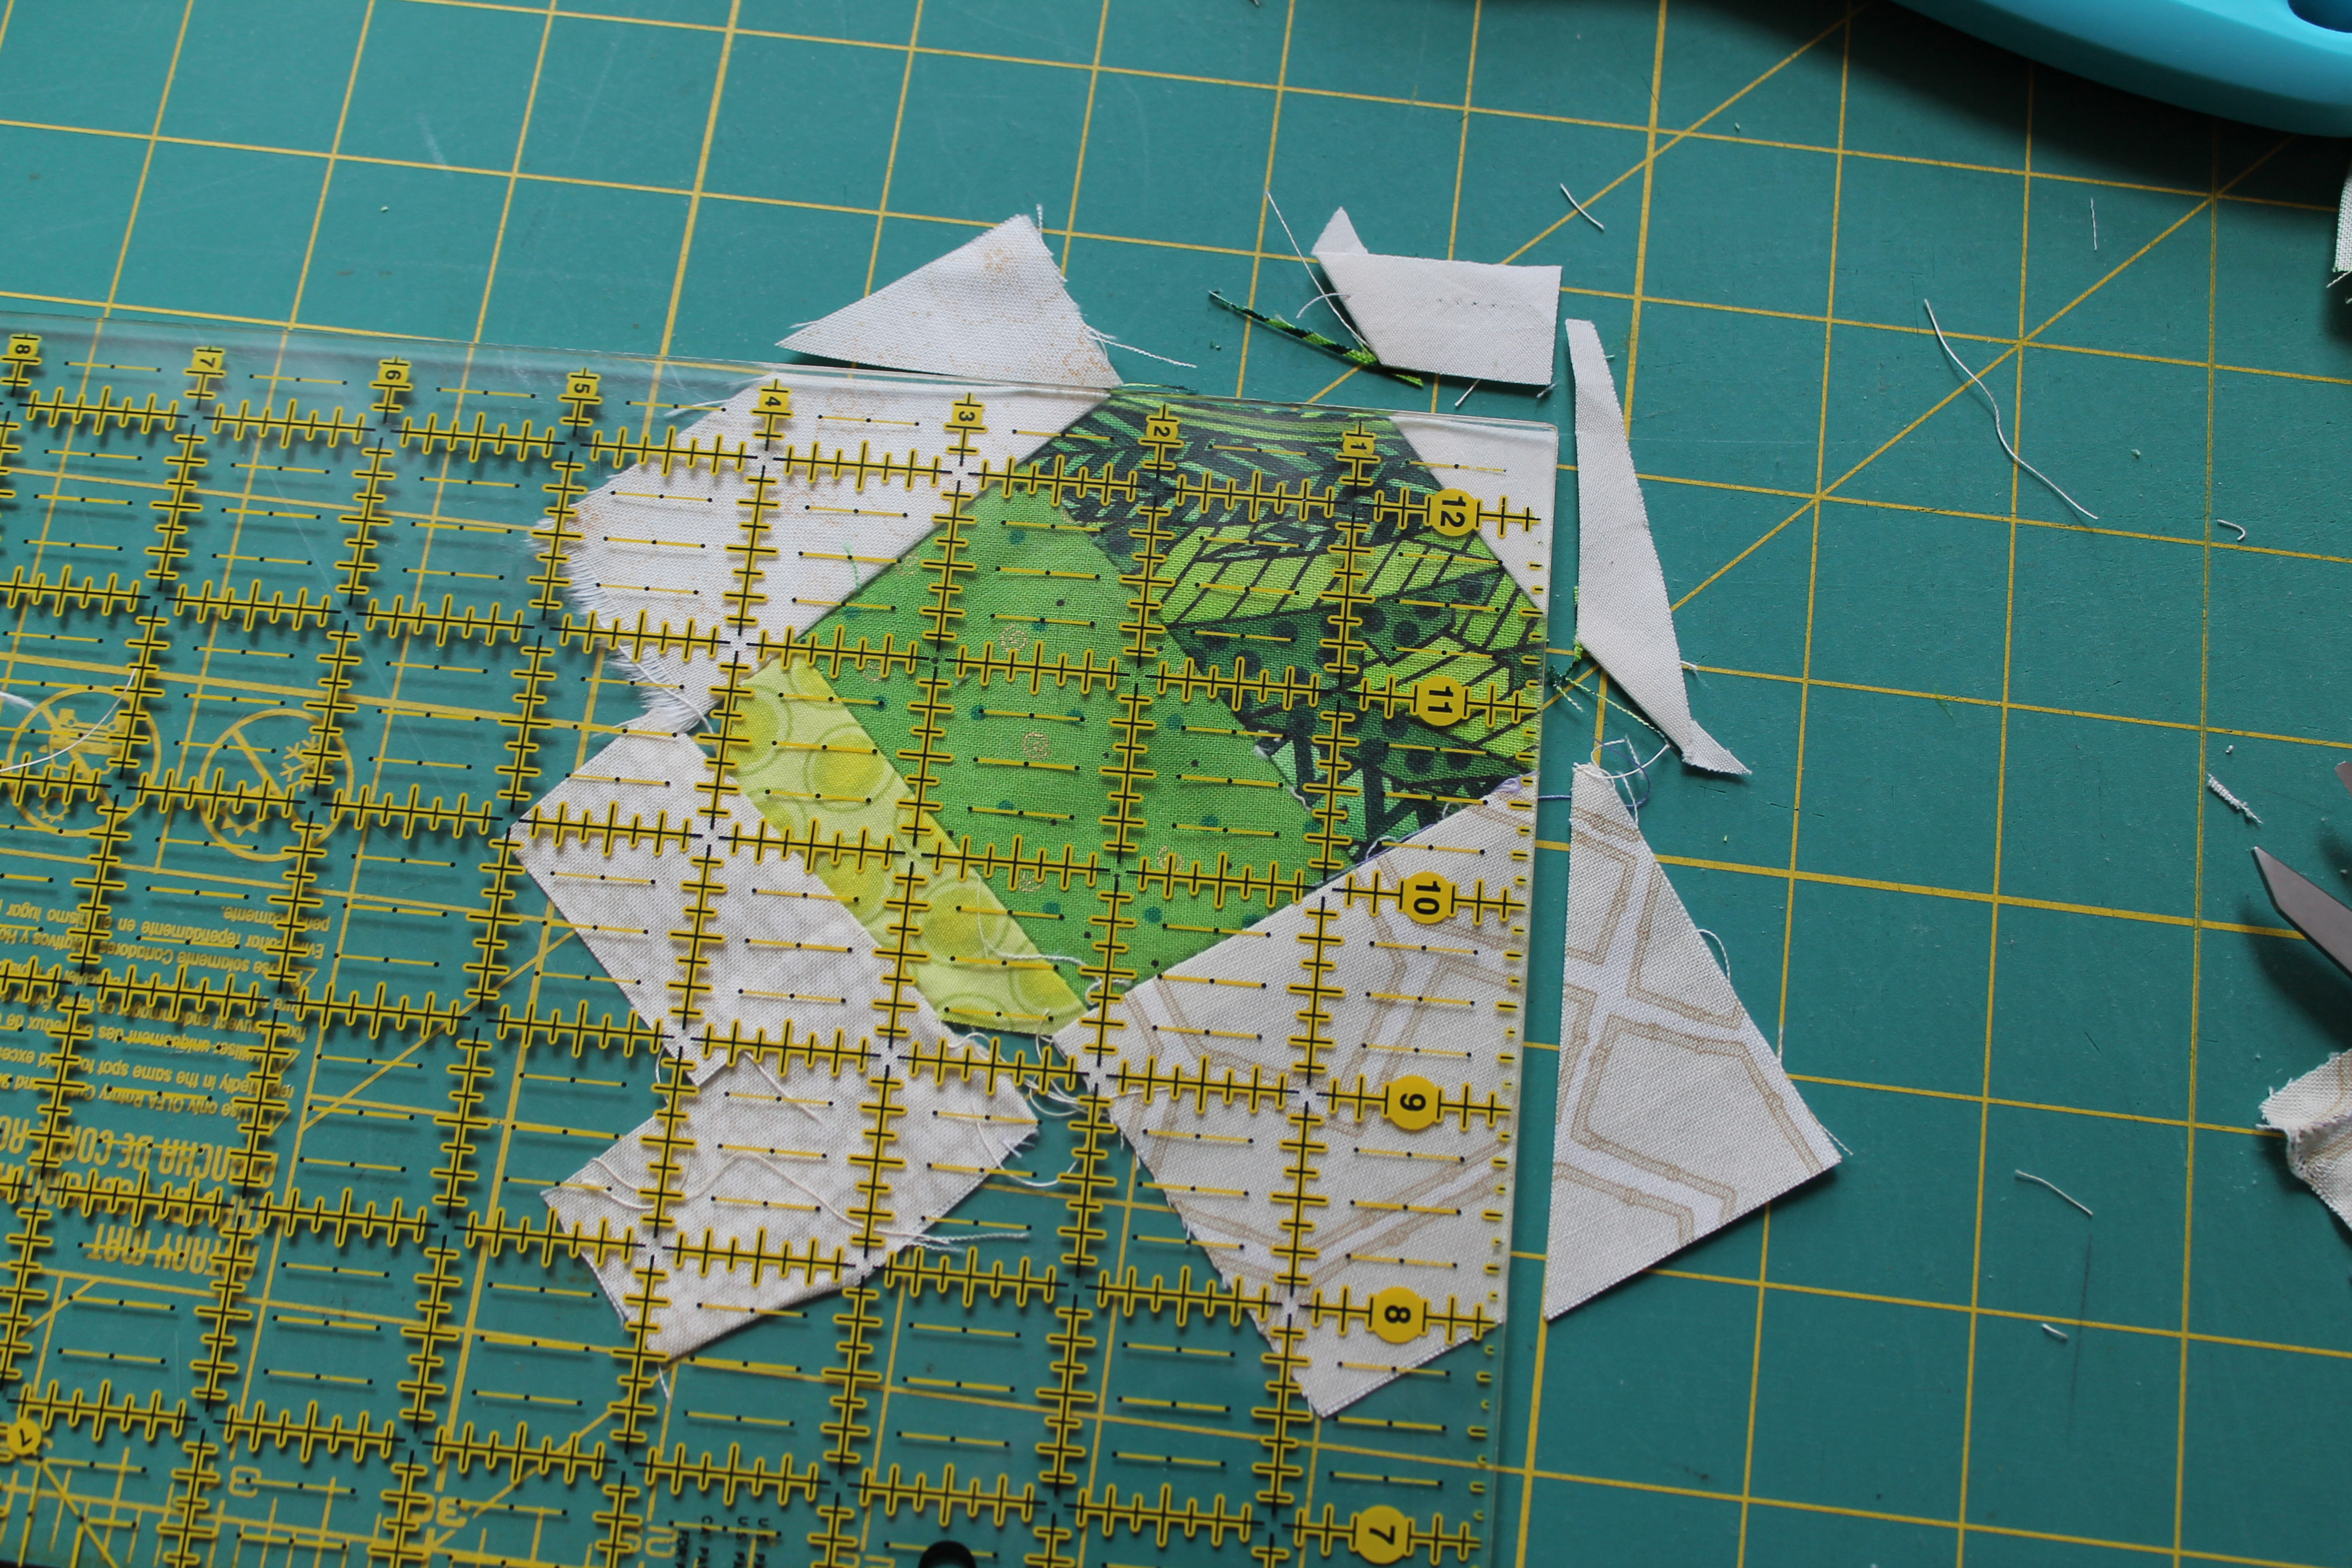
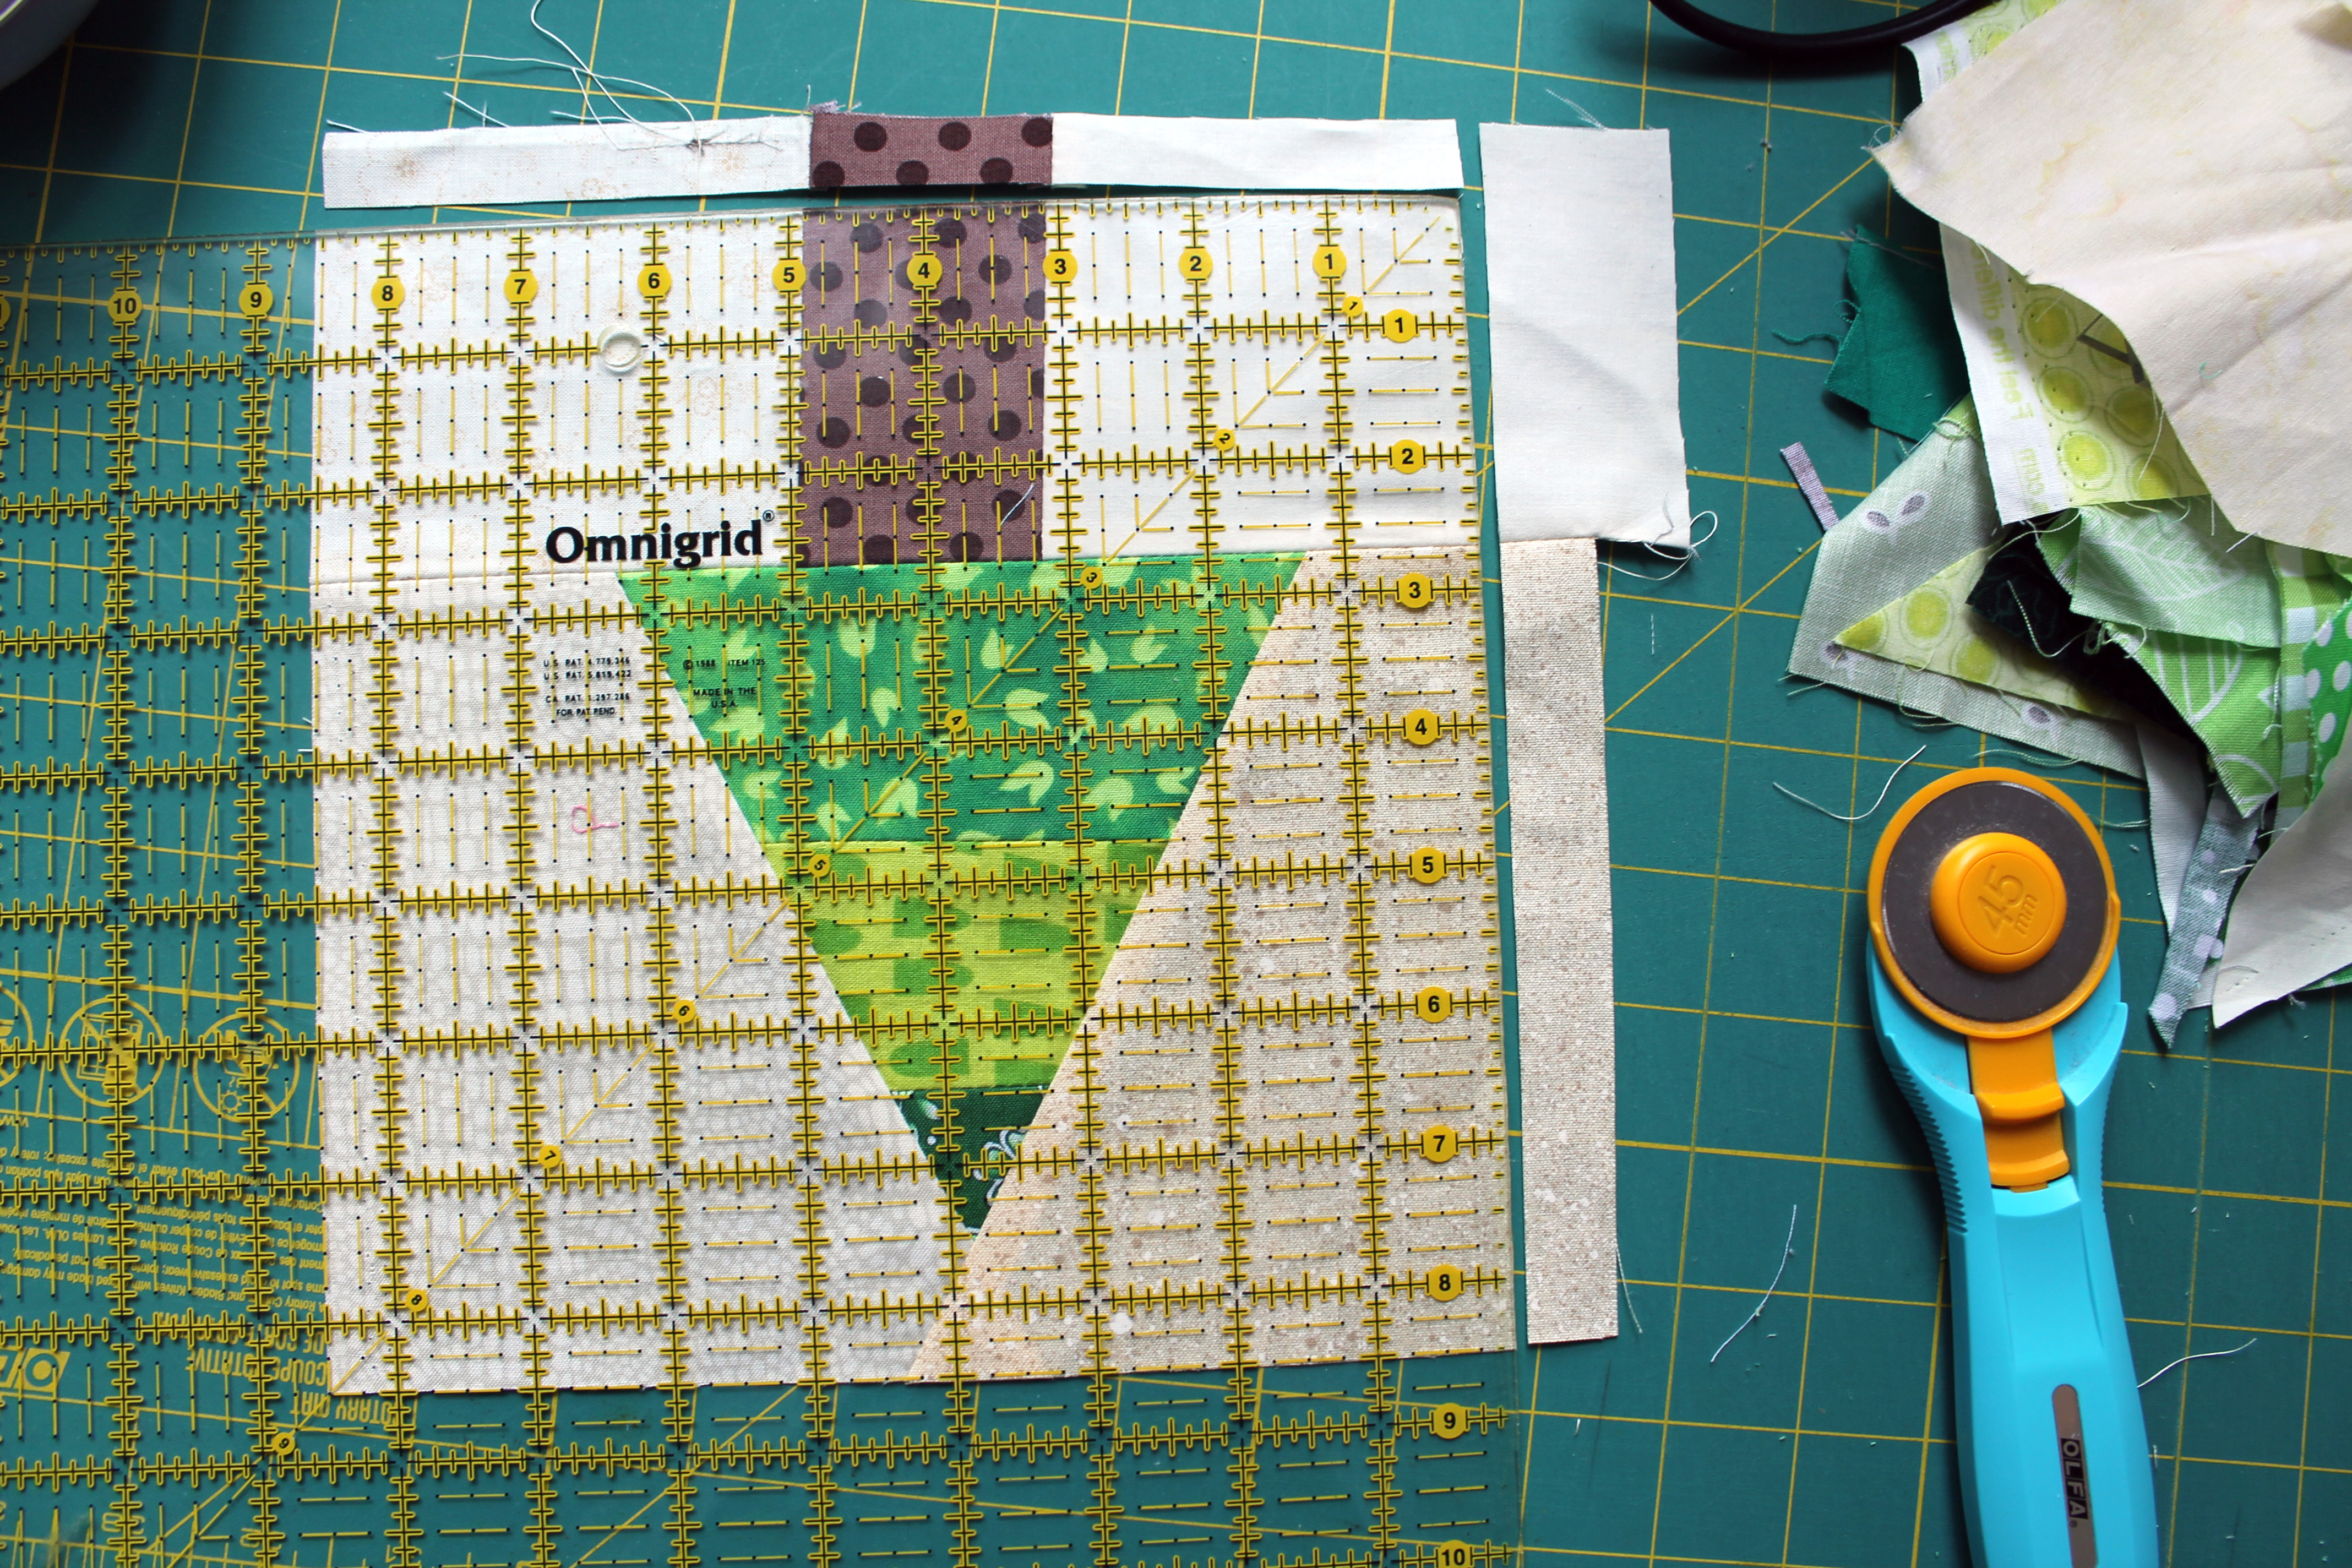
 Step Two... sew a selection of your scraps together to make a rectangle of green goodness… this is going to be your tree top so make it as big or as small as you want you tree to be.
Step Three… trim said rectangle to your desired shape. For some of our trees we used a triangle ruler…
 and for others we just made wonky oval shapes by trimming the corners of our rectangle and adding some corner background fabric….
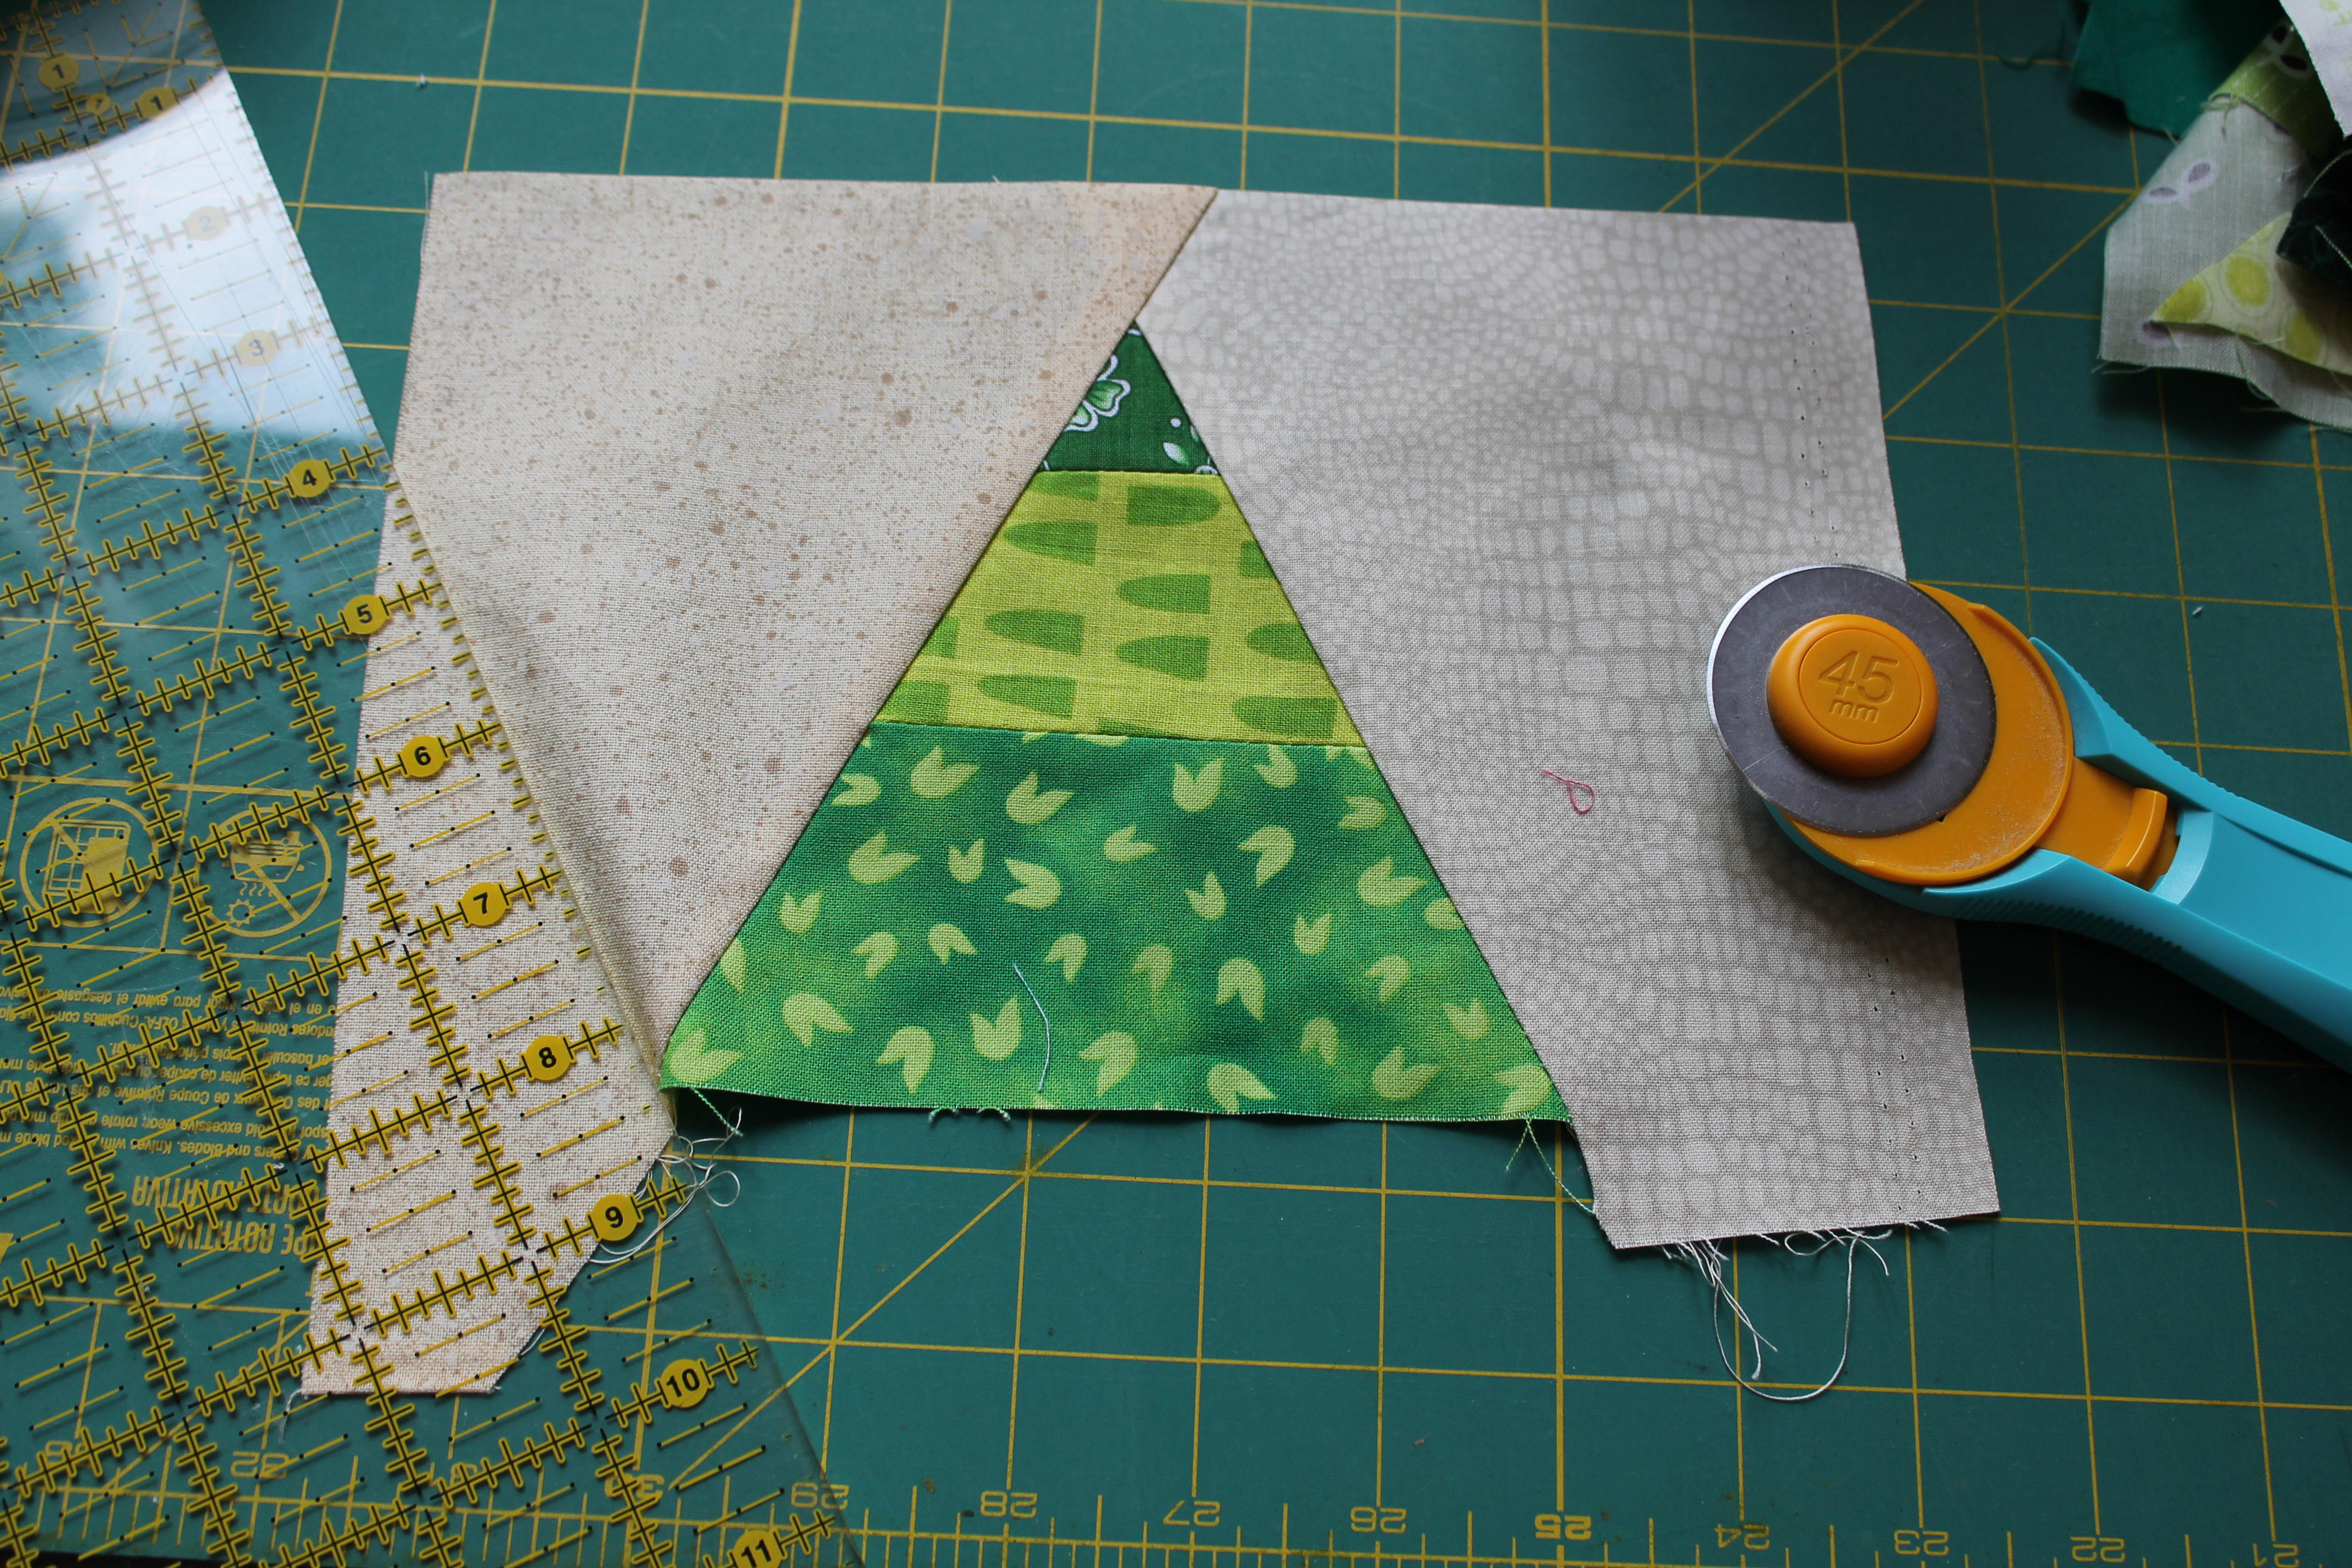
 Step Four…. add pieces of your background fabric around your tree top to make the it square and trim the bottom of your tree top so that it is straight…
 Note: You do not have to worry too much about making sure that the “sky” (background fabric) around the tree is as big as your finished block size as you have the ability to add a border to the block as needed. With the smaller trees we made the tree block up and then sashed the block out to the 8 1/2 inch square finished size (see Step Six and a half).
Step Five… Build the tree trunk by cutting a small piece of brown scrap fabric to make a suitable sized tree trunk. Remember this is wonky quilting so it can be as fat or as thin or as tall or short as you want. Sew two pieces of your background fabric to your brown strip, making sure your finished trunk piece is at least as wide as your tree top piece. Make sure that you trim the top of the tree trunk so that it is straight.
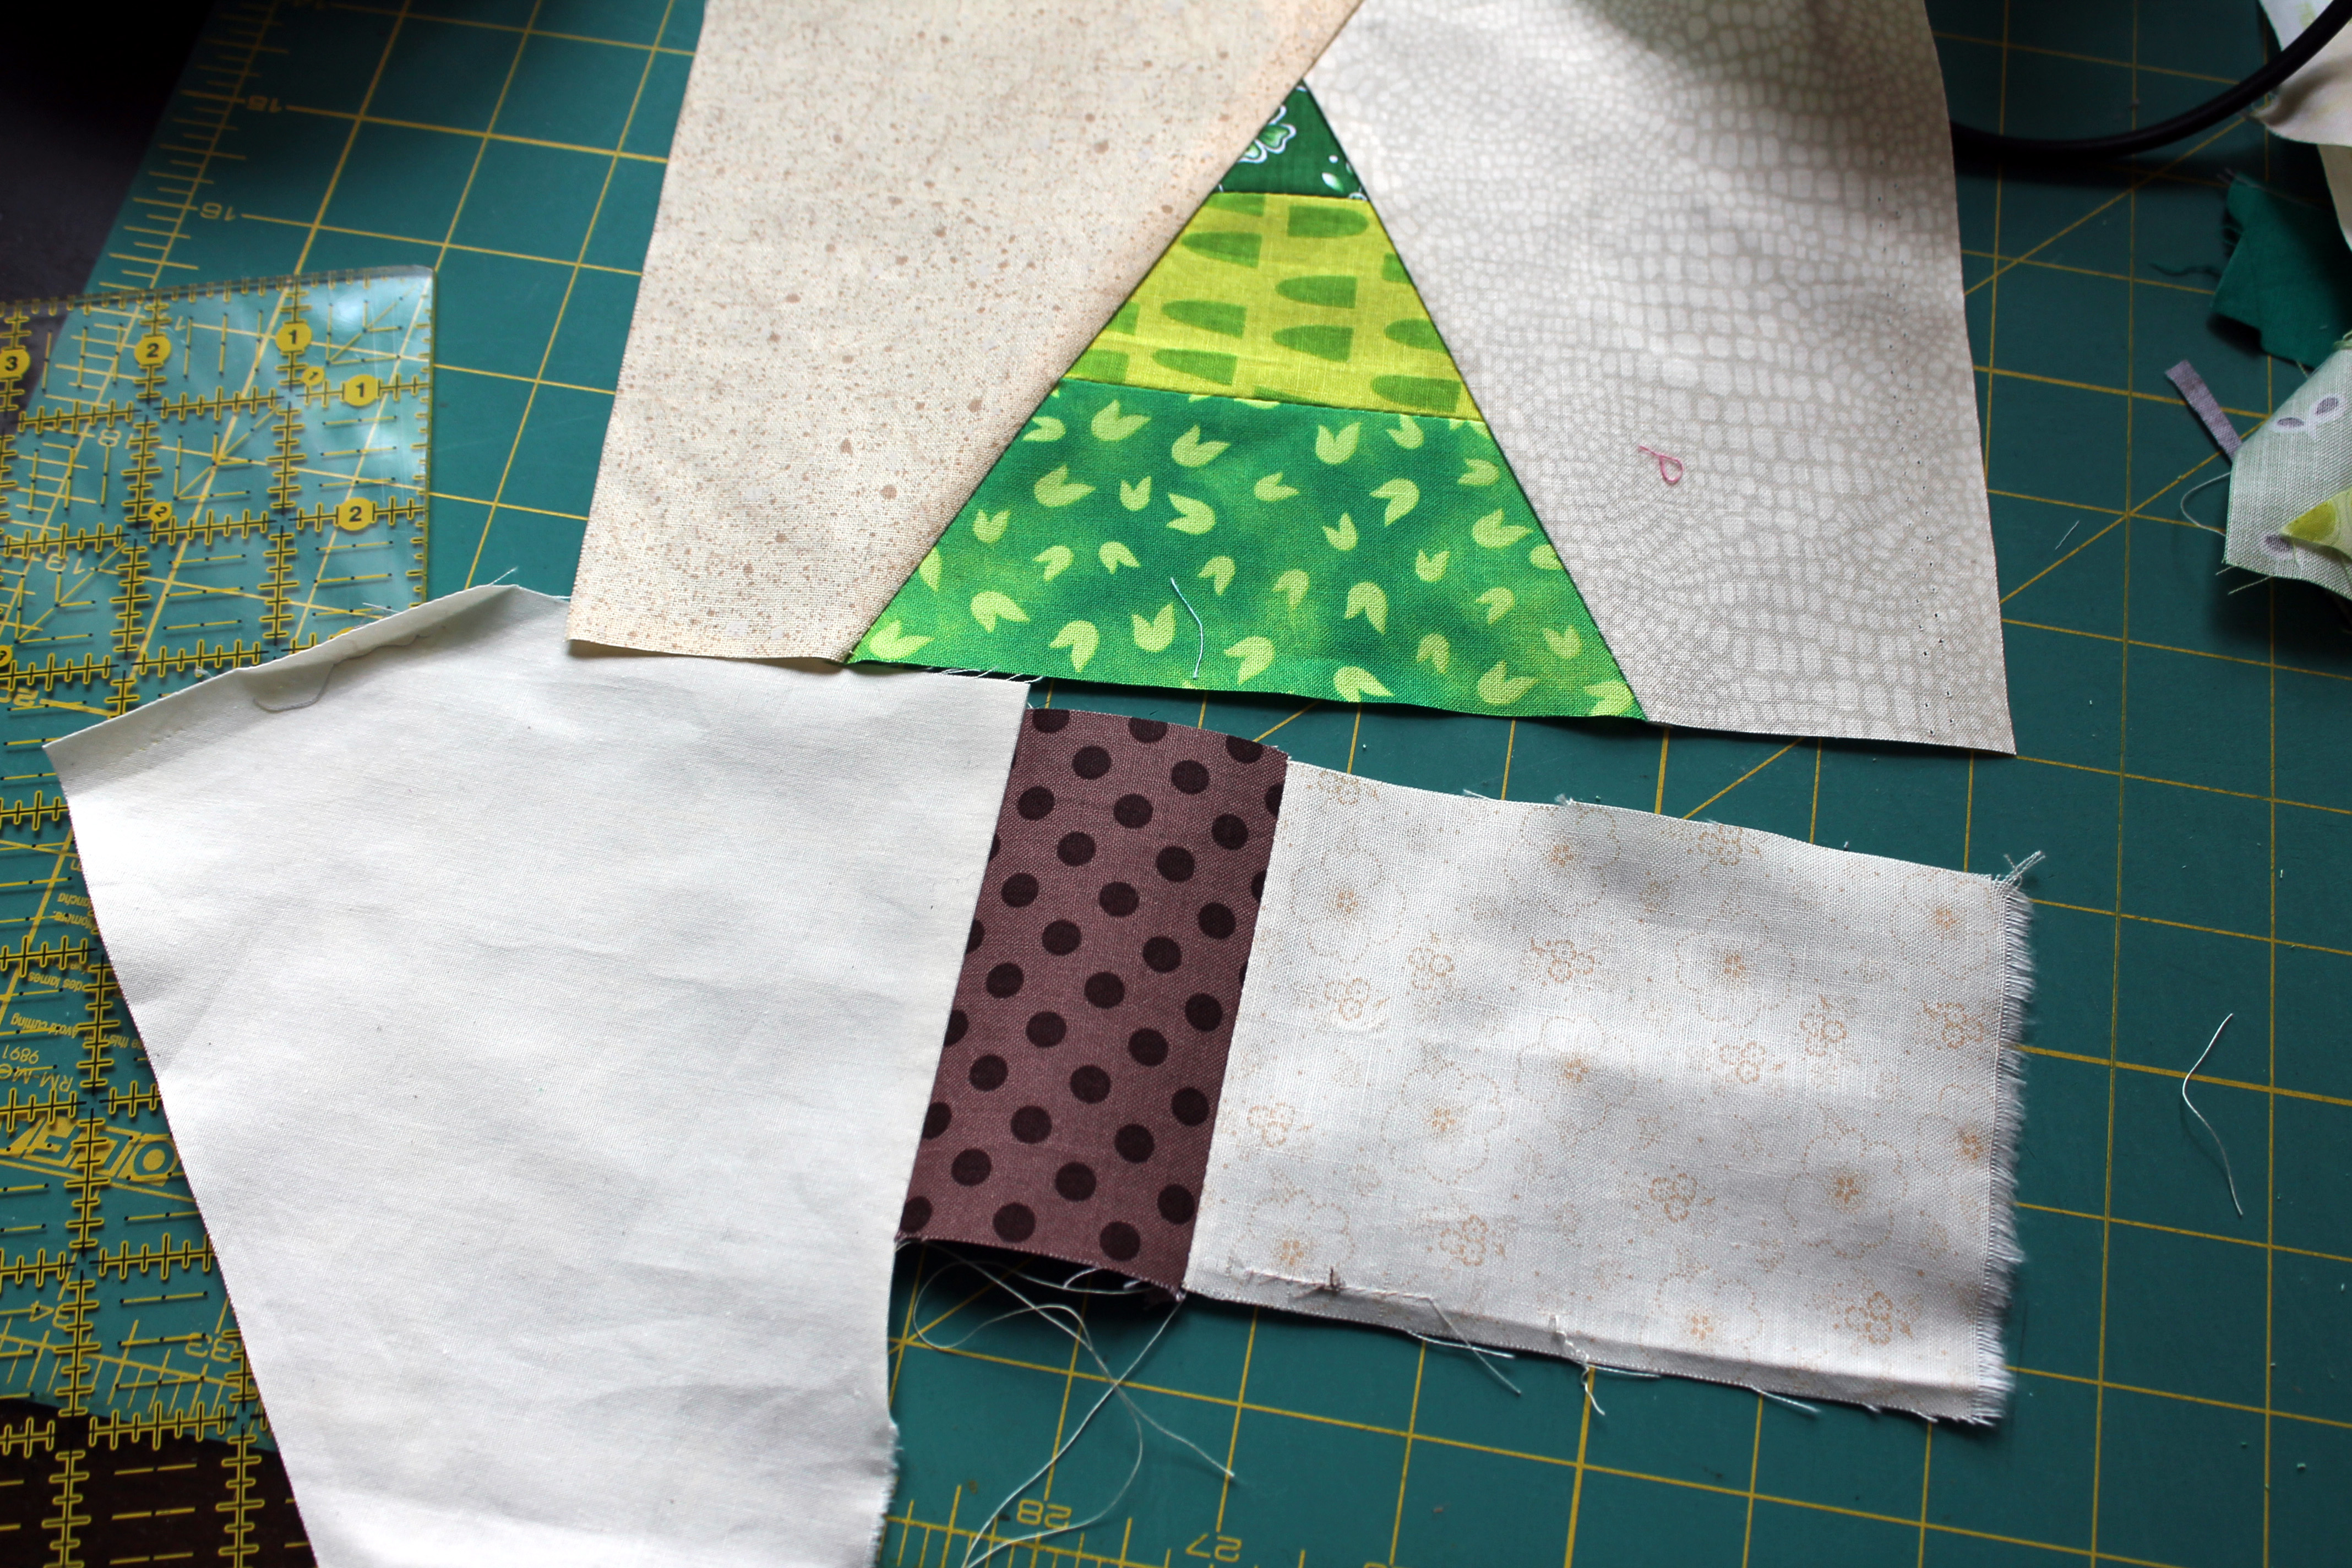 Step Six… align the trunk to your tree top and sew the two pieces together.
Step Six and a half… if you have made a small tree sash your tree block to make it the correct size.
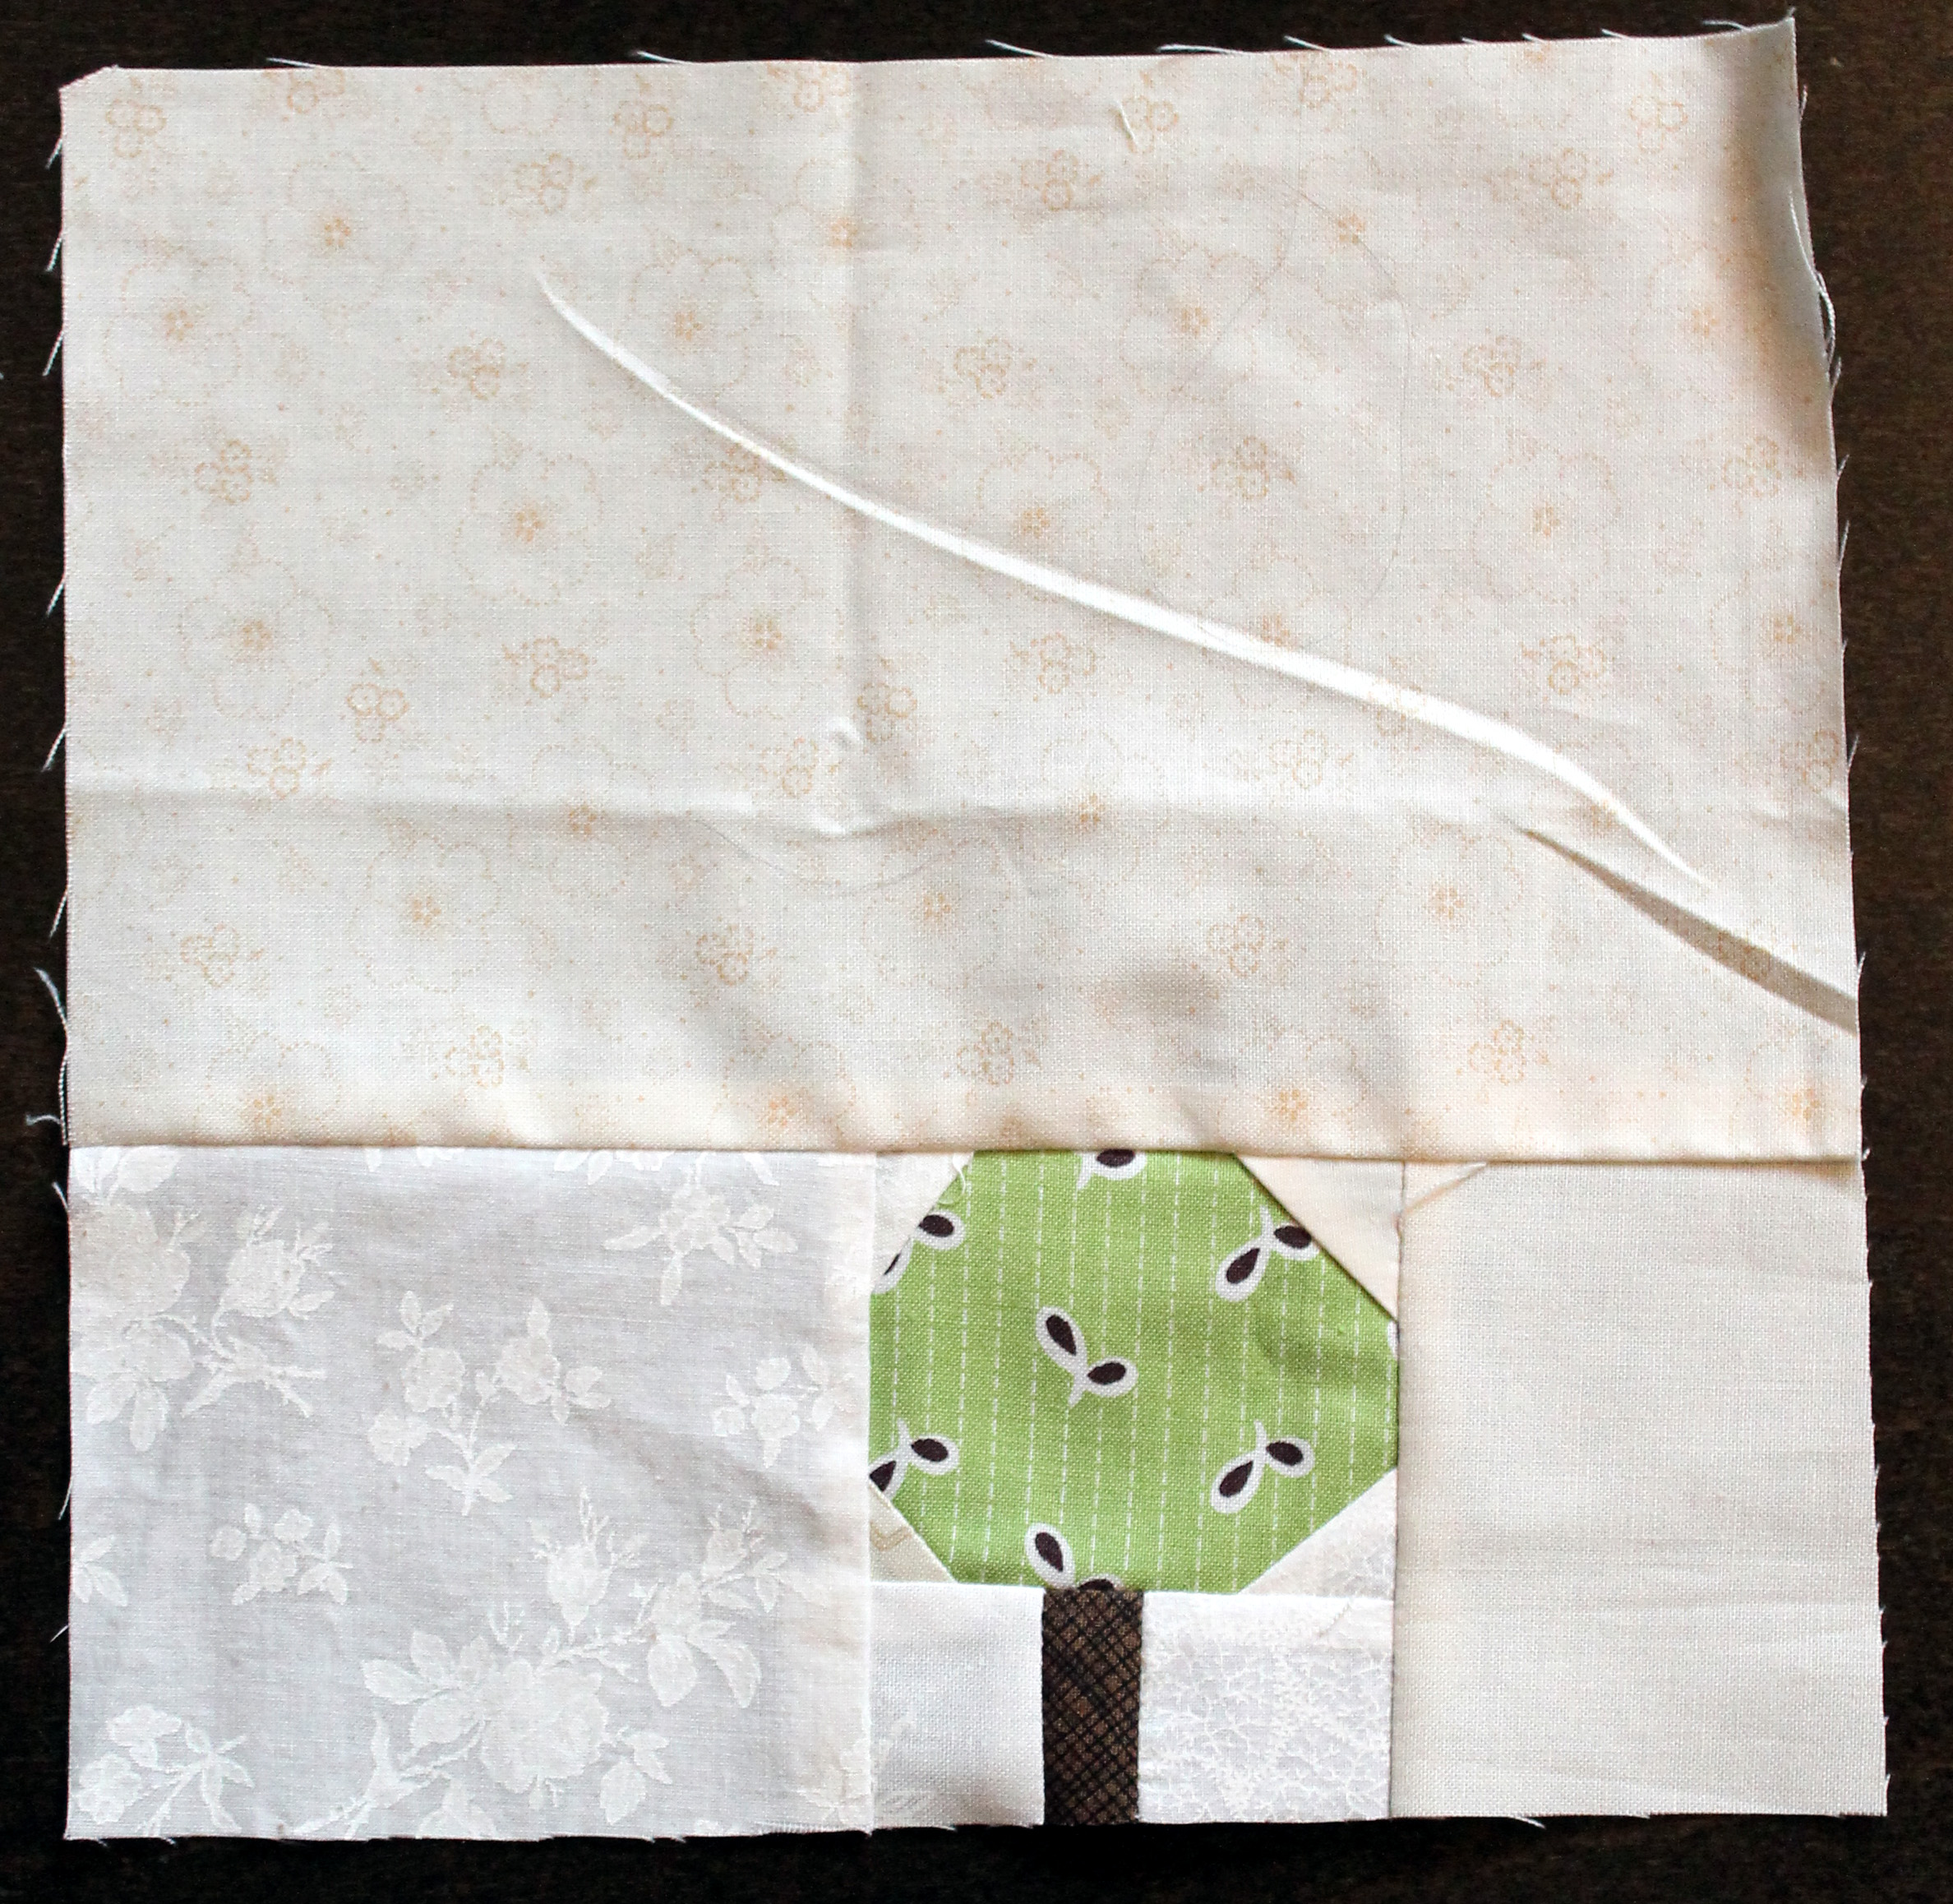 Step Seven…. Trim your block to size, we went with 8 1/2 inch square. Note: that the tree trunk ends at the bottom of the block, with no extra background fabric at the bottom. I found that having all the trunks at the bottom of the block made the overall look of the pieced quilt cleaner and more uniformed.
 And voila you have a wonky tree block….
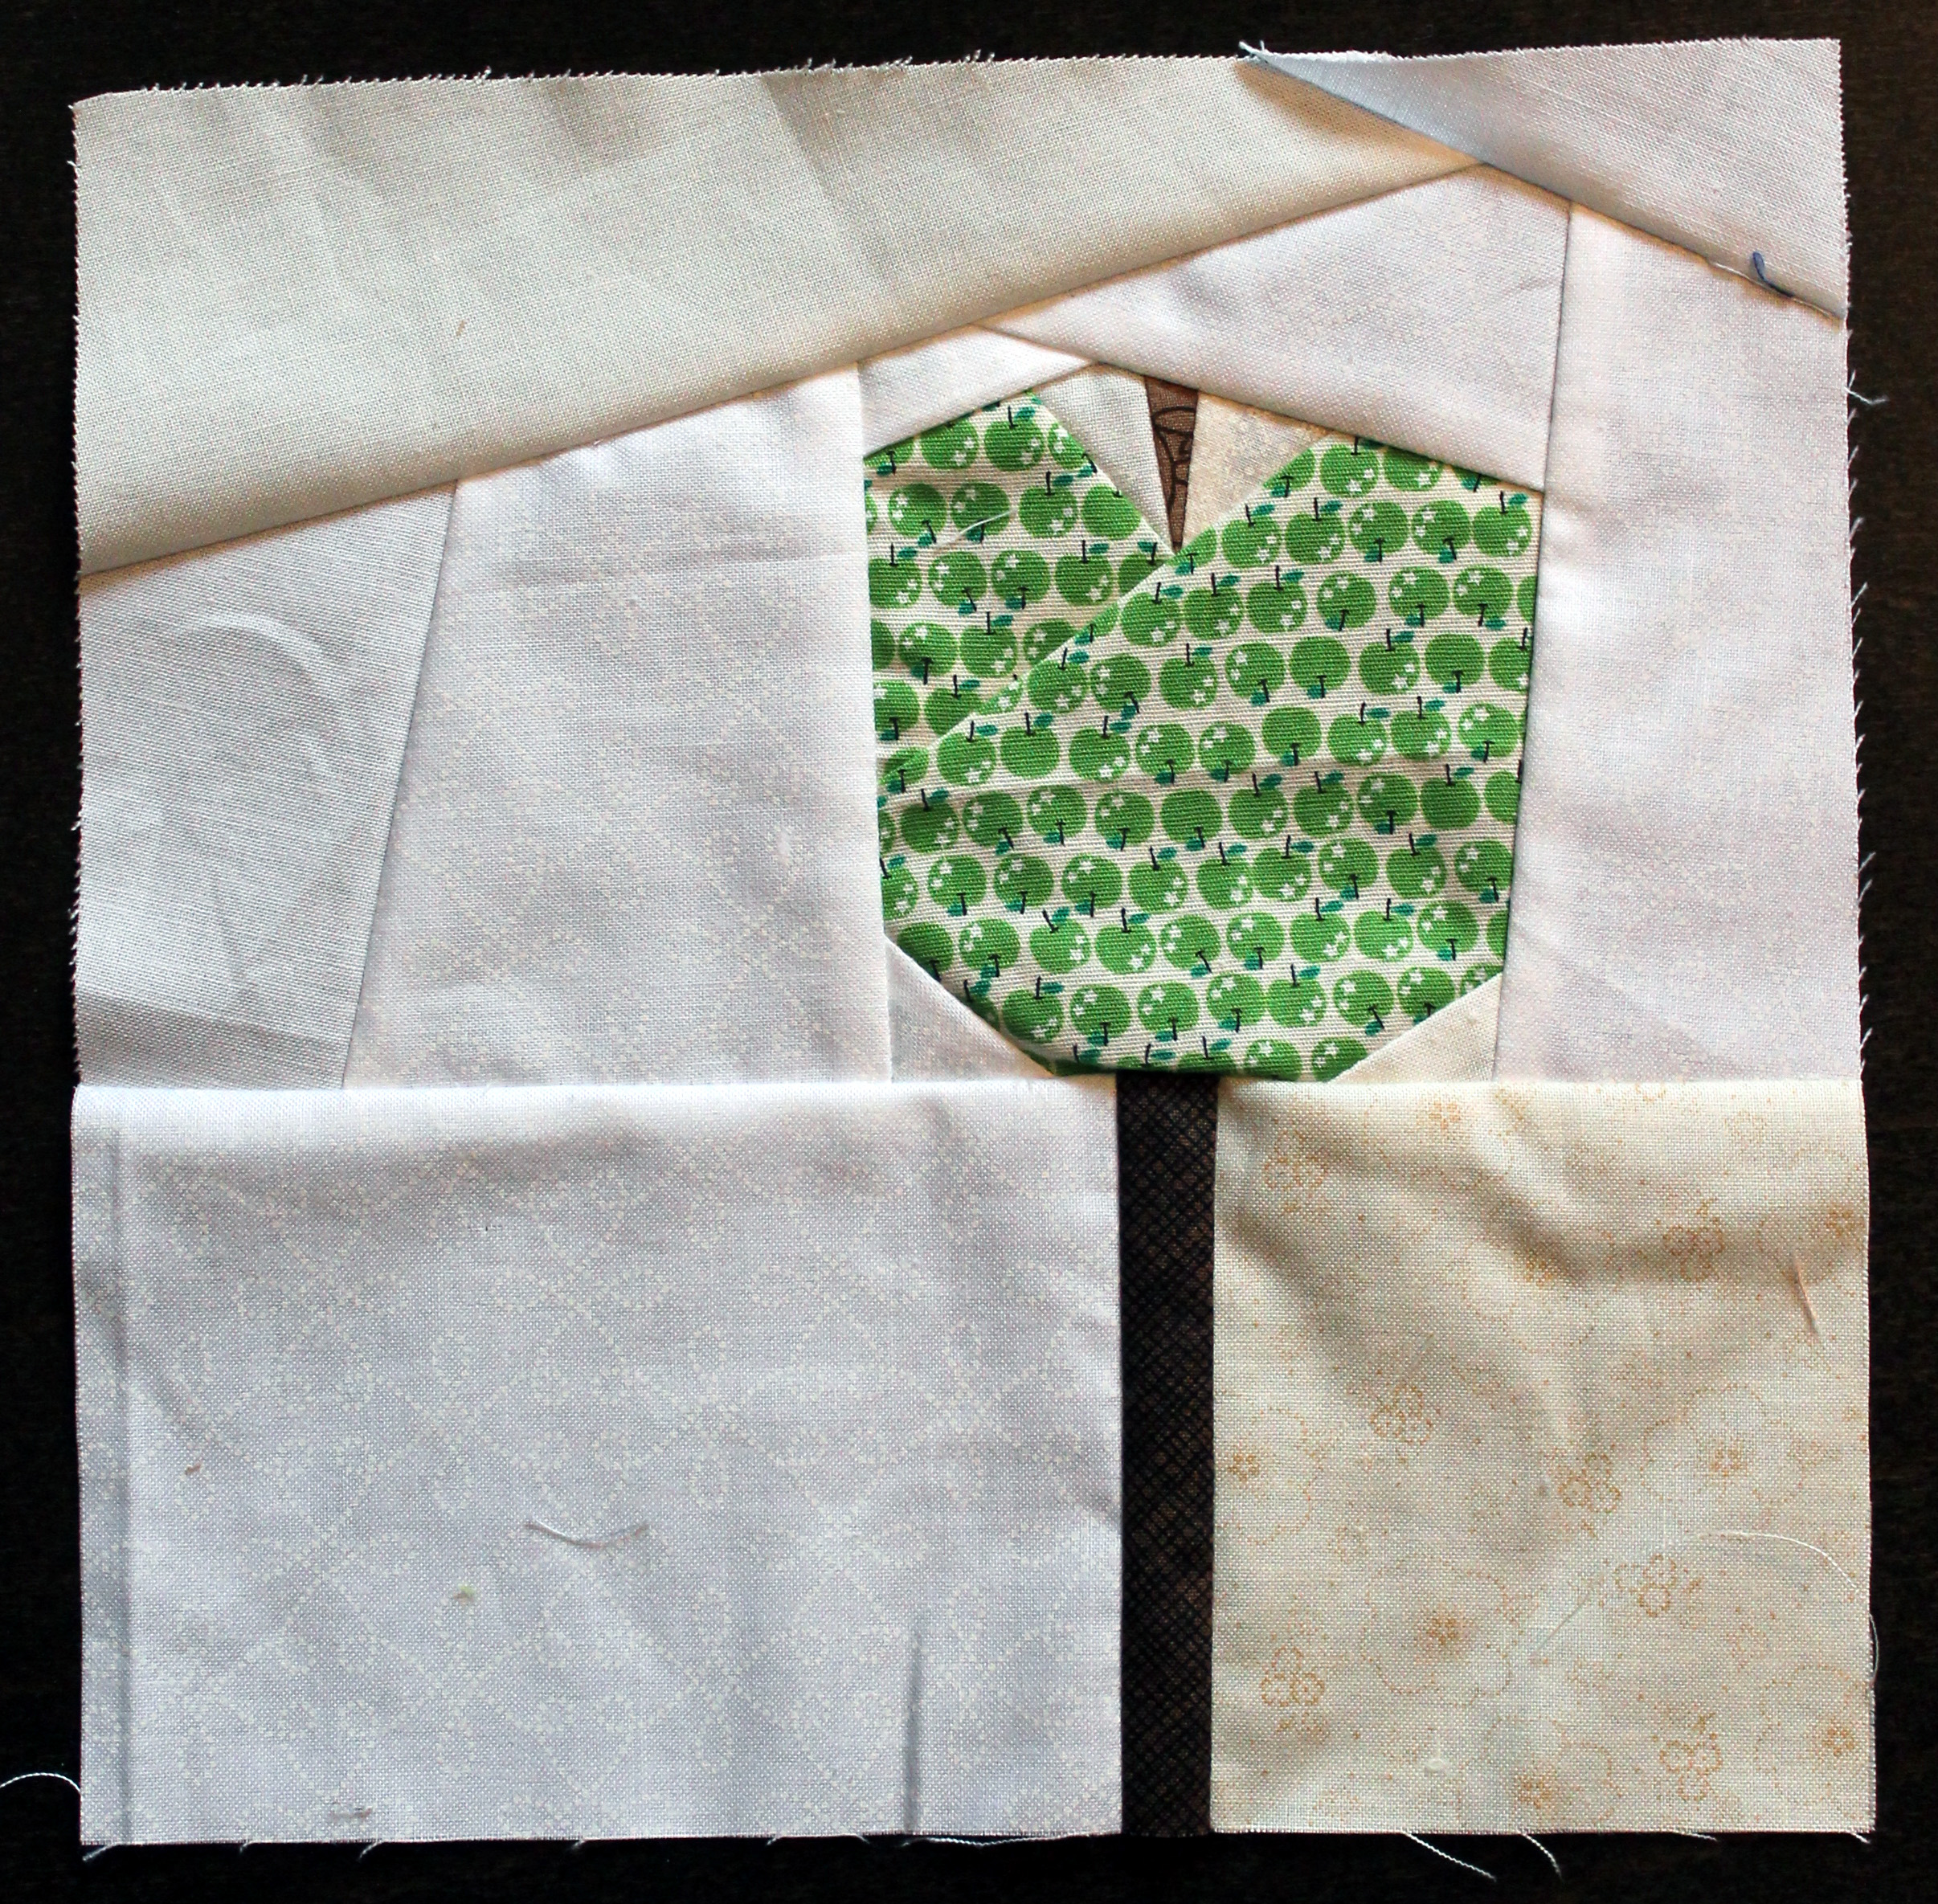
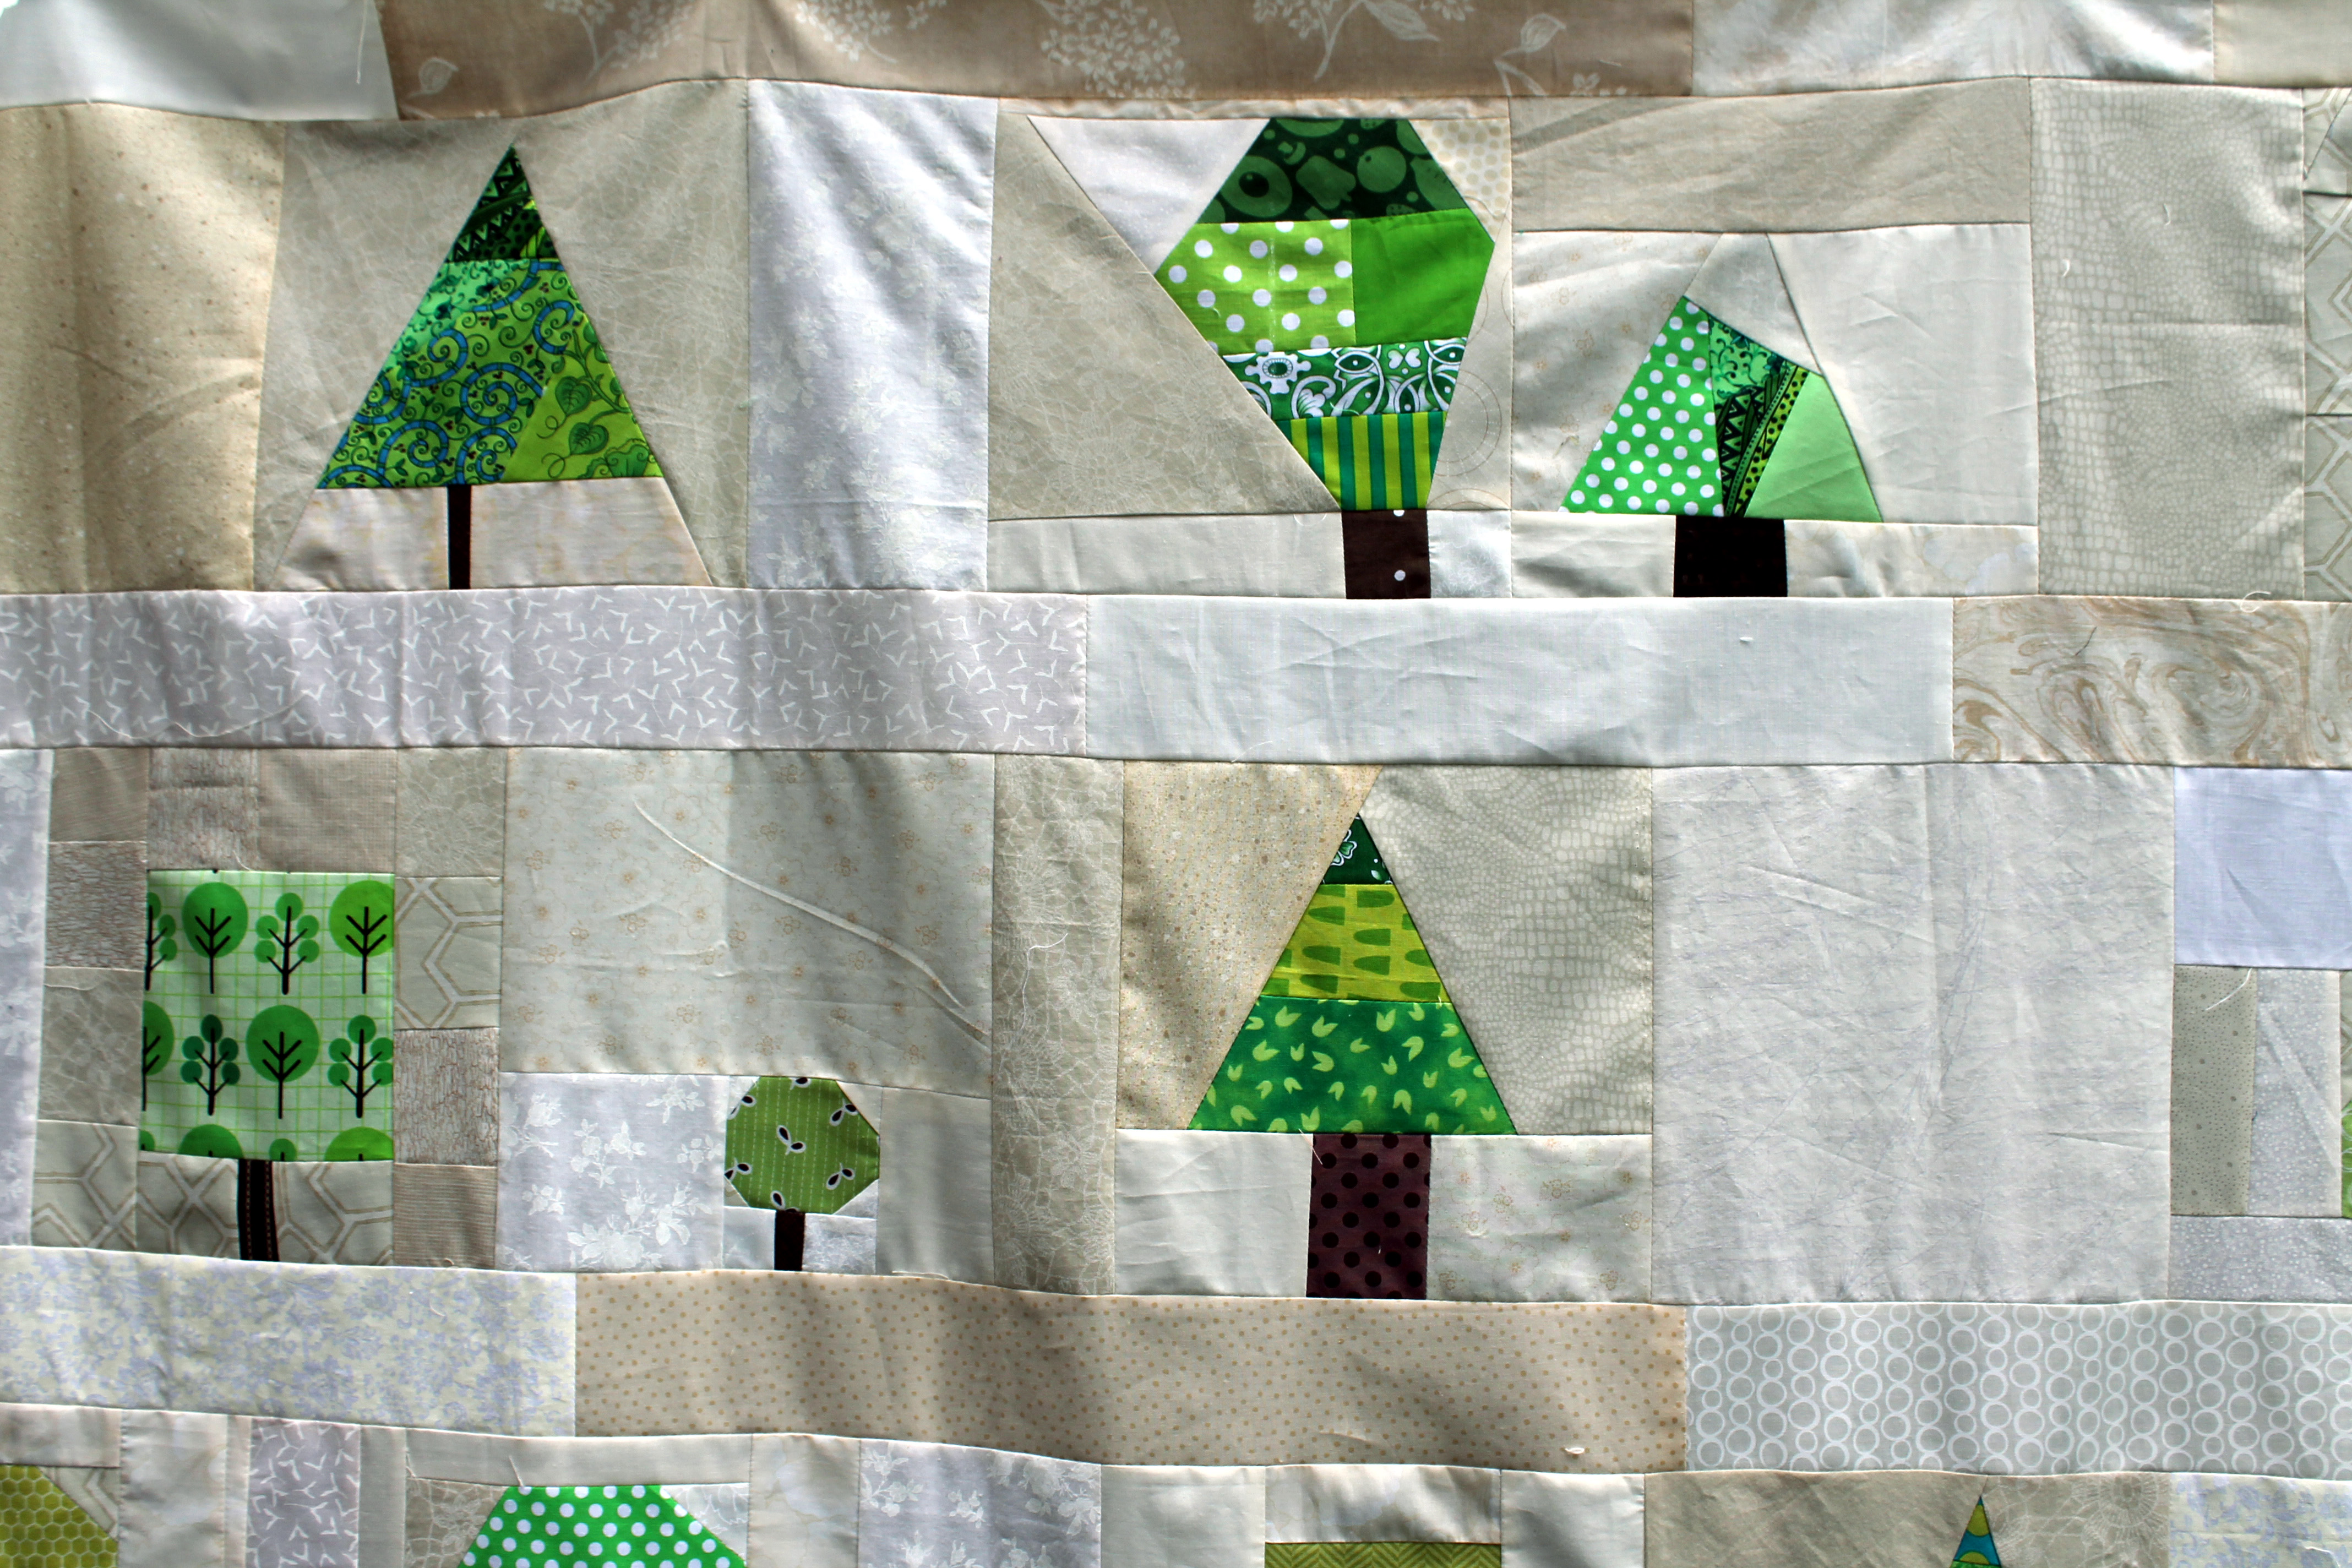 At the end of our day of sewing we had a veritable forest of different type of trees. Everyone embraced the wonky and the freedom to do whatever took their fancy. My favorite creation of the day was the Apple Tree…
 It was so much fun putting the final quilt top together, there were so many fabulous blocks to choose from and I spent a good hour or so re-arranging the forest on my design wall.
 When piecing the top together I used cream scraps cut into 8 1/2 square blocks and 4 1/2 x 8/12 inch strips to space out the trees. From playing with the layout on the design wall I knew I did not want to put all the trees together in one clump. I then added a 3 inch sashing of cream scraps between each row of trees.
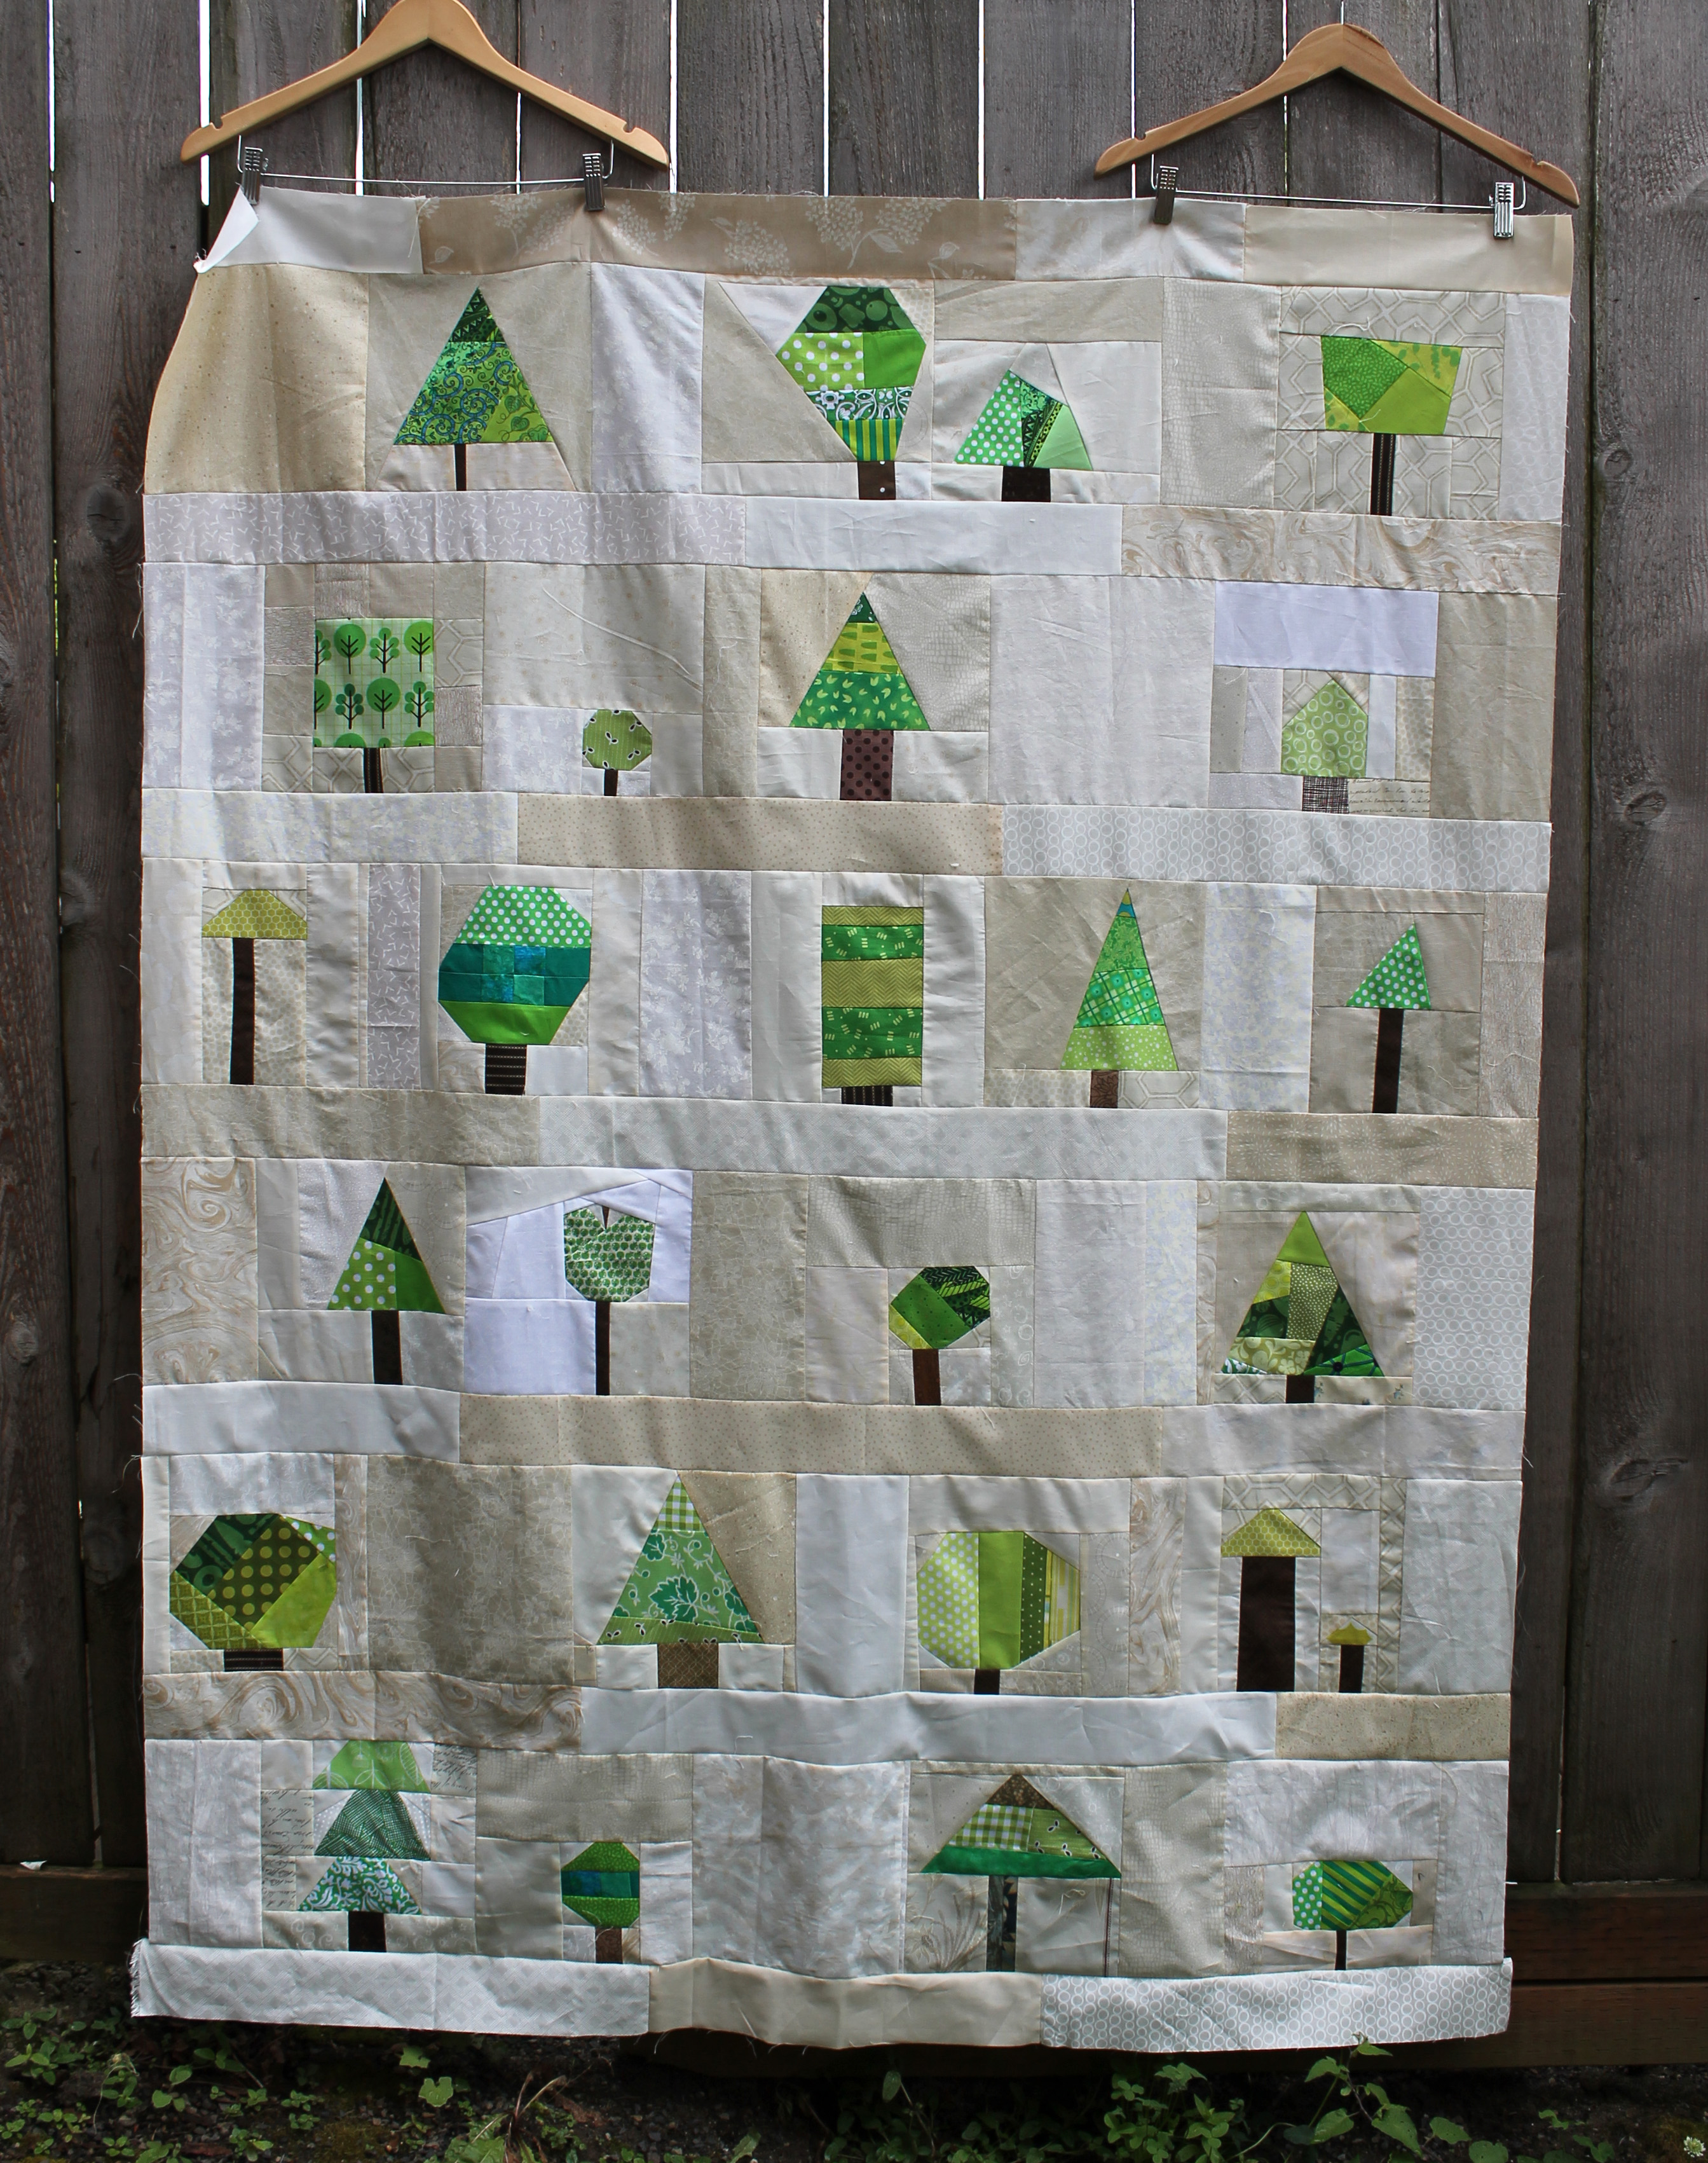 I am so pleased with how this top turned out. There is a sense of fun and silliness to the trees…everyone did such a stellar job and no two trees are alike.

Now our forest is being handed off to one of the Guild’s talented longarmers for quilting. I can not wait to see how they handle this one.

Sorry in advance…. Wooden it be nice if the longarm quilter gave you a wood grain or bark type pattern? This is such a sweet quilt, and you all clearly had heaps of fun!
Kate you pun like my husband. You two are going to get on swimmingly. Lol.
Wow! What a cool forest of trees! It’s awesome.
Those trees are so great, and they make for such a cute quilt top!
I want to make one now!
They are so easy, fun and foolproof. I can highly recommend wonky trees. In my head I said this statement in a monotone voice kind of like on of those spoke people but I mean it really.
Love it!
I love it! It looks awesome 🙂
I adore this!!! Living against the Olympic Rain Forest, to say nothing of being in the Pacific Northwest, makes me want to do this – or at the very least make throw pillows. Thanks for the blow-by-blow on it – wonderful!!!
That is so fun! What a cool idea – nice thinking.
This looks like so much fun to make. I want to do it, too!
Ooh I love how you put it together, Cath! Great job! I still love my chubby tree, lol!
Oh your chubby tree rocks… It was really great fun putting this together and getting to see first hand what people had created.
Hi Cath! This is fantastic! I love all the improvised cute trees and absolutely want to make one! Thank you for inspiration! x Teje
Teje it really is freeing and such great fun. I can highly recommend making a forest.
OK, this one is so beautifully simple looking but so complex… I am IN LOVE with it!! Can I get one for a king size bed!? hehehe!
If you ask really nicely…or have Max ask. Either way will work. Lol.
Lovely trees. I like all wonky things.
What a great group quilt idea! My favorite is the apple tree. He he. It’s too cute.
P.S. You have an extra u in “tutorial” in the post title.
Thanks for the heads up about my bad spelling. I used to have it edit for a living and spell check has completely ruined me.
What a great idea and fun! I think this would be a good “bee” quilt too! I love that it is scrappy and each block is SO unique! I am filing away this idea for someday! THANKS!
The trees make a super quilt top. I love it. I can’t wait to see it quilted.
Hi Cath! I just picked up this quilt top tonight, and I really love it! But I wanted to clarify that I am NOT a talented long-arm quilter–I am just a mediocre home machine quilter. I will do my best, and I think that will do, but if you want to take it back and give it to someone with more expertise, I completely understand!
Amber Your best will be perfect and fabulous. Thank you so much for quilting this top.
You had me at wonky, in need of something fun and think your great tutorial, this way I cant see the wood for the trees 😉
Too funny… I love a good pun.
This is such a clever little quilt! Can’t wait to see it all quilted and bound!
Super cute quilt top! Love all the variety in the fabrics and types of trees! Awesome job 🙂
refreshingly stunning and fun looking 🙂
What a great idea for a group project! I can see this in my future. Your group did a fantastic job. I love it!
Brilliant idea for a group project. I always find it is much better to embrace a group’s wonkiness and differences and take them to the extreme than try to make everyone do the same thing (as no two will ever match).
Wow, this is fabulous!! I will have to keep this idea as I keep on buying more and more green fabric!! I’d love my own wonky forest 🙂
Love it! I wasn’t able to make it to that particular charity sew day. Forest Park might be a fun name for this one.
Love the name. It is perfect.
I’m going to suggest this as a block of the month for the Victoria MQG — very Pacific northwest, and also what a great way to use up the non modern looking stashes some of us have!
Great wonky tree quilt, your group did a wonderful job.
Pingback: Just one tree in the forest… | WOMBAT QUILTS