Oh what a week

After last week’s spring clean I felt so refreshed and energized, and it is reflected in the fun I have had this week.  The highlight of the week has to have been having Jacquie Gering of Tallgrass Prairie Studios talk at the Portland Modern Quilt Guild.  I love the freedom of Jacquie’s quilts and am sooo inspired by seeing her quilts in person and hearing her talk.  I can not wait to cut my poppy quilt up and try to make something modern and different from it.  Stay tuned.

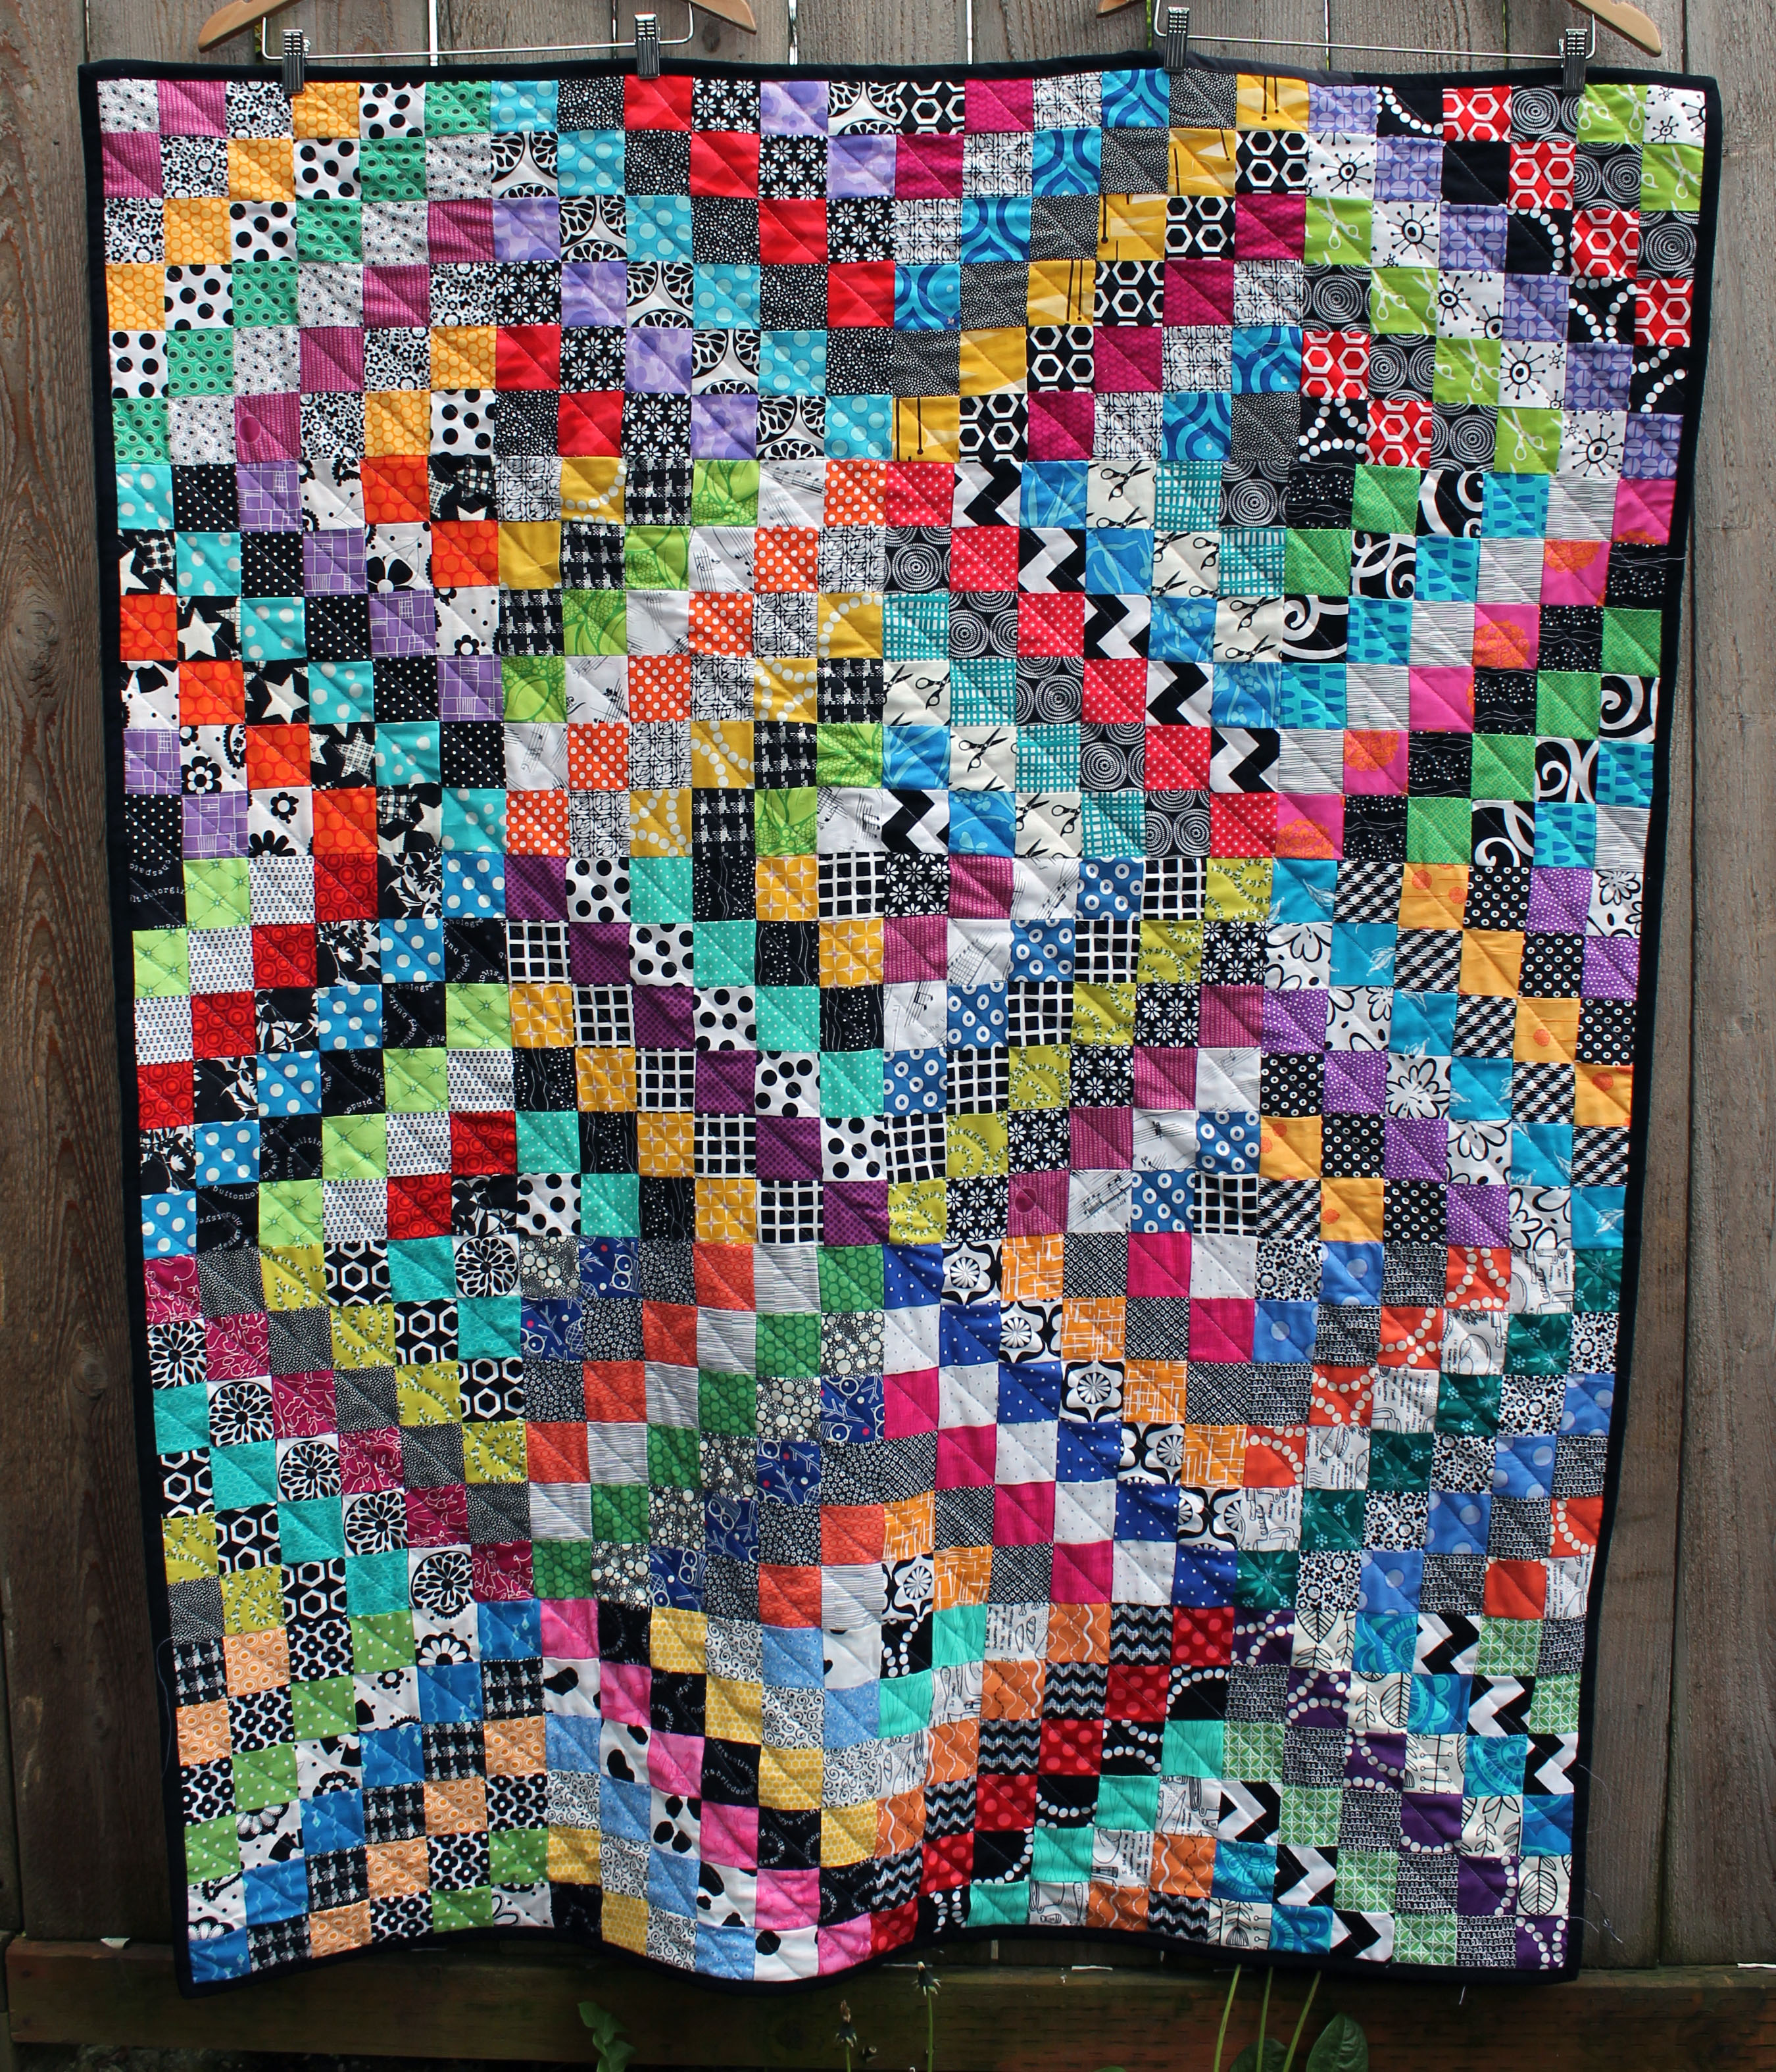
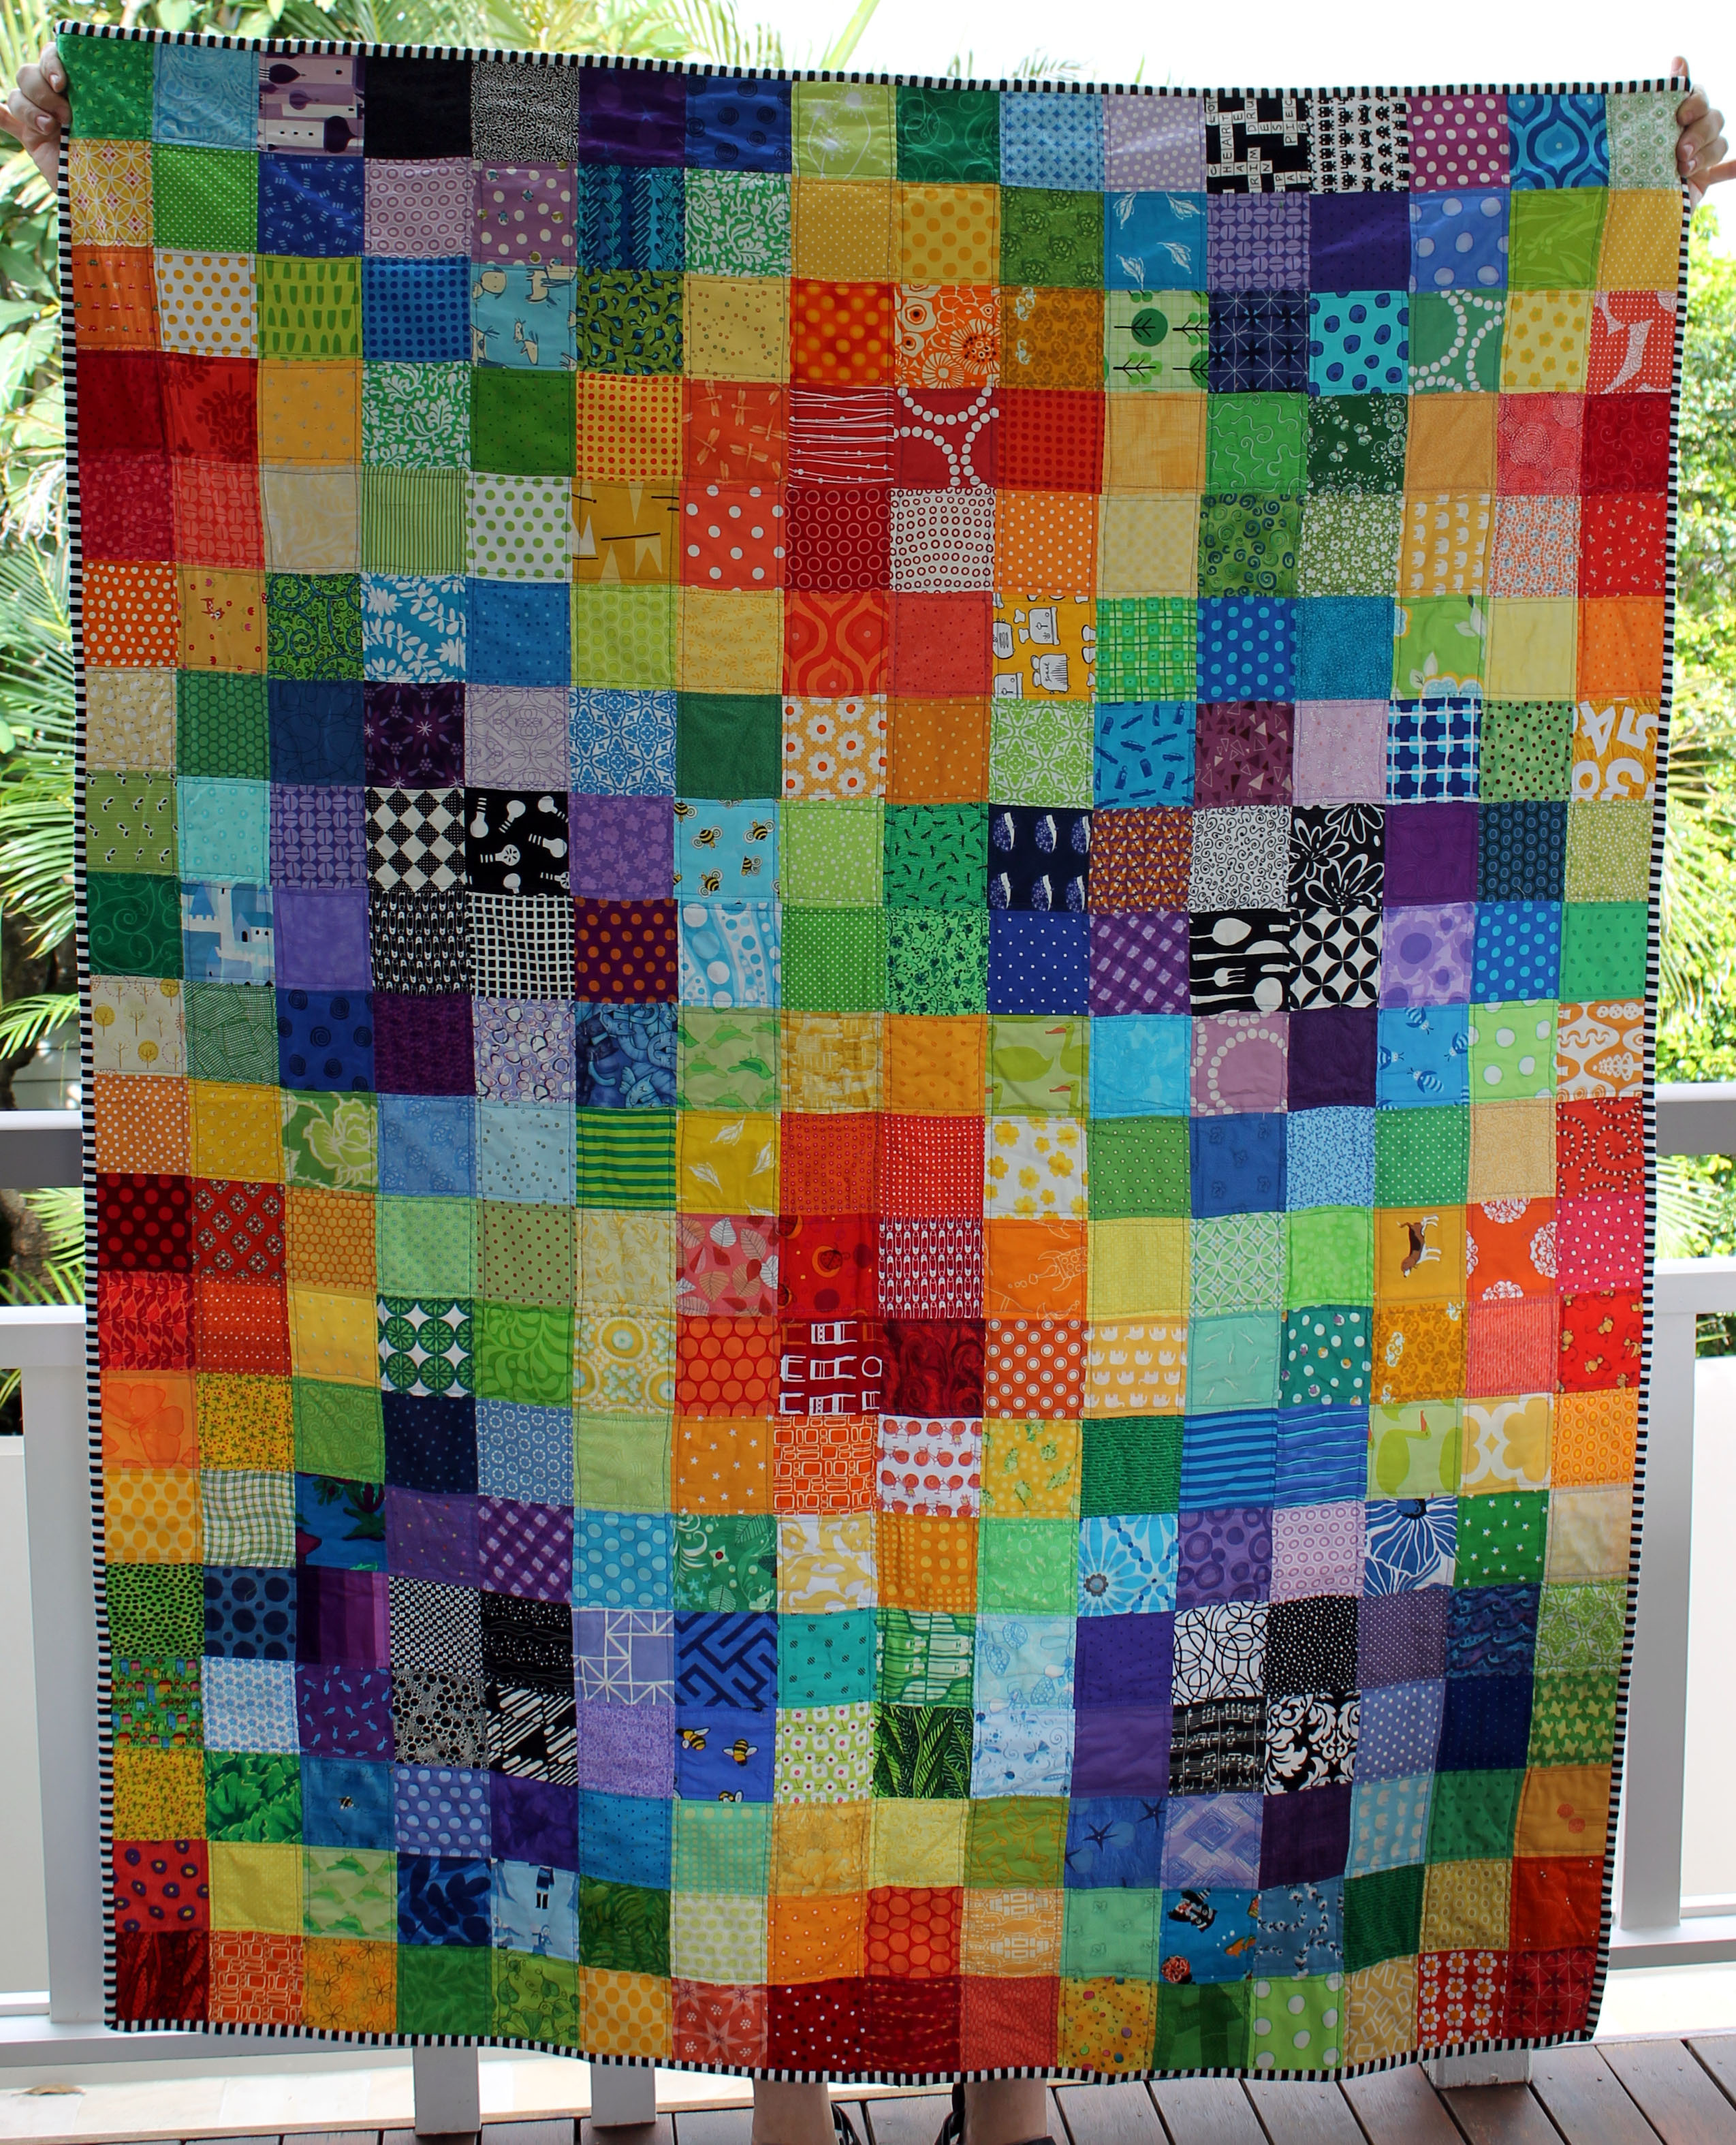
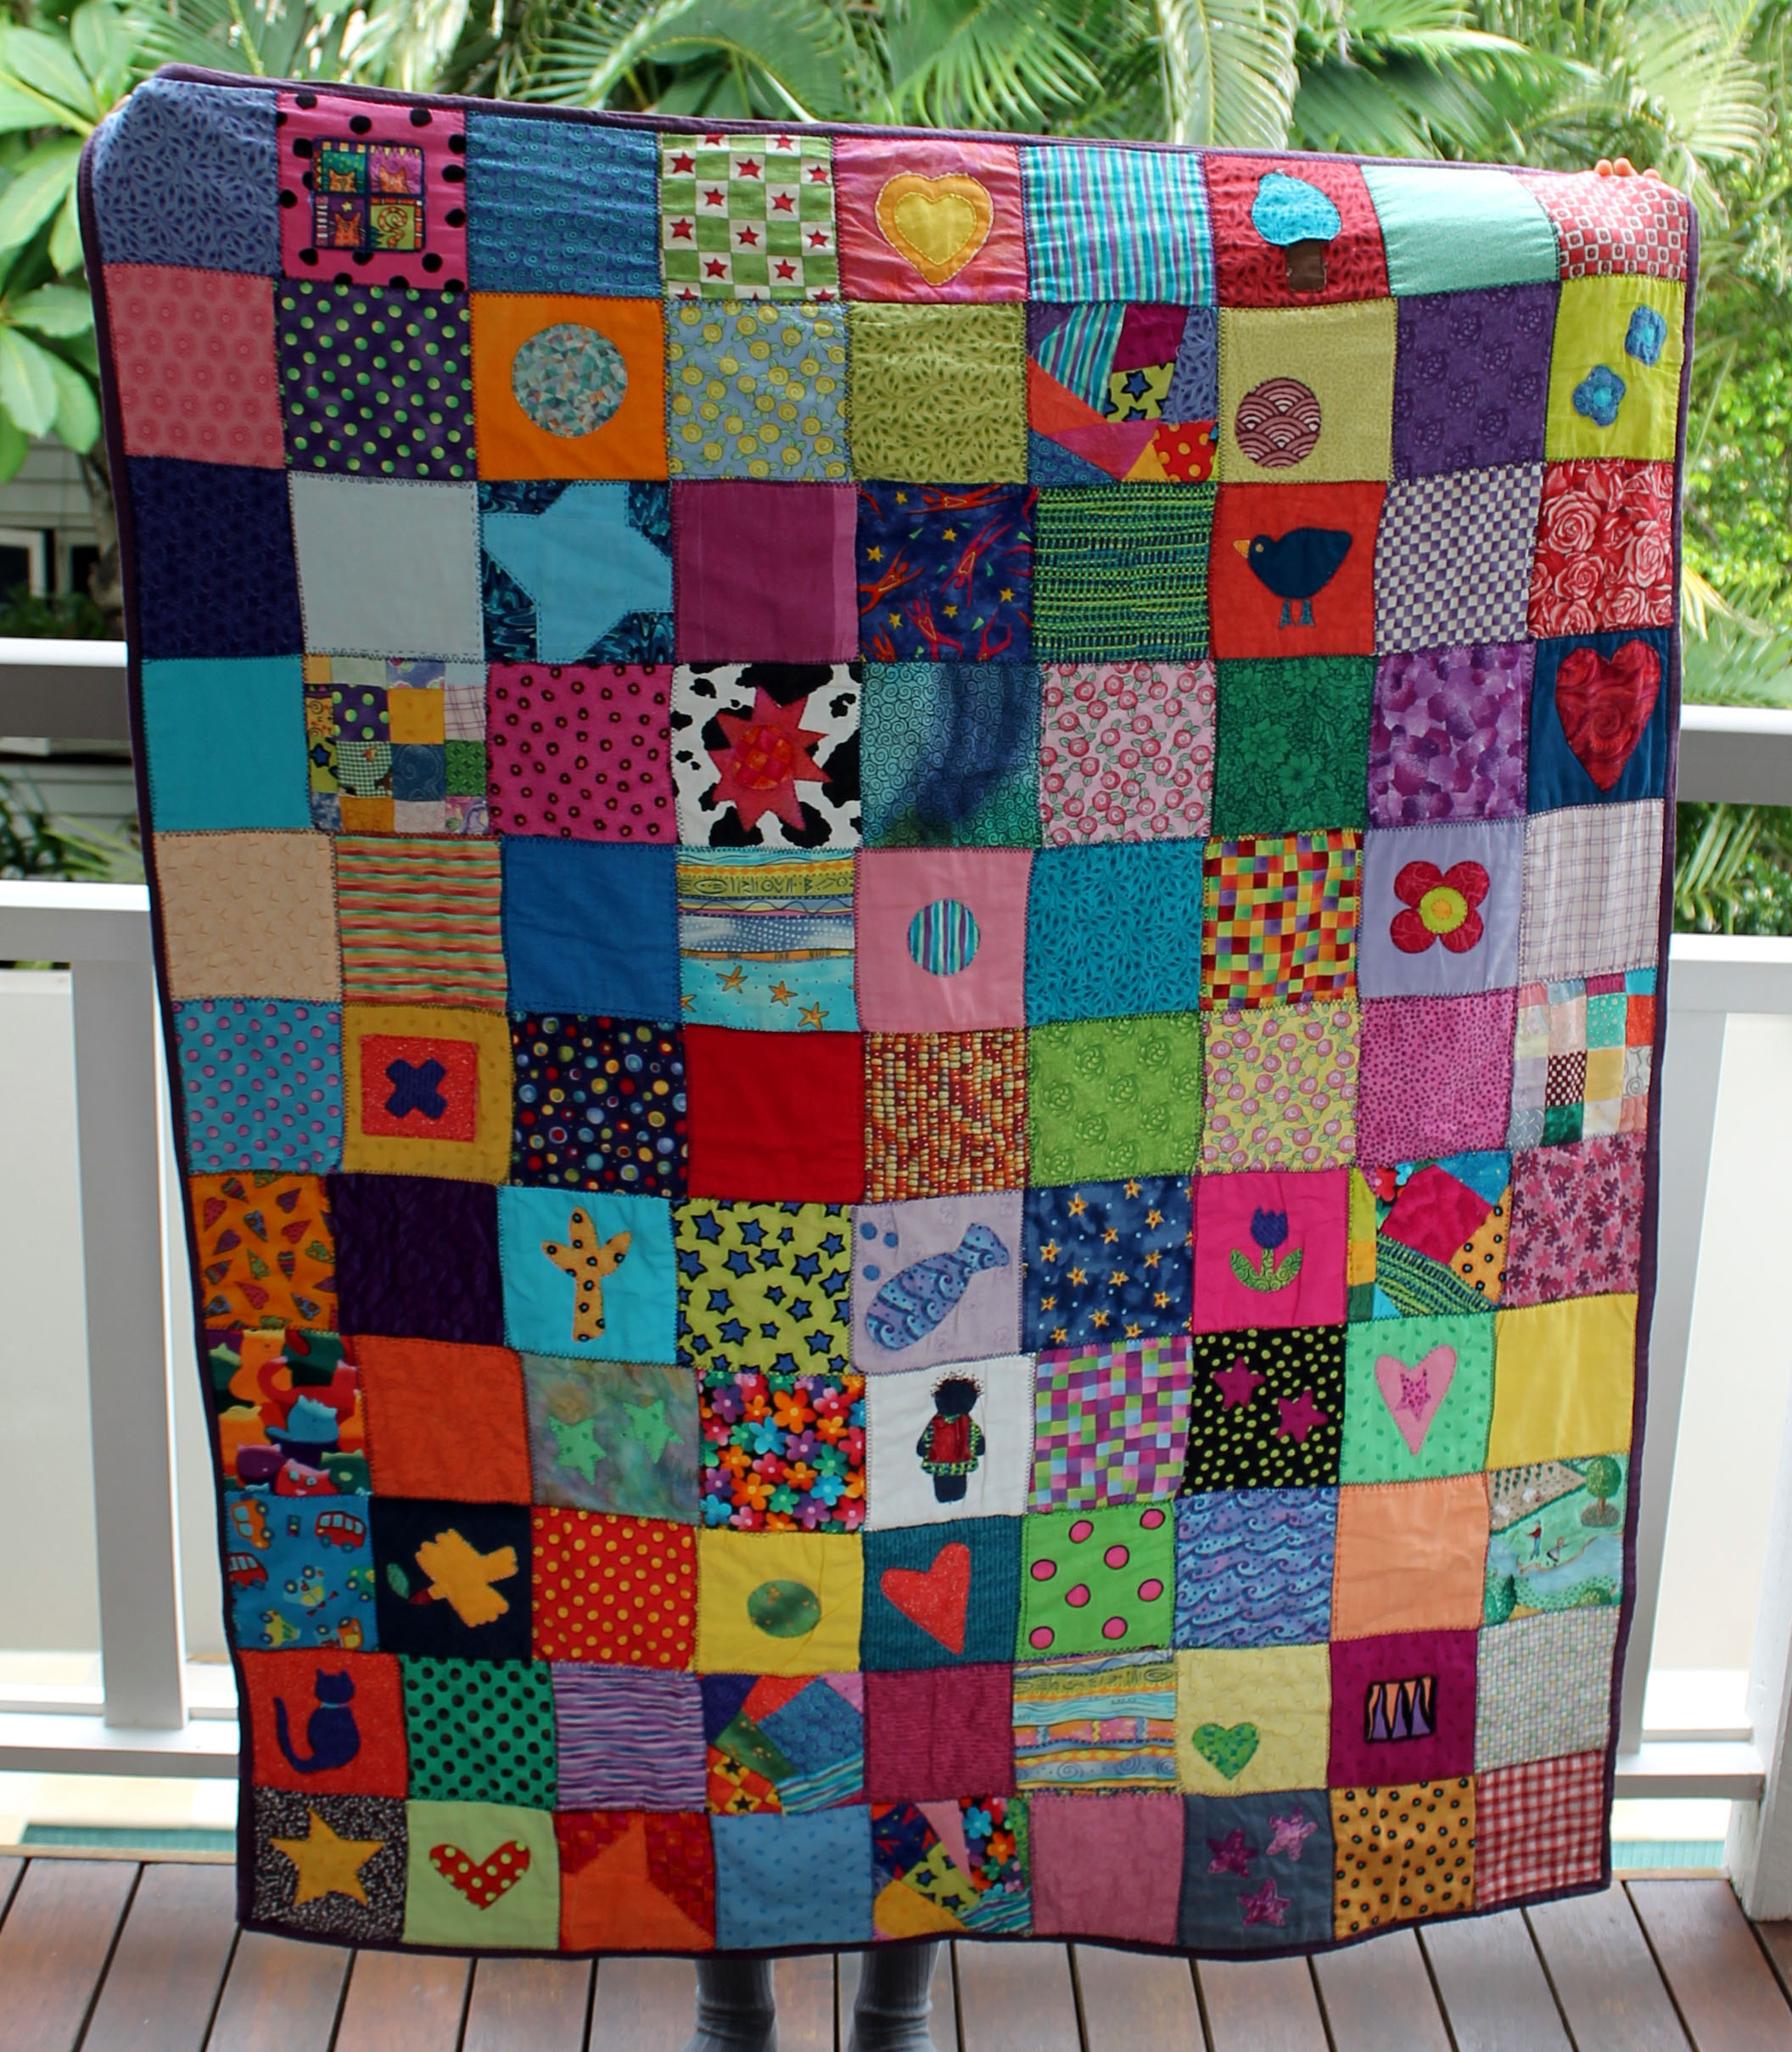
This week I also managed to finish a quilt.  Surprising I know, but I felt I had to get something completed.  So here it is…

modern bright scrap quilt

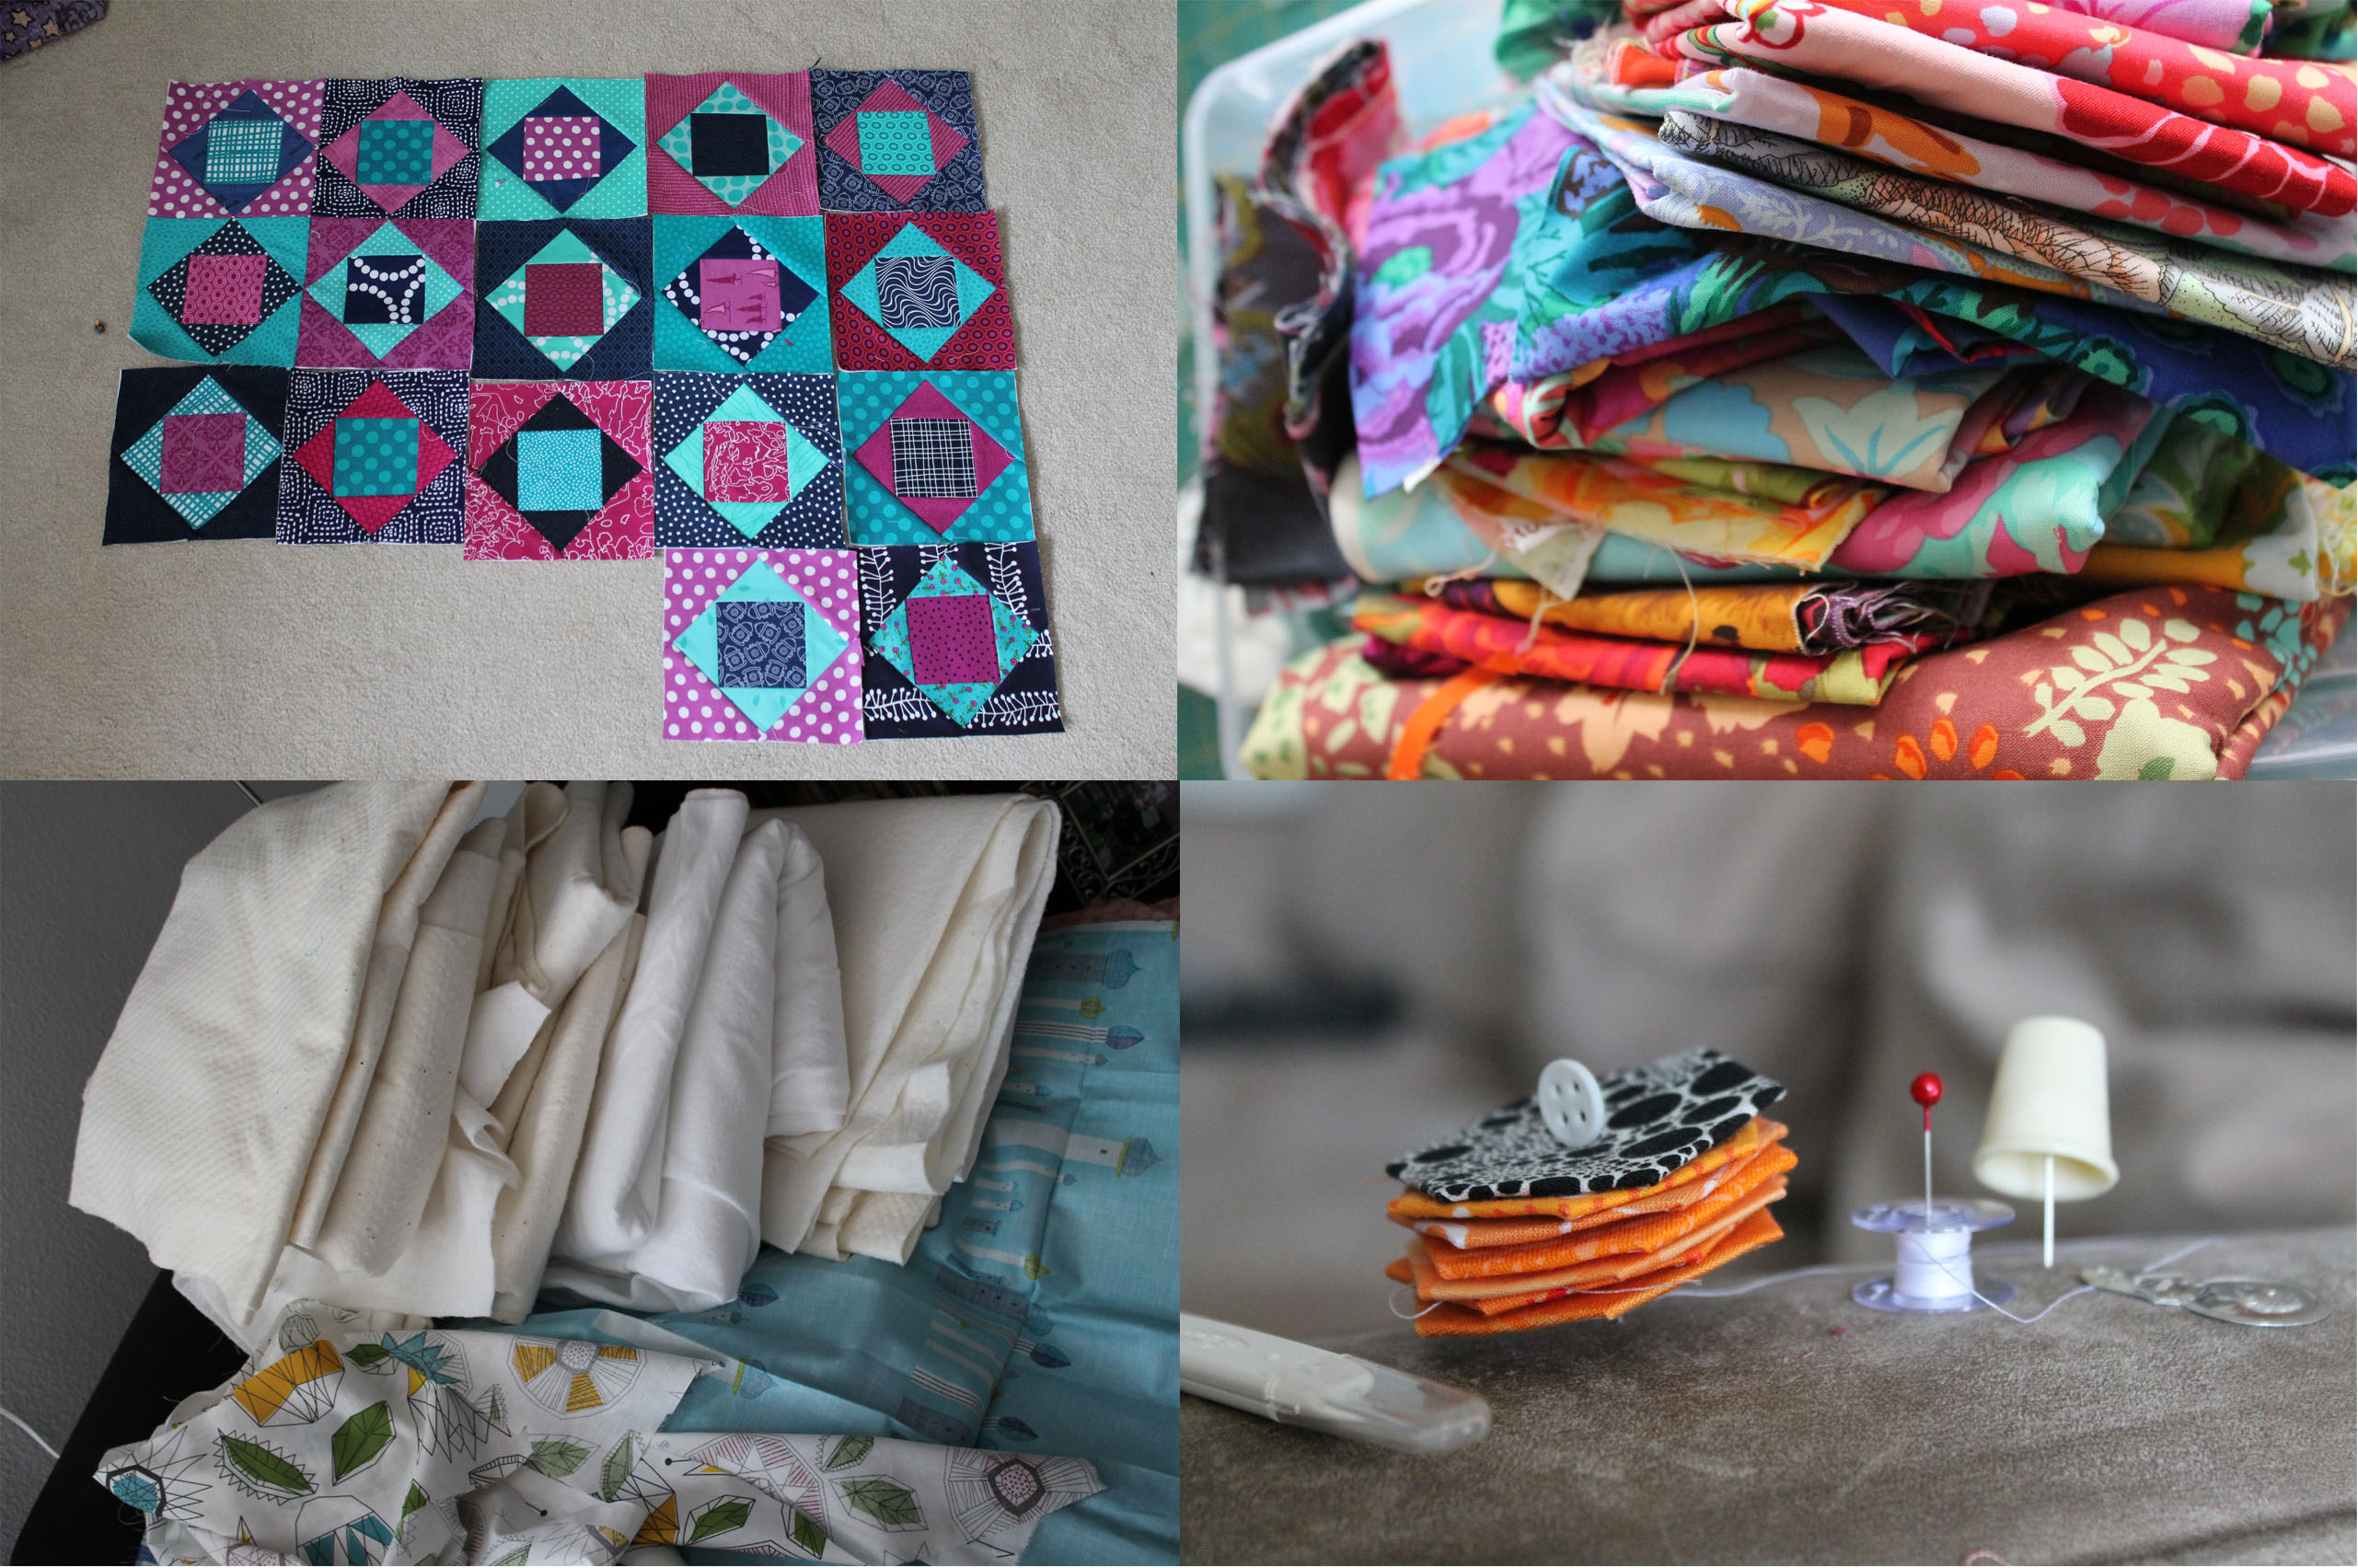
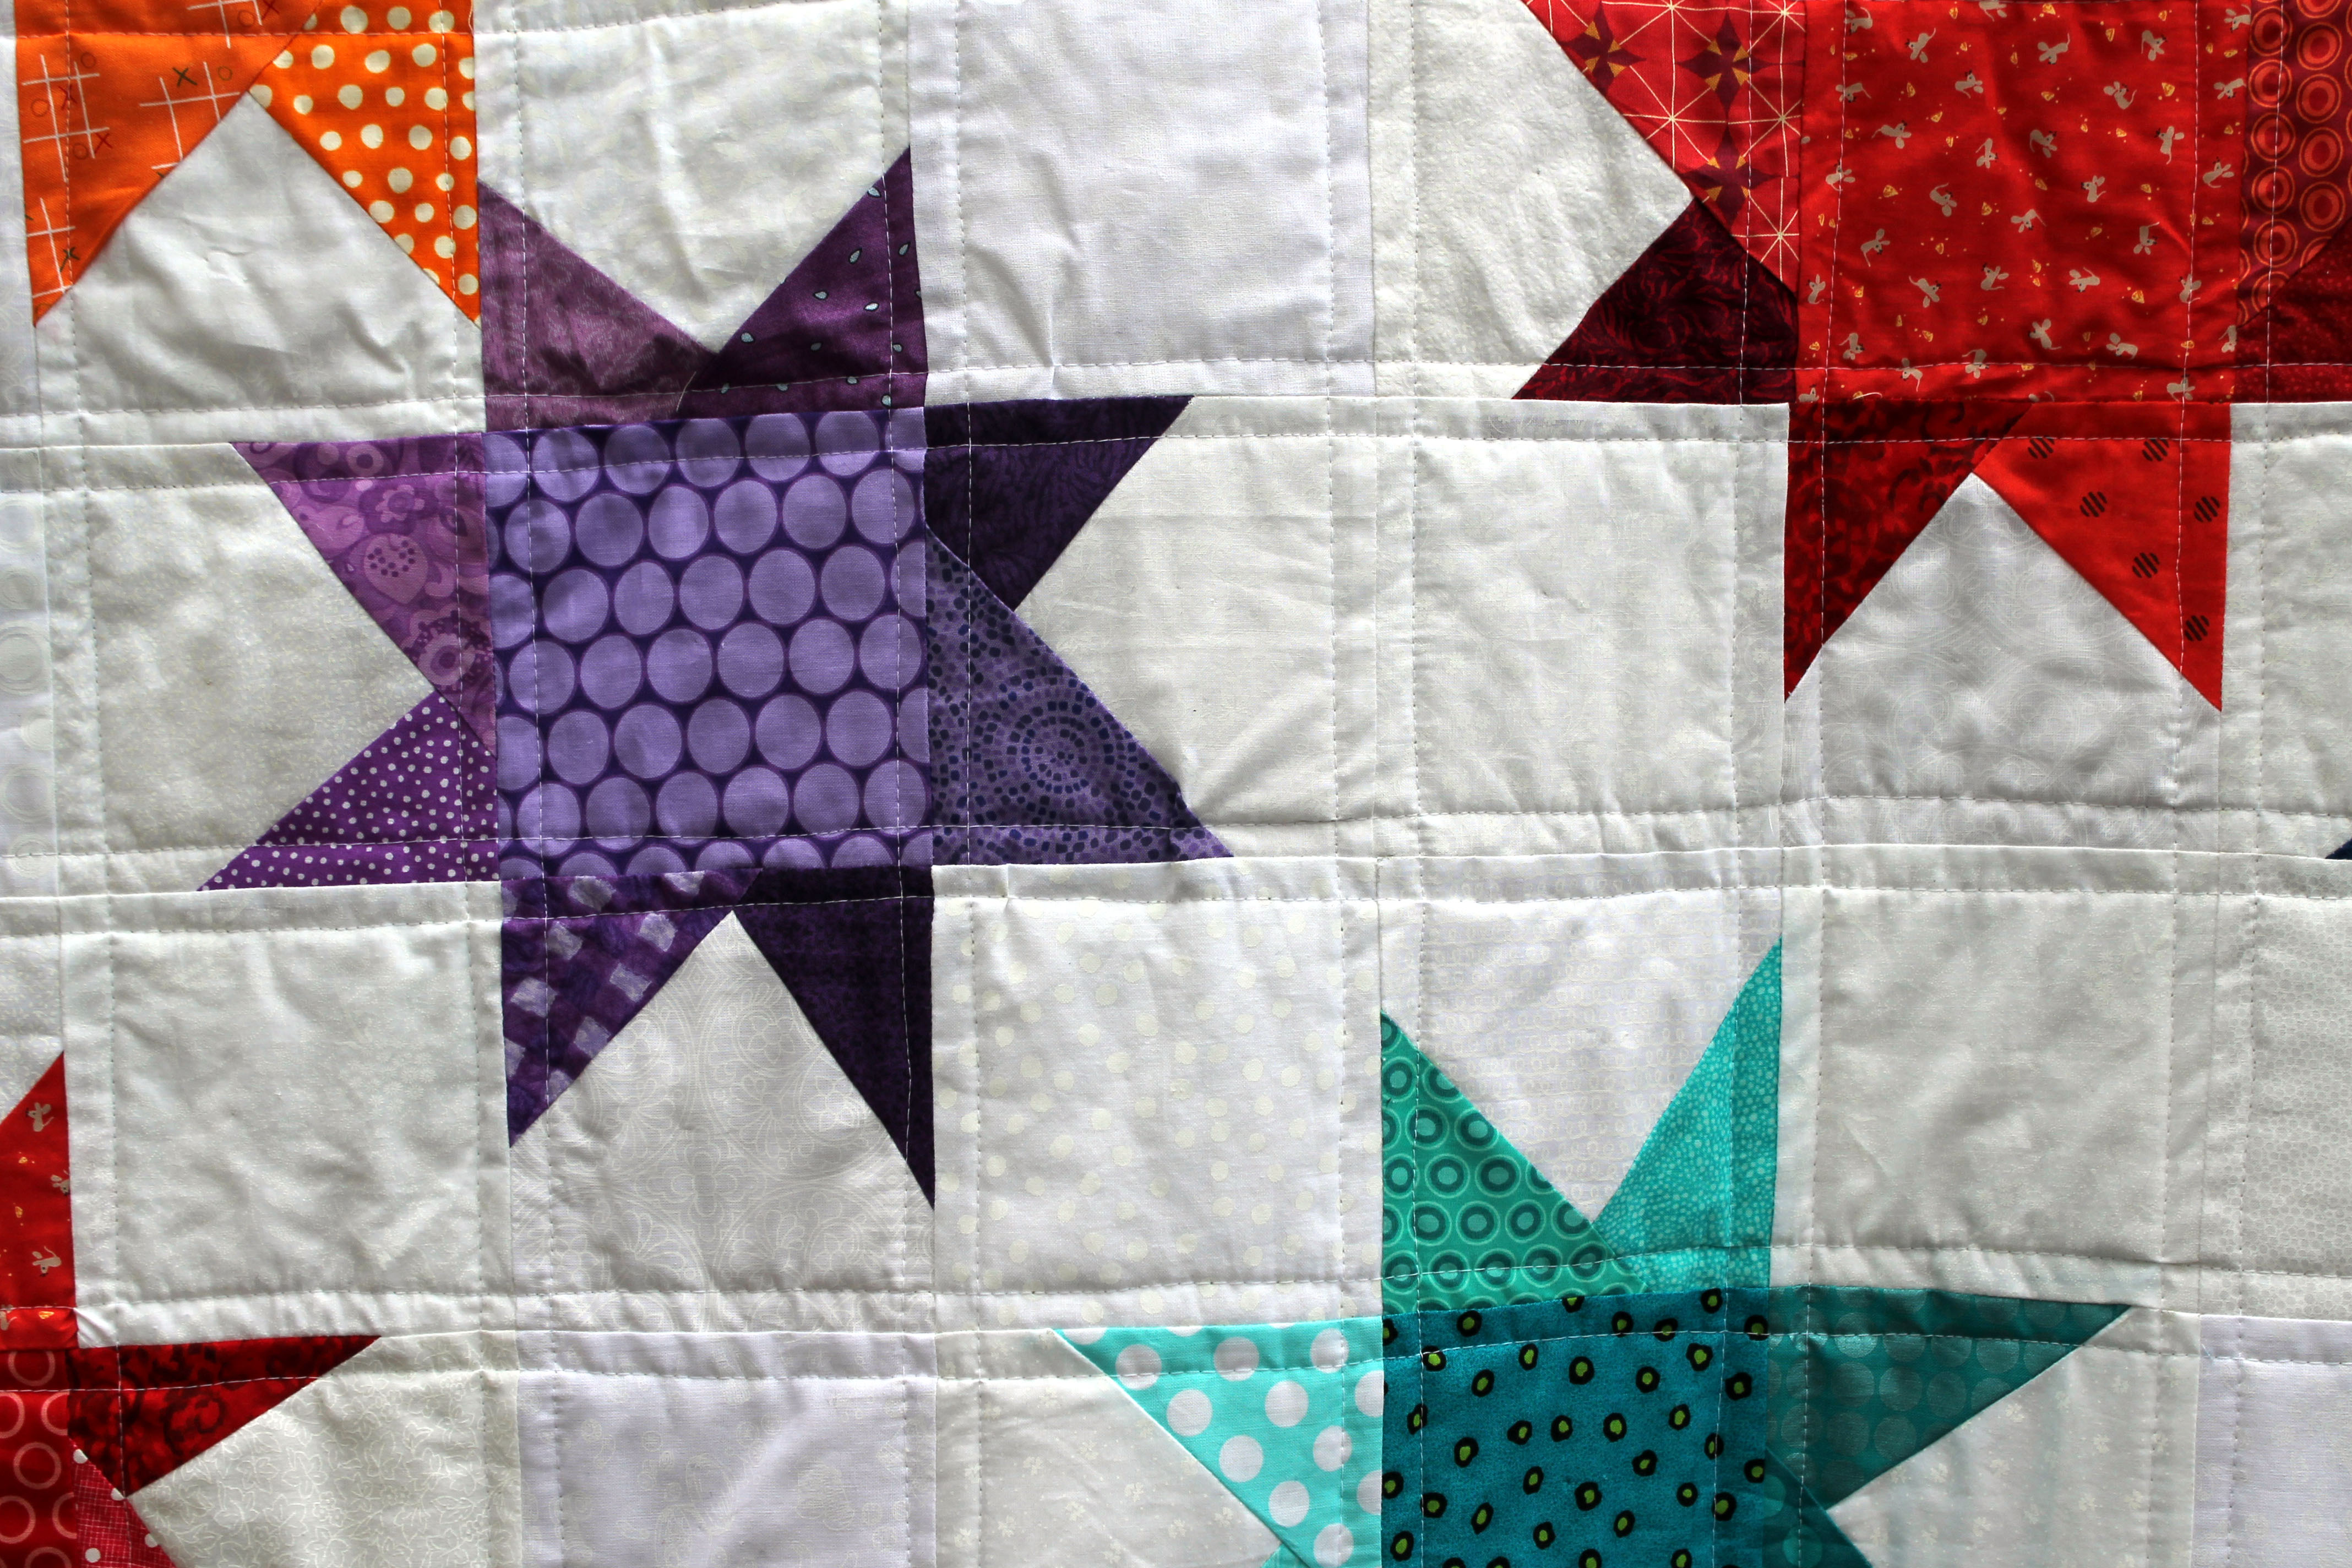
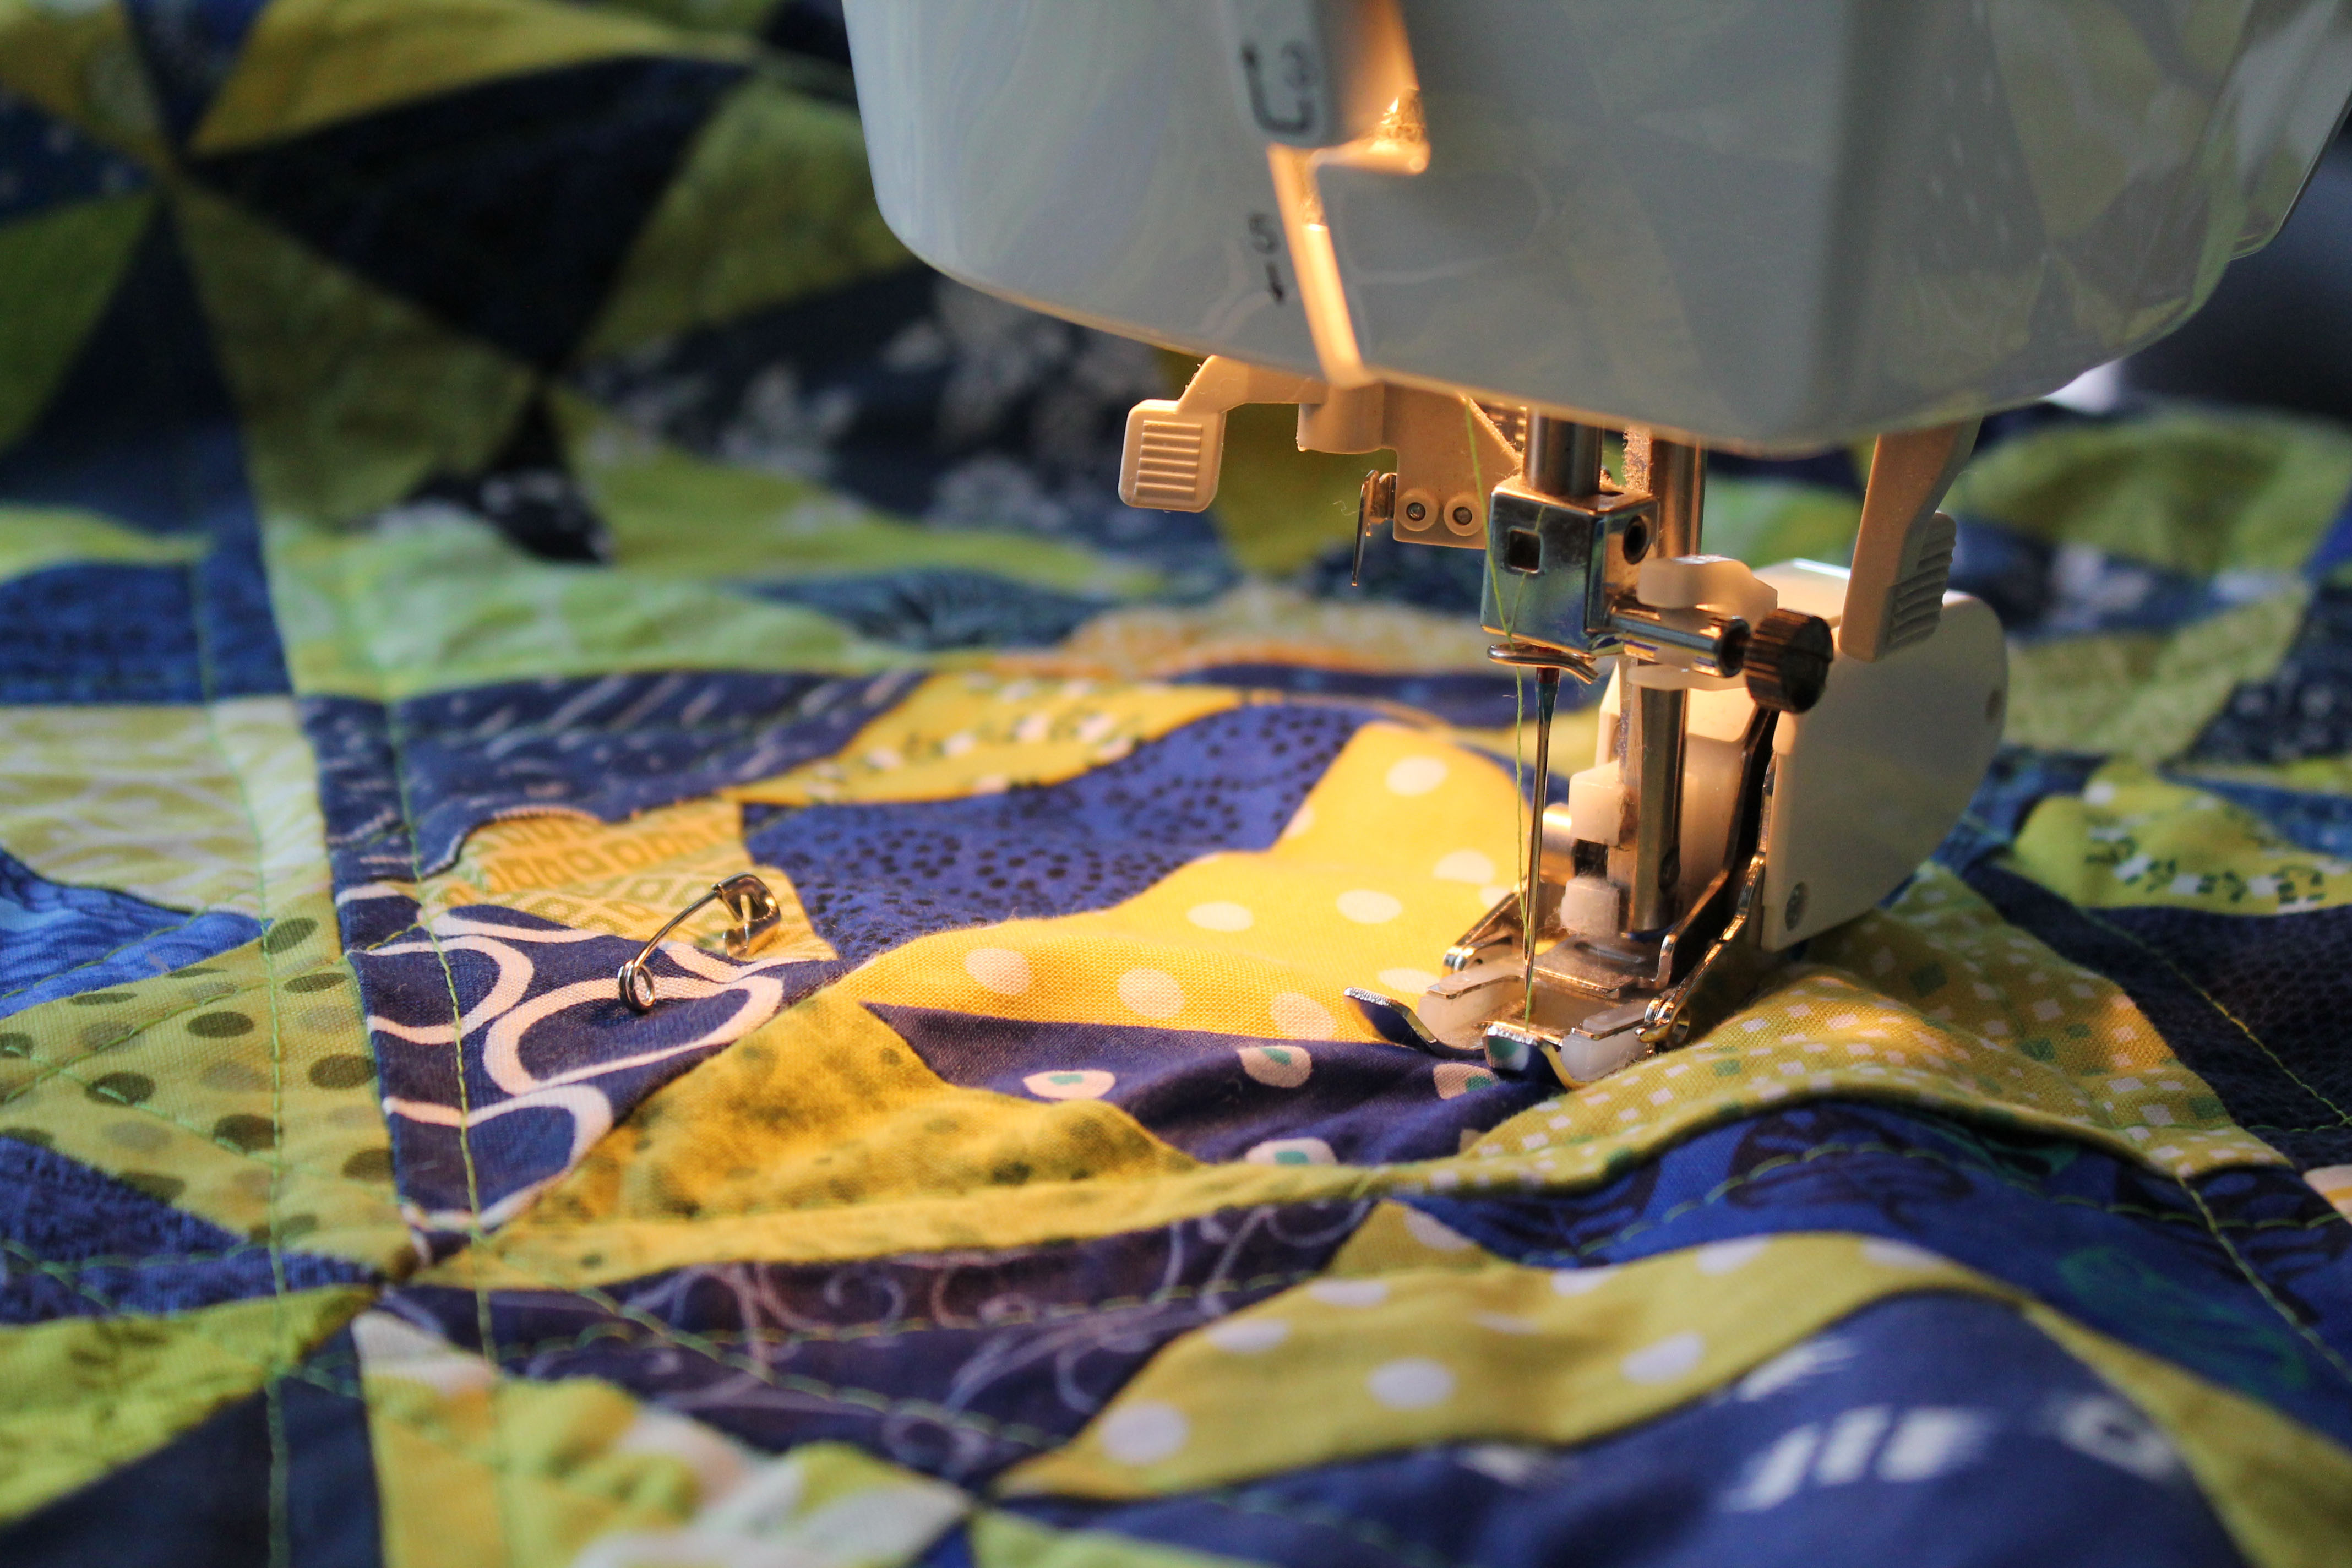
This quilt started a little while ago with this modern Ohio star block (posted here)….

modern ohio star quilt block

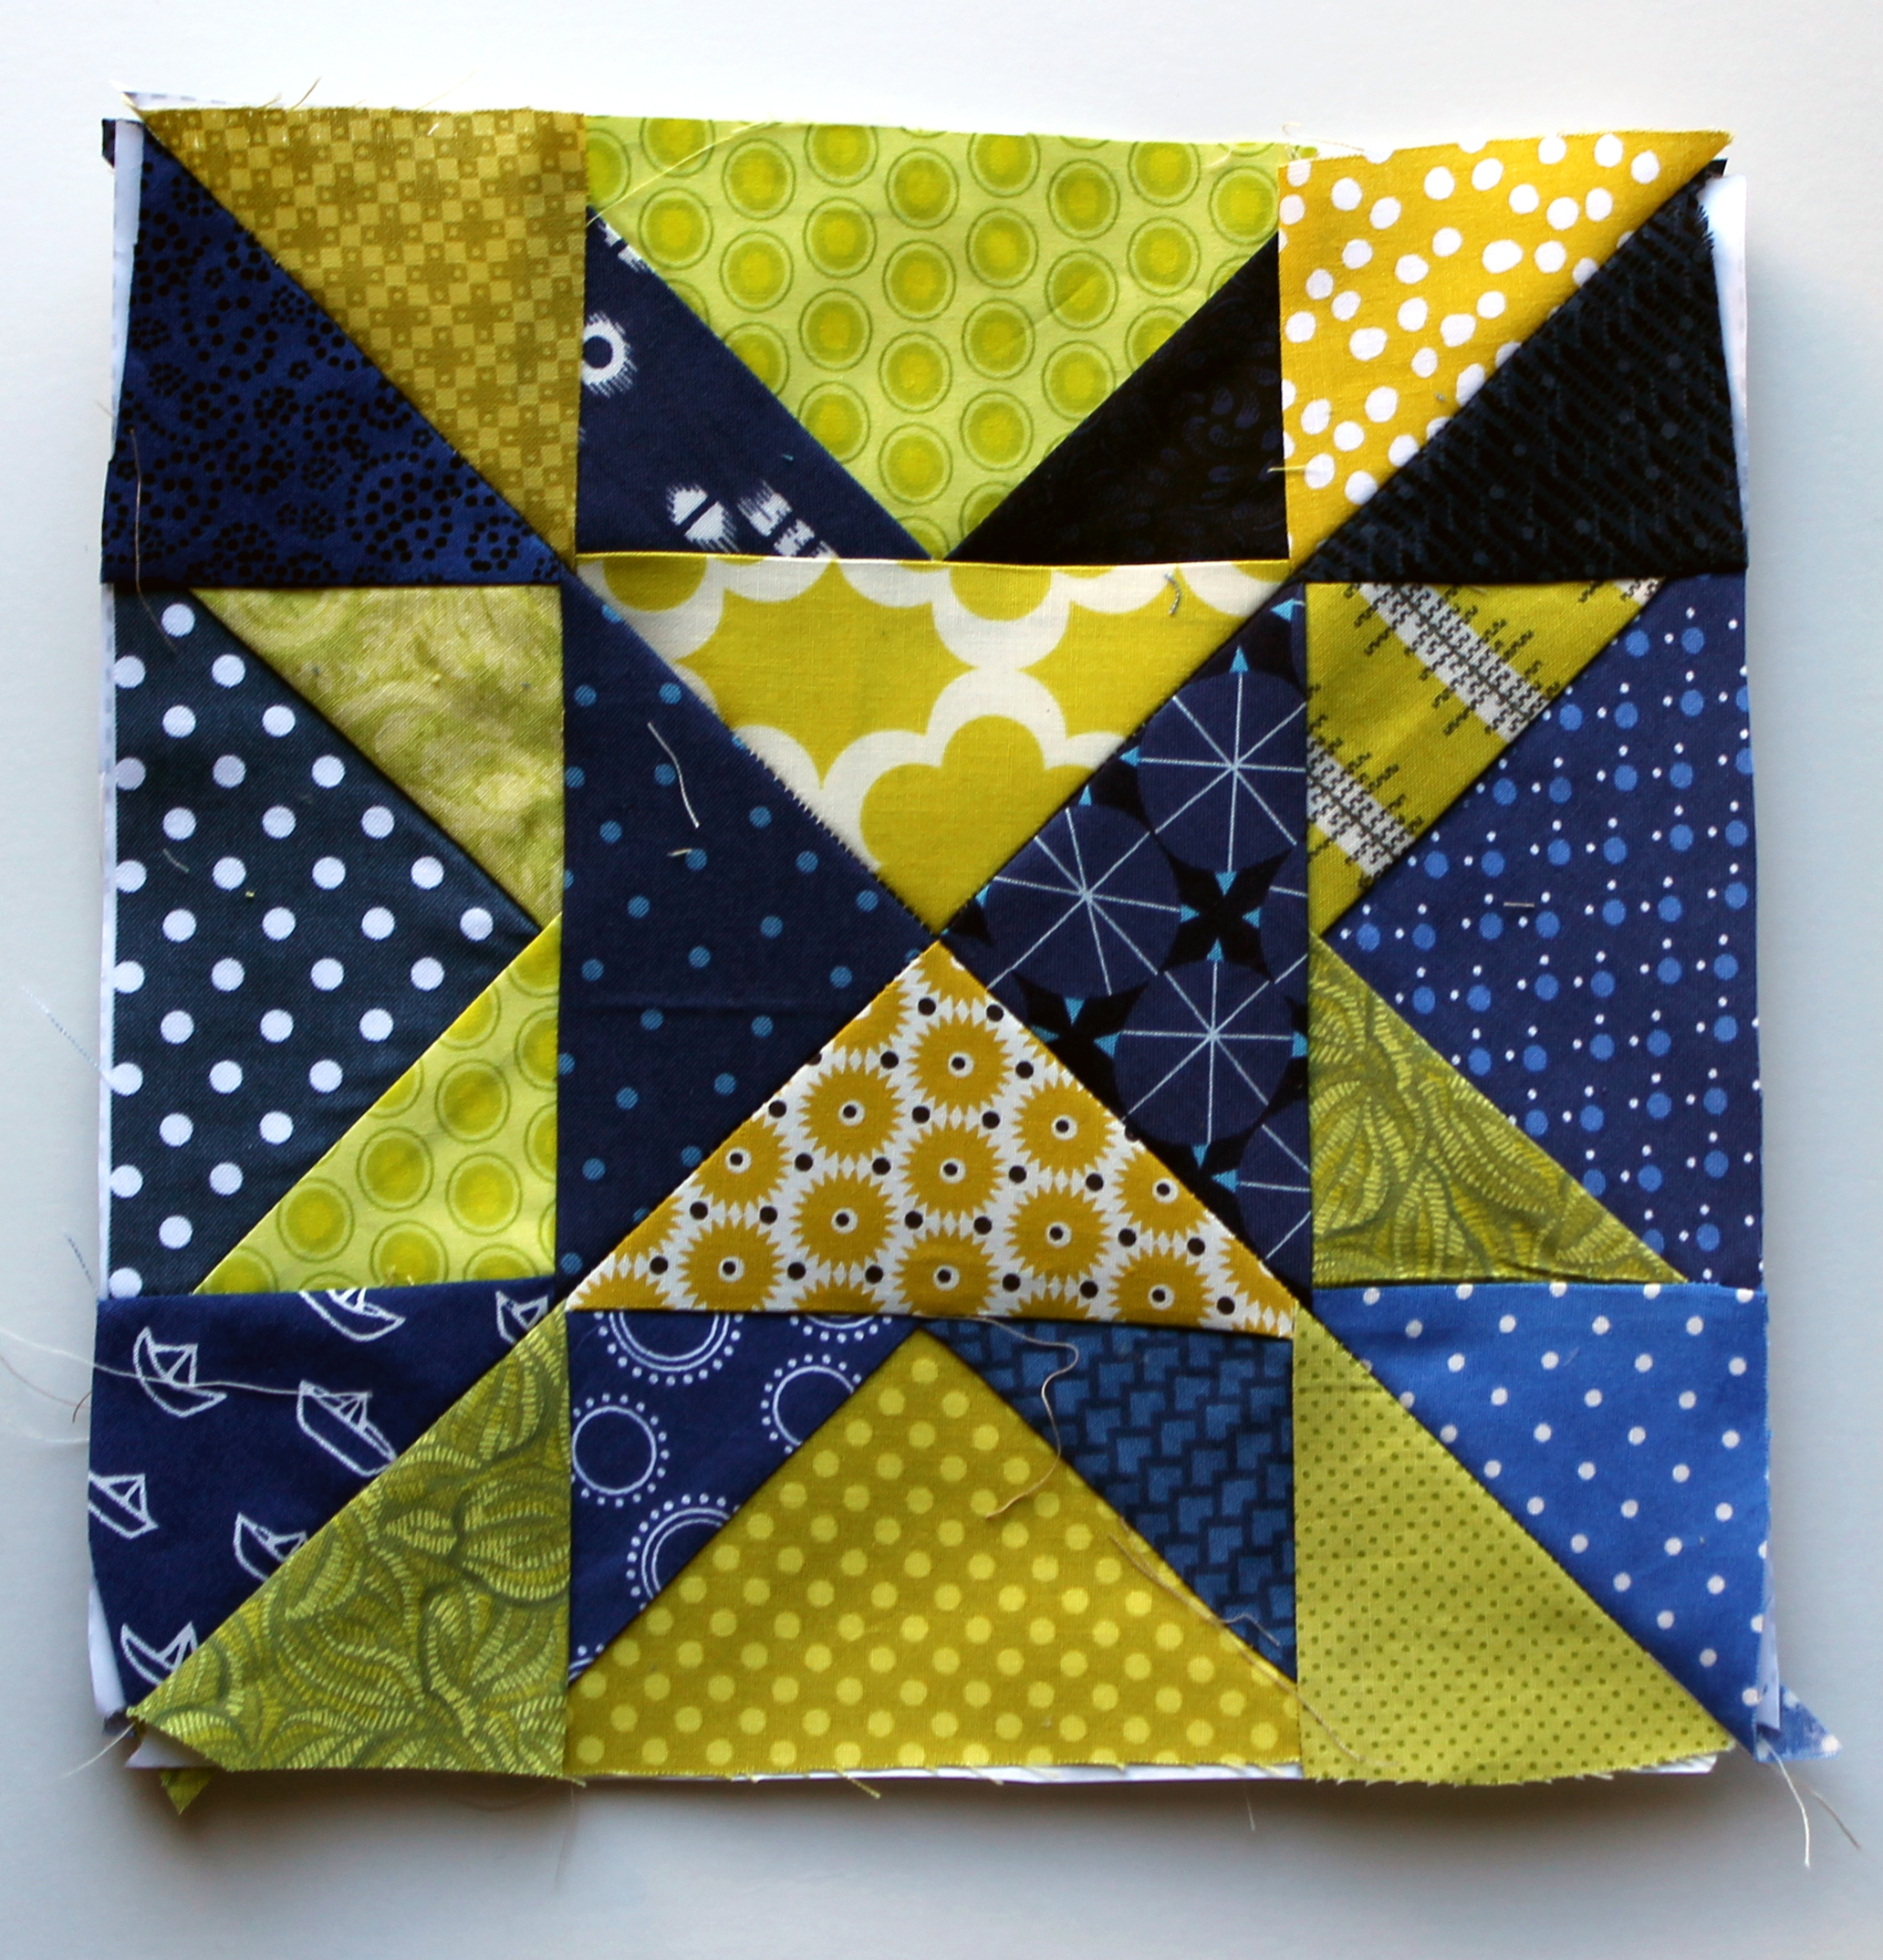
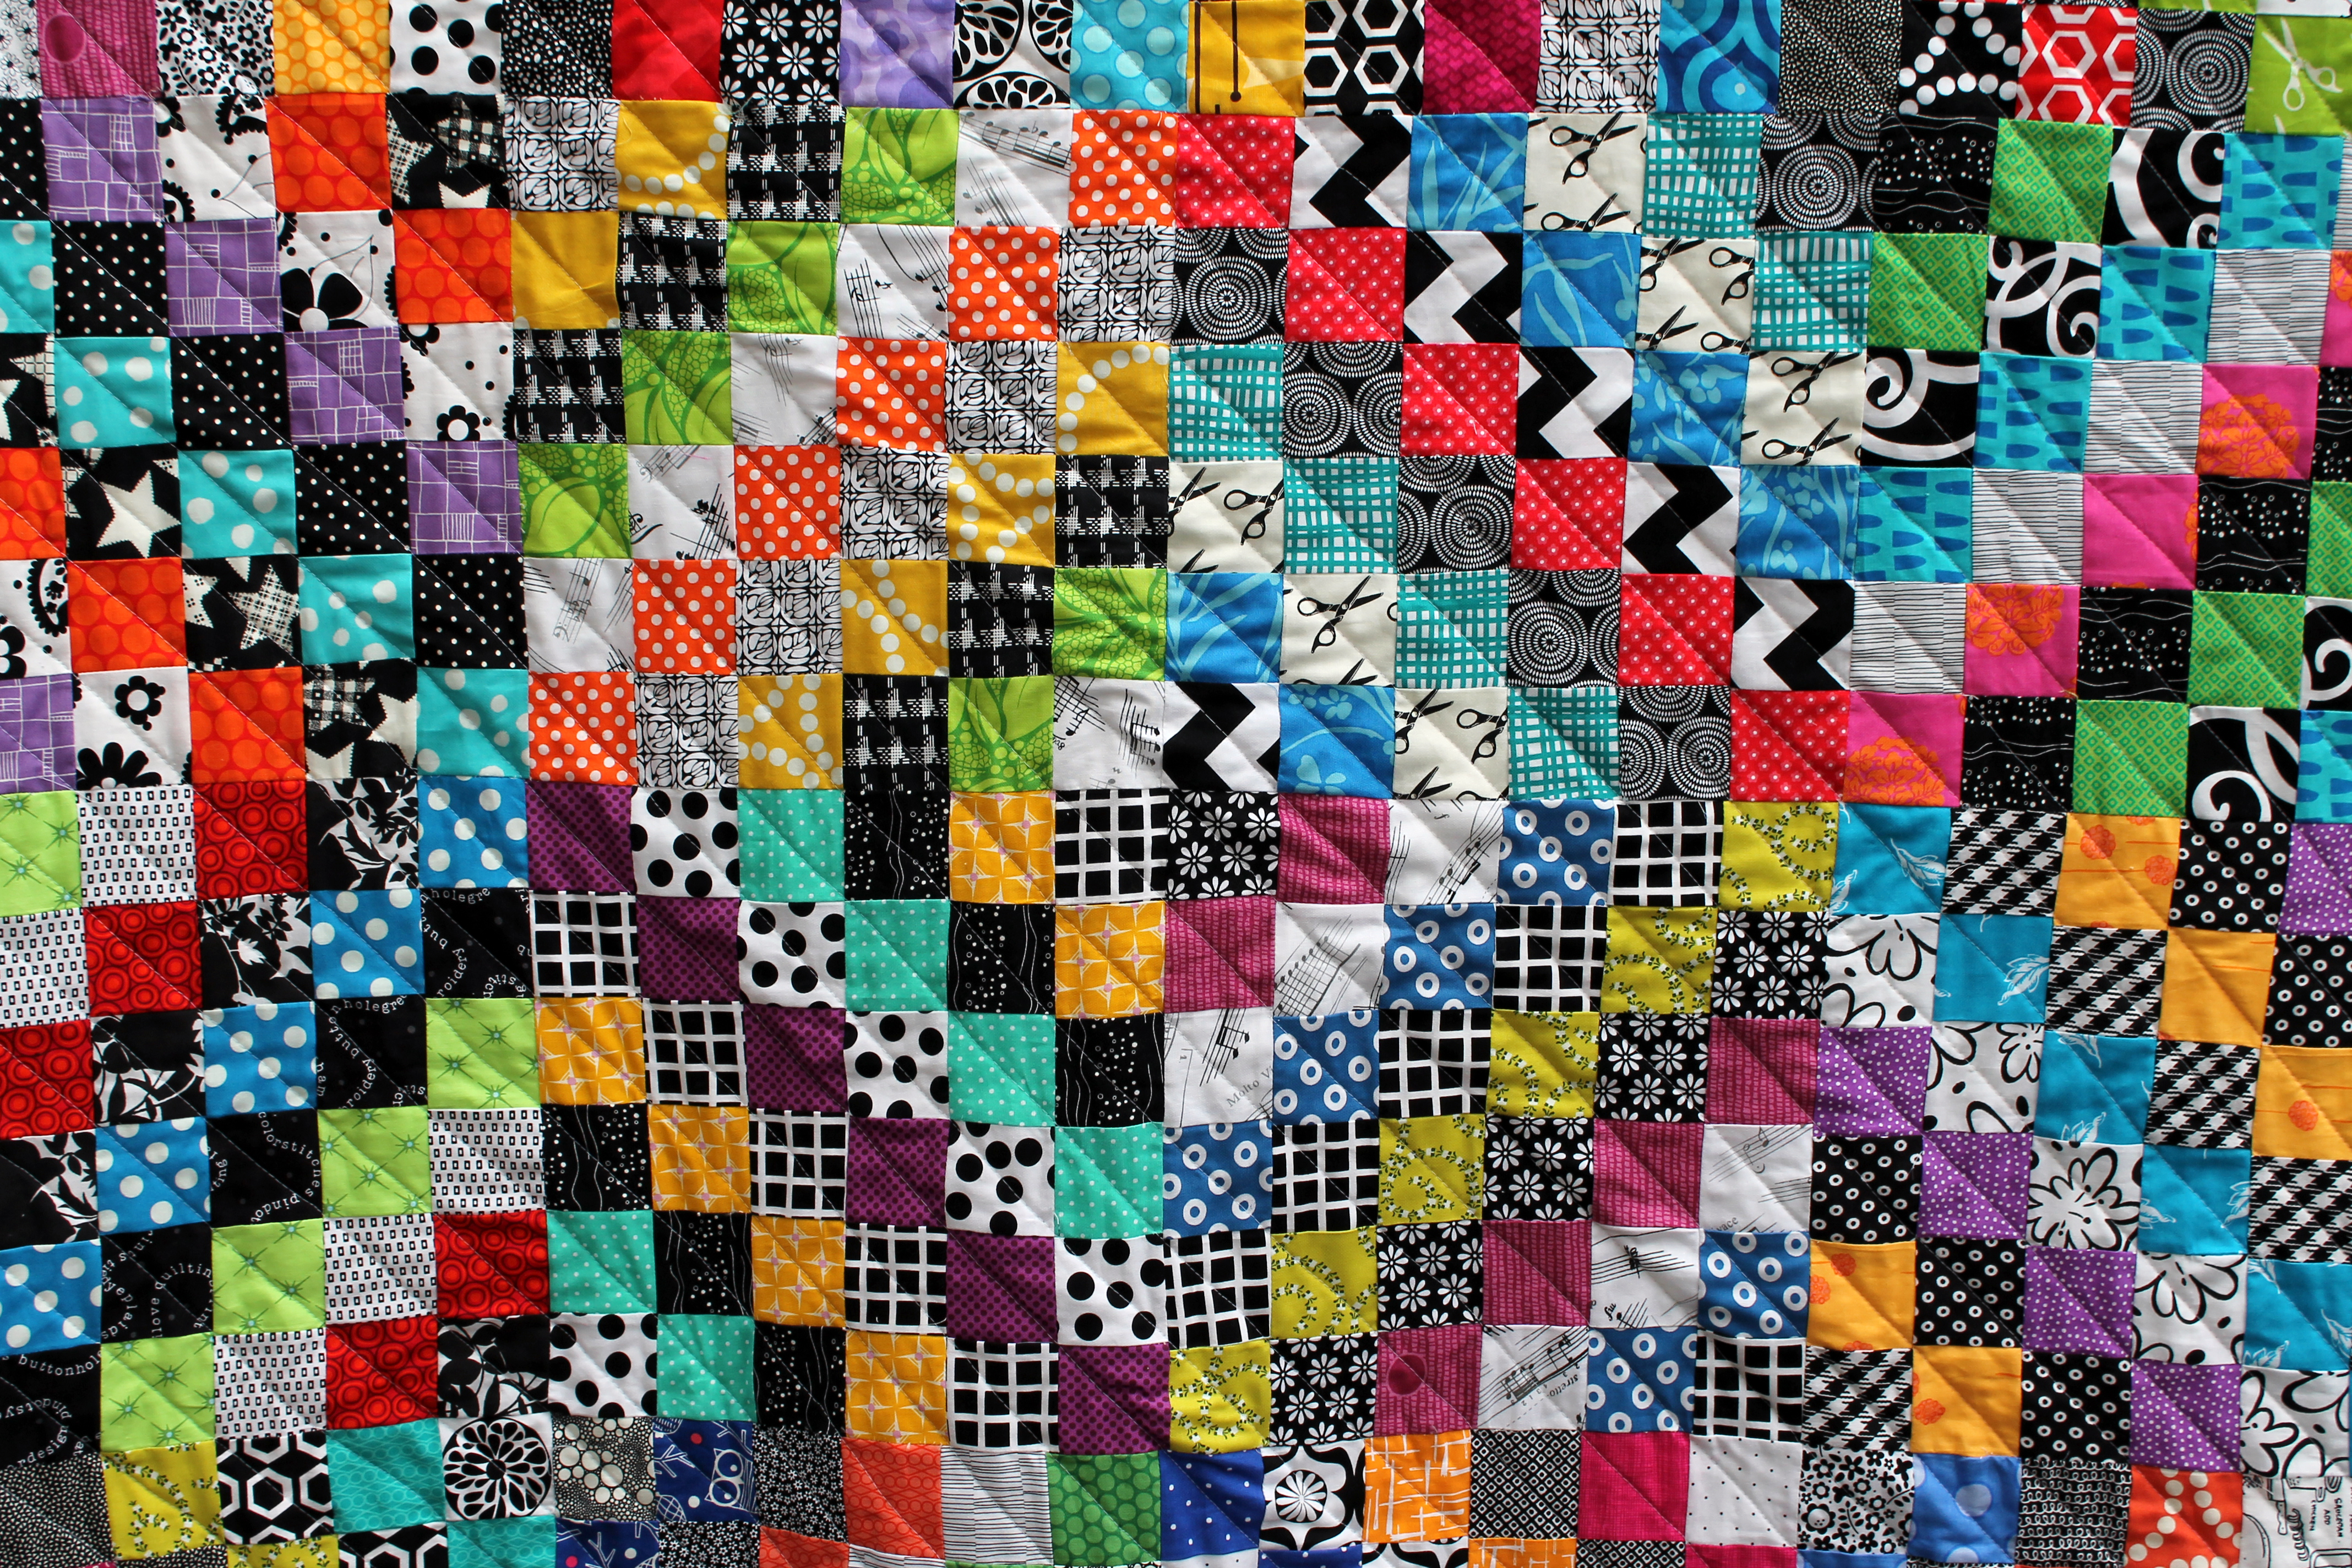
And it grew into this fun bright quilt.  Once again with the block you can see the star pattern, but with the quilt you see so much more (mainly lots and lots of triangles!).

citron arrow quilt detail

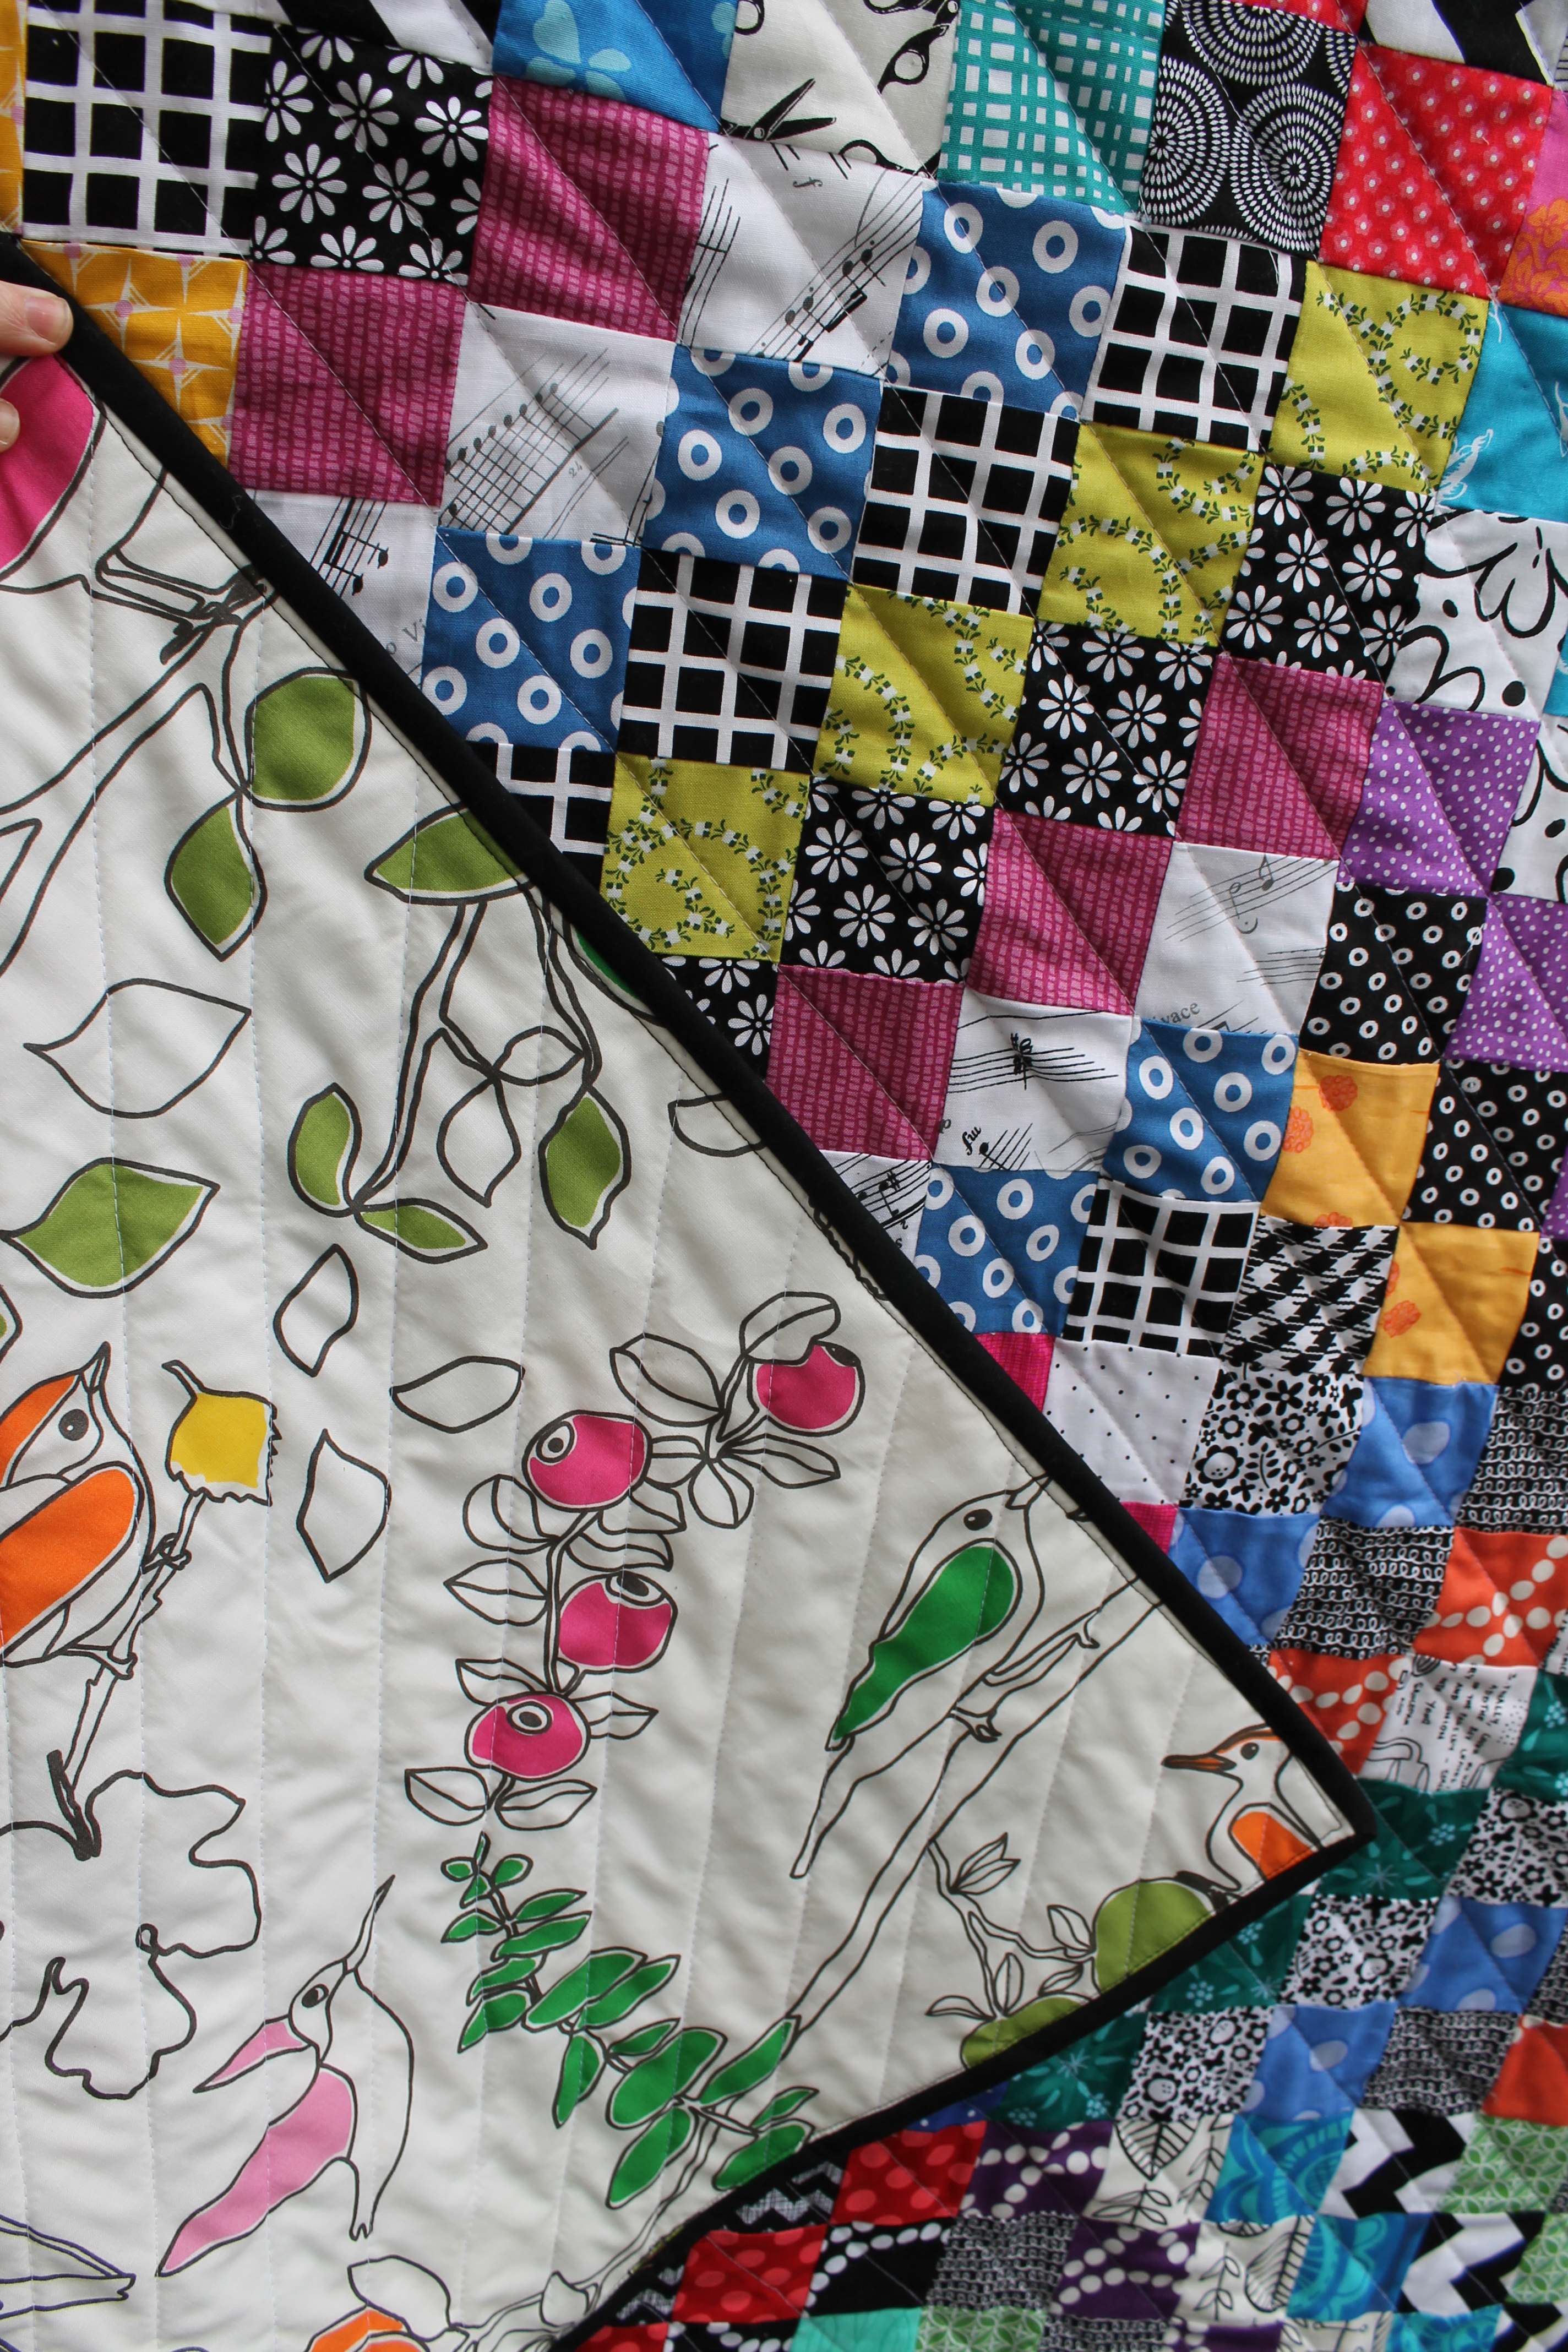
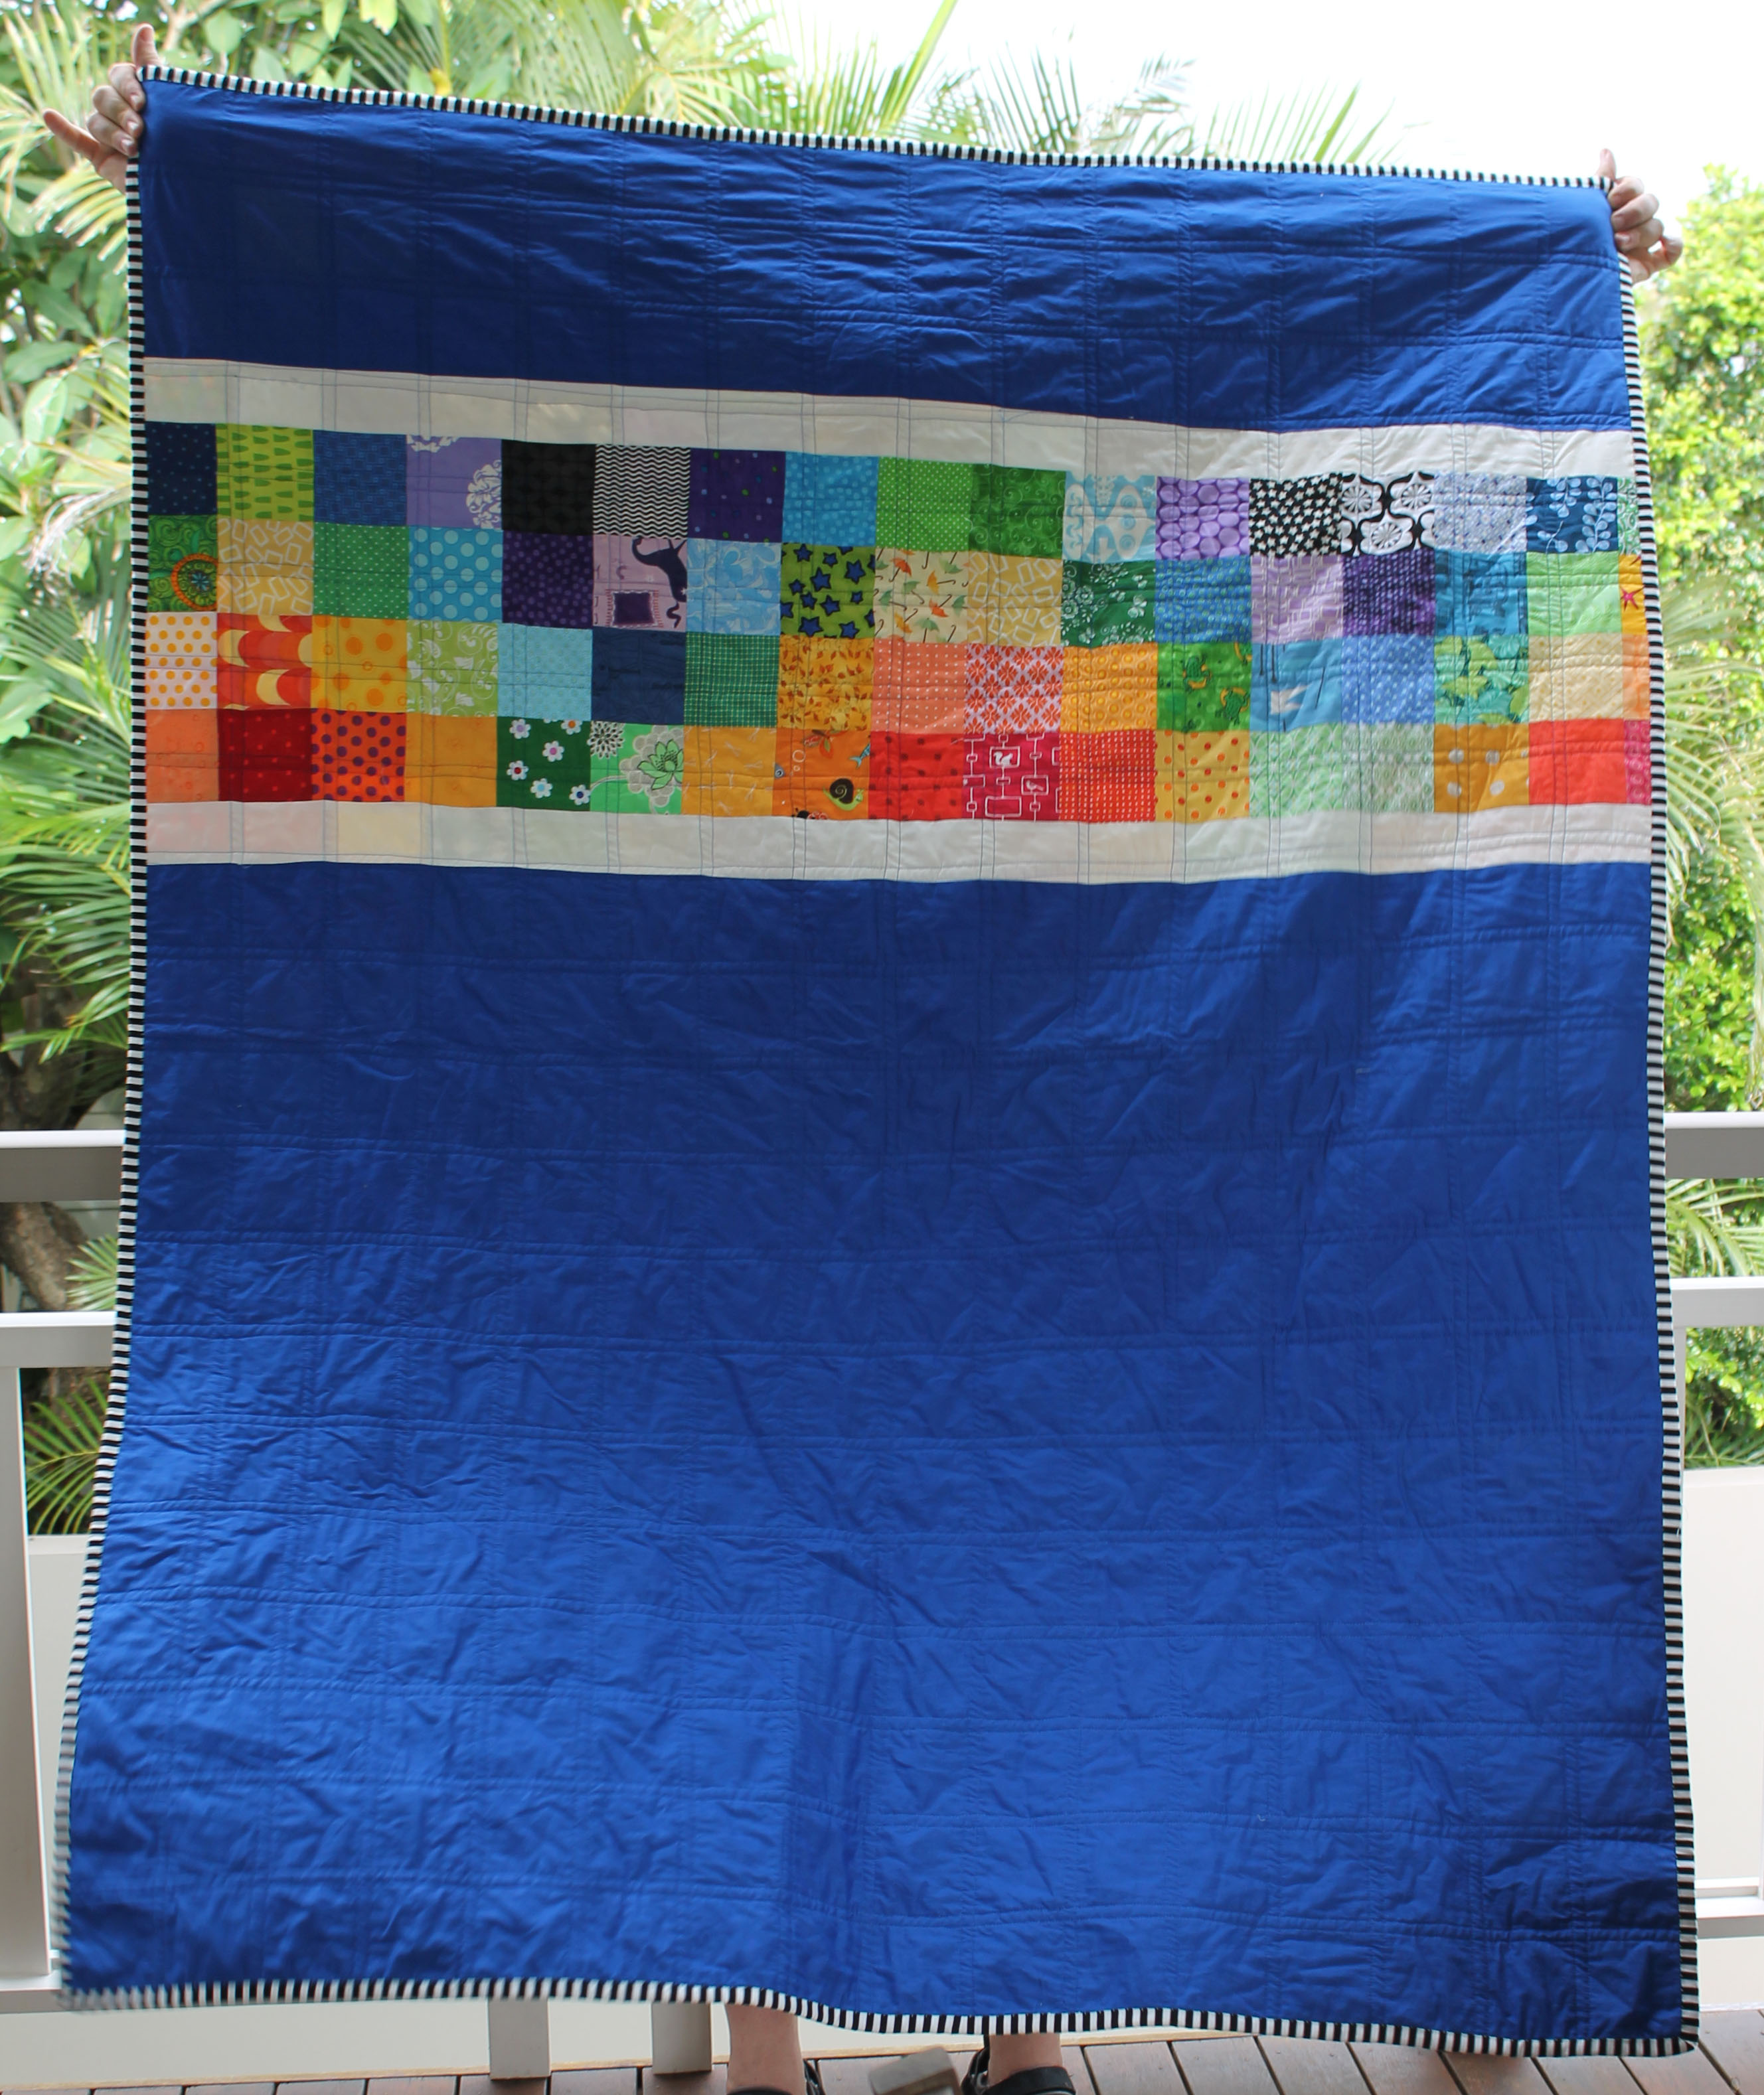
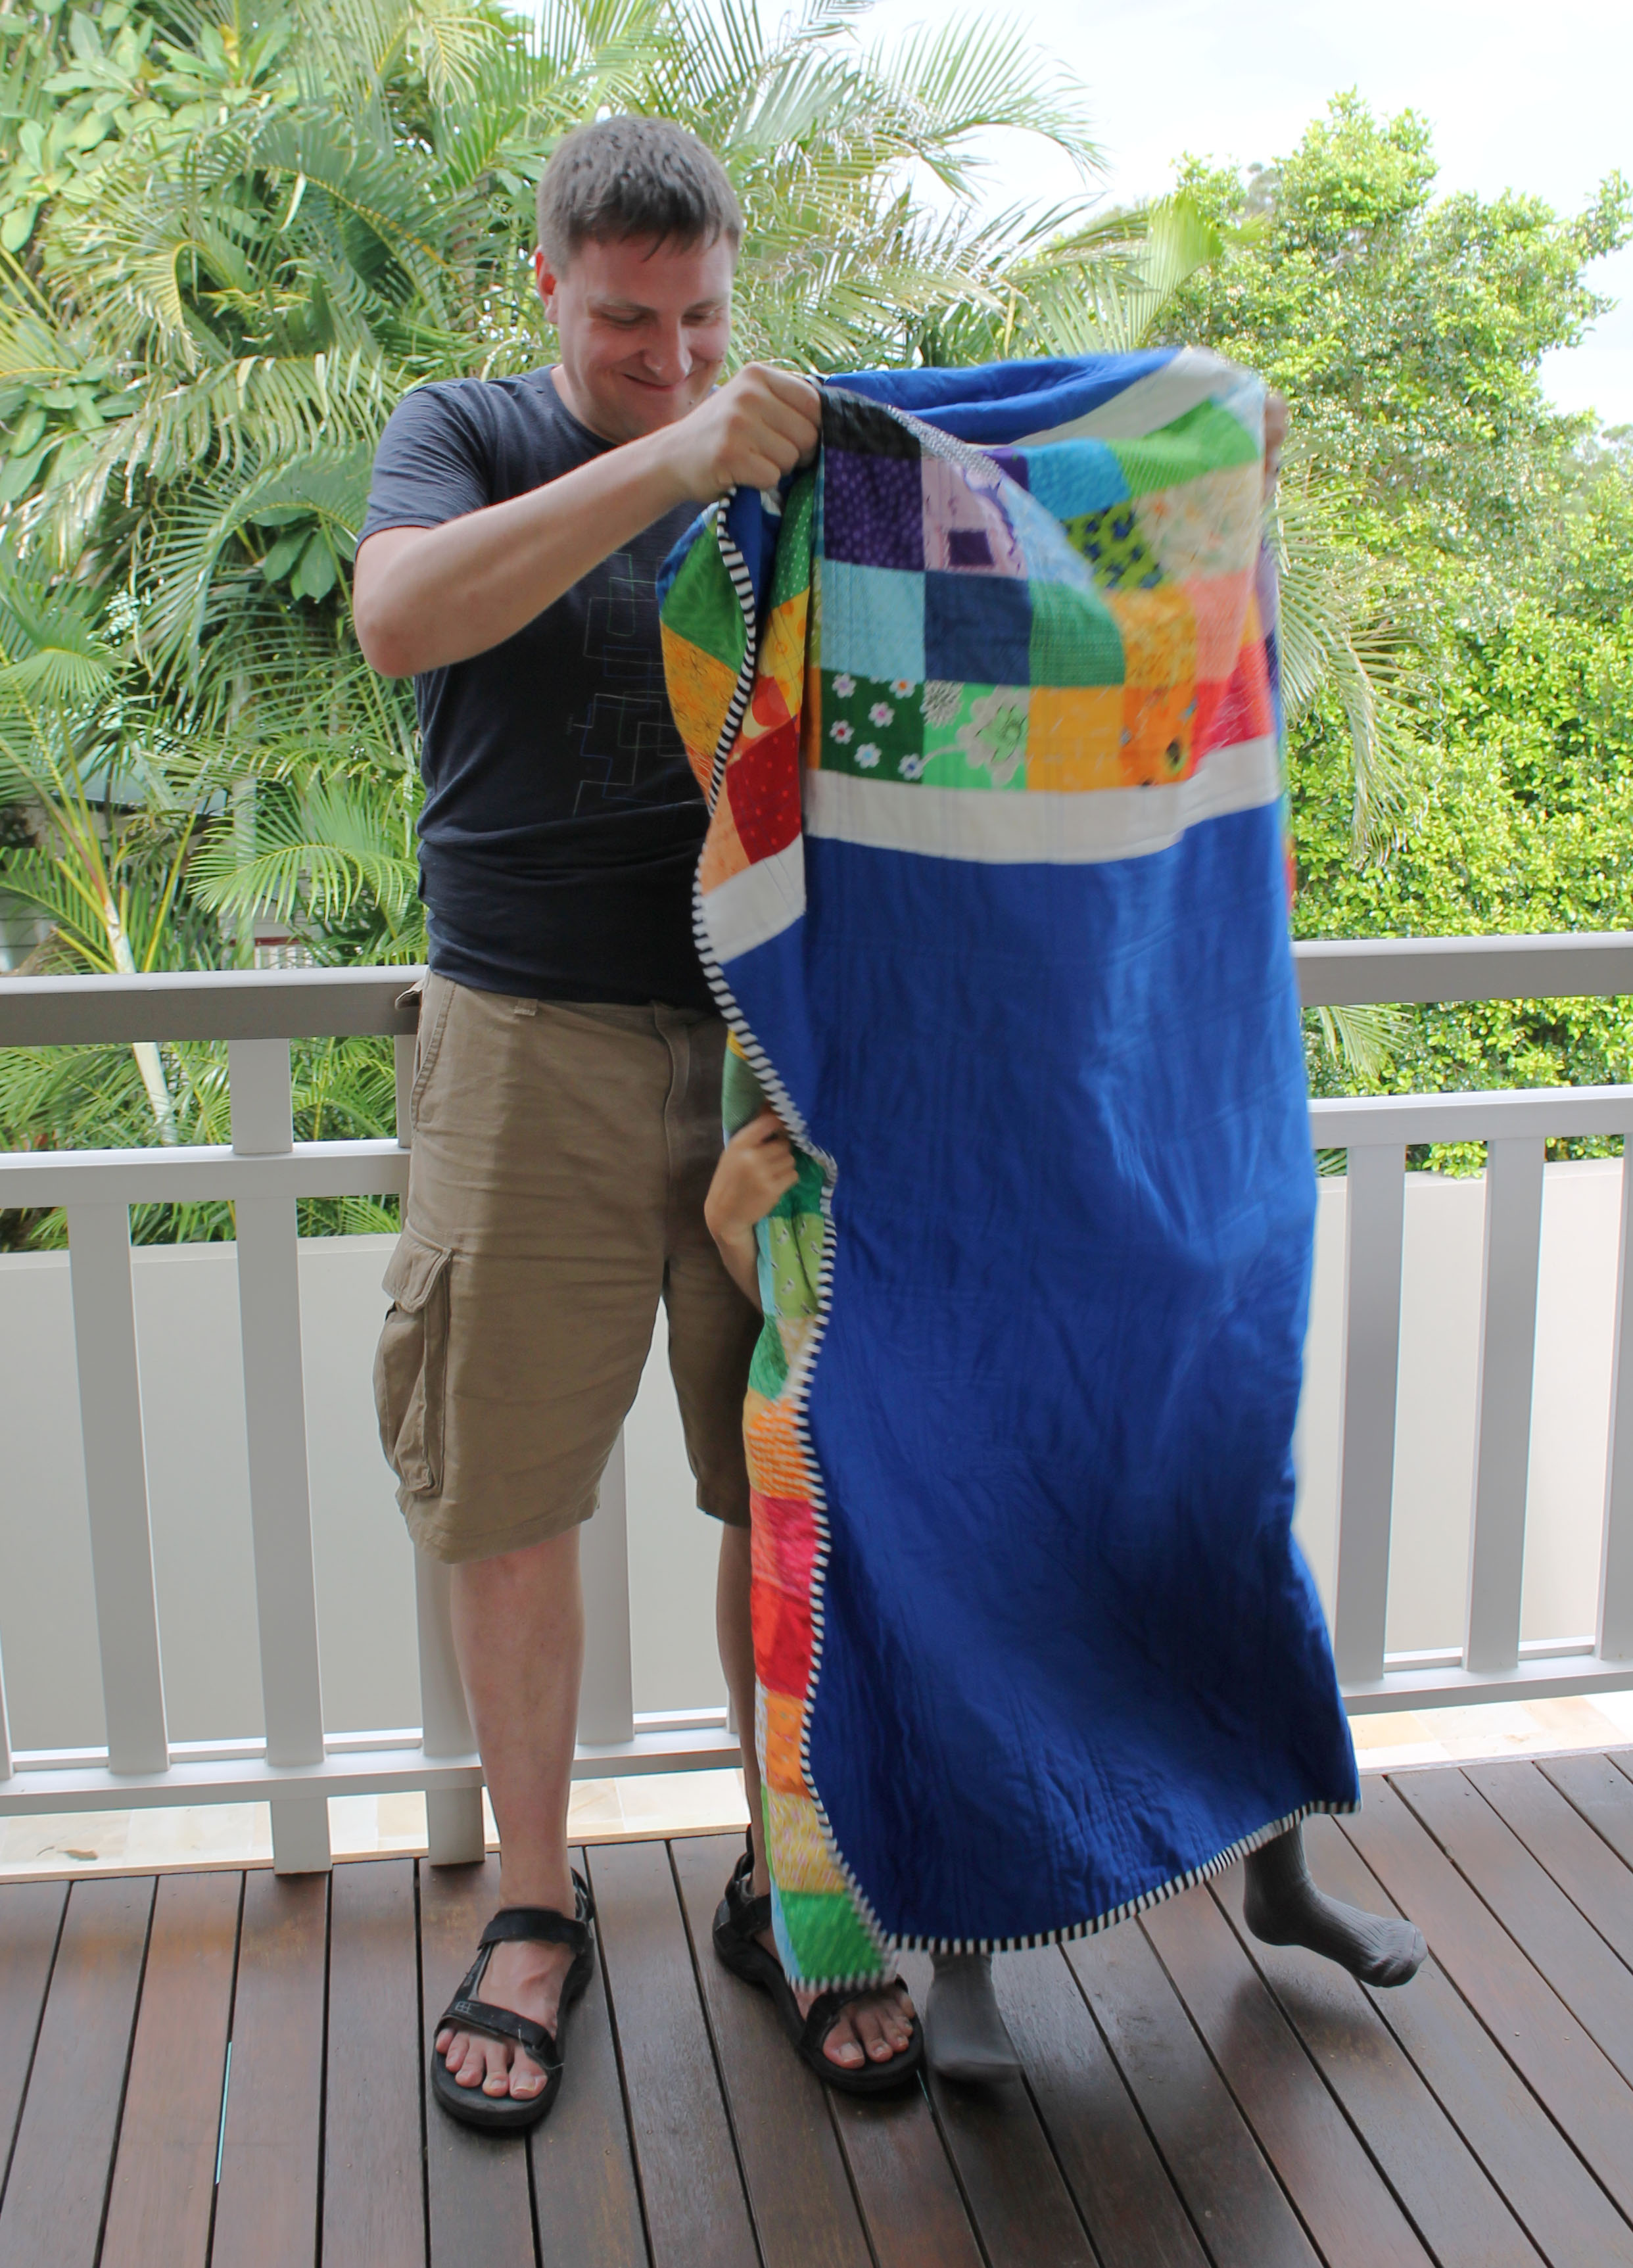
 I struggled for a couple of weeks over the backing of this quilt.  I pulled out and prepared a couple of printed fabric choices but nothing seemed to work just right for me.  Then I woke up yesterday morning with the perfect solution.  I grabbed some solids and little bit of quilters linen and made this backing piece.

modern quilt back

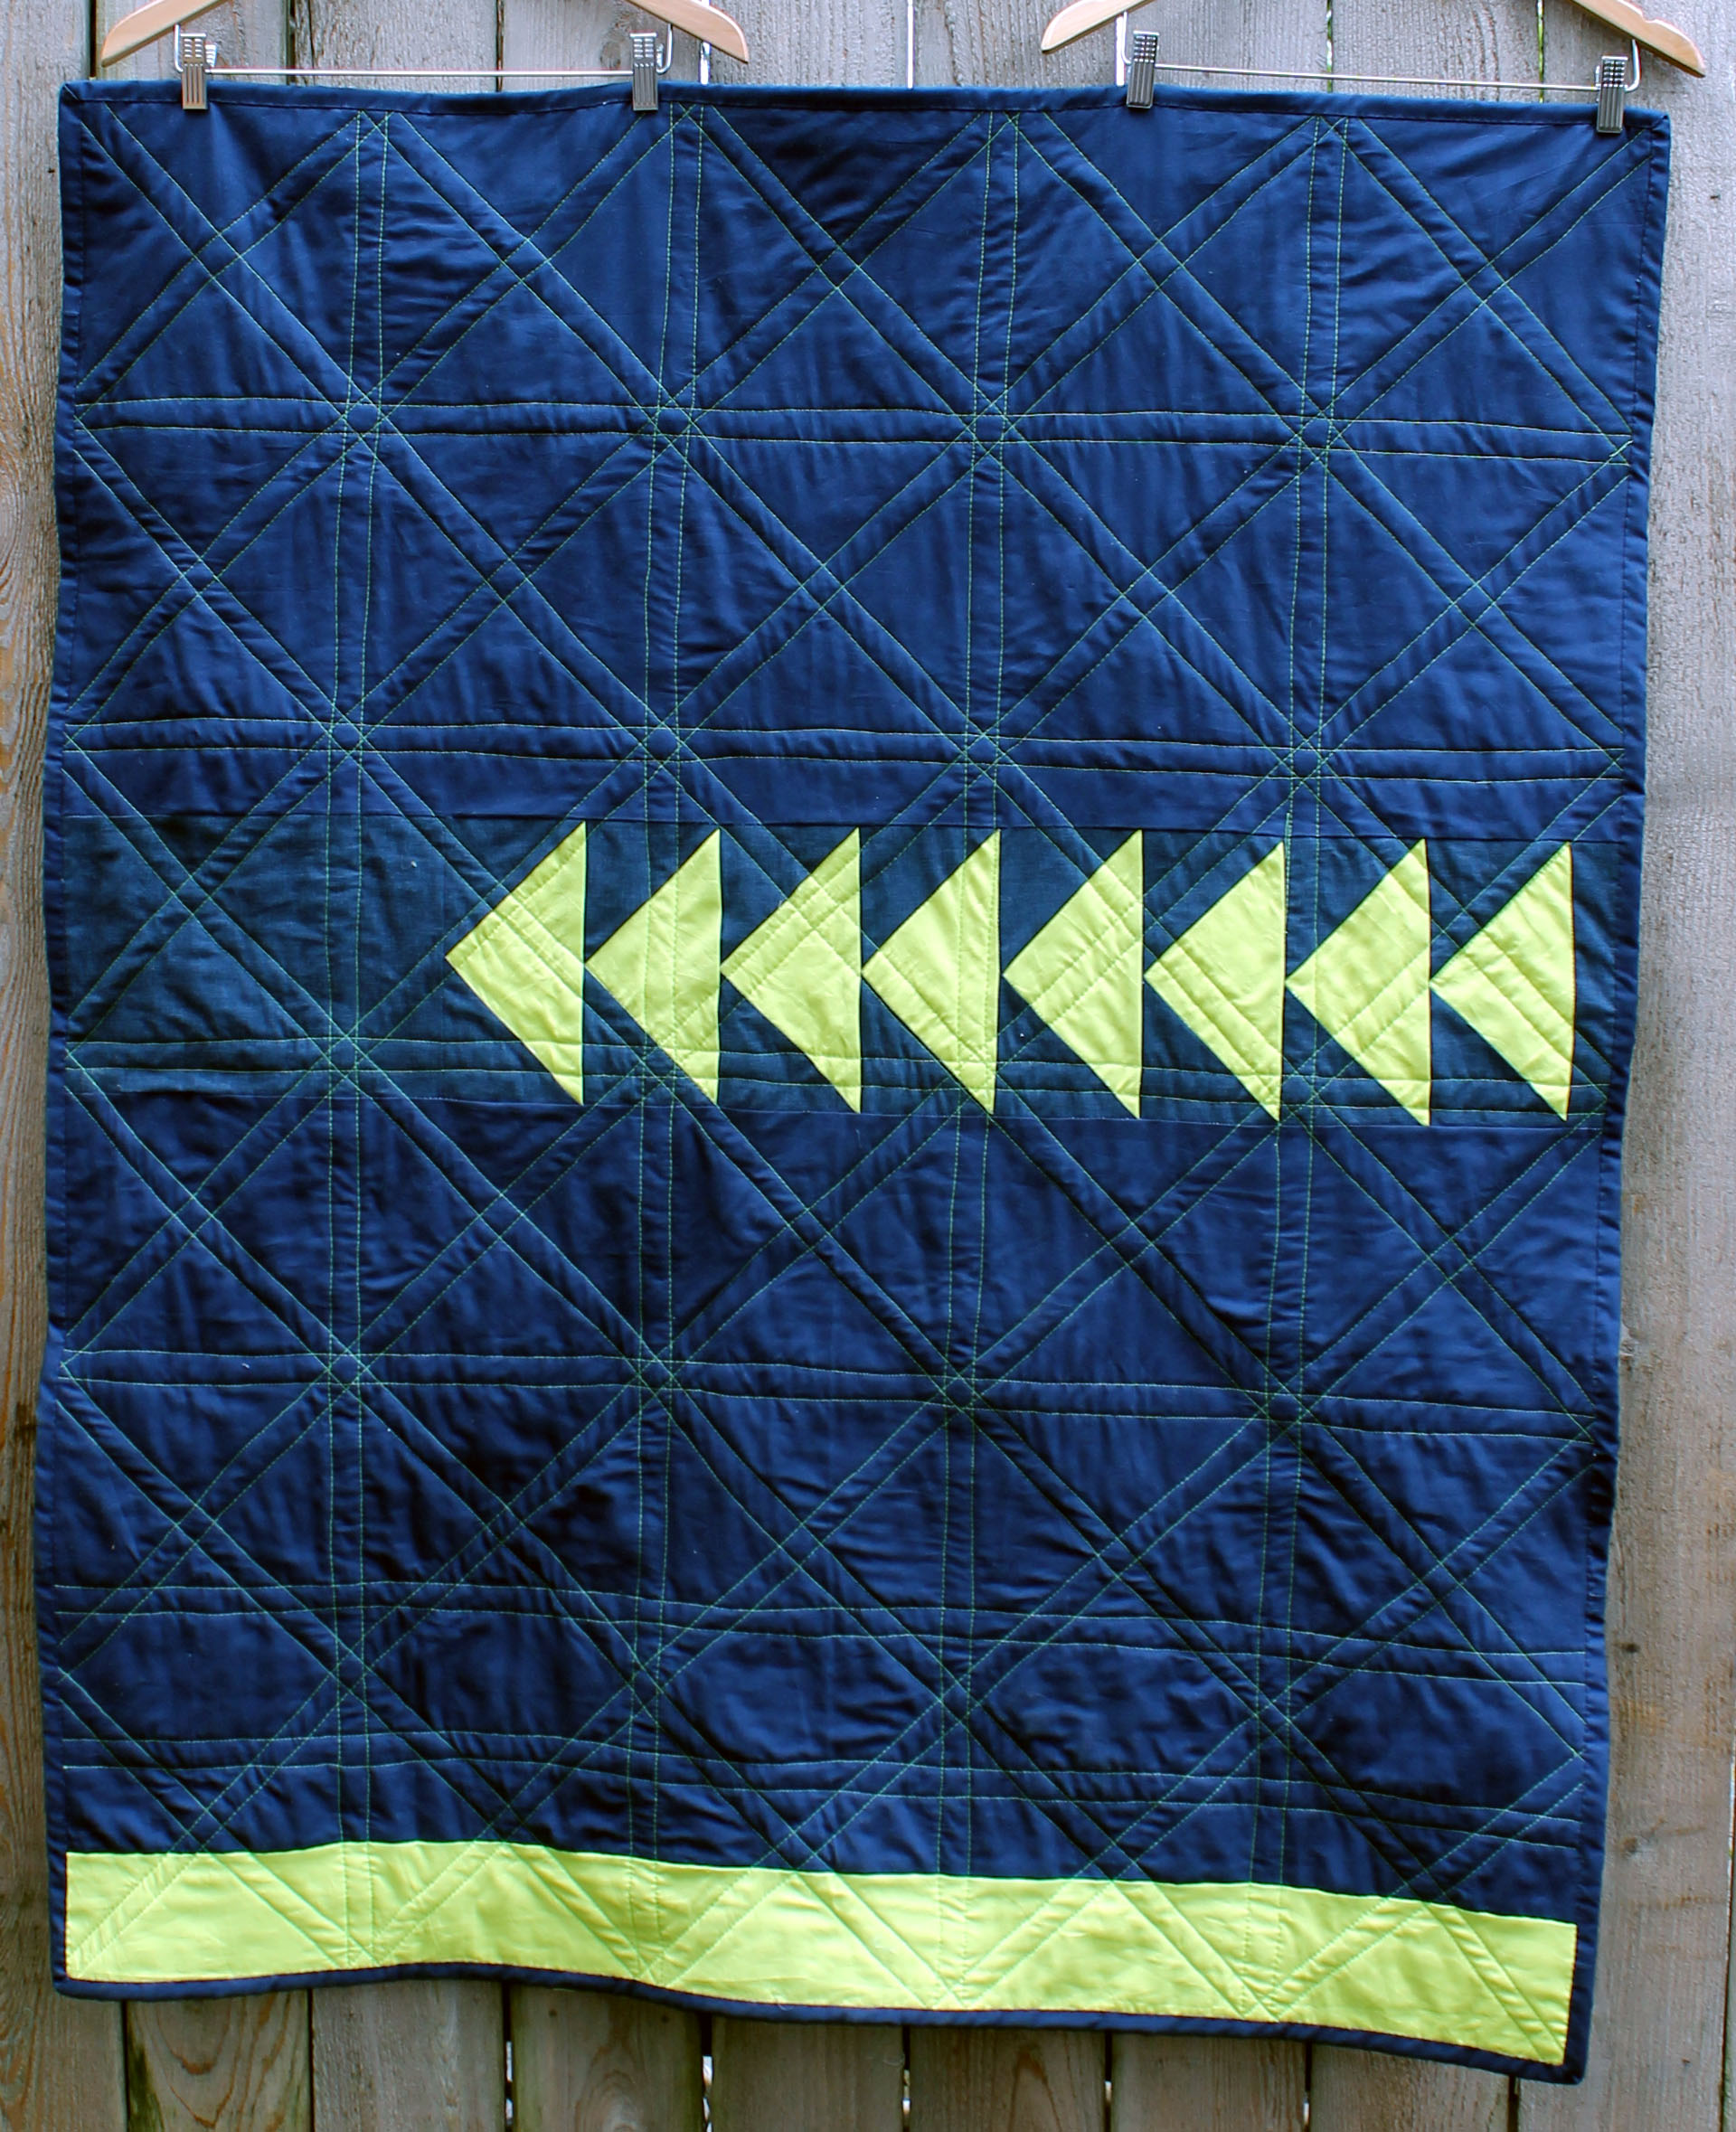
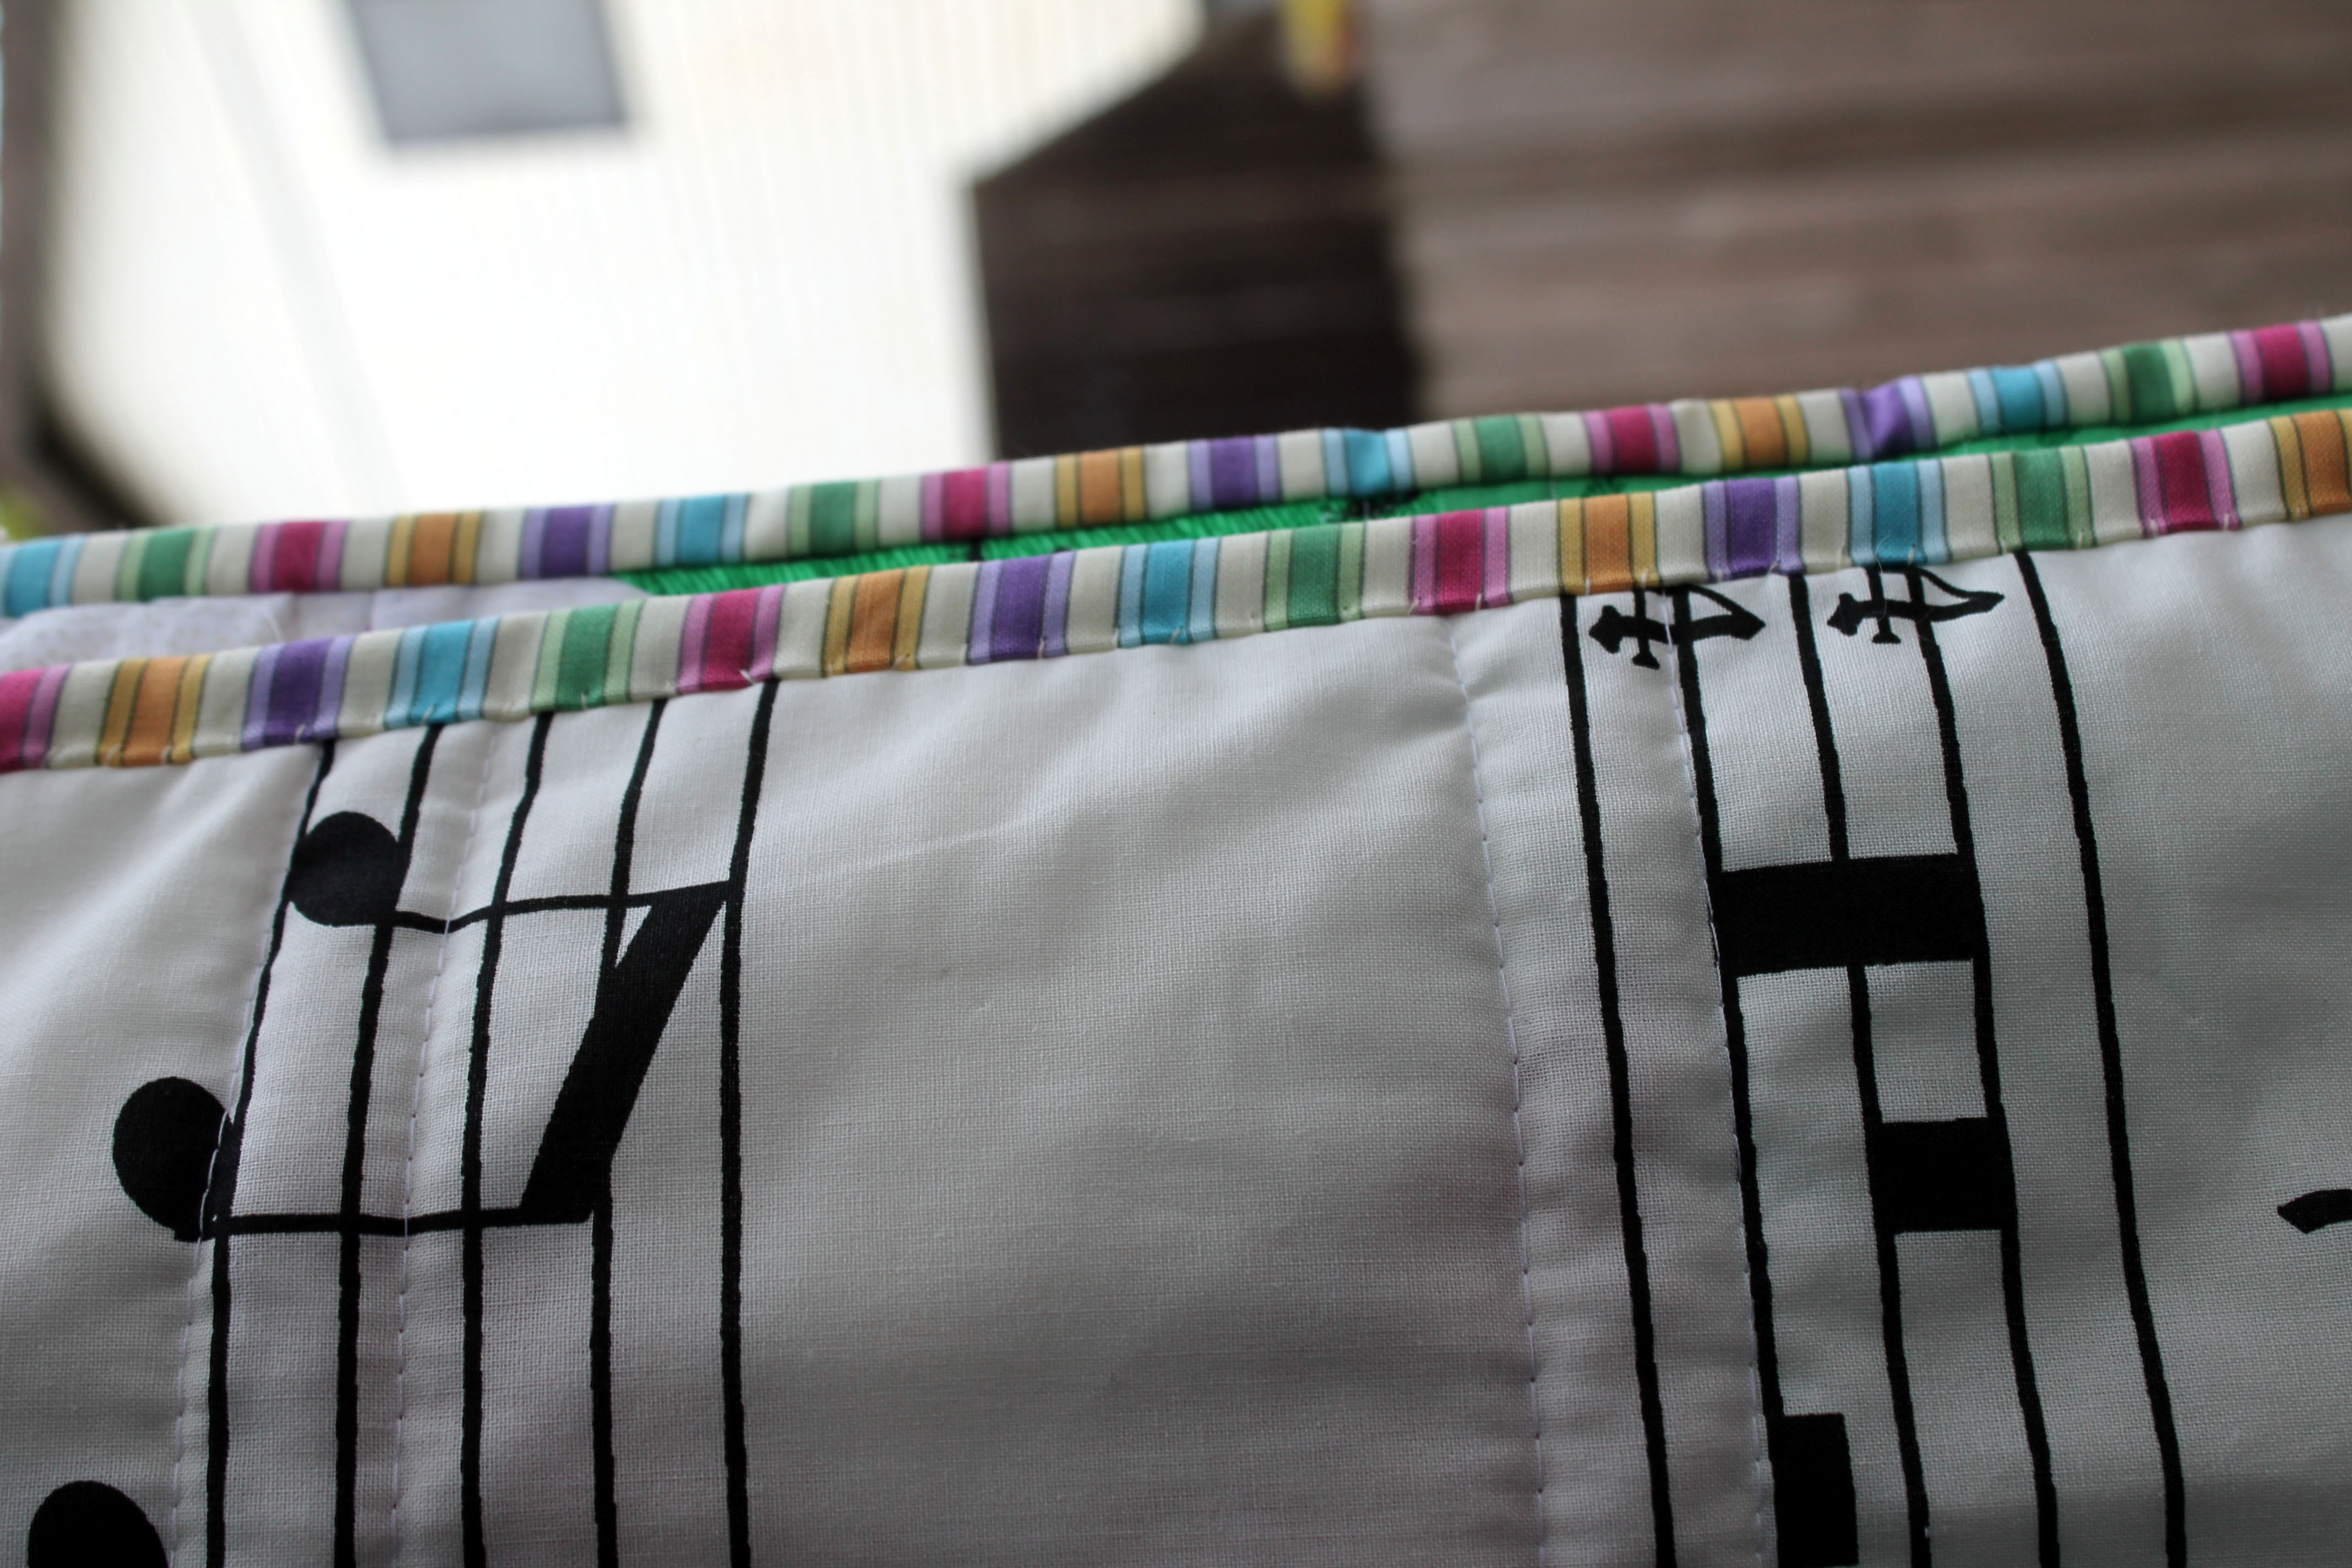
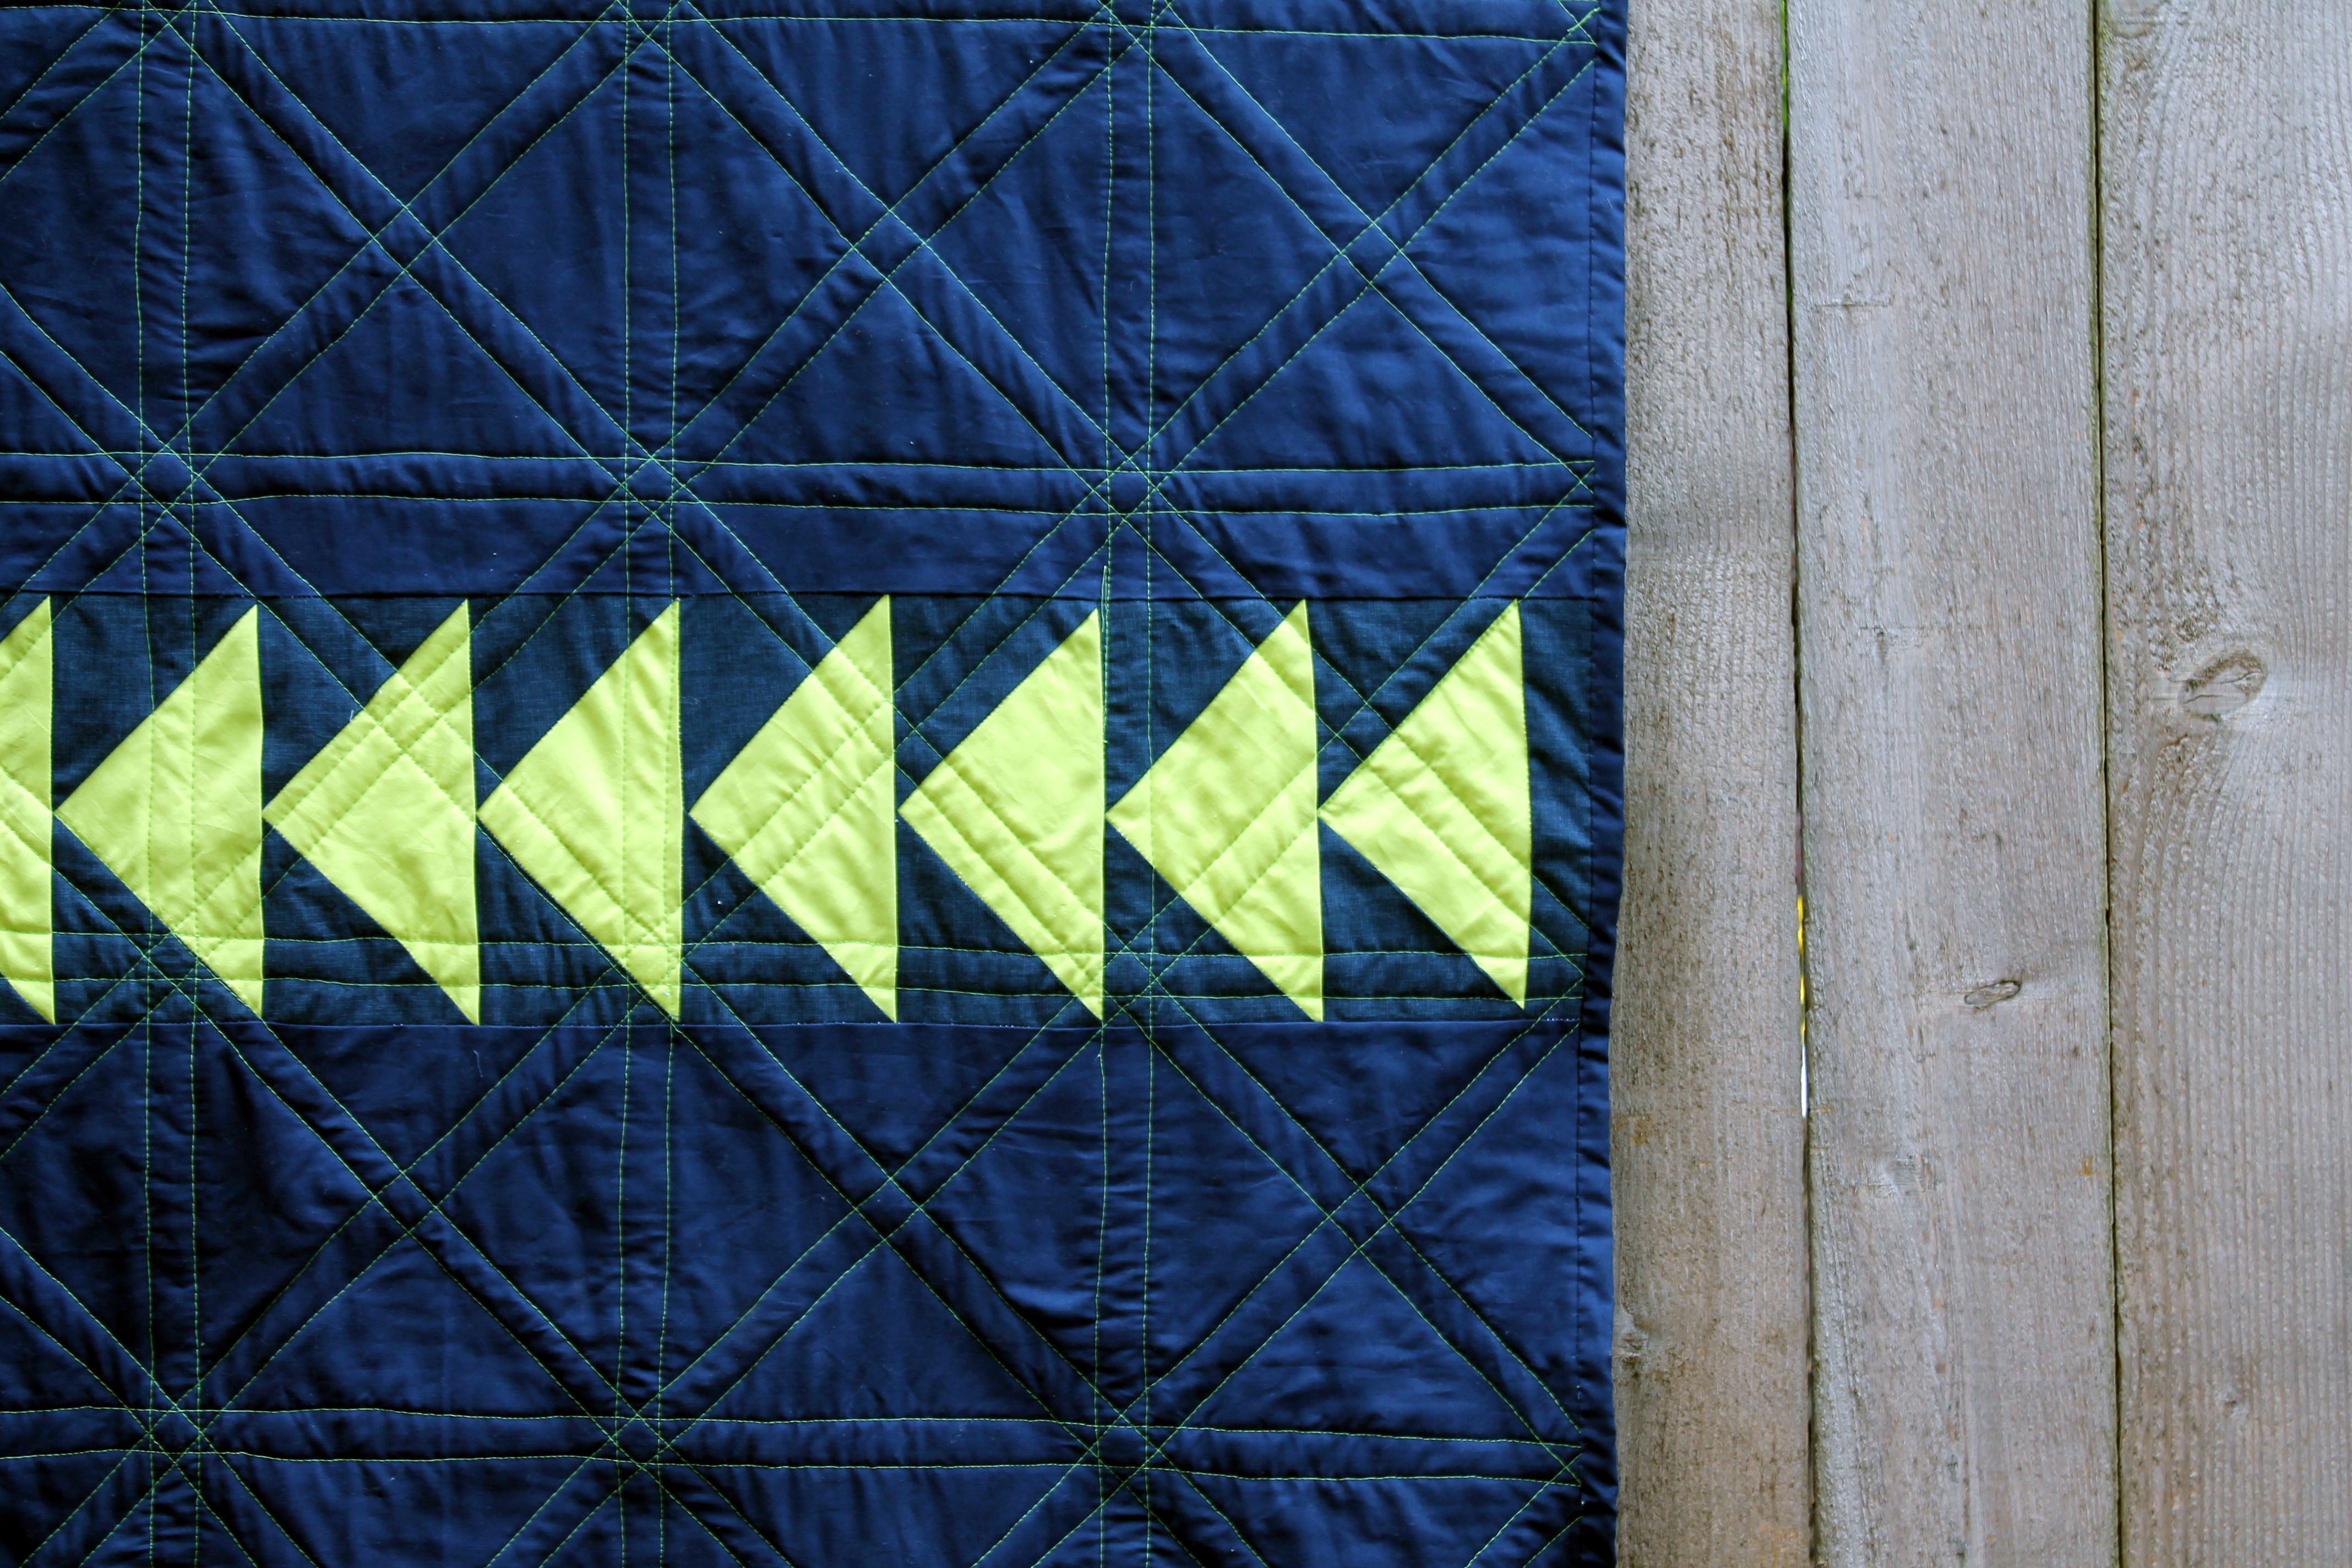
I decided to quilt along several of the block seams to really highlight the triangles in the pattern.  I used lime green thread so that you could really see the quilting on the back.  I do not usually do this, but in the spirit of new things, I gave it a try.

quilting in progress

It does mean that you can see a couple of my not so straight lines but I am embracing the imperfections.

quilt back detail

I am entering this quilt in the Bloggers Quilt Festival in the two colour category.  It is the first time I have entered a quilt and the quality of the quilts entered is amazing.  Check out the site, in particular their quilters focus, for some amazing inspiration.

Now I am off to do some more quilting.  I have a stack of quilts that unfortunately are not going to finish themselves… unless someone will lend me some quilting elves!

A Trip around

Like a lot of quilters out there, I have been seeing Trip Around quilts and blocks on-line for ages and ages.  I had seen some amazing versions but I had never really thought about making one myself…  then the Portland Modern Quilting Guild set it as one of their charity blocks.    That is when the trouble started.

First I checked out the pattern instructions from Bonnie Hunter at Quiltsville.   Looked easy enough.  My initial intention was to make just on block for the charity quilt so I cut 6 strips of fabric and made this.

trip around block modern bright quilt block

What was not included in the instructions was how addictive this process was.  My one block very quickly and easily grew to be this.

scrappy trip around quilt

Lots of black & whites mixed with loud obnoxious colours makes for a fun quilt.

trip around quilt detail 3

I backed the quilt with some Ikea fabric, did some diagonal quilting and machine bound it. I had never bound anything with solid black before but I think it works  well with this quilt.

IMG_1270

I am digitally adding my Trip to the growing collection out there on the web and then sending the real thing off to Project Linus for some one to snuggle under.

And in the spirit of Trip Around… here is visual trip around my quilting space (also known as our Living Room) as it looks this morning.

quilting space

That is… wip on the floor… fabric on the table waiting to be cut…. batting waiting to be used…. and my hexies work station on the couch/sofa arm.  Yes I am a messy quilter.

The joy of 5 inch squares.

Last year I had a brief period of time when I had some back issues that meant that sitting was not a fun thing to do.  I decided that, seeing I could not sit at a sewing machine, I would cut fabric.  For weeks I cut 5 inch squares out of my scraps and stash.  The end result was hundreds and hundreds of 5 inch squares.  Now all I had to do was find ways to use them.

My first step was to make a pile of simple baby quilts for Project Linus which played with colour (please excuse the dodgy i-phone photos).

simple bright kids quilts

This year I have got a little more creative with the squares, while still keeping it simple.  First I used the squares as the basis for my wonky star quilt which you can see here.   I then used the left over bits and pieces of that quilt (plus some left over scrappy white squares) to make this.

modern simple kids quilt

The 5 inch squares were used for the center pieces of the block, the background of the quilt  plus I cut a number of  the squares diagonally and used these triangles to make the star points.  Wonky star quilts really are so ridiculously easy.

The latest quilt I used my 5 inch squares on is my extra-large granny square quilt, which I have just finished.

modern large granny square quilt

With this quilt I just lay the blocks down diagonally to make the pattern,  sewed the blocks together then trimmed the extra edges and it was ready to go. Again ridiculously easy.

With both these quilts I did a simple straight quilting, running down both sides of the “ditch”.

quilting detail

The backing for both these quilts is from Ikea.  The granny squares got the most fabulous fun lips fabric as it’s back (yes the photo is upside down!)

quilt back

And for the wonky stars I went with a simple black & white music note fabric.

quilt bindingWhat I love about Ikea fabrics is their width.  You can easily piece larger kids quilts with one piece of fabric plus their prints are really fun.  Both these quilts are now finally finished and ready for delivery this month to Project Linus.

Sun & Sea quilt finished

I have just finished my sunshine and sea quilt that I started just after I came back from Australia… and I am really pleased with how it turned out.  I keep looking at it and smiling.  It reminds me so much of the fun time we spent at the beach, when the sun was shining and the water was warm.  On this cold and over cast Portland day it reminds me that sun does shine, somewhere!  Summer is not going to come quick enough for me.

blue orange finished modern kids quilt

The overcast day does have one advantage – it is great for taking photos (as long as it is not raining!). Okay,  enough about the weather… moving on.

With this quilt I have been struck by how a quilt pattern can change when you sew the whole quilt together.  I rarely map or sketch out the finished quilt.  I really like to just see where it all takes me, for better or for worse.  So I started the process with an easy block that looked like this.

blue orange quilt block simplified modern Iowa star block

The pattern in the block is like a simple star with four points.  I mirrored the block pieces to give it a more interesting effect.  When I look at the quilt now I struggle to find the stars, all I see is a pin wheel.    The original pattern is in there, I just have to search a little harder for it.

modern bright kids quilt detail

This quilt was  really quick and simple to make but the interesting part came when I was sewing it all together.  There are sections of the quilt where 12 block pieces meet which causes a little bit of bulking, even with sewing seams flat.

To help with the bulking I chose quilting that would go through and around the center of this join.  In having so much quilting through the bulk it helped flatten and strengthen this area.  It also made for a lovely pattern of quilting.

detail ofsimple straight quiltingA pieced back and scrappy orange binding finishes the whole thing off.

sun & seaback of quilt

I must admit it had been a month or so since I had hand stitched the binding on a quilt and in that time I seem to have forgotten how to do it.  The stitches at the start are a little big and a little rough, but by half way through the process I was back to invisible stitches.  I was tempted to unpick it all but decided to leave it be.  Looking at the small section where the hand stitching is visible reminds me that the quilt is hand-made and that a lot of effort has gone into the finished product.

Loud, bright and fun… the quilt

.. and the nephew.  When I was back in Australia I took the opportunity to photograph the quilt I made my nephew last year.  I finished the quilt just before I started blogging and forgot to photograph it before I sent it on its way.   Better late than never right….

Rainblow quilt finished

This pattern was an out-and-out steal/borrow from a “do good stitches” quilt posted on Blue Elephant’s site.  I fell in love with the pattern immediately  and thought it would be great for my nephew.   The block is simple and the directions are easy and clear – its foundation is a 16 piece block of rainbow colours.  If you are interested in the pattern check out the above link for all the great instruction straight from the source.

quilt detail

For the back of the quilt I used some of the extra blocks I had.  I usually have blocks left over because I make more than I need so that I have choices when I am putting the finished quilt together.

quilt back 2

This quilt replaced a baby quilt I made for my sister about 12 years ago.  I actually made the quilt without knowing that my sister was pregnant or what sex the baby would be.  All I knew was I was heading out on an adventure and I did not know when I would be able to quilt again.  This is the much-loved, much washed  old quilt.

Harry's old quilt

Photographing these quilts involved more time and effort than usual as there was much misbehaving, silliness and photo-bombing going on.

trauma for photographing the quilt

In amongst the crazy I did manage to get a photo of Miss Banana and her new quilt.

Miss Banana and her quilt

What I did not manage to photograph was the hilarious sight of my 6ft tall husband walking around Portland Airport with a pink and yellow quilt sticking out of his backpack.  It is a sight I will not forget in a hurry.