I have a confession to make…

…deep breath…. here goes….I am a messy quilter.  You may not be able to tell from what I have put up on the site but in the last couple of weeks the truth has become harder and harder to ignore.

So what has forced this revelation…. Quilting Bees. Over the last couple of weeks I have been getting quilt blocks from around the country – I was “Queen Bee” for both ScrapBeeLicous Bee and Do.good.stitches Hope Circle.

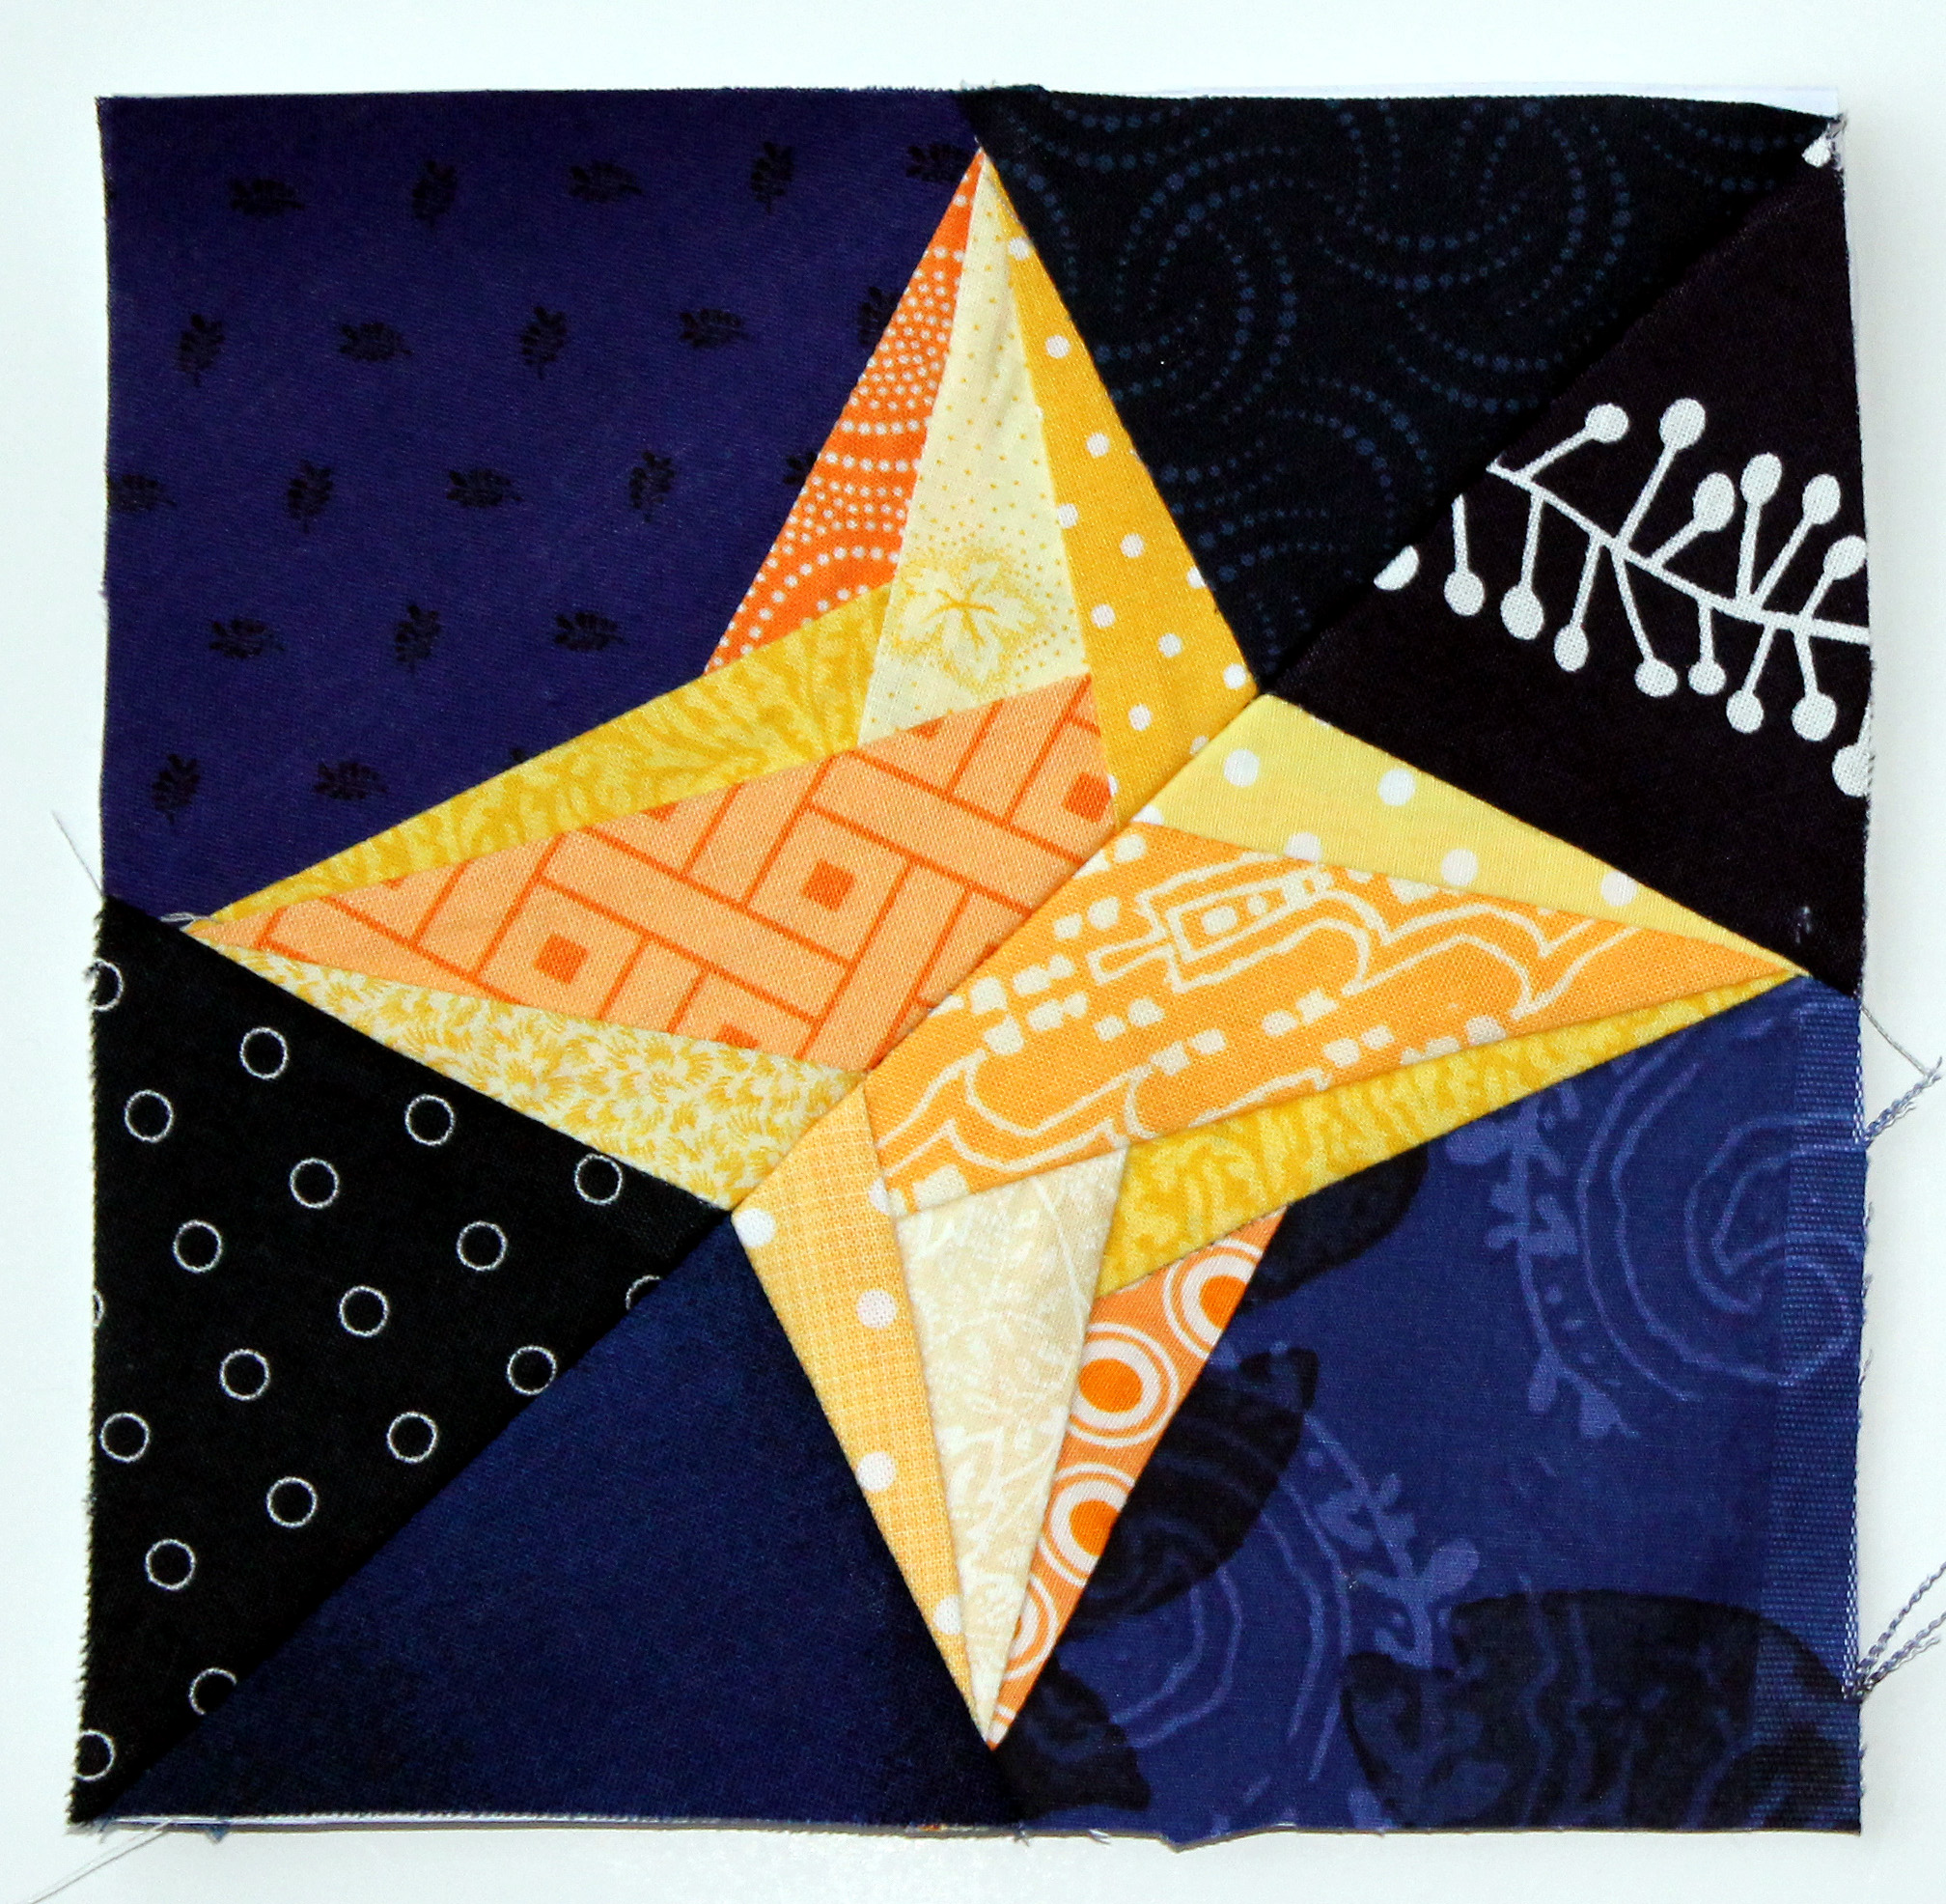
So here is the evidence, as I see it.  Exhibit A…. a block received for the Do.good.stitches Bee.

Exhibit A

Please note the neat seams.  The lack of loose threads. The overall precision and beauty of the back of the block.

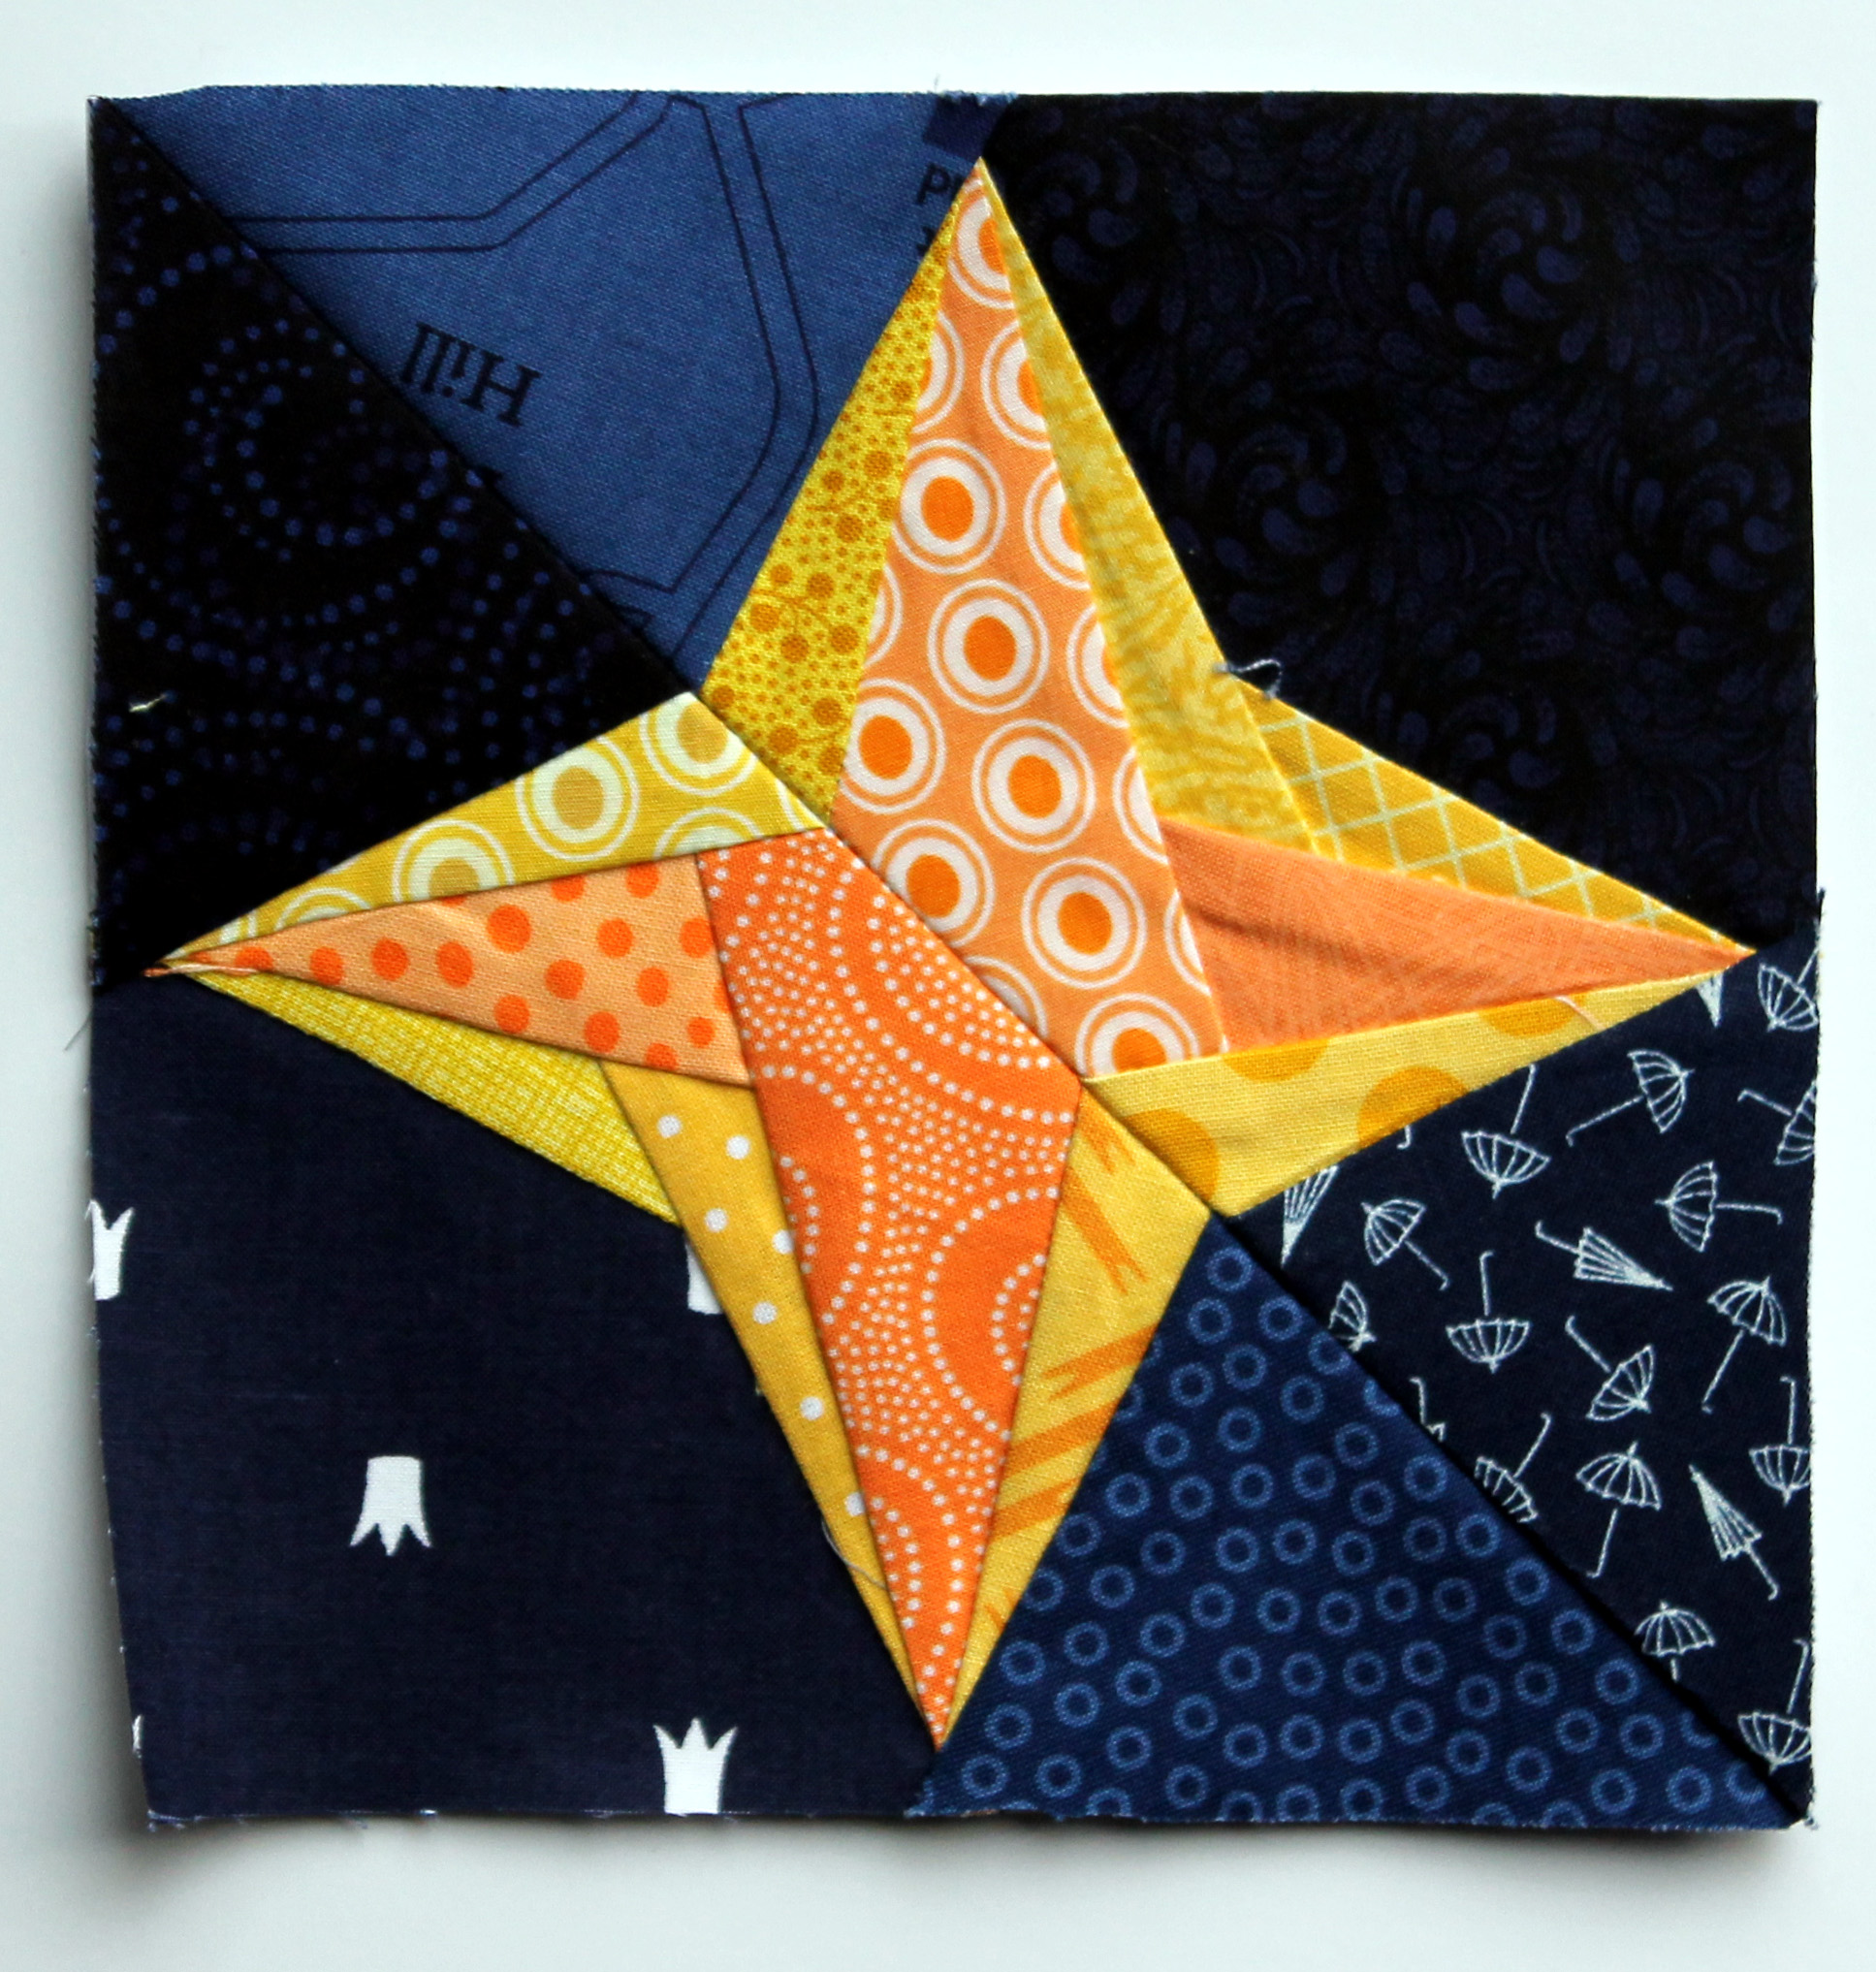
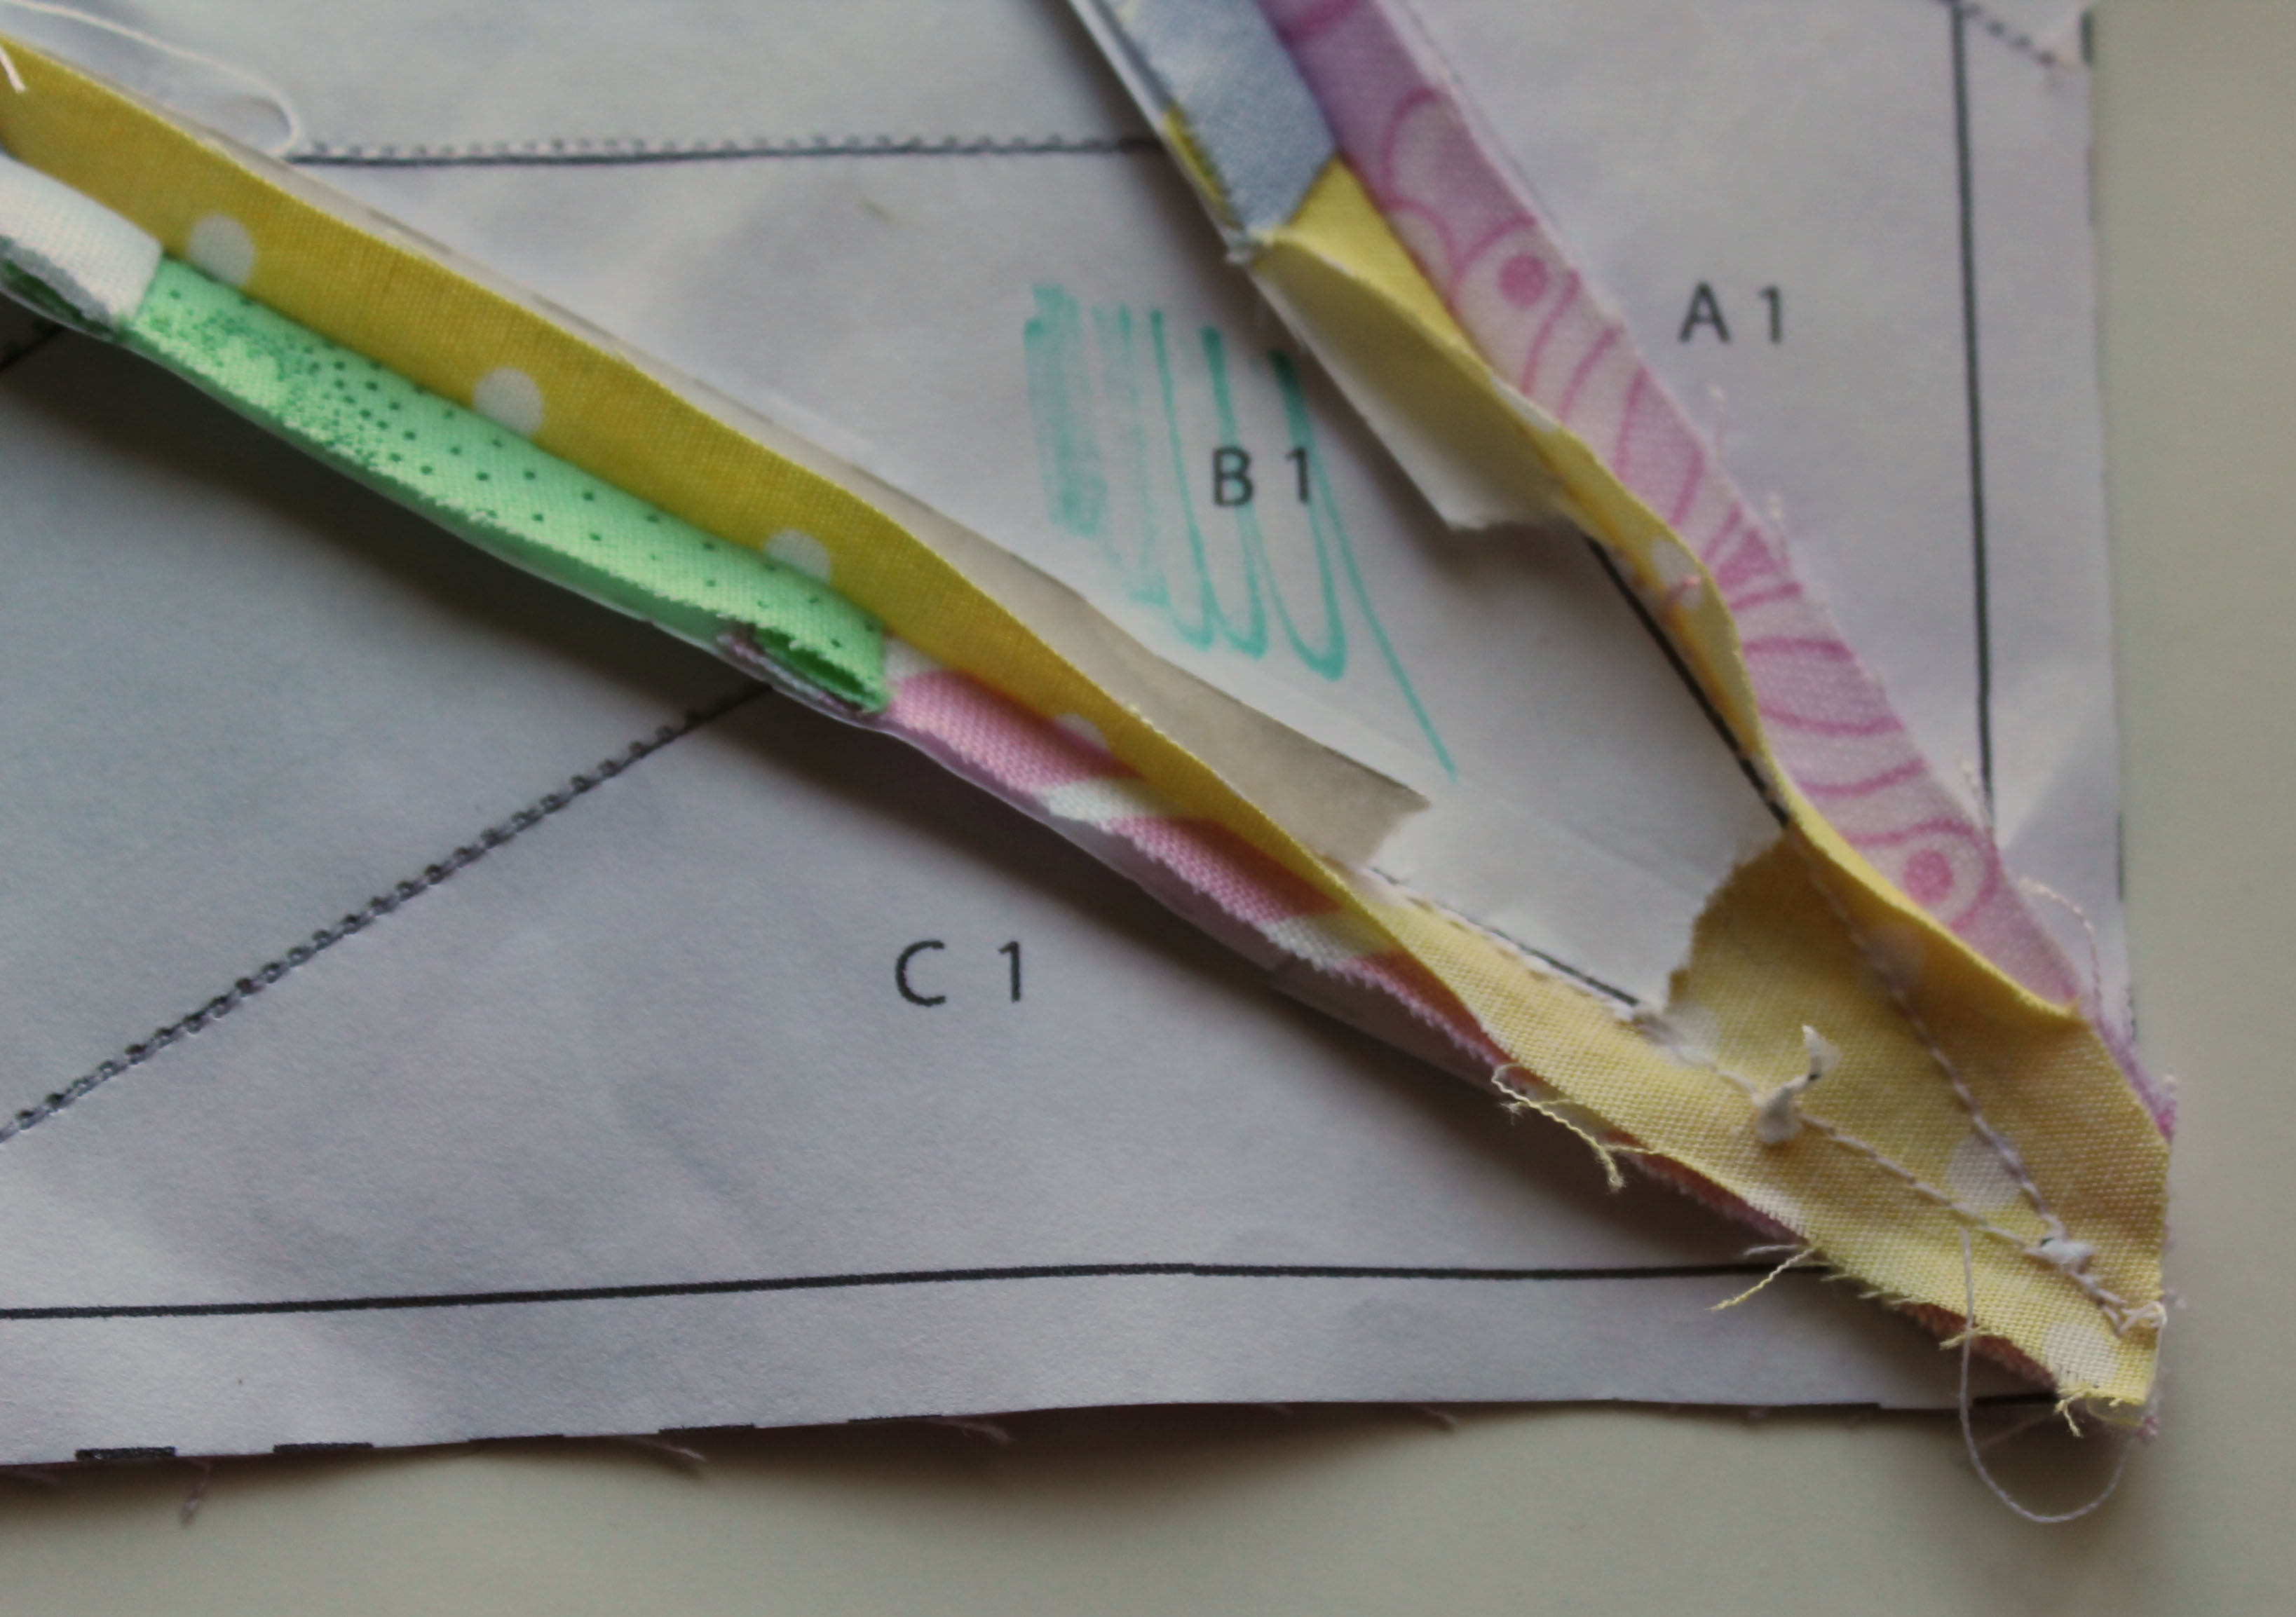
Now Exhibit B…. my Icky Thump block for the same quilt.

Exhibit B

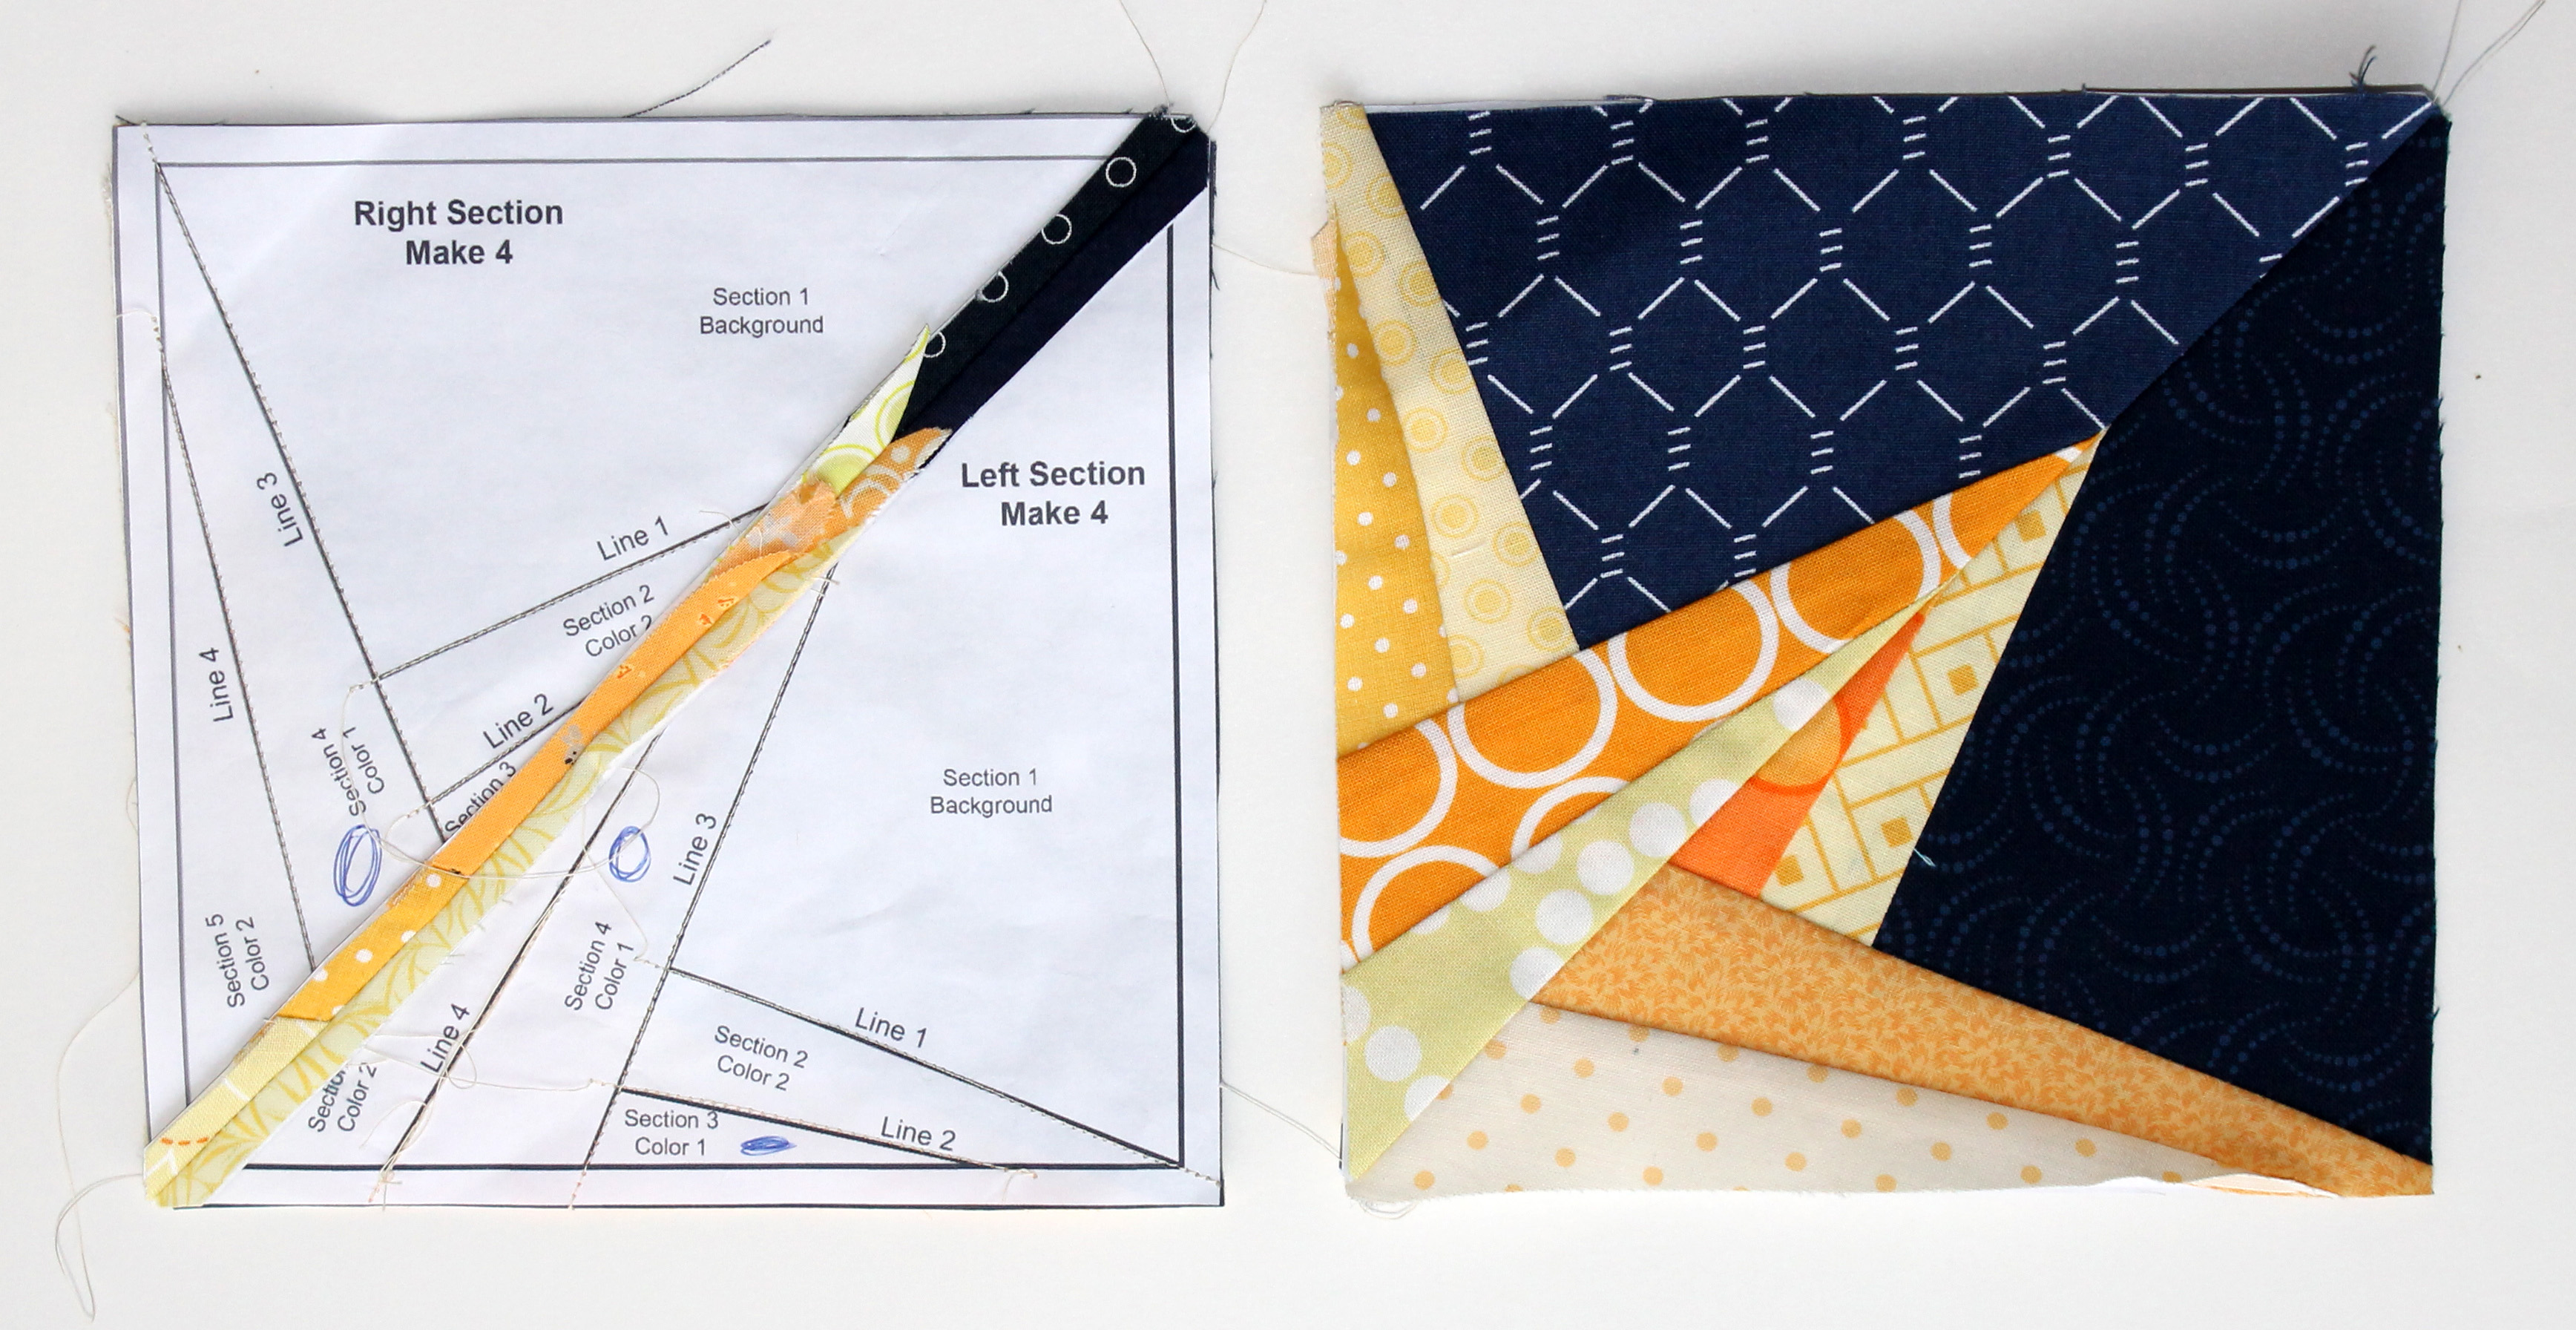
It is down right embarrassing.    In my defense I taught myself to quilt and never knew that you should carefully cut threads.  Since seeing my fellow quilters blocks I have started taking more care with my threads but I still trim my paper piecing with scissors.

With these startling revelations and confessions, there is only one saving grace…. you really can not tell from the front of the quilts.

quilt blocks

When setting this block for the Bee, I did not realise that most of my fellow Hope Circle had not paper pieced.  I believe I drove a couple of them to drink.  It really did not occur to me that there are people out there that have not tried paper piecing –  I wrongly assumed that it was a technique commonly used.

I set this block because it was an easy block to do, but very very effective.  Some of you may recognize the inspiration from a post earlier in the year.

Paper pieced block

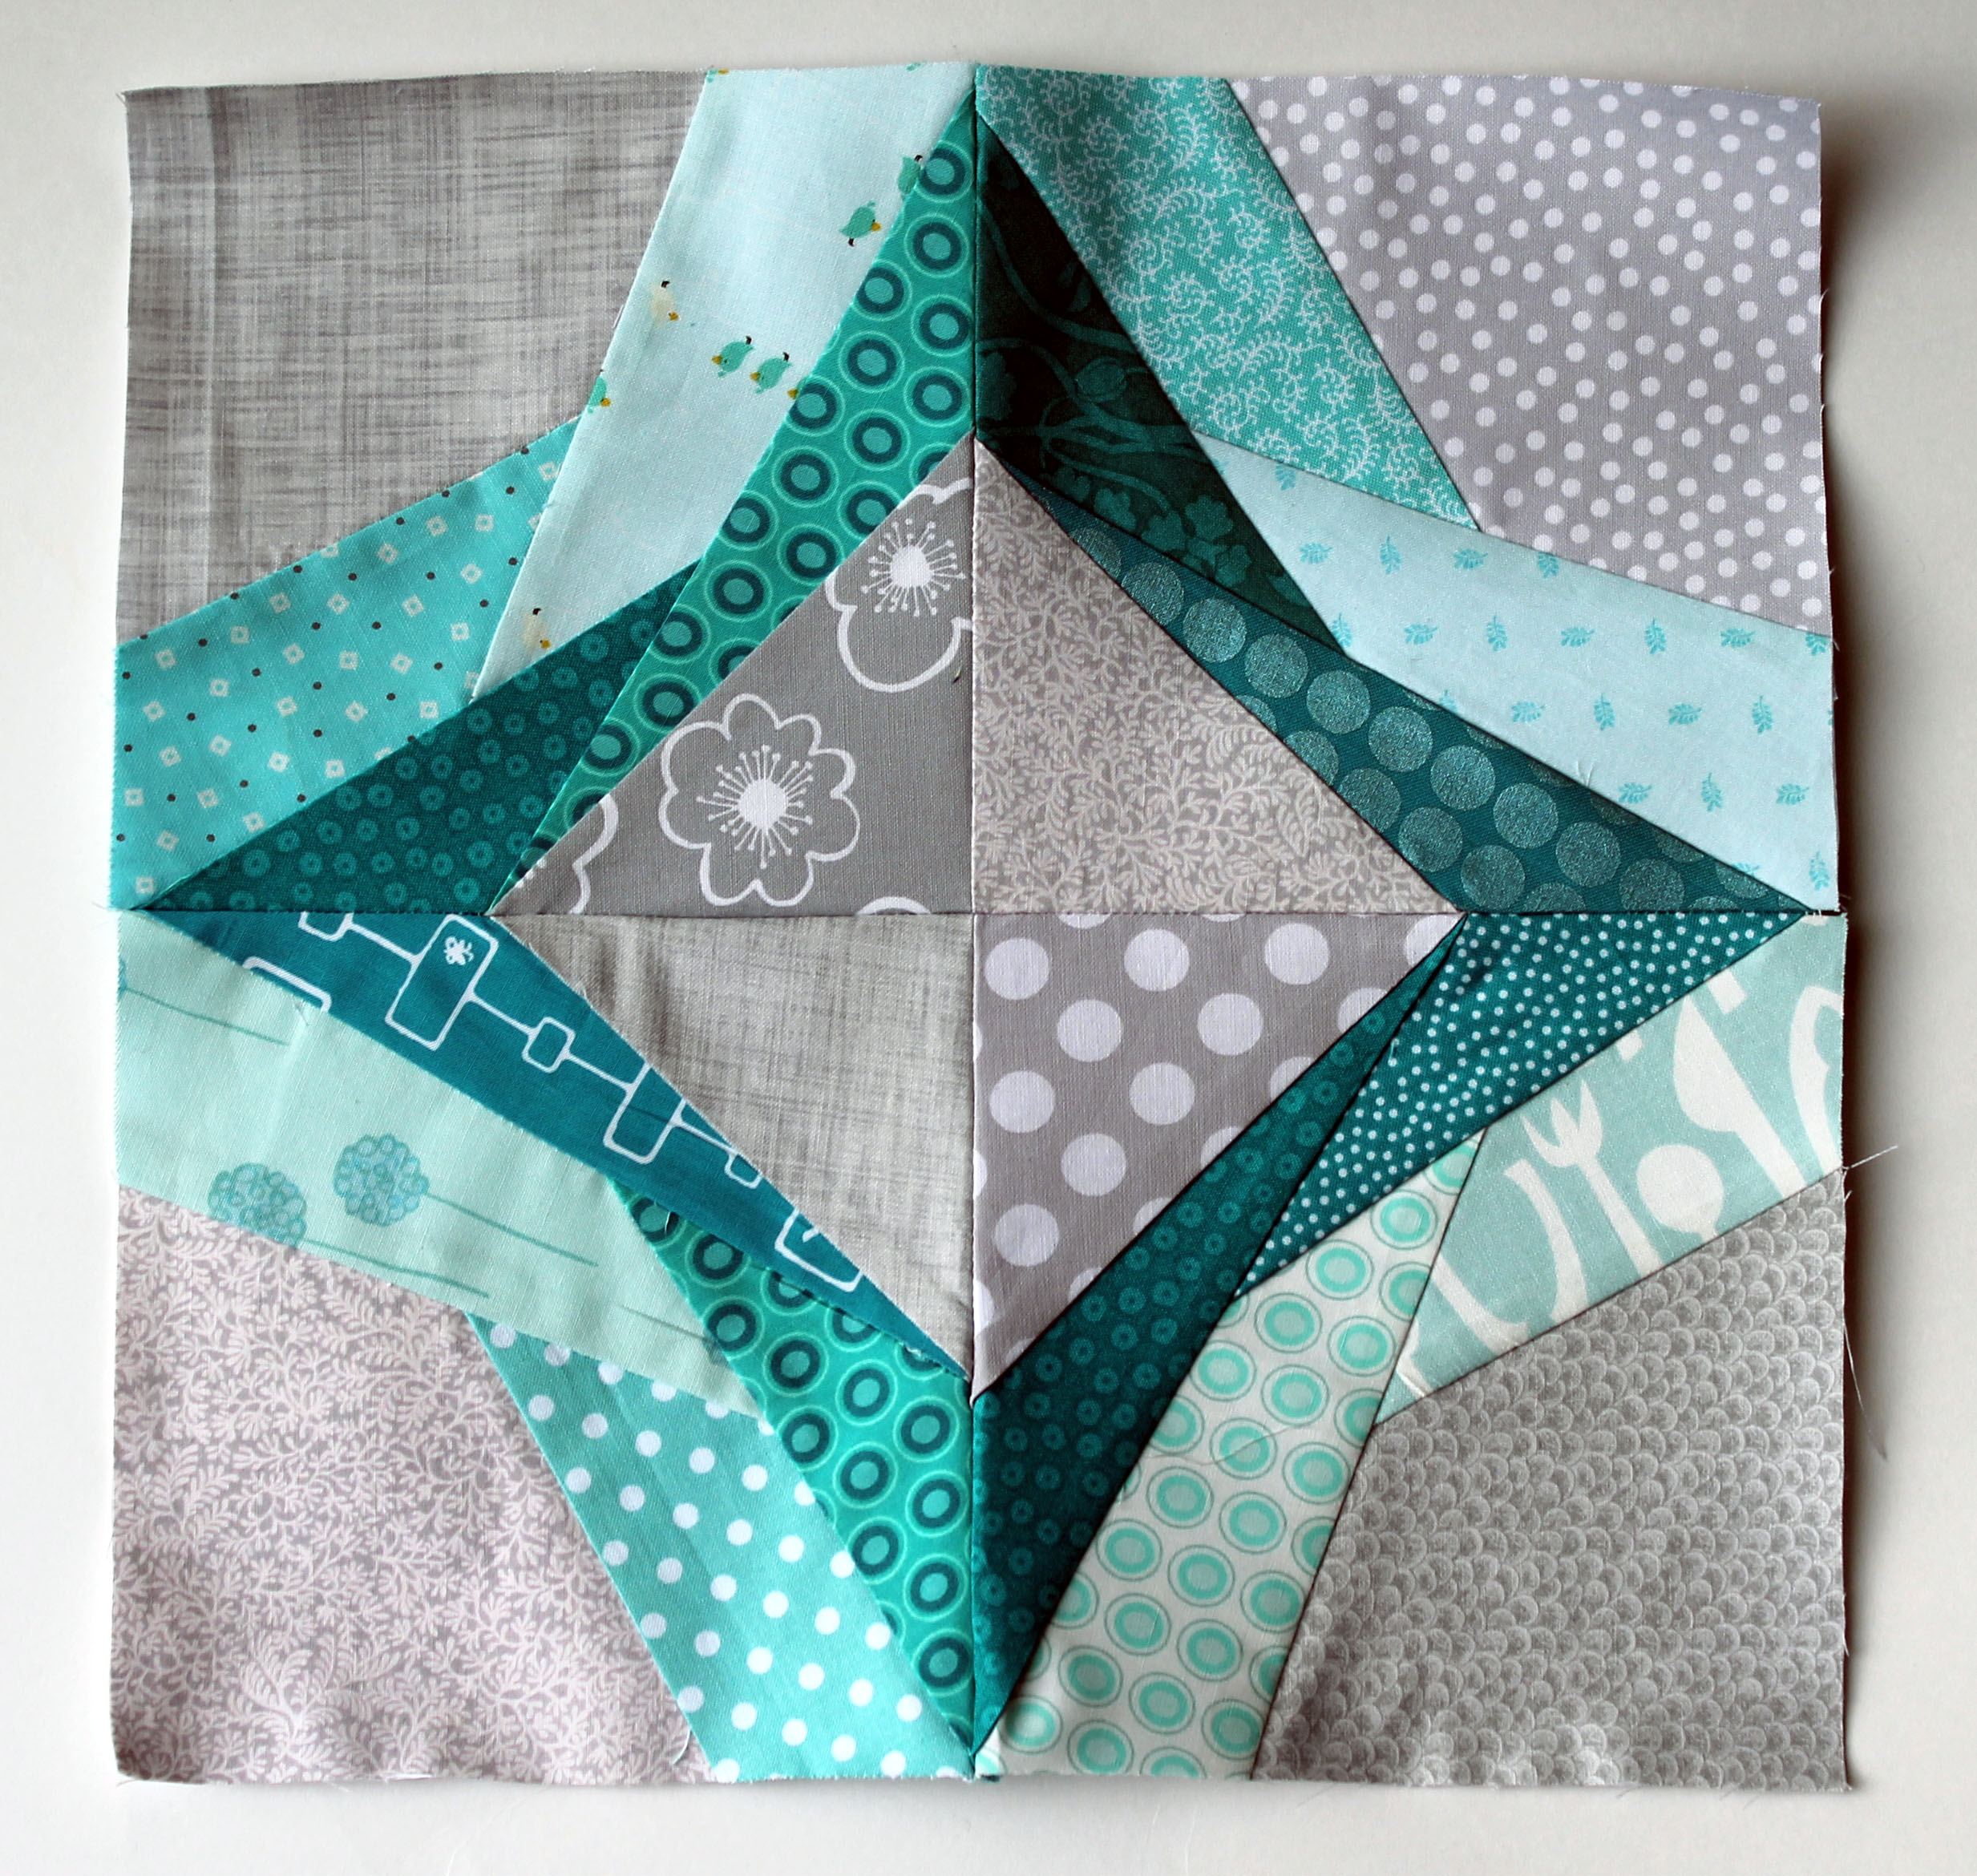
I made this block using Julie at 627handworks free Icky Thump paper piecing pattern.  I loved it so much and was determined to make a full quilt in this colour way.

Icky Thump blocks
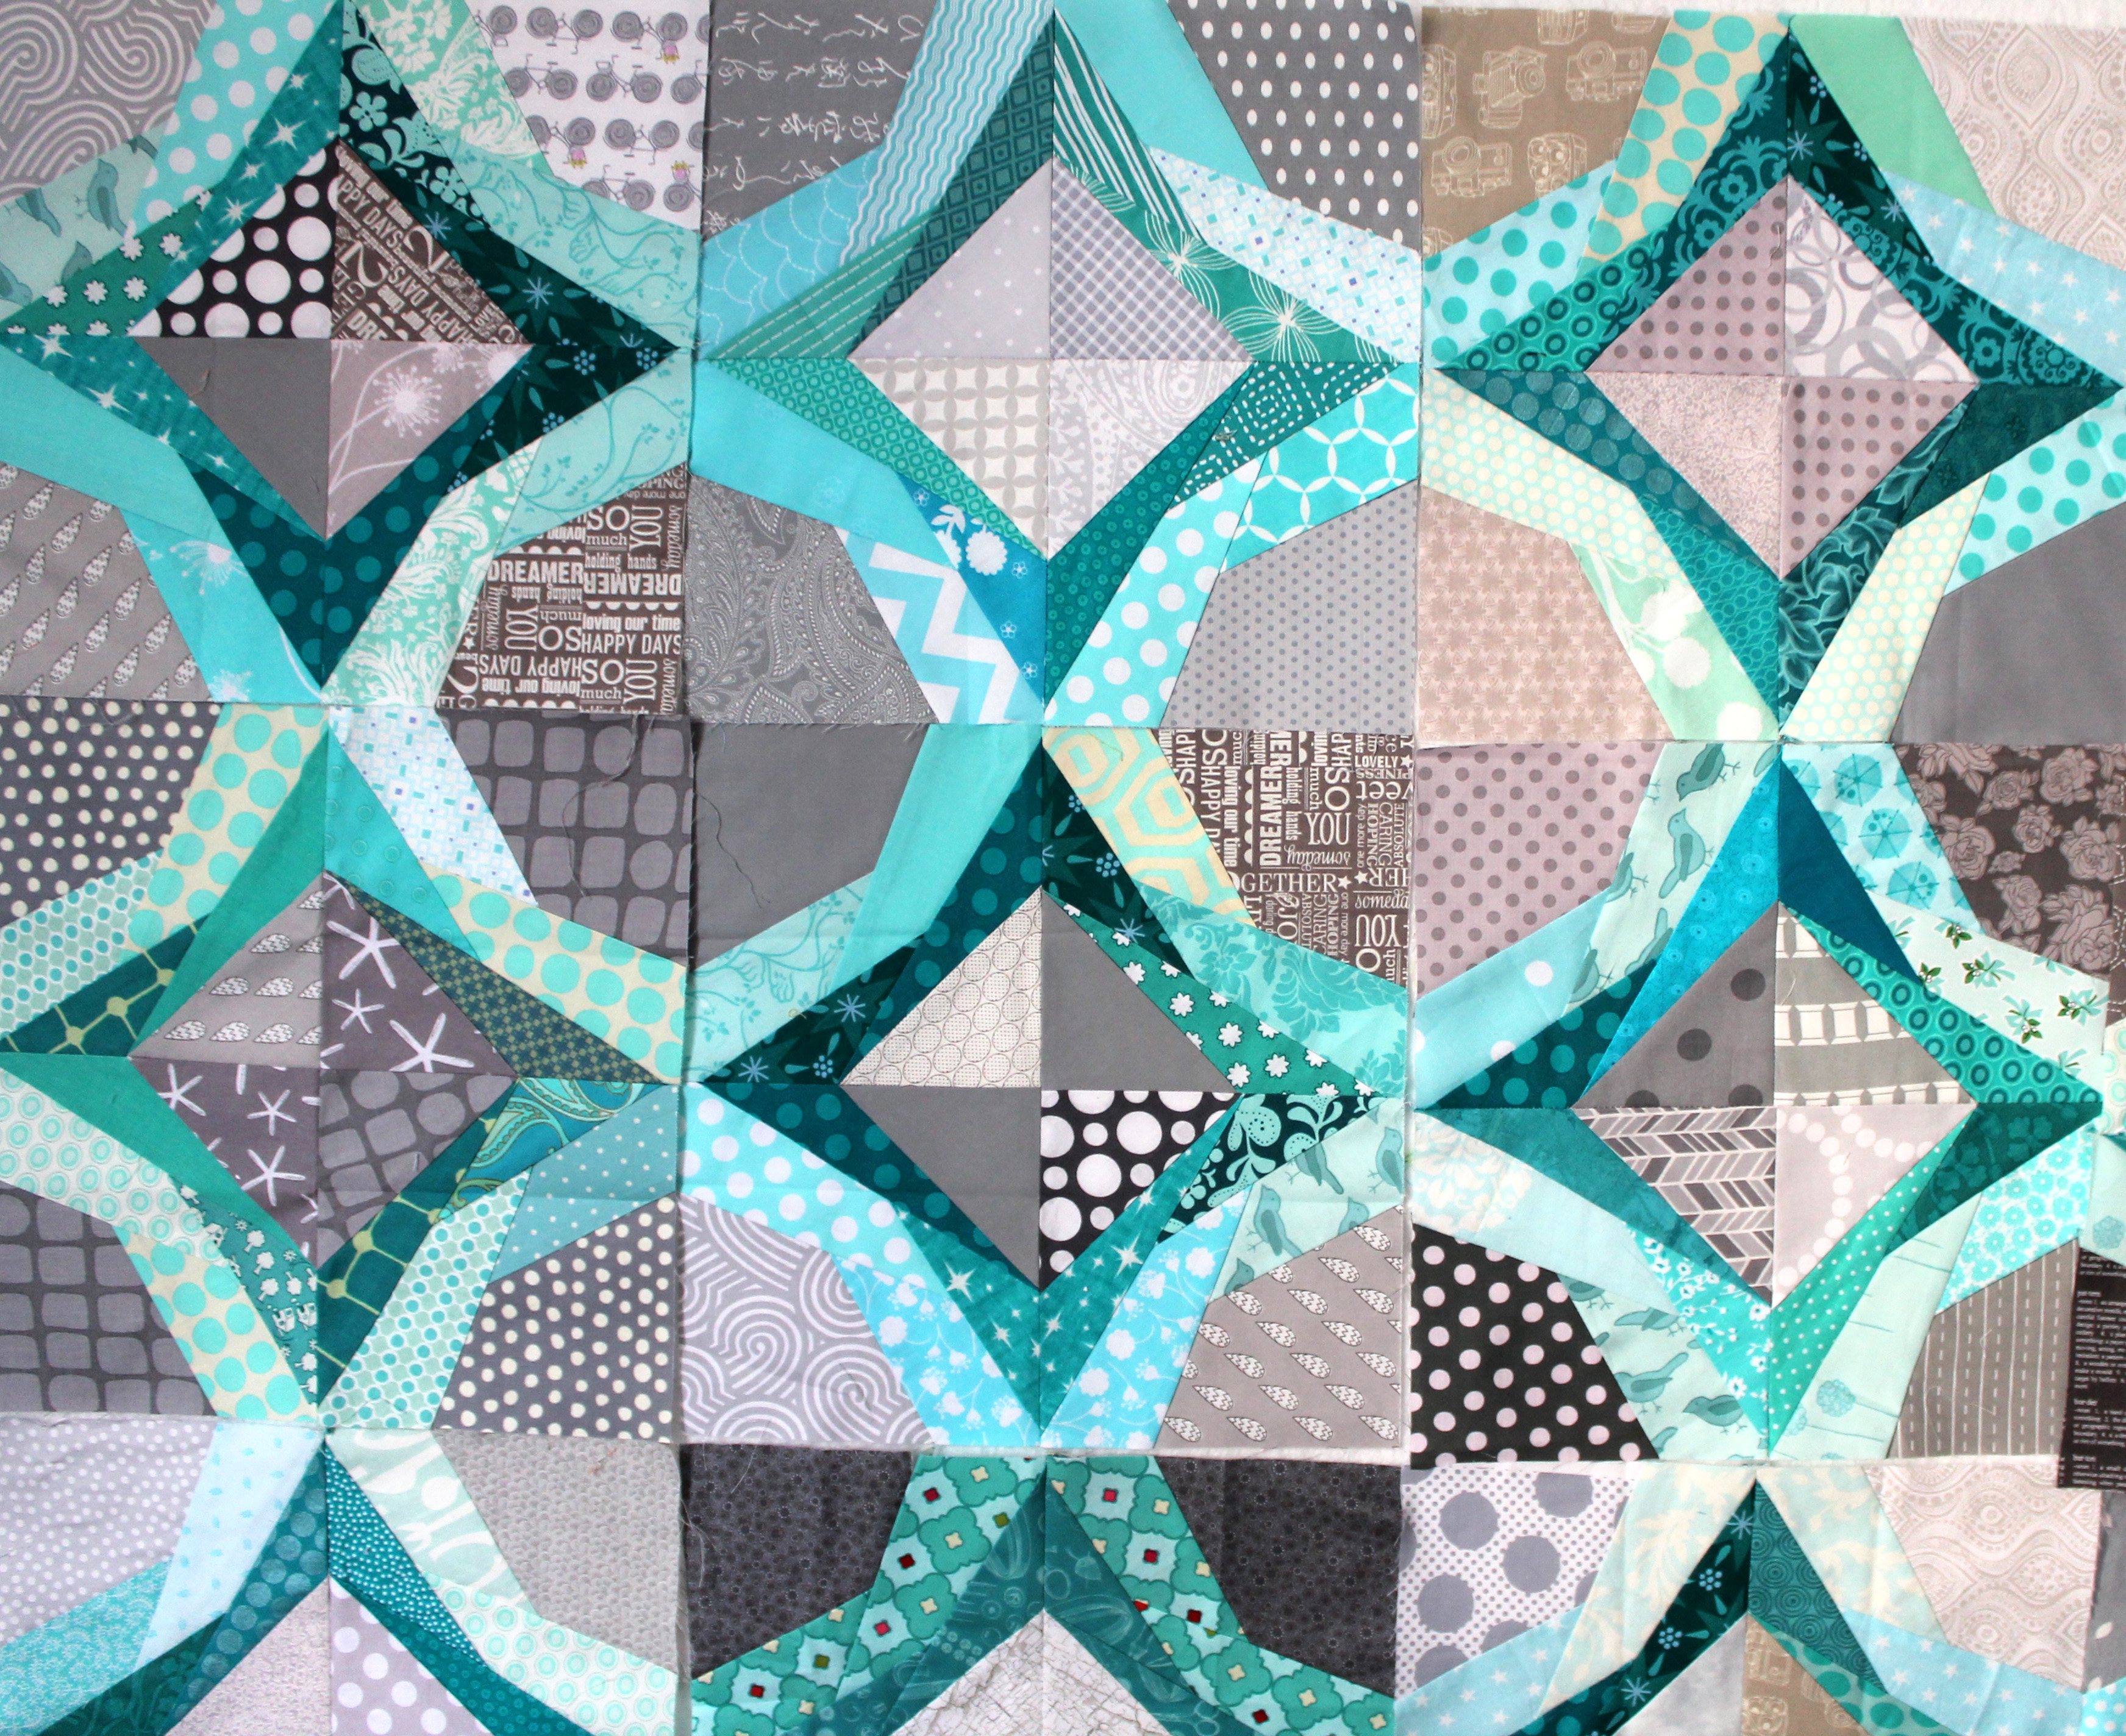
The quilt  is coming together nicely… I am still awaiting a few more blocks in the post and then I can put the top together.  The finished top will be 4 blocks wide x 5 blocks long…. and fabulous.

Starry Night continues – Paper Piecing Monday

After last weeks easy (read 18 piece) blocks I decided to up the fabric piece count with this weeks star.

Starry night Cactus Compass block

This fabulous star is another free pattern from Quilting on the Squares new bonus compass star patterns.  The Cactus Star Block star is a 64 piece star, with enough complexity in the colouring that I had to resort to coding my pattern…

Cactus Compass block parts

I must admit more and more orange is creeping into these stars…along with a touch of dark purple here and there.  I just can not seem to limit myself too much colour wise, particularly with these more complex blocks.  They work best, I think,  if you have variety in your colours.

Starry Night Part 2 – Paper Piecing Monday

After some of the discussions about the complexity (or not) of last week’s block, I decided to do a really simple block this week.

Braided Star block 1This block, which measures only 8″ x 8″, was made using a free paper piecing pattern by Moira McSpadden at The Quilted Snail.   I thought my Starry Night quilt would work best if I vary the size of some of the blocks – my usual Paper Piecing Monday size is 12″ x 12″.   This block only uses a mere 18 pieces of fabric and is really quick and easy to make.

paper pieced star

It is so easy to make I made two…

Braided star block 2

If I am honest I made this block first but was not completely happy with it so made the other version.

Starry Night Paper Piecing Monday

First of all I have to explain, for those of you that do not know me, I have the attention span of a gnat.  I get bored easily and always have more ideas than I have time.  With this revelation in mind I hope you will forgive me for putting aside my pastel paper piecing blocks and starting a new project… Starry Night.

paper pieced star quilt block

I had the idea for this series of blocks the other day while watching an episode of “Face Off” and after seeing Quilts of a Feathers fabulous WIP Tardis quilt, and just had to run with it. Then I discovered that Quilting on the Square had added a six more free blocks to it’s Compass collection and it seemed like Kismet.  I promptly picked the Rolling Compass block pattern (block3countryregister) and went to work.

Starry night block pieces

Another fairly simple star pattern with just 40 pieces, but once again the scraps make it look more complex than it is.  I think this is going to be a fun quilt to make.

ps.  last night my husband did a very technical spreadsheet thingy and choose a winner of Give Away. Congrats to Melintheattic.  A bundle of fun goodies will be winging their way to you soon.  And thanks to everyone for the kind comments left on the site… made me feel all mushy.

Paper Piecing Monday tips

This week as I put my paper piecing block together, I thought of what I have learnt this year doing these blocks… and thought I would share some of my tips.

So this week I choose another of Julie @ 627Handworks great blocks.  The block, Siouxsie, is one that Julie has put up on Craftsy and is block 13 of her Block Rock’n series.  At a $1.00 for the pattern is it a bargain.  You can also download Julie’s free Block Rock’n blocks at Craftsy as well.

paper pieced scrap star block

Tip #1…   I always download the pattern to my desktop before I print.  This is the best way to guarantee that you are printing to the correct scale.  I had some fun issues printing directly from the website early on in Paper Piecing Monday’s life, which resulted in me have to remake some blocks.  Also make sure that you tick the “print in original size” box in your print dialogue box.

Tip #1a… I use normal photocopy paper for printing my patterns.  It is cheap and easily available.

Tip #2… If the block is complex or I am making it complex, I use coloured pens to mark up my paper pattern.  This way I do not lose track of what colour goes where.

star 11 paper piecing pieces

Tip #3… I always glue down my first piece of fabric.  I go through so much Elmers glue it is not funny.  I find it easier to align the first set of seams with one of the fabric pieces already stuck in place and pins cause fabric bunching which is annoying.

glue stickTip #4…  I am always generous with my seam allowance on my scraps.  I have found it is much easier to work with BIG scraps or pieces of fabric than it is to work with precisely cut pieces of fabric.  In paper piecing you get all sorts of weird shapes and having an abundance of extra fabric means that you can get even the weirdest shapes to work, without having to re-sew the block over and over.

Tip #5… Do all sewing with a small stitch length.  I usually do my paper piecing stitching on a length of 2 – 2 1/2.  This helps make ripping the paper off at the end easier, but also ensures the integrity of the sewing.  Ripping the paper off the block can cause stitches to loosen and the smaller stitches helps with this immensely.

stitch setting

Tip #6…  I use scissors to trim my excess fabric, not a rotary cutter and ruler.  I find it quick and easy – I can do it while still sitting beside my machine.  No one ever sees the backside of the block, so I do not mind if it is a little messy.

trusty scissors

Tip #7…. Your iron is your friend. I iron all my seams/pieces to get them to lie flat.  For this block I sewed the first two fabric pieces together on all the pattern sections and then stood up, ironed all the seams and then sat down and sewed the next fabric piece to the pattern.  For last week’s fox block I used my mini iron to sew as I went.  Whatever way all seams get ironed.

Tip #8… Before I sew together the finished paper pattern pieces, I  rip the paper off any bits of the pattern that are bulky or intersect.  This makes the block less chunky and means my sewing machine is less likely to hiccup when it hits the multiple layers of fabric/paper.  With this pattern the center pieces of the block needed to be pulled.  I leave enough of the paper so that you can still see your sewing lines.

remove paper

Tip #9… Tweezers are an essential paper piecing tool.  When you are removing the paper pattern at the end of the process, the big bits are easy but tweezers are the only way to get those pesky little bits of paper that are hiding in the corner of the block.

tweezer action

Tip #10… If at all possible train your husband, children or friend to help you pull the paper off your finished quilt top.  It really does make life easier.