To celebrate this years Pacific North West MQG Meet up our fearless leader, Michelle Freedman designed a fun modern block to celebrate… the Urban Chicken. During the Meet Up we did a charity sew day where chickens ran wild.
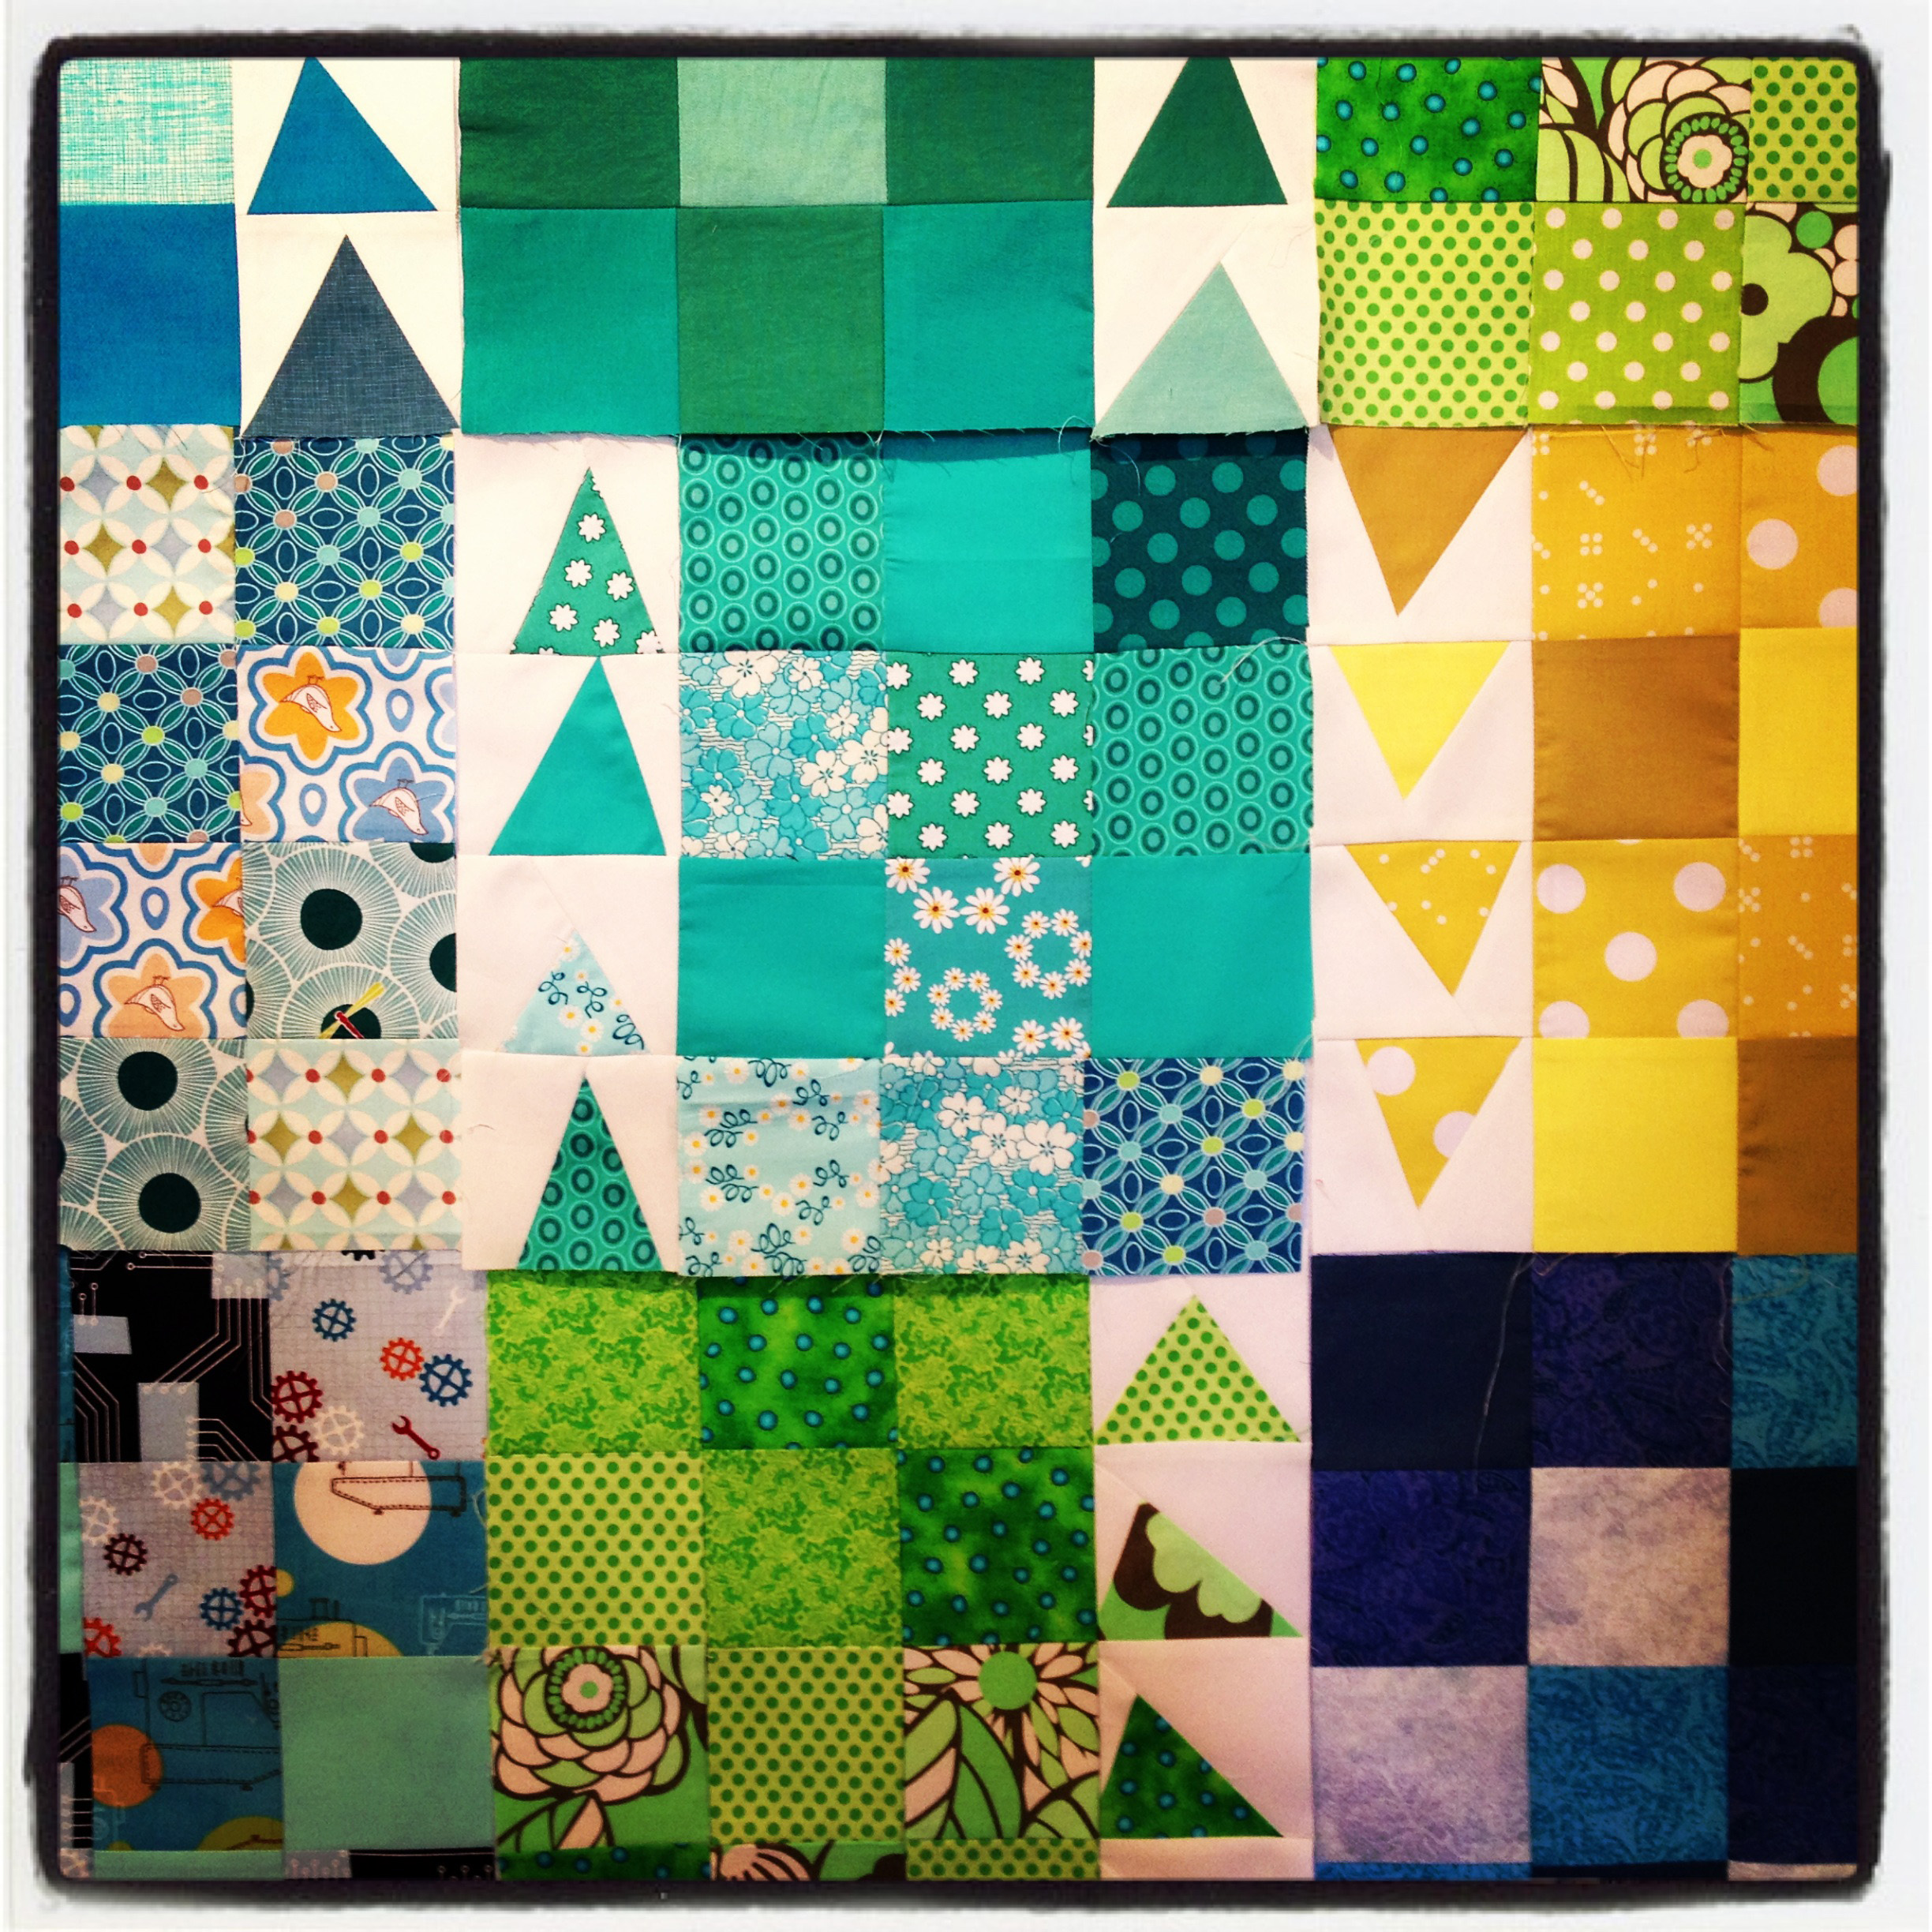
This week I decided to dust off the pattern card and make my own Urban Chicken quilt… below is my plagiarized, annotated and updated version of Michelle’s original pattern.
For each block you need:
1. Four (4) different shades of the same colour – I decided to stick to green, blue & yellow
2. White or off white fabric – I pulled all my scrap bag of solid whites out.
Then it is off to work making a block….
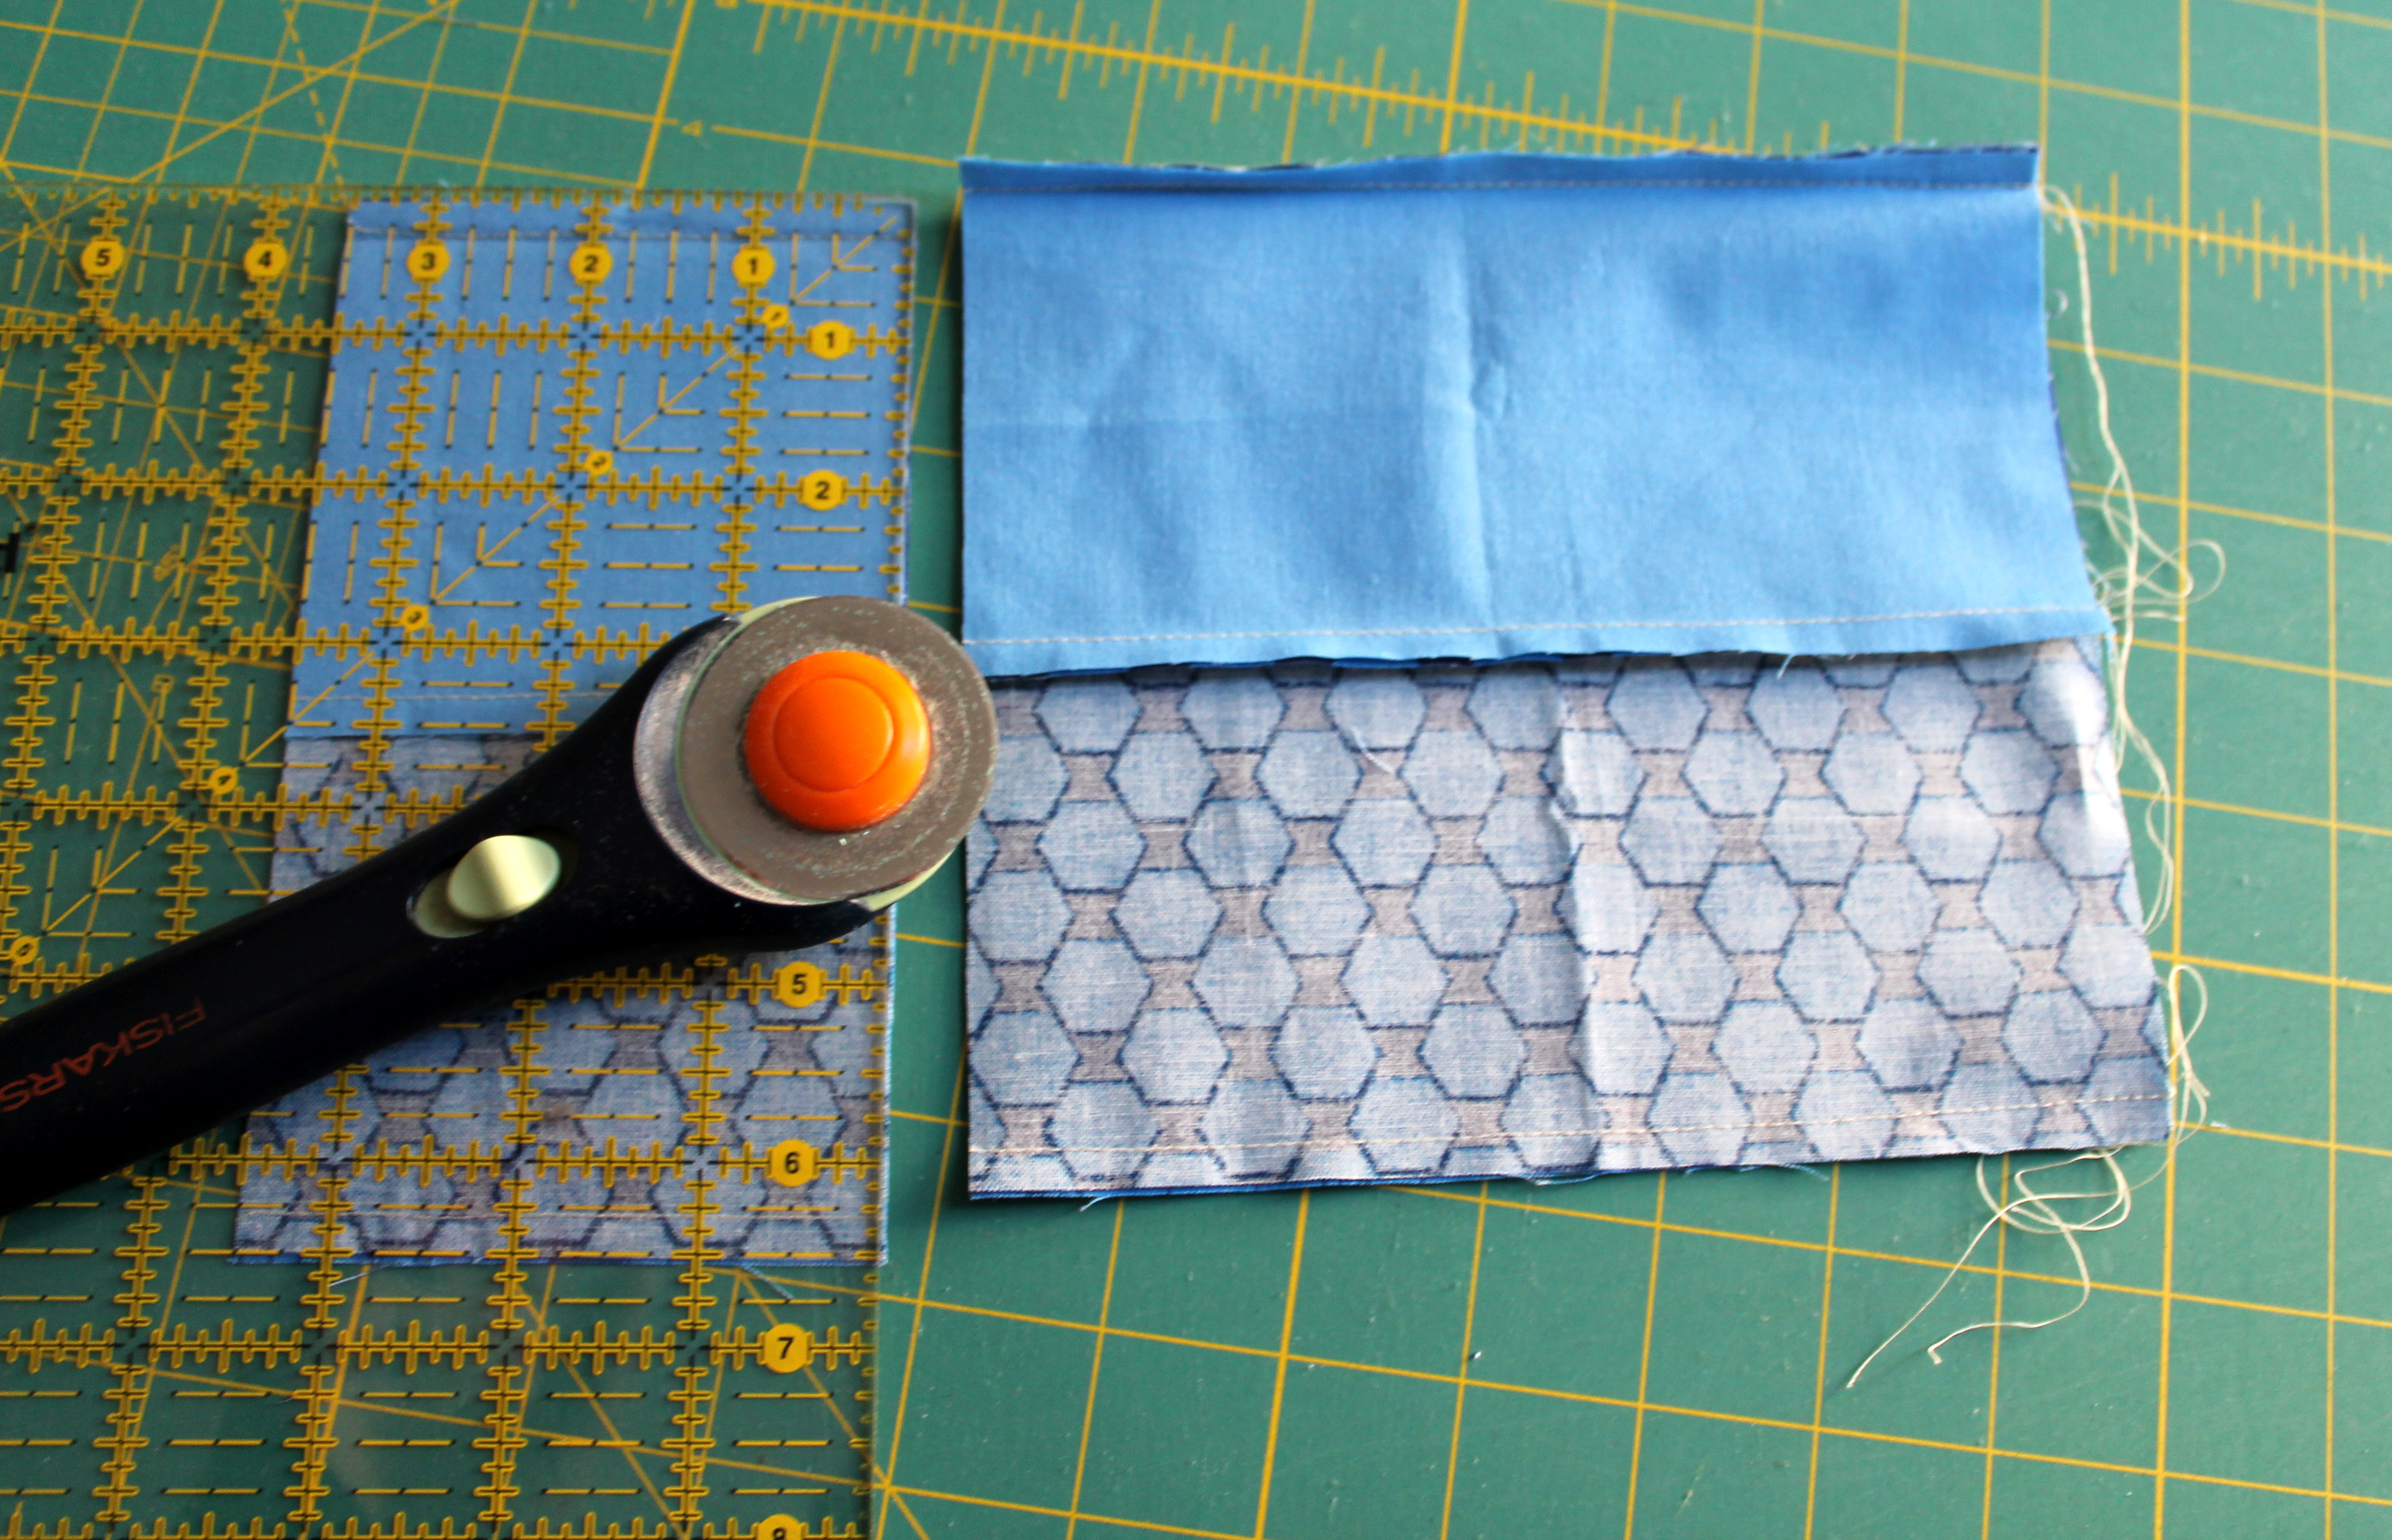
1. Cut one 3 ½ inches x 14 ½ inches strip of each of your four coloured fabric. I added an extra 1/2 inch to the strips from the original pattern to allow for some wiggle room (ie. mistakes).
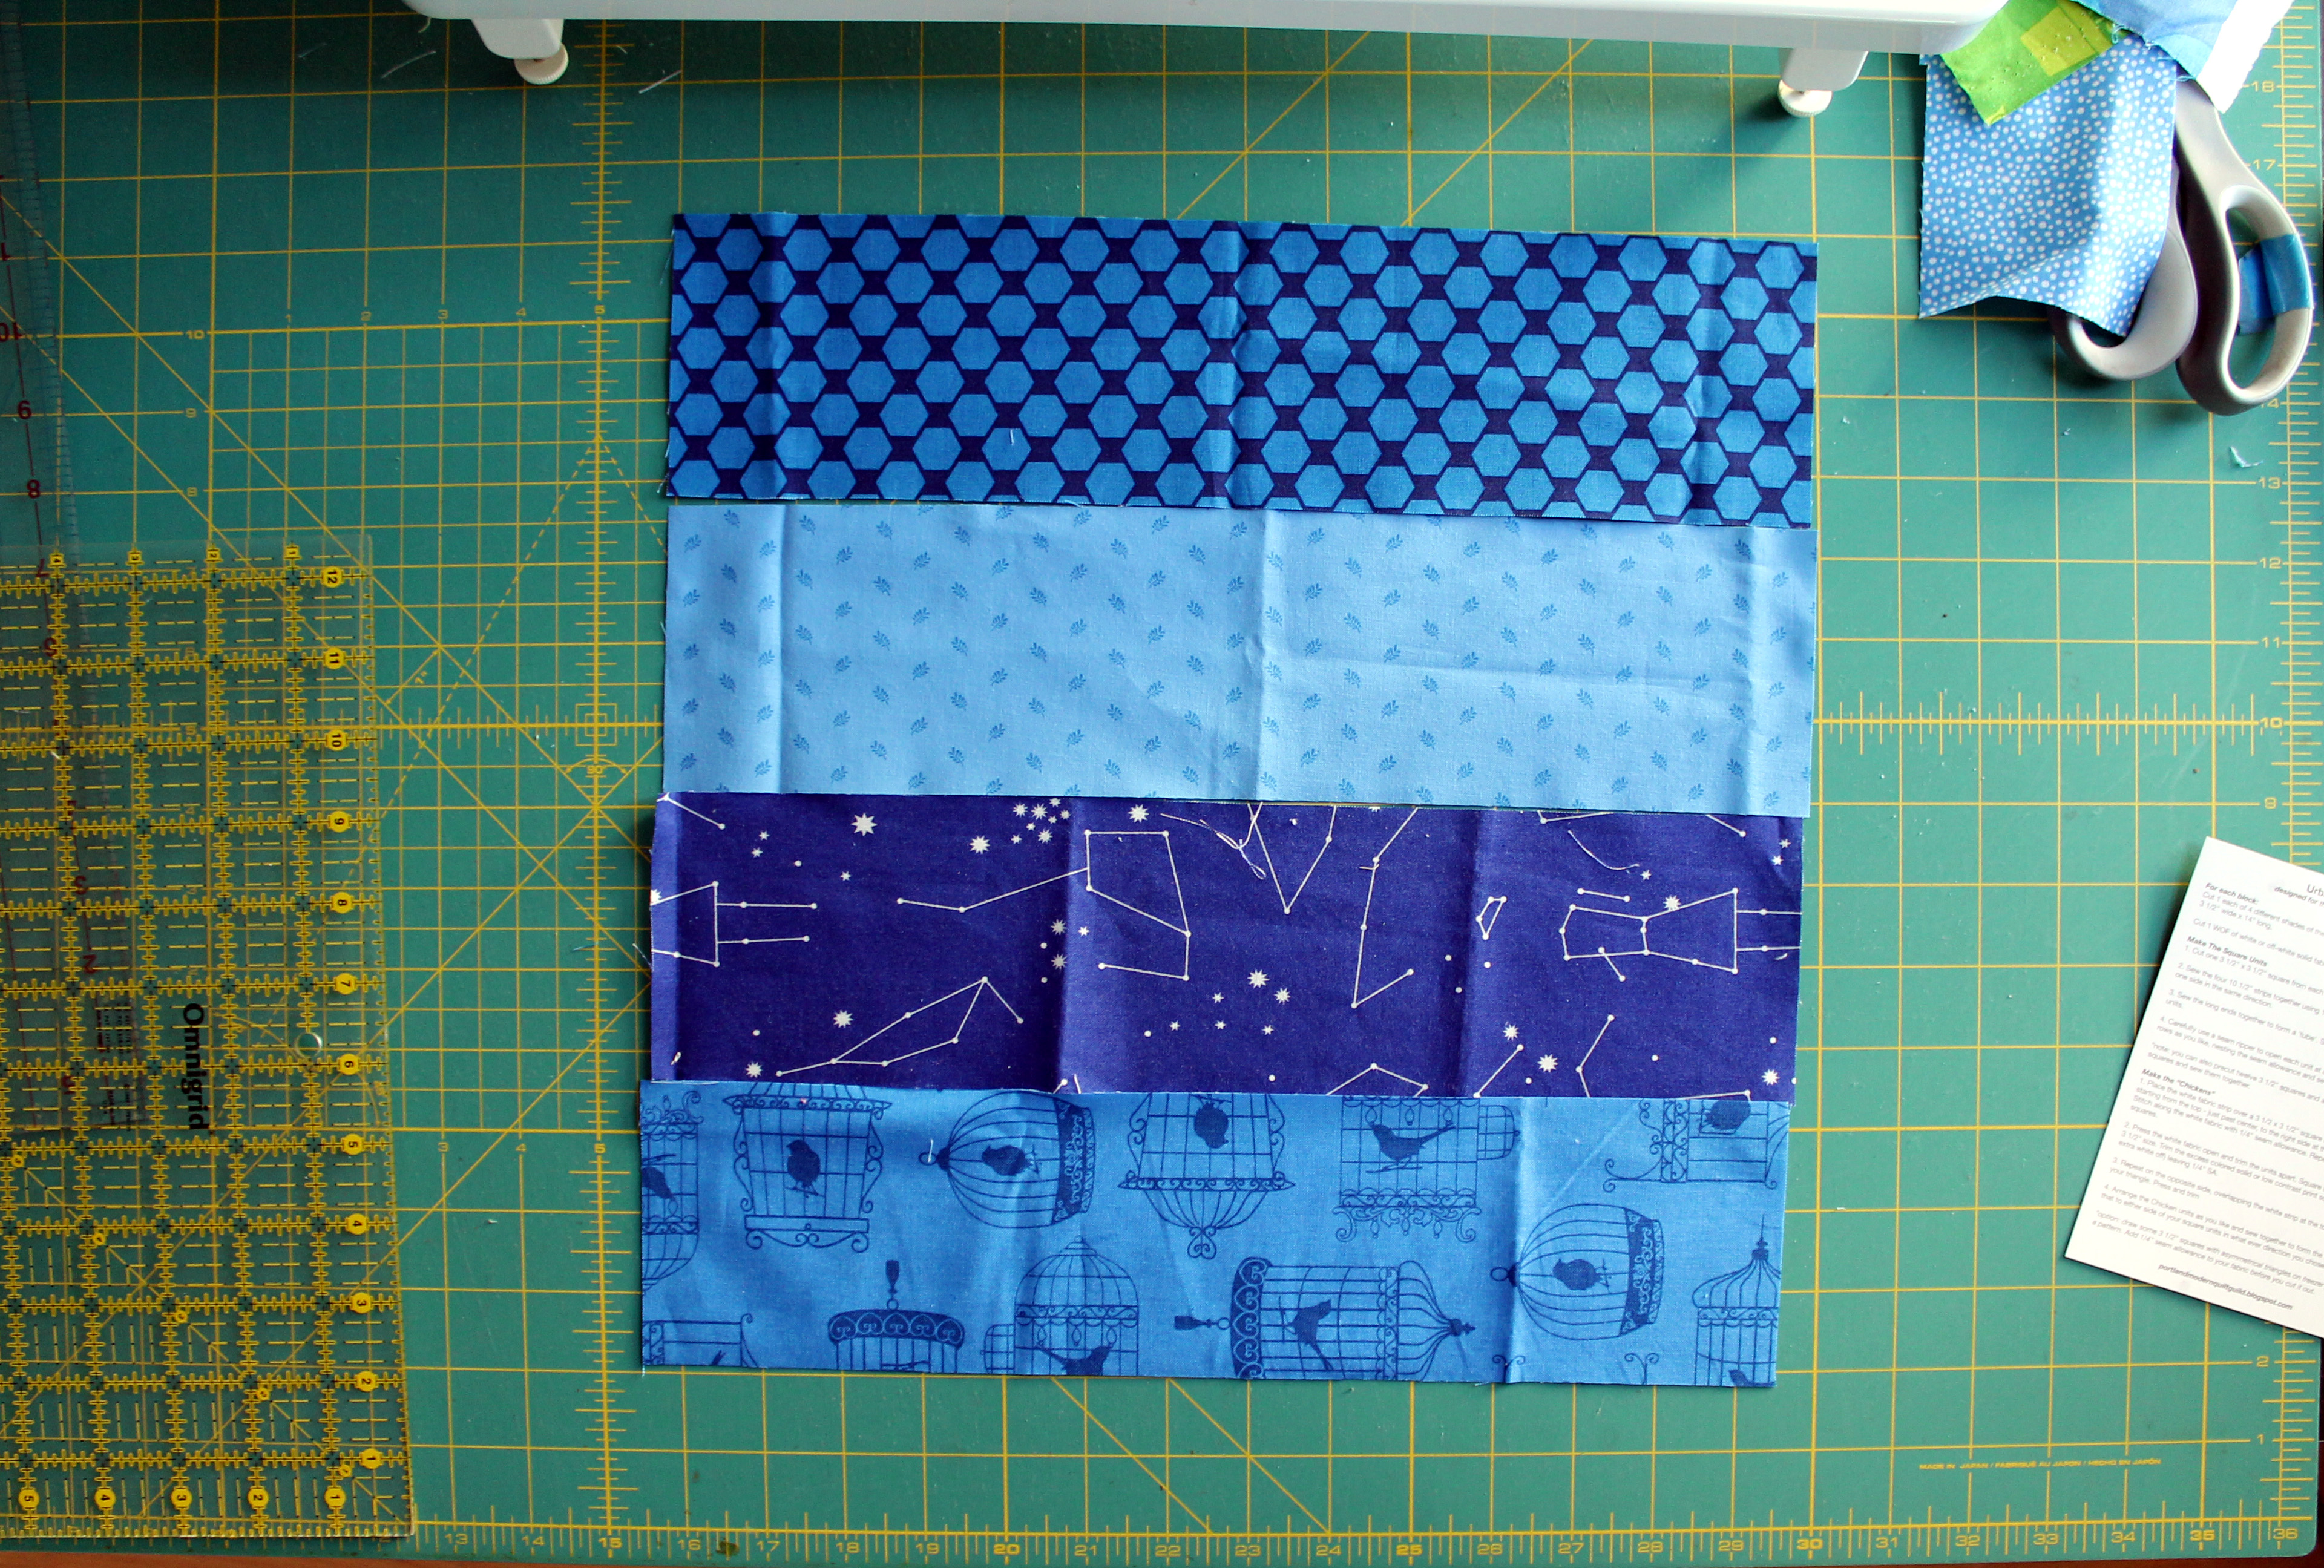
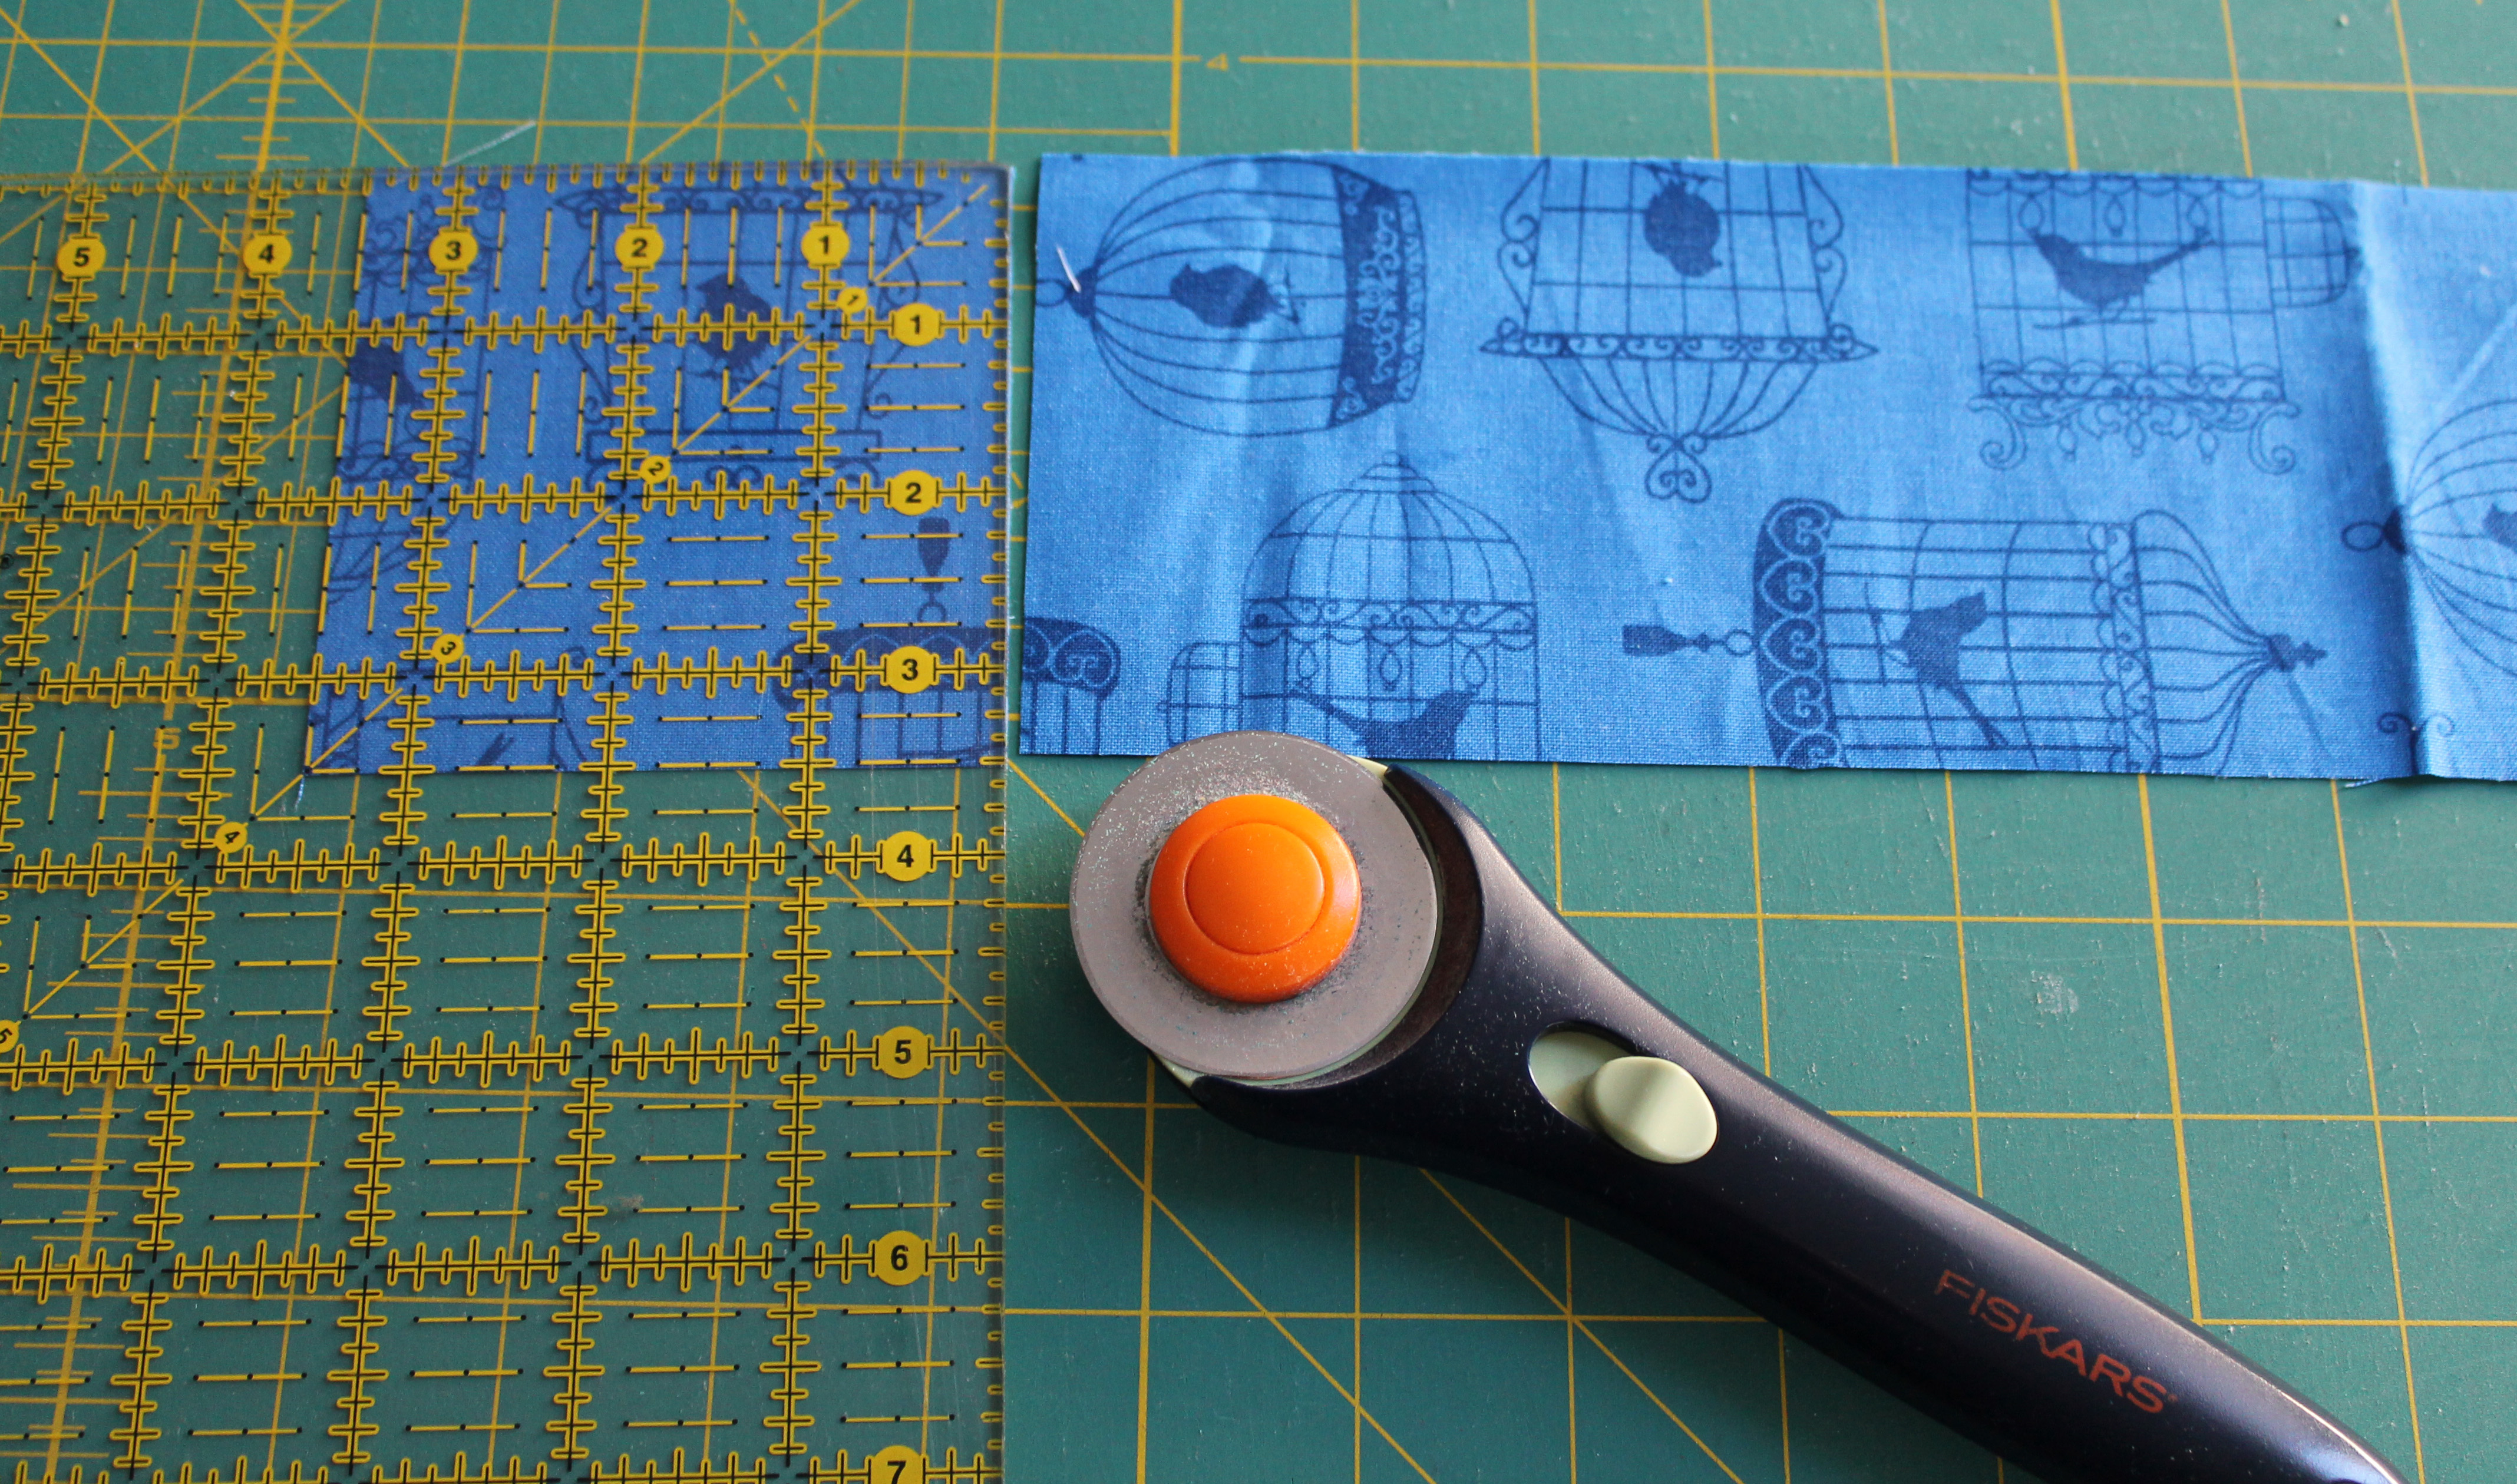
2. From these strips cut one 3 ½ inches x 3 ½ inches and set aside these squares.
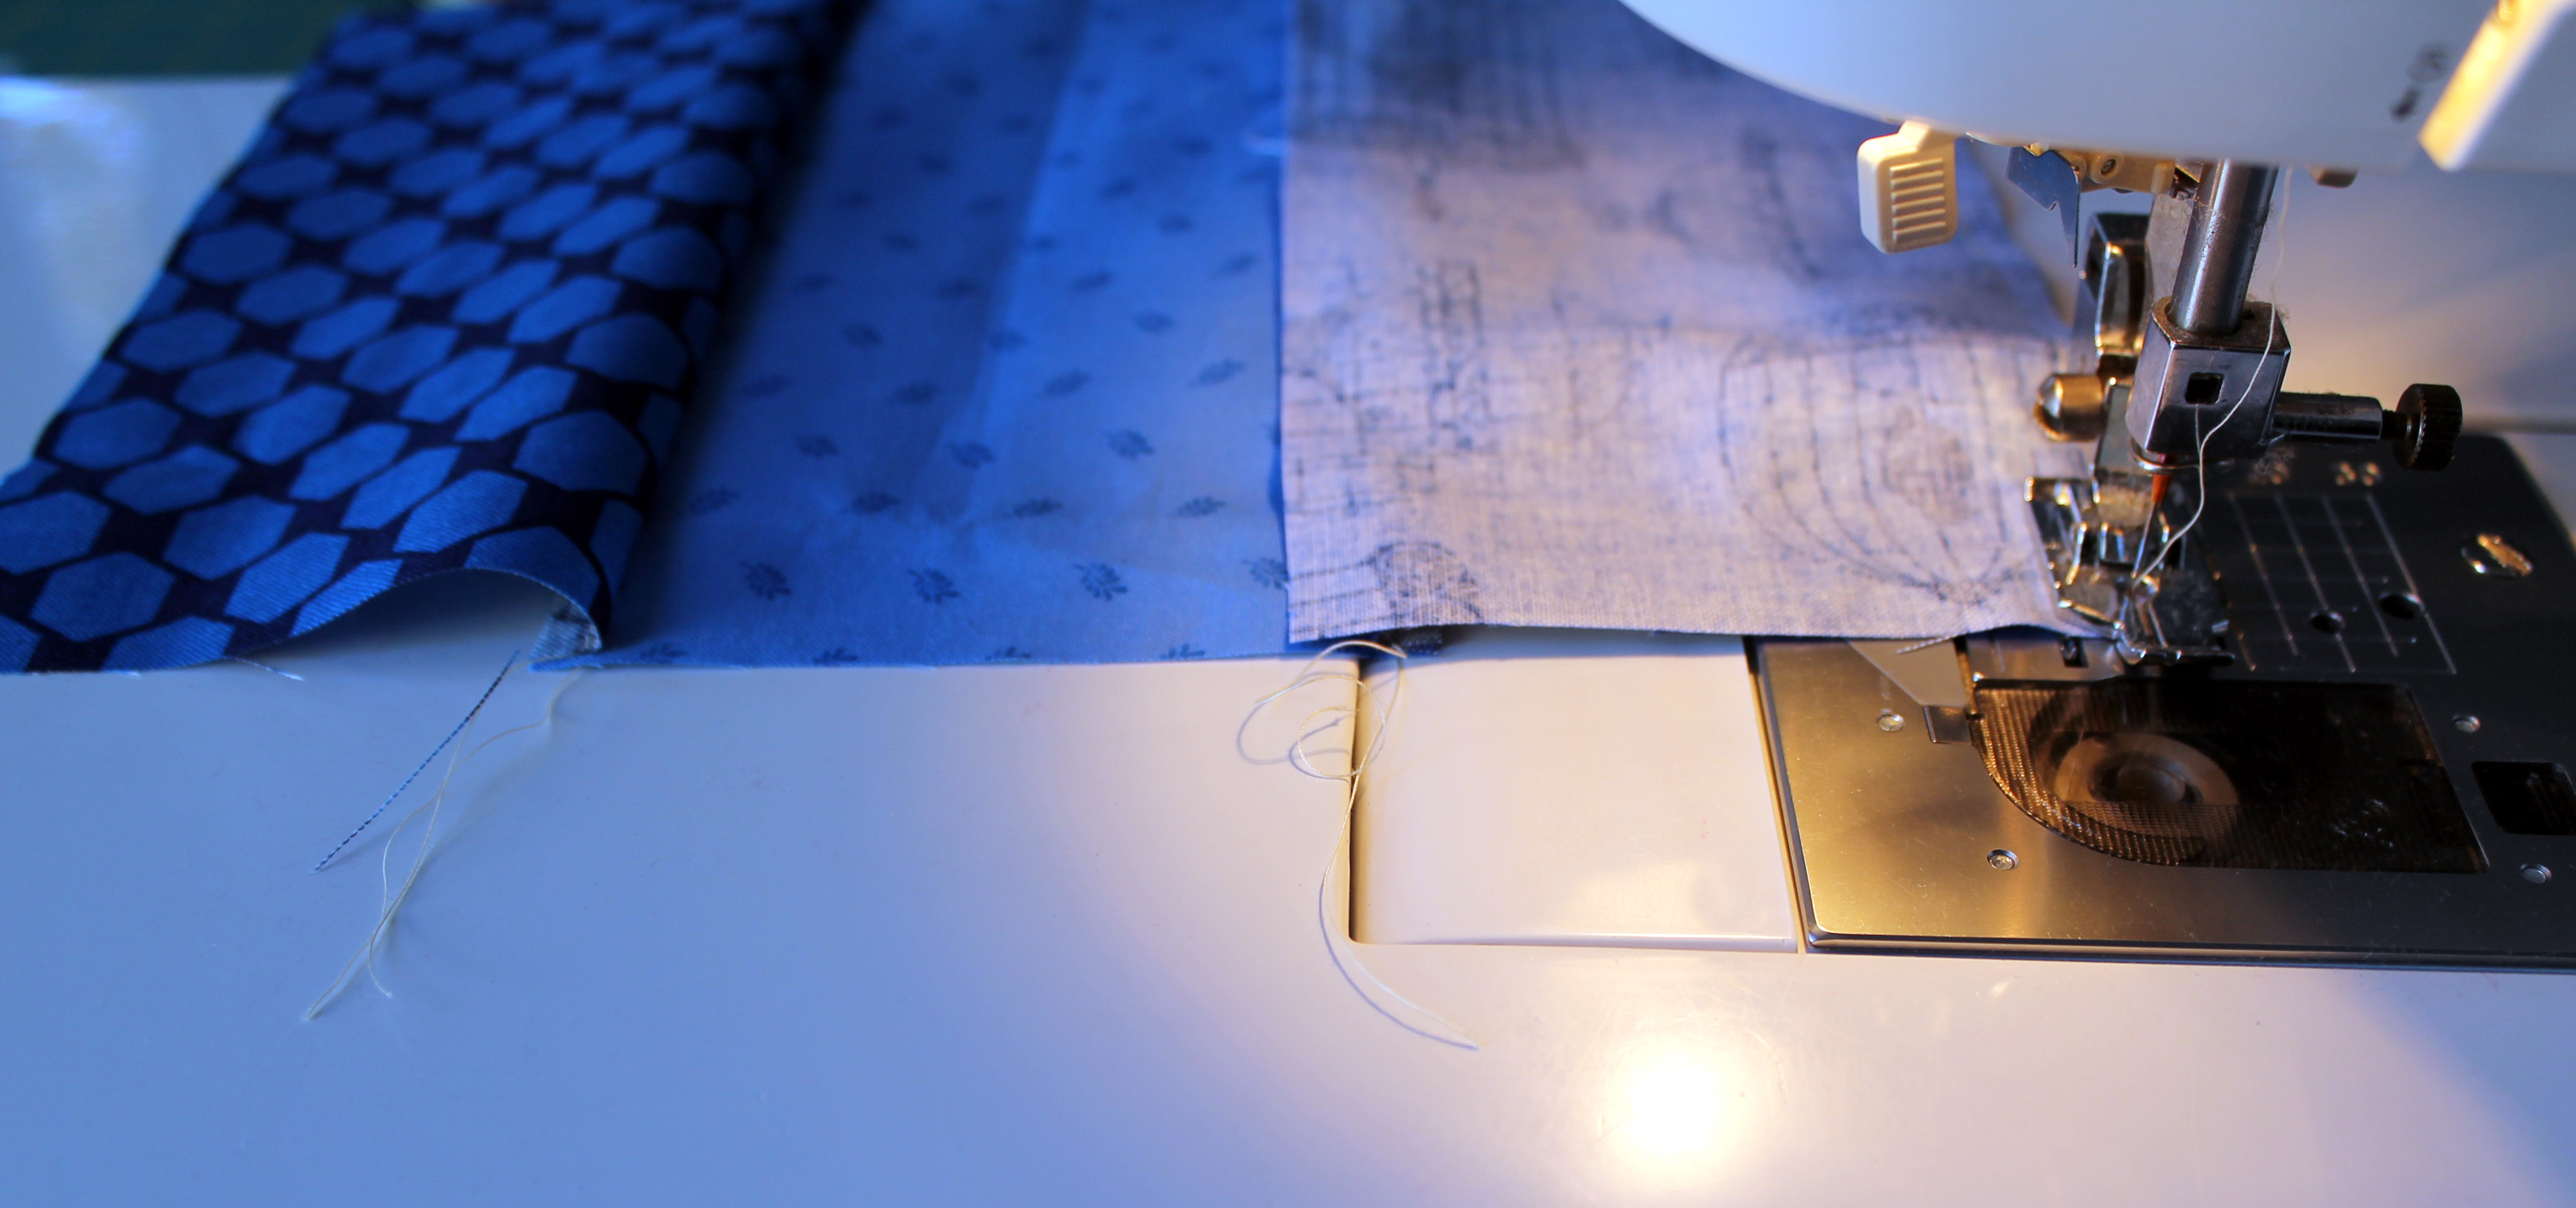
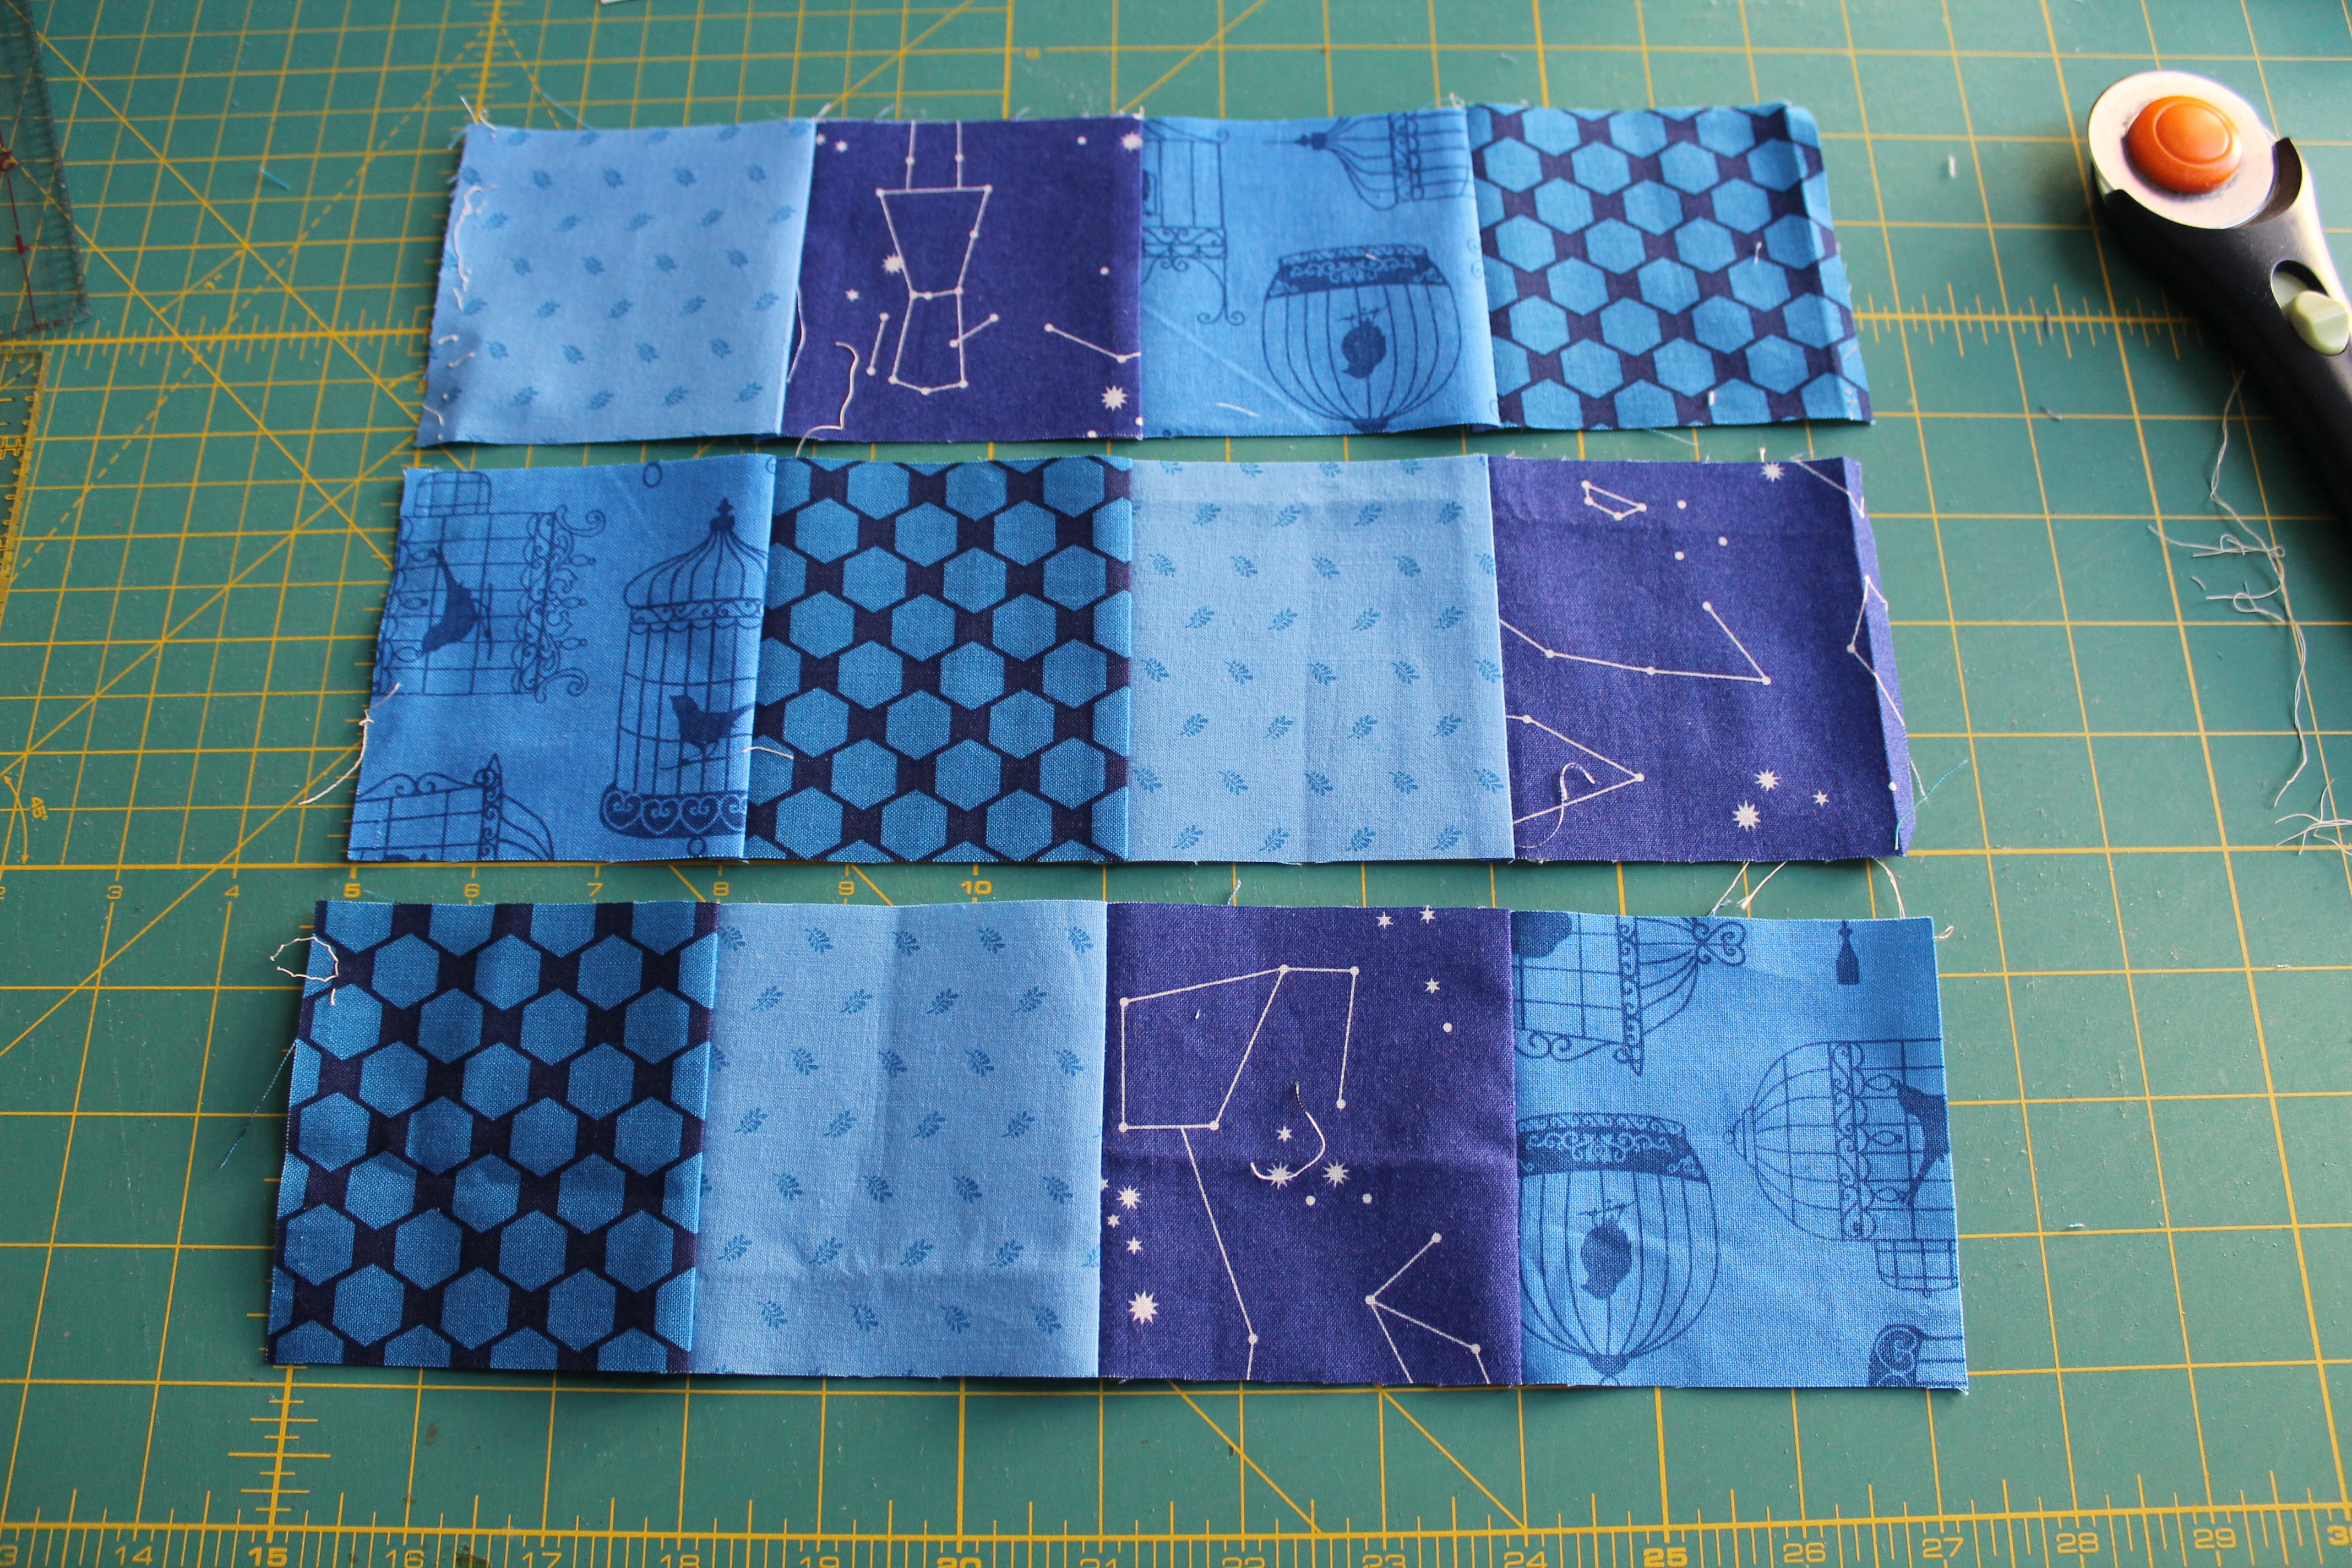
3. Sew the four 10 ½ inch strips together using 1/4 inch seam allowance. Press the seams to one side in the same direction.
.4. Sew the long ends together to form a tube… these next steps are the same as you would do for a Trip Around quilt.
5. Subcut the tube into three 3 ½ inch wide units… this is where the excess 1/2 inch of fabric on the strips comes in handy for me.
5. Carefully use the seam ripper to open each unit at a different place. Arrange the three rows as you like, nesting the seam allows and sew together. Press the seams open or to alternating sides.
Then to make the chickens….
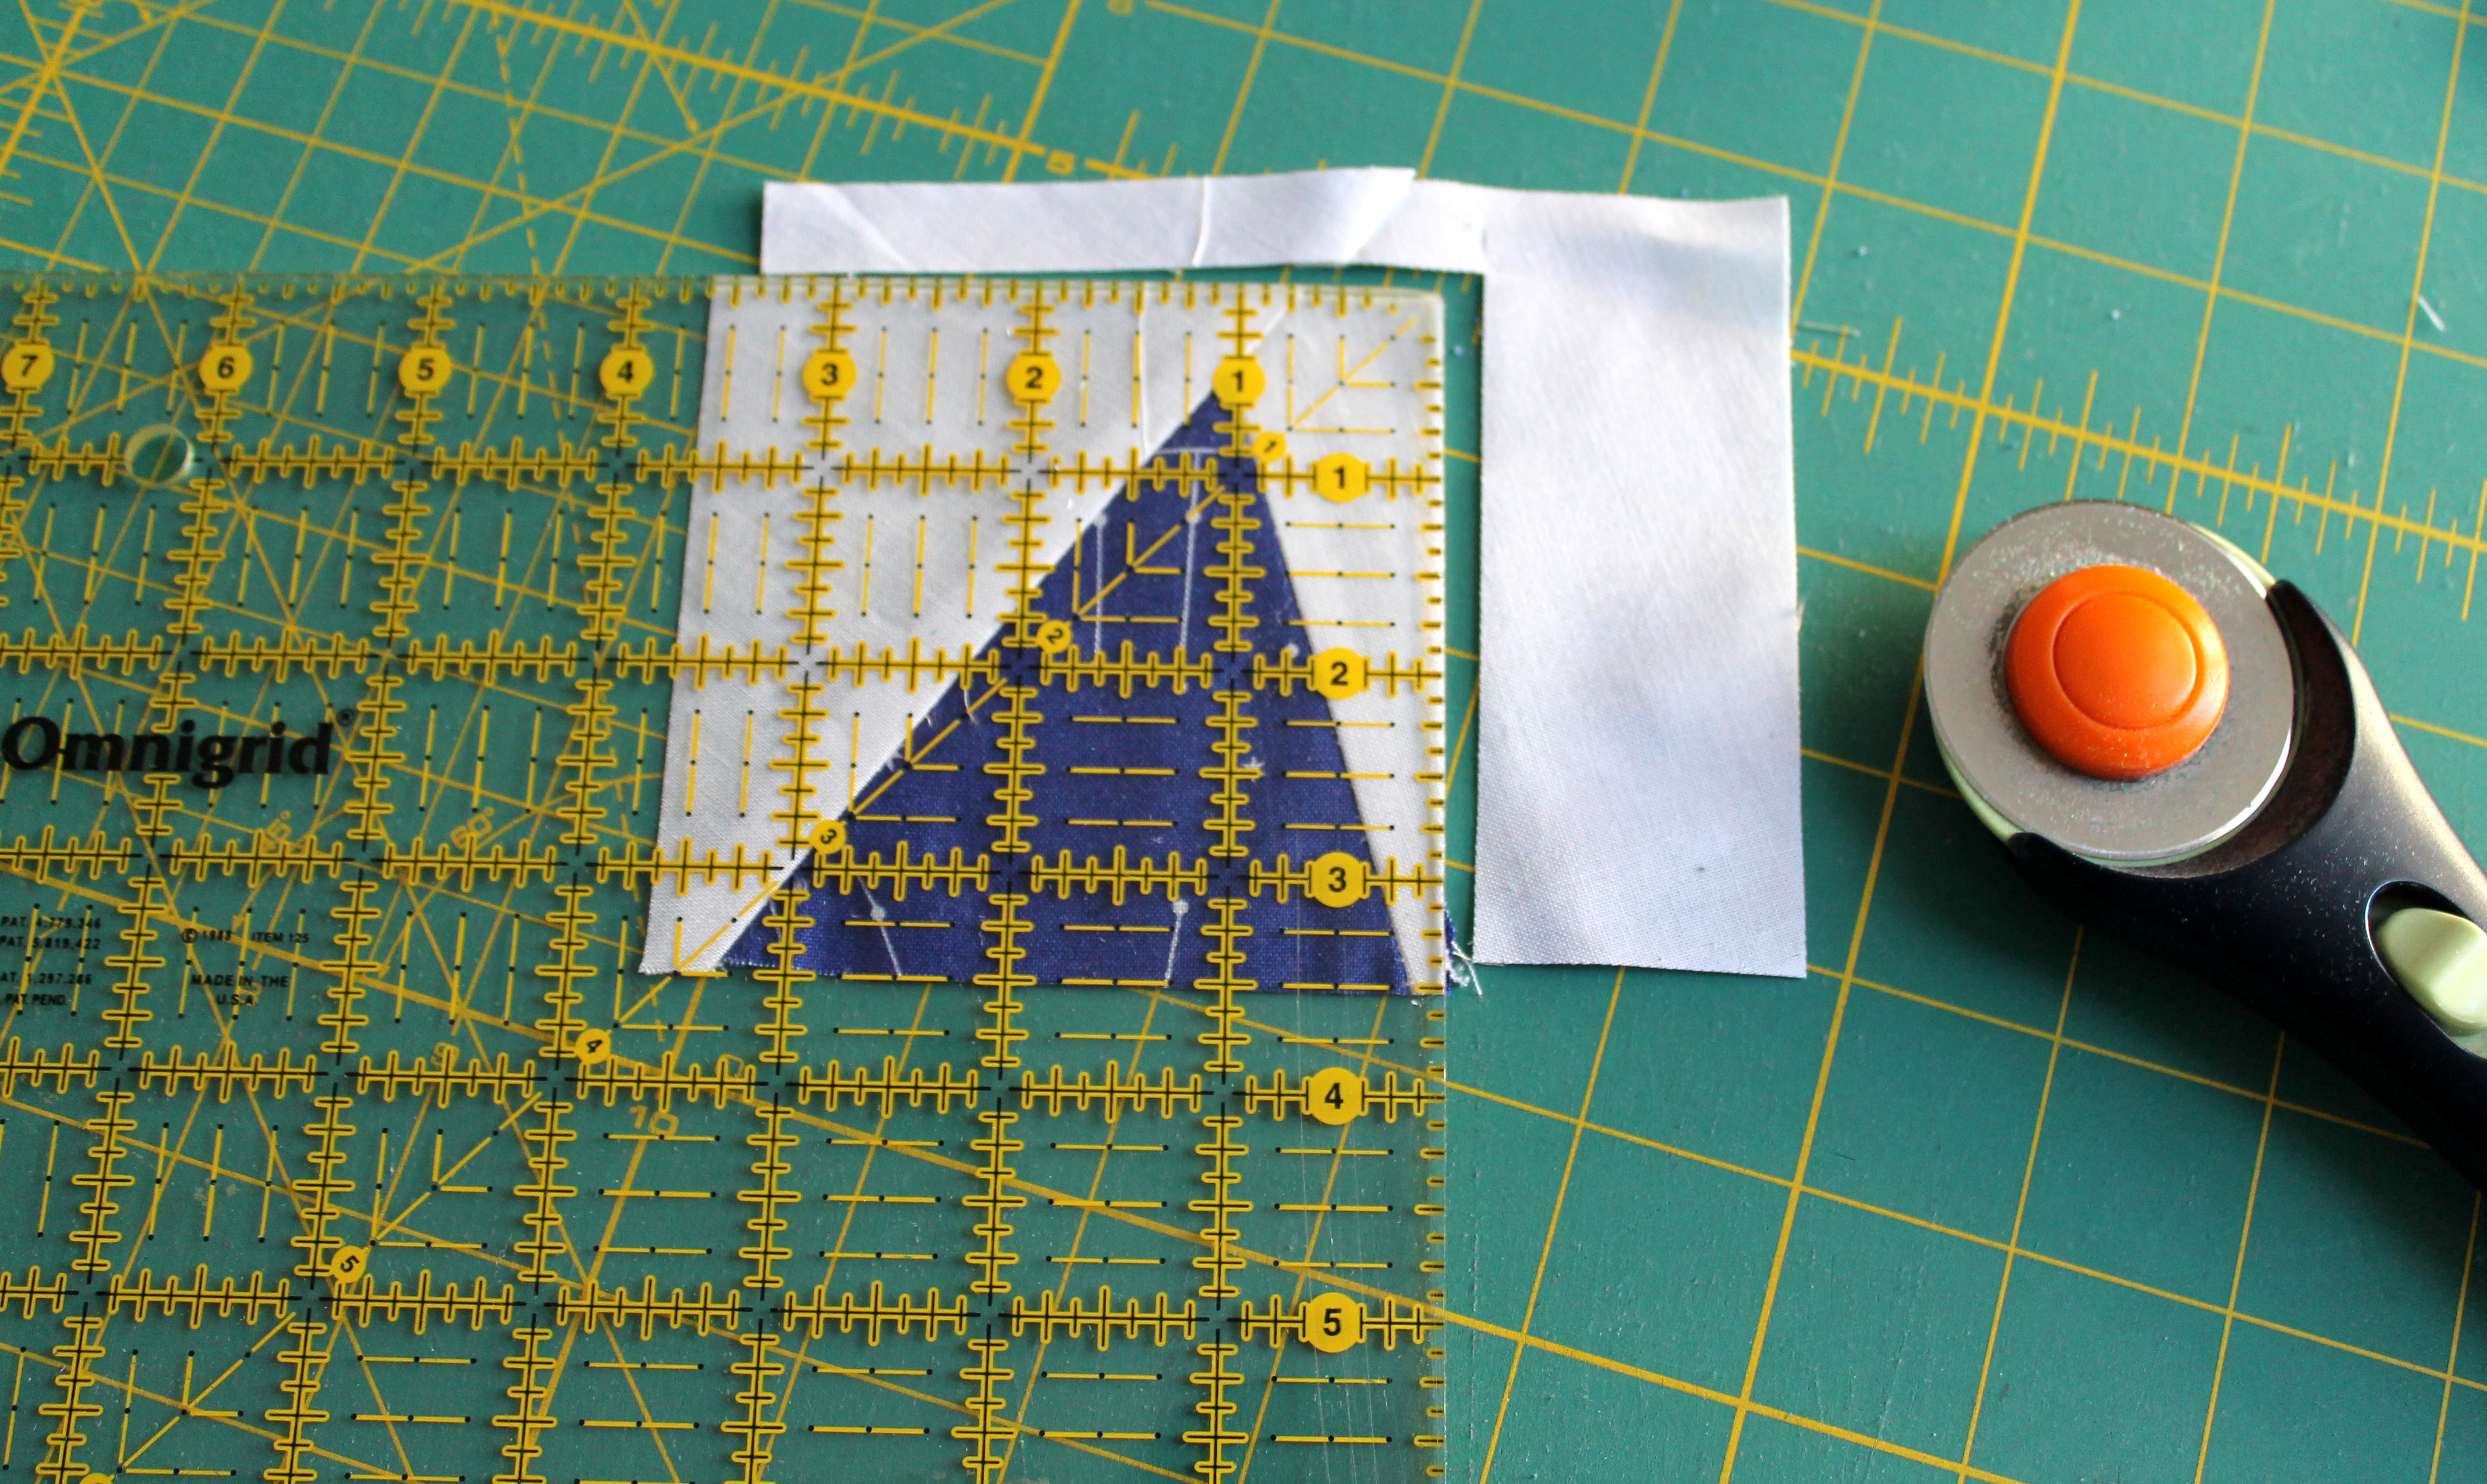
1. Using your white scraps or some generously cut white strips (no smaller than 2 ½ wide) and the four coloured squares you had set aside make some wonky triangles.
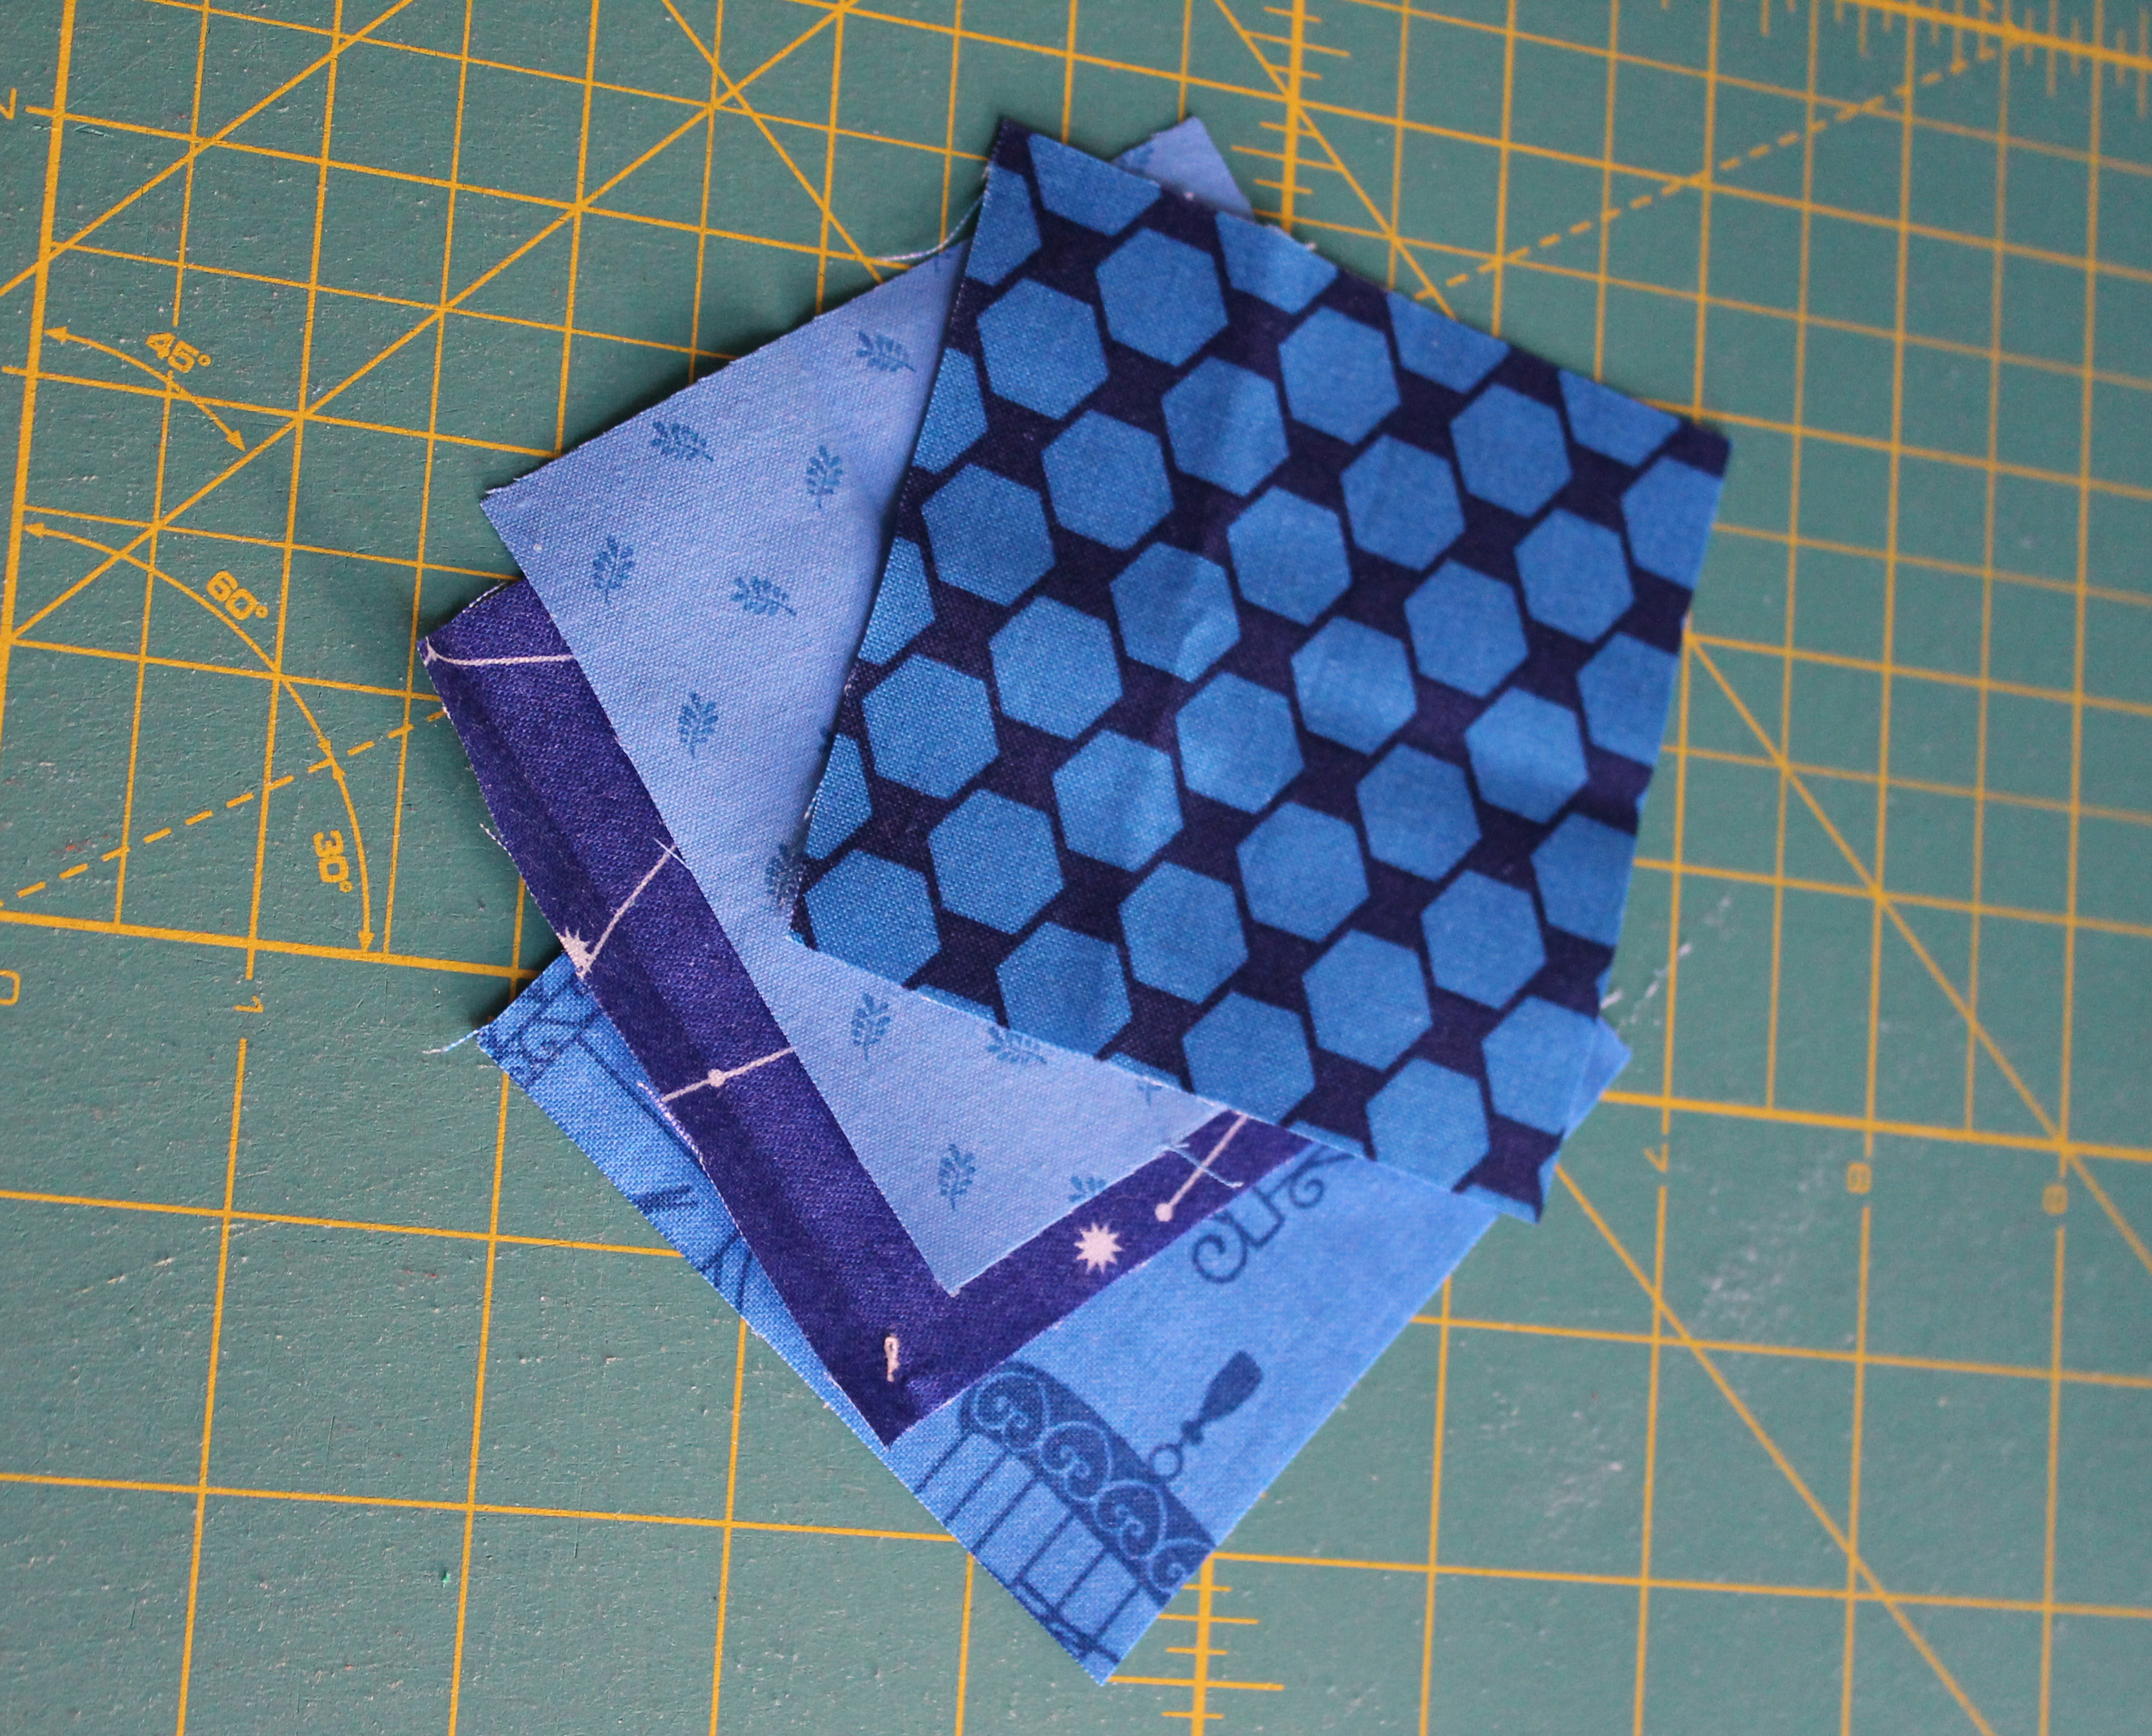
2. Place the white fabric strip over the 3 ½ x 3 ½ inch square right sides together – angling the white fabric from just past center of the square to one corner of the square. Repeat on the other side. Do this for all four coloured squares.
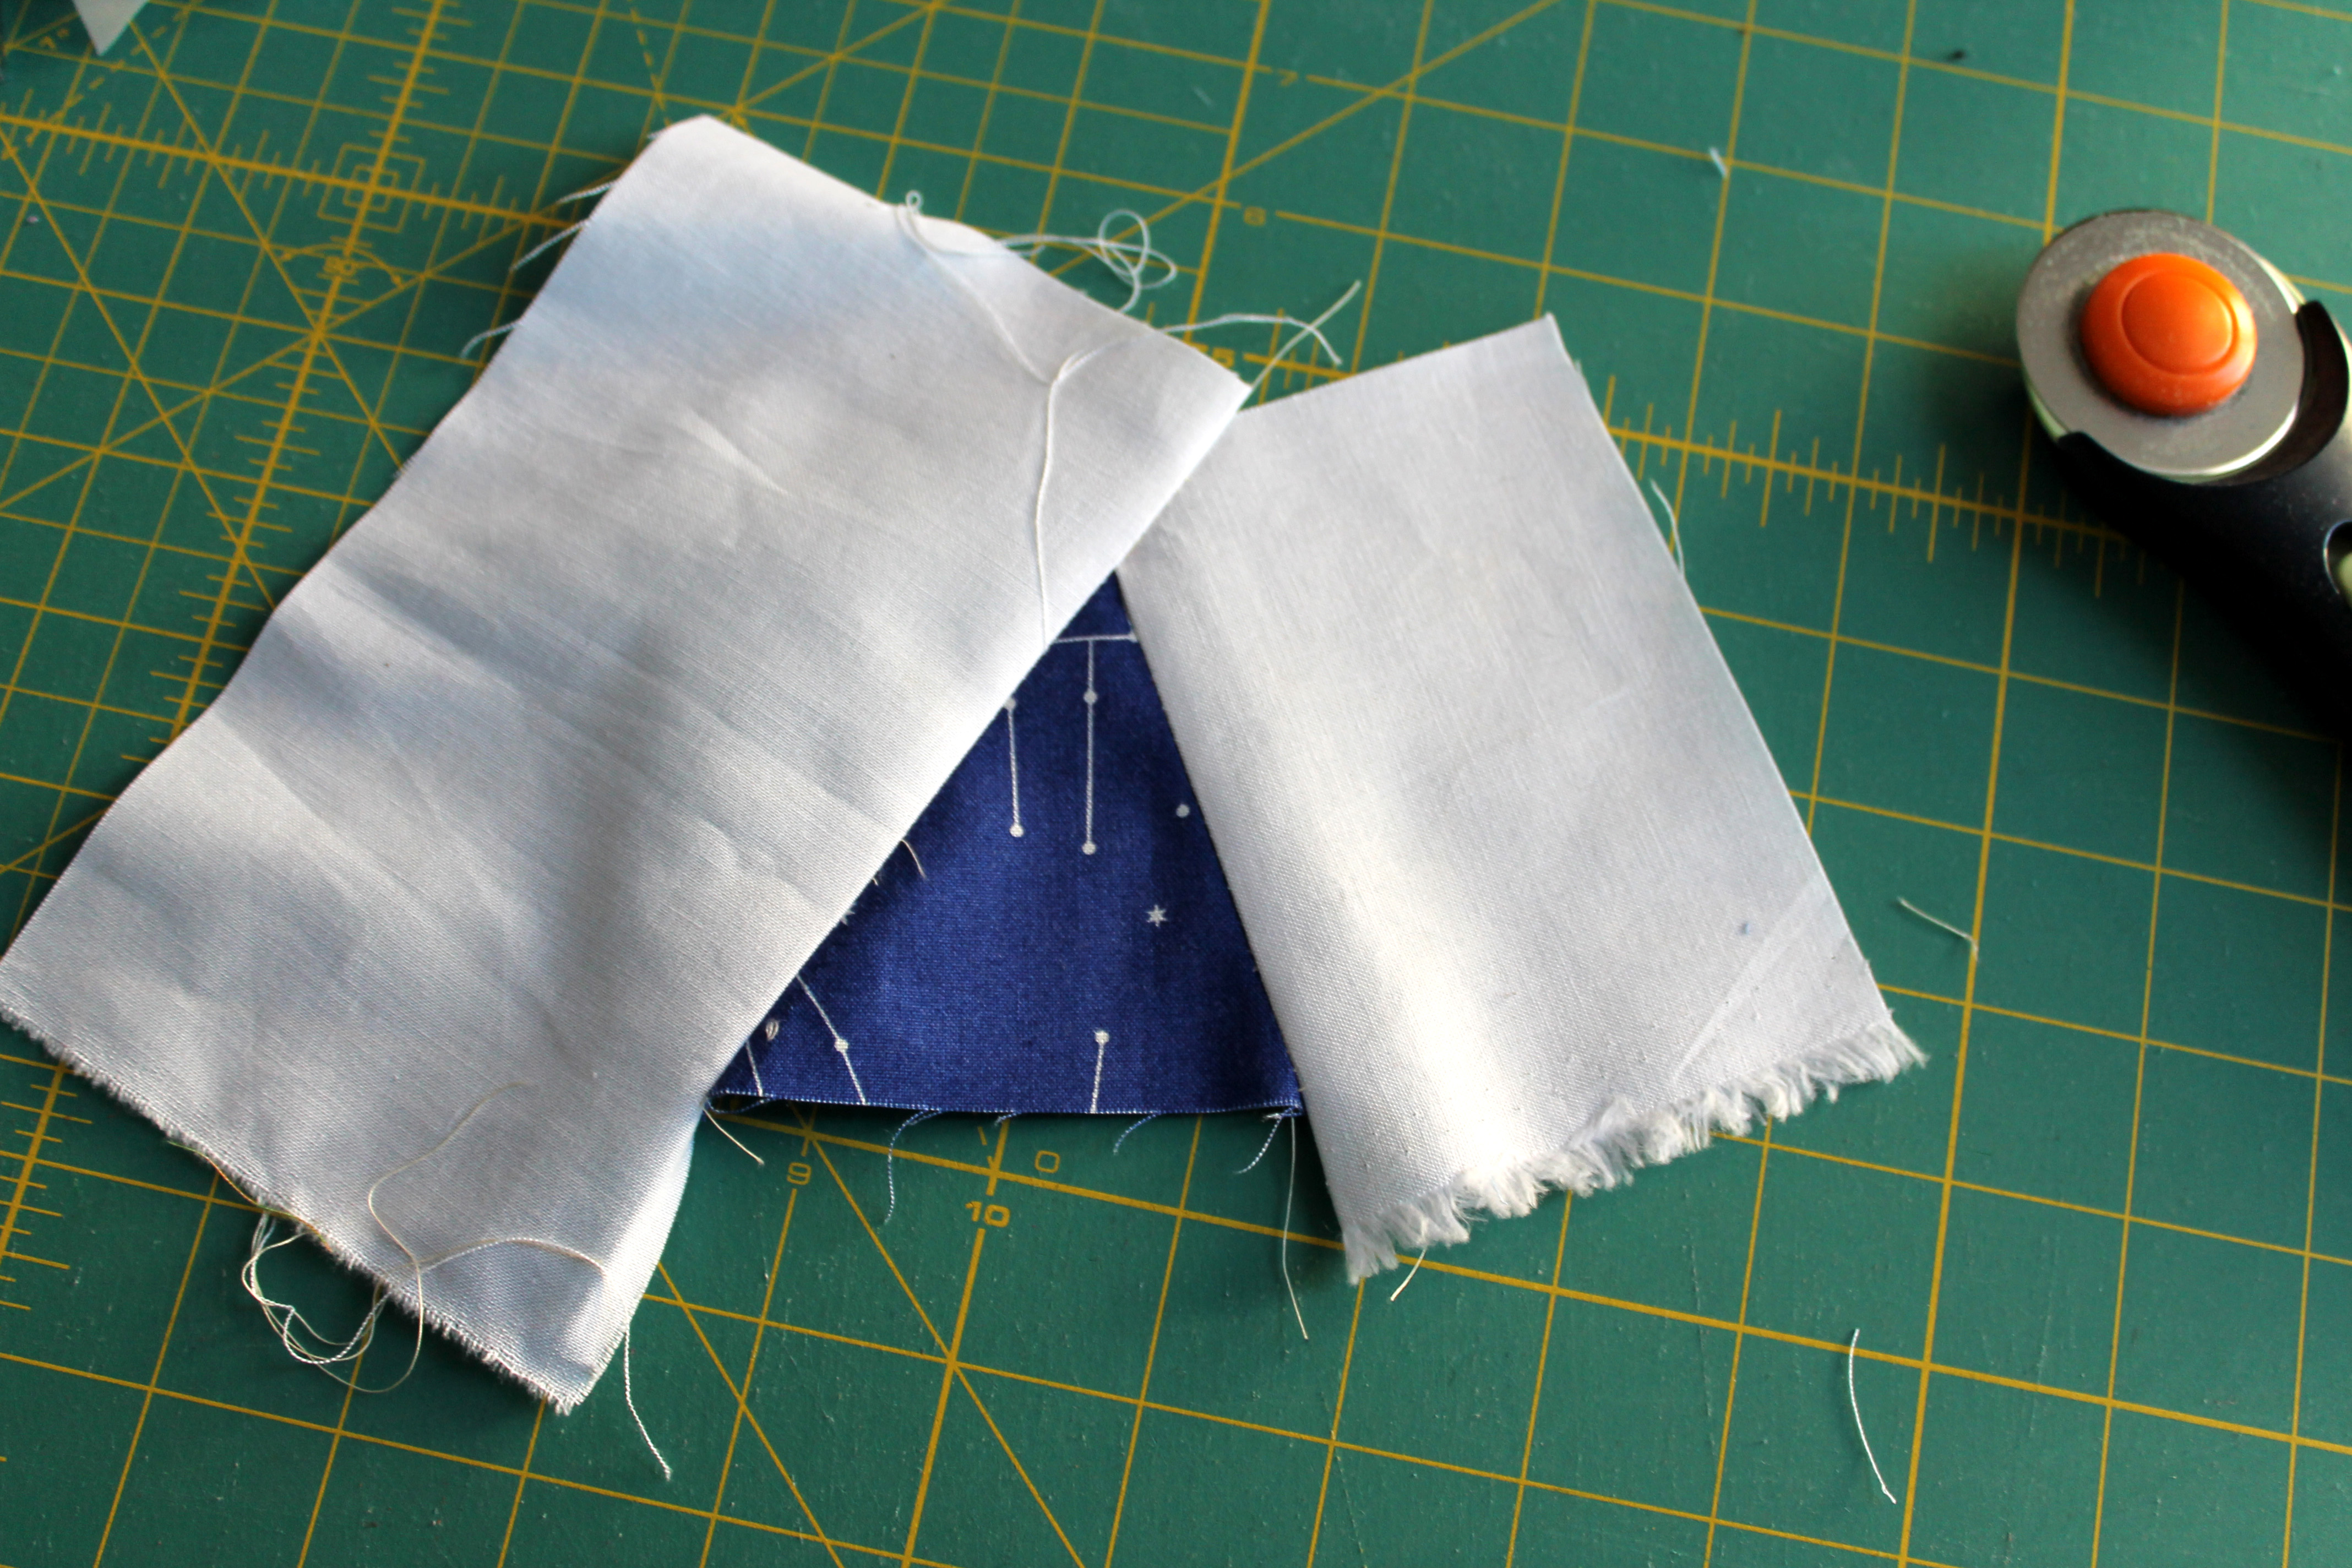
3. Press seams on your chicken unit and square it up to the original 3 ½” x 3 ½” size. When trimming make sure that the top of the triangle has a ¼ inch seam of white. This will allow you triangles to come to a clean point (learnt this one the hard way).
4. Arrange your chickens as you like and sew them together to form the fourth strip of the block.
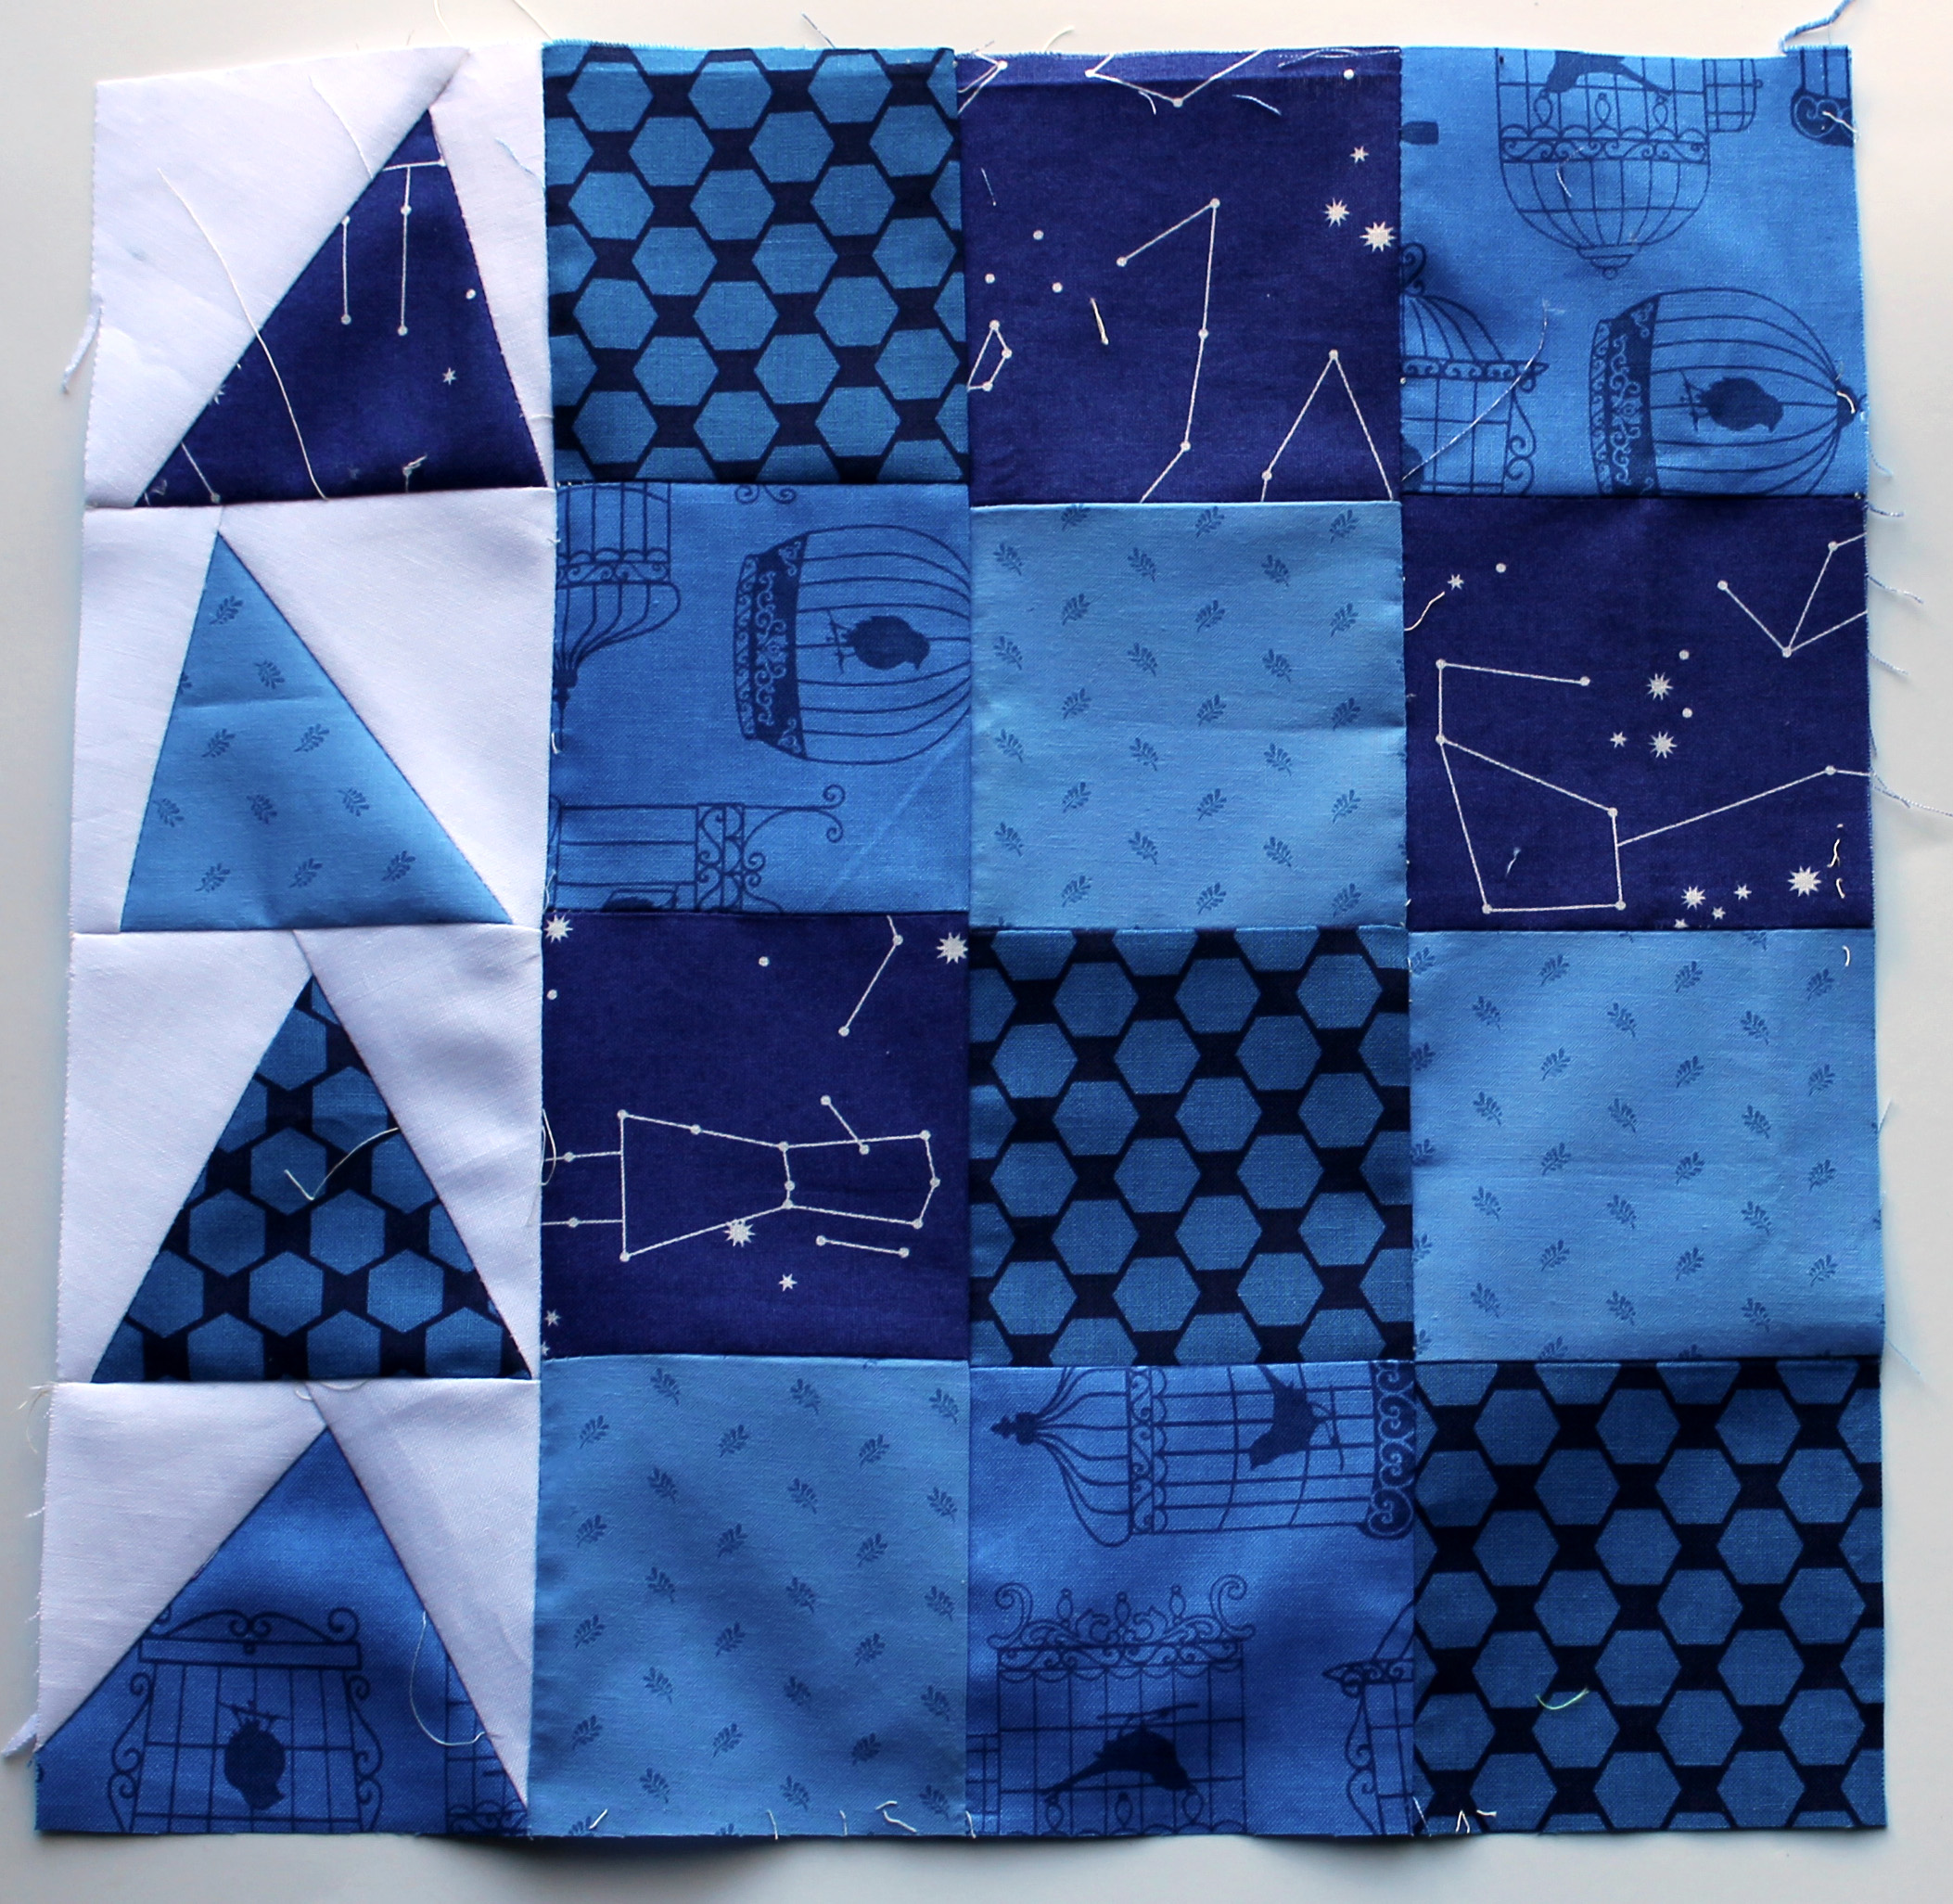
You can stitch your chickens to either side of your solid blocks.
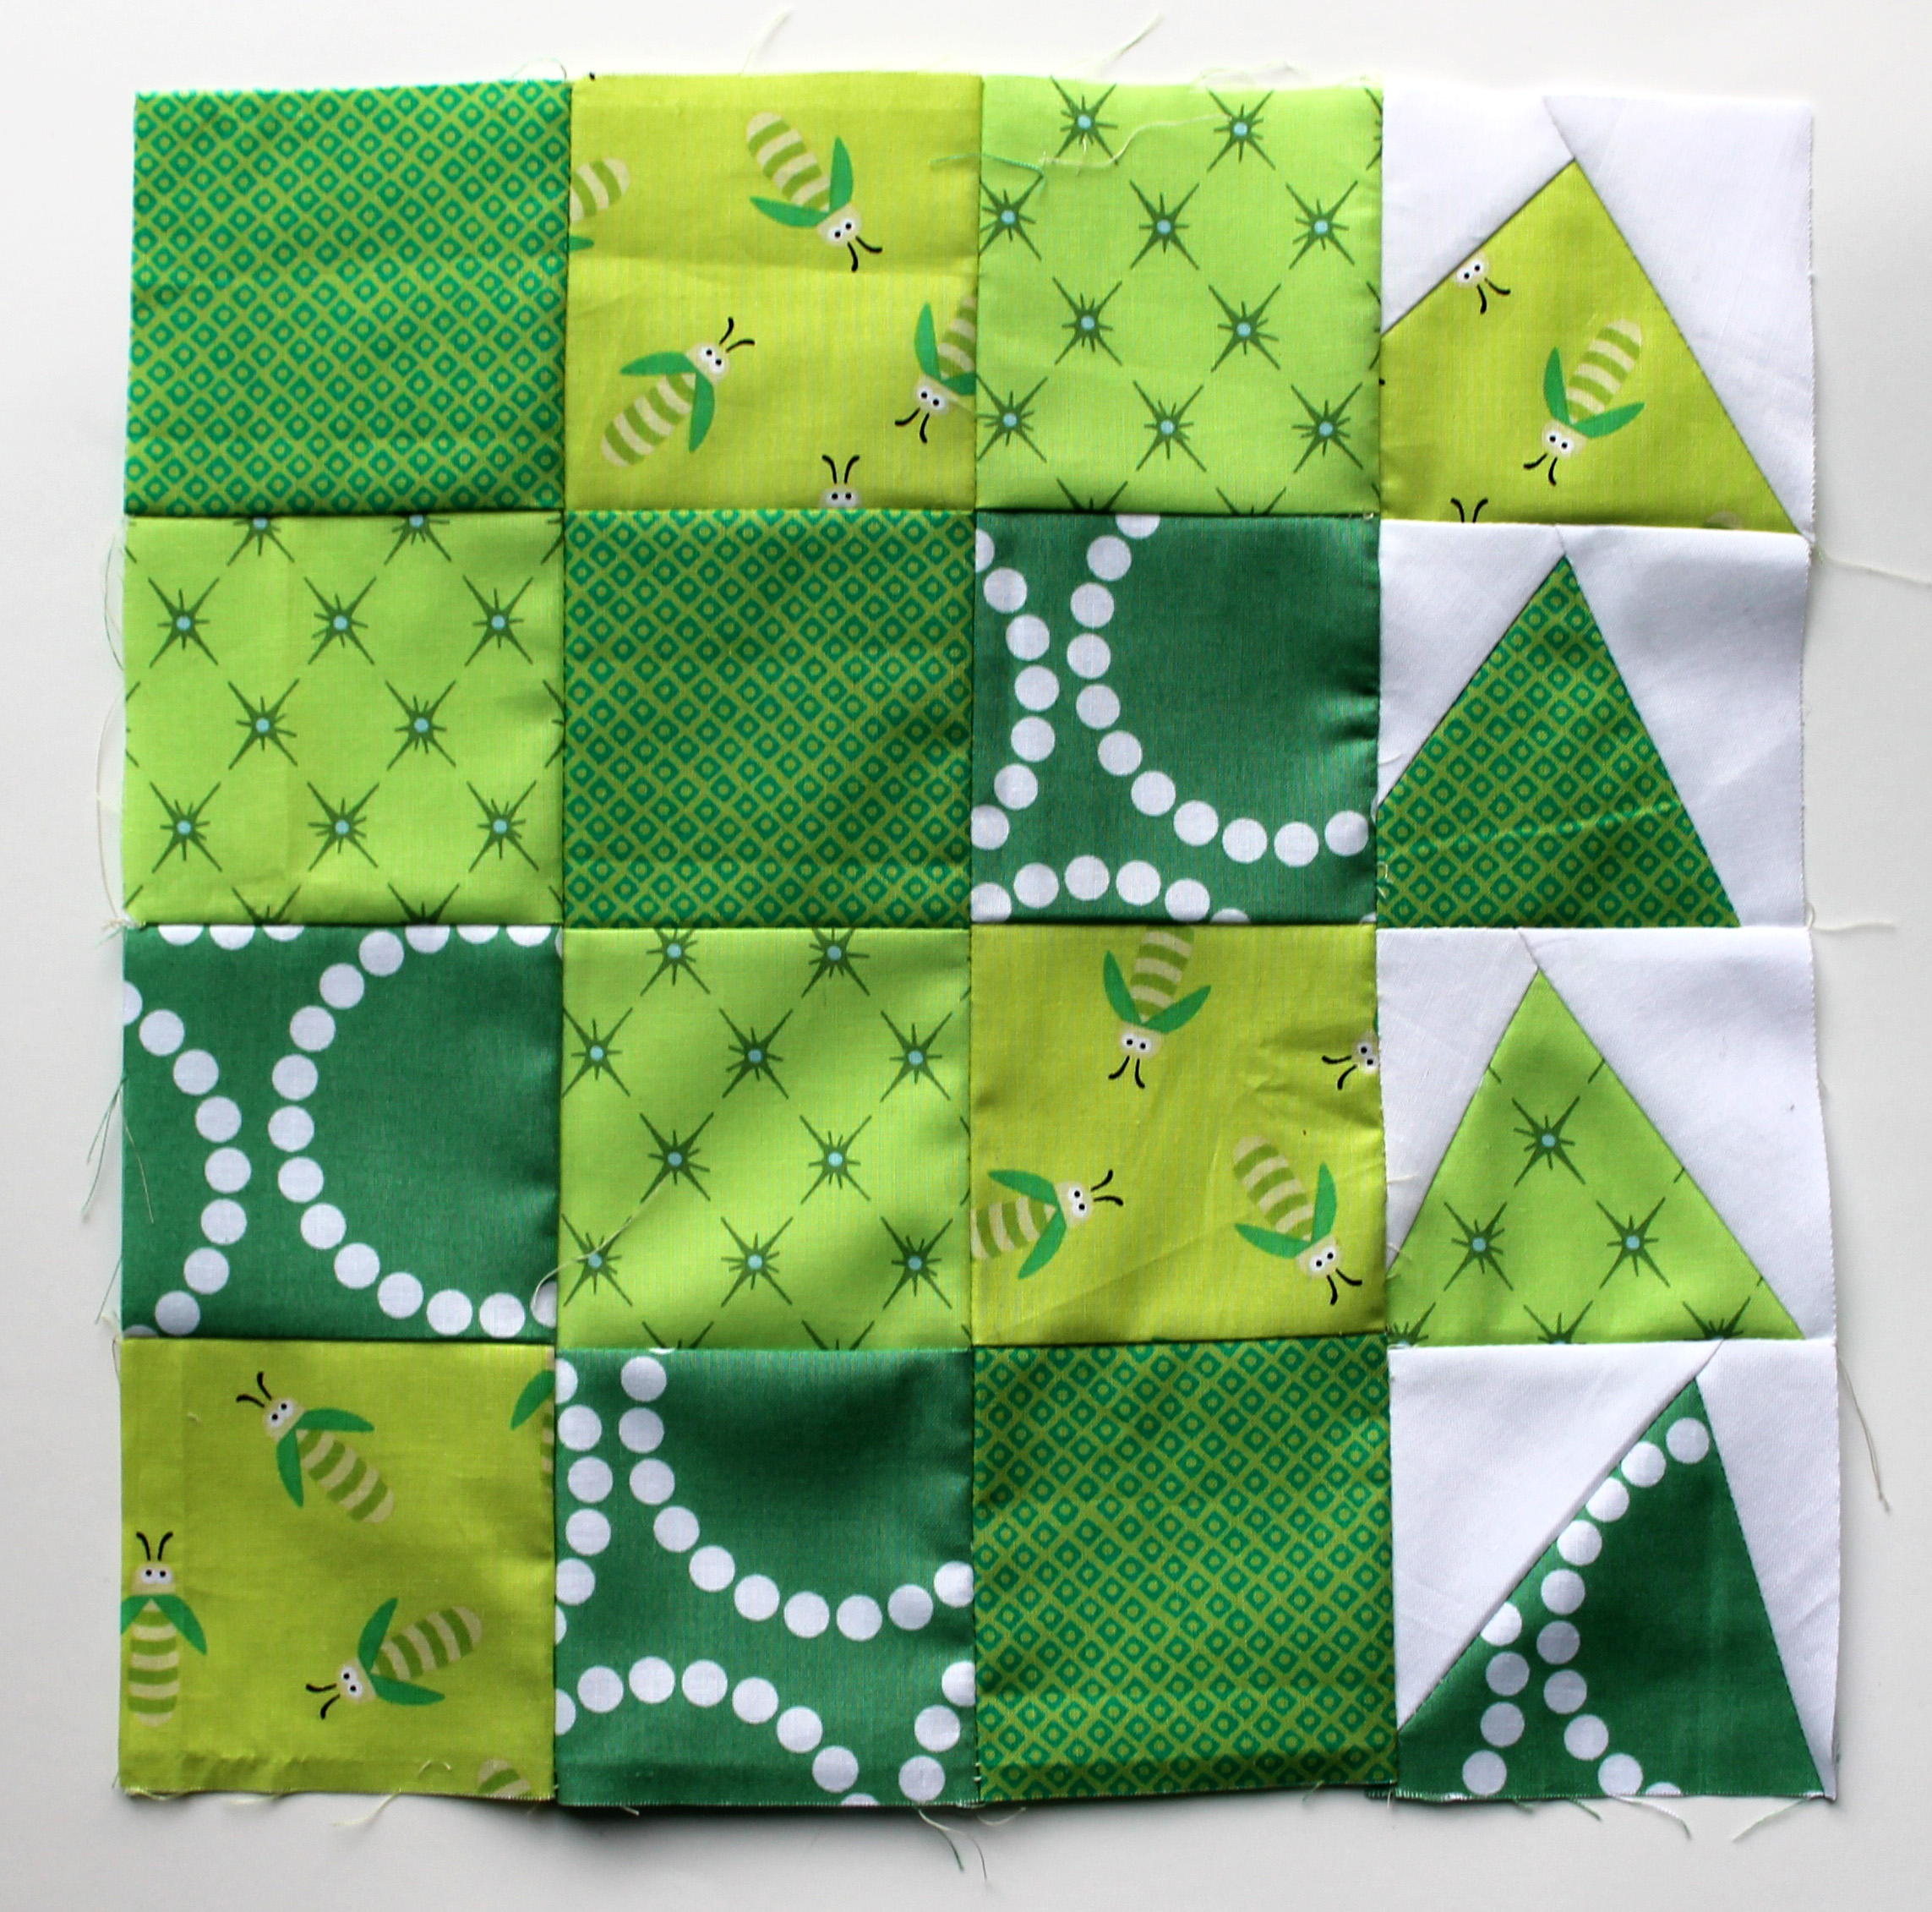
5. Make sure you square off your completed block ensuring it measures 12½”” by 12½”.
To add some variation to your Urban Chickiens, Michelle suggests doing some blocks up without the chickens… that is blocks of just 4 x 4 coloured squares.
I am now off to add some more chickens to my coup. I am really having fun with this quilt and can not wait to have a finished quilt top to show.

Love your colour choices so far. Can’t wait to see more.
I love this color combination! I will probably “steal” it from you for my next project! 🙂
oh, cool. I love the wonky angles. Thanks for the idea and tute
LeeAnna Paylor
lapaylor.blogspot.com
Those little chicken blocks are so cute! Love those fabrics and bright colors you chose.
Love this! Those chickens are so fun. Can’t wait to see how this turns out 🙂
Love the movement of the wonky chickens…er…triangles!
So lovely! Thanks for the tutorial. This I have to try, because I love scrapy and wonky quilts with bright colours. Looking forward to seeing your quilt finished.
Wonderful colours and fun blocks! Thanks for your nice comment about my EPP 🙂
Flipping in love with this city flock 🙂 🙂
I am going thru a flying geese phase. It is kind if weird.
Love the colour!!
What fun blocks! Thans for the tutorial 🙂
I like your flock so far!
adorable little quilt!
These blocks have a “needtomakethemNOW” quality to them. I love all your chickens. I have got to get out from under my pile of WIPs so I can make some too!
I totally agree!!
Thanks for tutorial, I have to dust my card off and do one also.
What a fun pattern. I love that they are called chickens!
I really like this. I have a fascination with triangles wonky or not! so I love this block
So cute! Love them… and your colours!
I love this block – what a great way to use up scraps in my bins! Thanks for sharing. I love your colors – they are so bright & cheerful.
Just love the chickens!! What a great idea…and a good scrap stash buster too! I like the free form you use with your triangles. Excellent tutorial; especially the tip about the tips of the triangles!!
these are so stinking cute!!!! I can’t wait to make some of my own next month for do. Good Stitches Hope group!
Love the colours of this quilt and the chooks (is that how it’s spelt?!)
What a fun block! I love the rainbow of saturated colors in the WIP.
Pingback: Urban Chicken Fun | Wombat Quilts
Pingback: No turkey here…just some Urban Chickens | Wombat Quilts
Thank you so very much for the tutorial! I love this darling take on that block. I like that you have limited your color pallette. That is a form of discipline I’ve yet to master. This will be fun to practice! And my favorite of any quilt pattern ever is the small, humble, 3″ block.
Thanks, much better directions than the other one I saw. =)
Pingback: Some more urban chickens… | WOMBAT QUILTS
Pingback: March 2018 Block Lotto | Saskatoon Modern Quilt Guild
Thank you for explaining the white part. I didn’t understand exactly what the original pattern meant, but now I get it. =)
I thought I might be doing something wrong, but some of your chickens lost their butts, too, so I think I’m okay. Thanks!