February is my month again to set the block for my Do Good Stitches Circle. After setting some more precision based blocks for my last two times out, I decided to go the wonky route this month…

Yep I am asking my fellow Bee mates to make some wonky circles using a low volume palette. To help out I am taking them (and you) step by step through the process to make two 12 inch blocks, starting with fabric selection.
For each block segment you will need two fabrics that have a small amount of contrast in them. My colour scheme for this quilt is warm so I am using yellow, apricot, pink and a touch of grey. For my fabric pull I went with predominantly cream and white background fabrics…
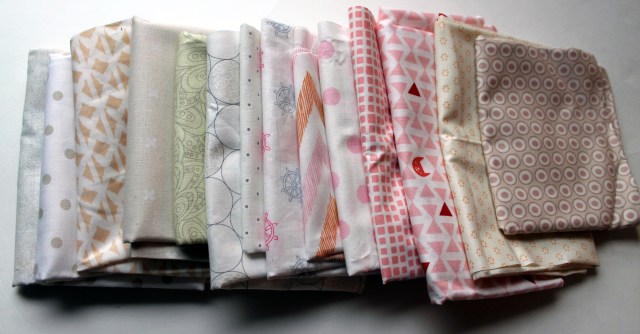
and for the contrasting fabric I choose more solid low volume fabrics…

For each block you need 8 different fabric – four light and four darker (note: you actually get two different finished blocks from this process). I selected my eight fabrics in pairs, making sure that there was a contrast between each pair. If you are not sure how the fabrics are reading against each other you can always use the black and white setting on your camera or phone to see how things look…
Now for the fun part…making the blocks.
Step 1. Cut out eight 7 1/2 inch squares from each selected fabric… Take two of your contrasting fabric squares and align them on top of each other.

Step 2. Using your rotary cutter, cut a curve shape out of your squares… making sure that you leave at least an inch or so between your curve and the edge of your block.

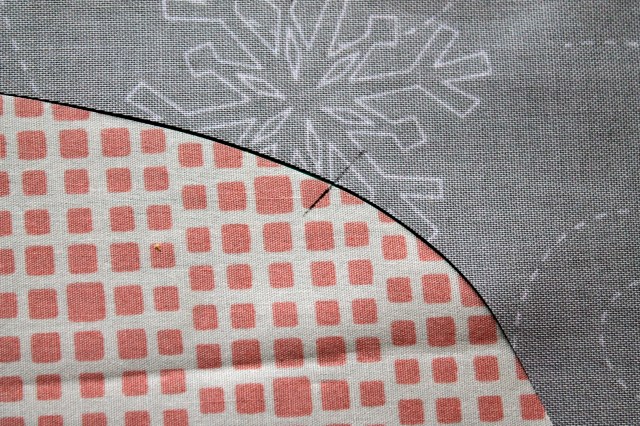
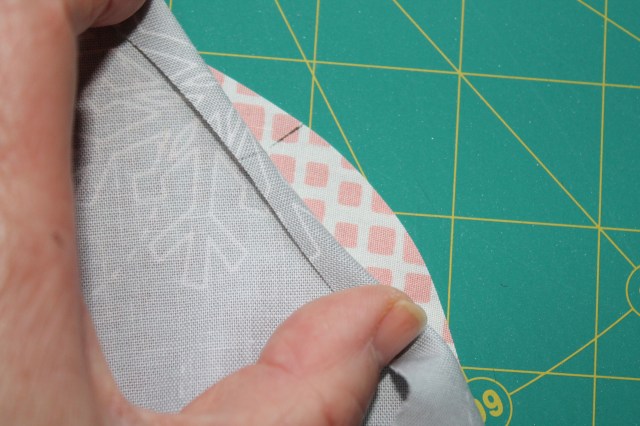
Step 3. Because you cut the two pieces of fabric together your background and center curve pieces should match exactly, no matter how wonky the curve you cut is.
Put together one of your fabrics as the background and the other as the center curve, making sure that they are as closely aligned on your cutting mat as you can get them.
Take a ruler and place it corner to corner across your block pieces.
Step 4. Using a chalk pencil or Frixon marker, mark the center of the block, making sure your mark across both pieces of fabric.
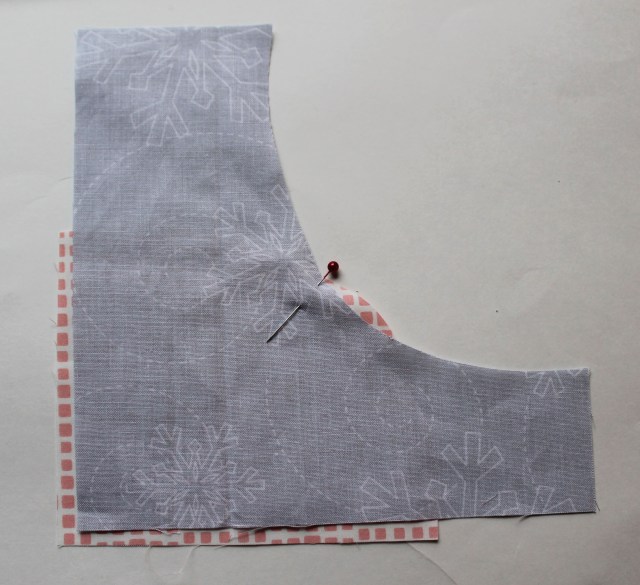
Step 5. Place your pieces of fabric face together, using the center mark to align the pieces…
Step 6. Pin your two pieces of fabric together at this center point… your fabrics should still be face together and the bottom corners of the block should be roughly aligned.
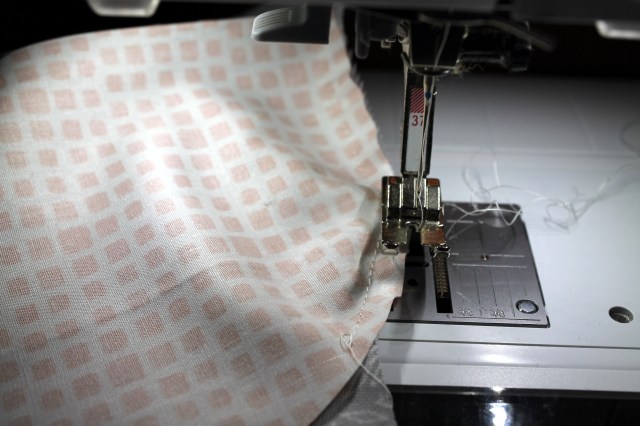
Step 7. To sew the pieces together, begin at the center part of the block… where you have pinned. I put my machine foot down on pin, remove the pin, lower my needle manually and I am ready to sew.

Step 8. Slowly sew from the center point out to one edge of the circle block, nudging fabric into alignment as you go. The fabric may not want to lay flat and that is okay… just try to avoid sewing creases into the block.
Note: I always sew with my machine in the needle down position, as it allows me to stop and adjust the block pieces as needed, without the risk of anything slipping or moving.

Step 9. As you are sewing you will notice the block ends do not align, this is okay…do not panic.

Step 10. When you have come to the end of the block, lift your needle, cut your thread and re-position your block back in the center, this time sewing the half of the block you have not done.
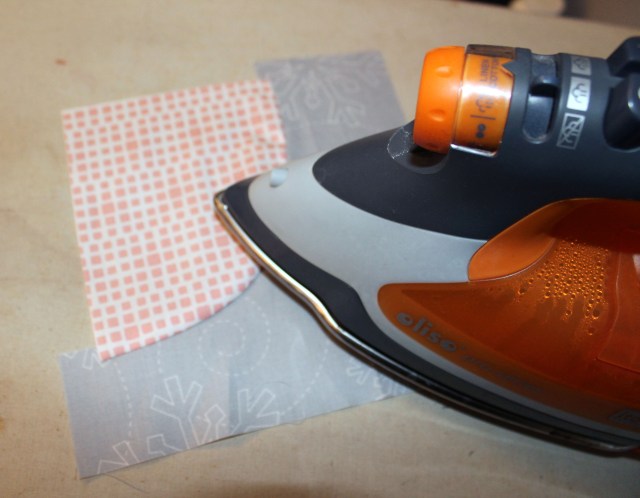
Step 11. Your block segment is now ready for pressing… an important step because it will not be laying flat at all and you will have to iron it into submission…

Step 12. When pressing my block I press my seams first from the back side of the block…… and then press the front side of the block, making sure that my curve is sitting as flat as I can get it.
Note: When pressing the block I always use starch as it helps persuade the fabric to do what I need it to do.
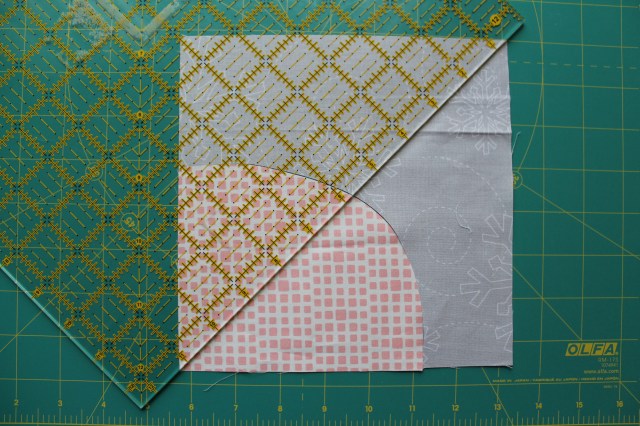
Step 13. The block piece is now ready to trim down 6 1/2 inches… you should have a bit of wiggle room with this block to trim a little off kilter, or with more background or more circle, depending on what you want to do.

Step 14. Repeat the process until you have all segments of your blocks done. For each colour pairing you make you will end up with two blocks….

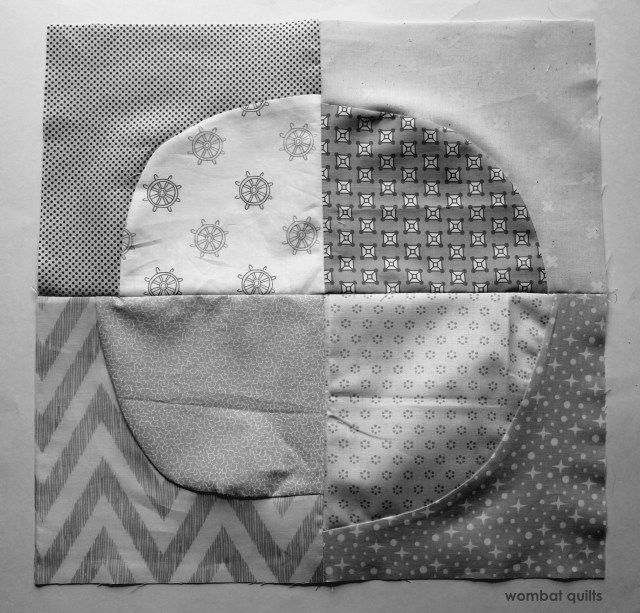
For my Bee blocks I am asking for two (2) 12 1/2 inch unfinished blocks…. laid out with alternating light and dark circle pieces.

What I love about this colour palette is that it compliments the wonky so well… the mismatch, strange curves are subtle, there are no stark contrasts drawing your attention to the off kilter shapes. I think this is going to be a charming quilt when done.

Delightful! Really love your clear directions for this. And the palette is scrumptious for this time of year :*)
Your fabrics for this are just gorgeous!
Nice little tutorial – thanks for sharing! I plan to link to it in my next newsletter…
Thanks Debbie. I found that circles were definitely less scary when you do not have to worry about them being perfect!
Such a lovely colour palette! I particularly love the grey snowflake fabric… My instinct would have been to clip the seam allowances, but you’ve shown that with enough steam, starch and determination, you can get it flat without that!
I tell my Costume students to leave the needle down as a pivot point. Helps keep things aligned. You can gently clip the curve for ease if others want a more flat curve. You clip only 1/2 of the seam allowance to allow the curve to ease flat. Same thing one would do for a neckline or armhole given the curve you sewed is larder than the curve you cut. But I LOVE the black & white camera tip!
Thank you for the tutorial! I’ve been inspired to give these a try!
Ironing into submission and persuading with starch! LOL!
When you cut curves this way, they are NOT a perfect match because you have not allowed for the seam allowance. The only way to get these curves to match is to make a template for each half–a template where the 1/4 inch seam has been added. That’s why these curved cuts are puckered. This is why drunkard’s path designs with templates produce a beautifully matched curve–the pieces have the added seam allowance.
Hi Sandra. I have made enough drunkards path blocks to understand the joy of templates and seam allowances. I wanted to do something different with this block and wanted to try wonky circles. The seam allowance is added to the square size, so that you can trim to the correct size. I love the imperfections of these blocks and am excited to see how they look together.
Pingback: New Year and new start… | WOMBAT QUILTS
Cath did you ever get enough of these blocks back to make this quilt? I would love to see all the blocks together!
Amber I finished the quilt a few months ago…and blogged about it. You should find it somewhere on the site.
Doh! I should have used that handy search function 😜 Thanks Cath love it!