This week I managed to finish up one of the Do Good Stitches quilt tops I have in progress. This quilt started with this wonderful block….
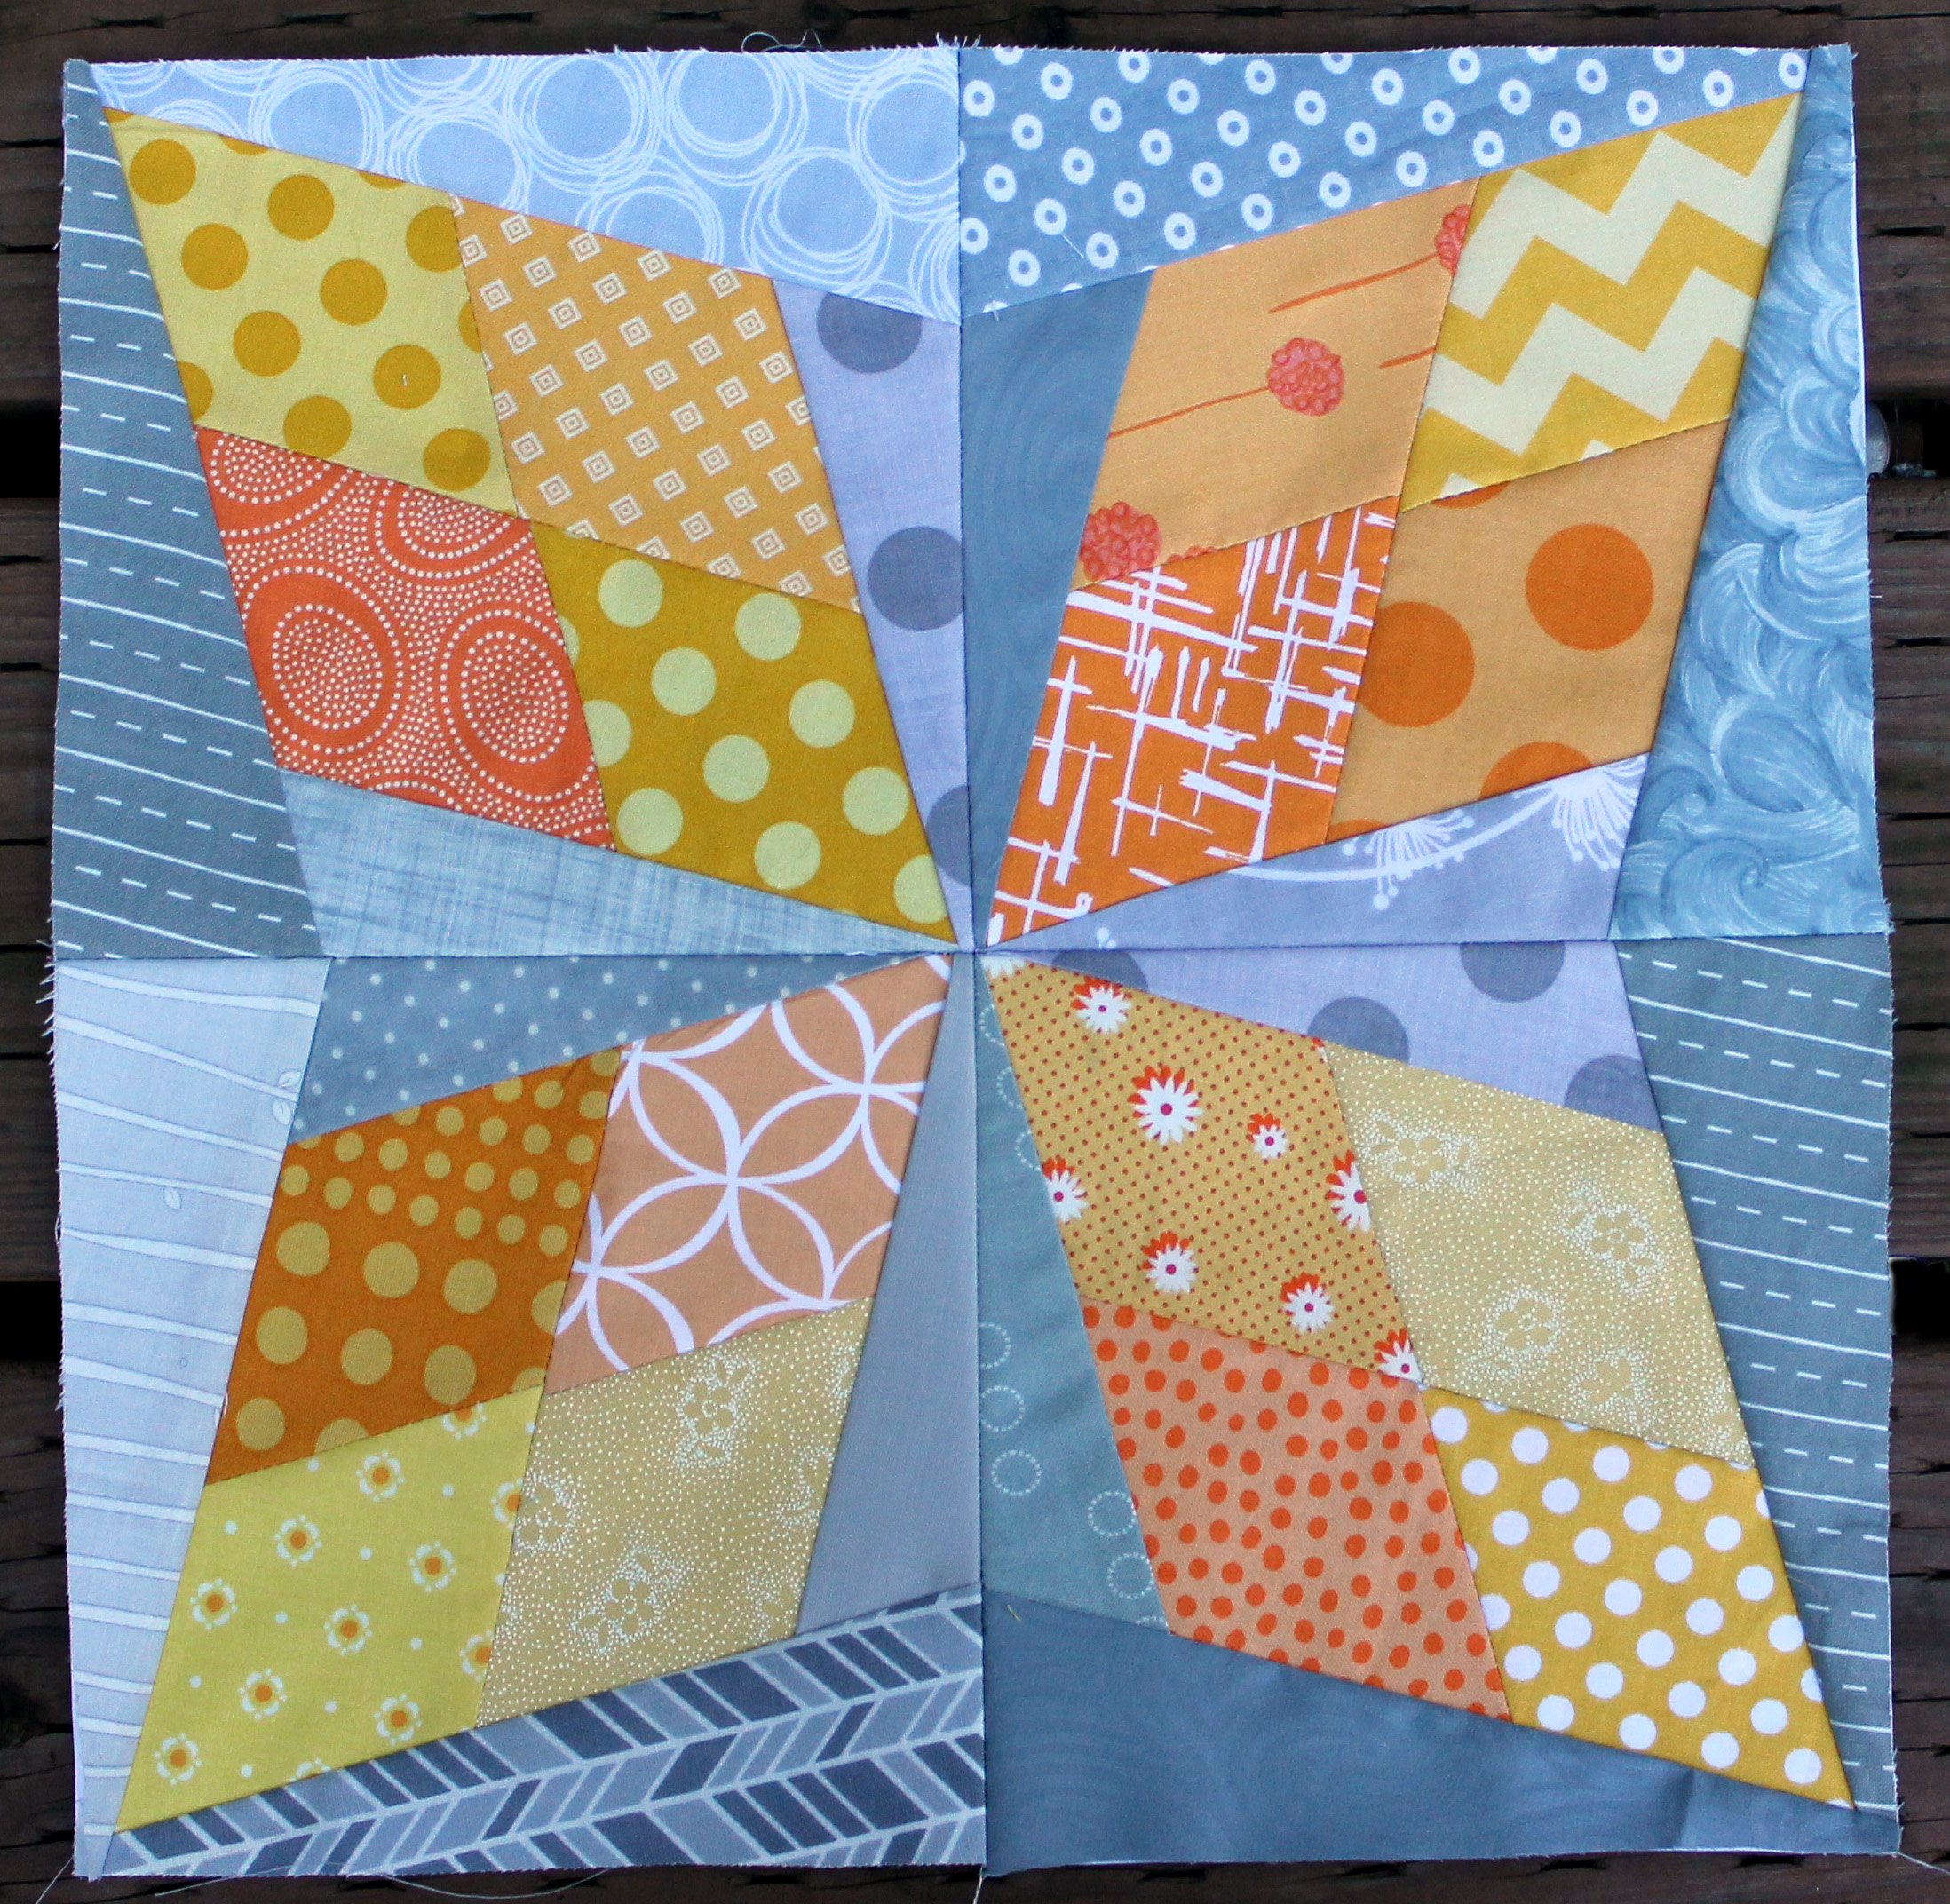
I found the paper piecing pattern at Freshly Pieced and fell in love. I set it as my block for August and then watched with delight as my fellow Hope Circle members sent in their blocks. A little bit of sewing and voila a quilt top was created…
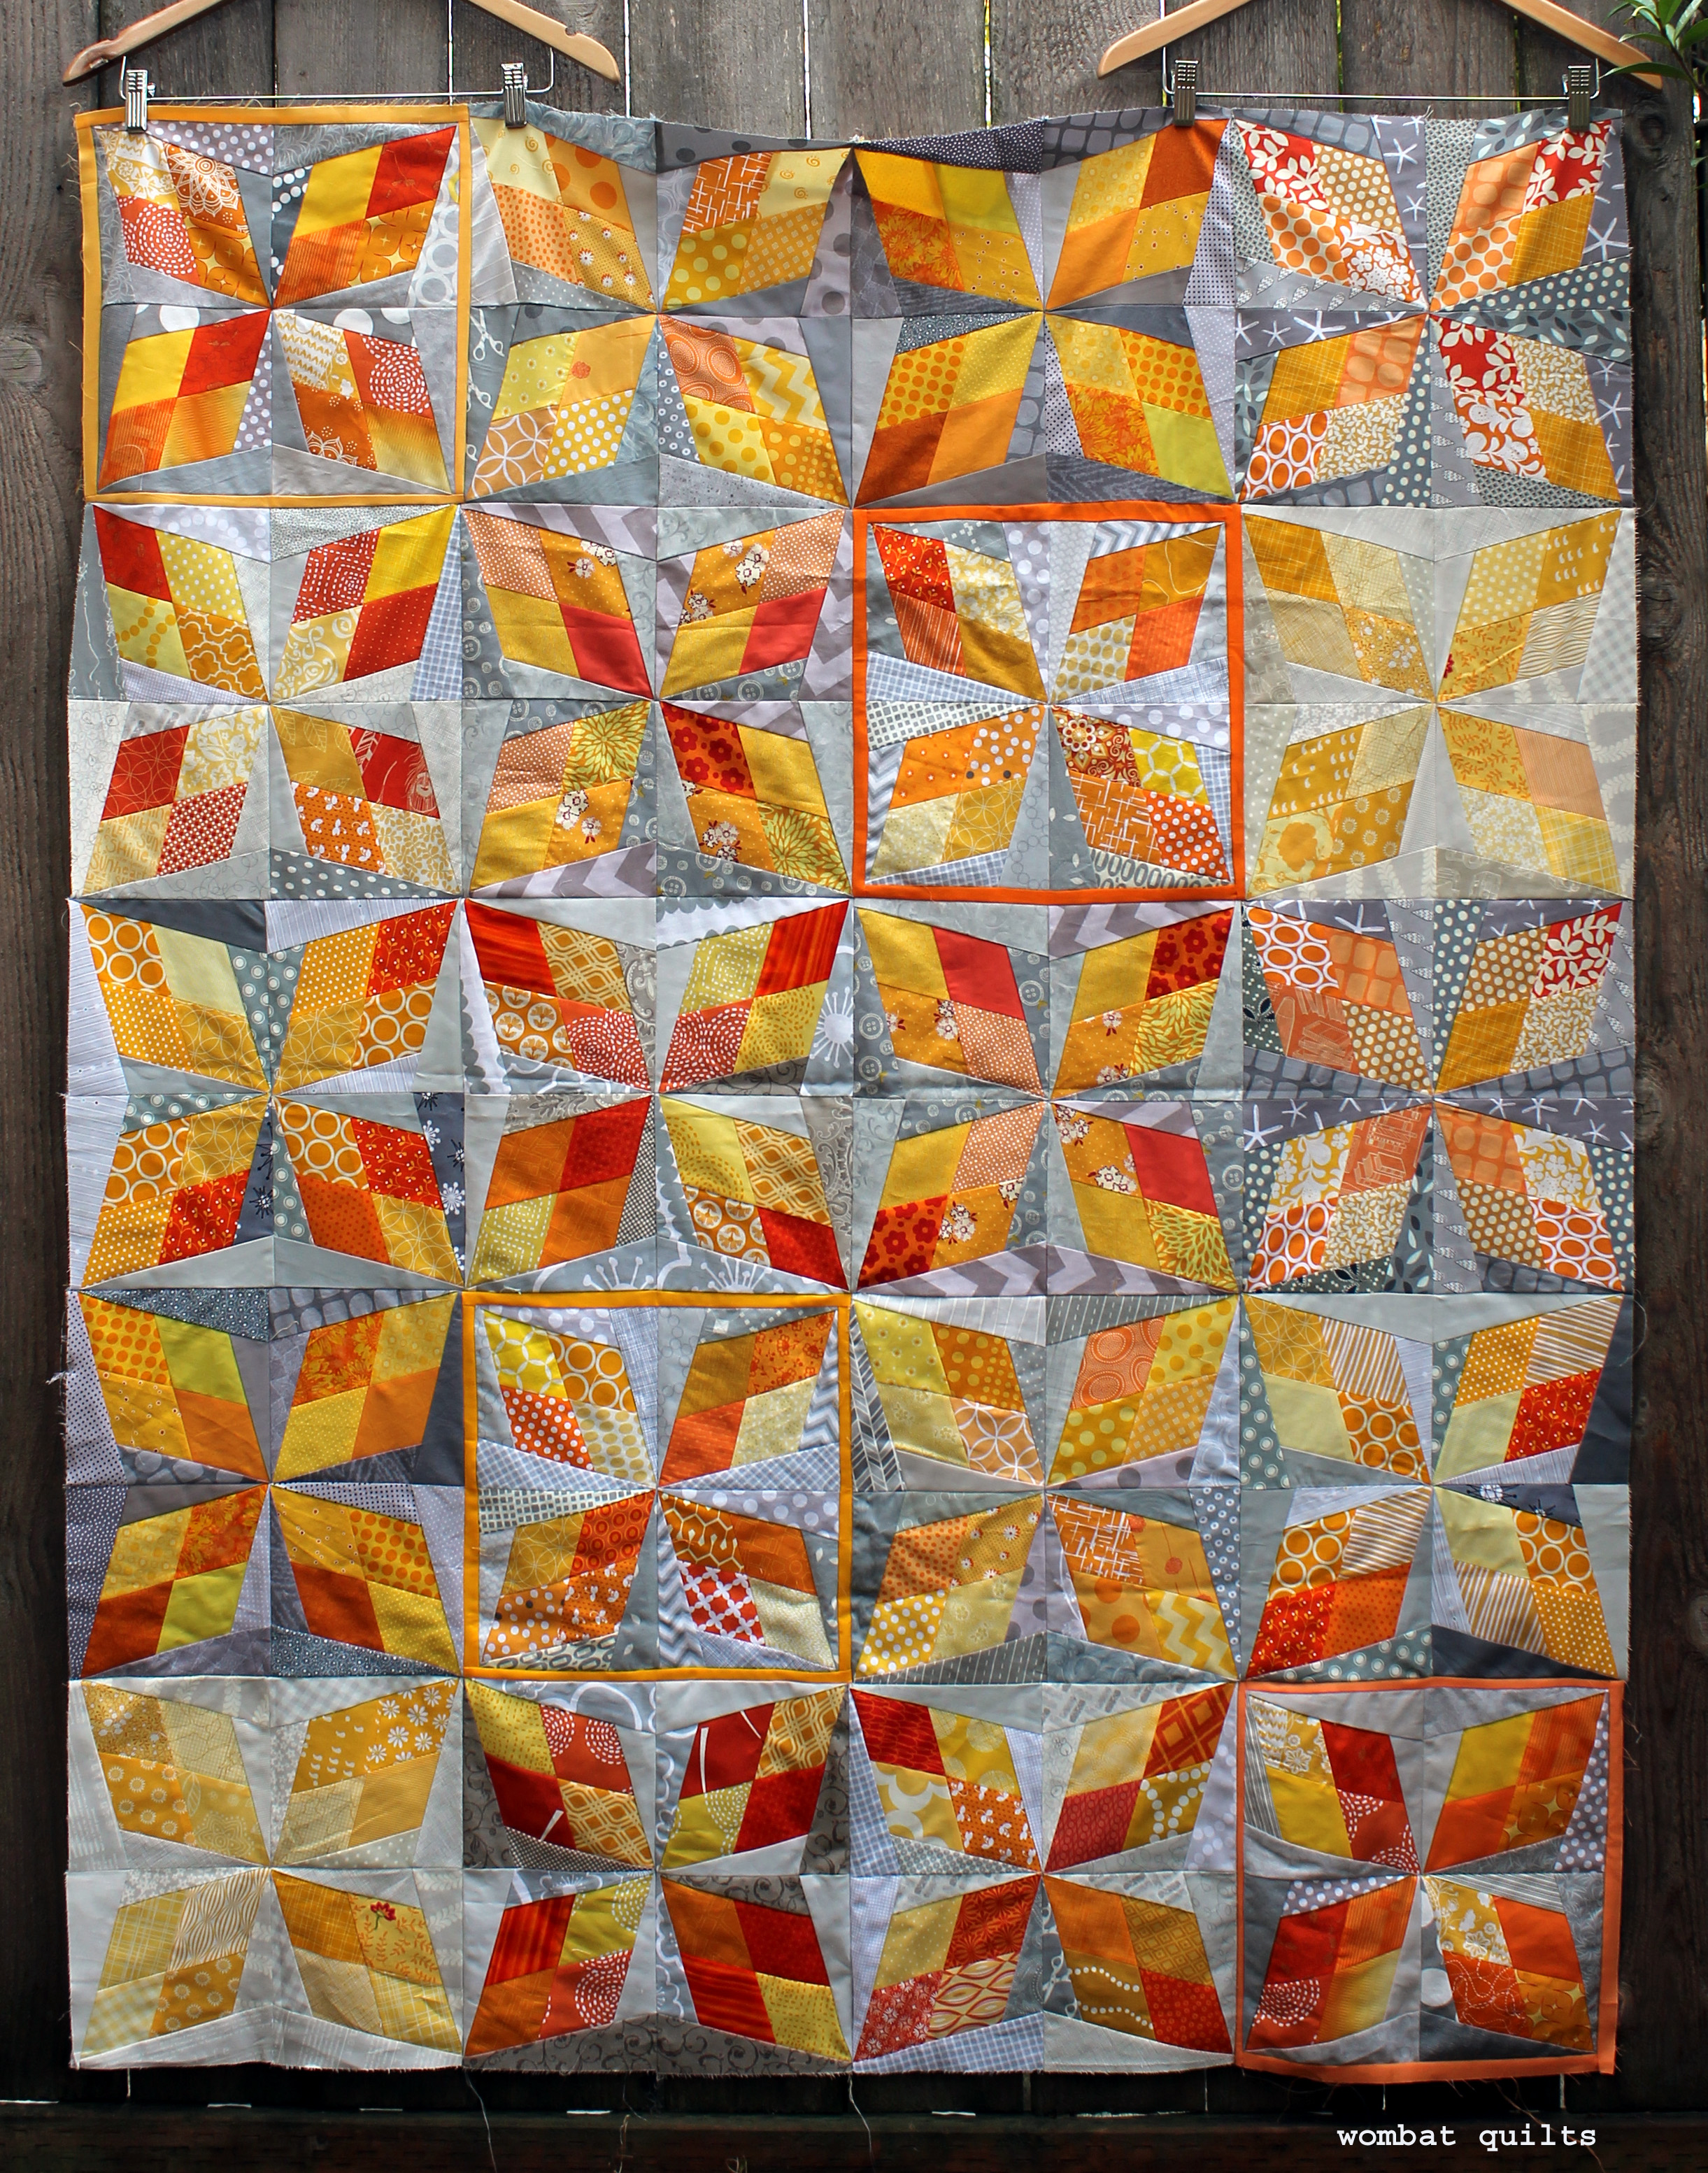
I loved the subtle variations in colour that were added by other members. The deep orange adds such a pop and the soft quiet yellow gives the eye a resting place.
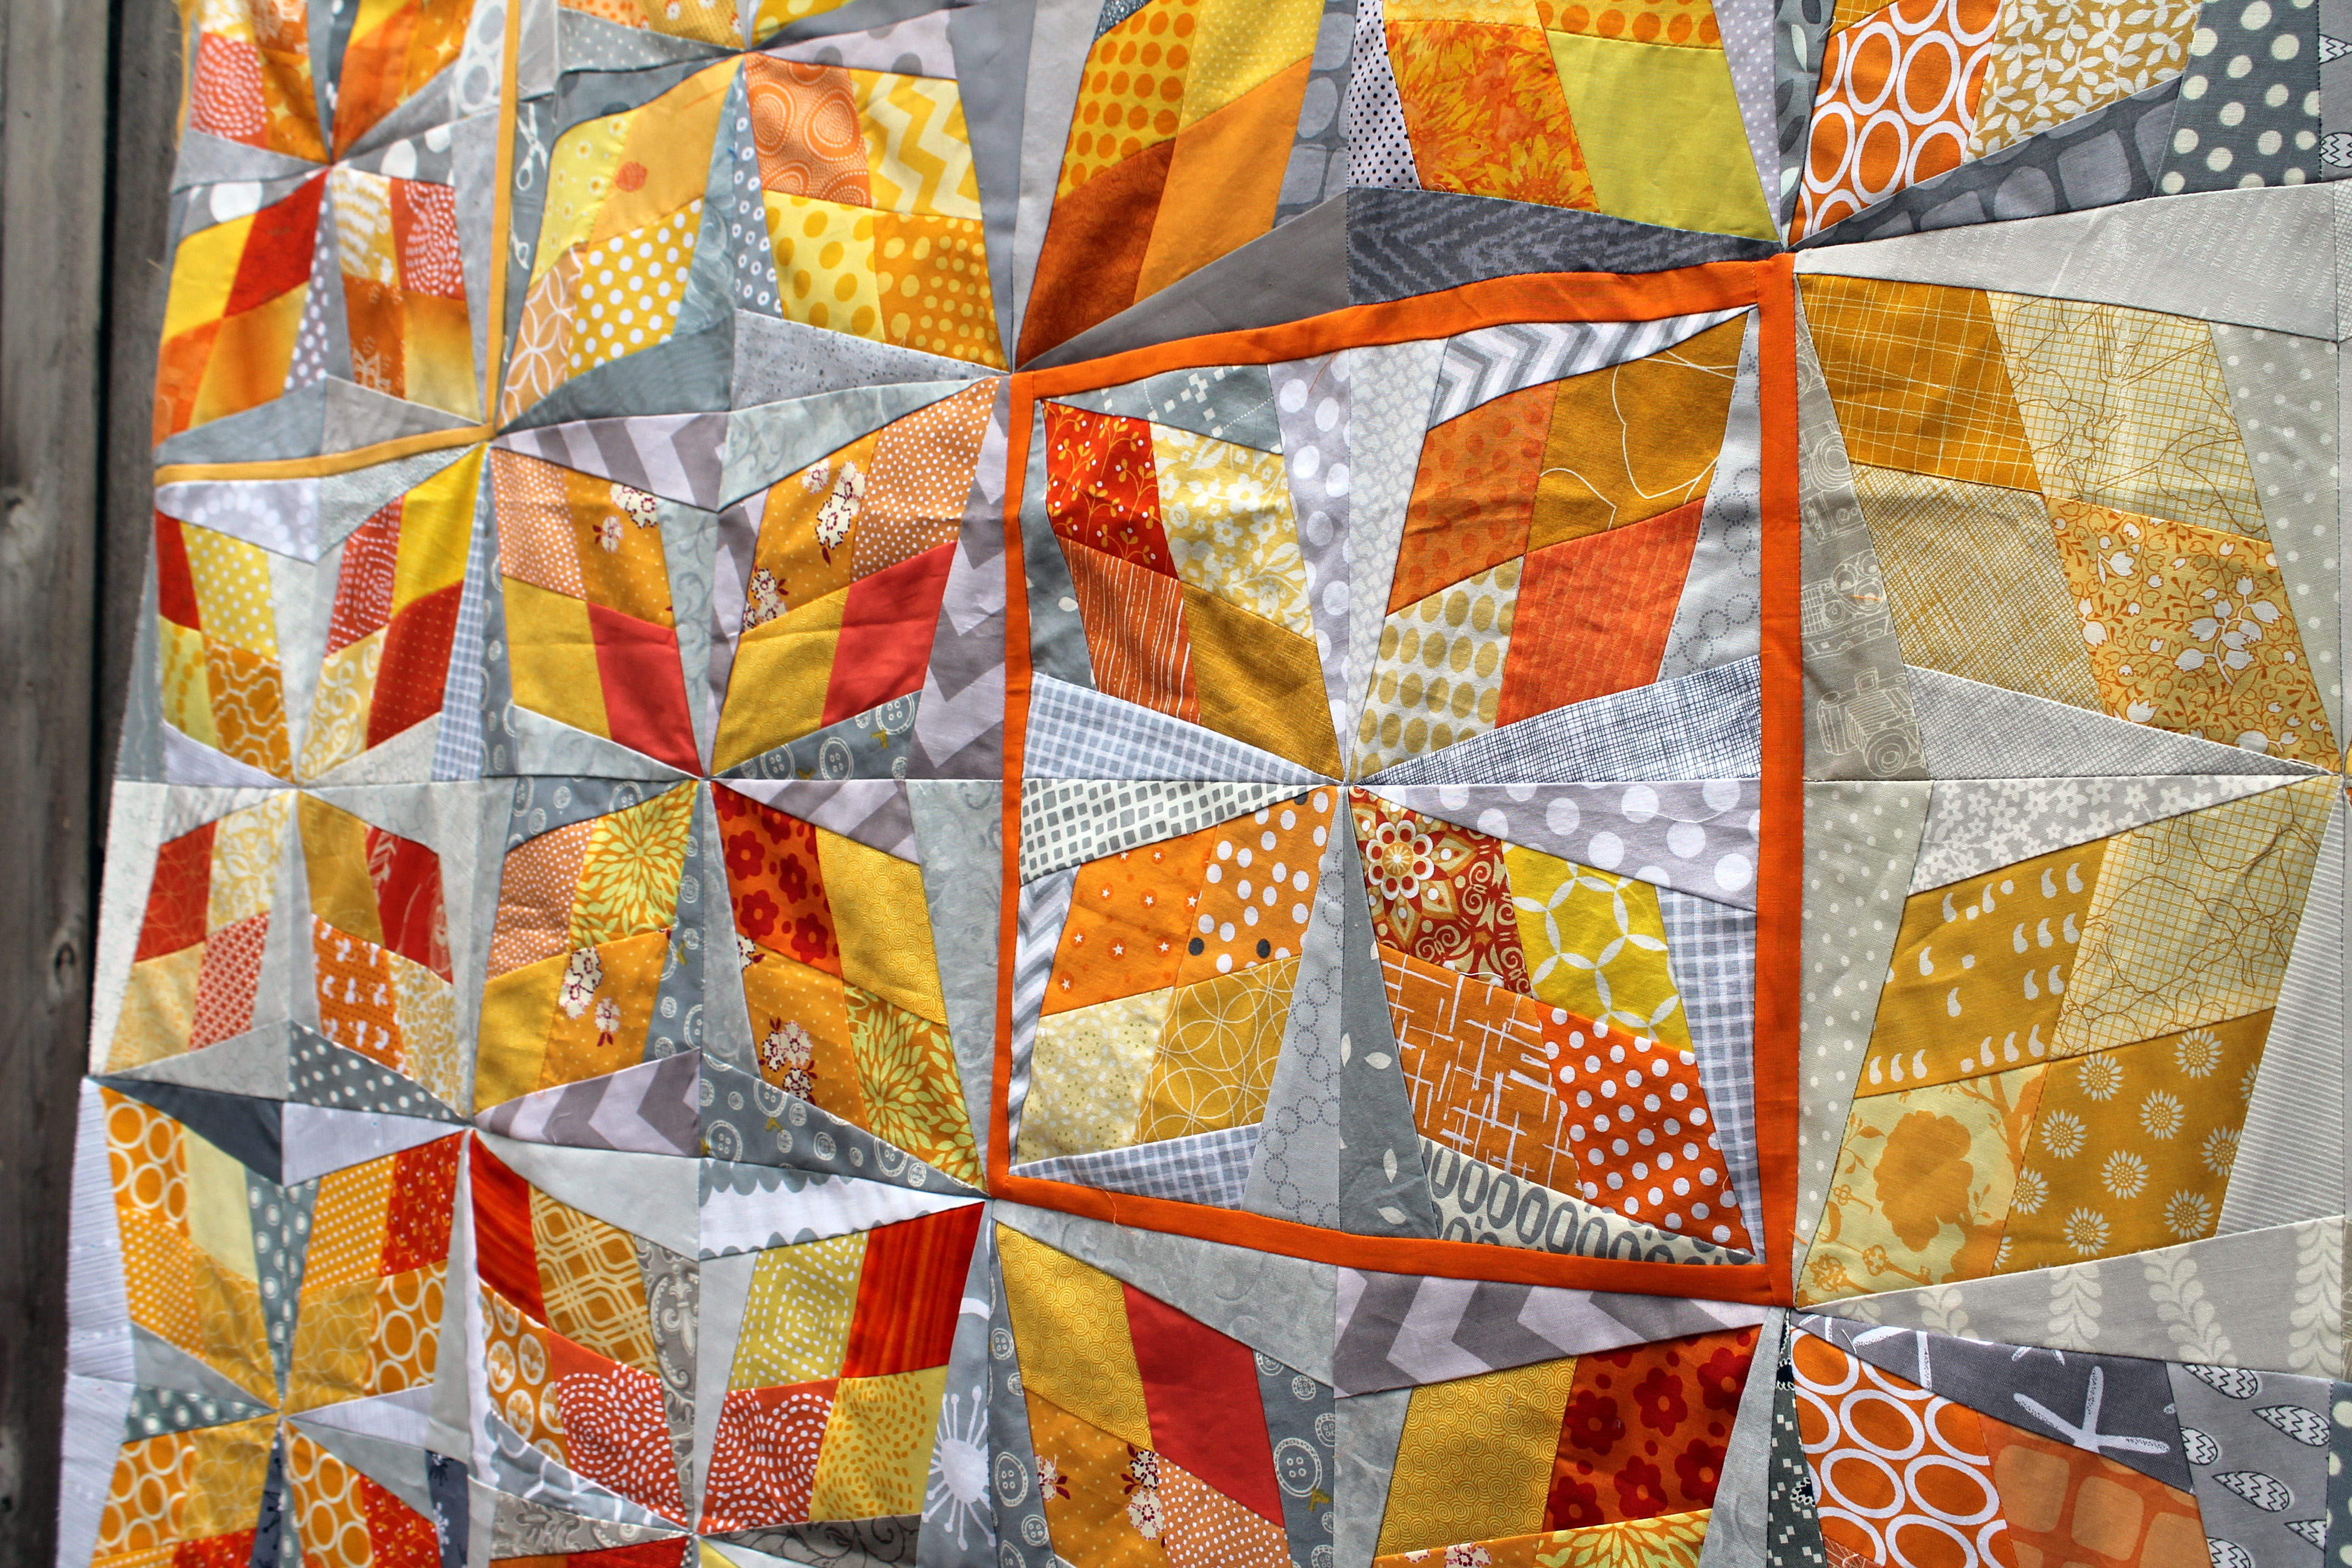
You may also have noticed some fun little sashing on the top. I love this touch, but it was not planned. When I set this block, I forgot that several of our Circle’s member had not done paper piecing before… and I had forgotten to give instructions on downloading the paper piecing pattern.
You see if you print a PDF straight from the website it prints out slightly smaller than standard. You need to download the PDF to your desktop/computer and then print from the download to get accurate sizing. 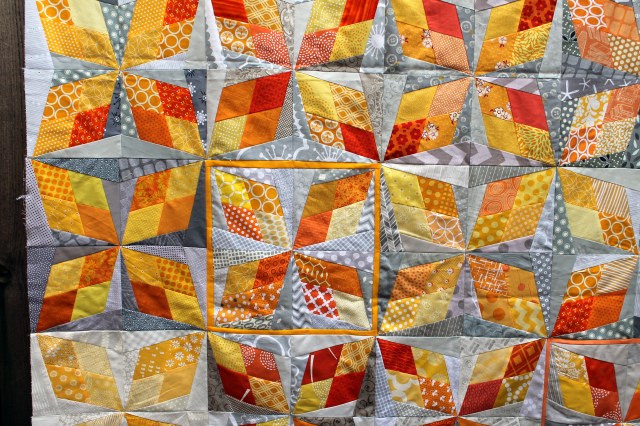
Also if you select the print dialogue box “print to fit” when you send the document to print it will also print out slightly smaller than needed. In the end the best thing to do is measure your pattern before you start sewing it, to make sure it is the correct size.
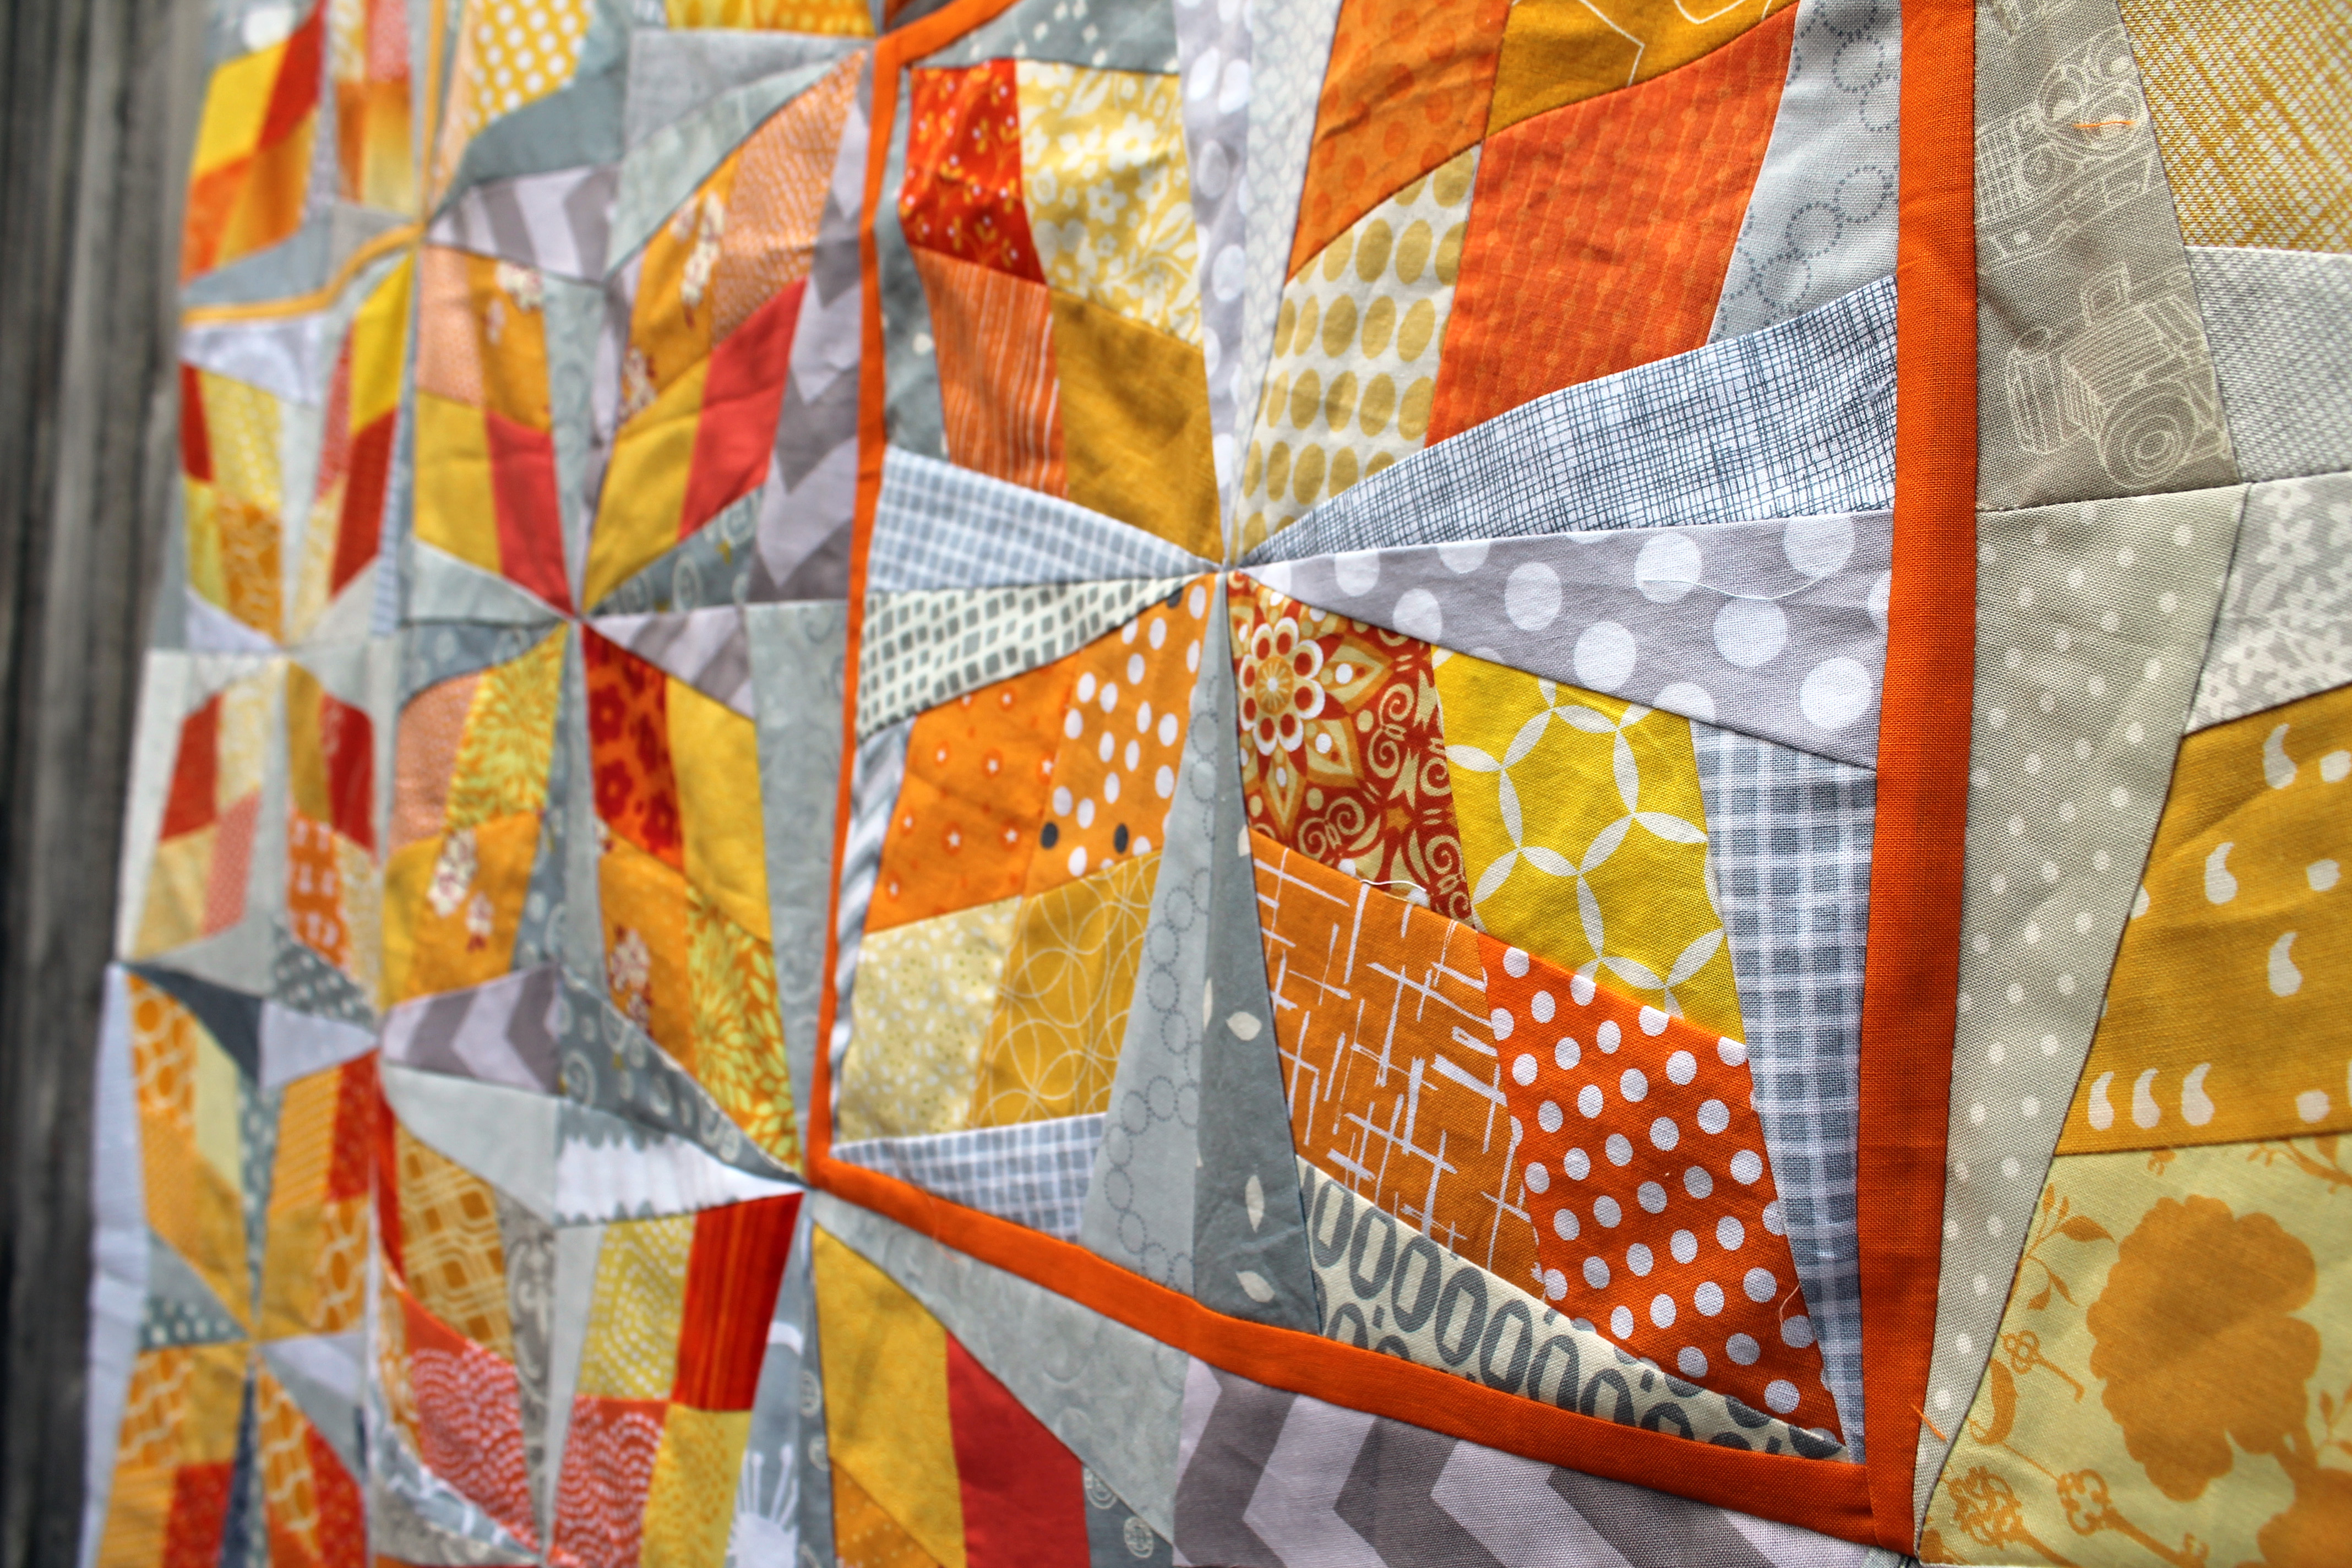
The four blocks that were slightly under size got a special border which added a wonderful pop of colour to the top.
So many times in my creative life I find little mistakes or hiccups make me think more creatively…make me rethink my original vision…force me to think outside the box. The end results have always be so much better than my original plan. This has been true with my painting, my film making and my quilting.
I am also linking up with Finish It up Friday over at Crazy Mom Quilts.

I love it when a group project ends up looking like it was planned from the beginning. Of course the setting has something to do with that–you made good use of the varied values. Love the solution to the size problem! Creative necessity at work.
Too right! When first looking at it I totally fell in love with the extra sashing! hen I was all, hey wait, how did she make sure those blocks were smaller? LOLOLOL Awesome!
I really love this block and the secondary pattern that shows up. Did you suggest fabrics or did so many dotted pieces show up by chance or do your group members just know you love dots? Very interesting!
I really like how you’ve done those special borders – those blocks really ‘pop’. Great work! 🙂
Gorgeous blocks from everybody – one day I will give paper piecing a try ….one day soon maybe 🙂
This is a wonderful quilt the sasking around the 4 blocks looks deliberate and adds a wonderful focus of colour what a great group project Quilty hugs
Ooops sashing I hate predictive text lol
It’s gorgeous! I love that some of the blocks have borders and others don’t.
It’s a gorgeous colour combination, and you’re right, that narrow sashing really lifts the whole quilt. I’ll have to remember the tip about printing from the download, not the website…
Too funny! I think the best part of this quilt is the unplanned orange sashing! Really makes the quilt pop!
It’s great! I LOVE the sashing. I always have a hard time using red, and this is a combination that really works for me. Beautiful.
What a great pattern and the grey and orange colour combo really makes it look fantastic. Well done! It’s beautiful.
I totally agree – the blocks with skinny borders just add to the overall appeal. Very nice!
I totally love what you did with the smaller ones! It’s a great idea! I love it!
I think this counts as thinking inside the box — the bright orange box, to be exact. You’ve come up with an excellent solution to the size consistency issue. It’s always a nuisance that my printing default is to fit to page. I have to be very careful to check and make sure it’s not shrinking my block behind my back.
It’s gorgeous, love the colours!
You are so clever! I LOVE the sashing around the smaller blocks!
That said, I’m sorry that I’m a delinquent. Thanks for the tips on how to print them out for the future so that I don’t create the same problem the next time . . . 🙂
Kim it was my fault for not putting instructions up. I forgot not everyone has done paper piecing. I absolutely love how the too turned out and would not have it any other way.
This quilt is stunning and I though those borders were on purpose. You are right they add so much to the quilt! This is going to make someone very happy.
It’s so interesting looking at the different blocks once put together and seeing each person’s interpretation of the colors/instructions and all the variations of color.
I like the mini border on those smaller blocks. It adds a little more interest to the quilt top.
I thought the sashing was deliberate. Well done to the beginners for trying a block that many might find challenging. I have never had a printing problem and now I know why. I will keep that advice in mind!
Looks fabulous! I love it!!
I’m almost done with the icky thump quilt. I loved yours so much that I had to give it a go. I loved the grays and teals you used in yours. I went with neutrals teals, greens and blues.
Looks lovely. No one would know the sashed blocks were sized wrong. It all looks very intentional.
What a wonderful block. I must try this as I have not done diamonds very often and need the practice. Your quilt is gorgeous.
Beautiful! I love the bordered blocks.
Thanks Cath – I just realised why your spiderweb-blog is steasing me!
I haven’t printed the paper at the same time, and most likely not the same way! I love the grey/yellow/orange combination, and the added orange border is just a twist, it blows a little life into the quilt……….
Love all that orange, especially this time of year with all the fall colors.
Pingback: Arkansas Traveller Quilt | WOMBAT QUILTS