No turkey here…just some Urban Chickens

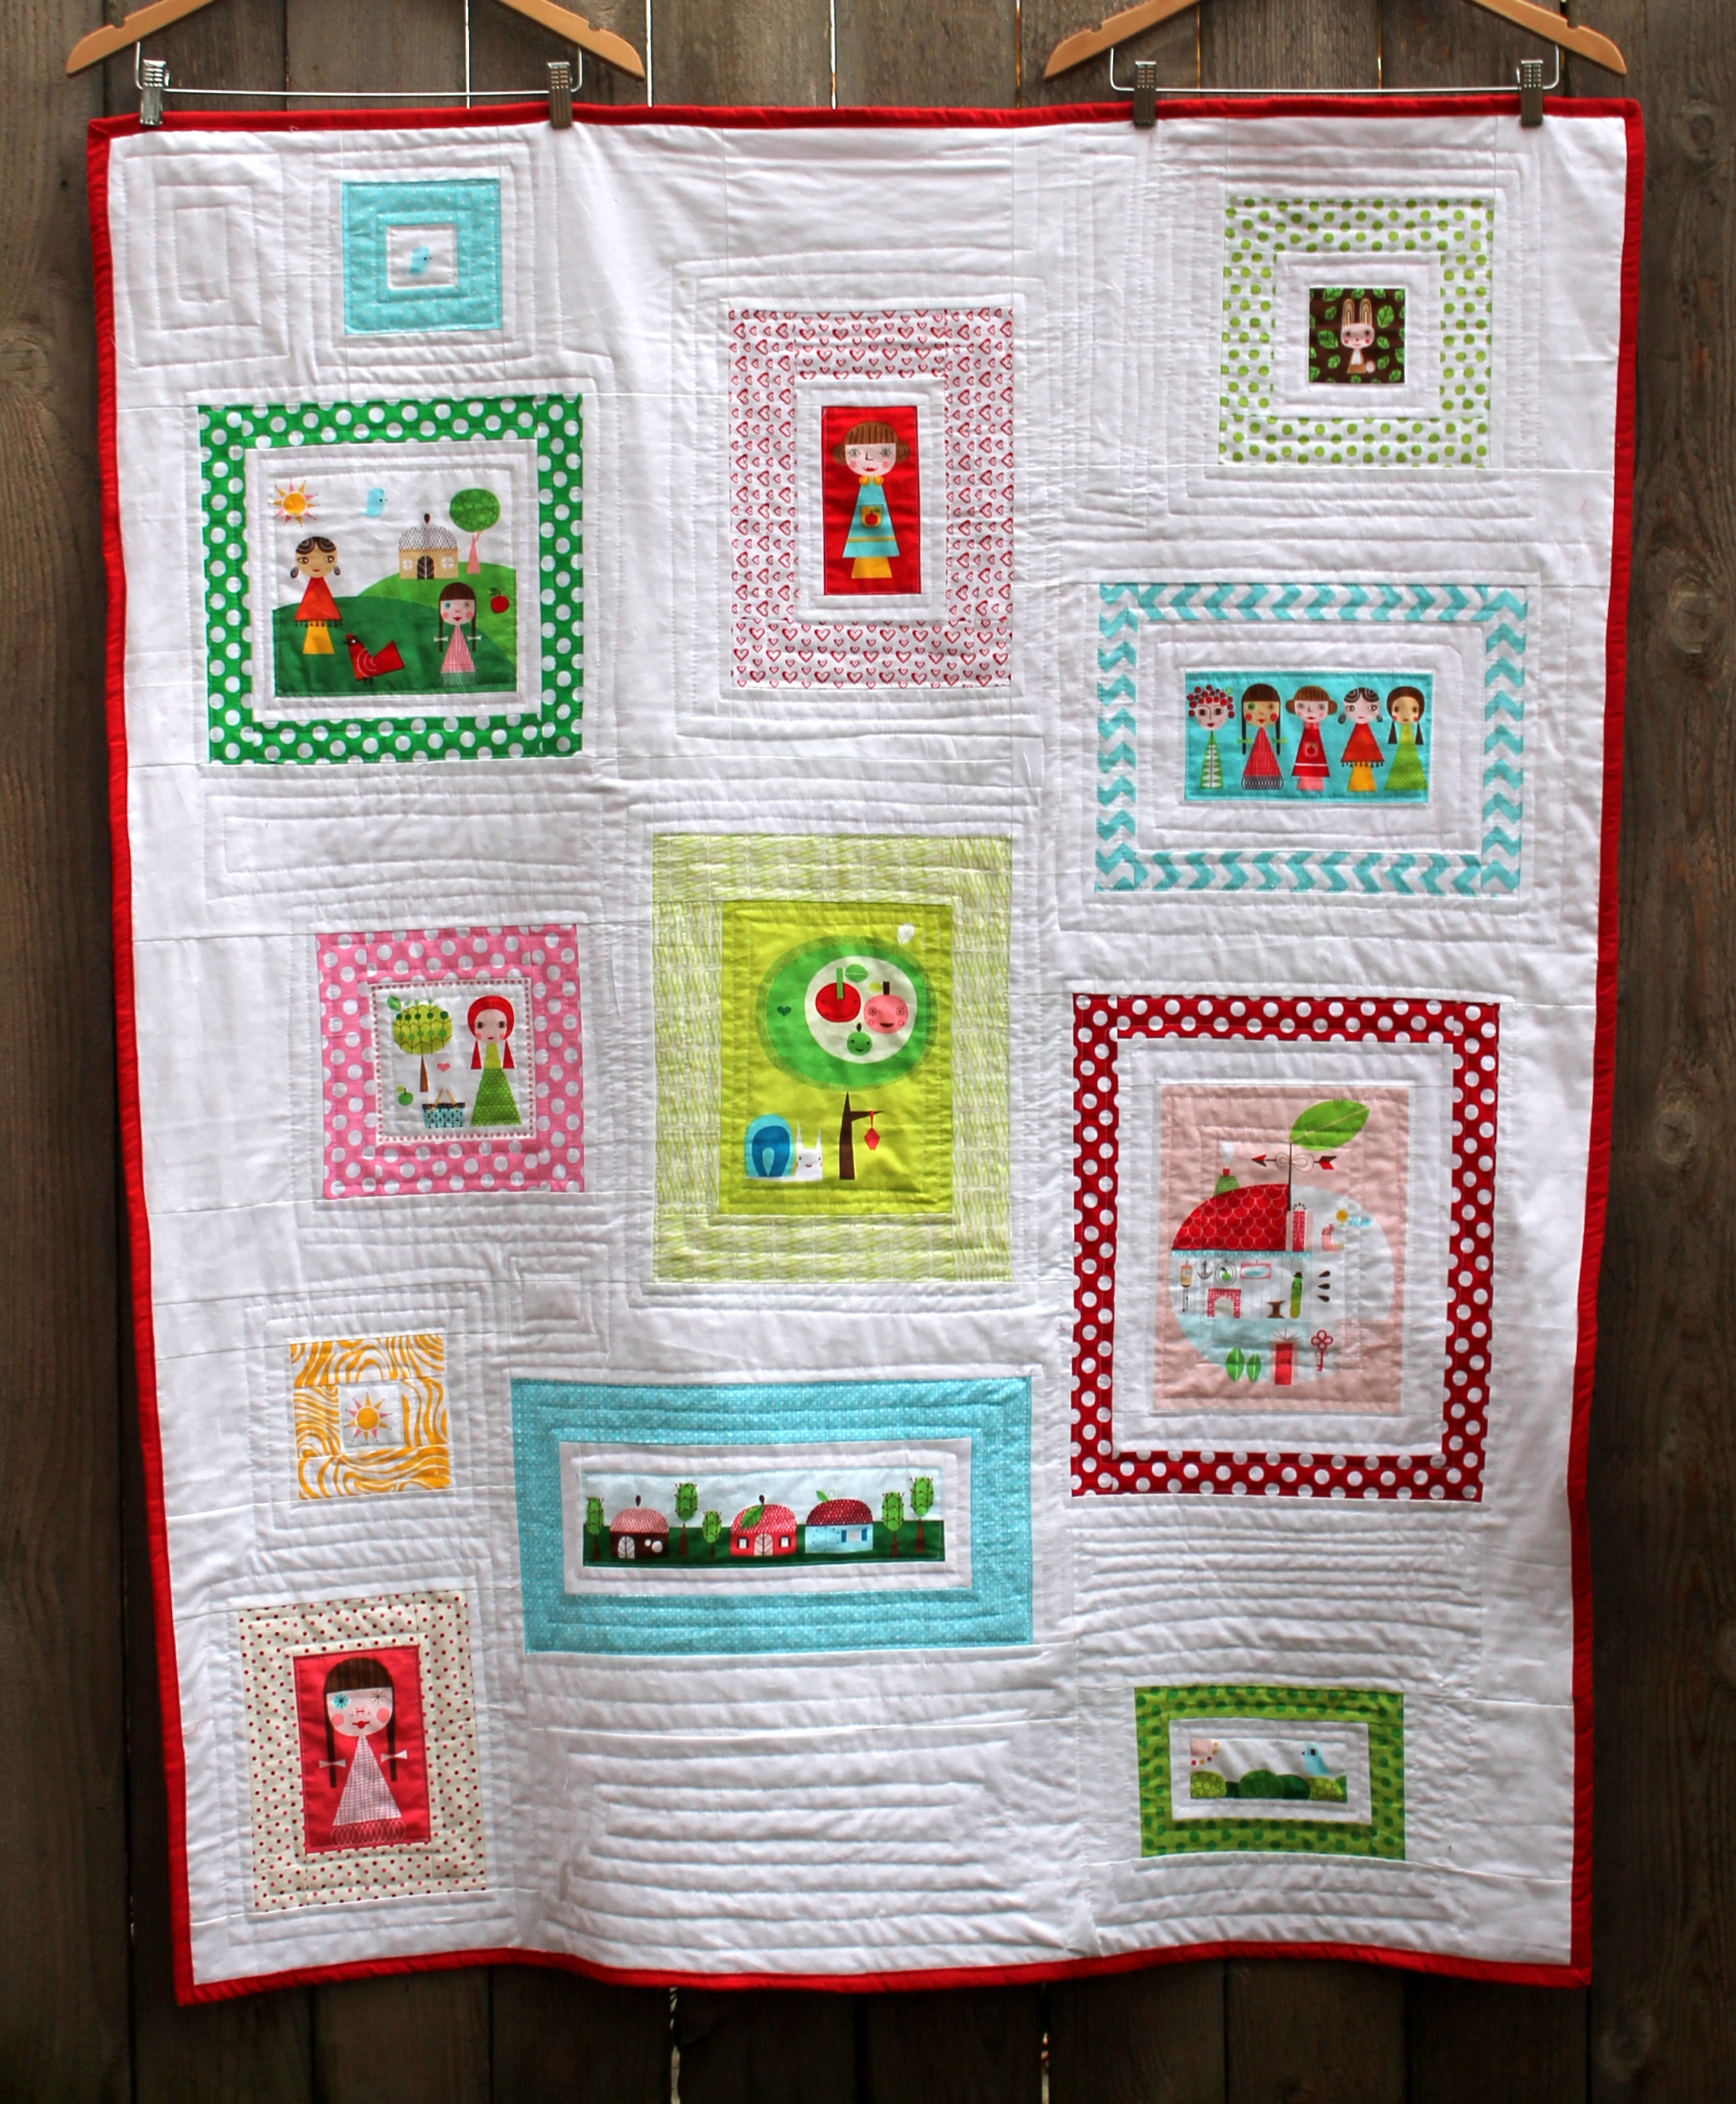
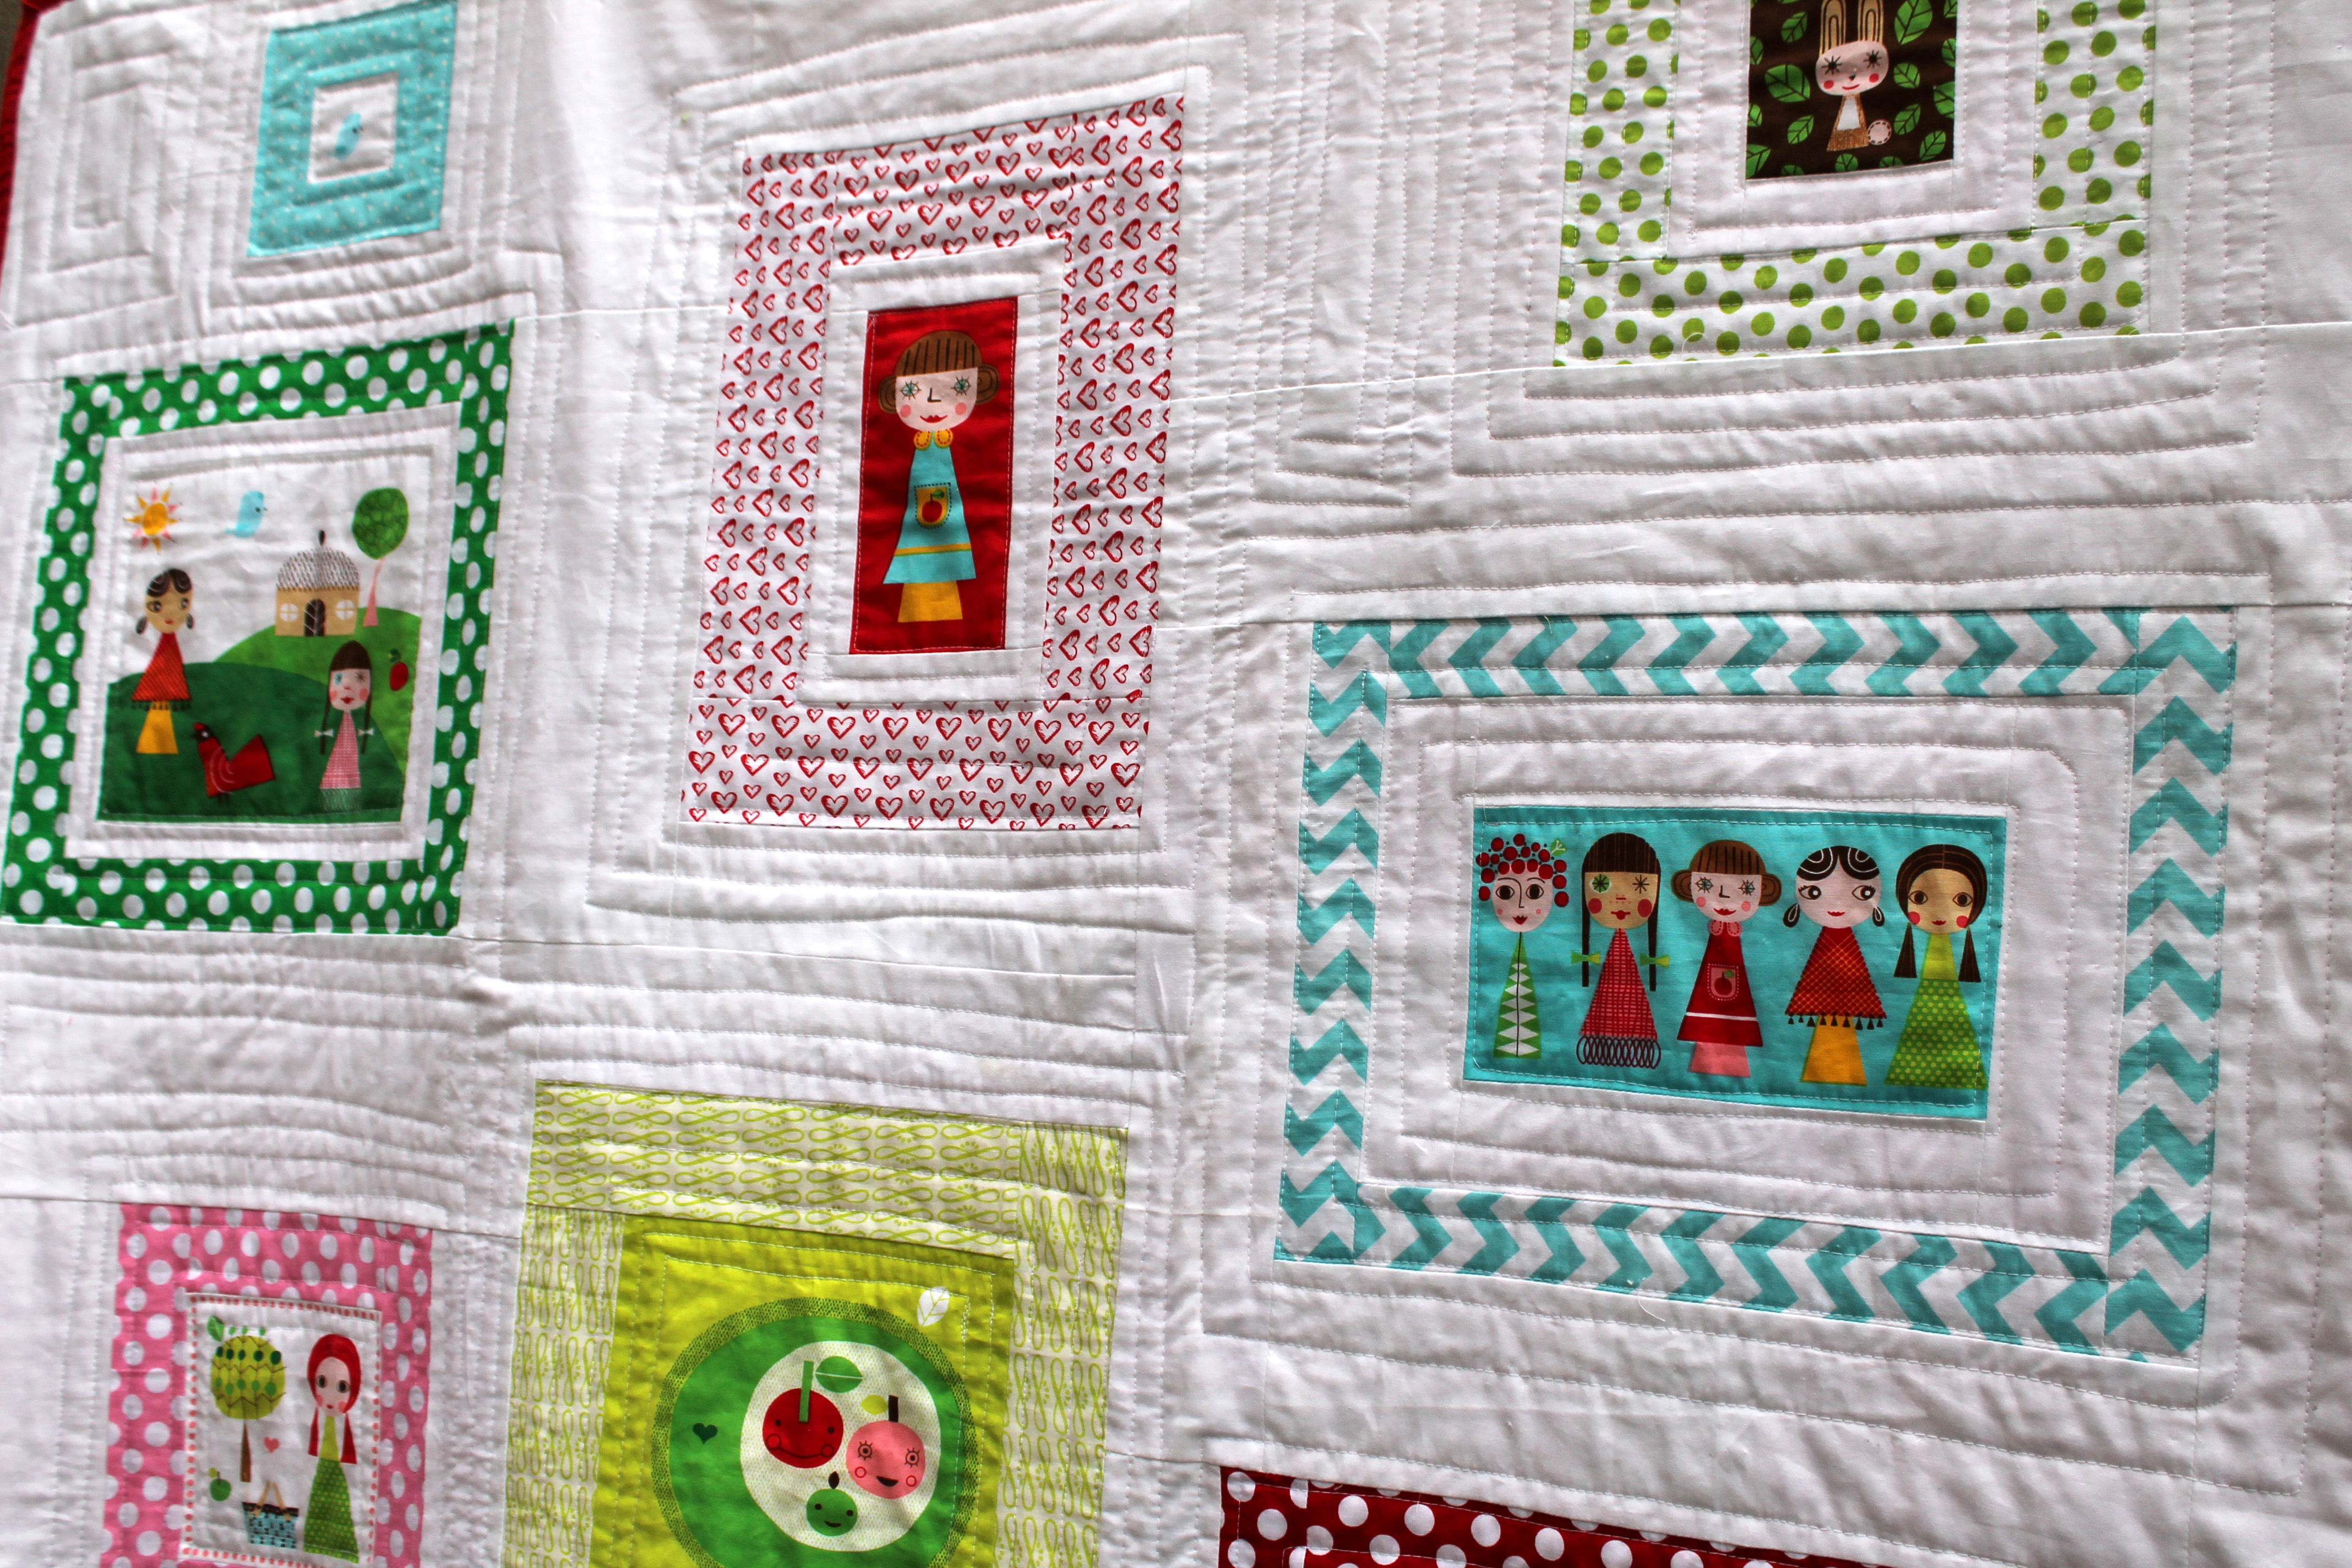
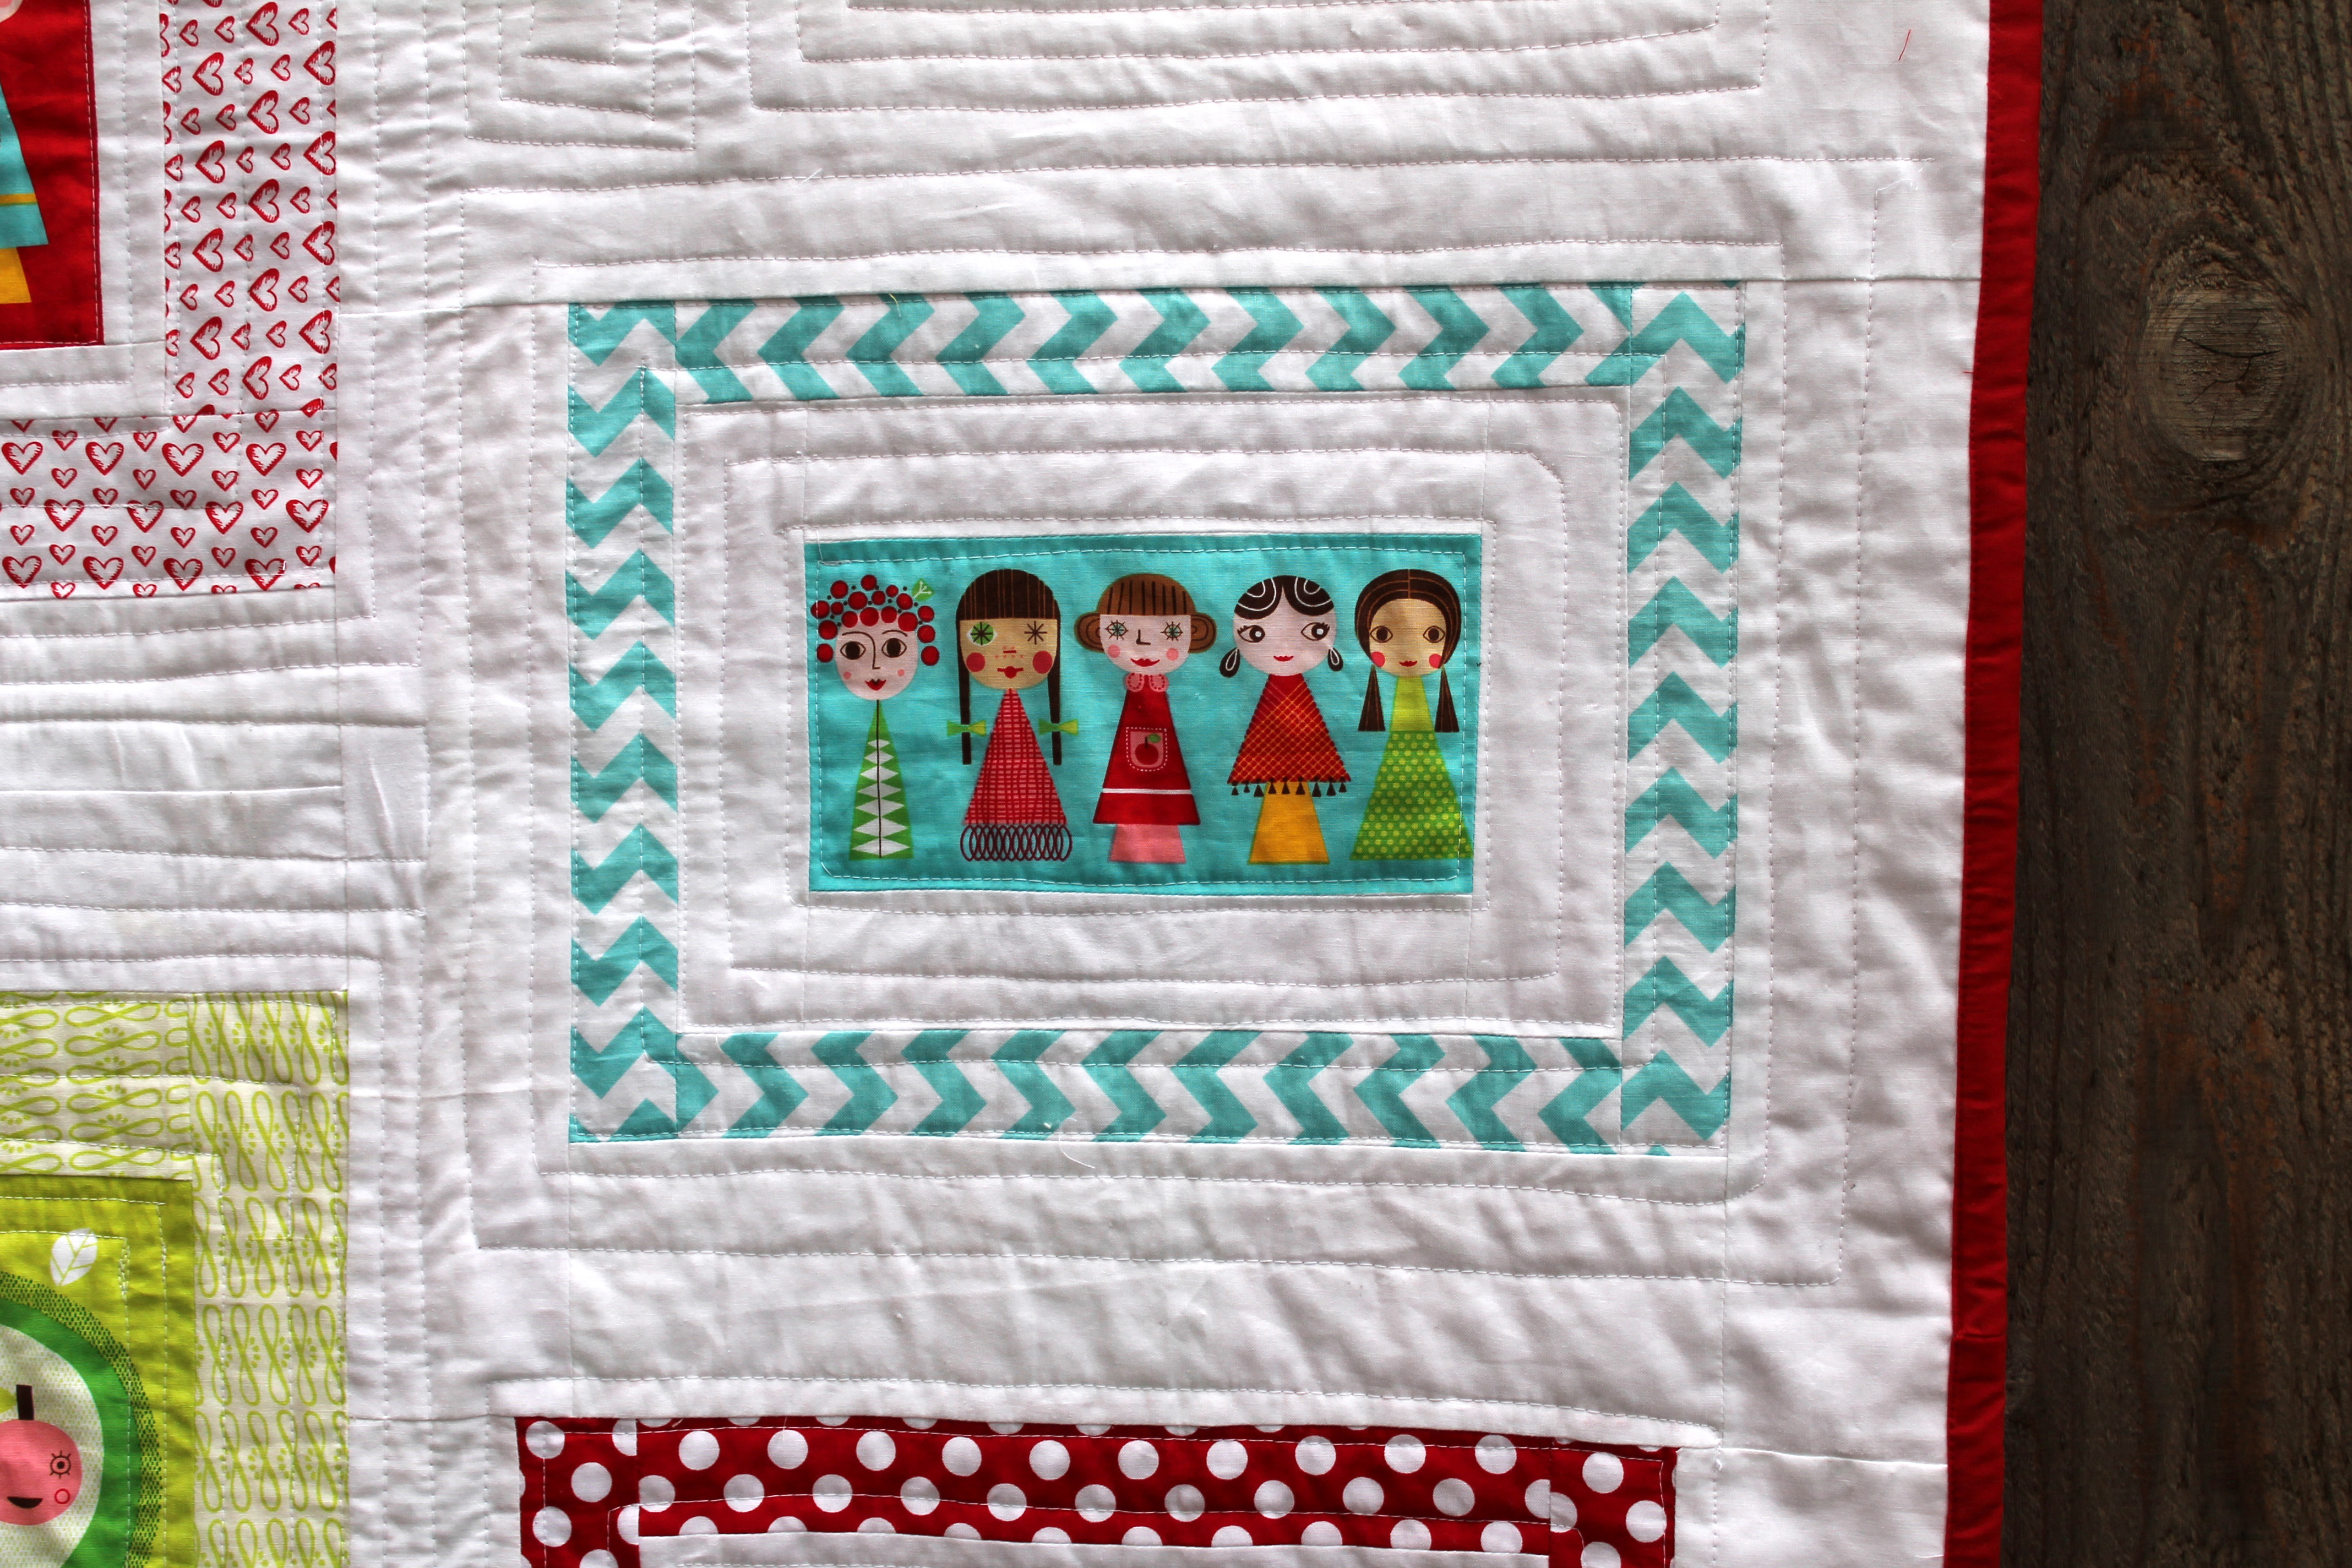
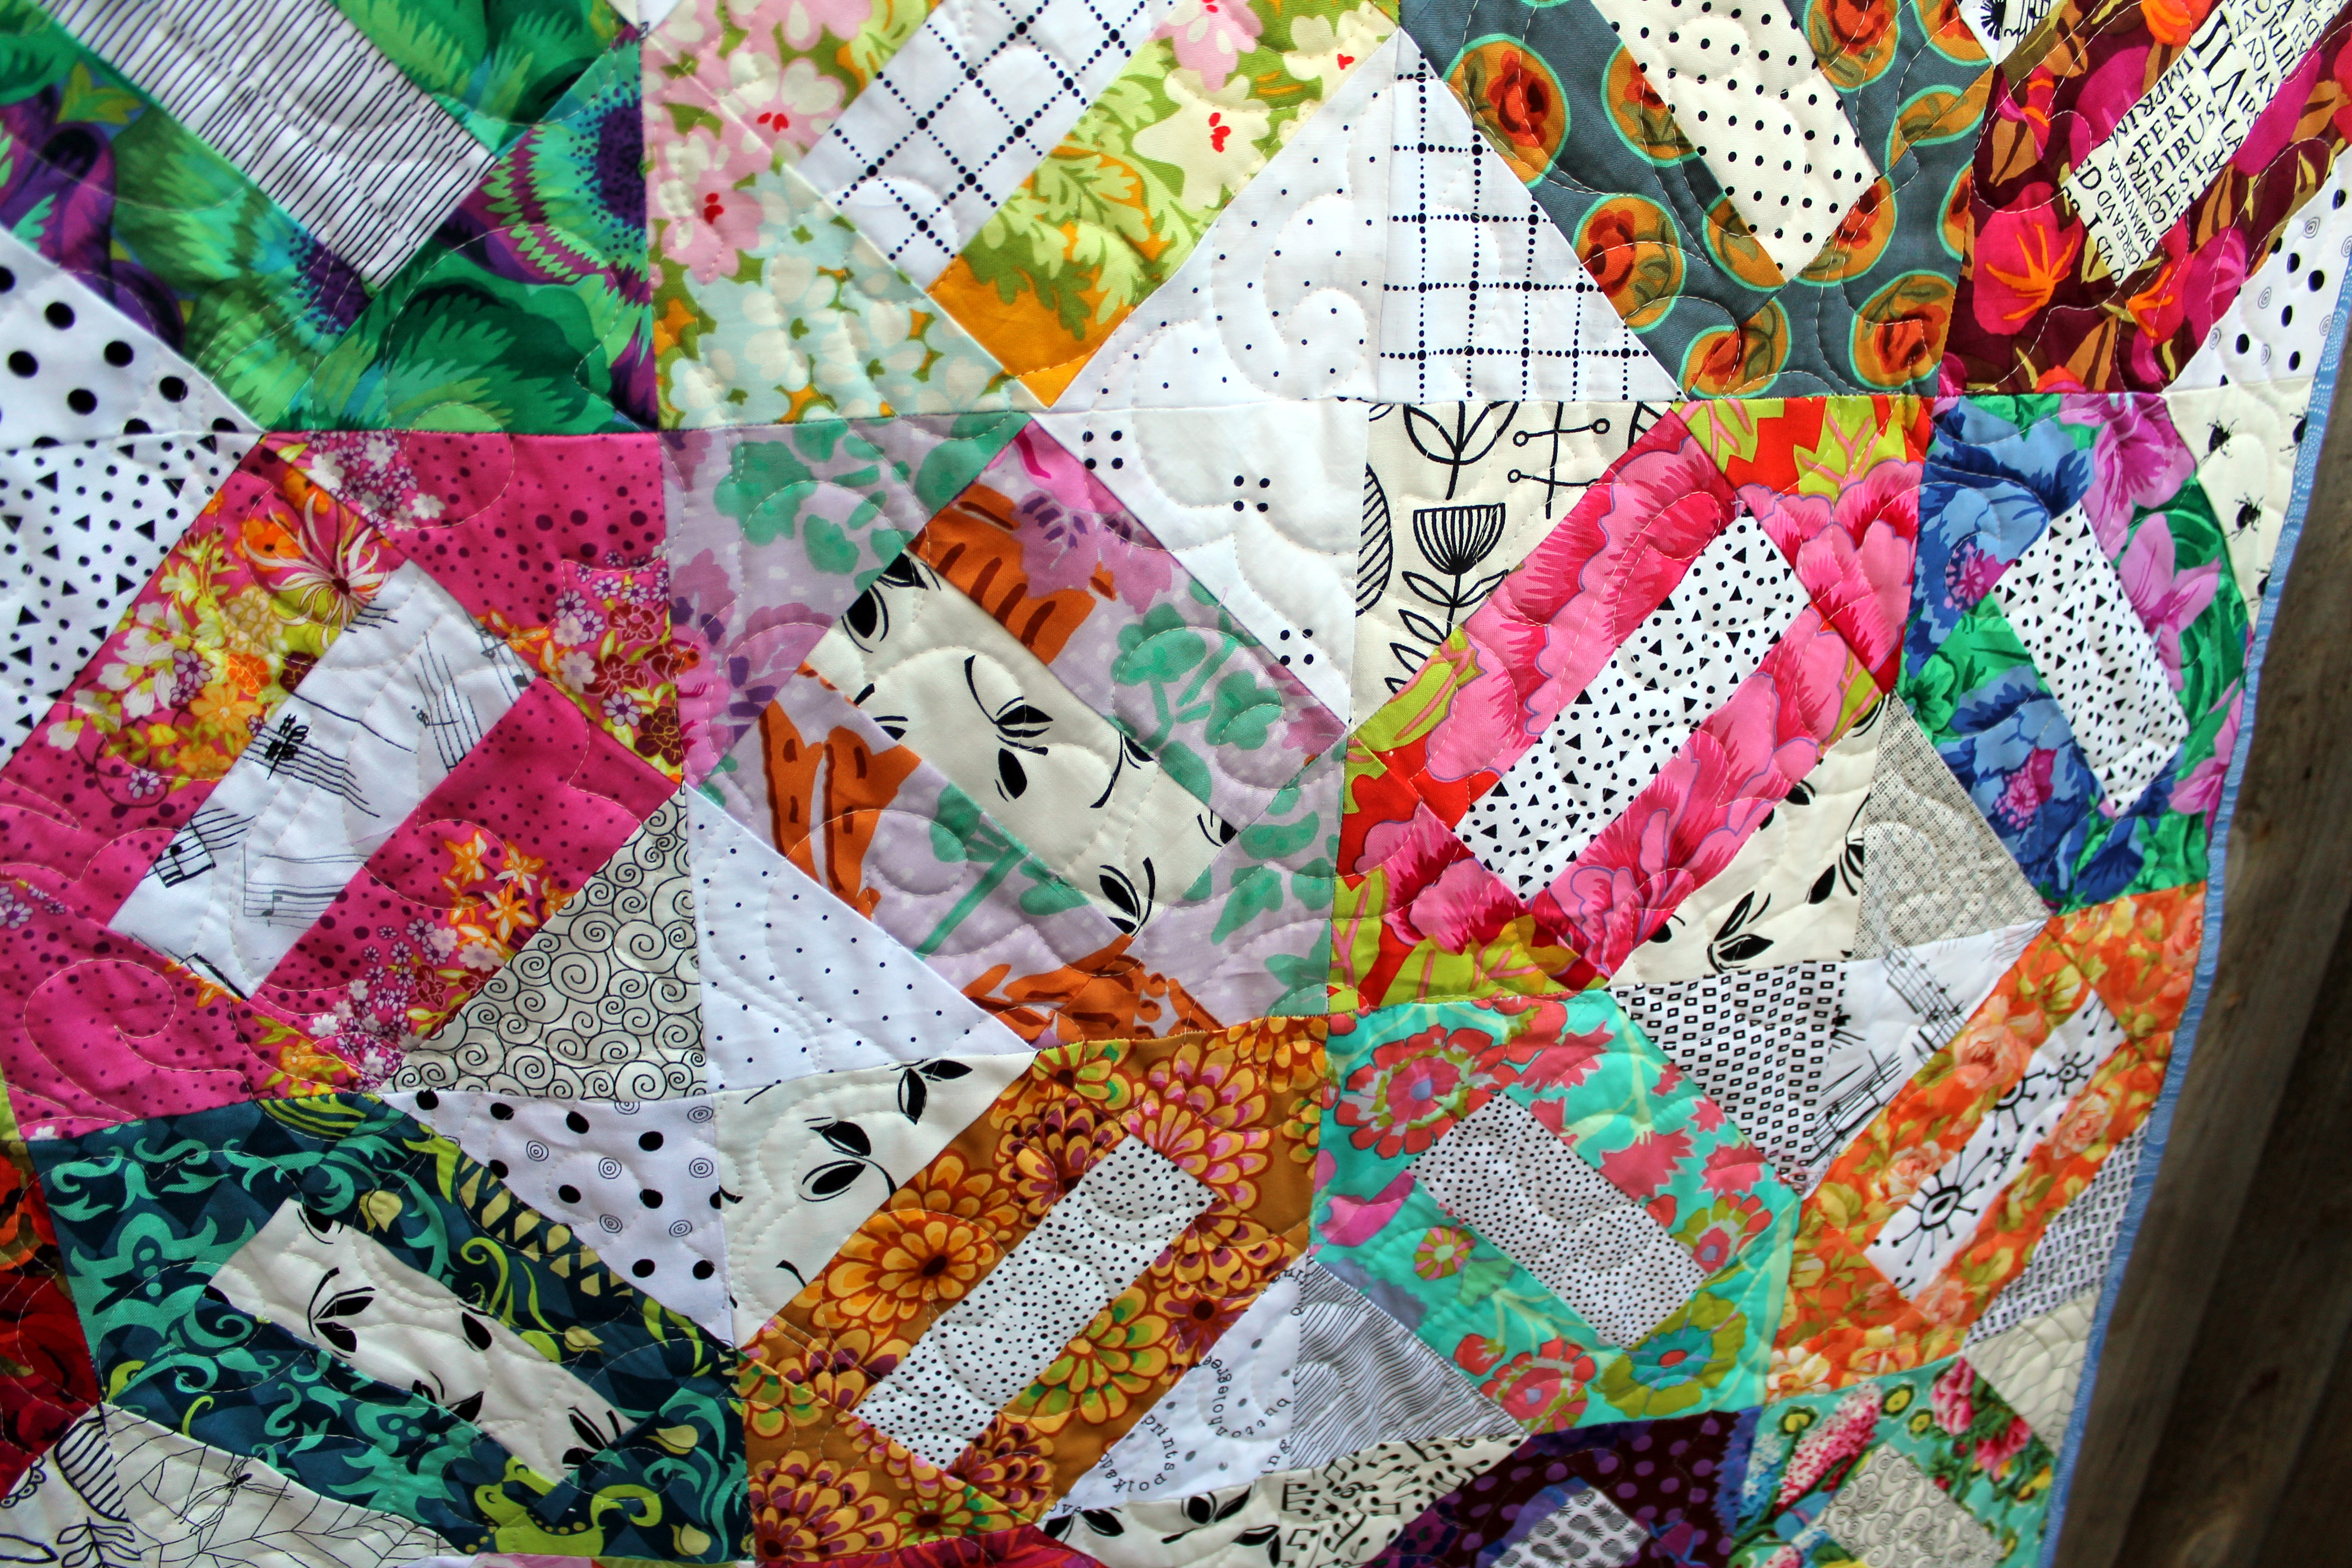
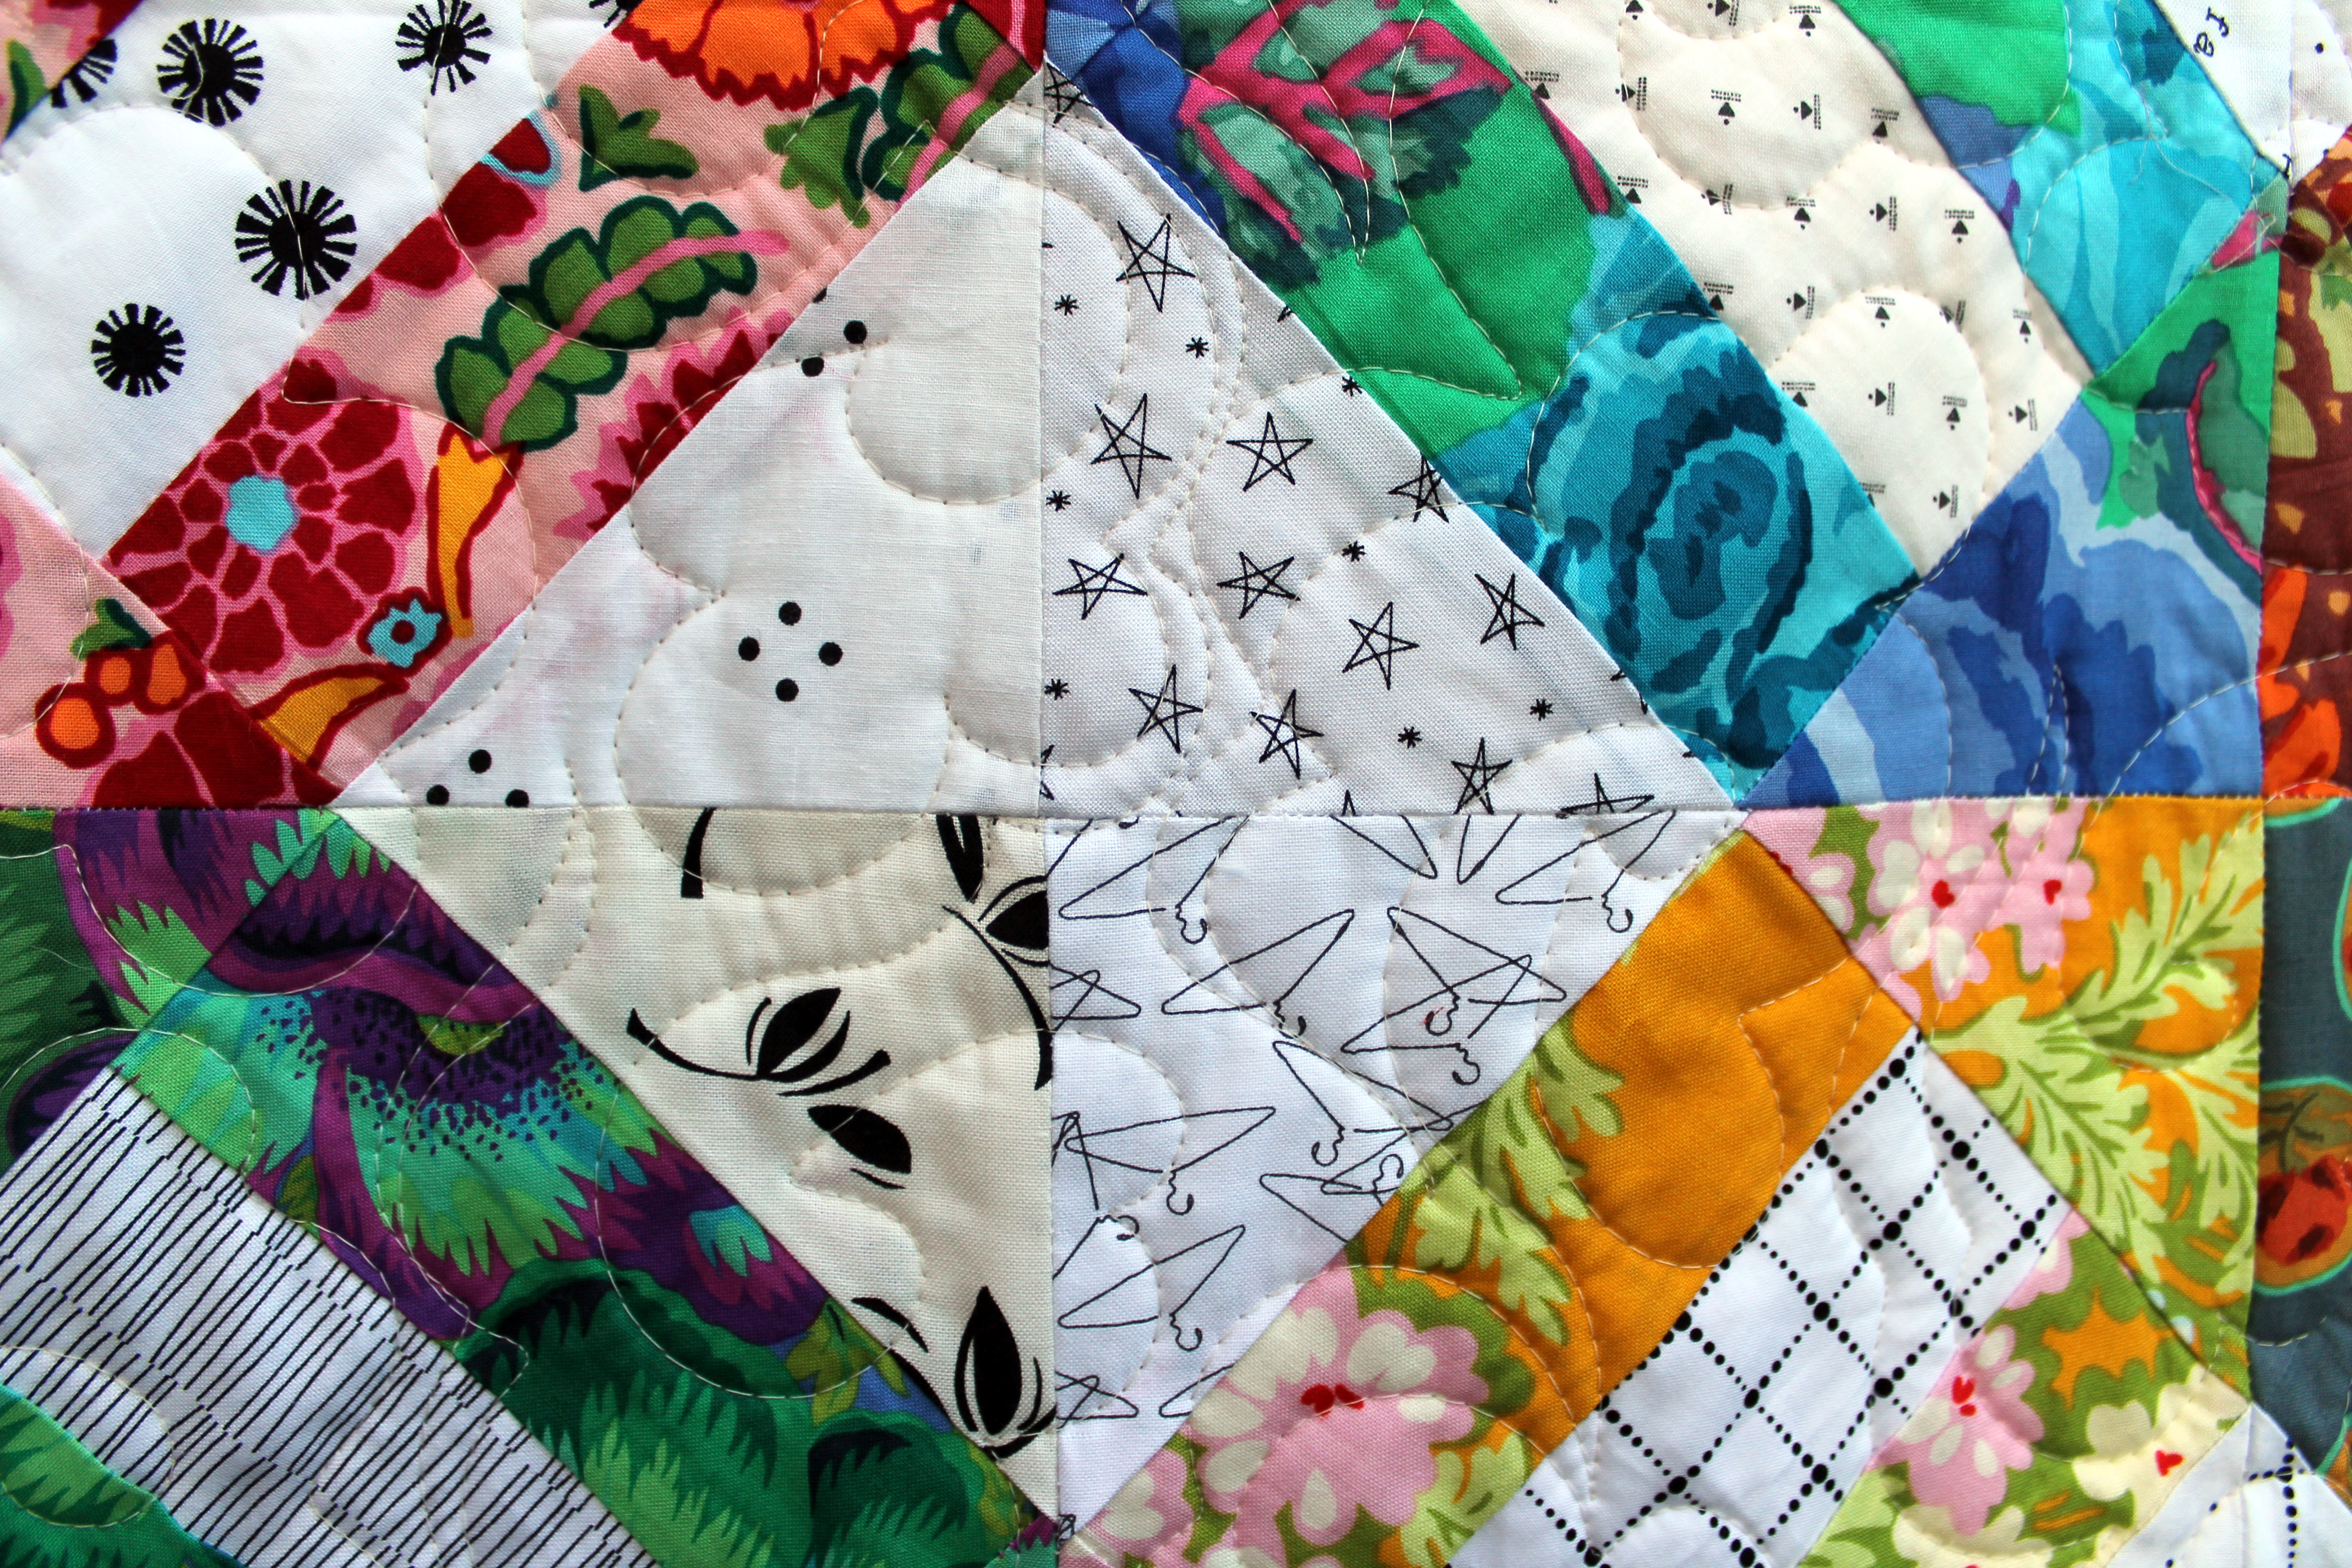
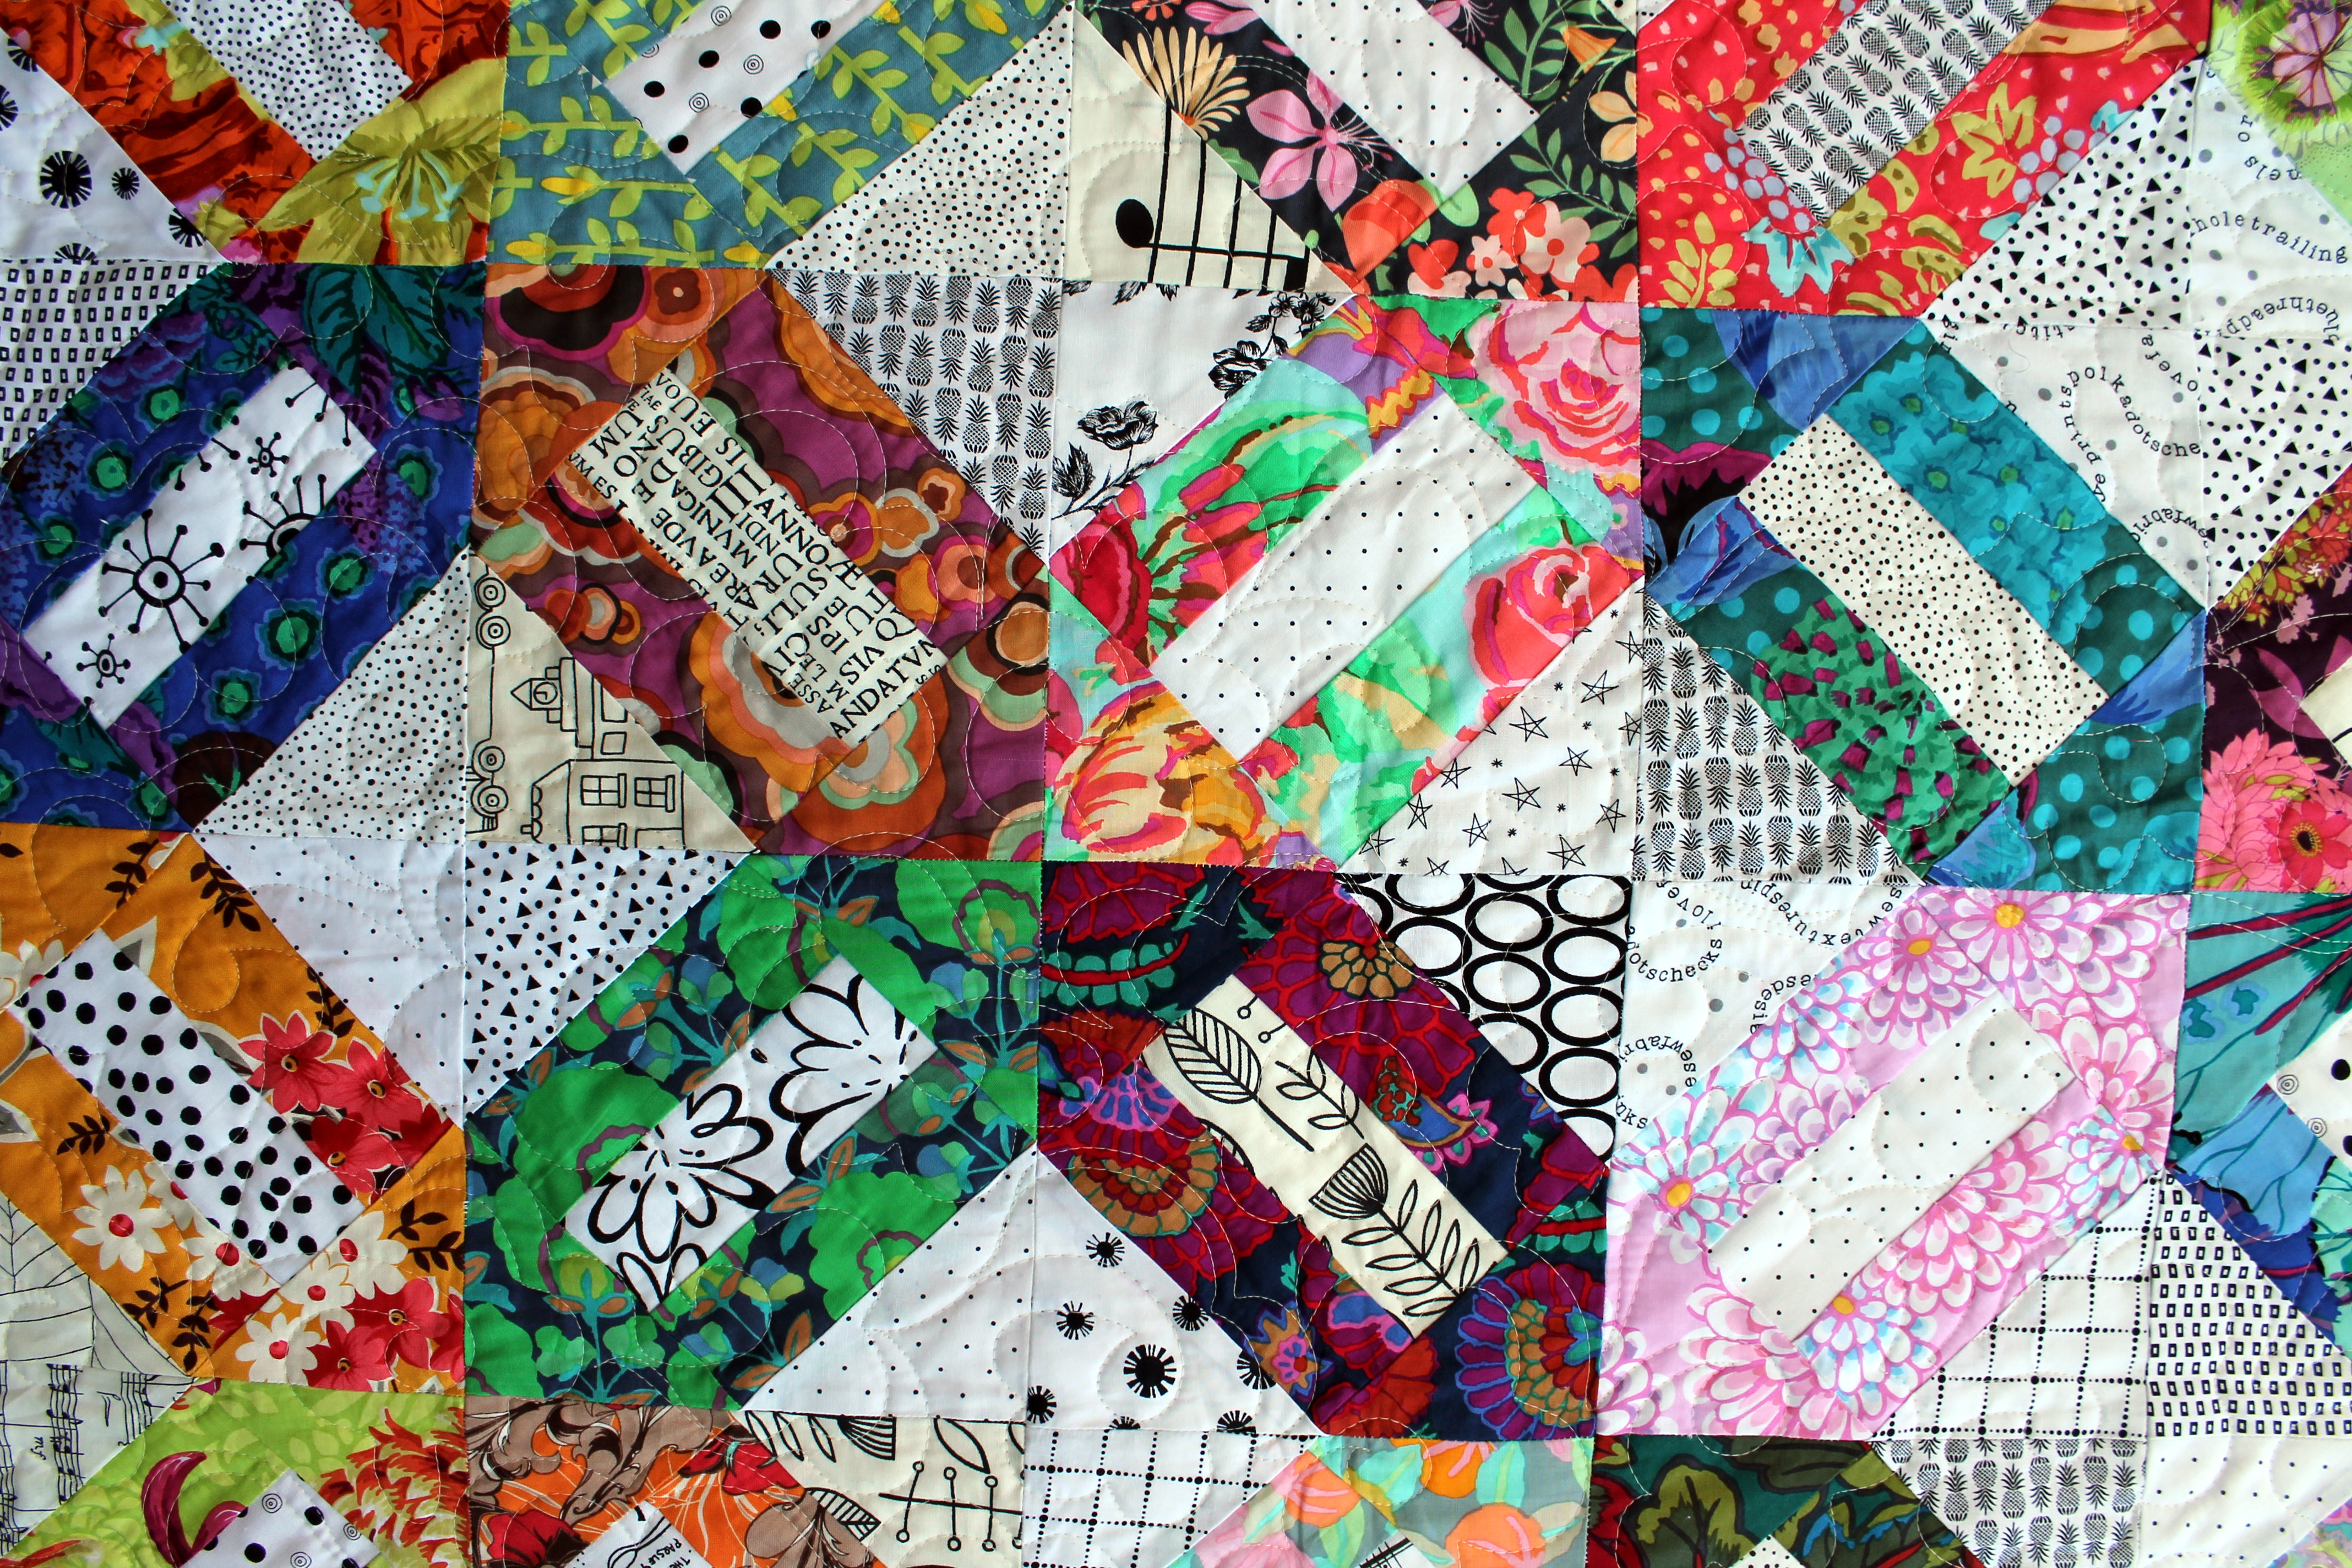
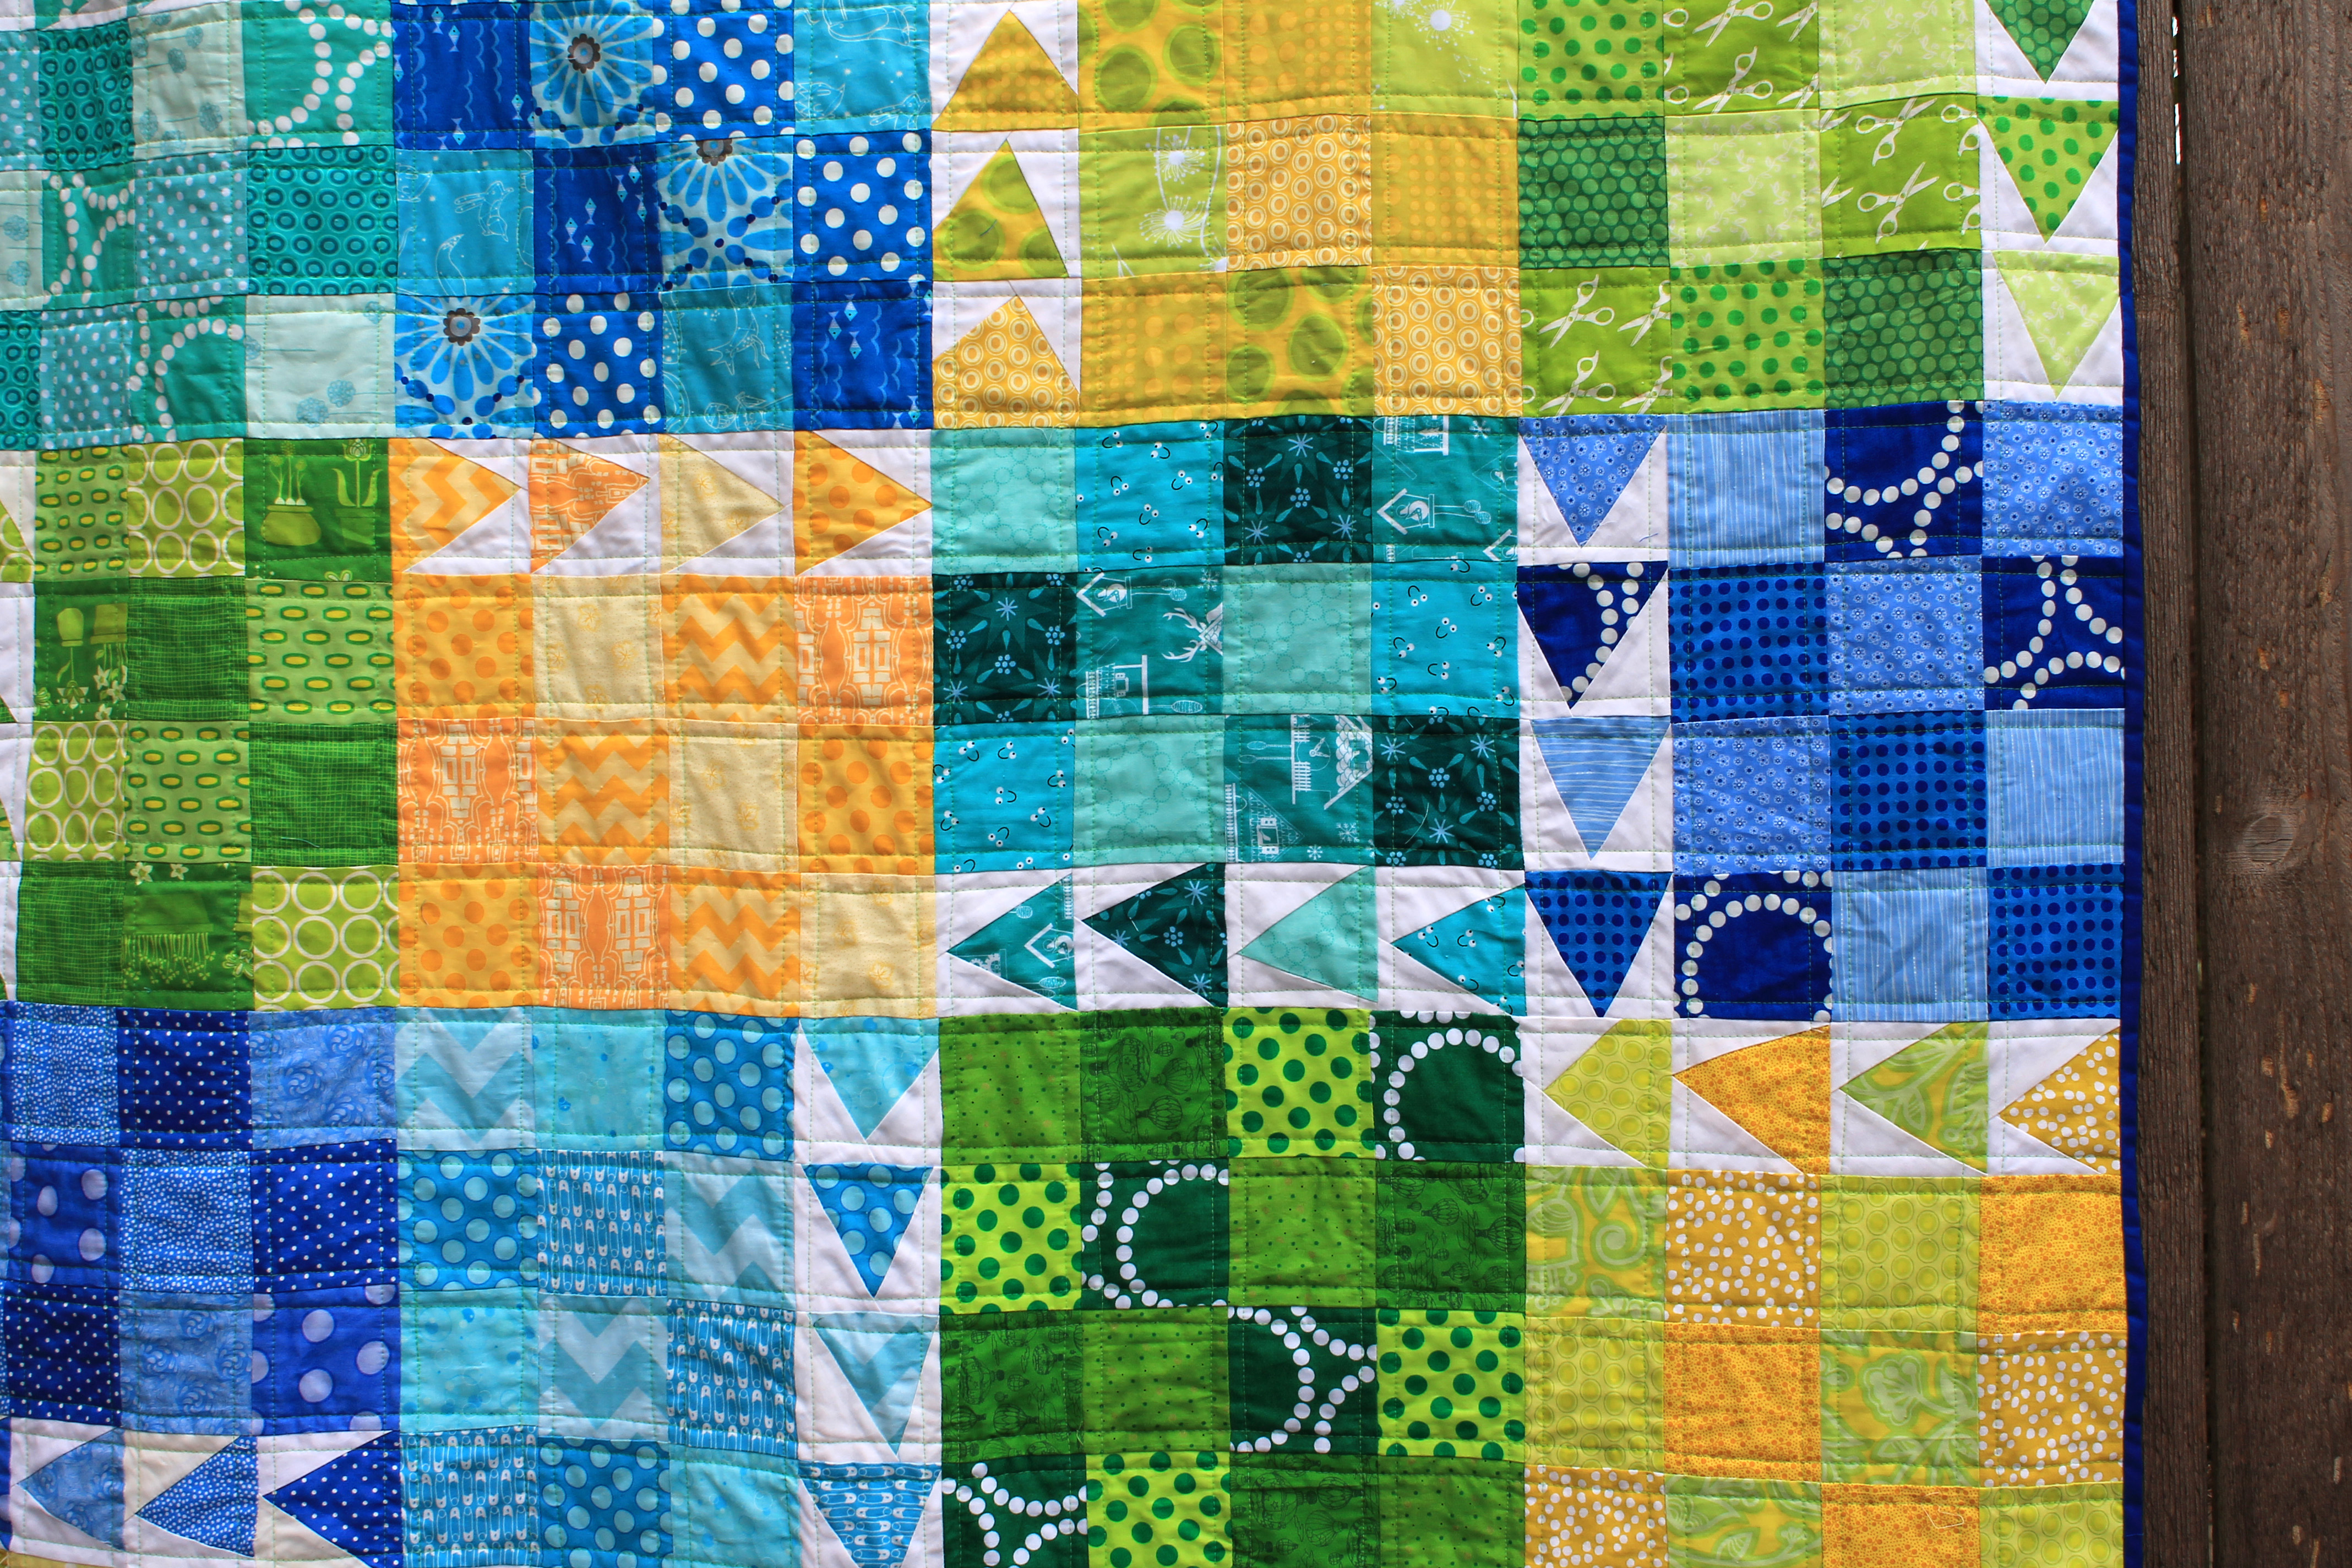
After a day full of Thanksgiving turkey yesterday, I thought I would stick with the poultry theme, but shake it up a little.  Somewhere in between baking tons and tons of pies this week I managed to finish my Urban Chicken Quilt.

easy modern kids quilt
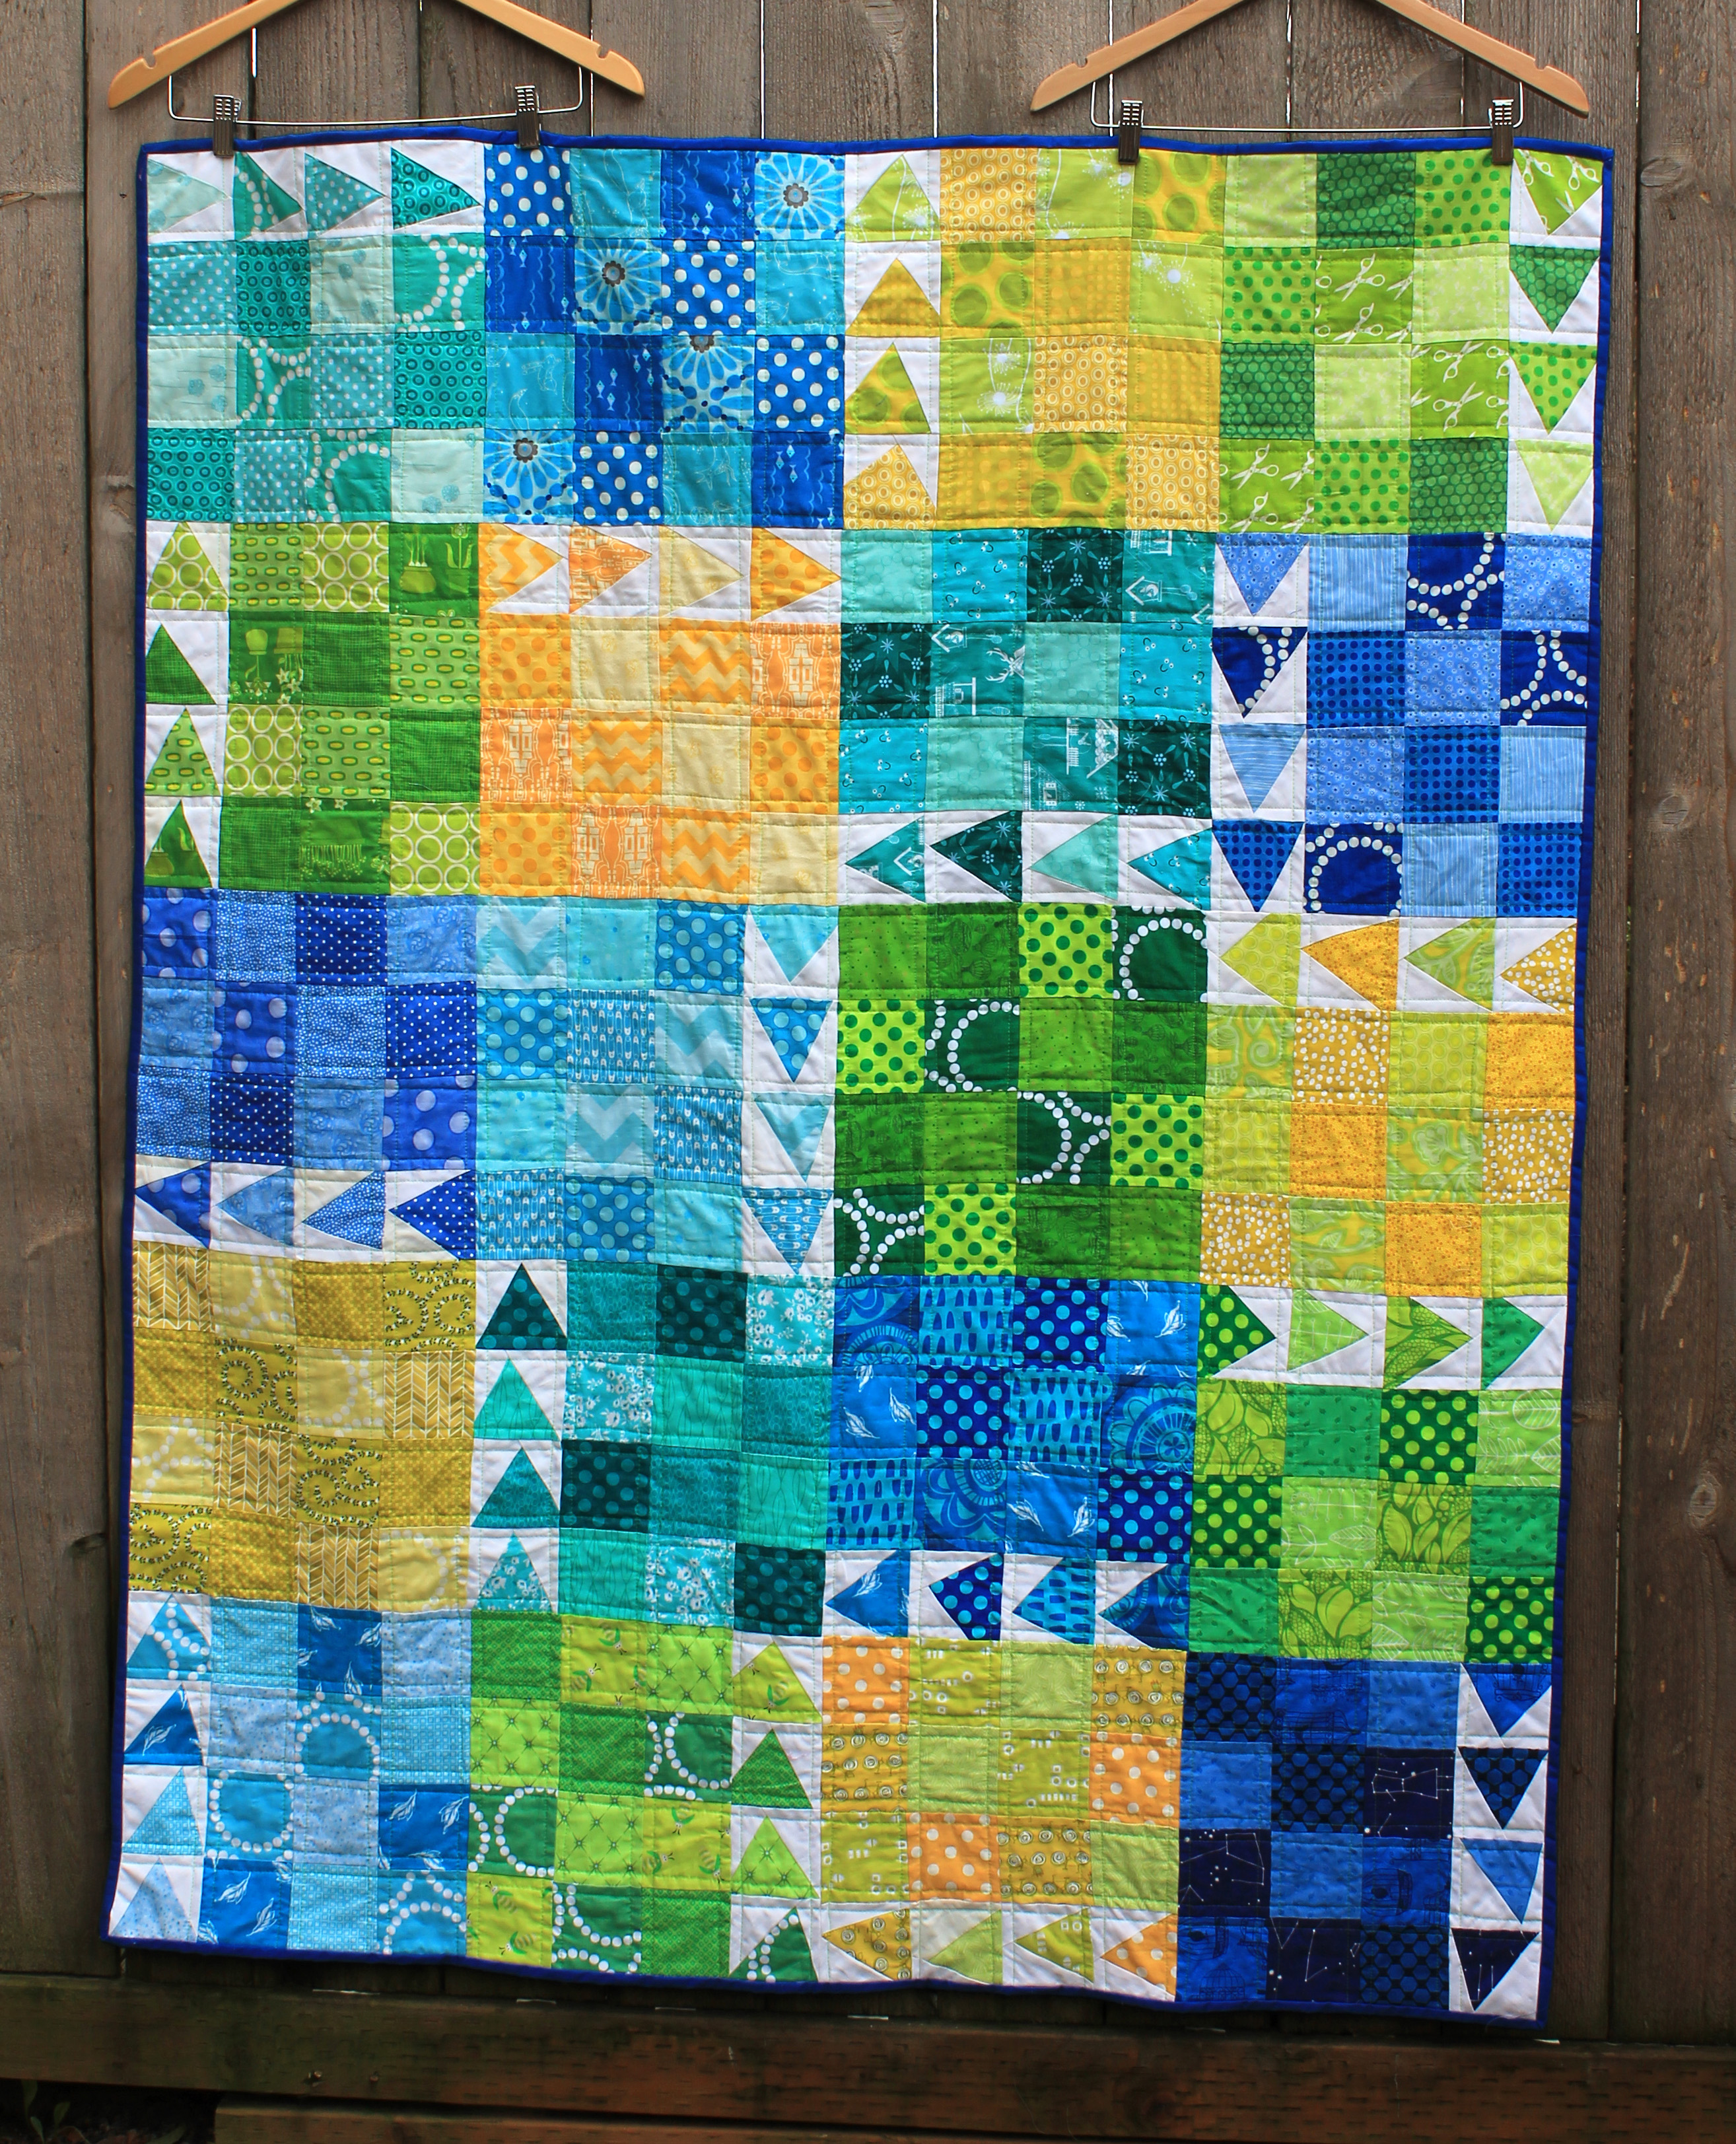
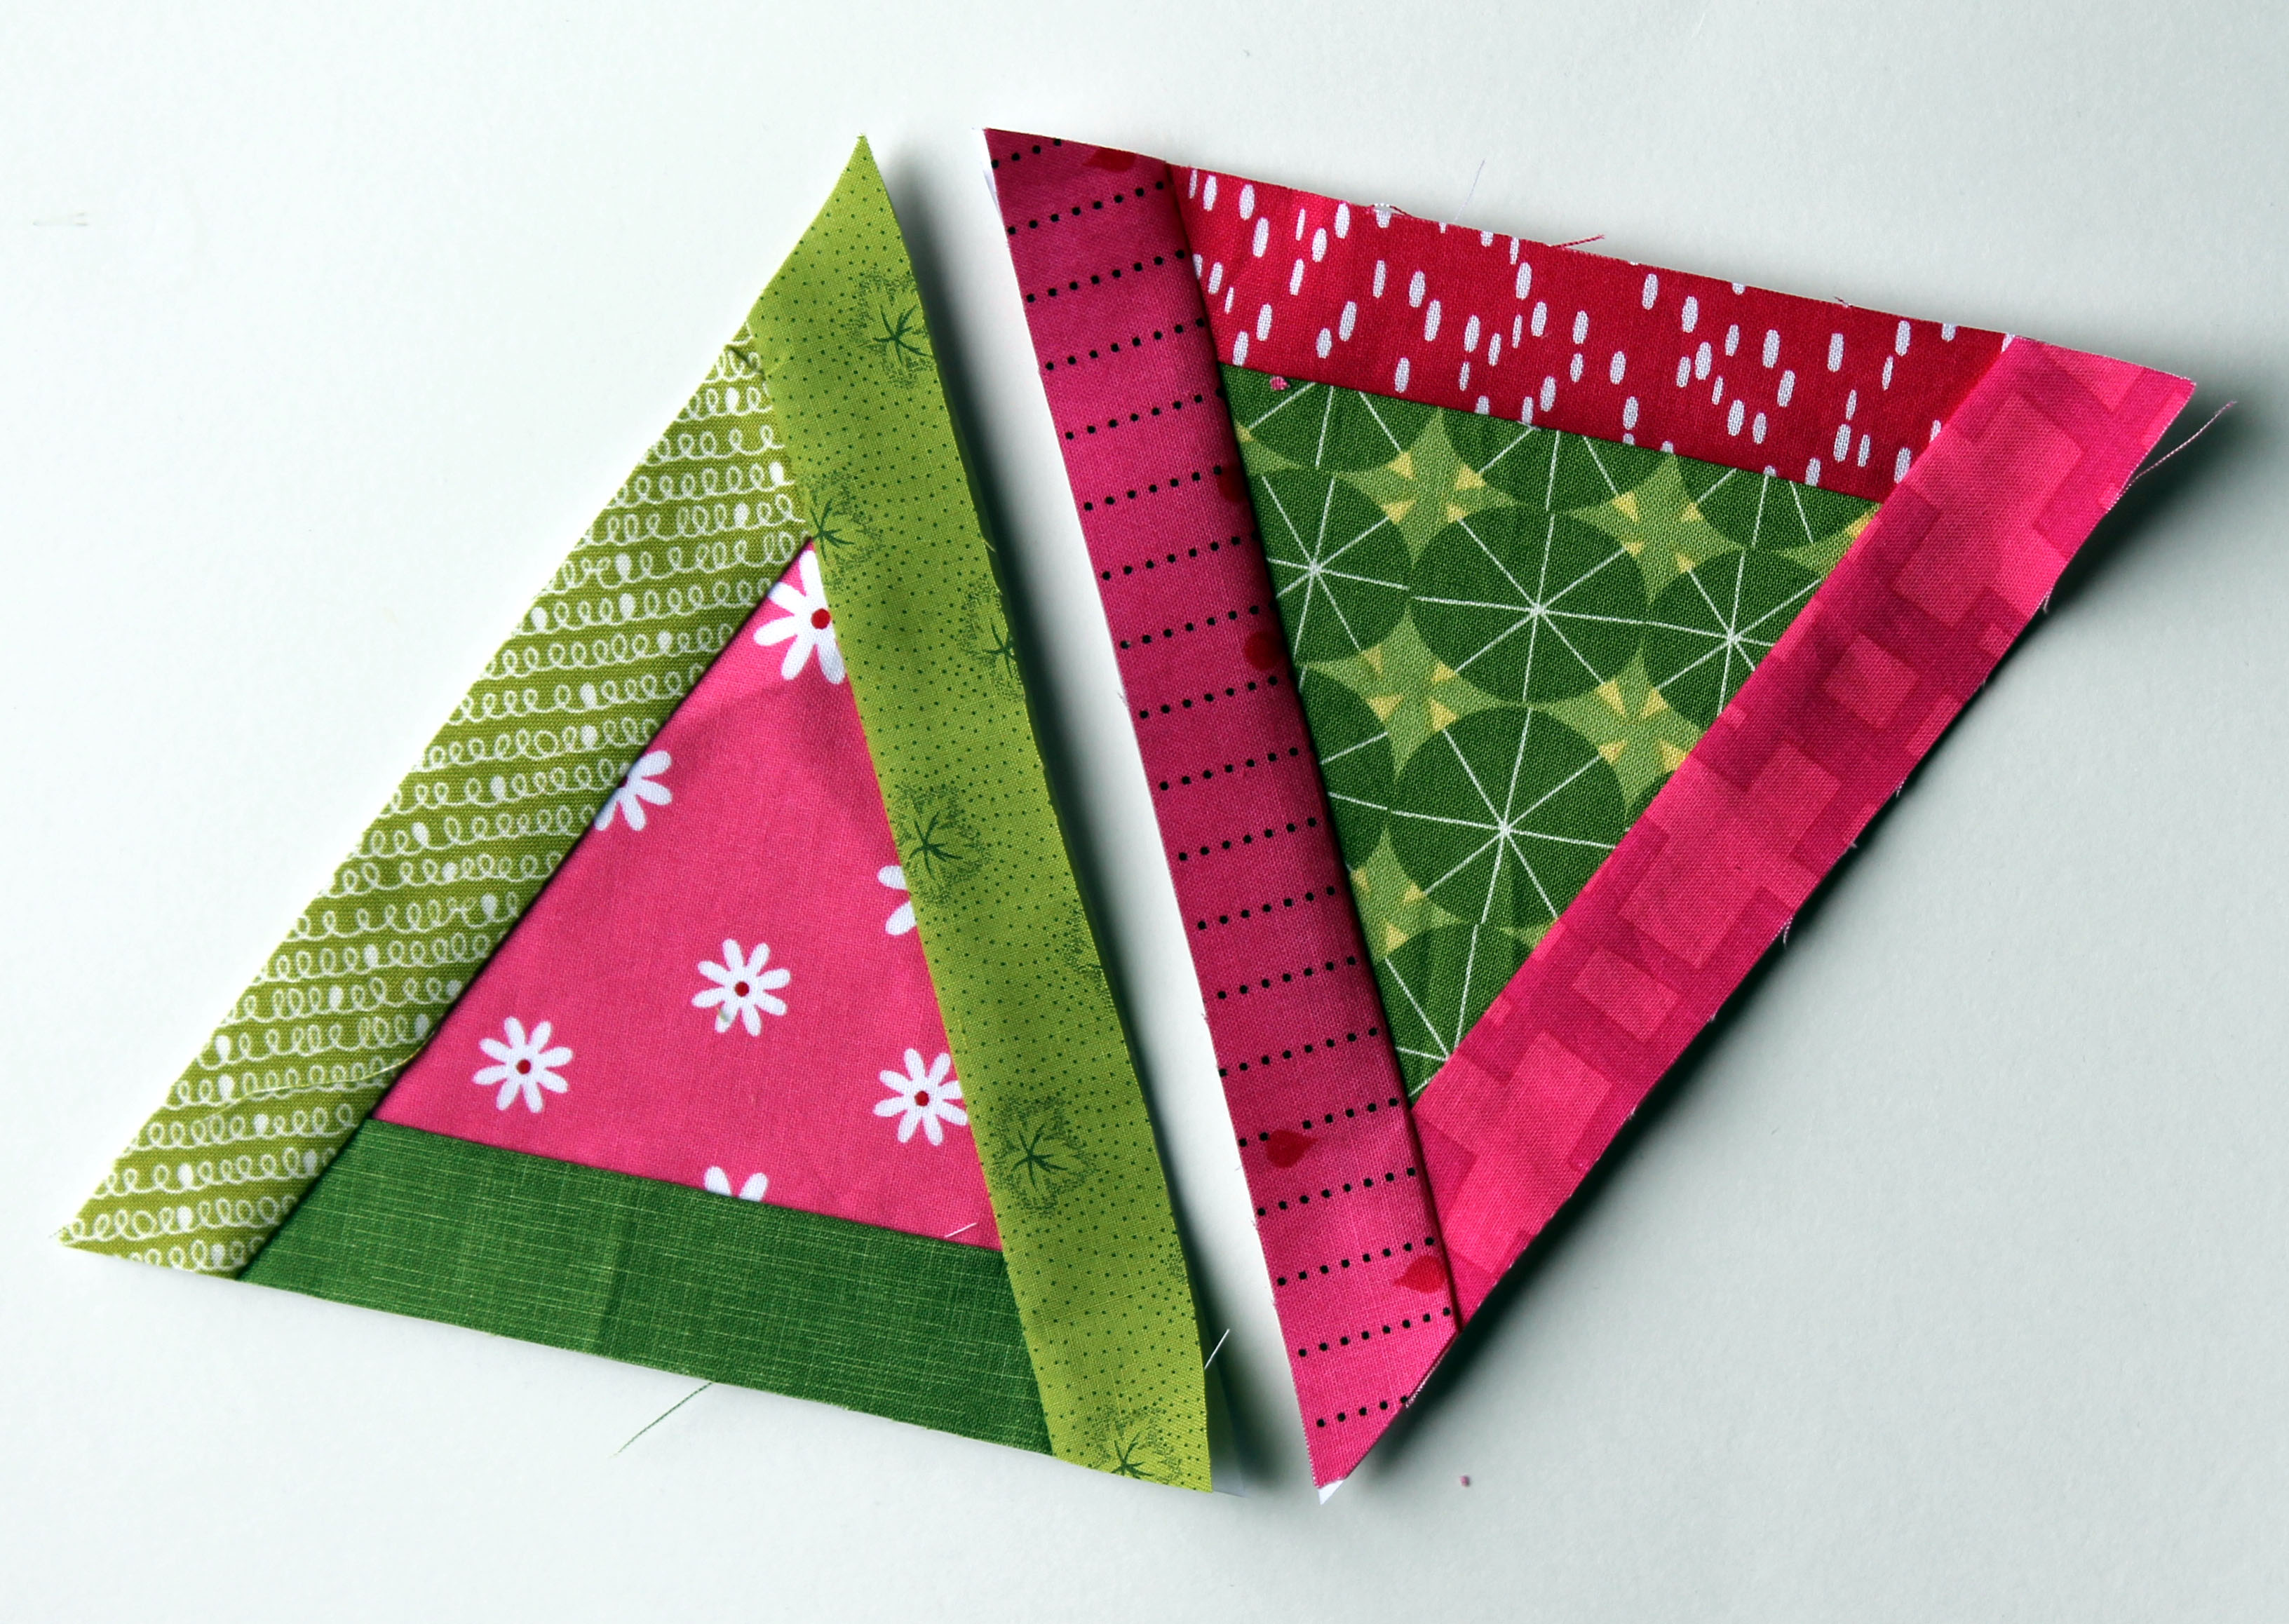
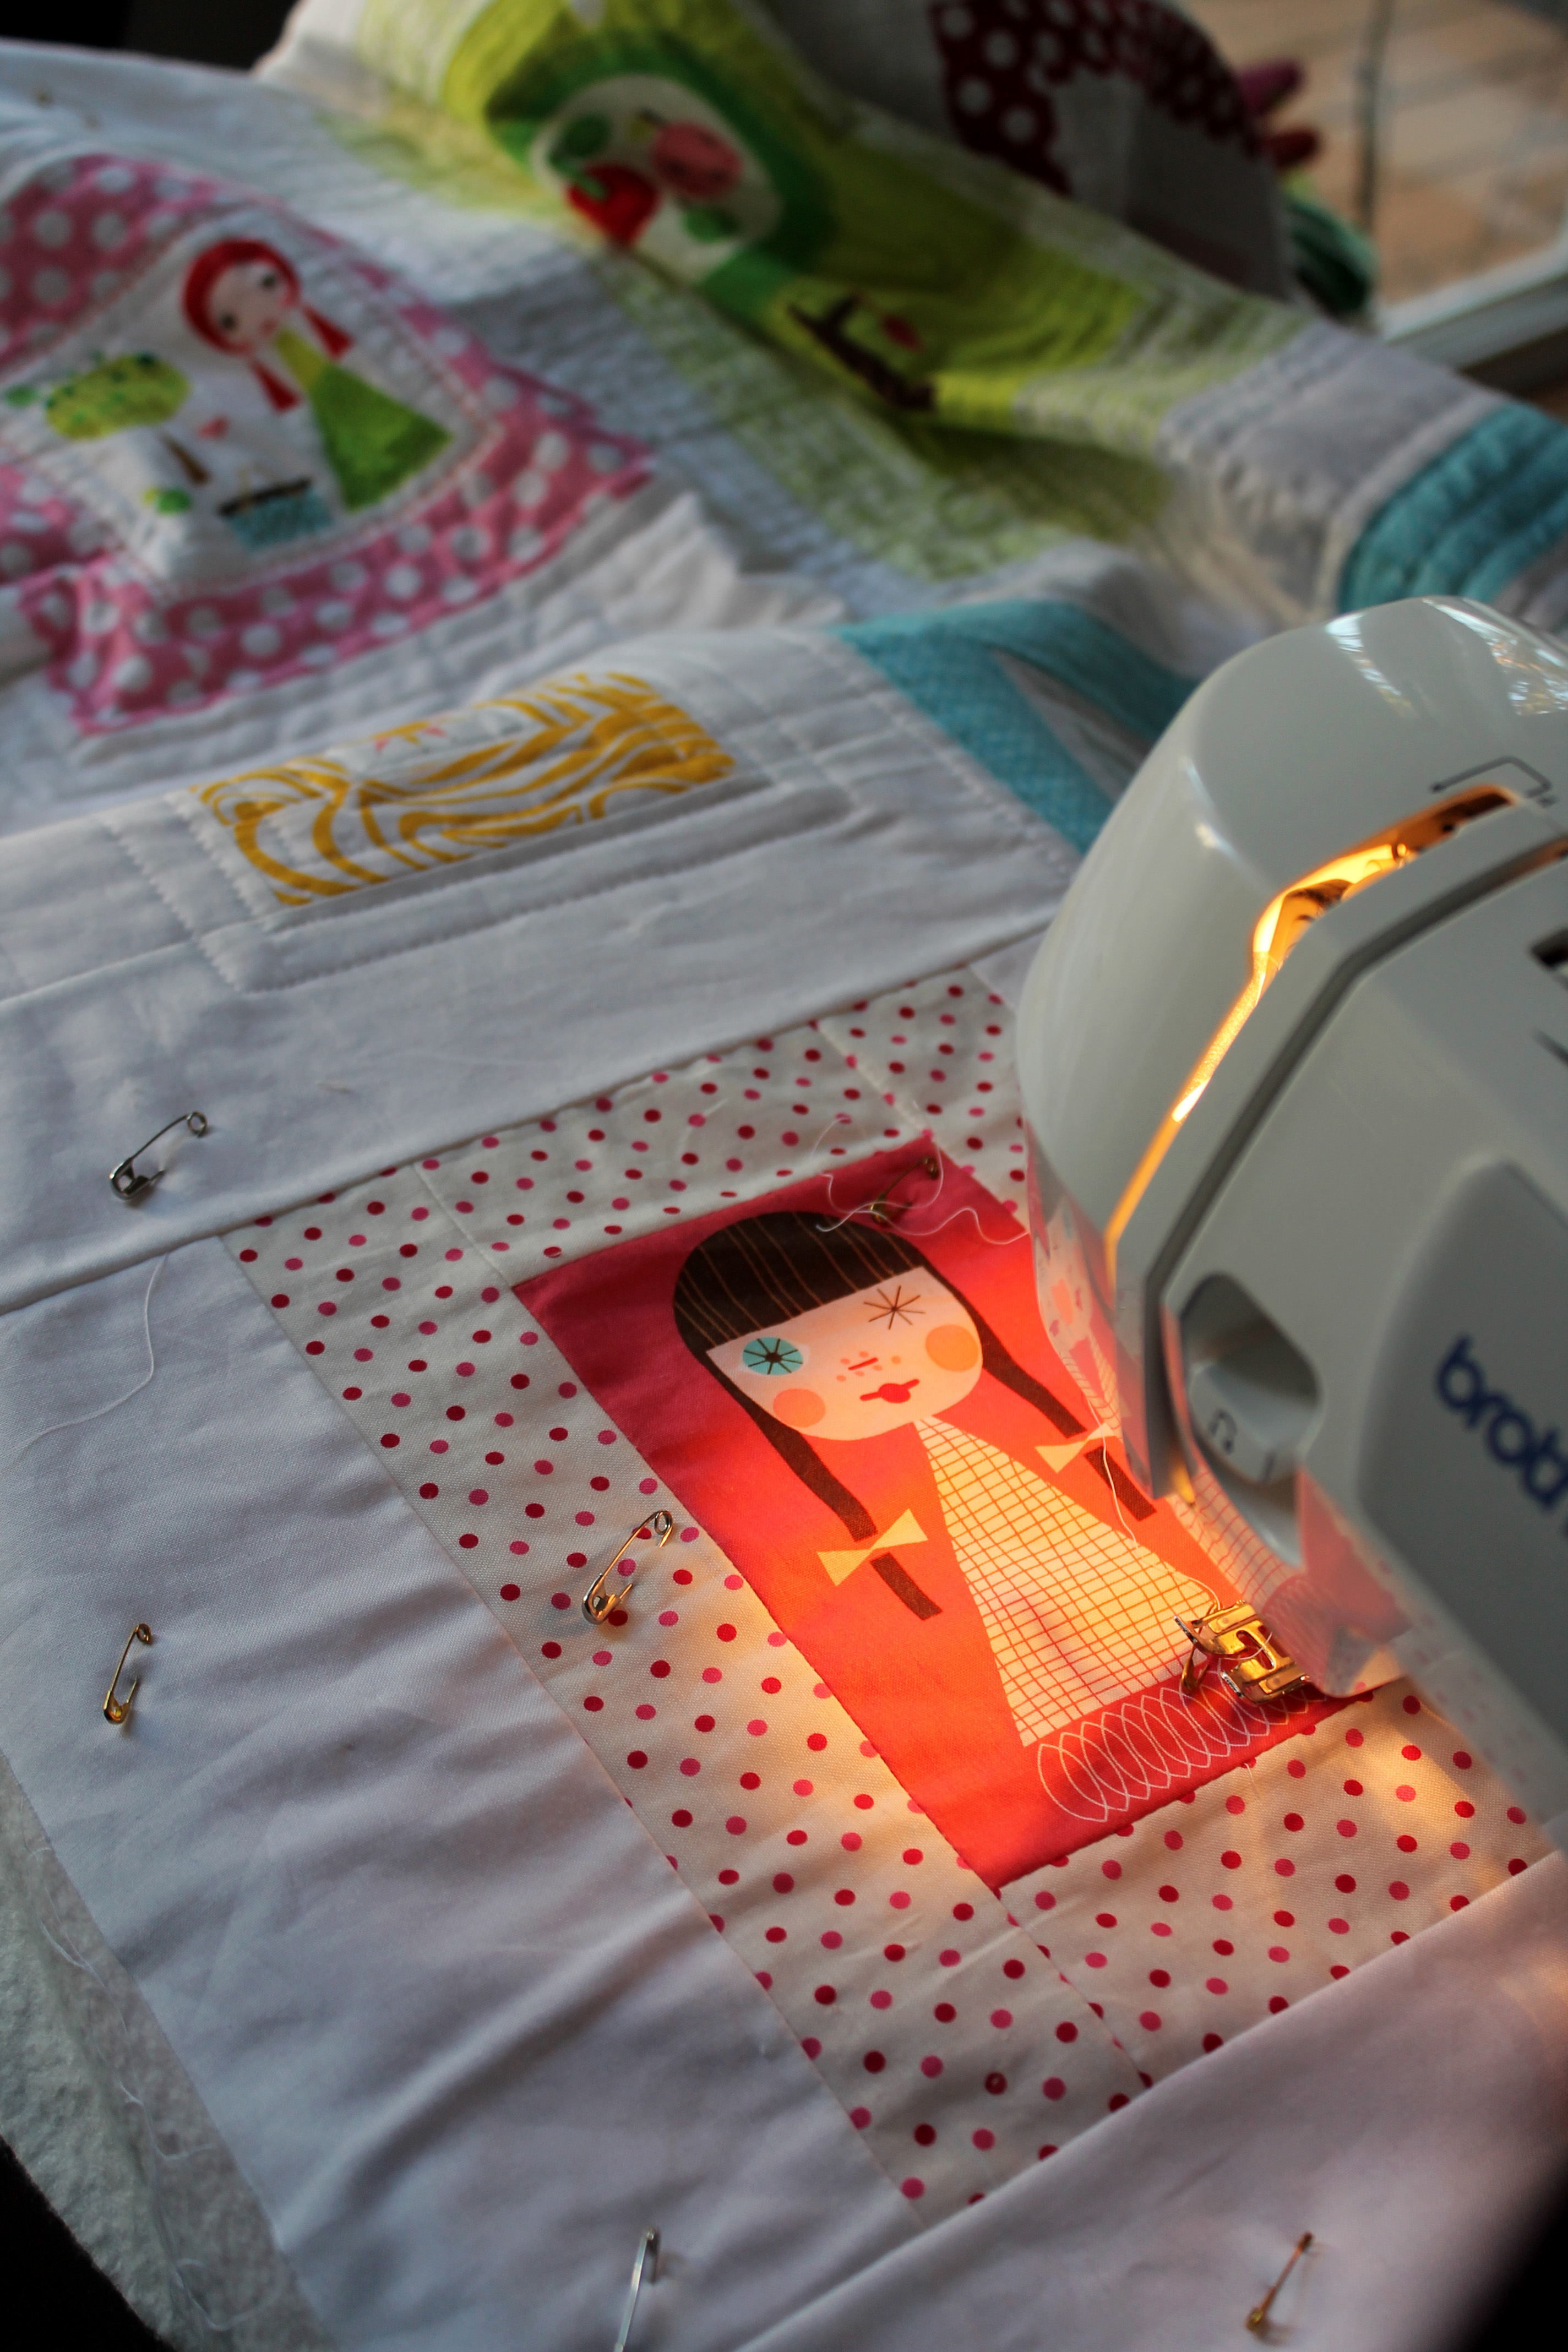
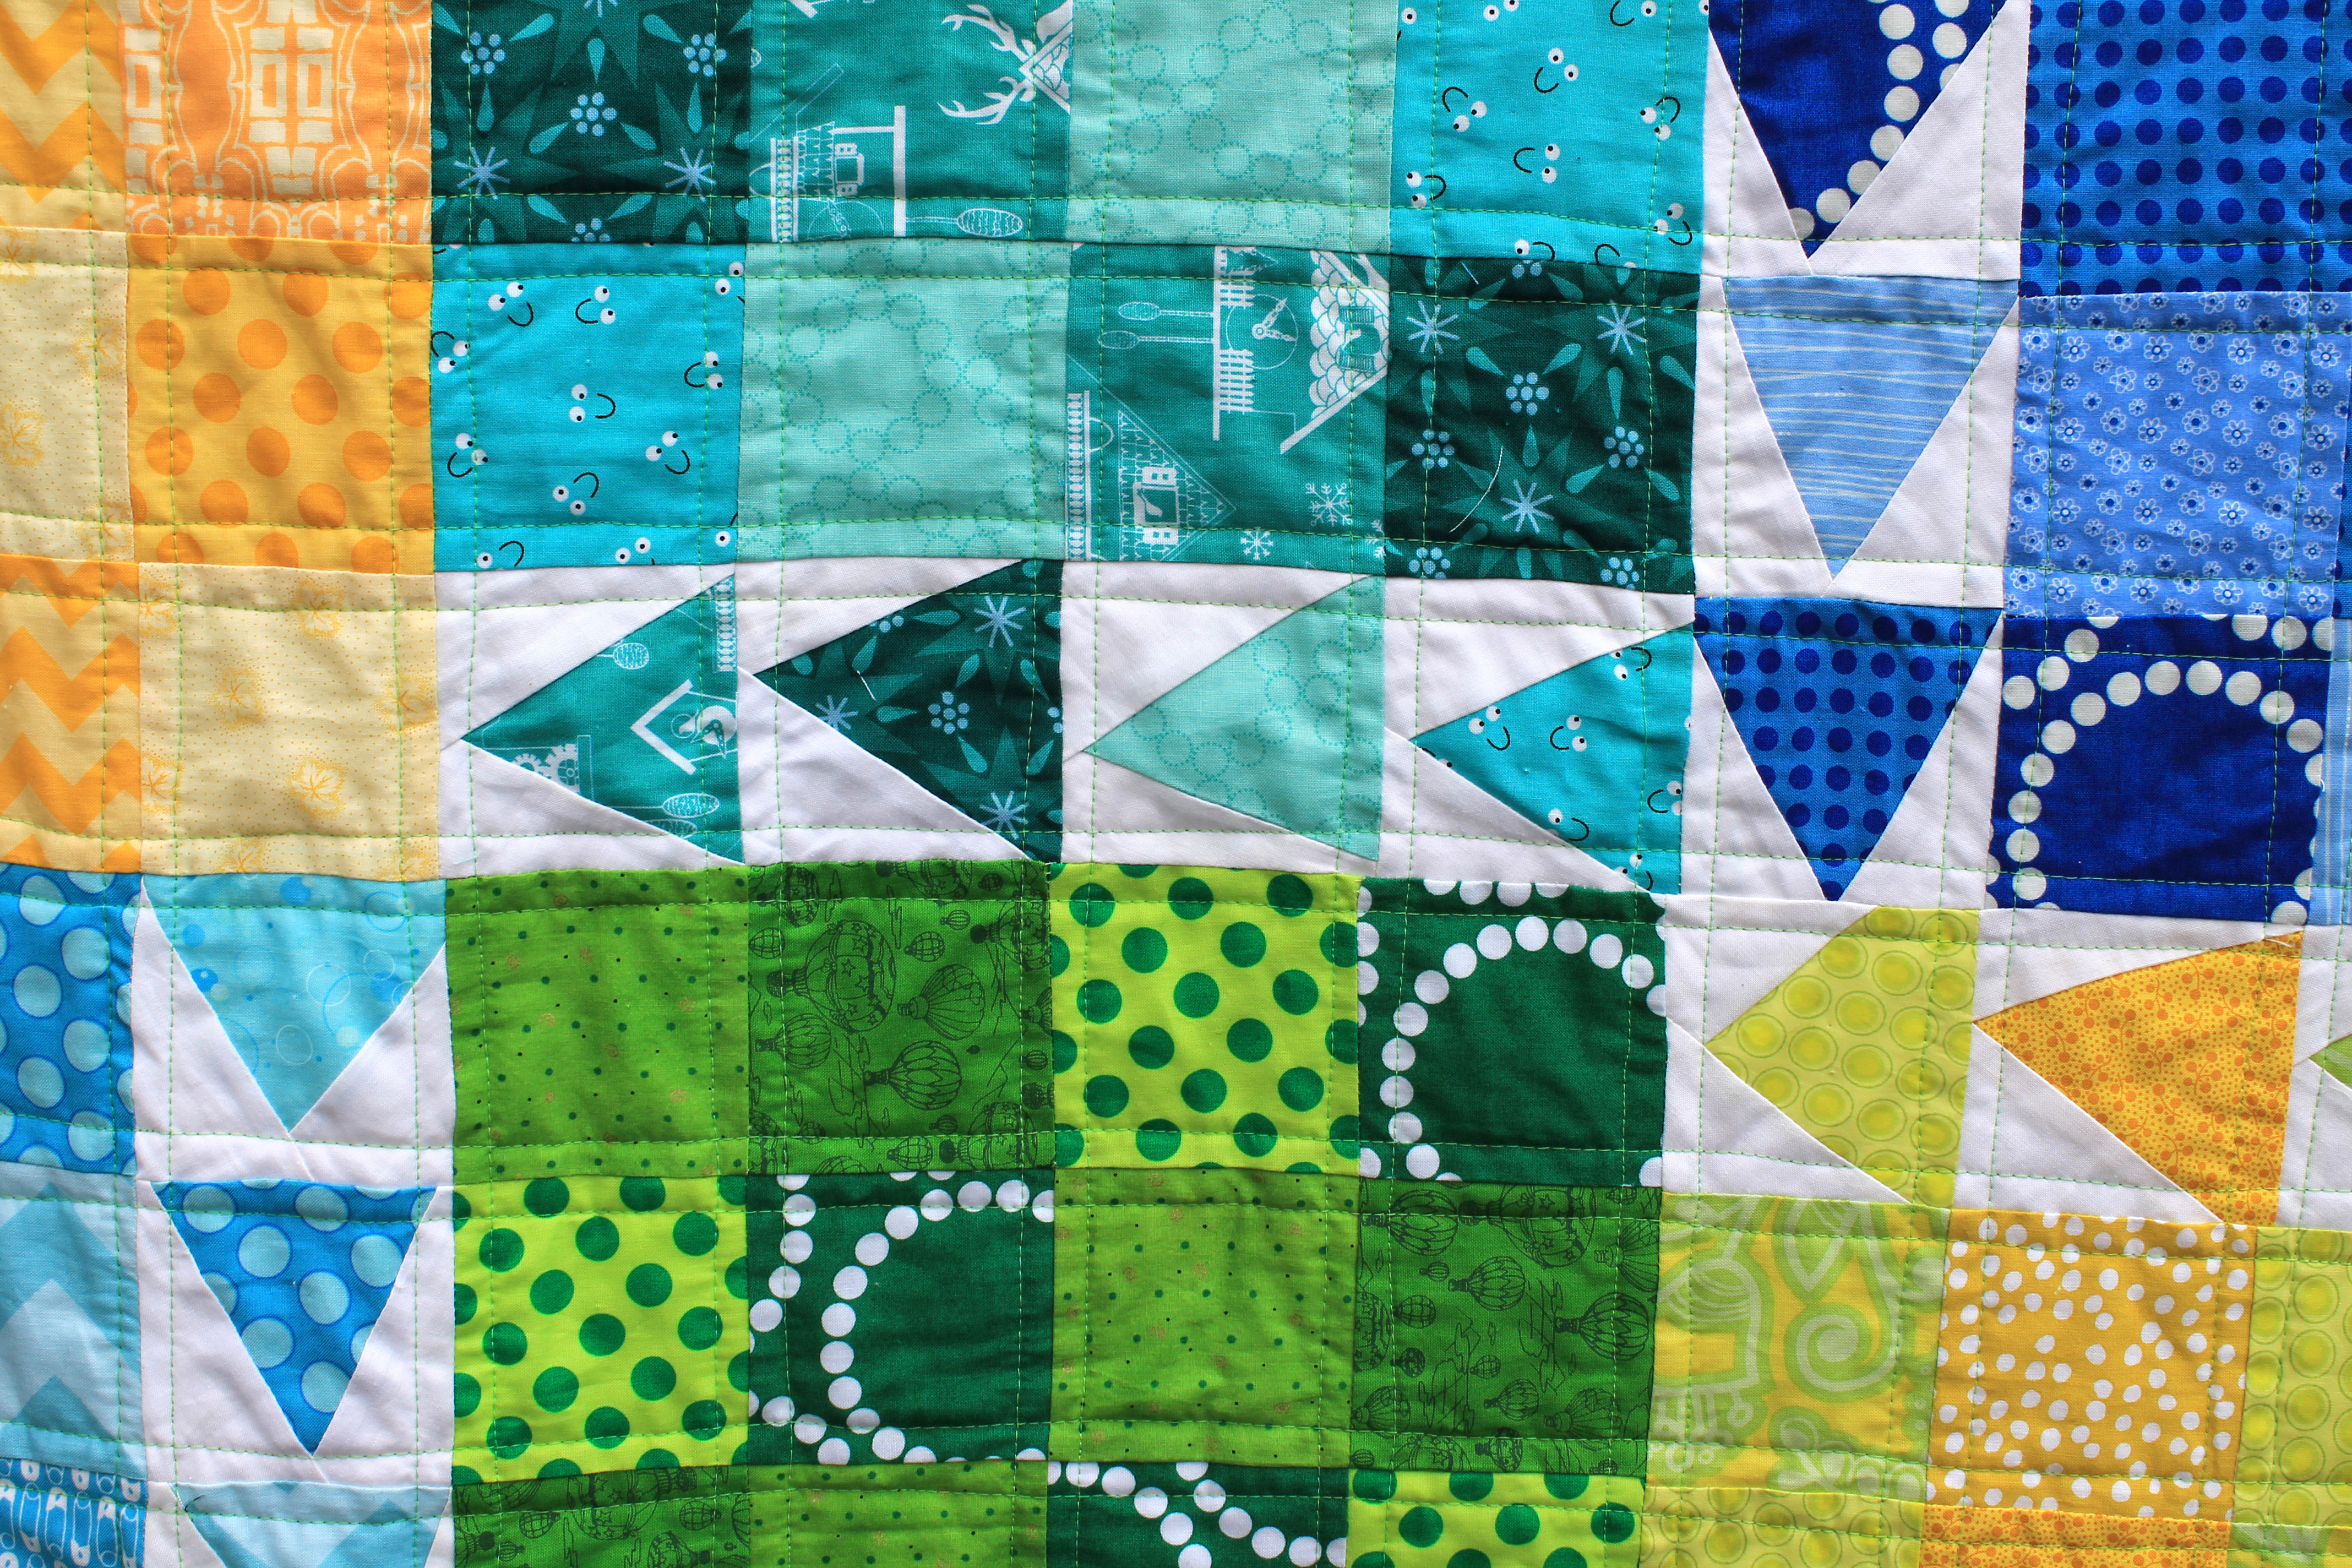
This block is so fun and so easy to make… I set it as one of my Do.good.Stitches Bee blocks so you will be seeing another version on this site in the next month or so.   My tutorial for making this block can be found here.

finished urban chicken quilt detail 2I really do love how easy this quilt block is.  I think it will be my new “go to” block when I need to get a kids quilt done quickly.   Though next time I think I will put some more prints into the quilt, not just tone on tones.  I also want to try to make one just using solids.  Oh I have too many ideas and not enough time.

finished urban chicken quilt detail 3

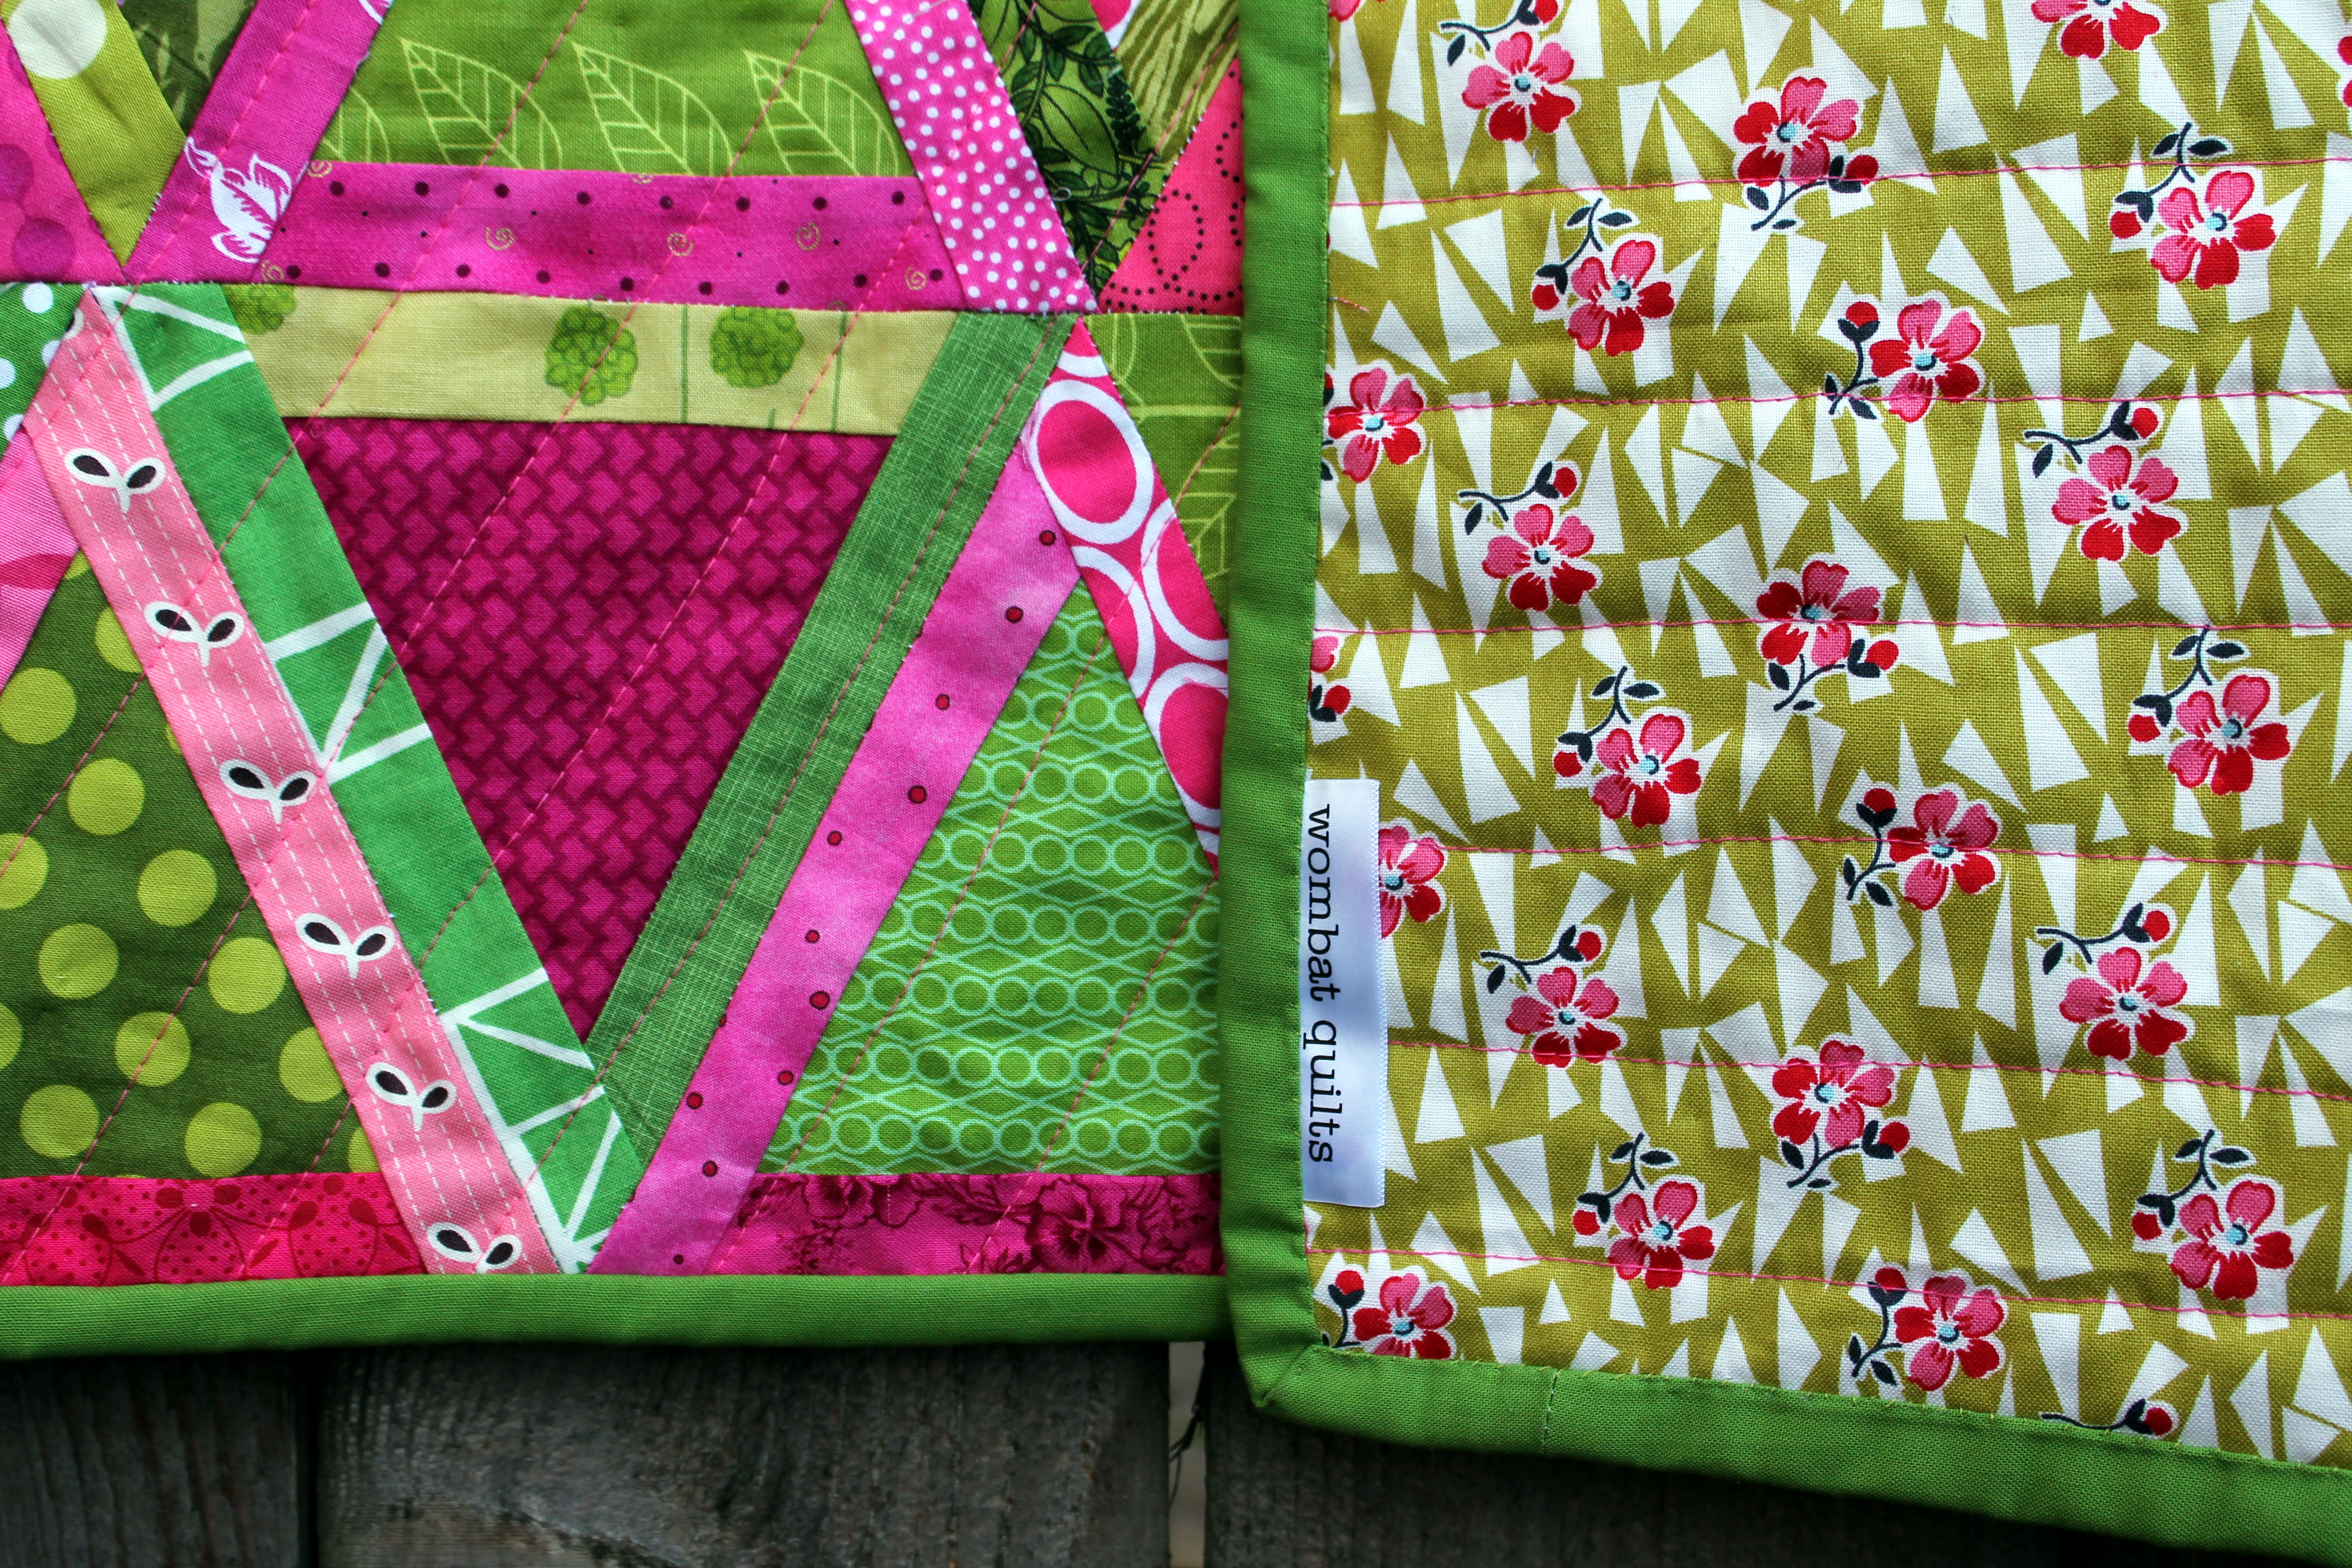
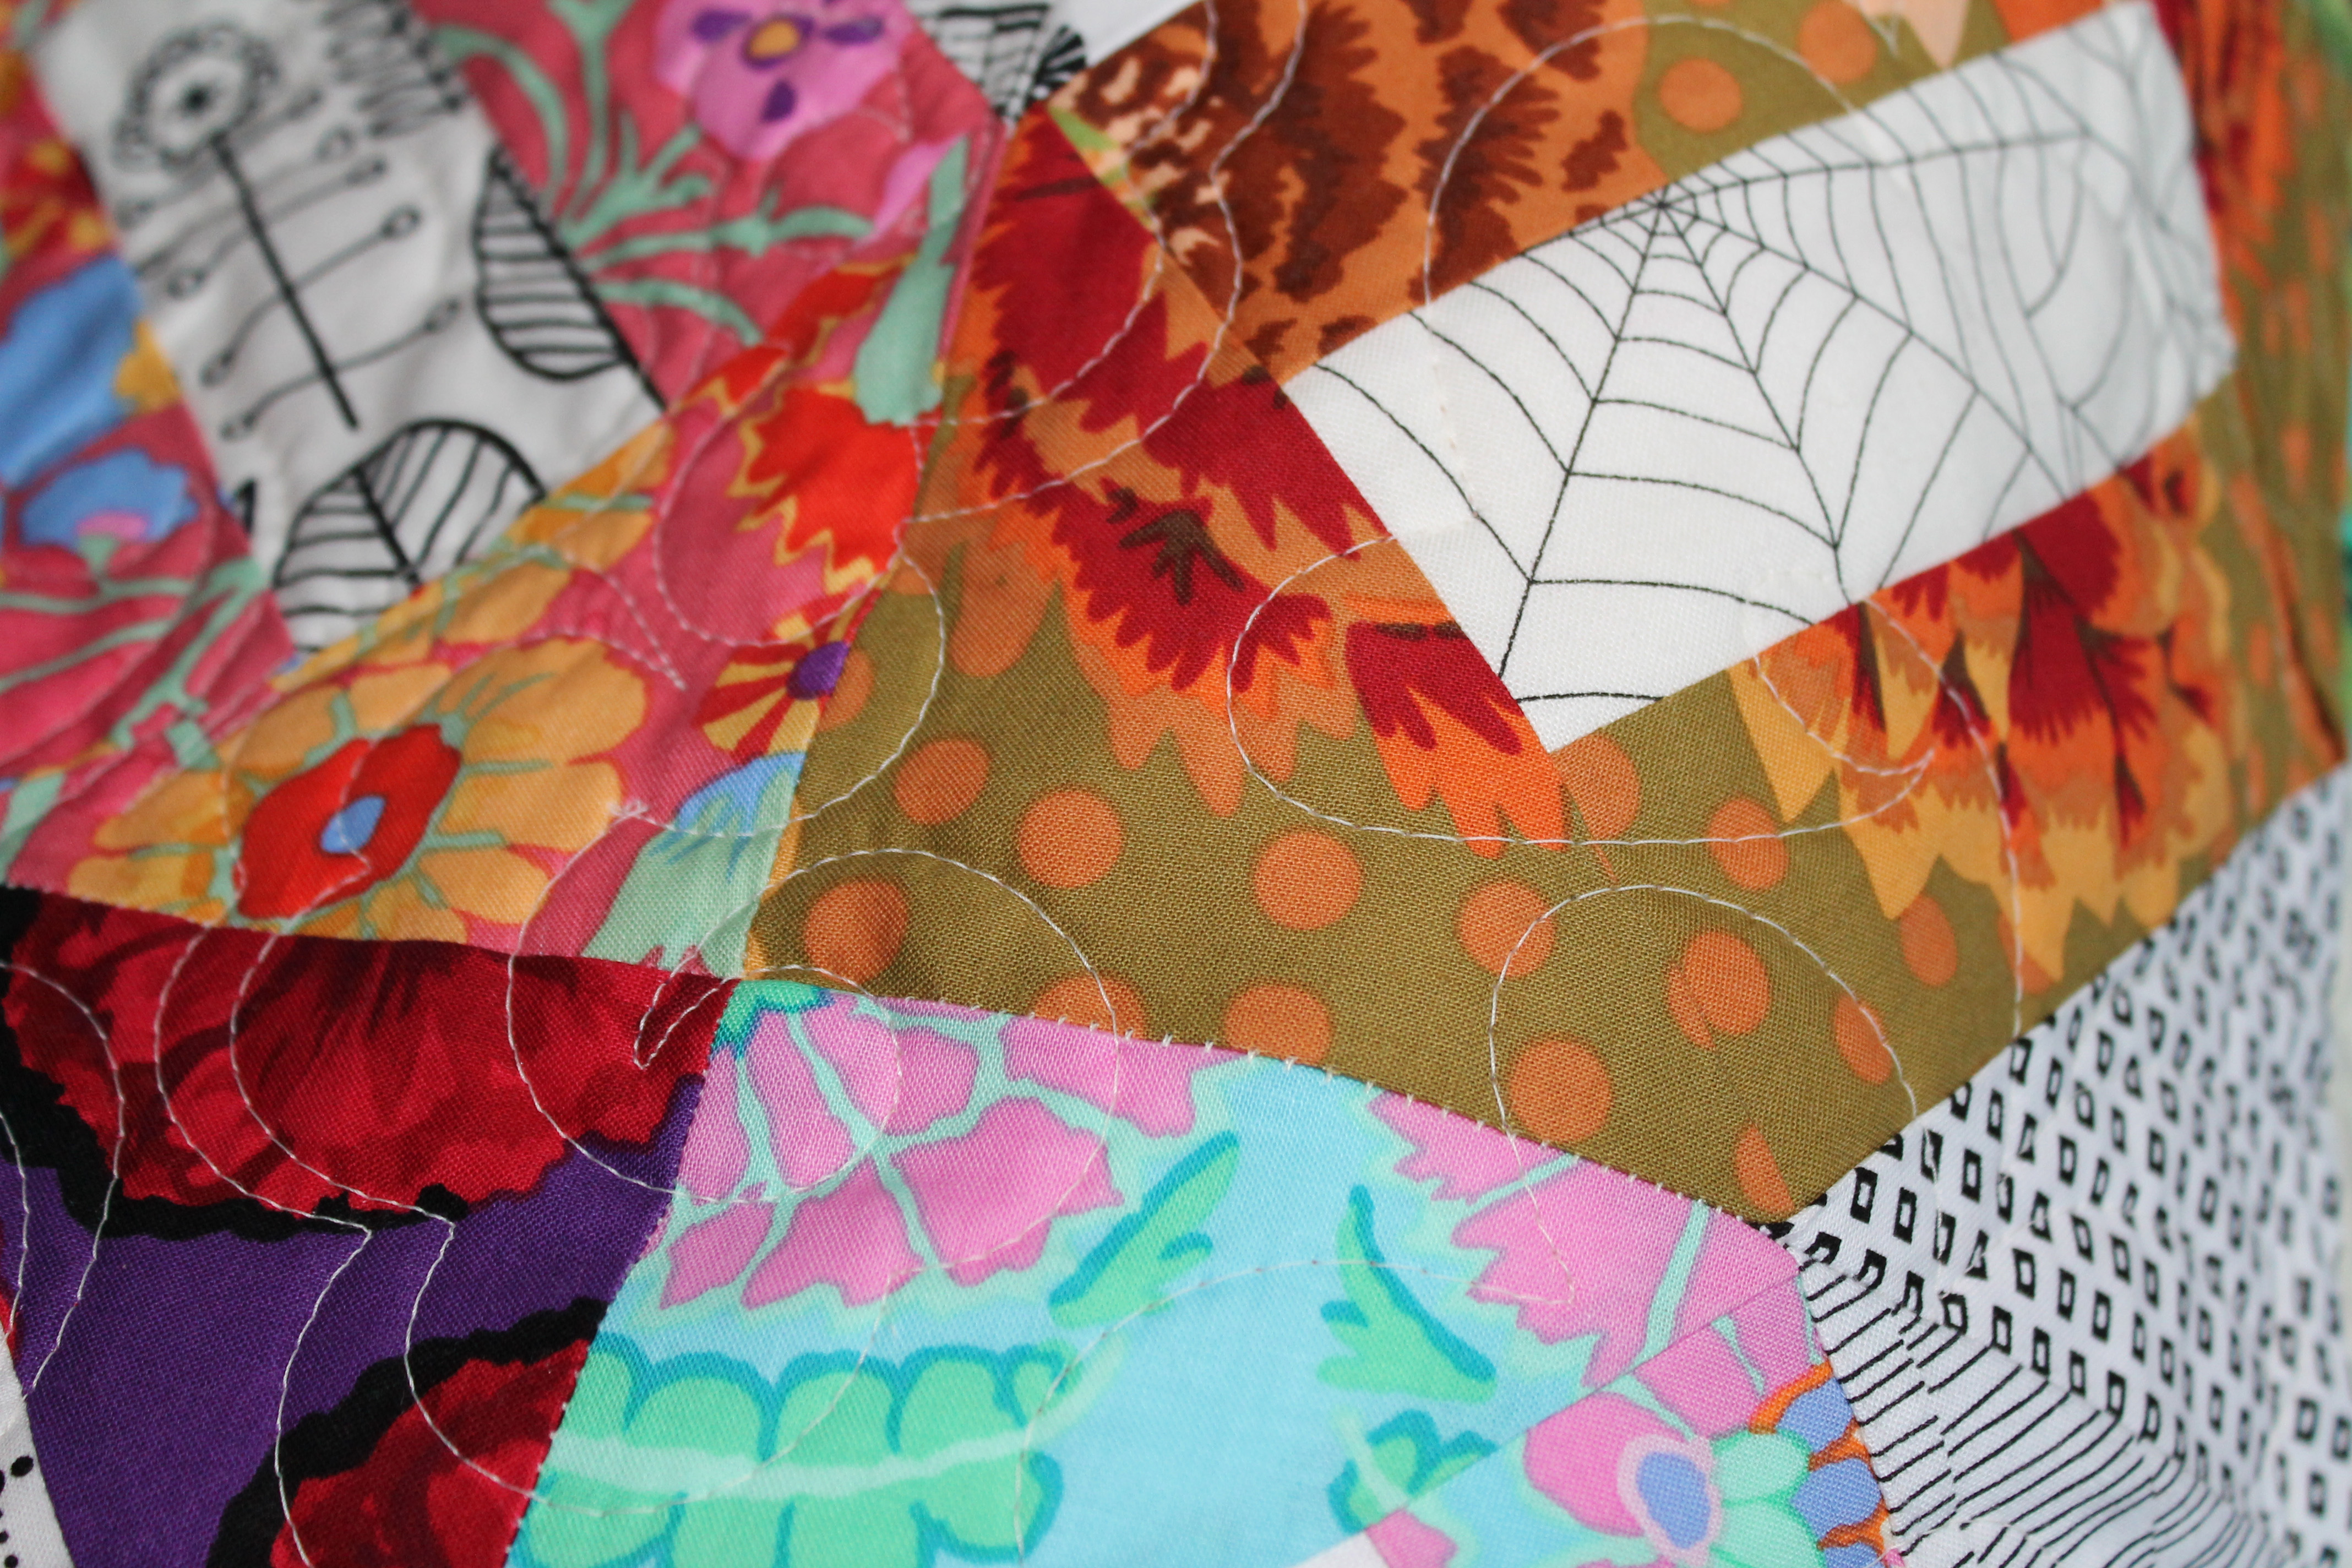
For the quilting on this, I just went with straight lines, running either side of the ditch.  At some point, as my FMQ gets better I would like to quilt one of these with “chickens”, that is triangles, all over it.

finished urban chicken quilt detail
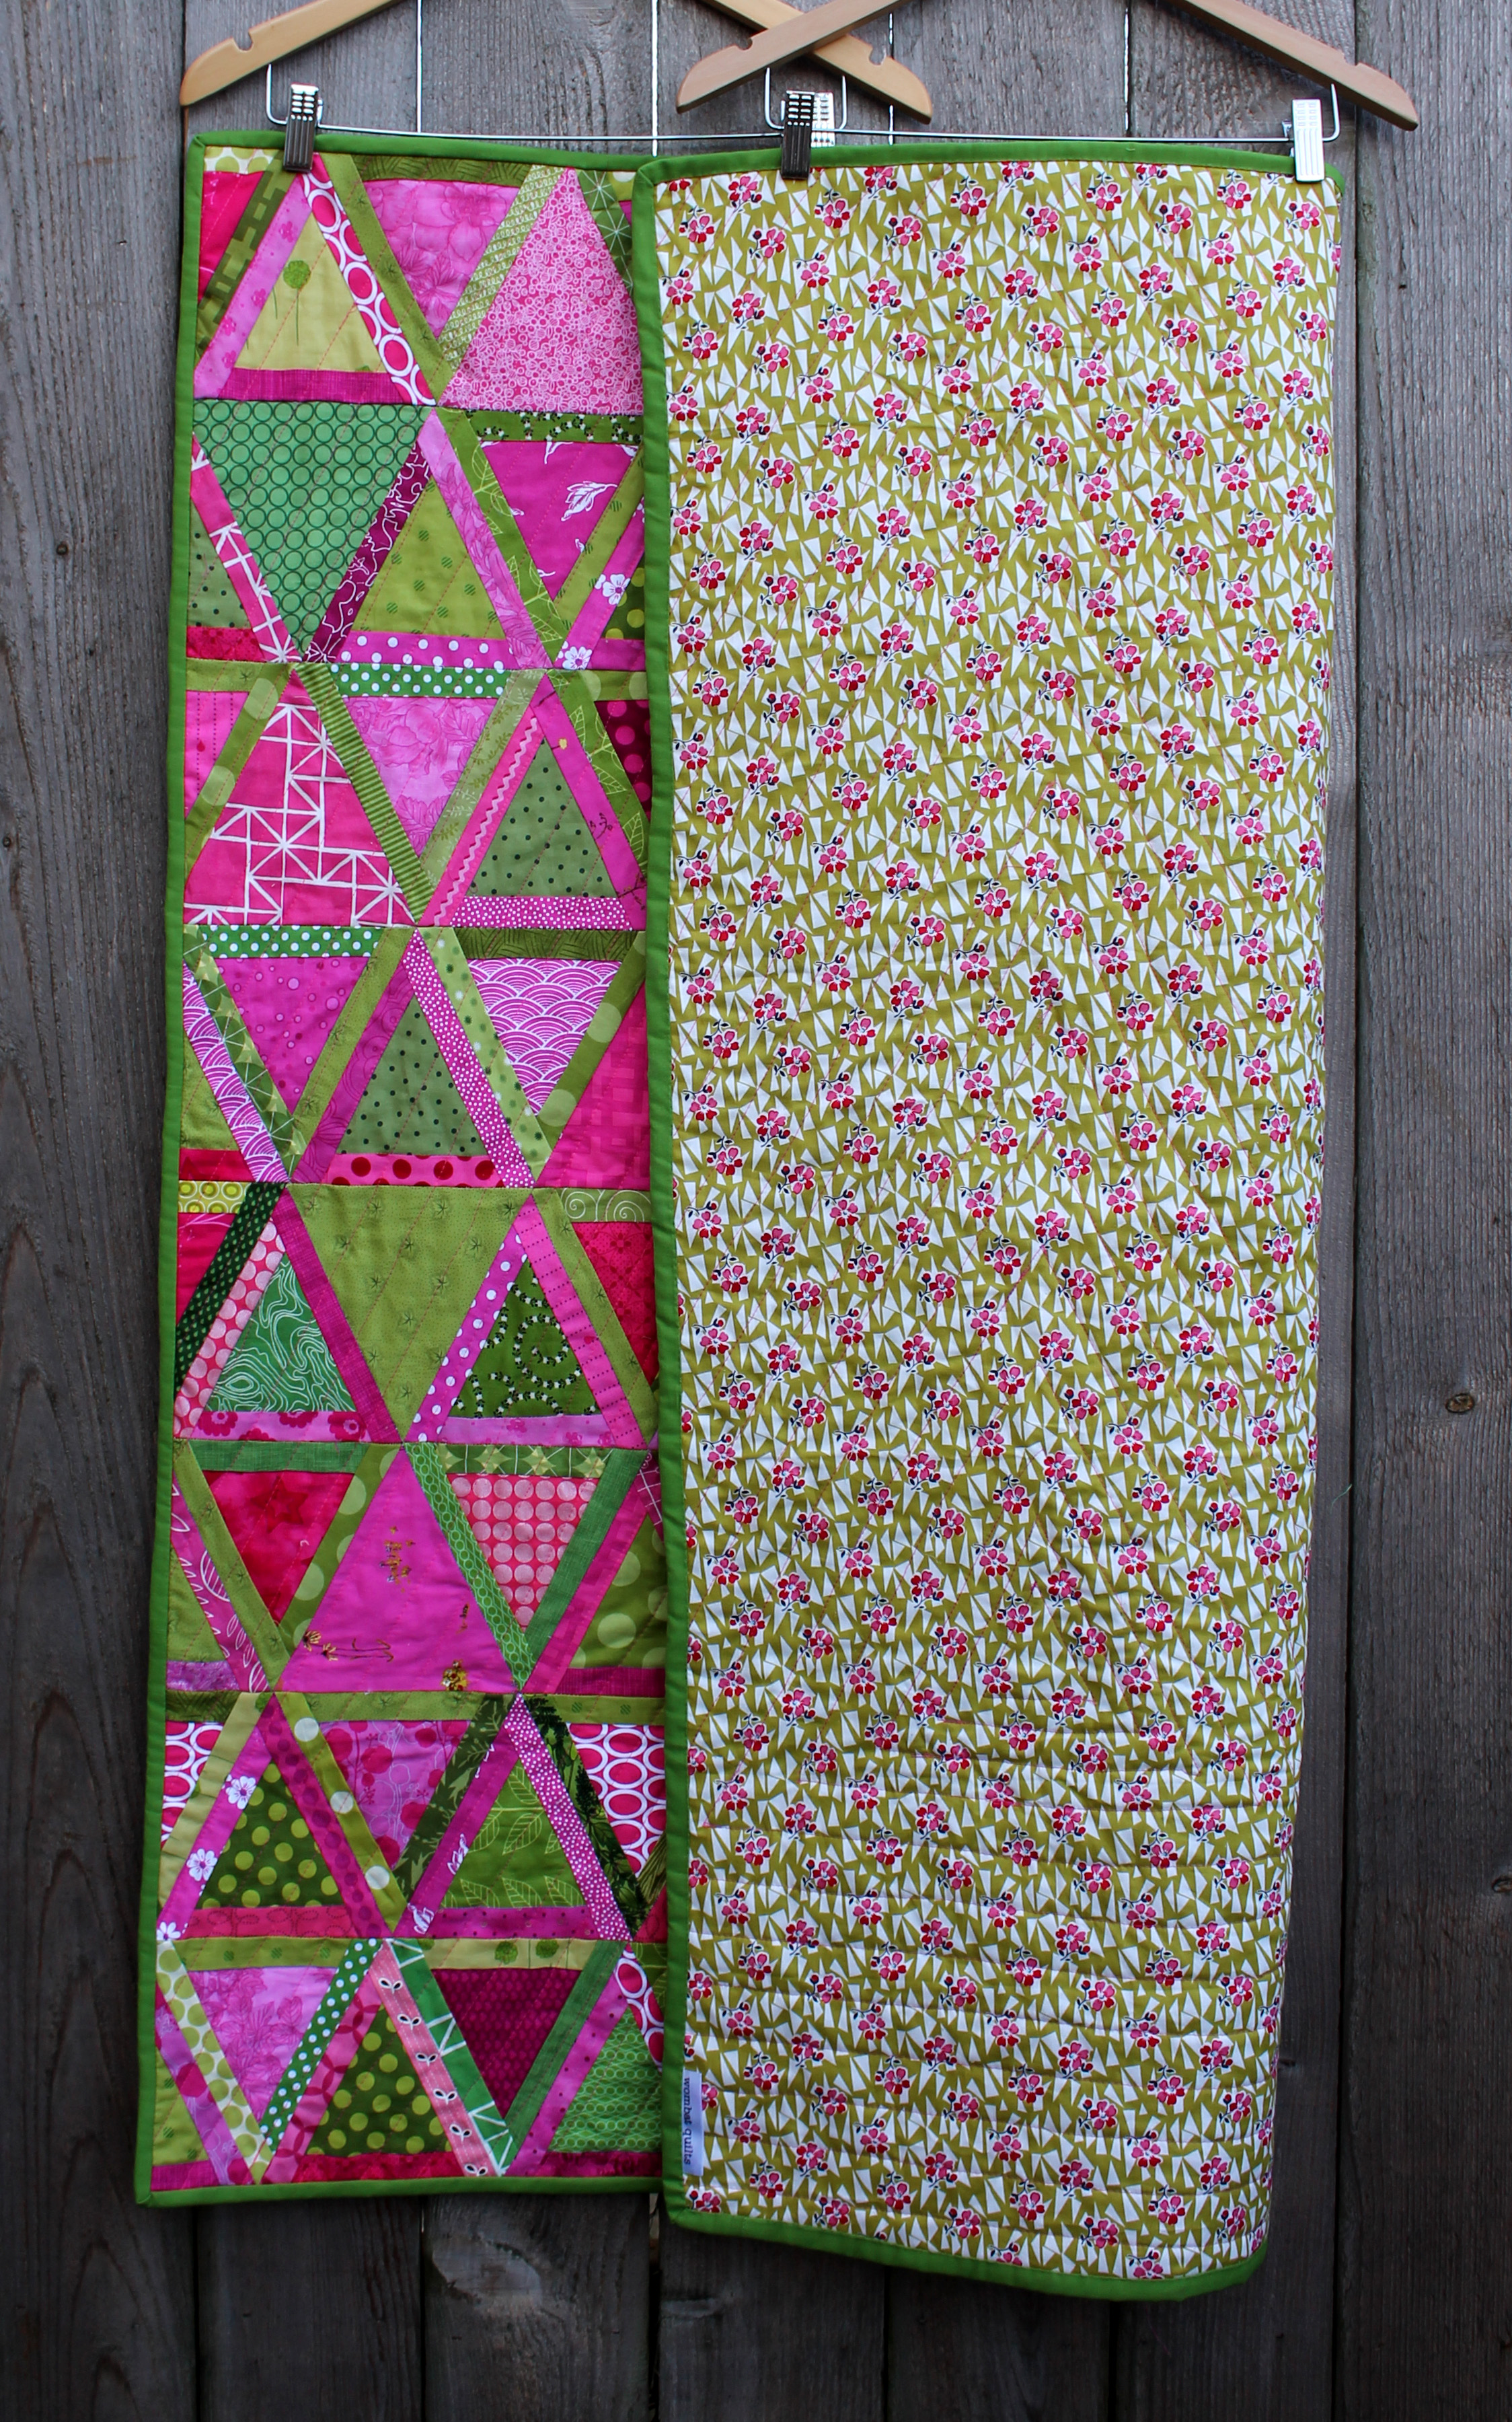
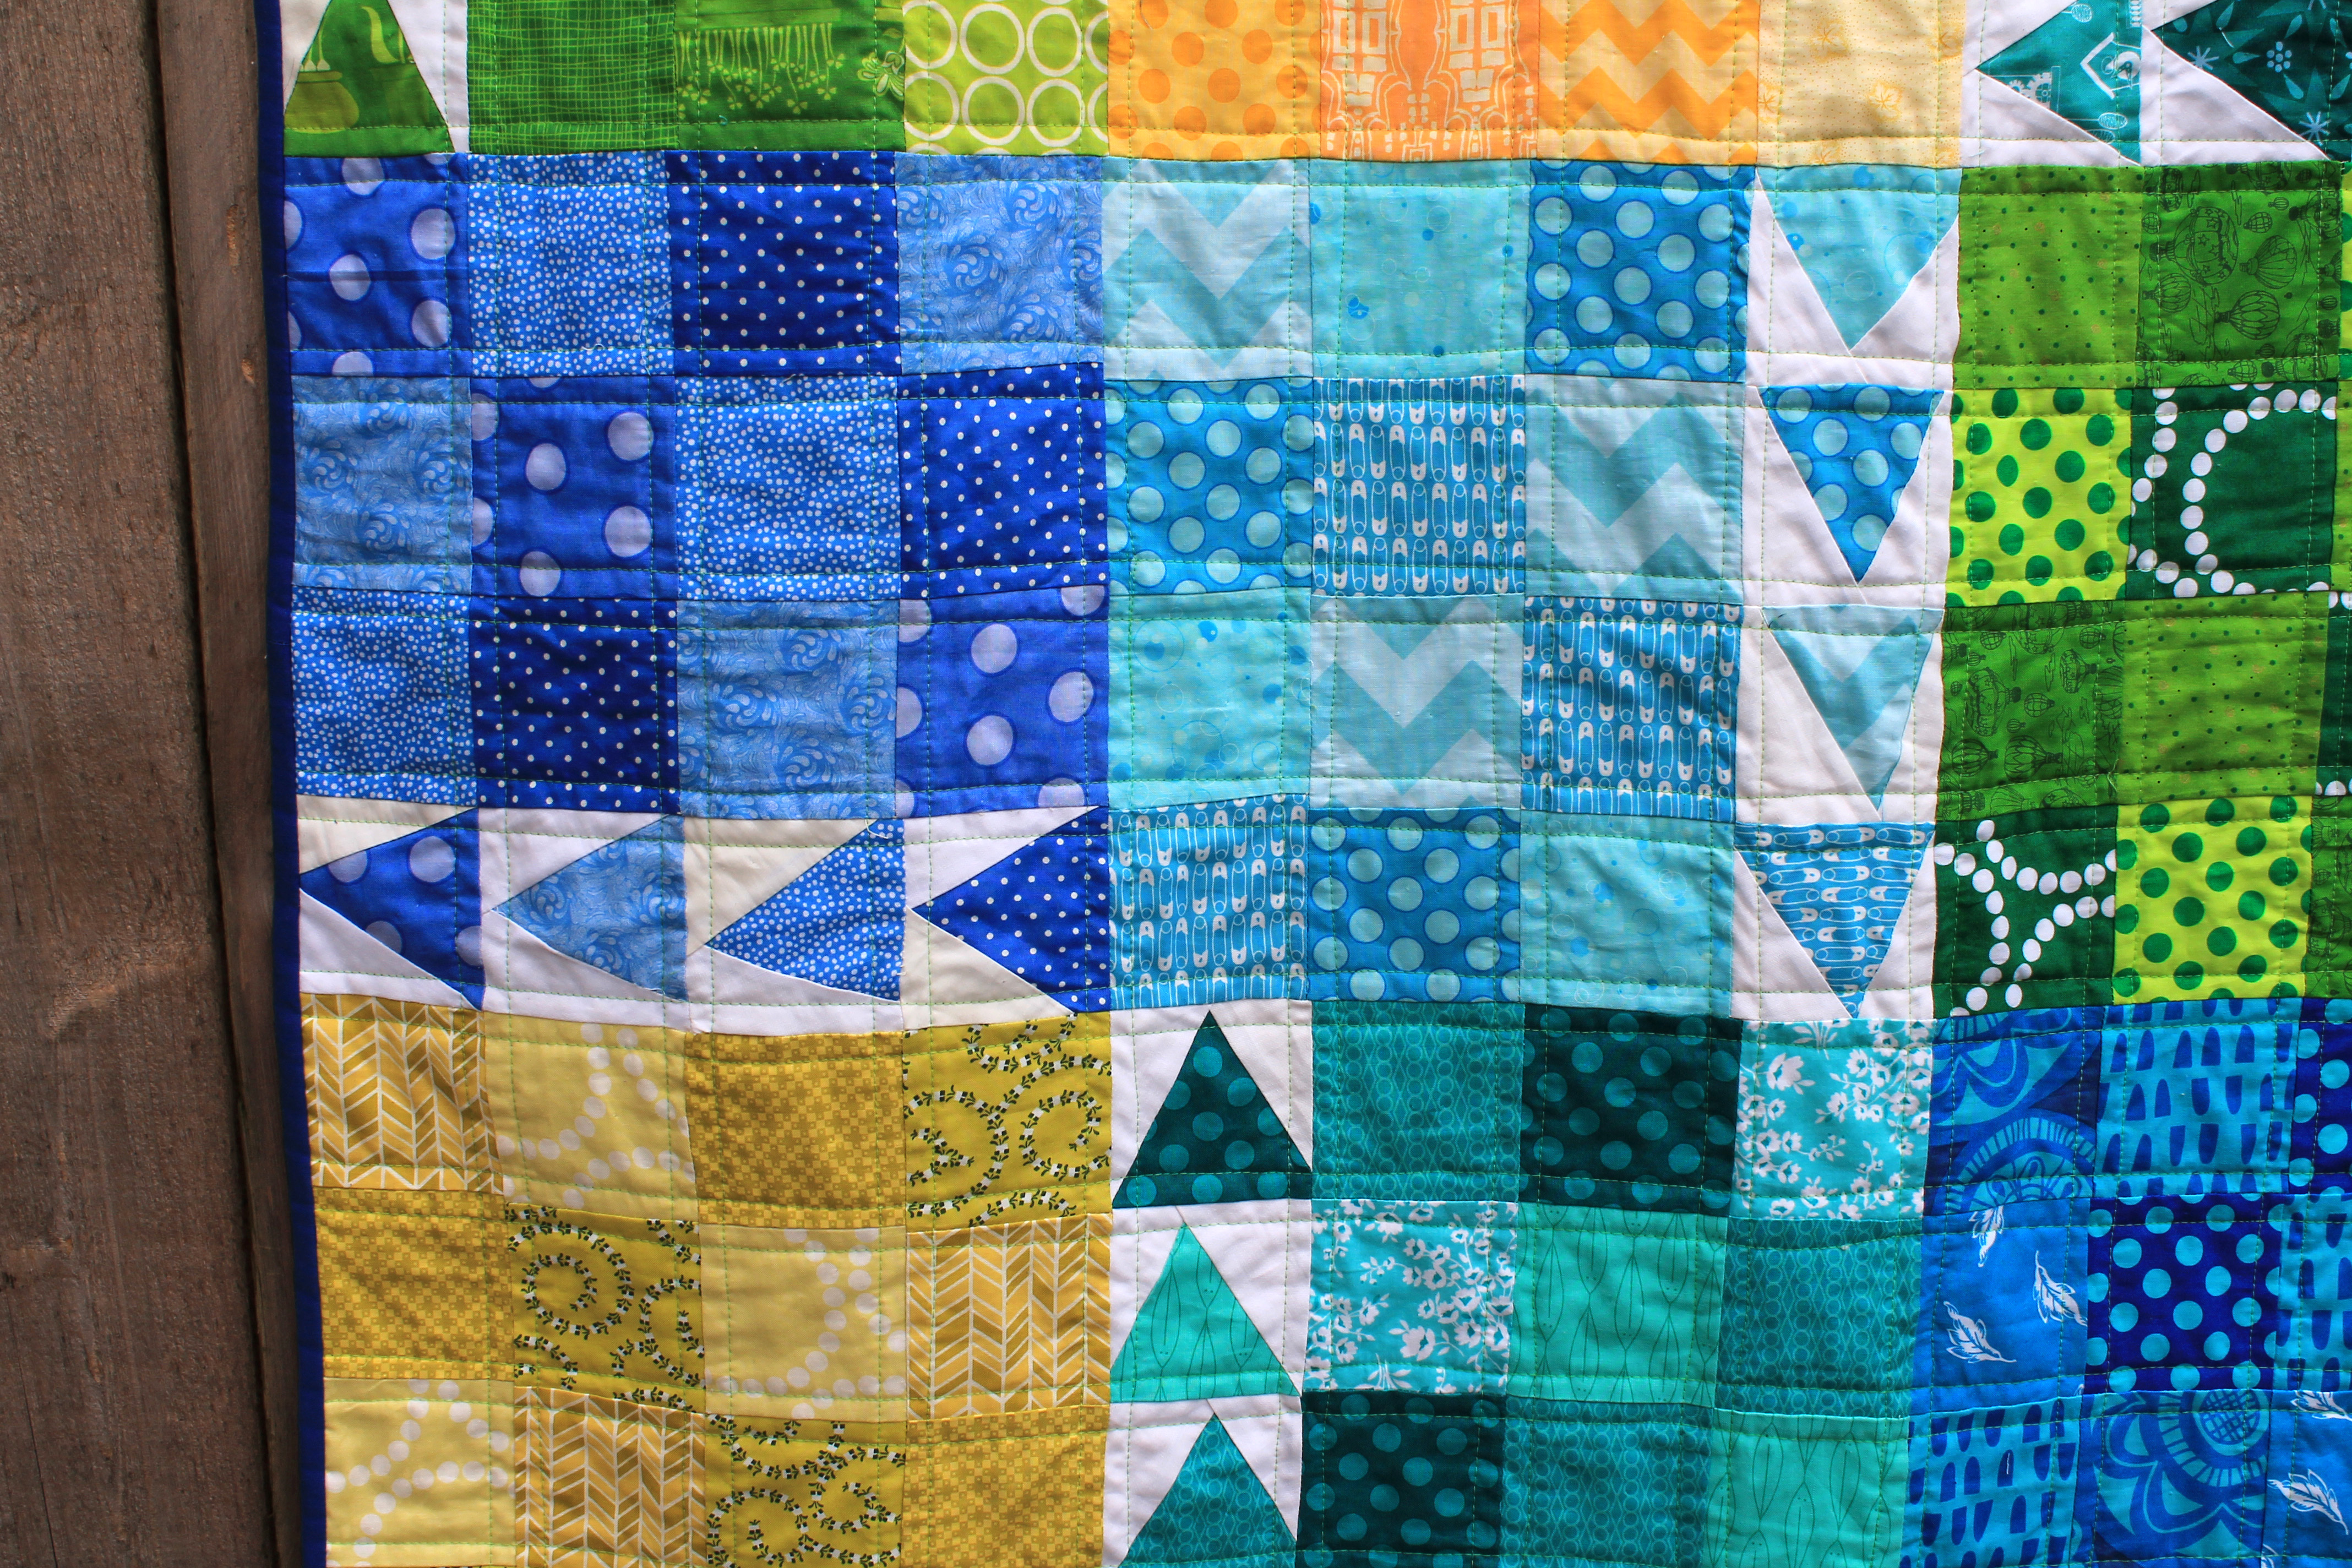
To back this quilt I used the last of my IKEA green and blue fabric.  This fabric has been a great way to back my quilts and I am going to keep my eye out for more of it.  The backing is one solid piece, but it looks like I have sewn together a pile of solid fat quarters.

finished urban chicken quilt back
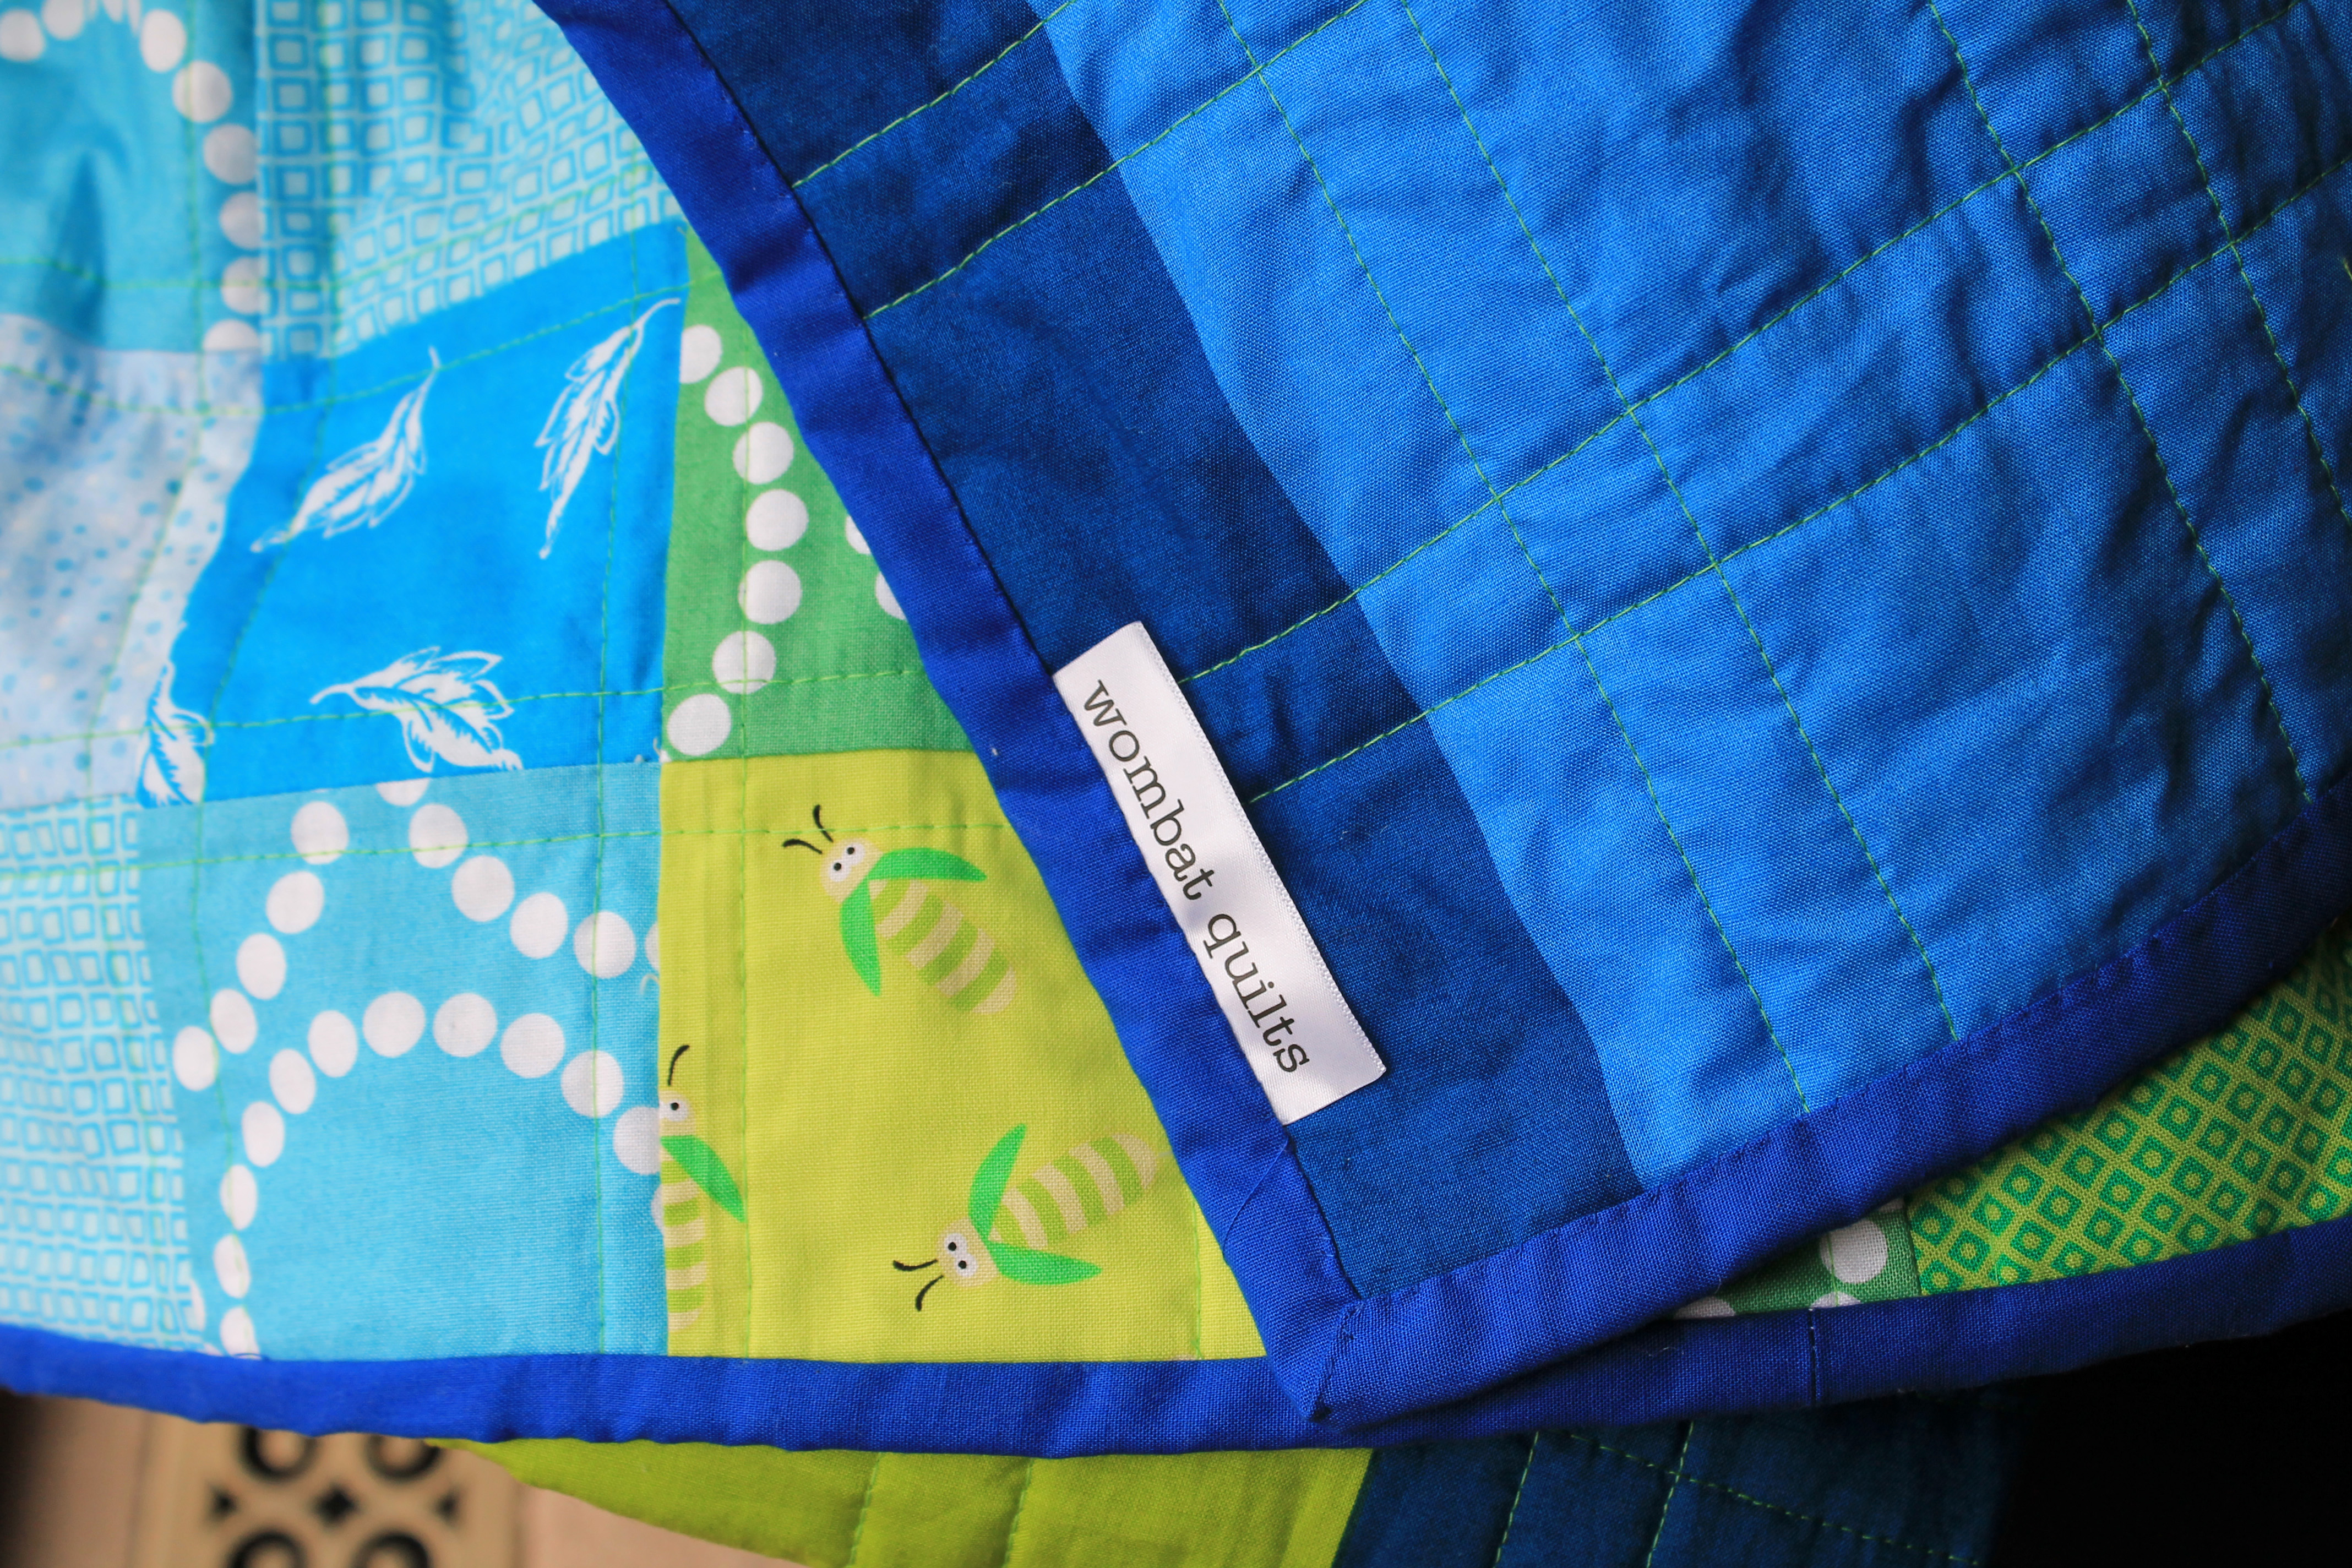
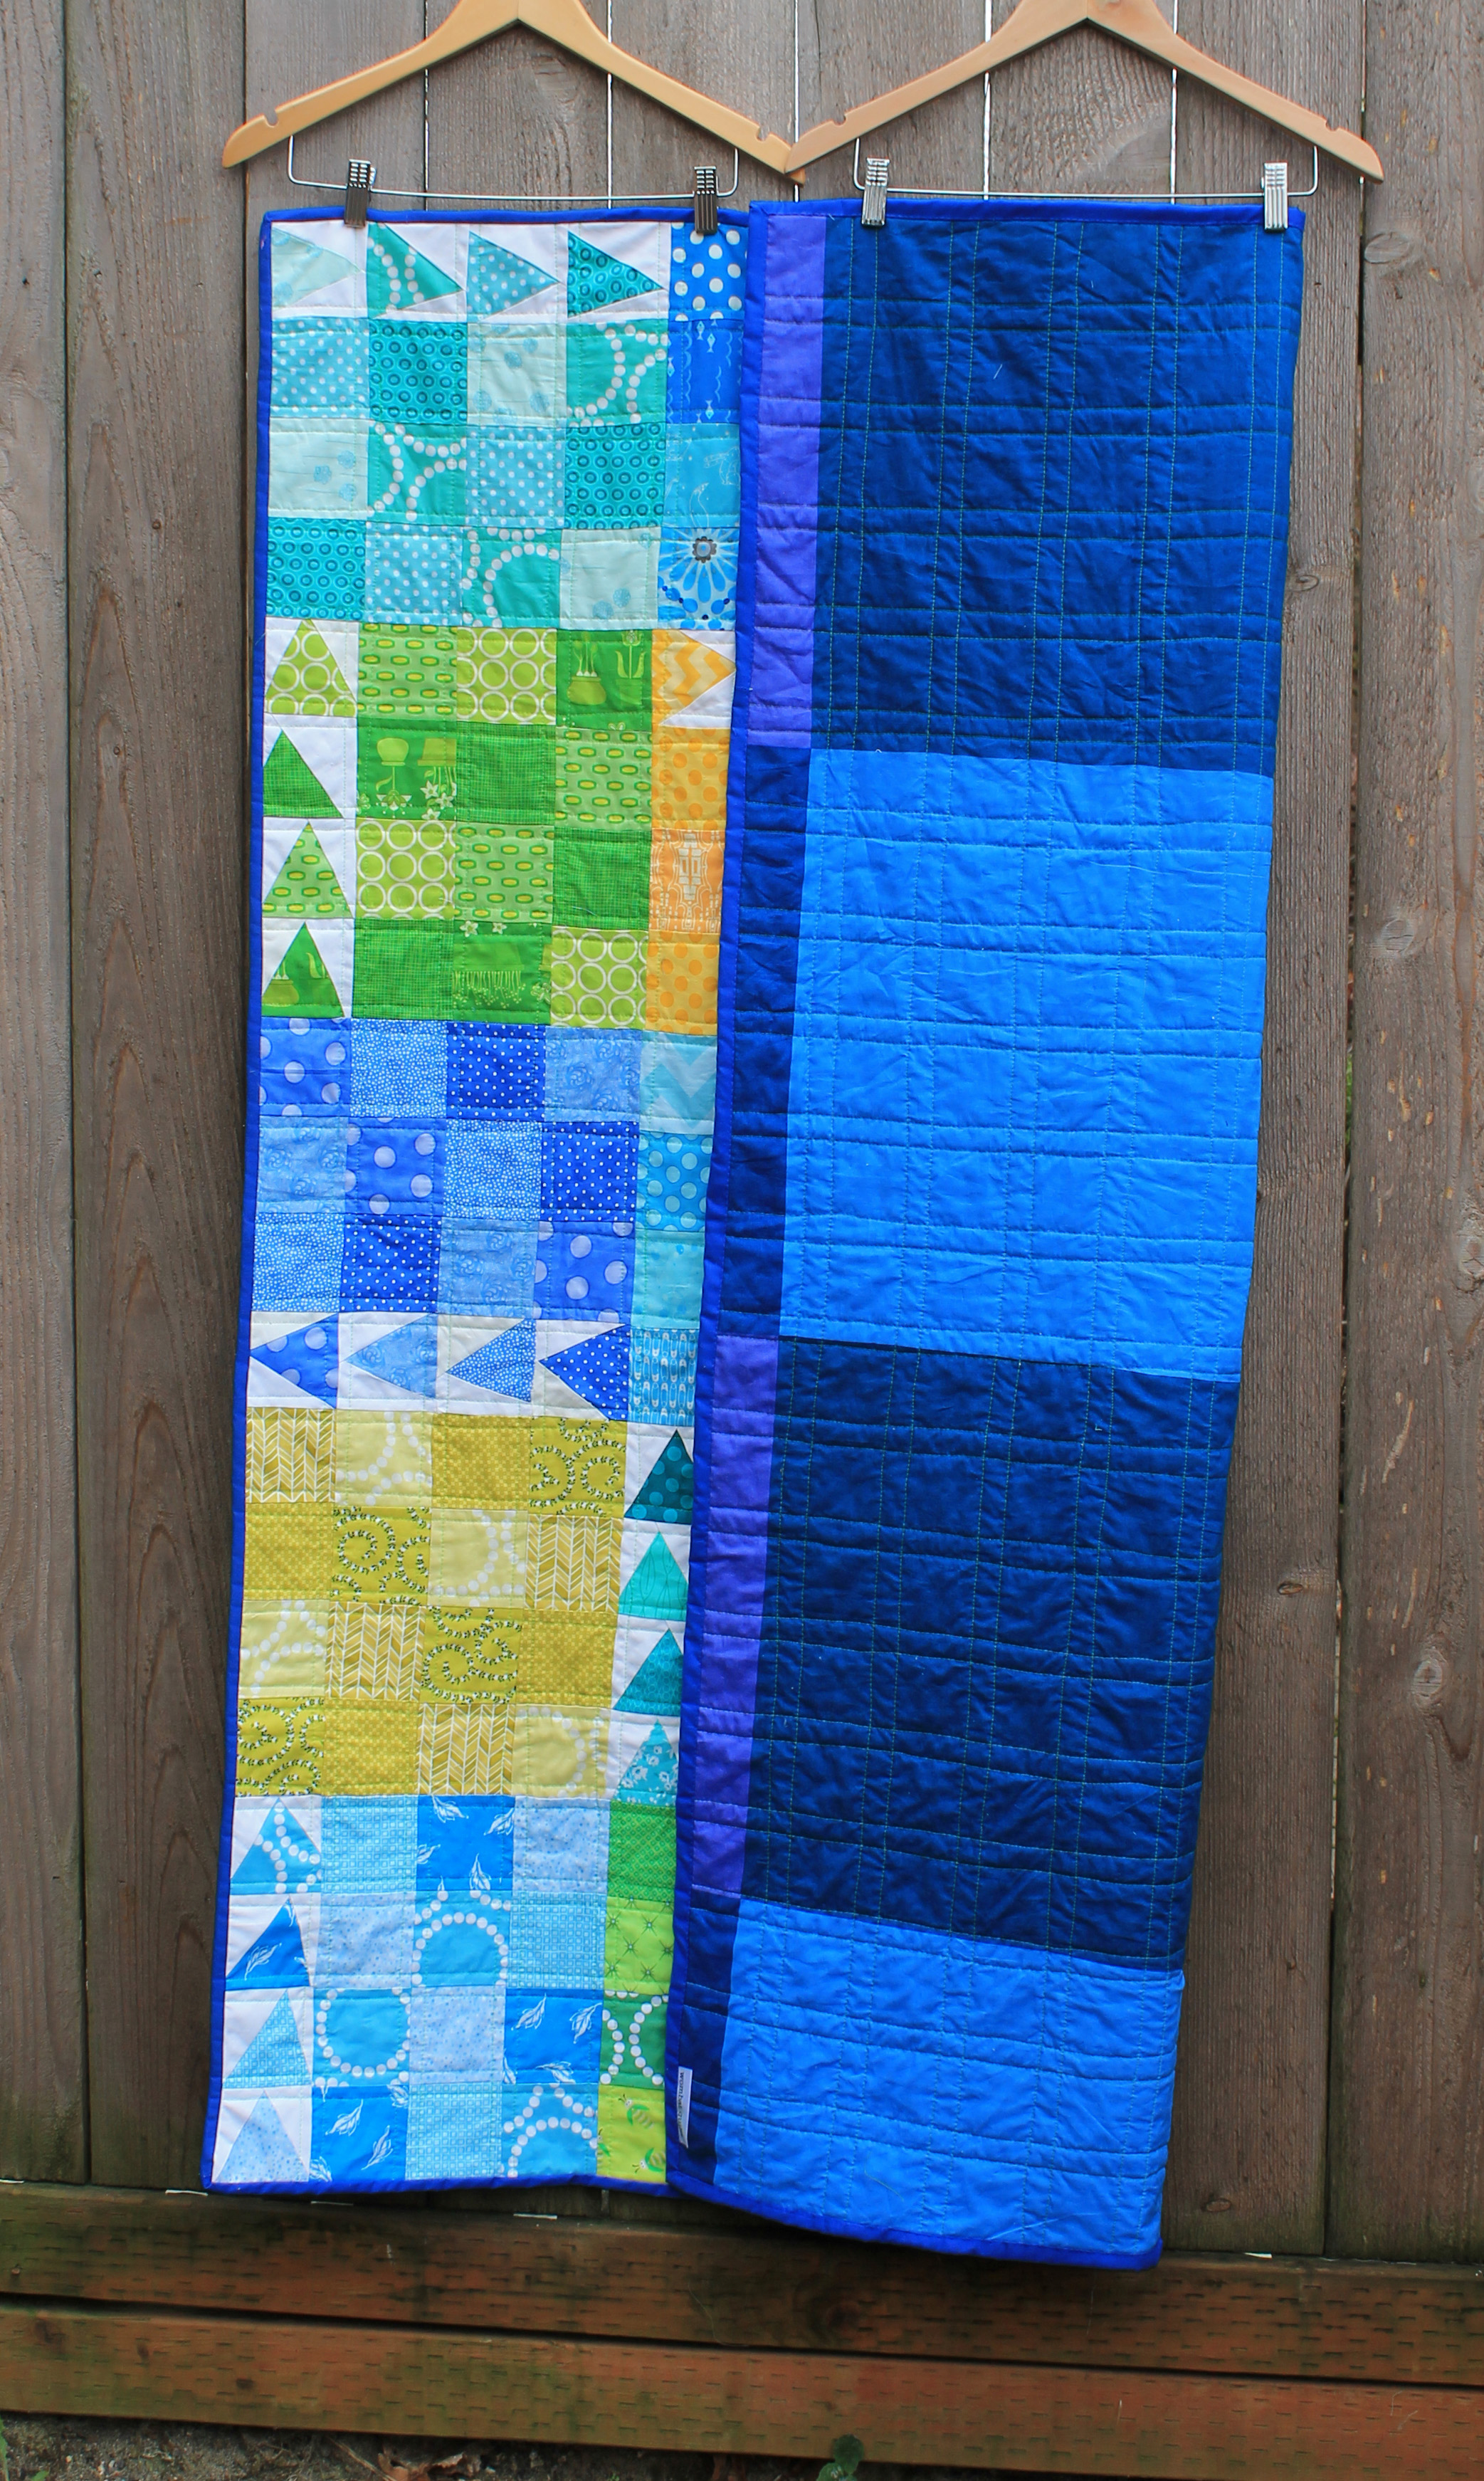
The finishing touch is an electric blue binding… I seem to go through a lot of binding in electric blue for some reason.  It is either that or someone/something is eating my blue binding.

finished urban chicken binding

So there she is…my first finished Urban Chicken quilt.  I am now off to make myself a turkey sandwich… got to love Thanksgiving day leftovers.


Tricky Triangles finally finished

I am very very very  pleased to say that my pink and green triangle quilt is finally all done.  I have procrastinated with this quilt in new and exciting ways over the last 6+ months… but she is now completed and I can move on with the rest of my life.

modern scrap triangle quilt

I must admit, in the spirit of full disclosure, that I had planned for this quilt to be bigger than what she ended up as, but I got to the point where I had had enough and just went with the blocks I had made.  Her finished dimensions are 45 inches x 50 inches which is a smallish kids quilt.

finished triangle quilt detail 2

I first posted this block way back in April… I had been given a small scrap pile of olive green fabric and wanted to do something with it.   Hot pink fabric was chosen to go with the olive and a triangle paper pieced pattern from the “Modern Blocks” book was chosen.   I was so optimistic with that first post I titled it “Triangle Love”.

triangle quilt blocks

Fast forward to a couple of weeks ago, when I decided to bite the bullet and finish this sucker… but now I was referring to it as “Triangle Trauma“.  Oh what a difference time makes….

finished triangle quilt detail

Now all is said and done I am really happy with how this quilt turned out…but will not be jumping into another triangle quilt for a while!   For the backing of the quilt I used a piece of Densye Schmidt which worked perfectly with the quilt top.

finished triangle quilt back

For the quilting I selected a random triangle, quilted around it and then radiated the quilting out from there.  It is straight line quilting but with a twist.  I went with pink thread of course, because you can never get enough pink in my opinion!

finished triangle quilt quilting detail

I nearly went with pink binding but opted for a Kona olive green instead – I think it made the pink pop a little more.

finished triangle quilt bindingSo now that I have finished a quilt, I am now, under Ashley’s mum’s rules, allowed to start another one.  I have a pattern picked out and fabric pulled… stay tuned.

Quilt Details:

Technique:  Modern scrap
Block:   Paper pieced triangle pattern from “Modern Blocks”
Finished size:     45″ x 50″

A mini finished Friday

This week I finished up my two doll quilts for the Oregon Ballet Theater fundraiser that the Portland Modern Quilt Guild organized.. and broke my digital SLR.  So for today’s post you get the joy of seeing my doll quilts through the lens of my iPhone.  I apologize in advance…

pink yellow star doll quilt

For both quilts I used my stash of 3 inch squares but backed and quilted each one differently.  For the challenge we were give some minky plush fabric, which I used for backing this yellow and pink quilt.  It is lovely and soft but a bugger to quilt.  I tried doing some free motion on this quilt but the stretch of the backing fabric made it impossible.  So I unpicked the mess and went with my trusty straight lines.

aqua wonky star doll quilt

For my second quilt I used a standard cotton fabric backing and did my first attempt at free motion quilting.  I pebbled this sucker to within an inch of its life.  I really liked the flow of doing pebbles but I find the idea of doing a whole quilt this way daunting.  I think I have found my next challenge.

The back of this quilt is so much fun… because it is for a Ballet fundraiser I had to use this old fabric from my stash…

quilt back

Yep those are pigs in tutus.  This is the photo where I really wish my camera was working so you could really see the joy that is ballet dancing pigs.

I am borrowing a friends Digital SLR while mine is being fixed, so I promise this is the only post with dodgy photos.

Appleville Quilt finished

I managed to finish my Appleville quilt this week… another Project Linus finish for October.    I started this quilt a week or so ago and it was a real challenge for me.

Appleville modern kids quilt

I was using a “cheater” panel for the first time and really wanted to highlight each of the individual illustrations somehow.  Once I had worked out my colour scheme and pulled some appropriate supporting fabric from my stash, the individual blocks came together easily.   My original post on the quilt was full of optimism.   Then  the struggle began for me with how to lay them out.

Appleville qulit detail

I had never worked with this much white/negative space before.  My design wall was a blessing as I moved the blocks around trying to find a flow I liked.  Once I had a layout I was happy with the real hard work began.  It was like doing a jigsaw puzzle piecing in the white Kona cotton.  The top part of the quilt took me ages to put together but by the bottom section I was an old pro.  There are even some Y seams in this sucker (another first for me).  I would love to hear from anyone who has advice, tricks or tips on doing this kind of piecing.  I know I have a lot to learn.

Appleville quilt detail

With the top all pieced I now had to fill all that negative space with quilting  First off I tried some hand quilting in red thread – I liked it but my wrist is not healed enough to handle that much hand quilting at the moment…. so unpicking number one.

Applieville quiltingThen I quilted  lines inside the blocks and tried a little free motion pebbles in the white space.  I did not like it, and again my wrist was not up to that much pushing and pulling of fabric through the machine… unpicking number 2.   In the end it was straight lines and boxes.

Appleville quilt detail 2

It does the job, but is not as beautiful as I would have liked.  I am still coming to terms with my quilting shortfalls (which is my actual quilting) and my current physical limitations (my darn left wrist).  I am chomping at the bit to do some proper free-motion quilting to build up my skills.

For the back of the quilt I used my favorite printed panel and made it the focal point.

Applieville quilt back

I think it is one of the cutest quilt backs I have done.  And it is all because of this little print.

Appleville quilt back detail

Appleville Quilt Details:

Style:  Modern free form

Fabric:  Appleville by Robert Kaufman & Kona White

Finished quilt size: 47″ x 57″


Floral Crackers Fabulous Finish

I was so excited last night when I took deliver of my finished Floral Cracker’s quilt.   The fabulous Rachel from 2nd Avenue Studios had used her amazing long arm/free motion quilting skills to complete this project for me.

modern scrap floral quilt

I meet Rachel through the Portland Modern Quilting Guild and fell in love with her quilts. She does the most amazing wonky scrappy creative quilts.  I was a huge fan and when she offered to quilt Floral Crackers for me I was beyond excited.  Rachel also makes a lot of charity quilts and also does long arming quilting of charity quilts for the Guild.  Basically she is a rock star.

Floral cracker finished quilt detail 3I made the blocks for this quilt months ago using my black and white stash and lots of crazy floral fabrics.  i raided my Kaffe Fassett stash, my Amy Butler stash as well as my friend Lisa’s stash.  You can find my original post about the block, along with pattern links on how to make it here.

Floral cracker quilting motif

Rachel used a wonderful free motion flower pattern for the quilting.  The shape is very  “Kaffe” and mirrors several of the fabrics in the quilt.

Floral Cracker quilting detail

I struggled to get decent pictures that do the quilt and quilting justice.  Why do photos never capture the true beauty of a quilt?

Floral cracker finished quilt detail

To back the quilt, Rachel went with a gorgeous light orange dot solid.  It is the perfect simple accompaniment to the crazy busy front.

Floral Cracker quilt back

Rachel also kindly did the binding for me on this quilt with her new Bernina binding magic thingy…. and I love it almost as much as I love the quilting.  As a nod to me she used Kaffe Fassett’s “Aboriginal Dot” fabric.

Floral Cracker binding detail

I know it is kind of cheating but I am counting this as one of my October Project Linus quilts… I did make the top!

FLORAL CRACKER DETAILS:

Technique:   Paper Piecing

Finished Block size:  7 inches

Quilt size:  56″ x 70″