Appleville Quilt finished

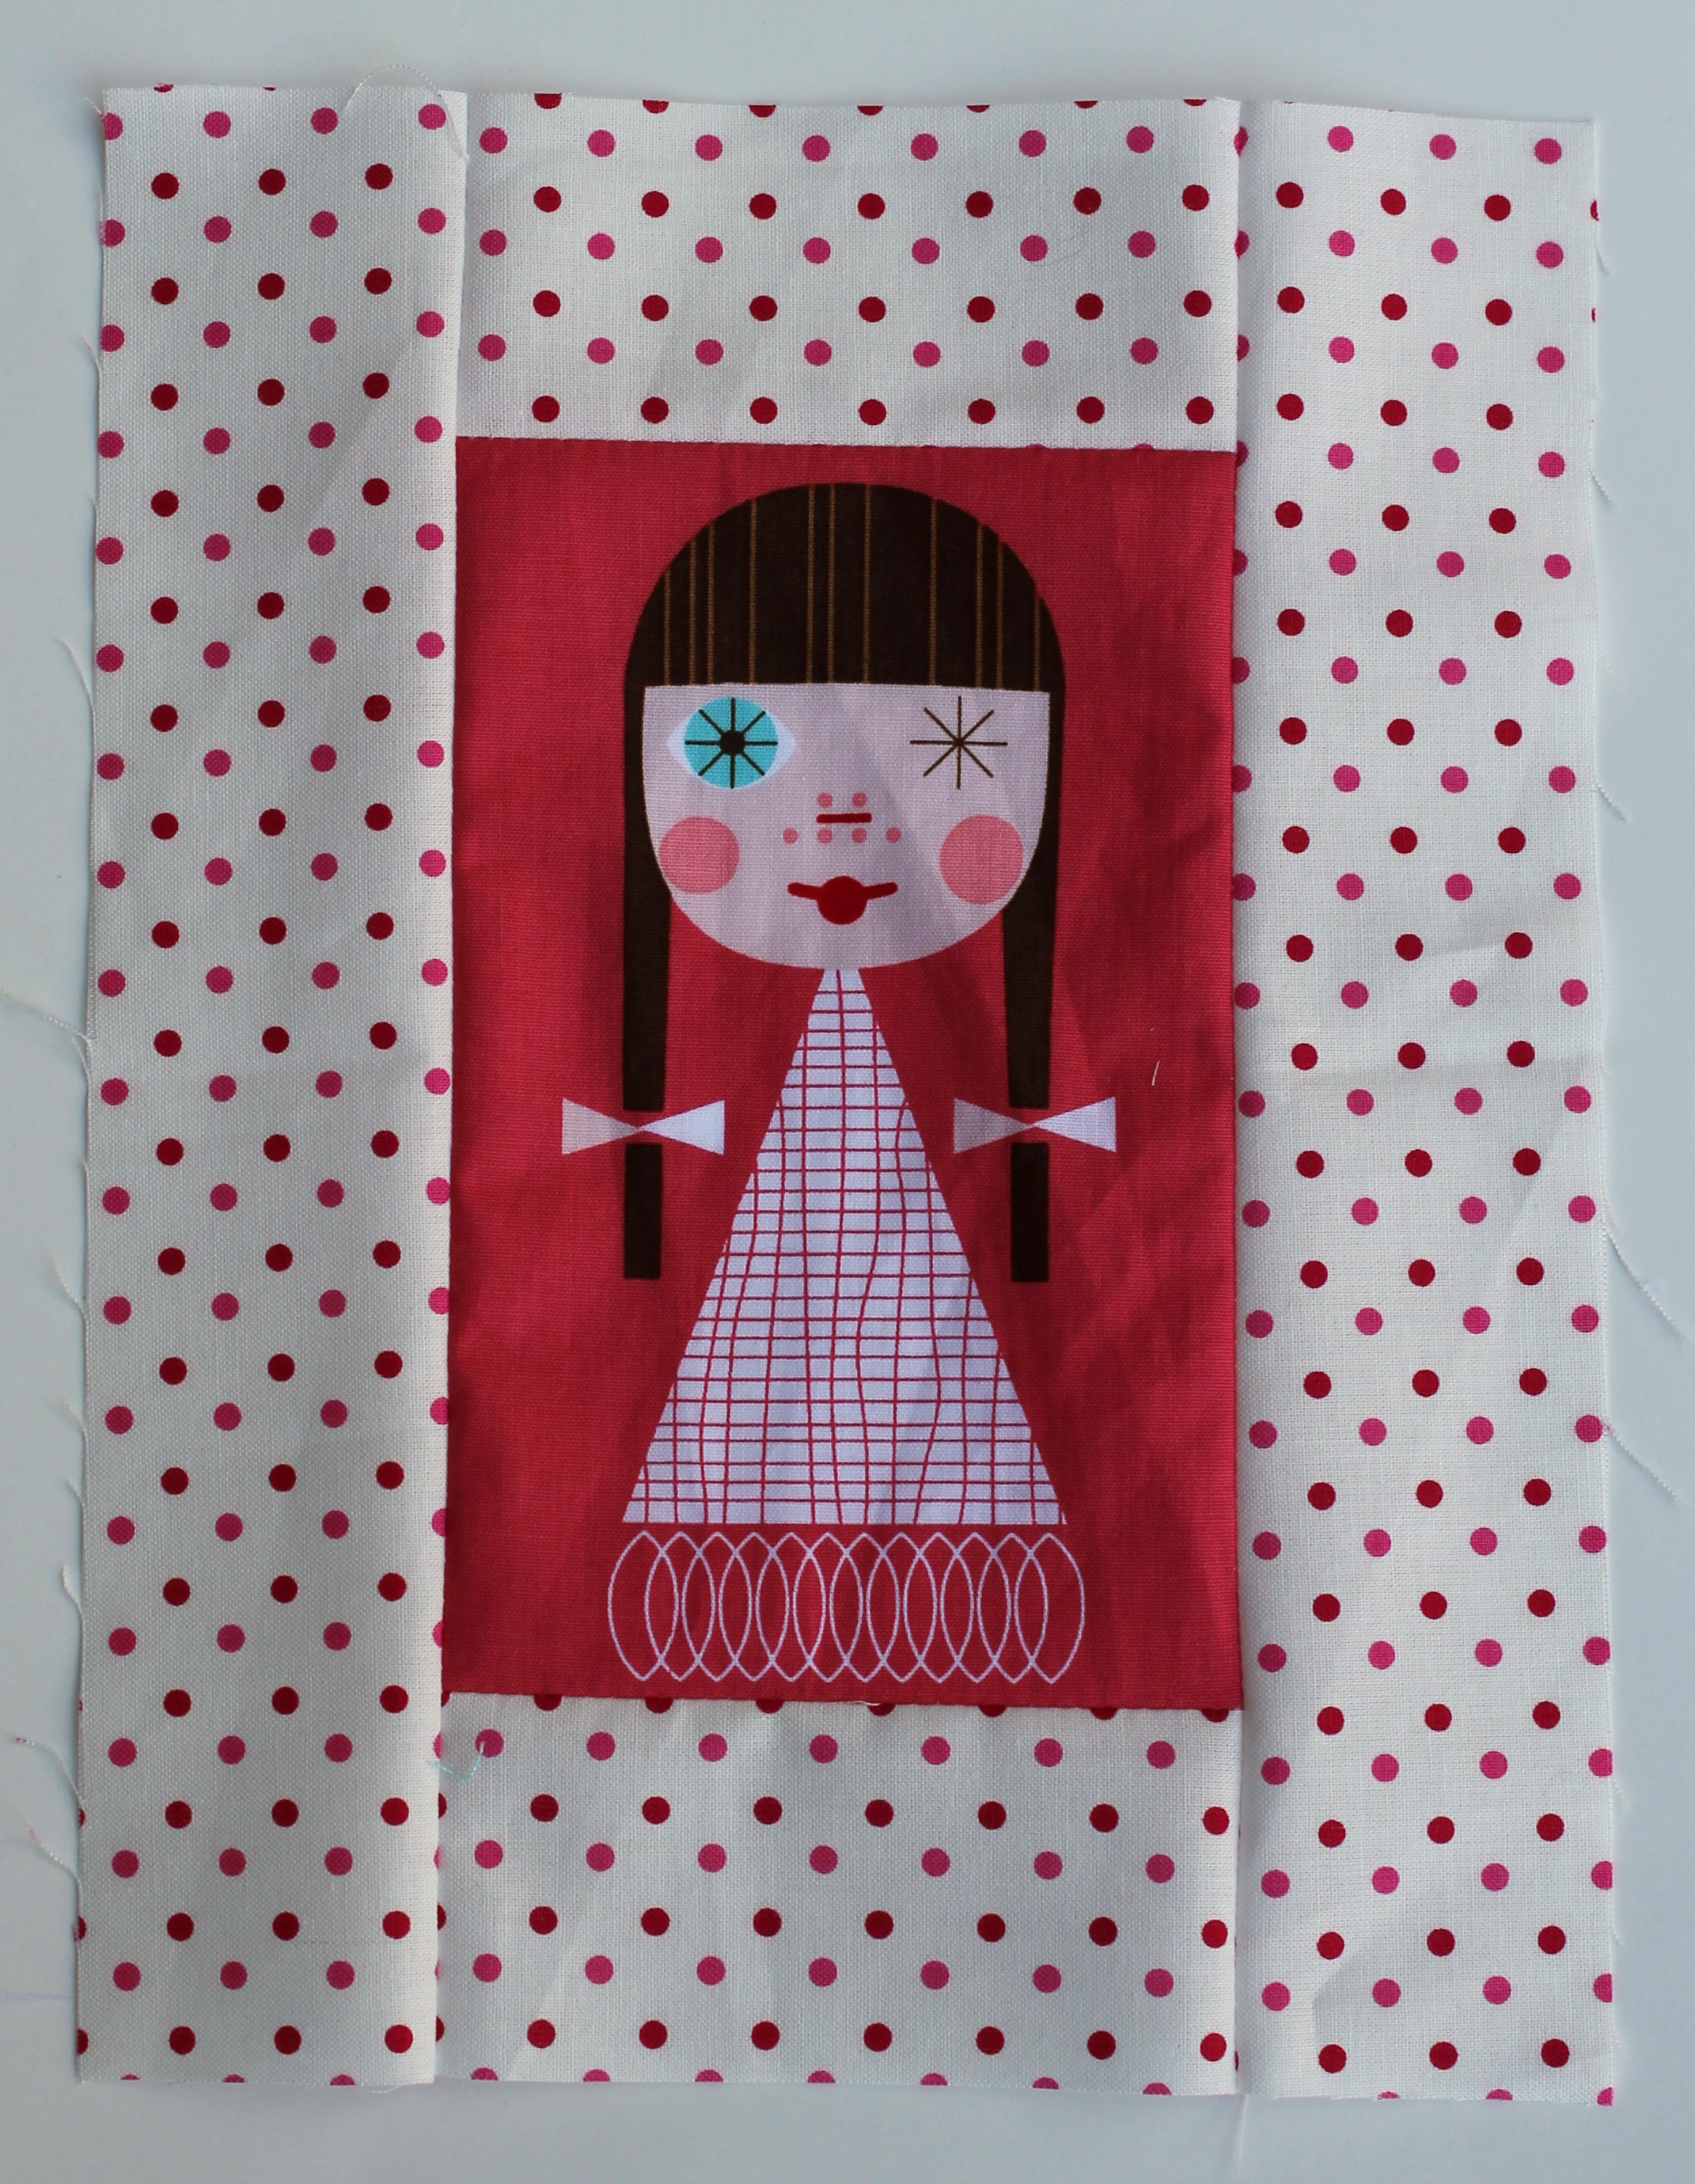
I managed to finish my Appleville quilt this week… another Project Linus finish for October.    I started this quilt a week or so ago and it was a real challenge for me.

Appleville modern kids quilt

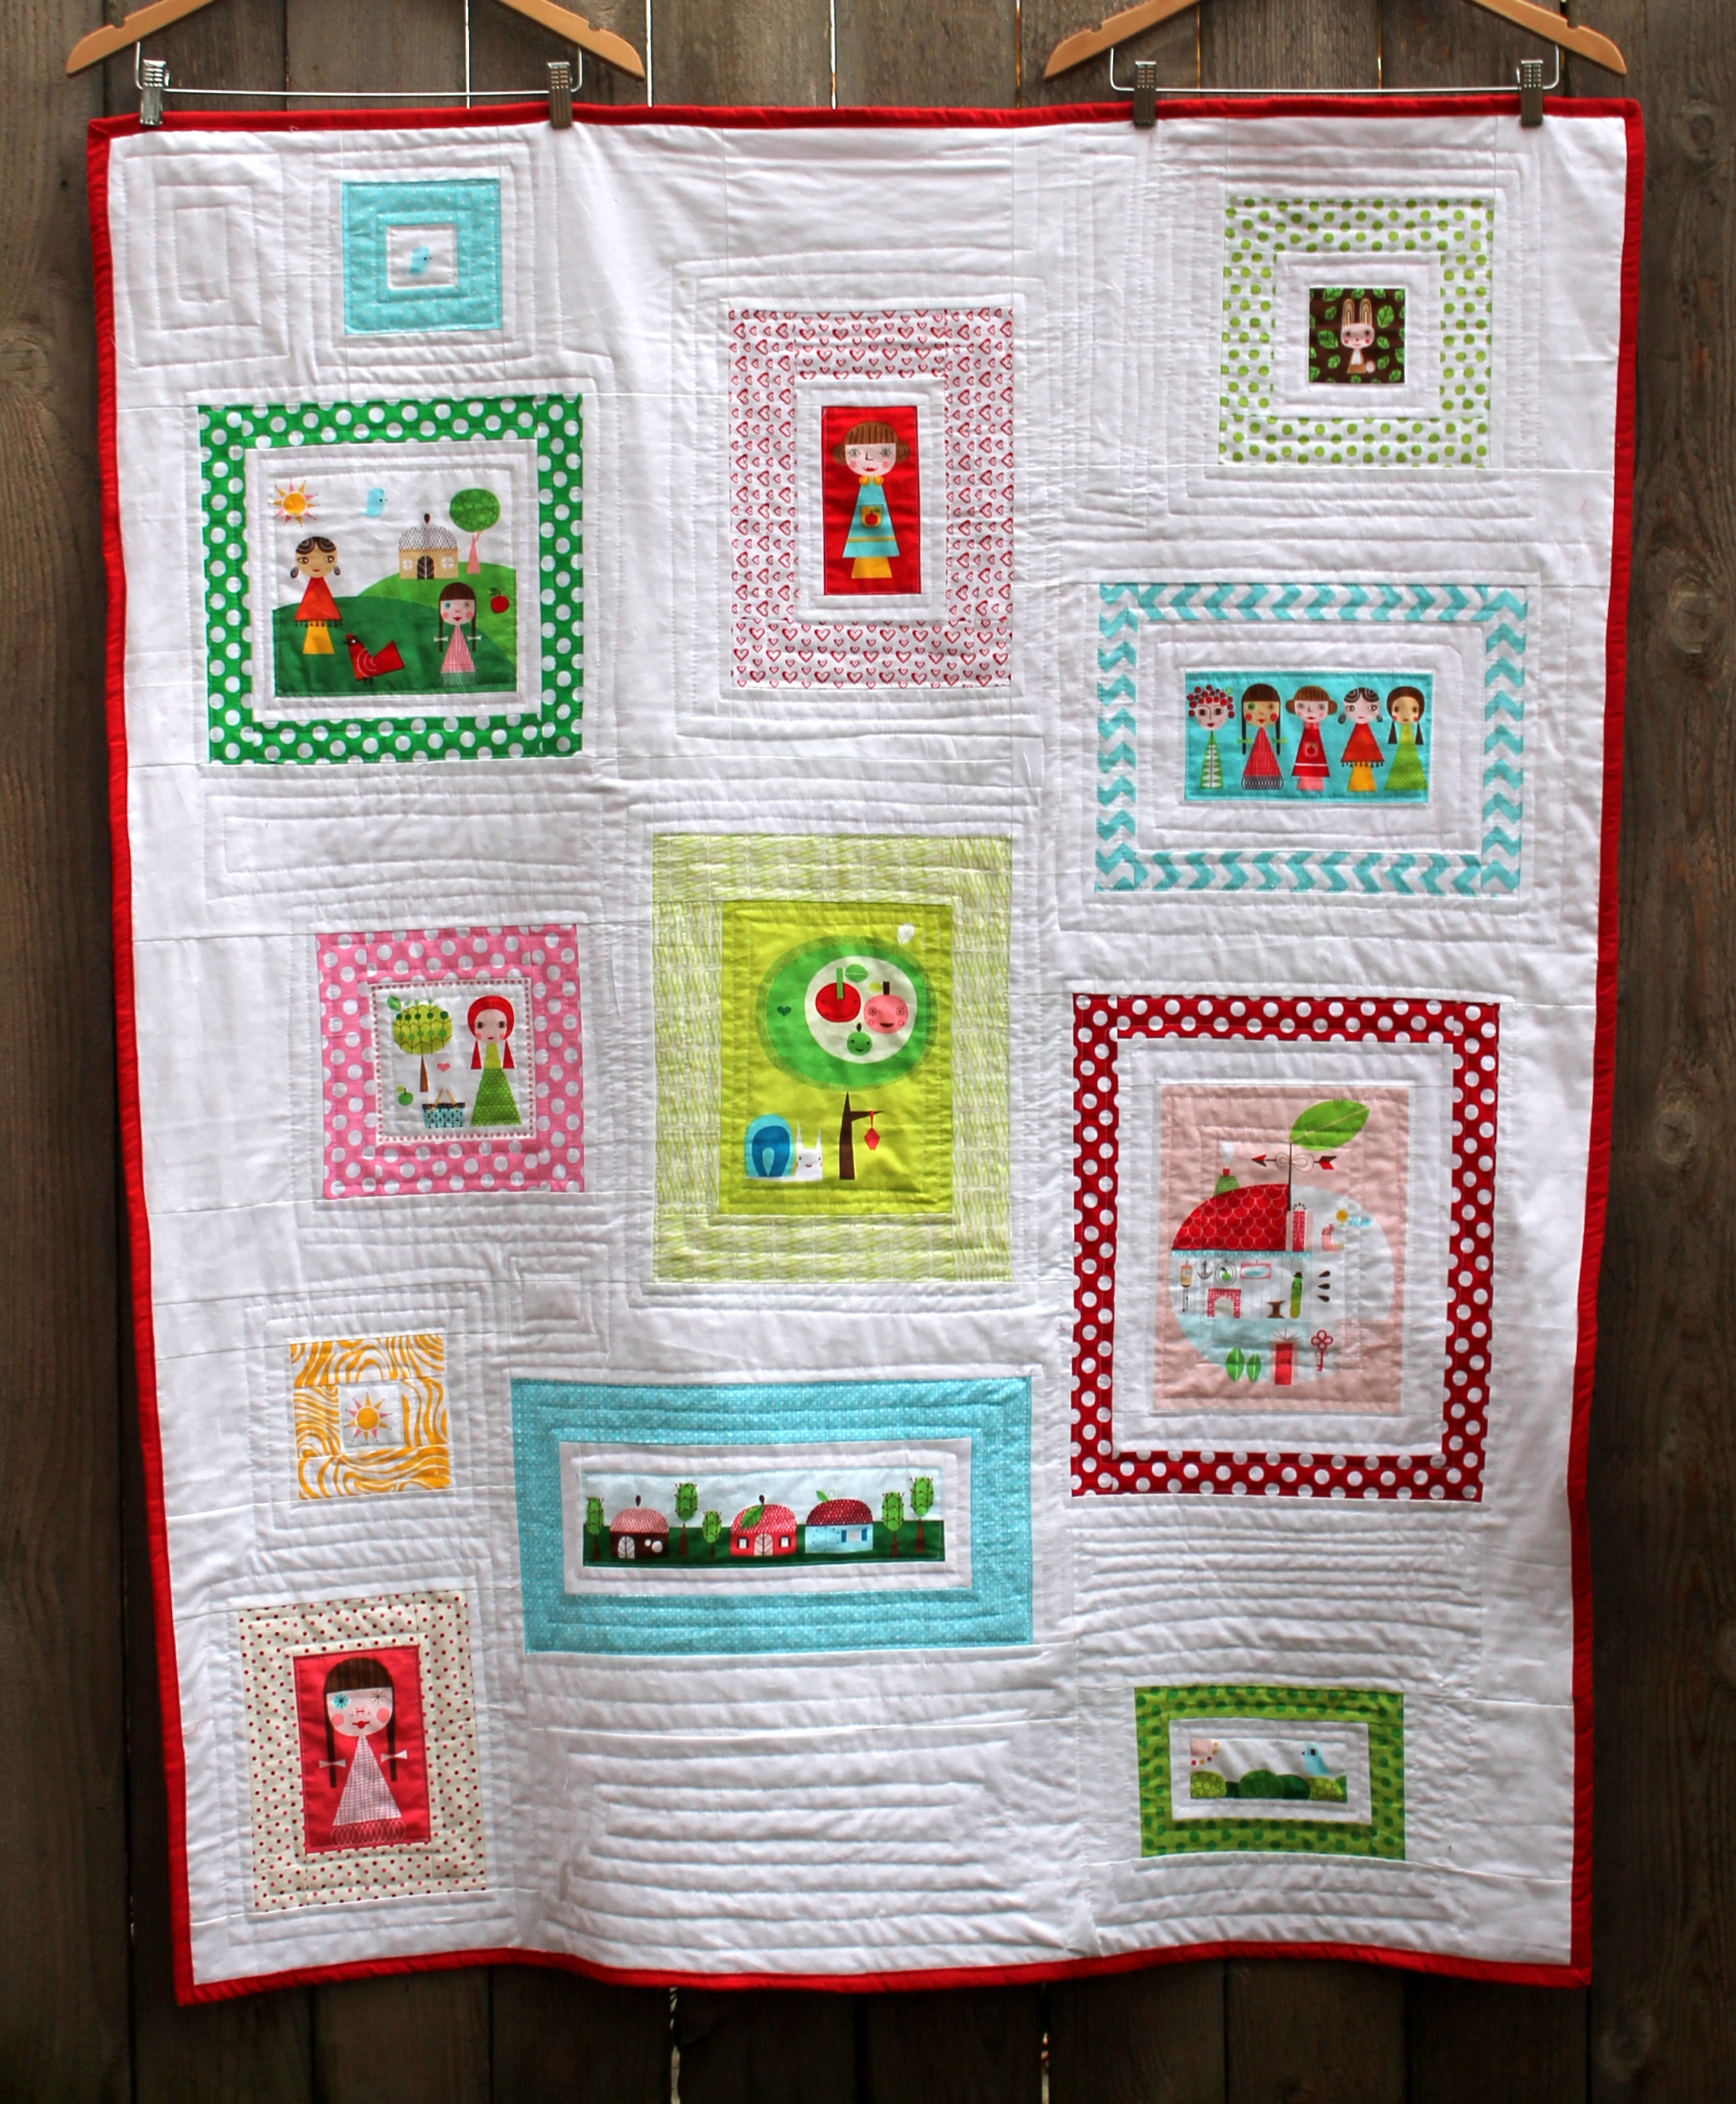
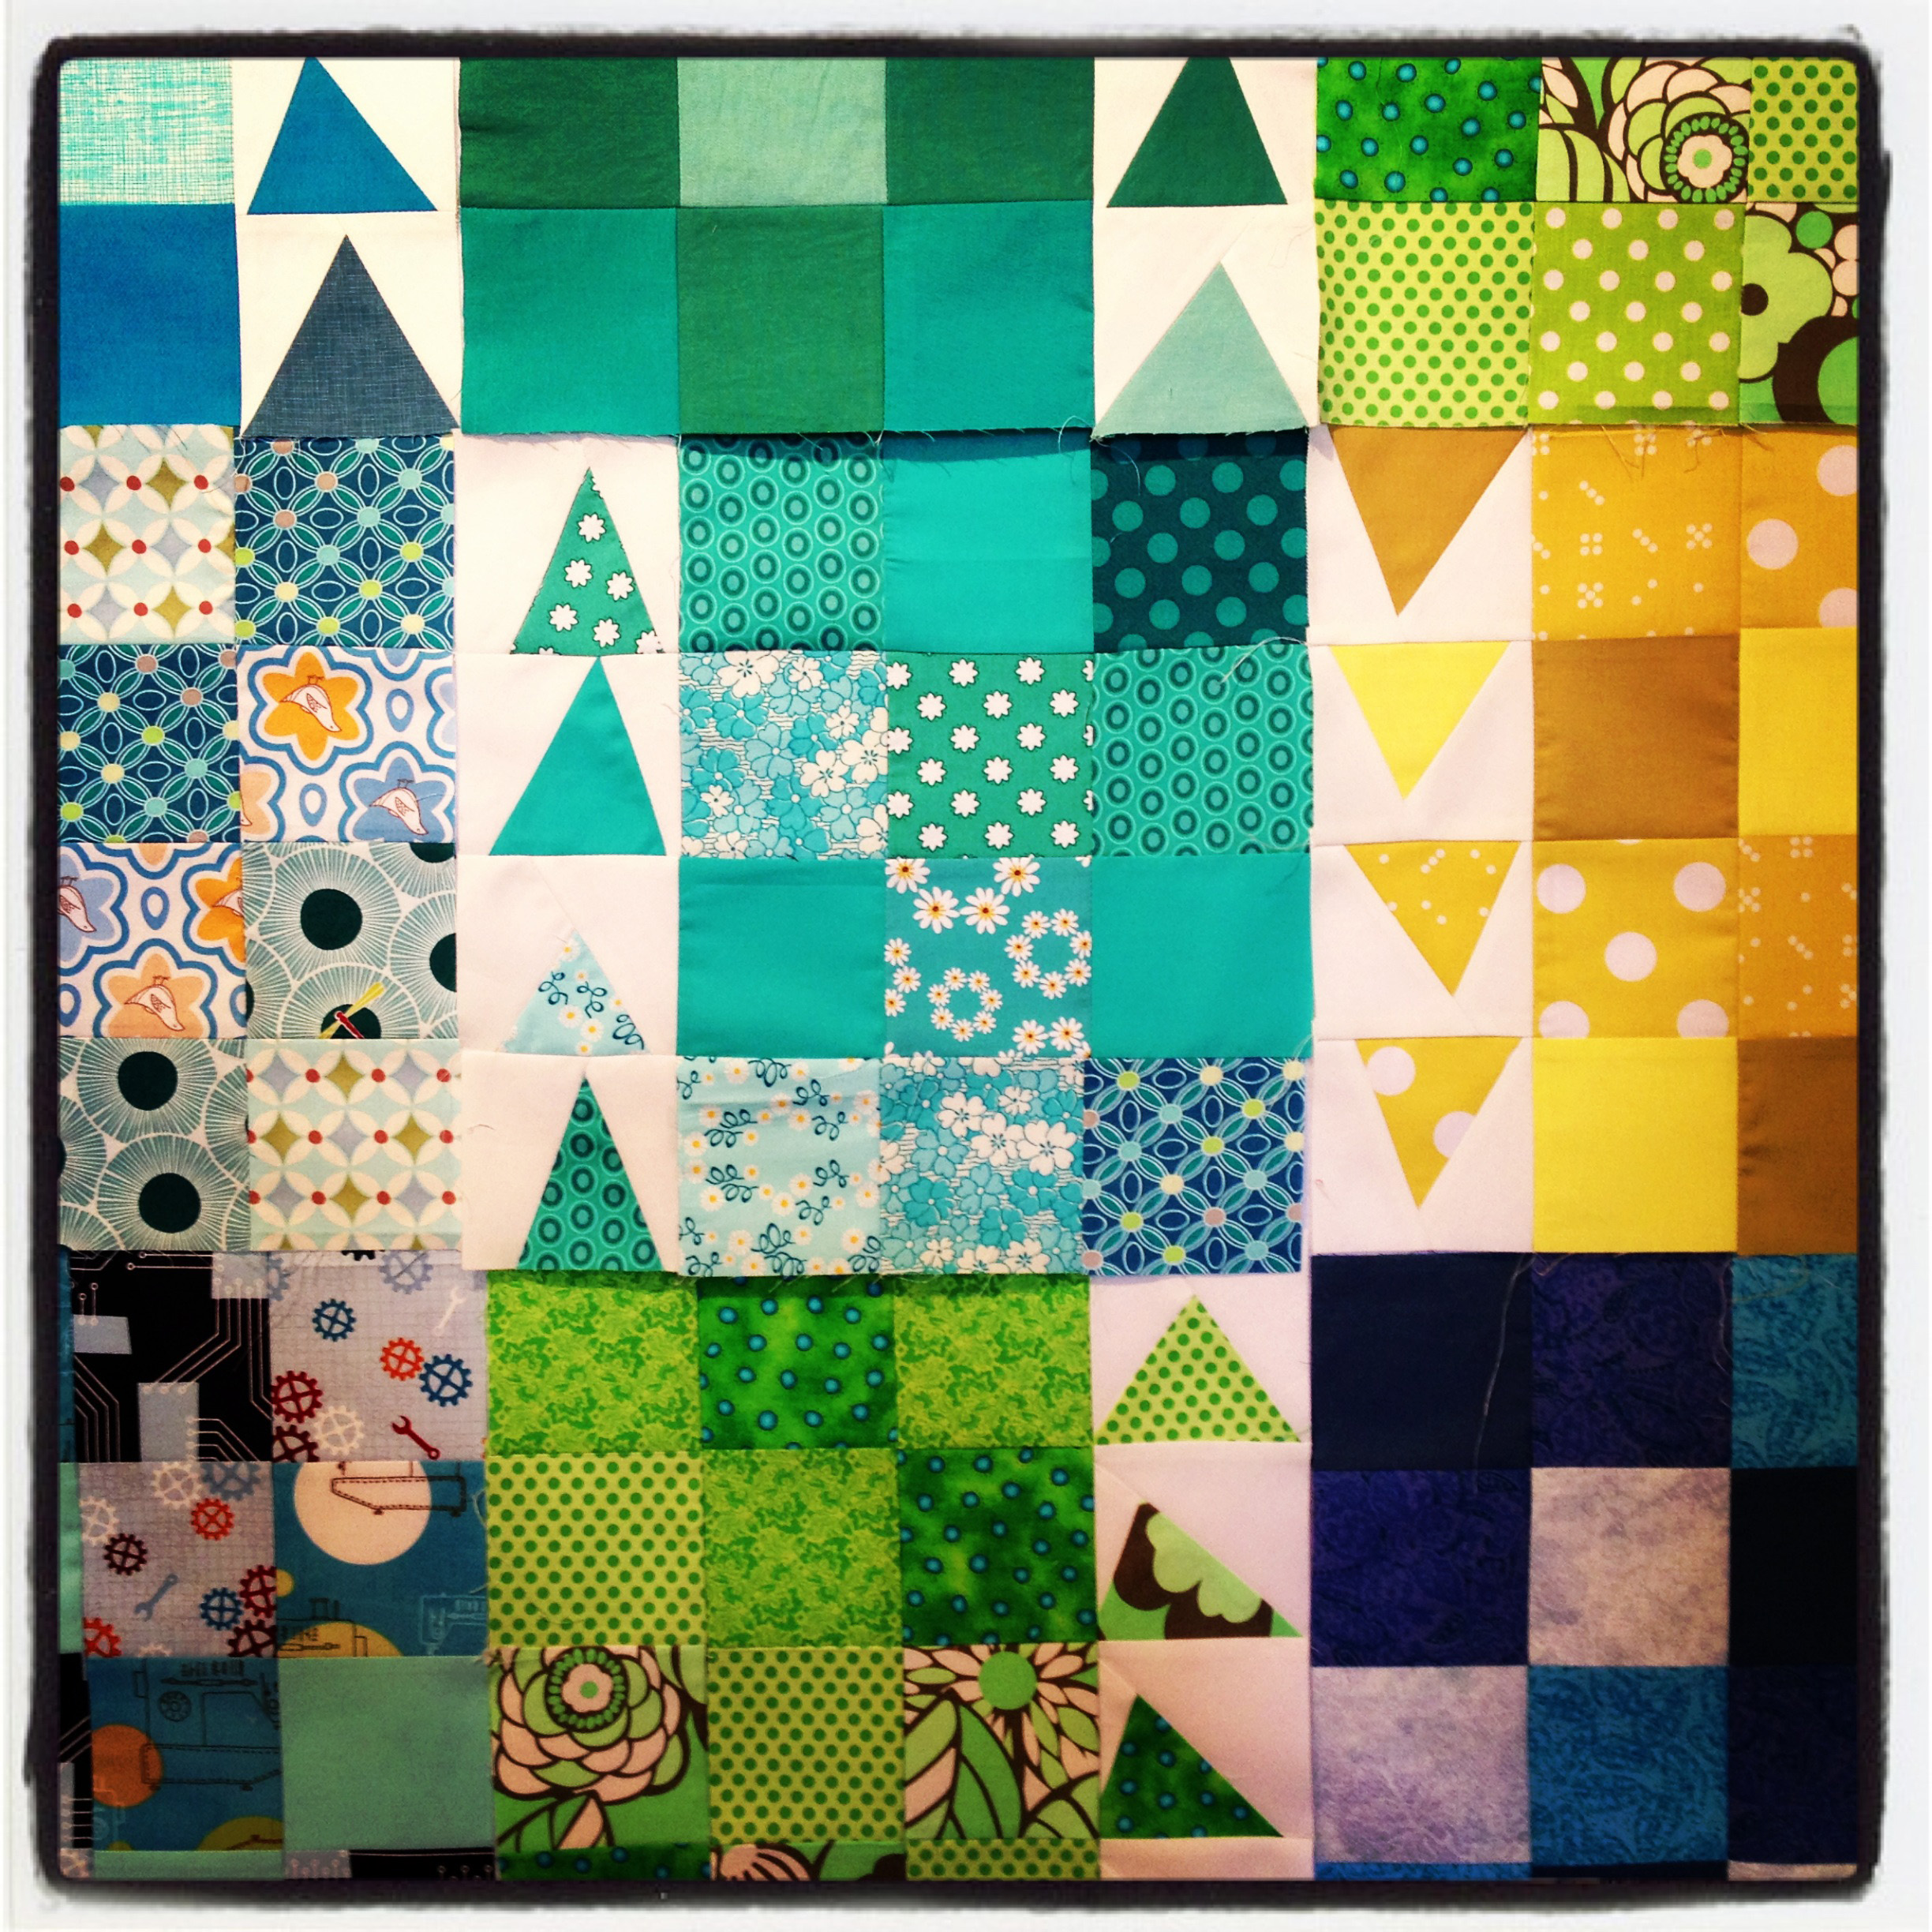
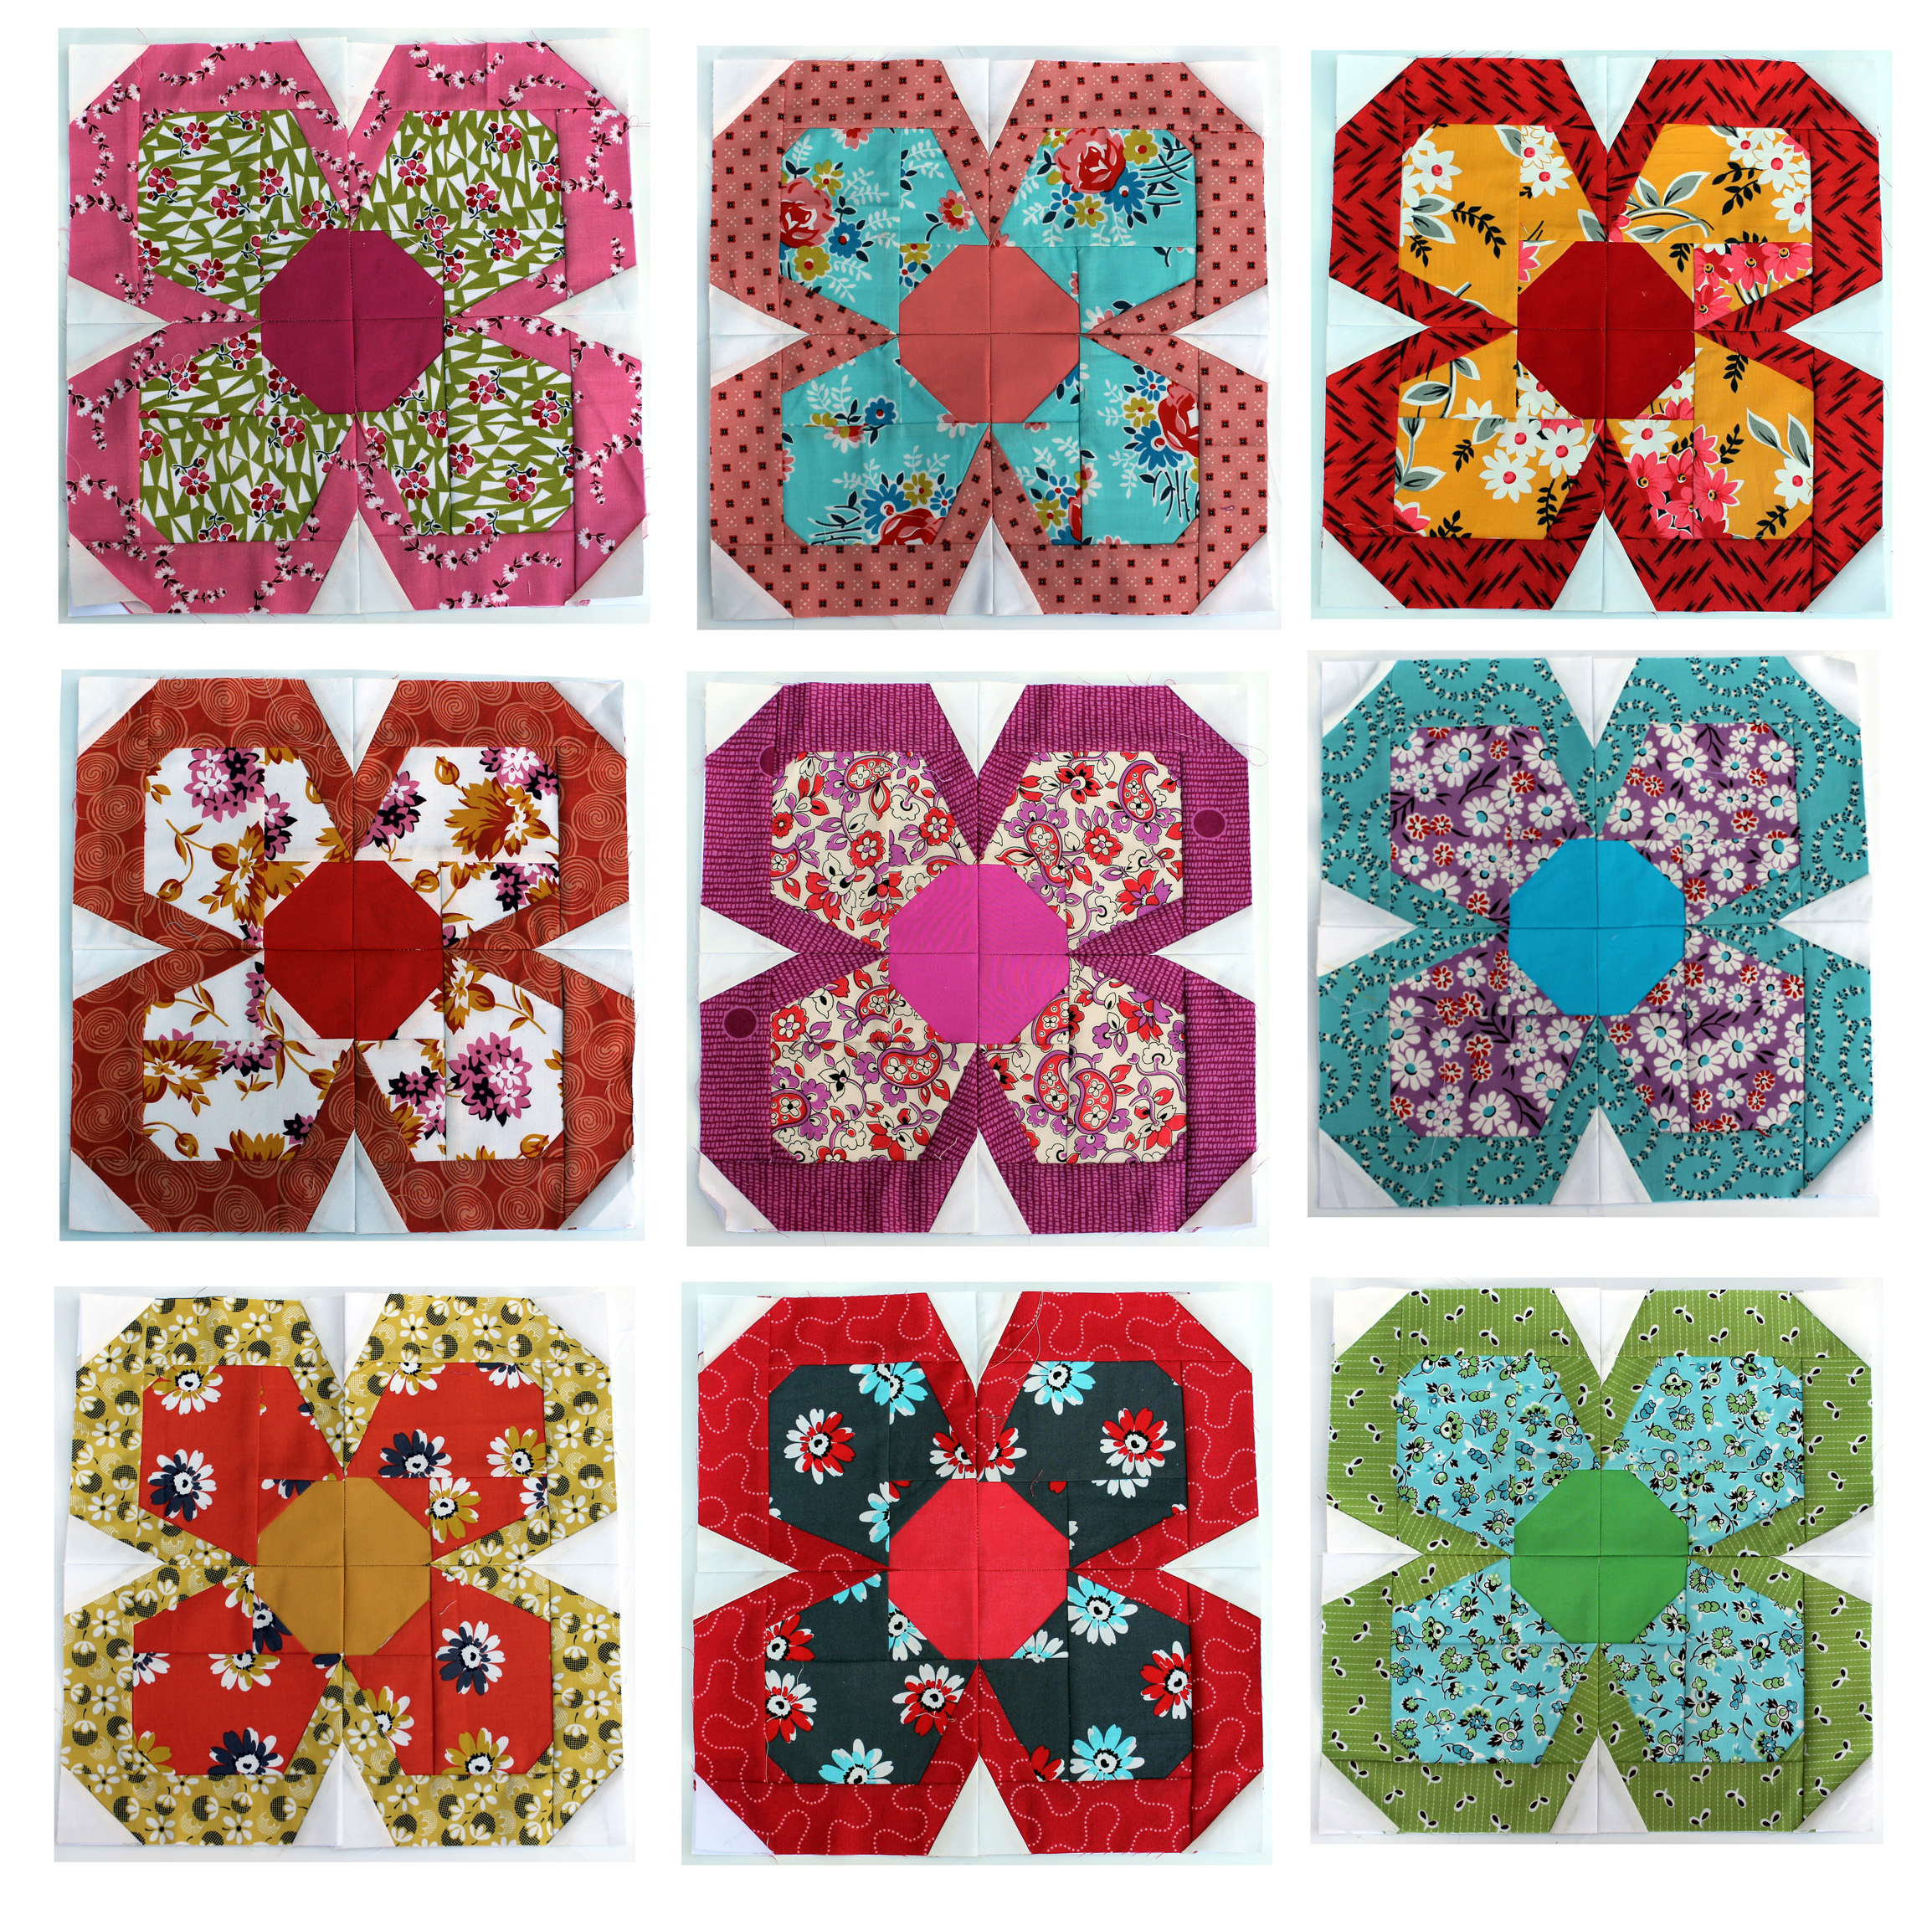
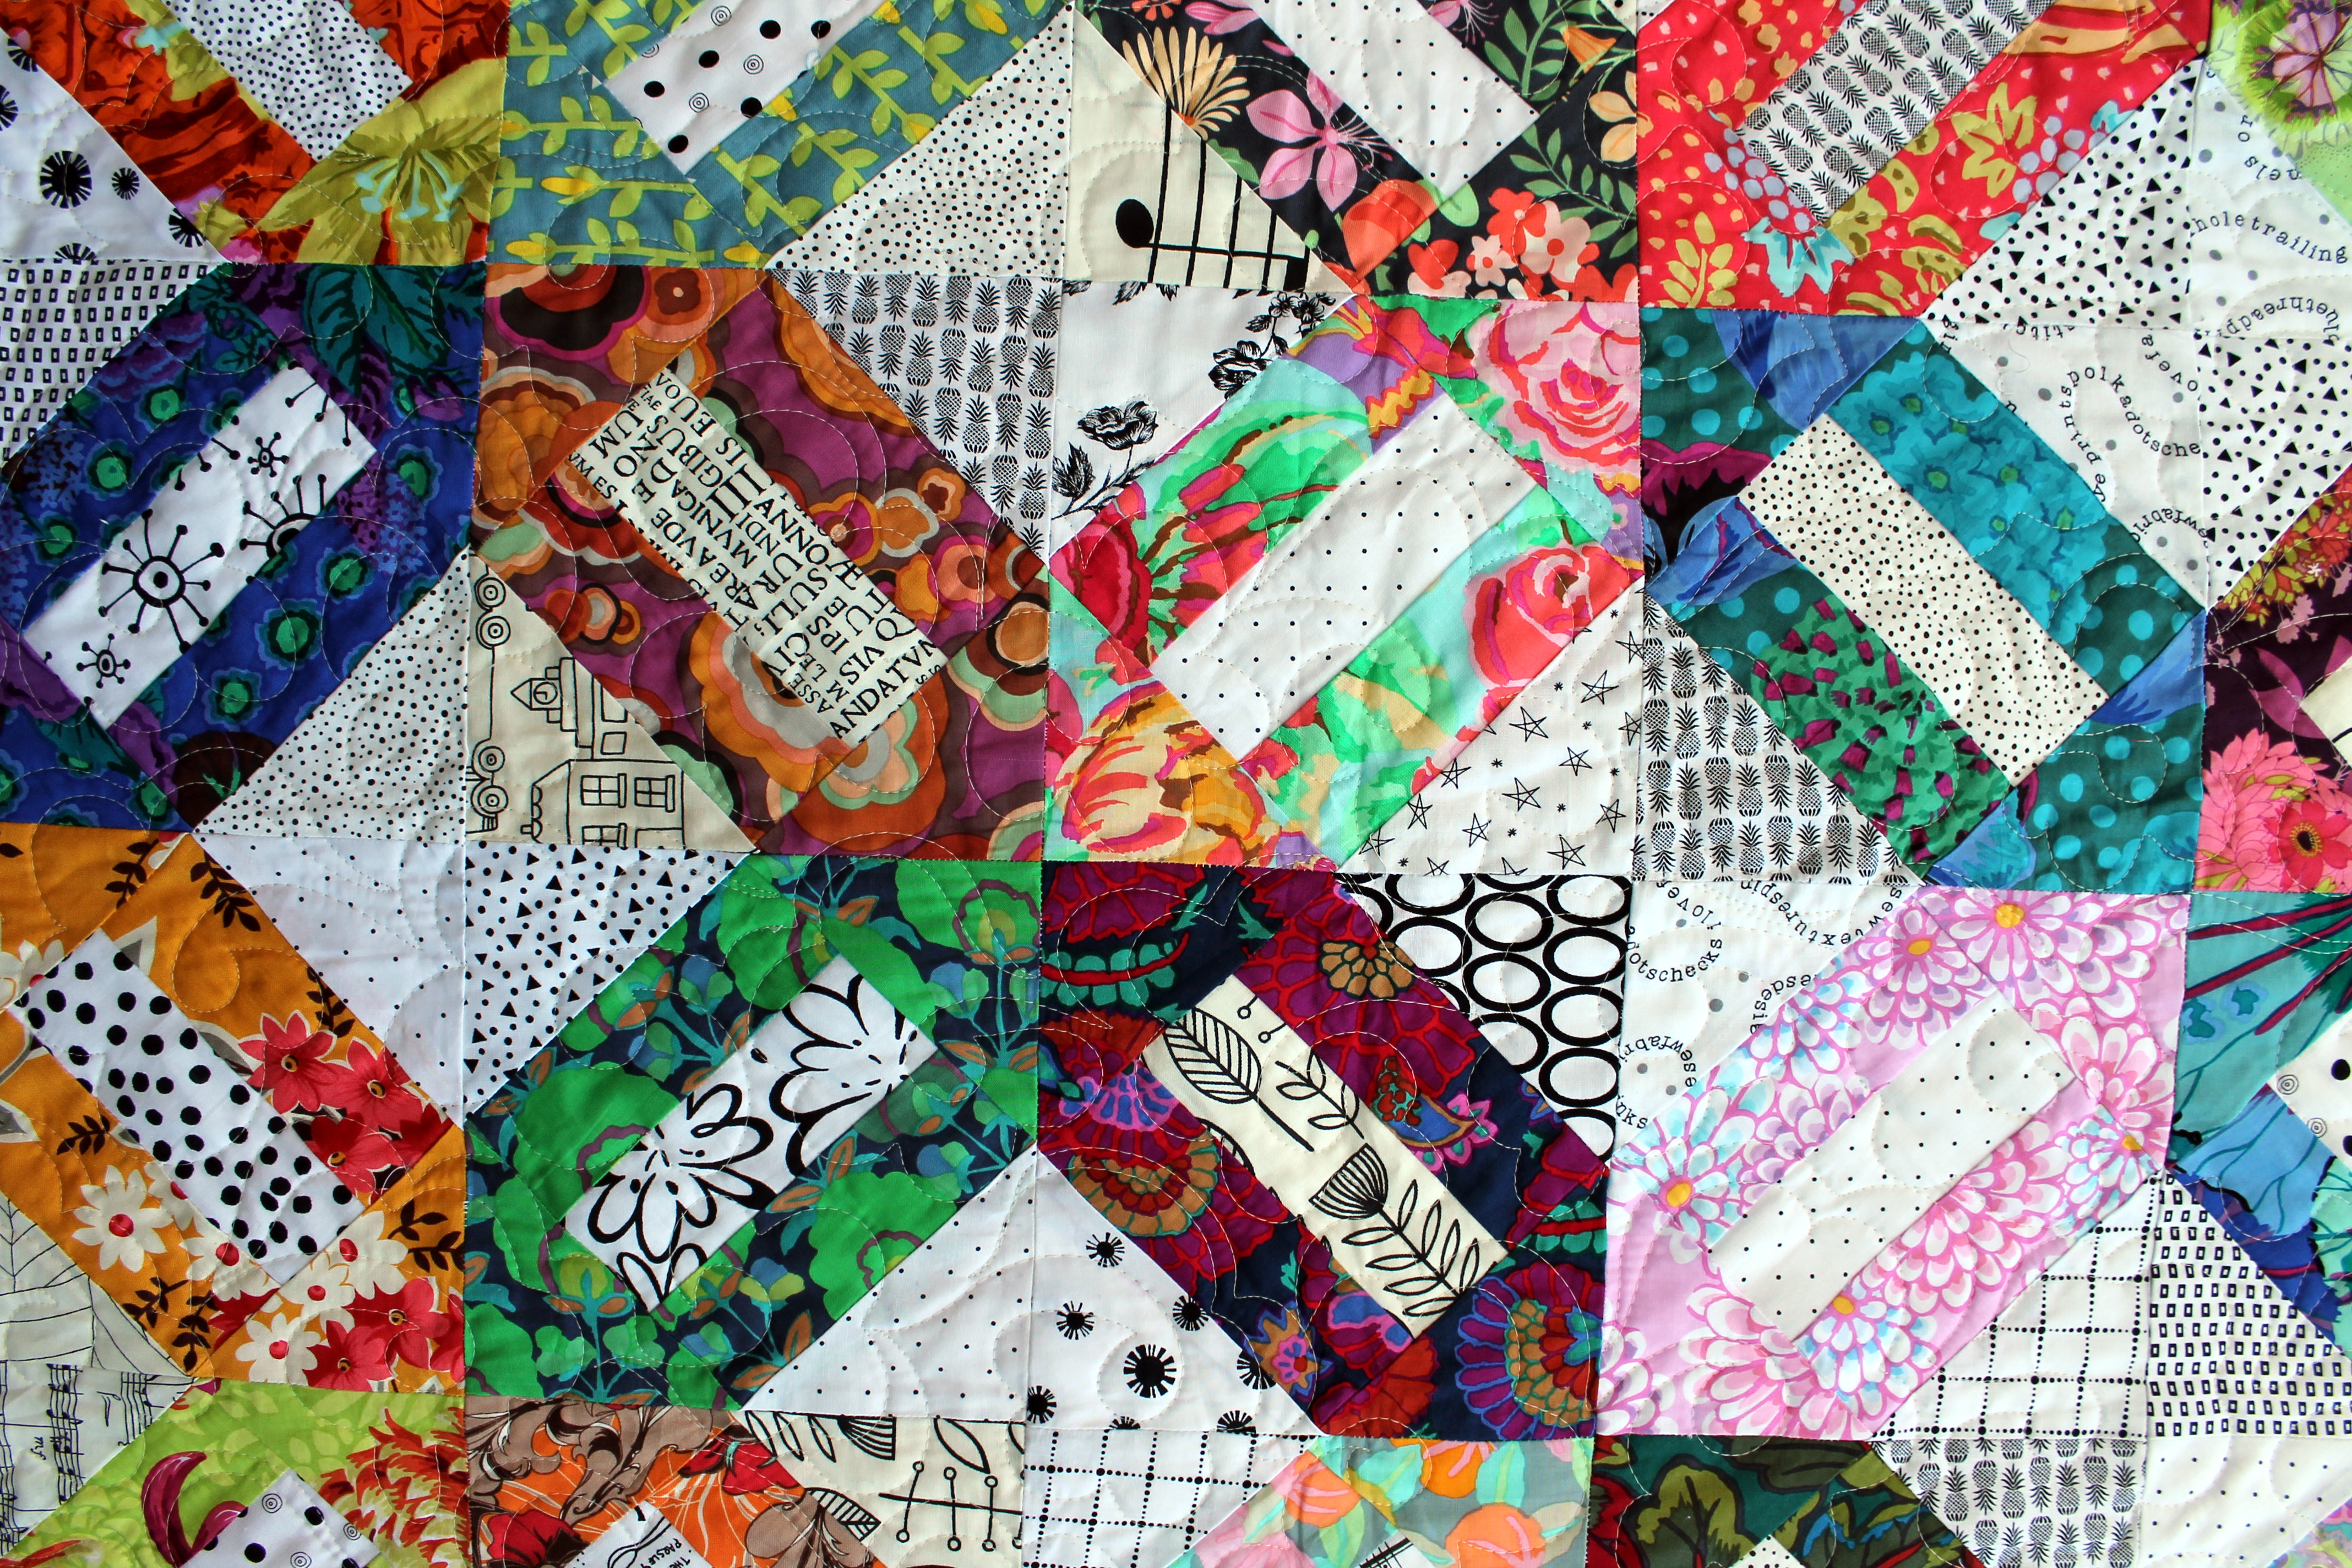
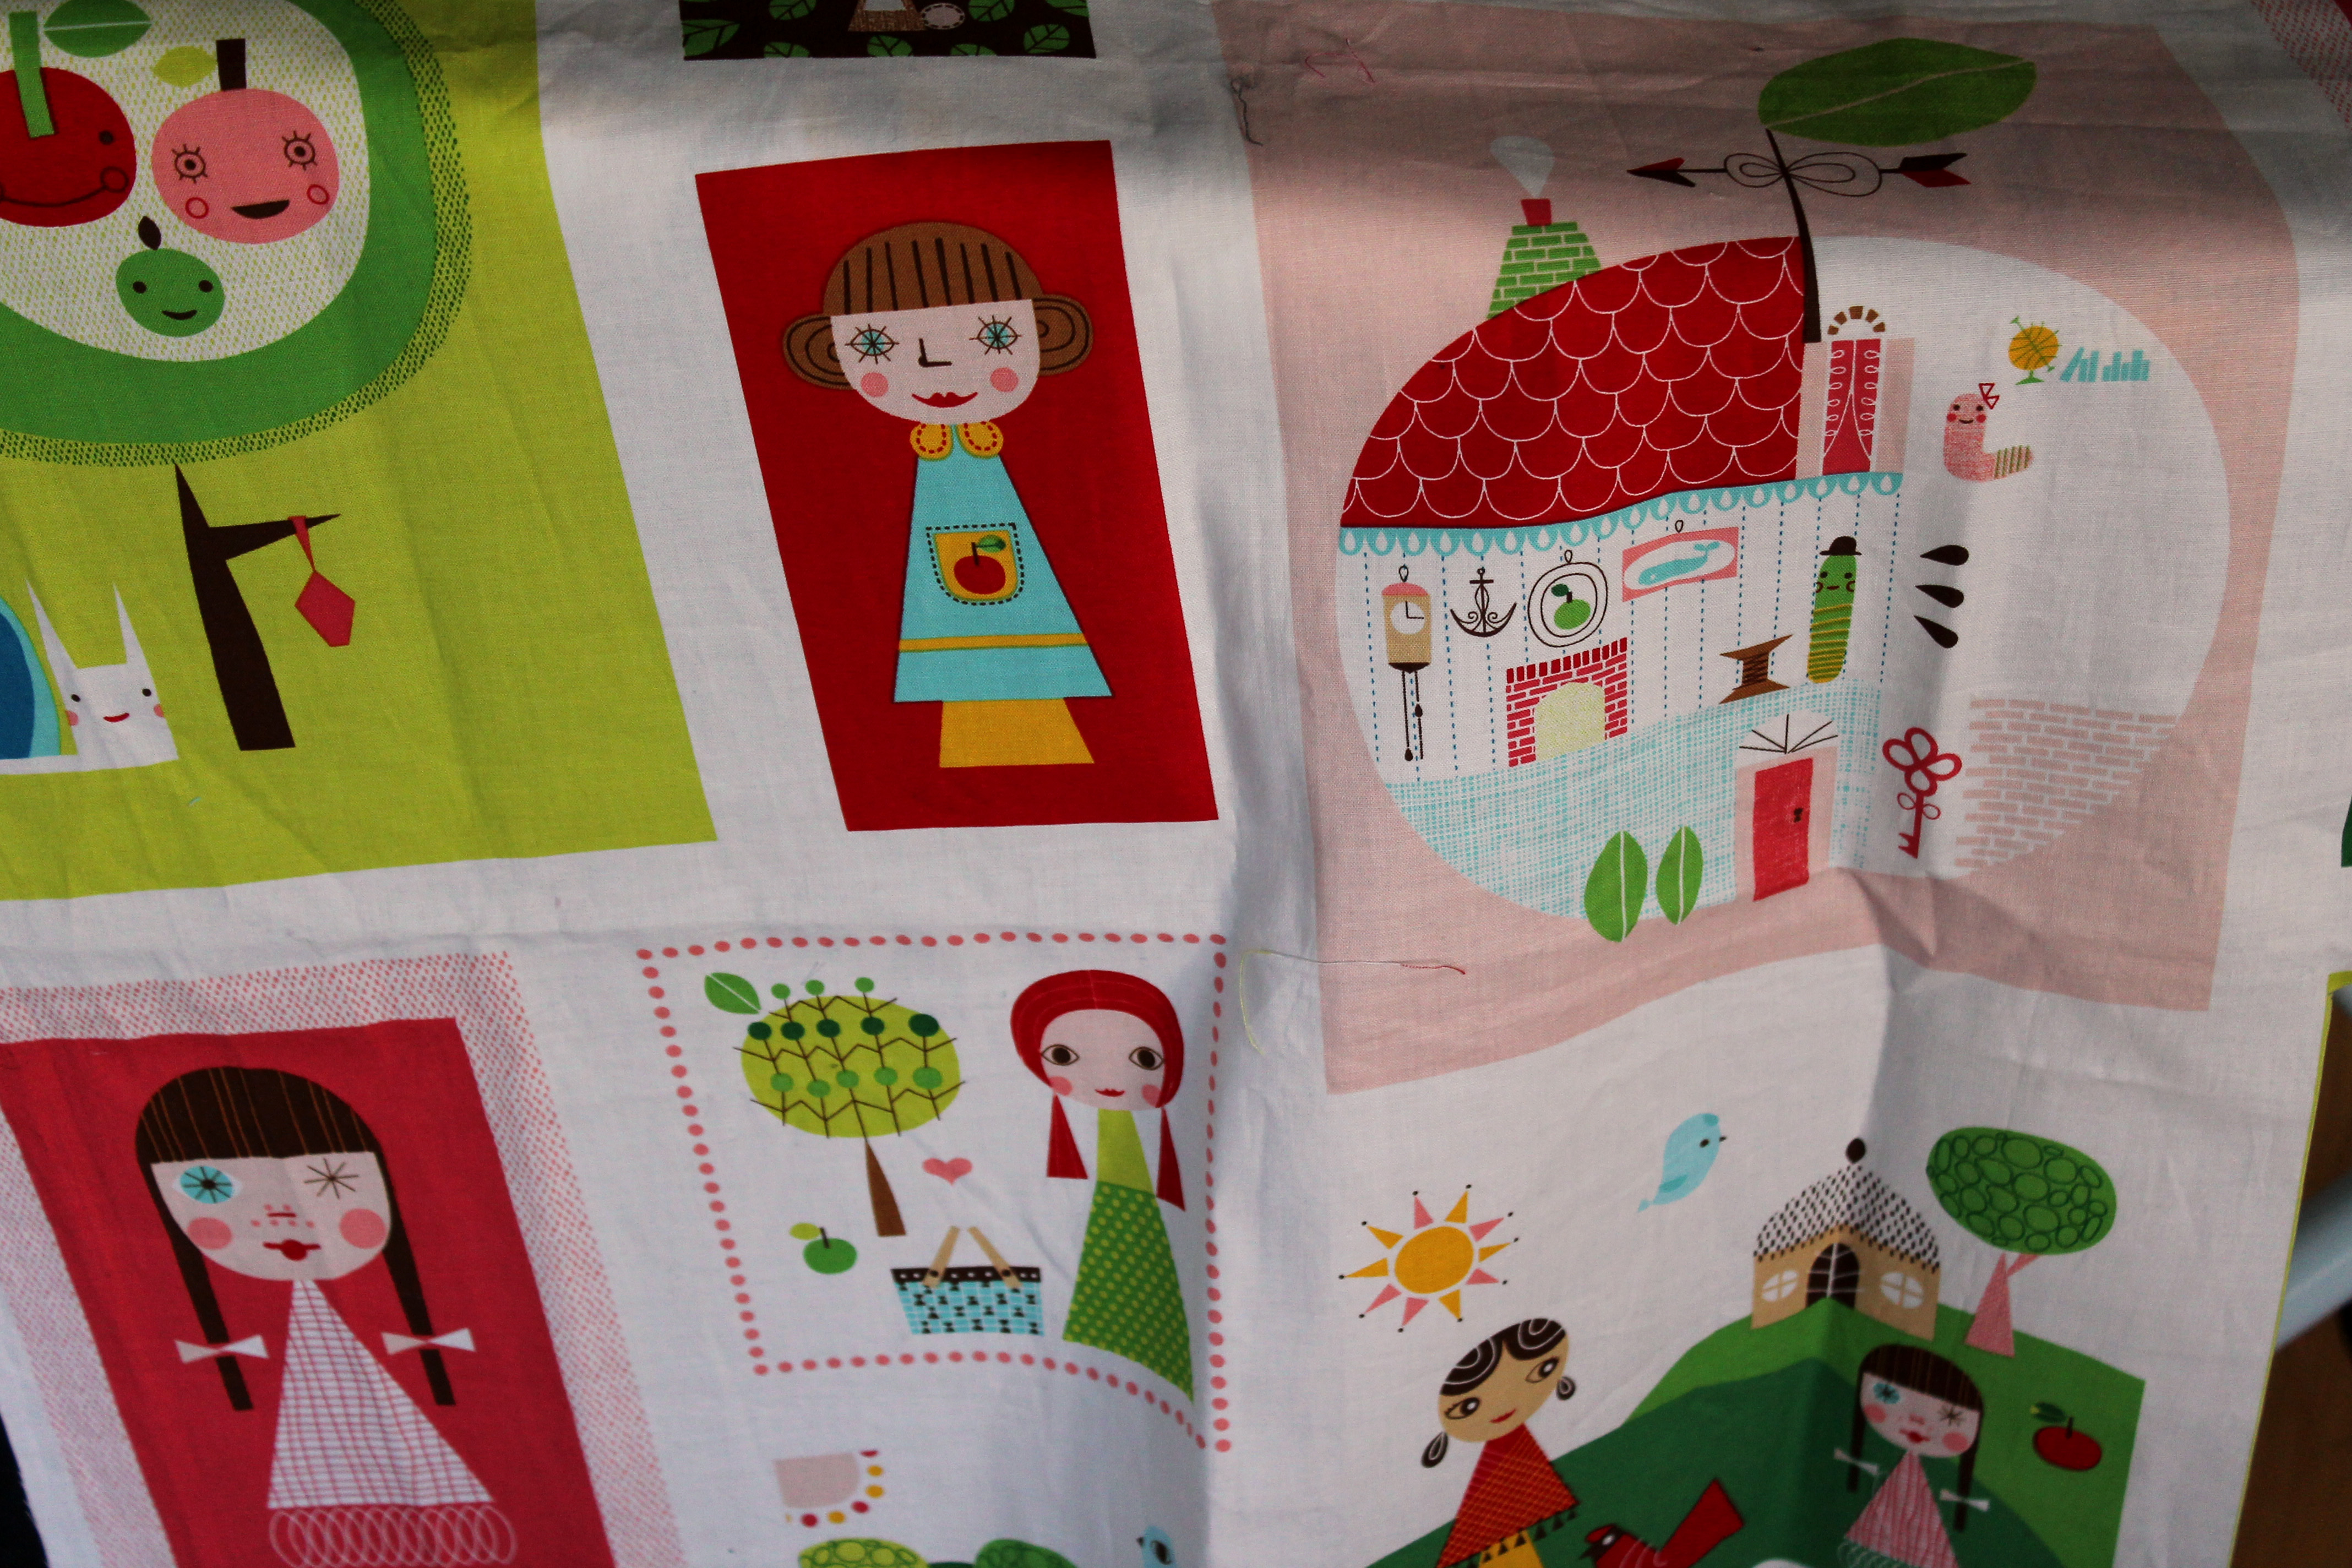
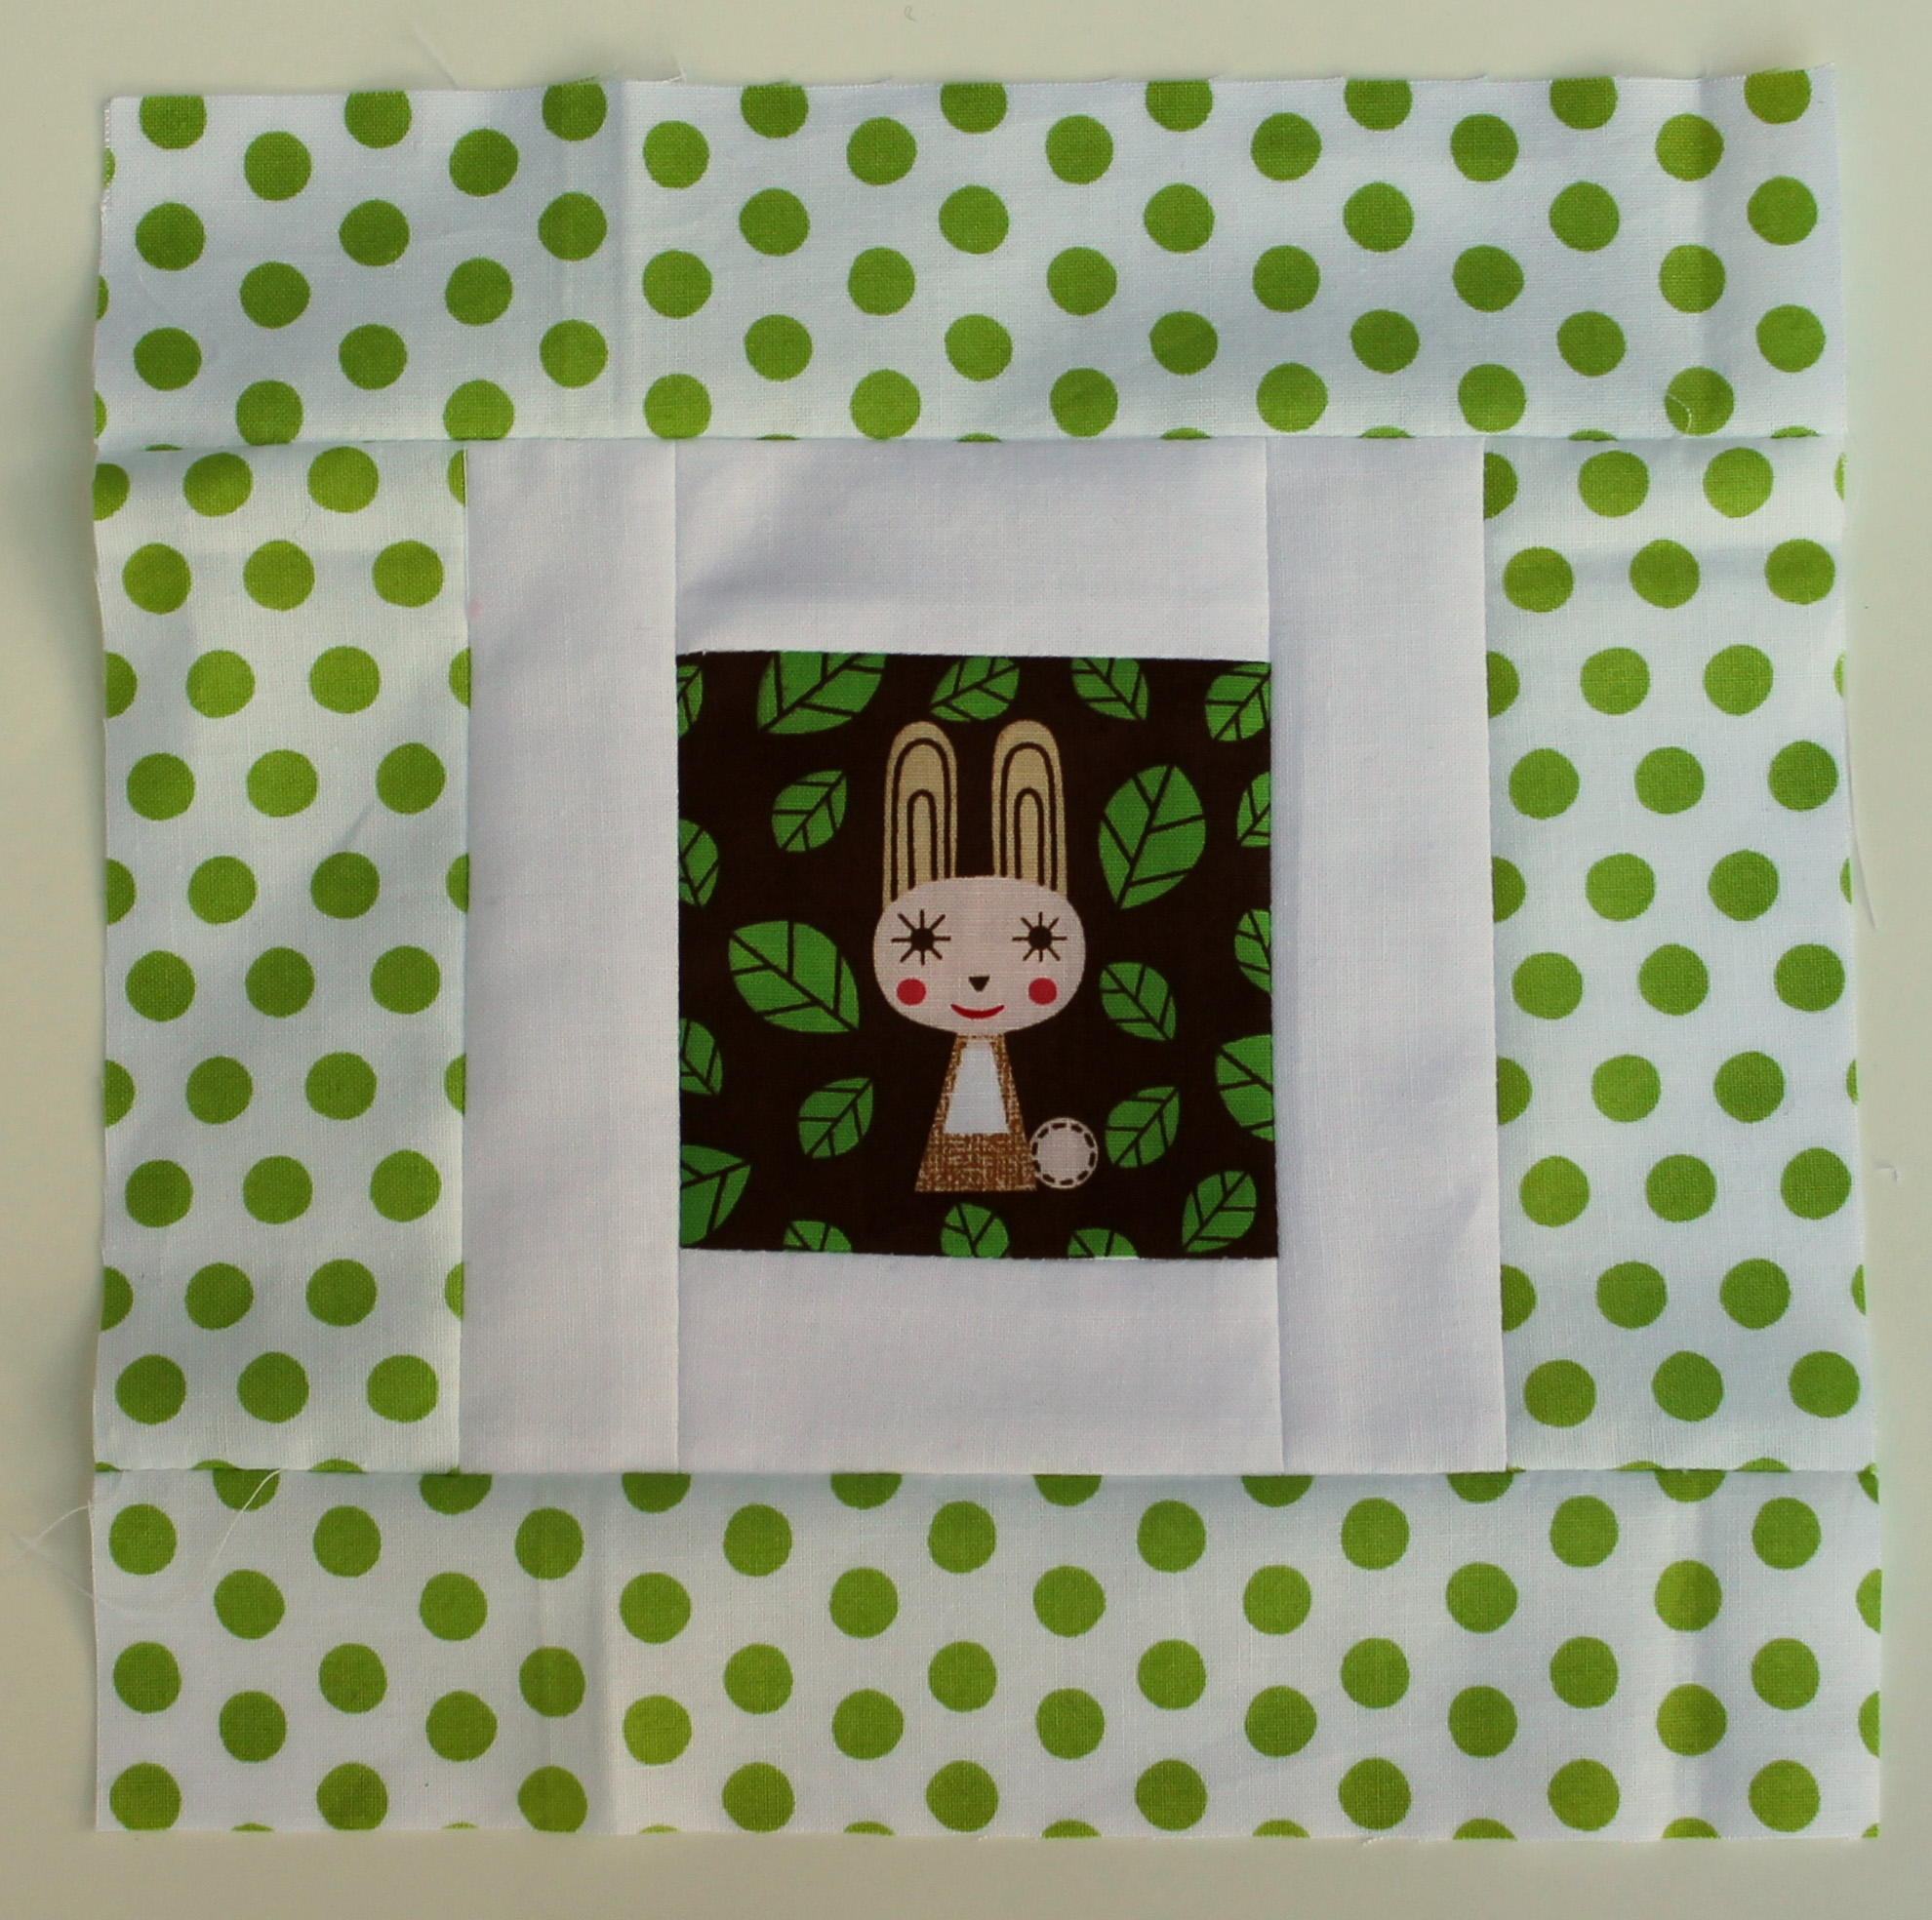
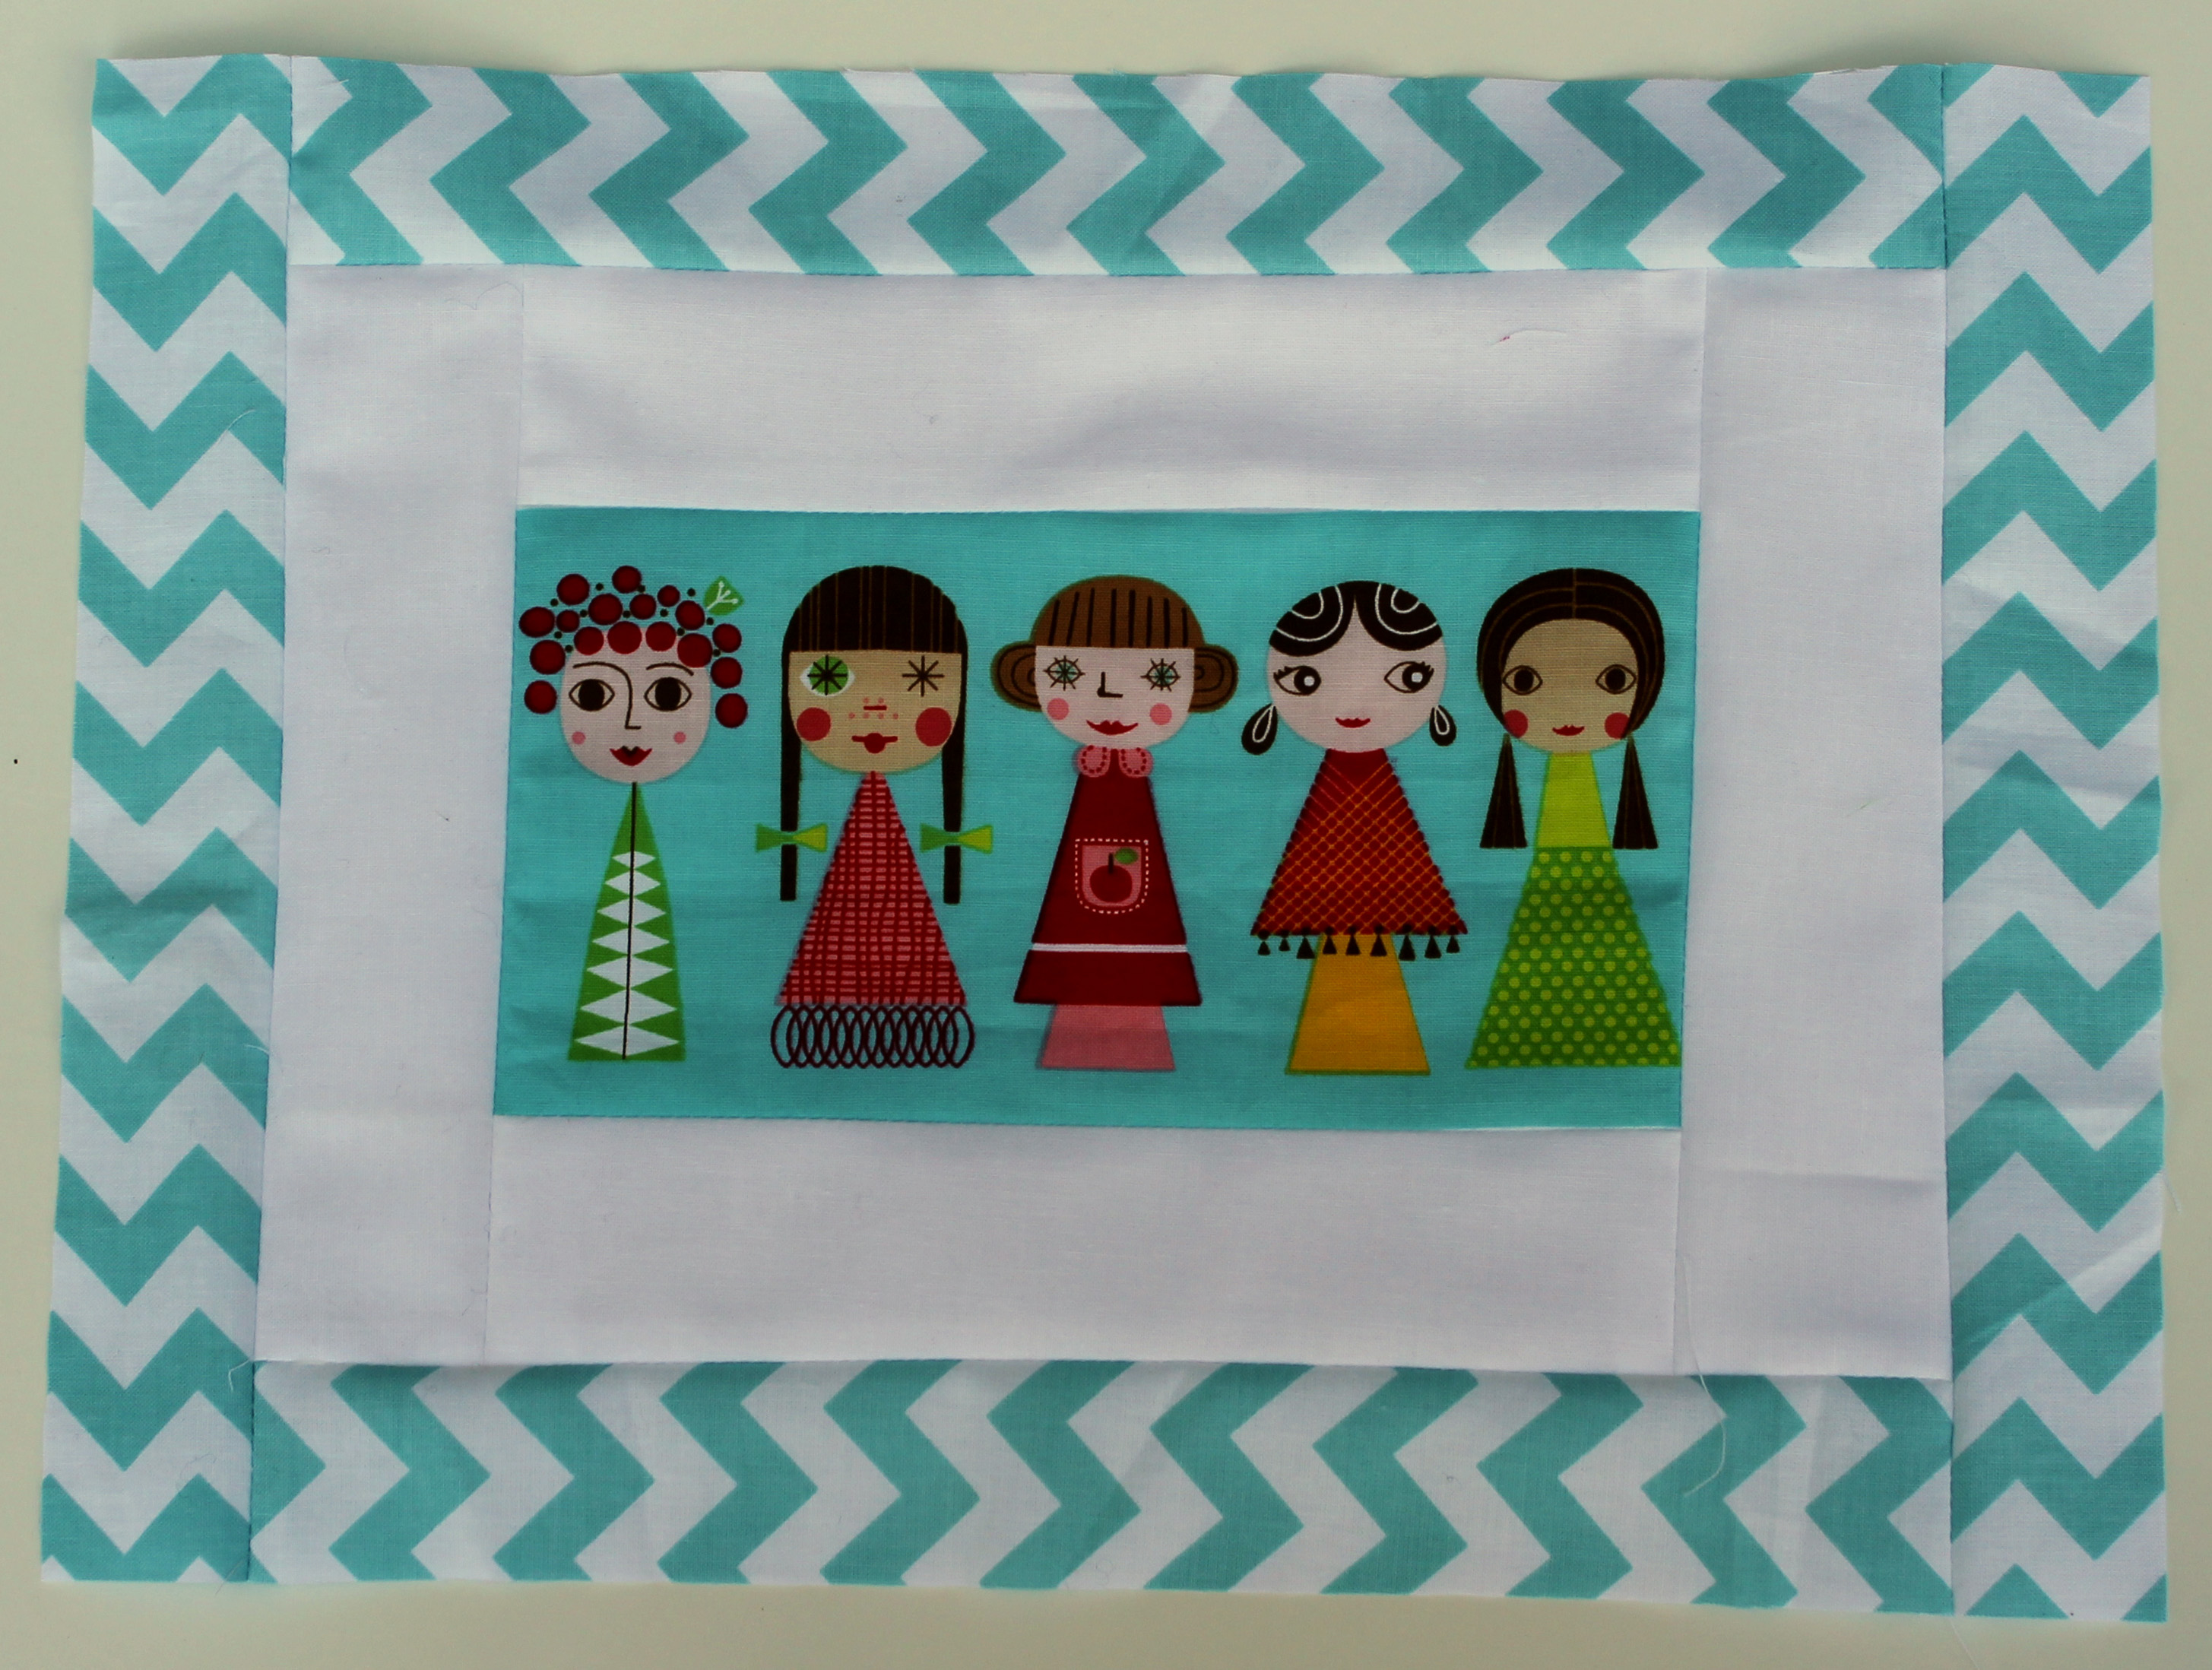
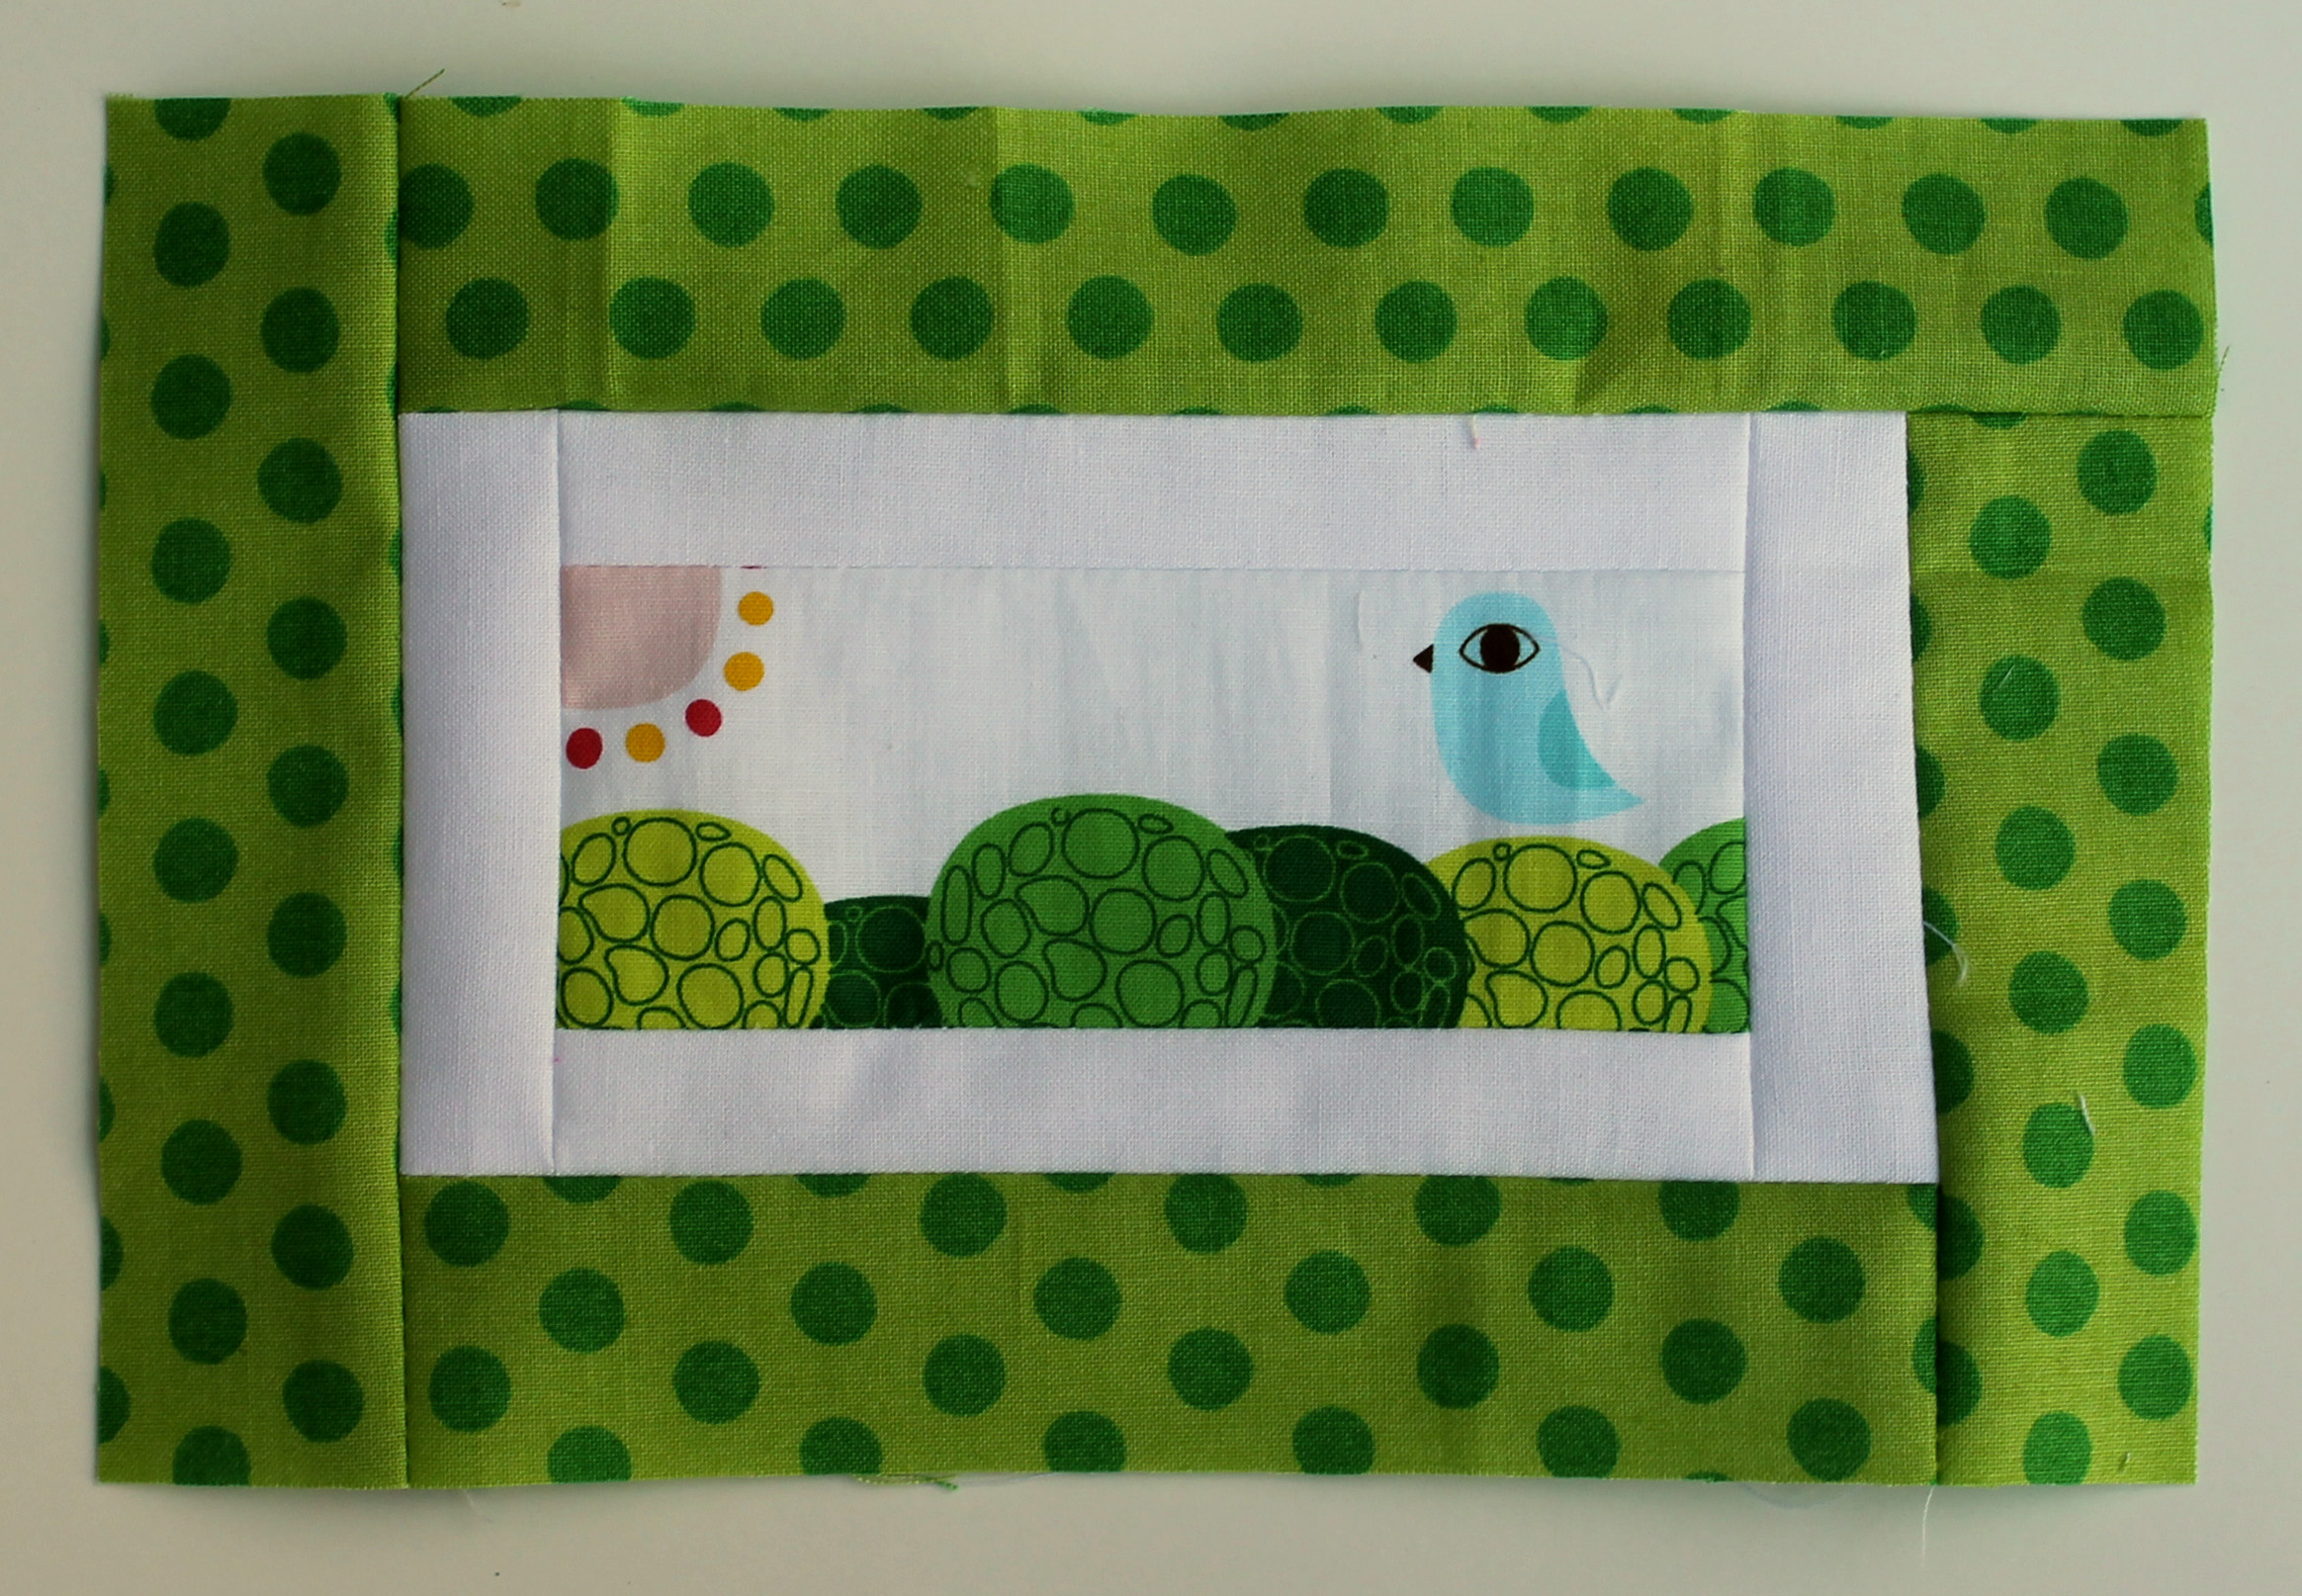
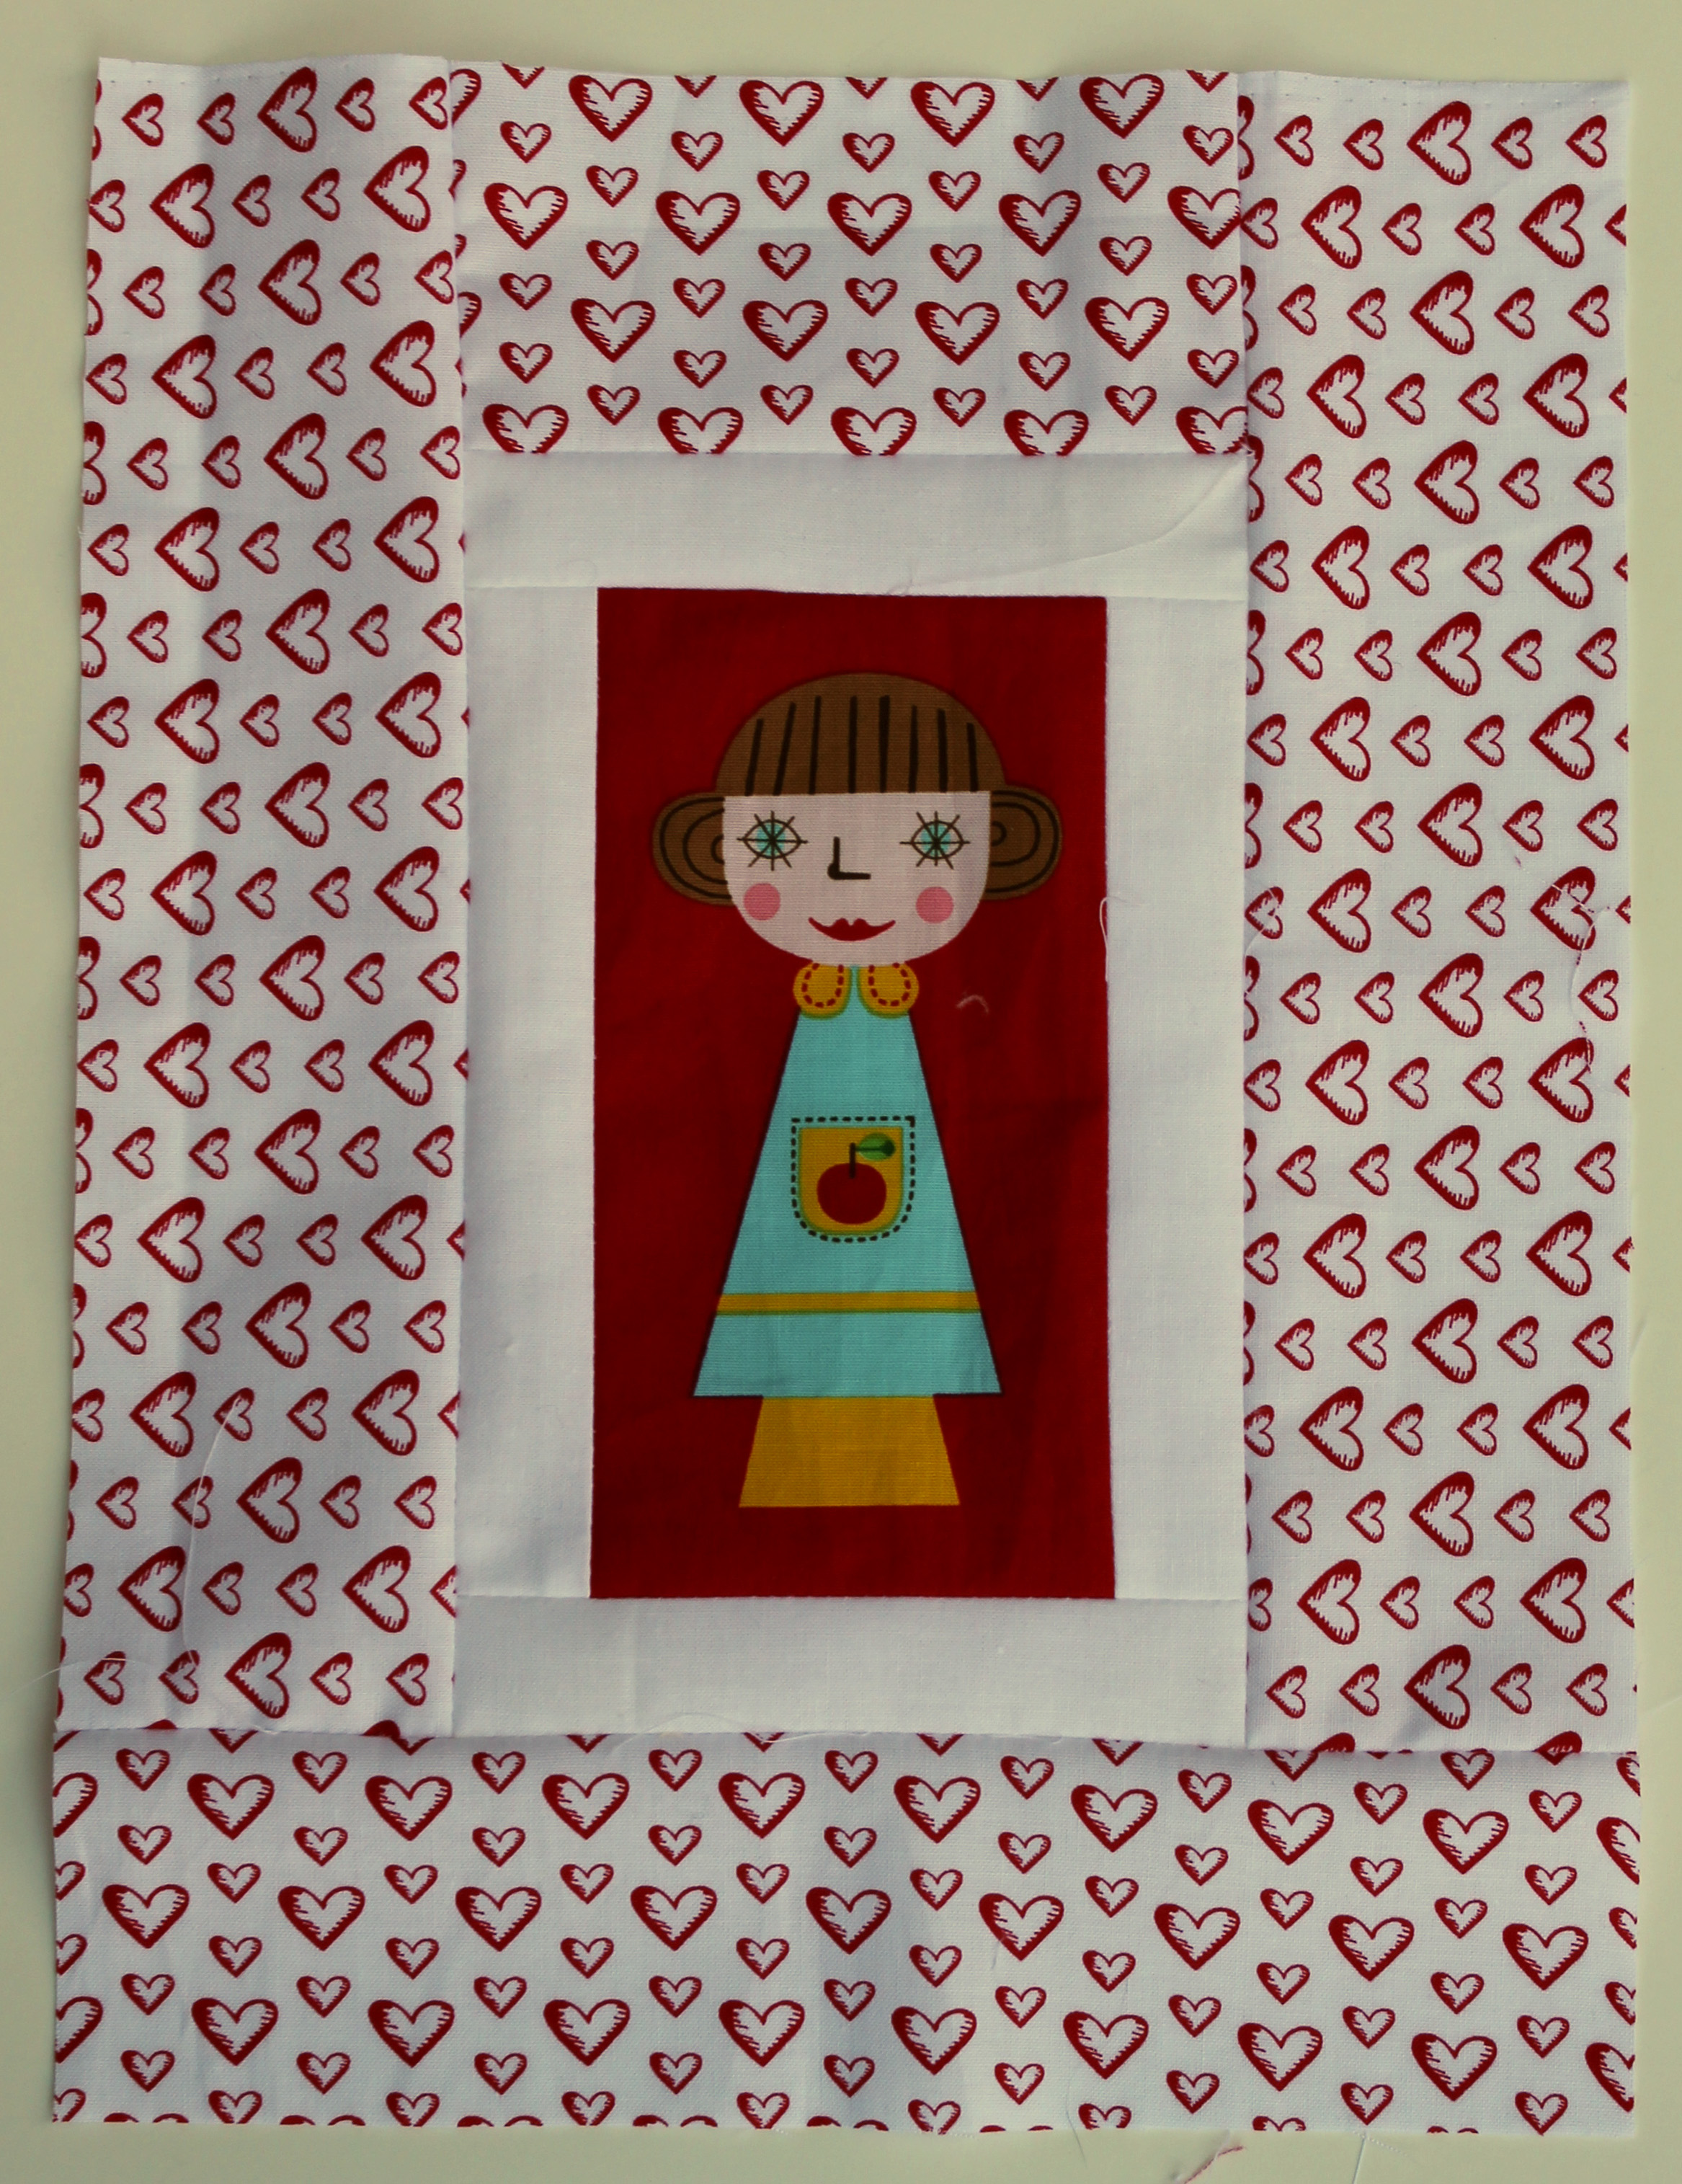
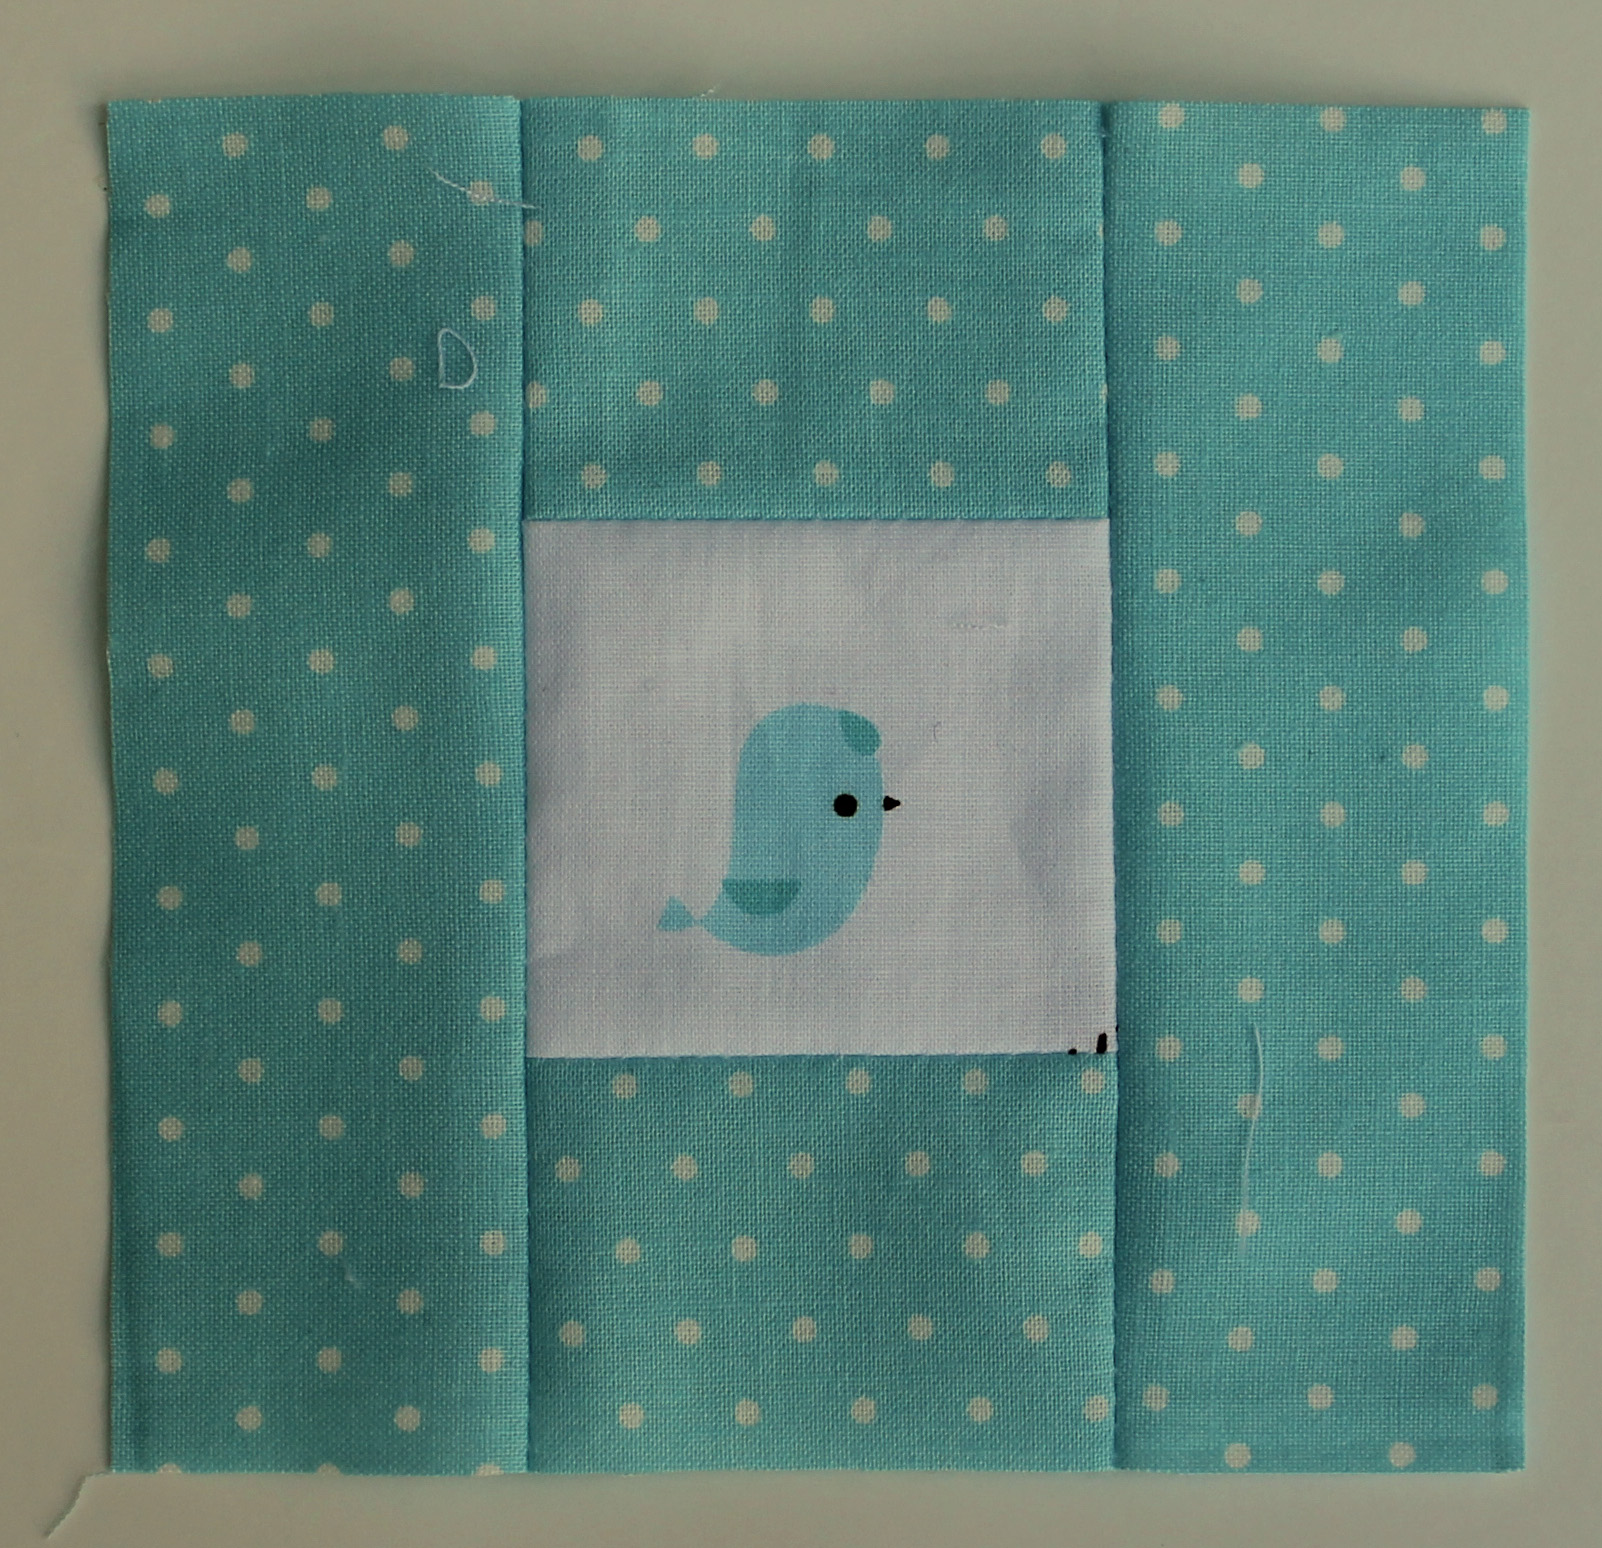
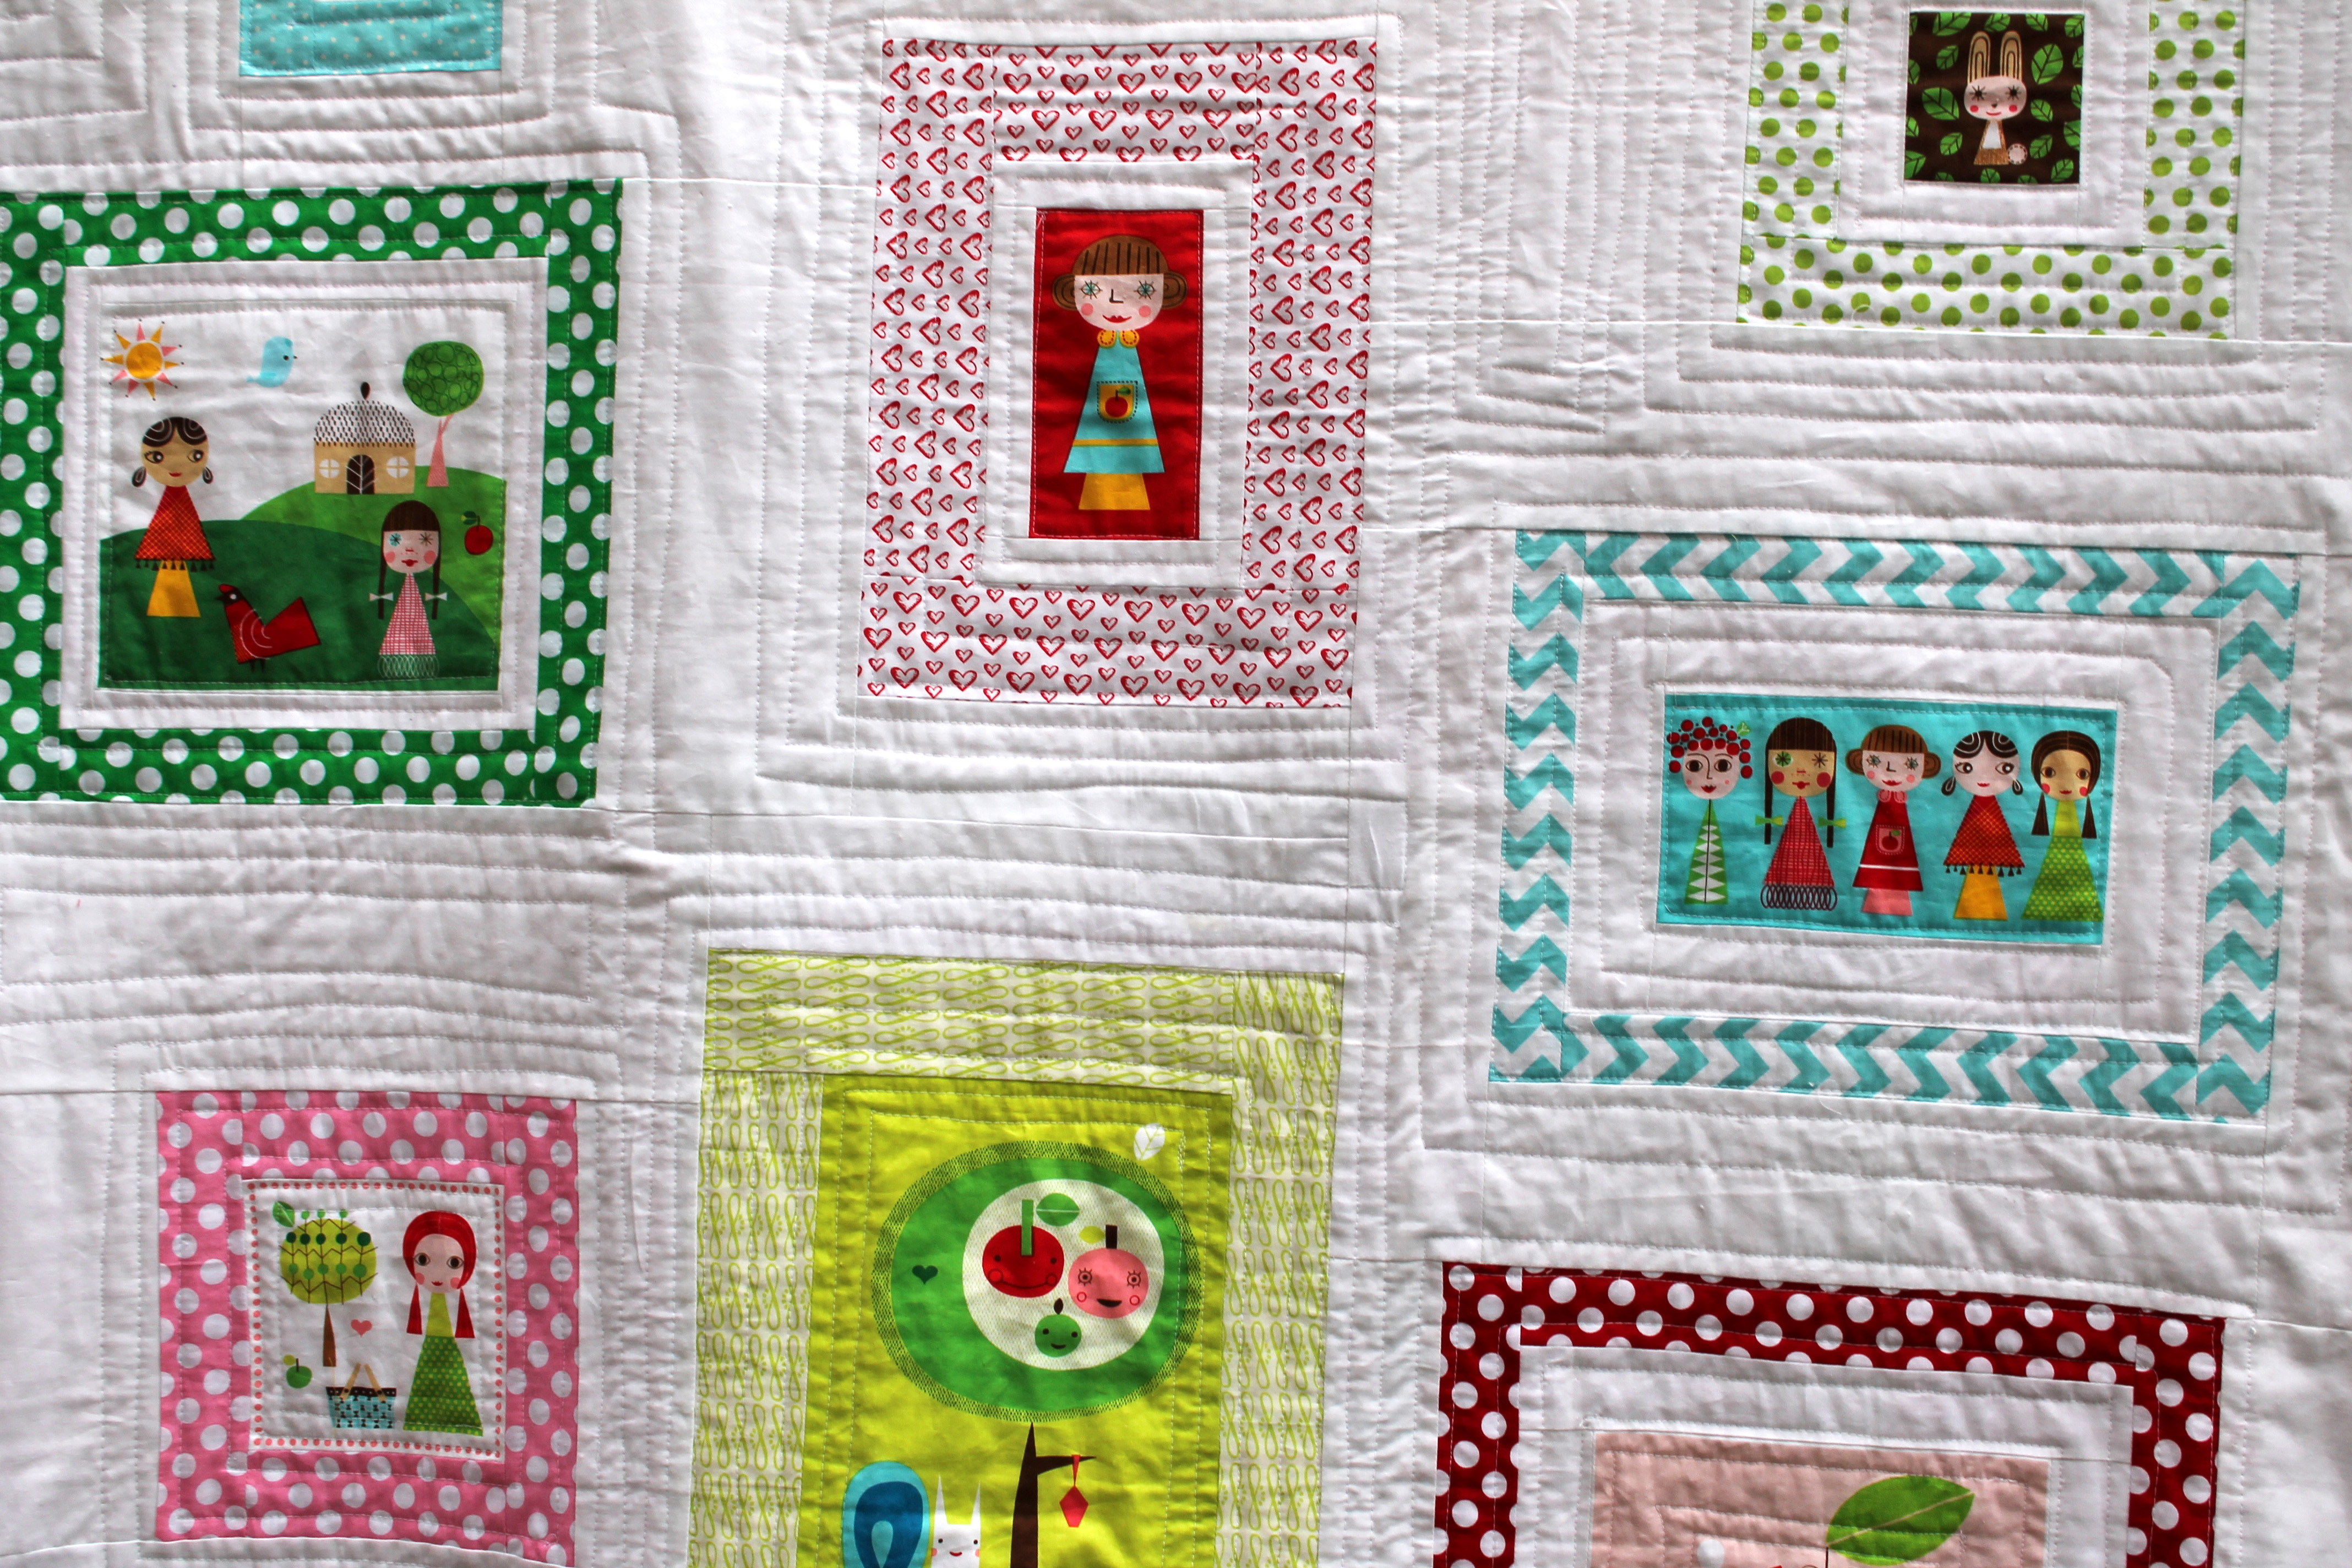
I was using a “cheater” panel for the first time and really wanted to highlight each of the individual illustrations somehow.  Once I had worked out my colour scheme and pulled some appropriate supporting fabric from my stash, the individual blocks came together easily.   My original post on the quilt was full of optimism.   Then  the struggle began for me with how to lay them out.

Appleville qulit detail

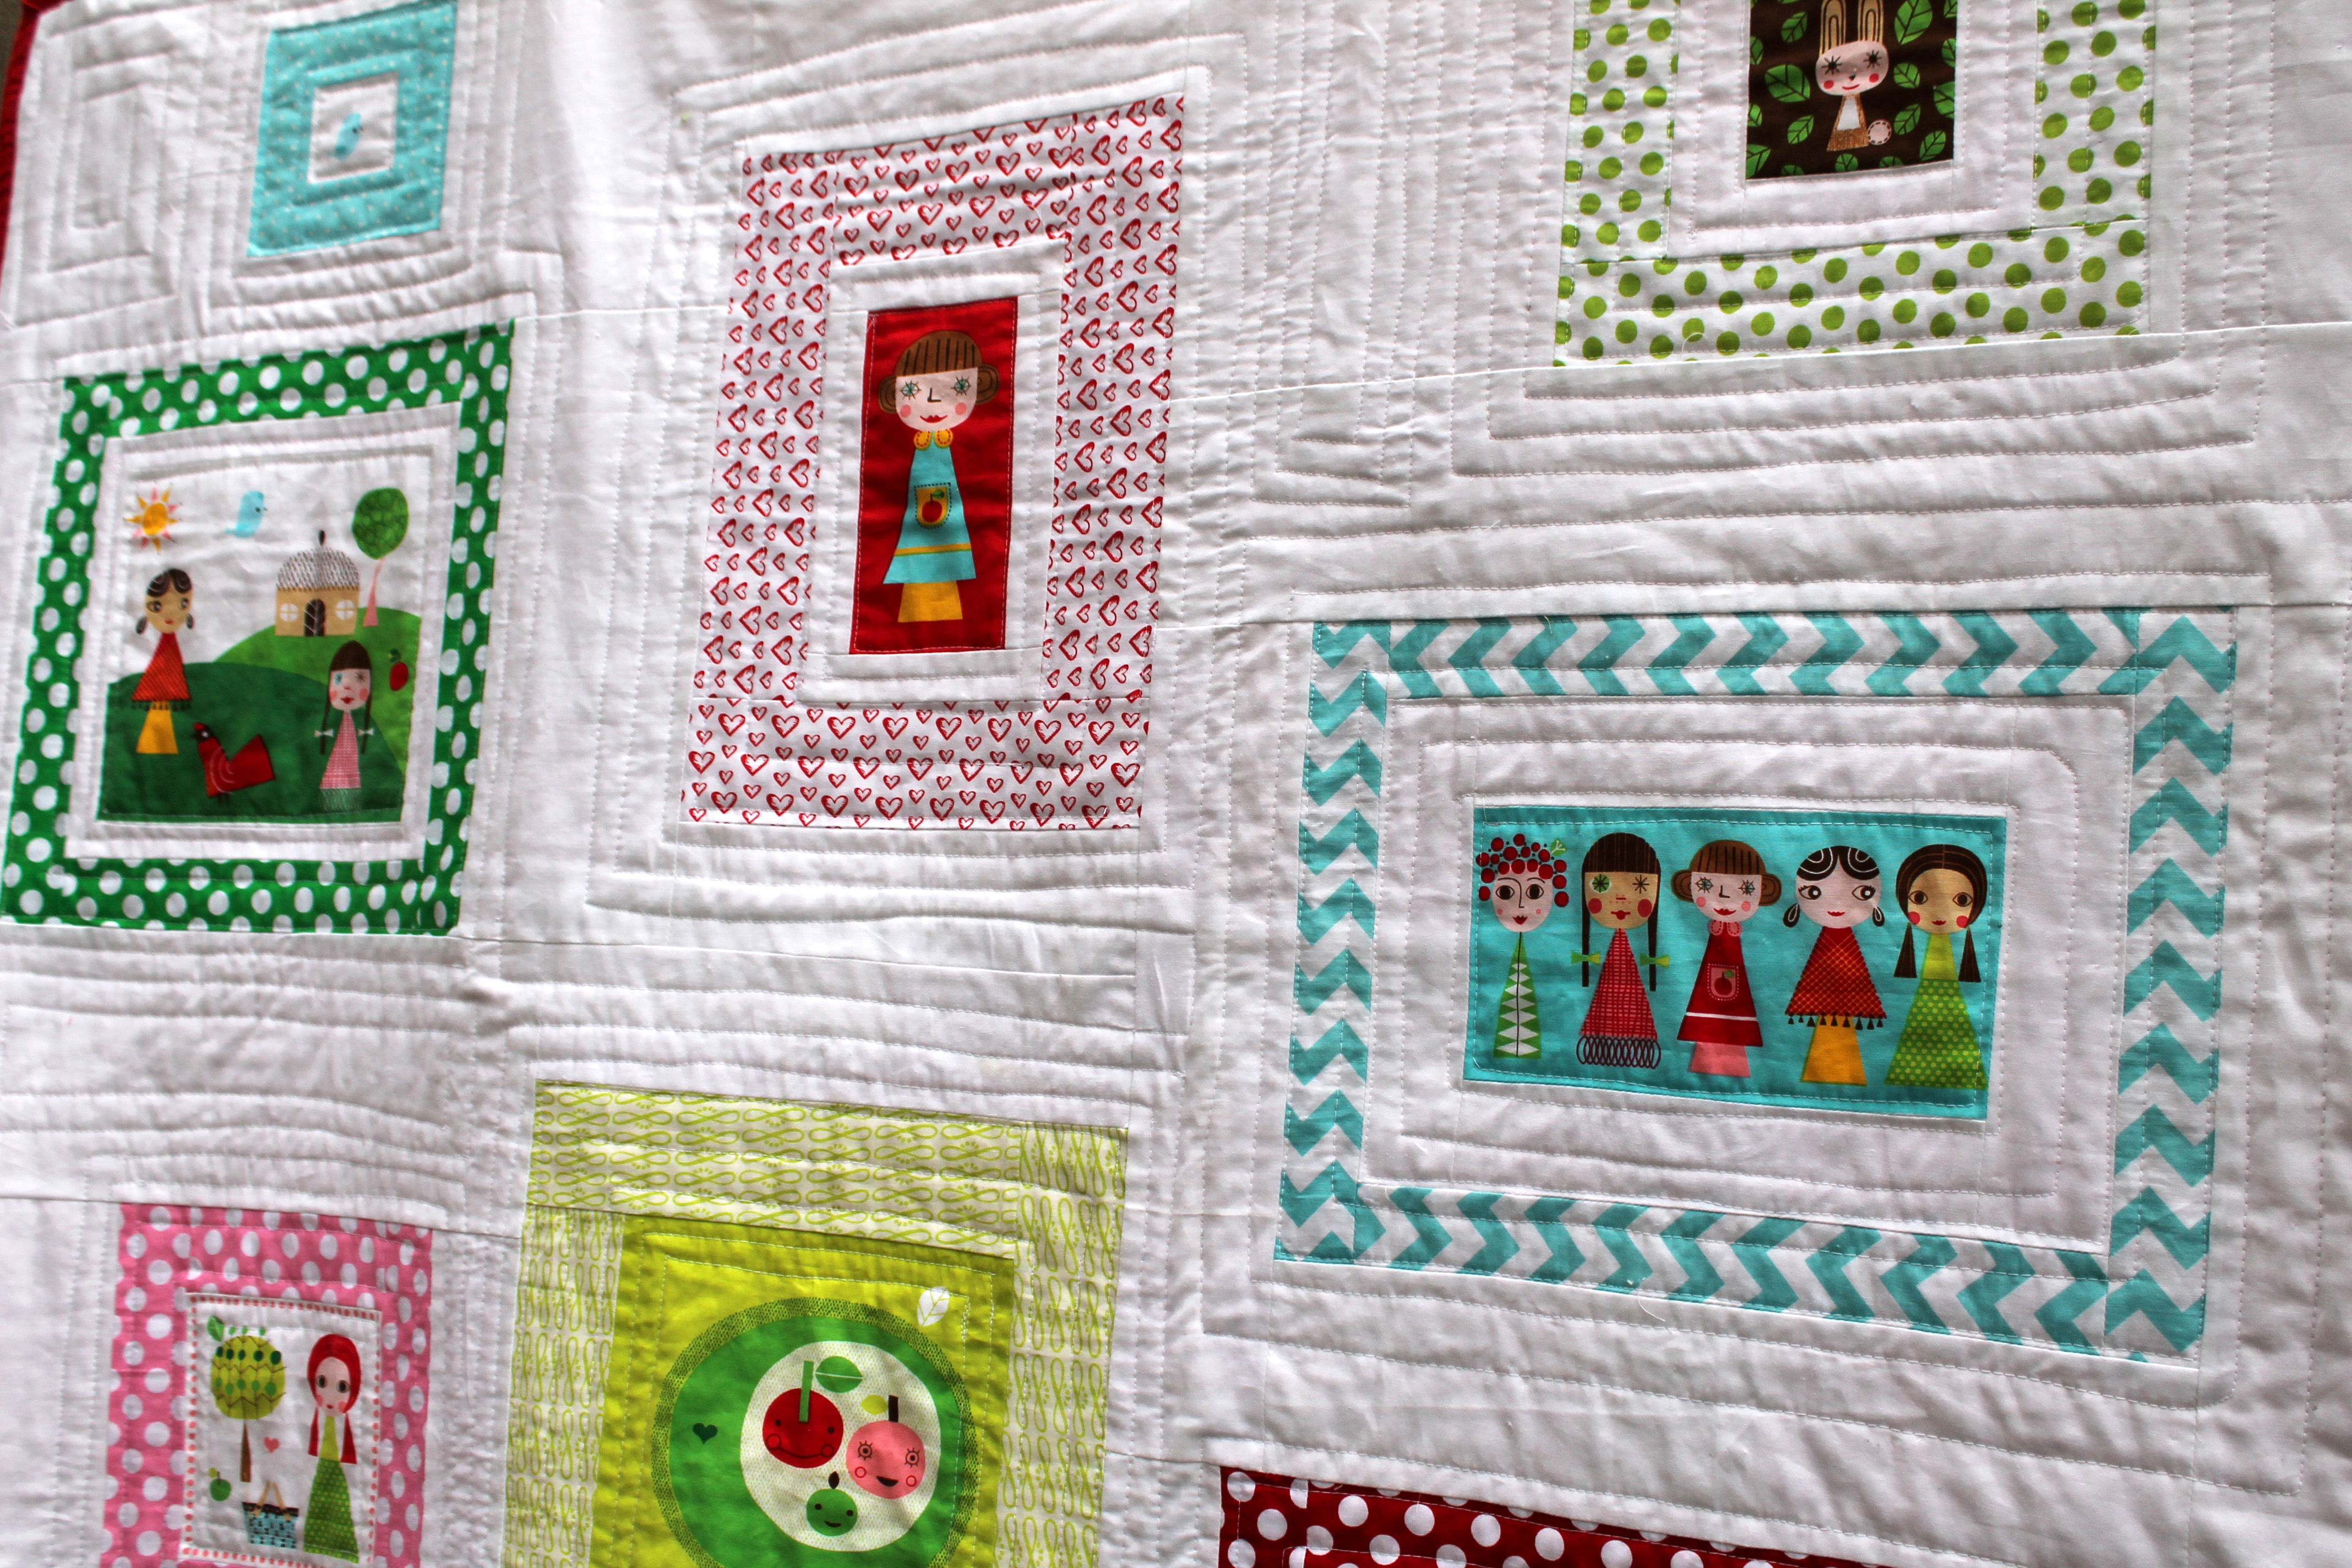
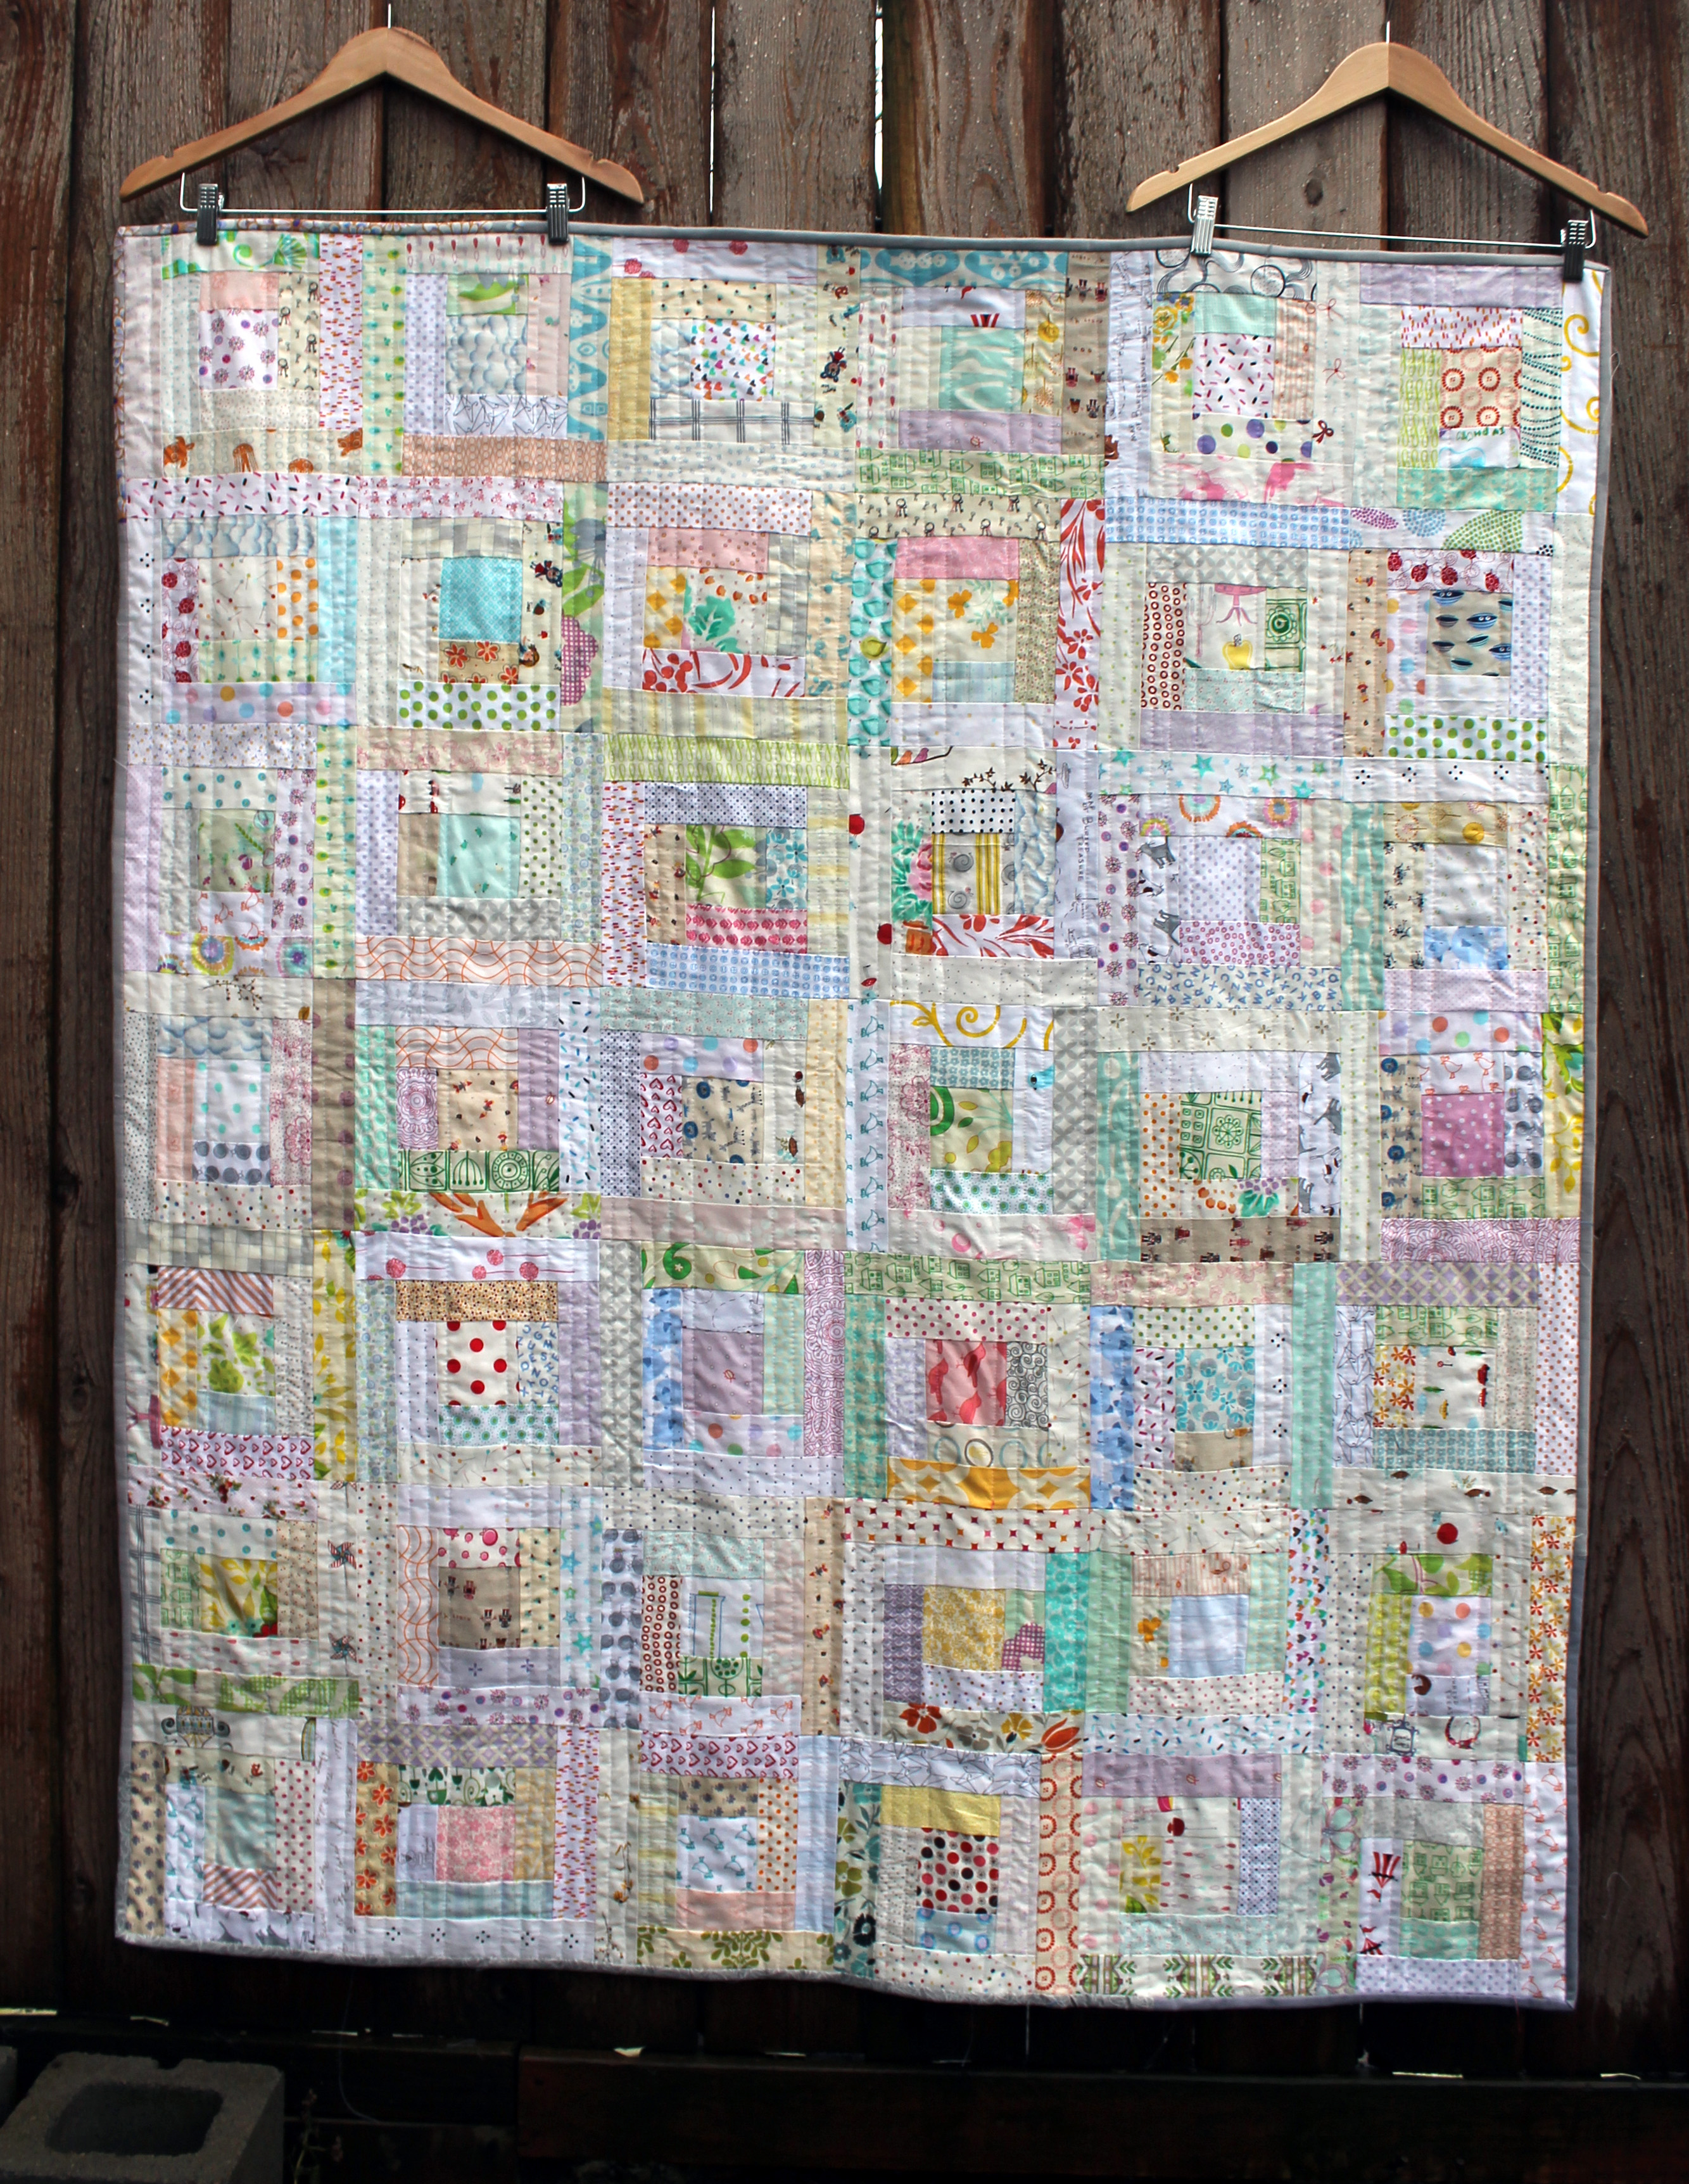
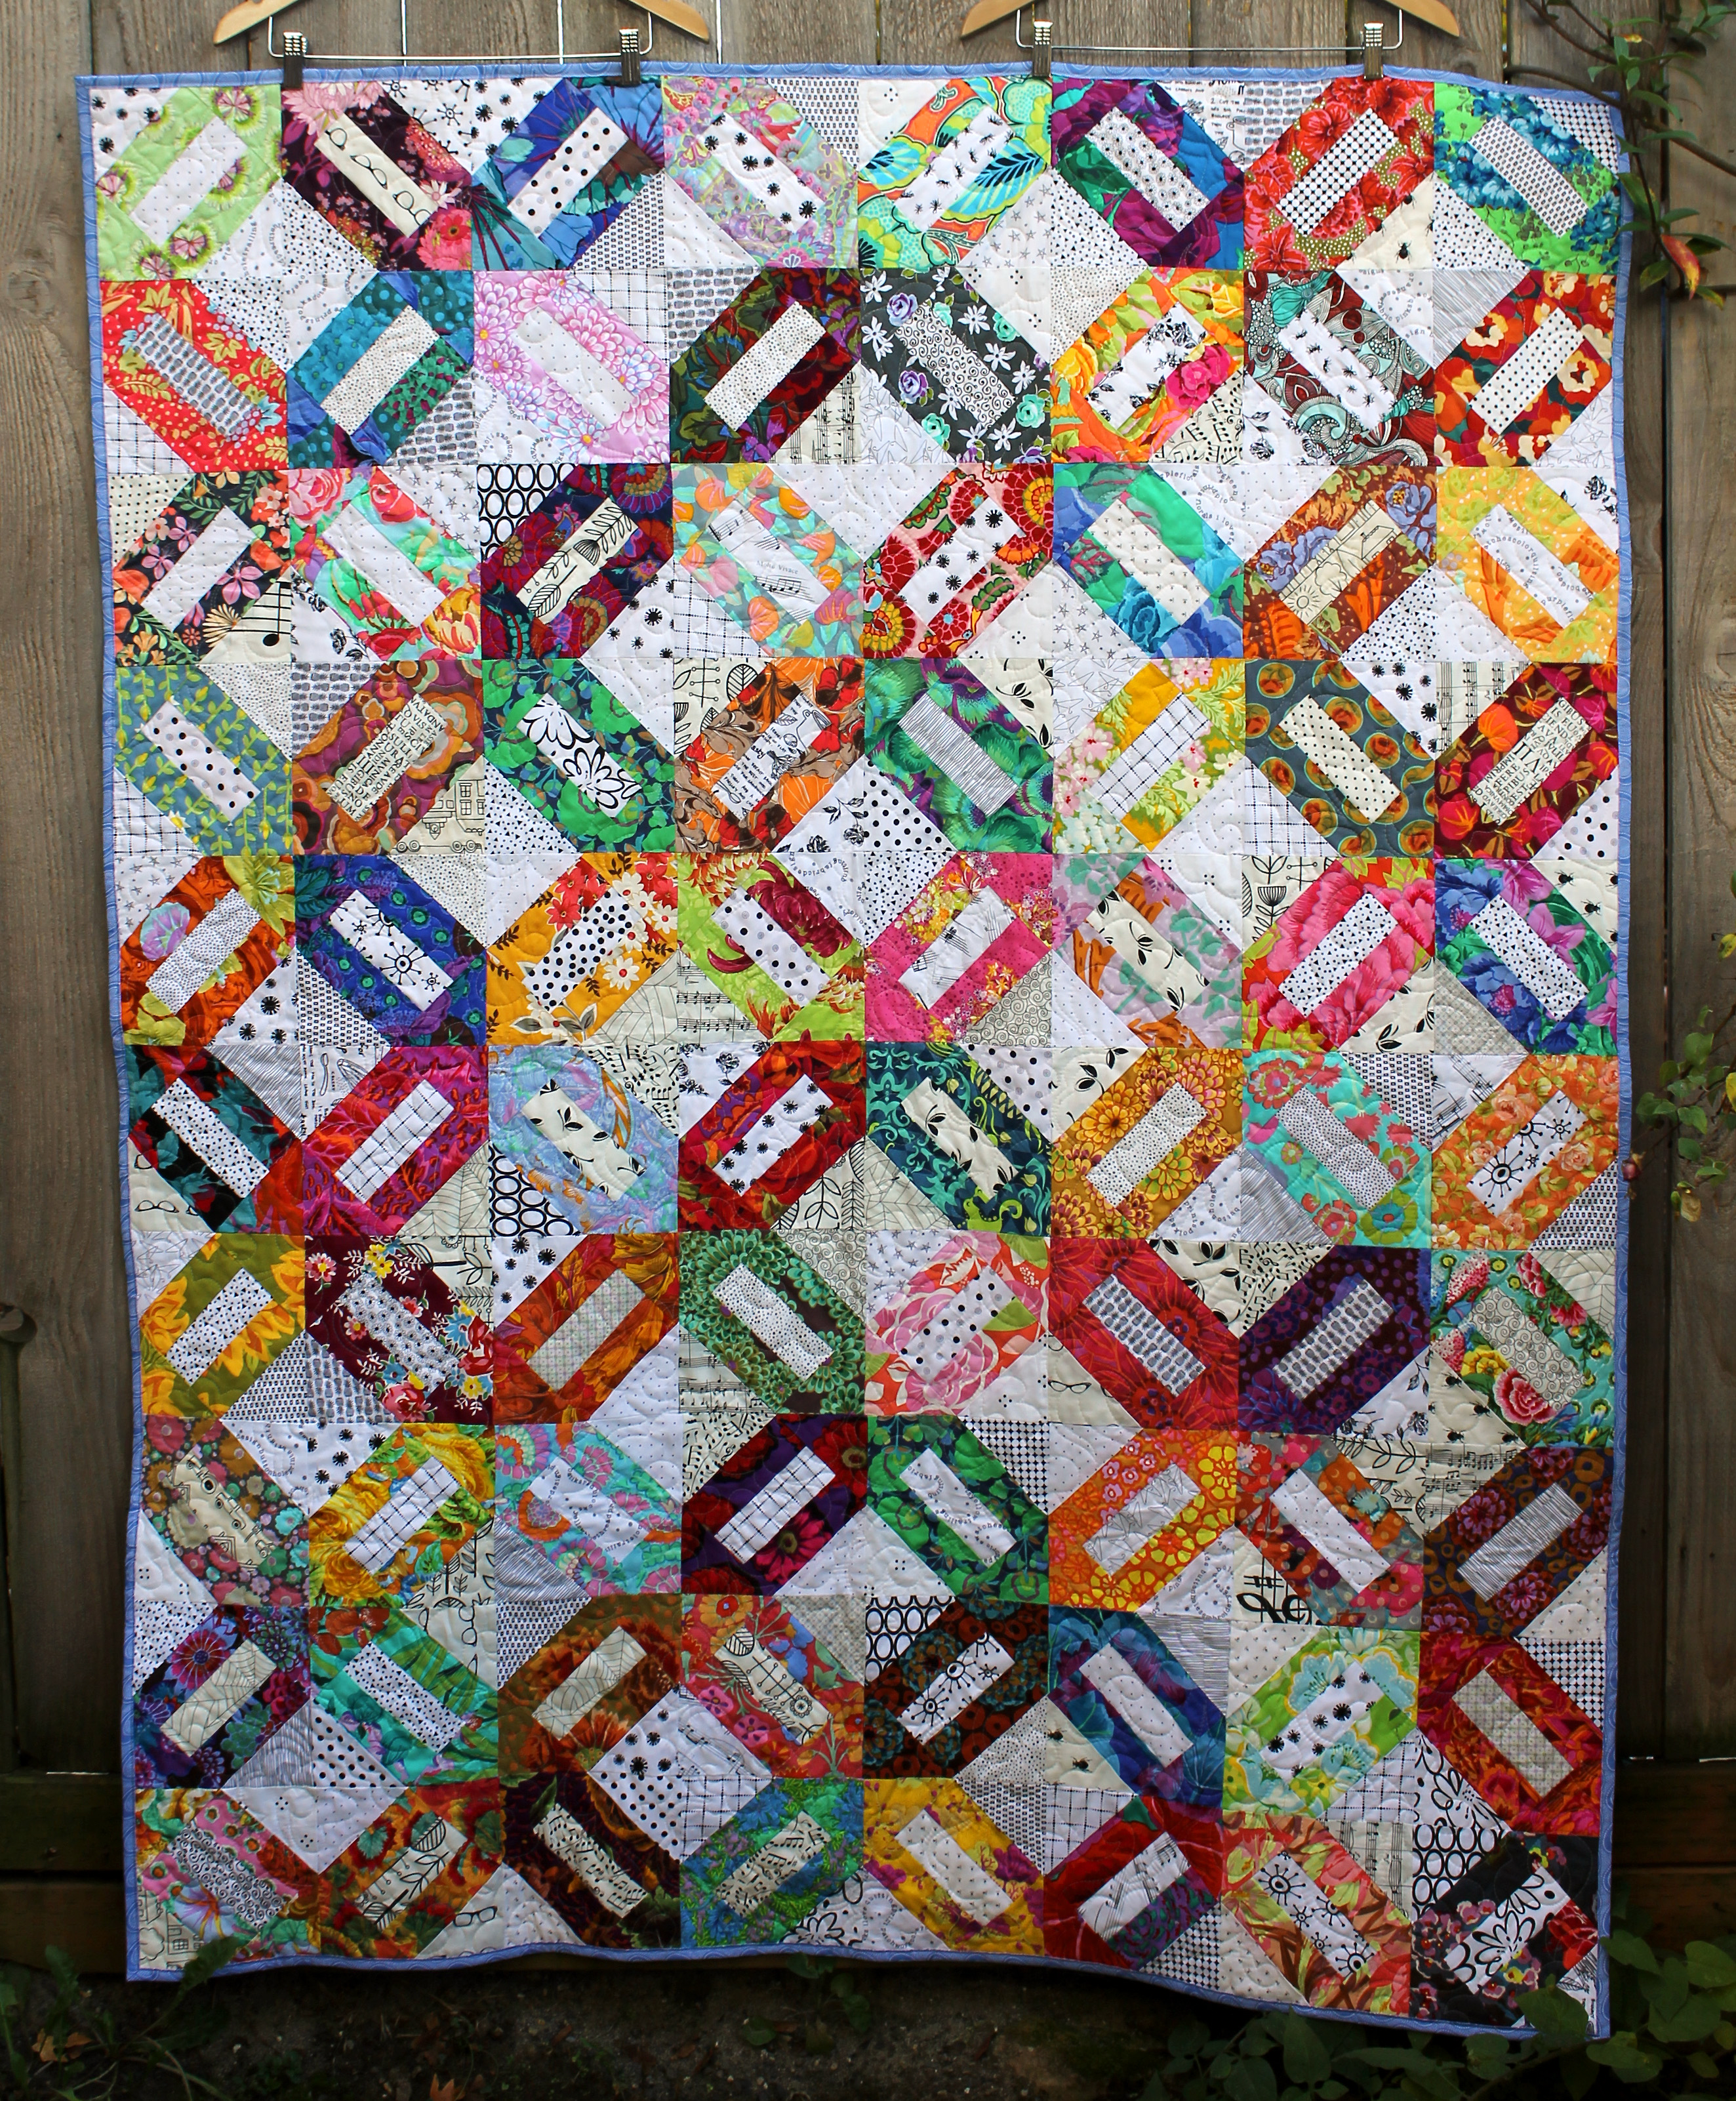
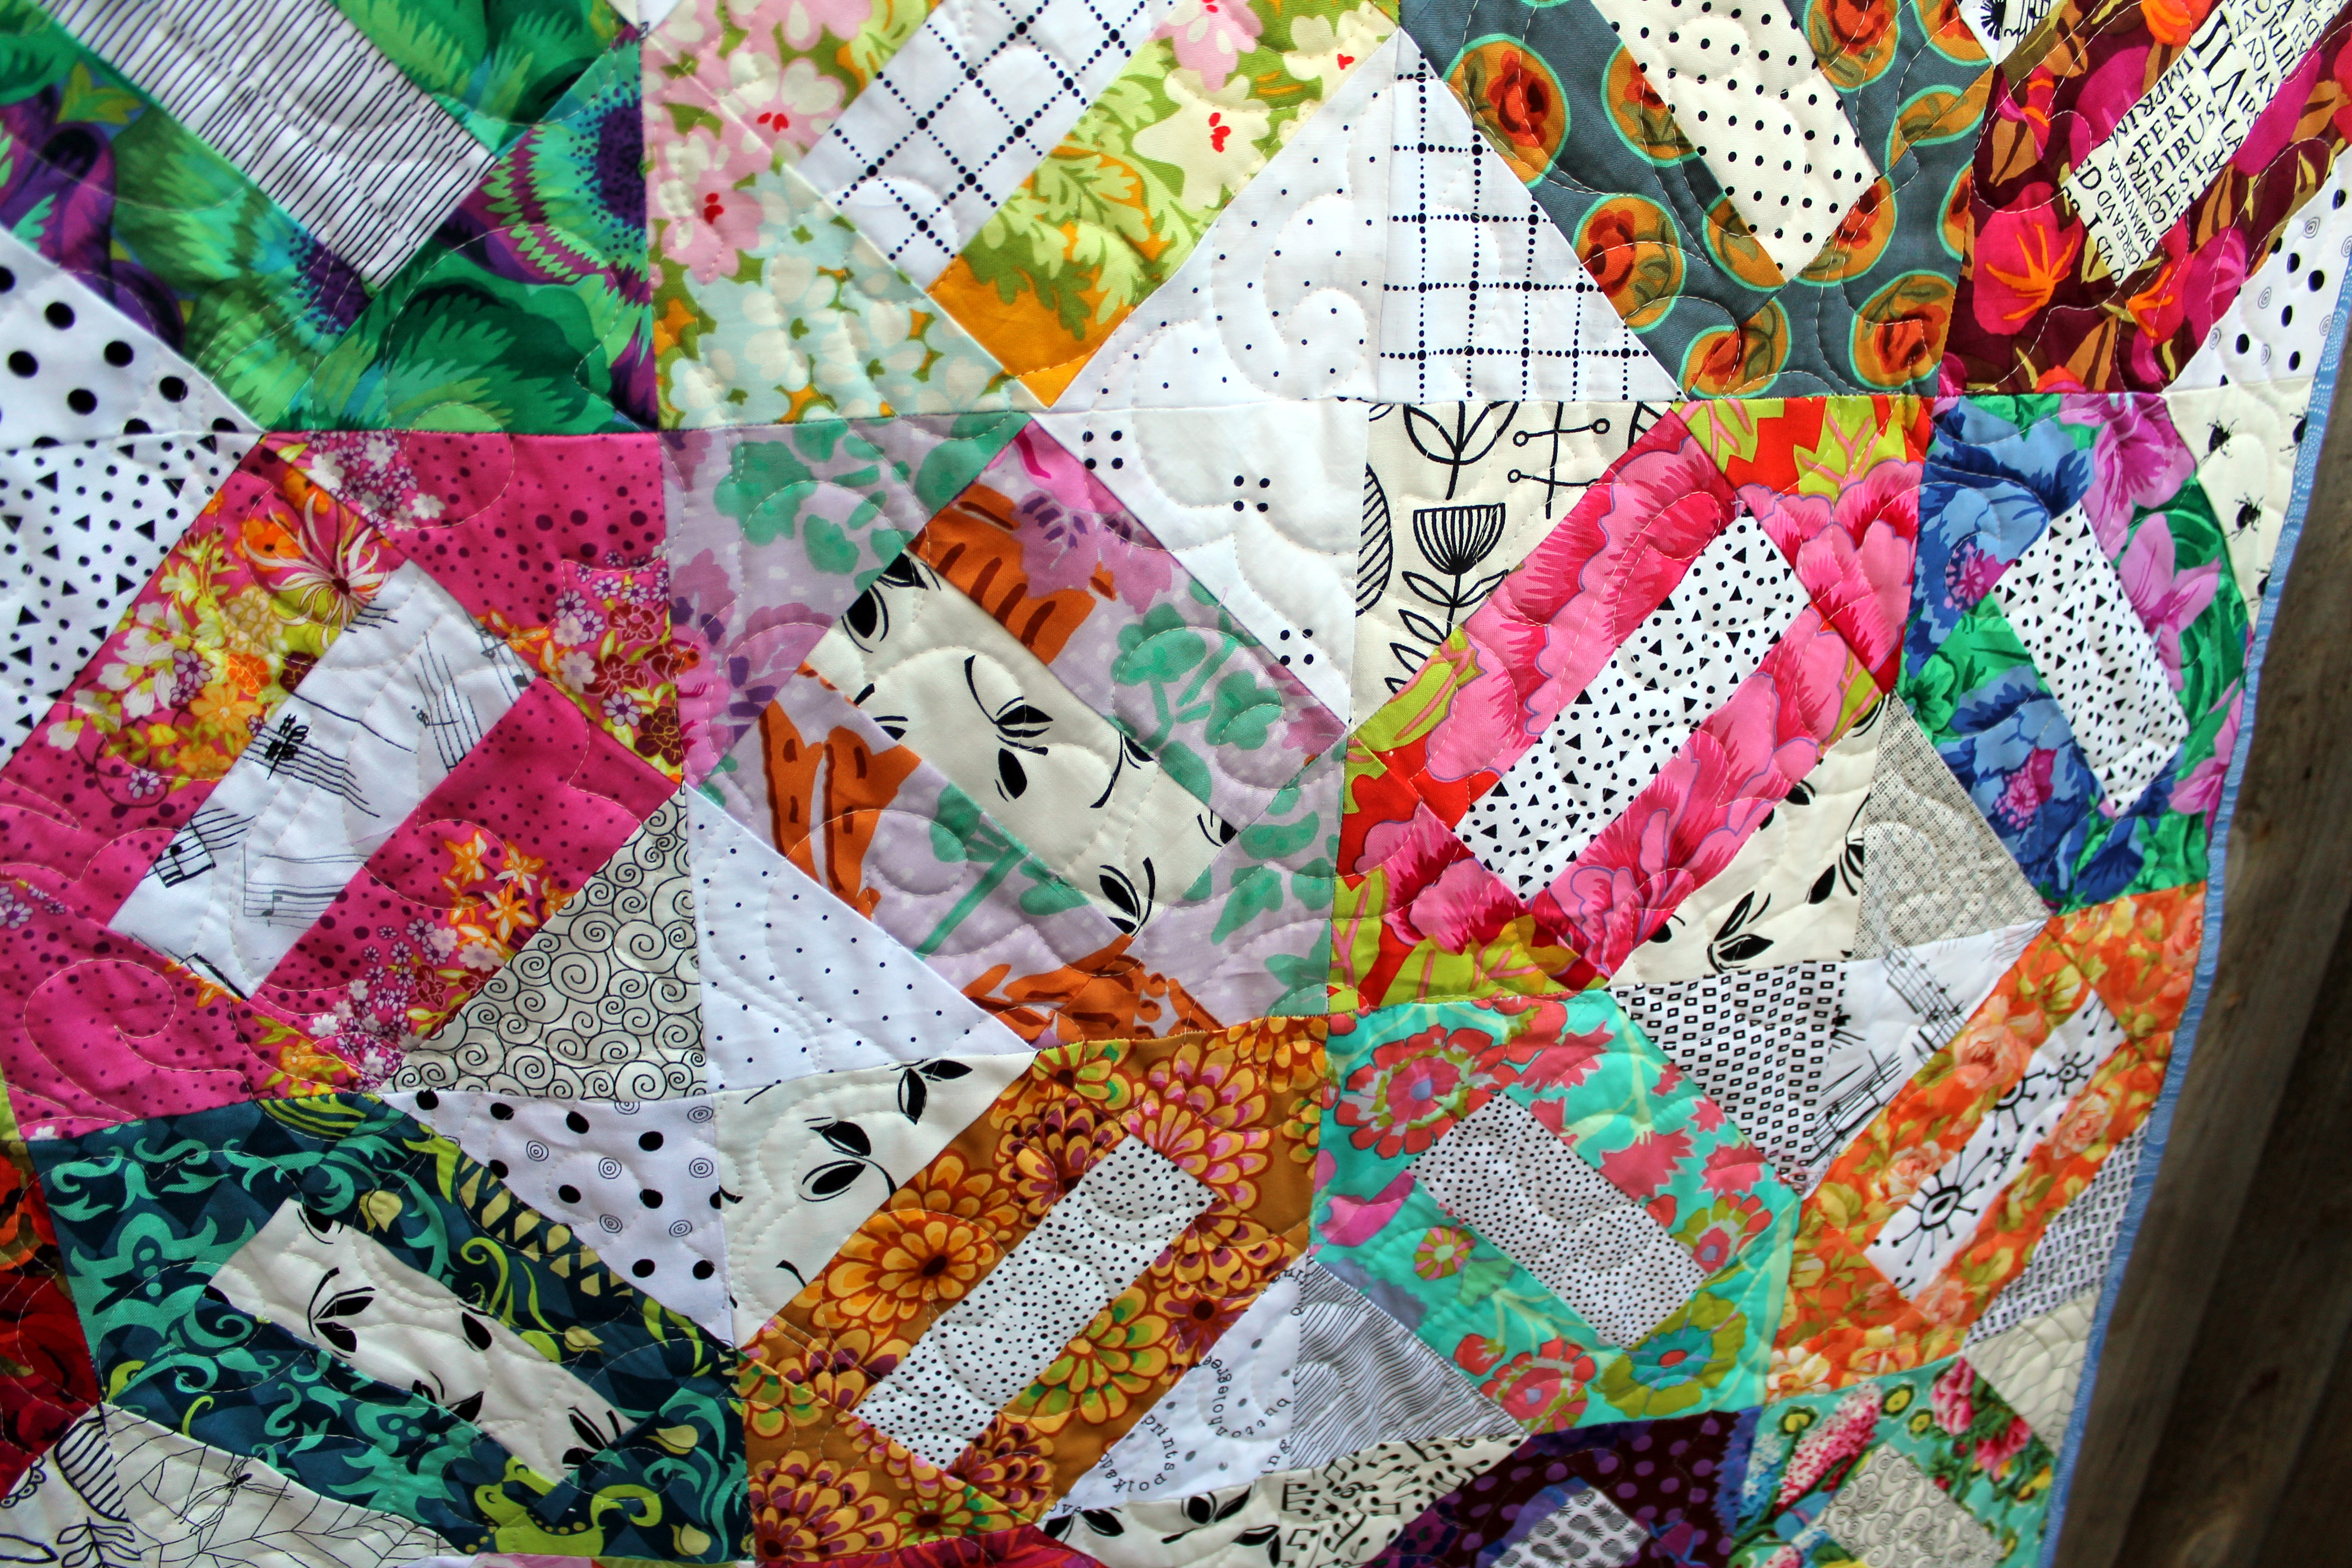
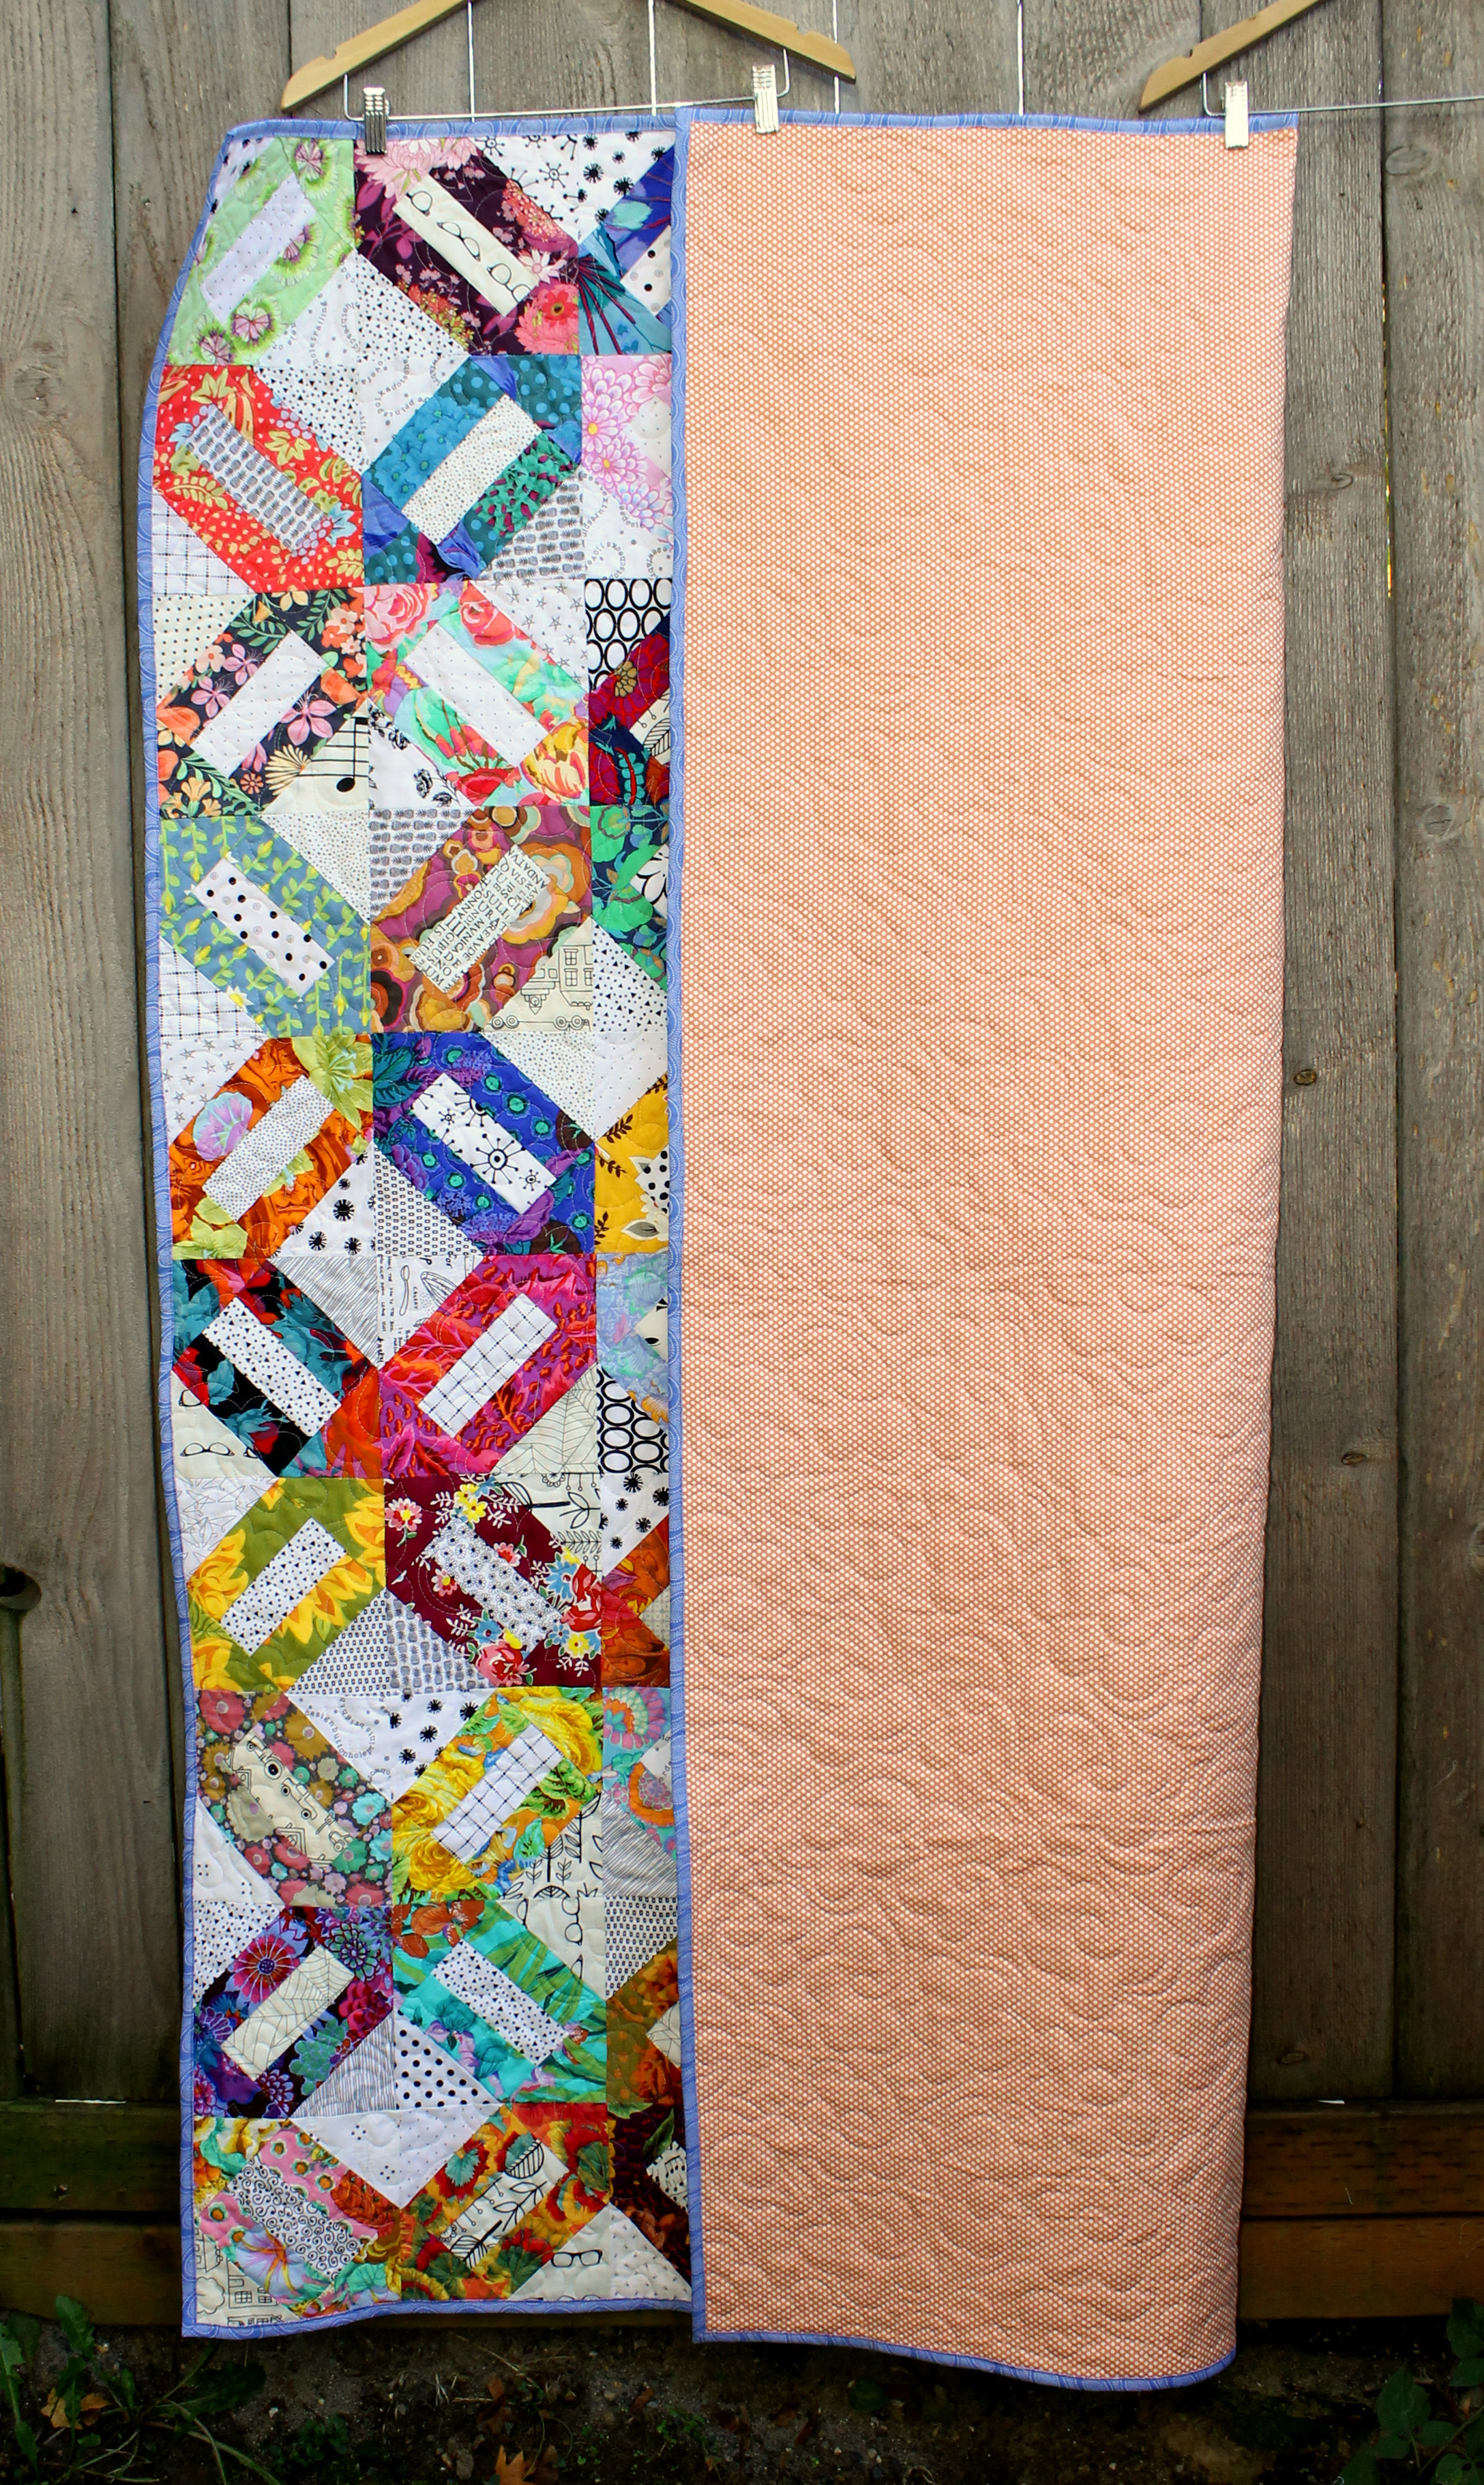
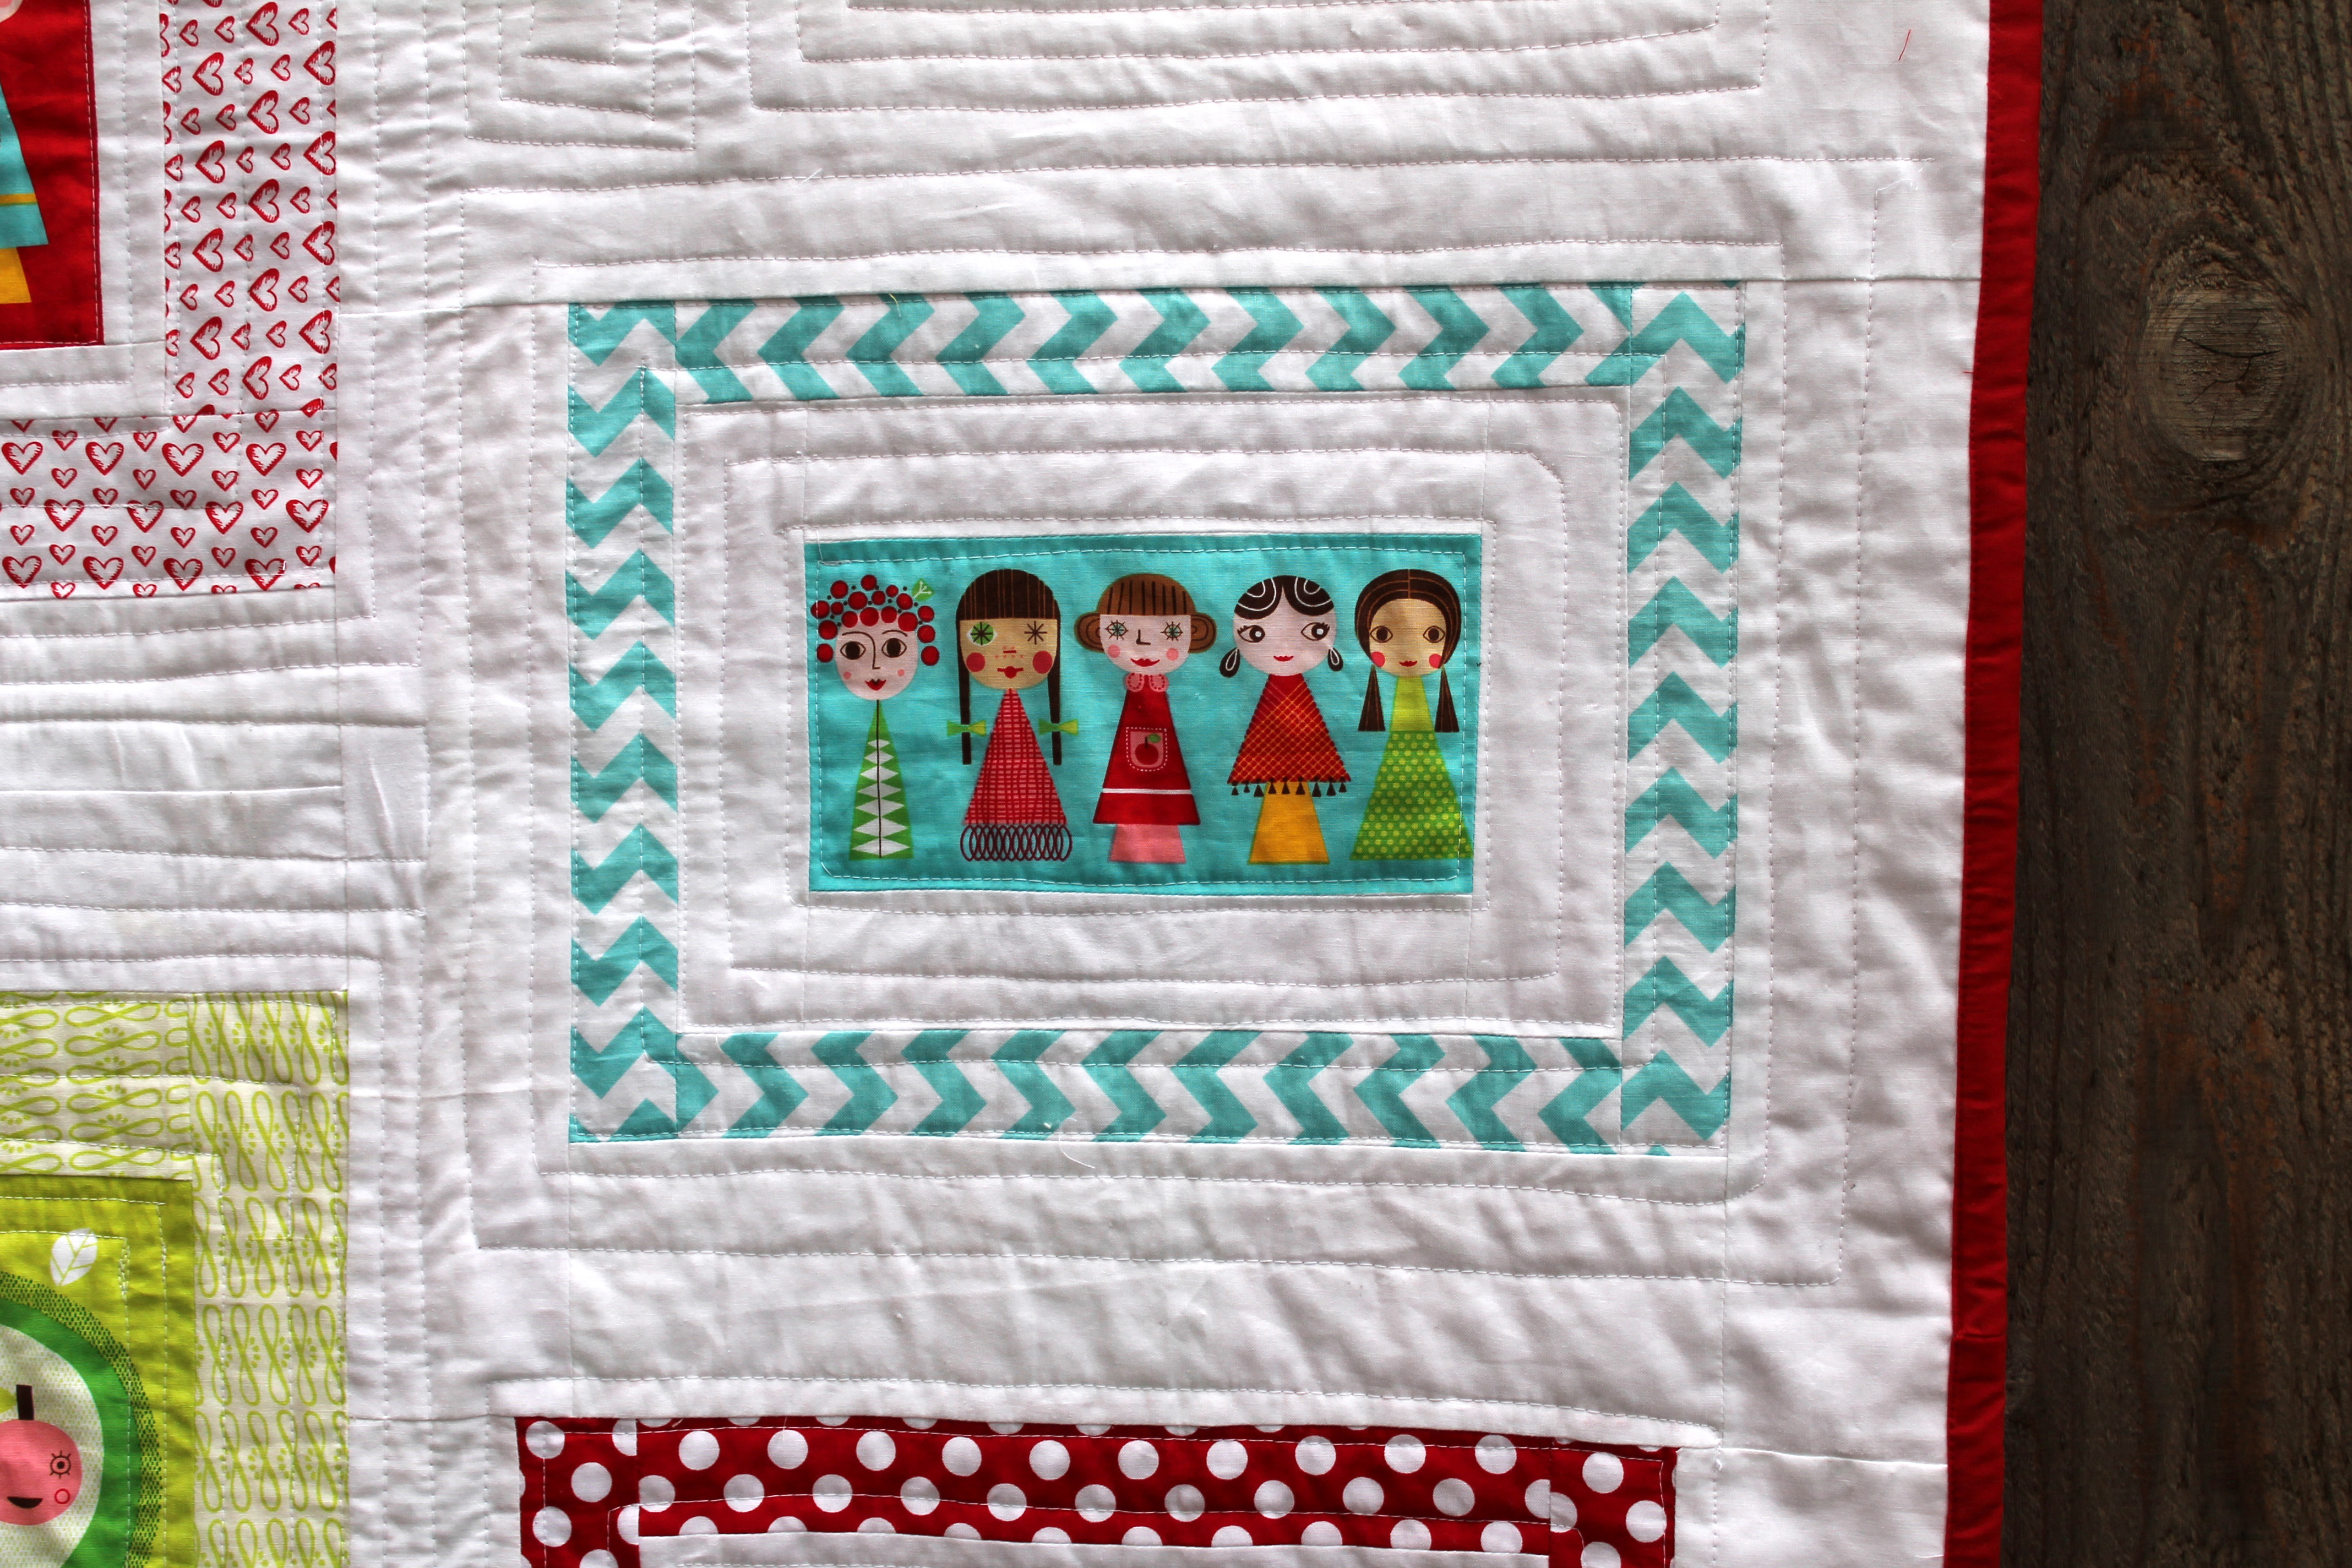
I had never worked with this much white/negative space before.  My design wall was a blessing as I moved the blocks around trying to find a flow I liked.  Once I had a layout I was happy with the real hard work began.  It was like doing a jigsaw puzzle piecing in the white Kona cotton.  The top part of the quilt took me ages to put together but by the bottom section I was an old pro.  There are even some Y seams in this sucker (another first for me).  I would love to hear from anyone who has advice, tricks or tips on doing this kind of piecing.  I know I have a lot to learn.

Appleville quilt detail

With the top all pieced I now had to fill all that negative space with quilting  First off I tried some hand quilting in red thread – I liked it but my wrist is not healed enough to handle that much hand quilting at the moment…. so unpicking number one.

Applieville quilting
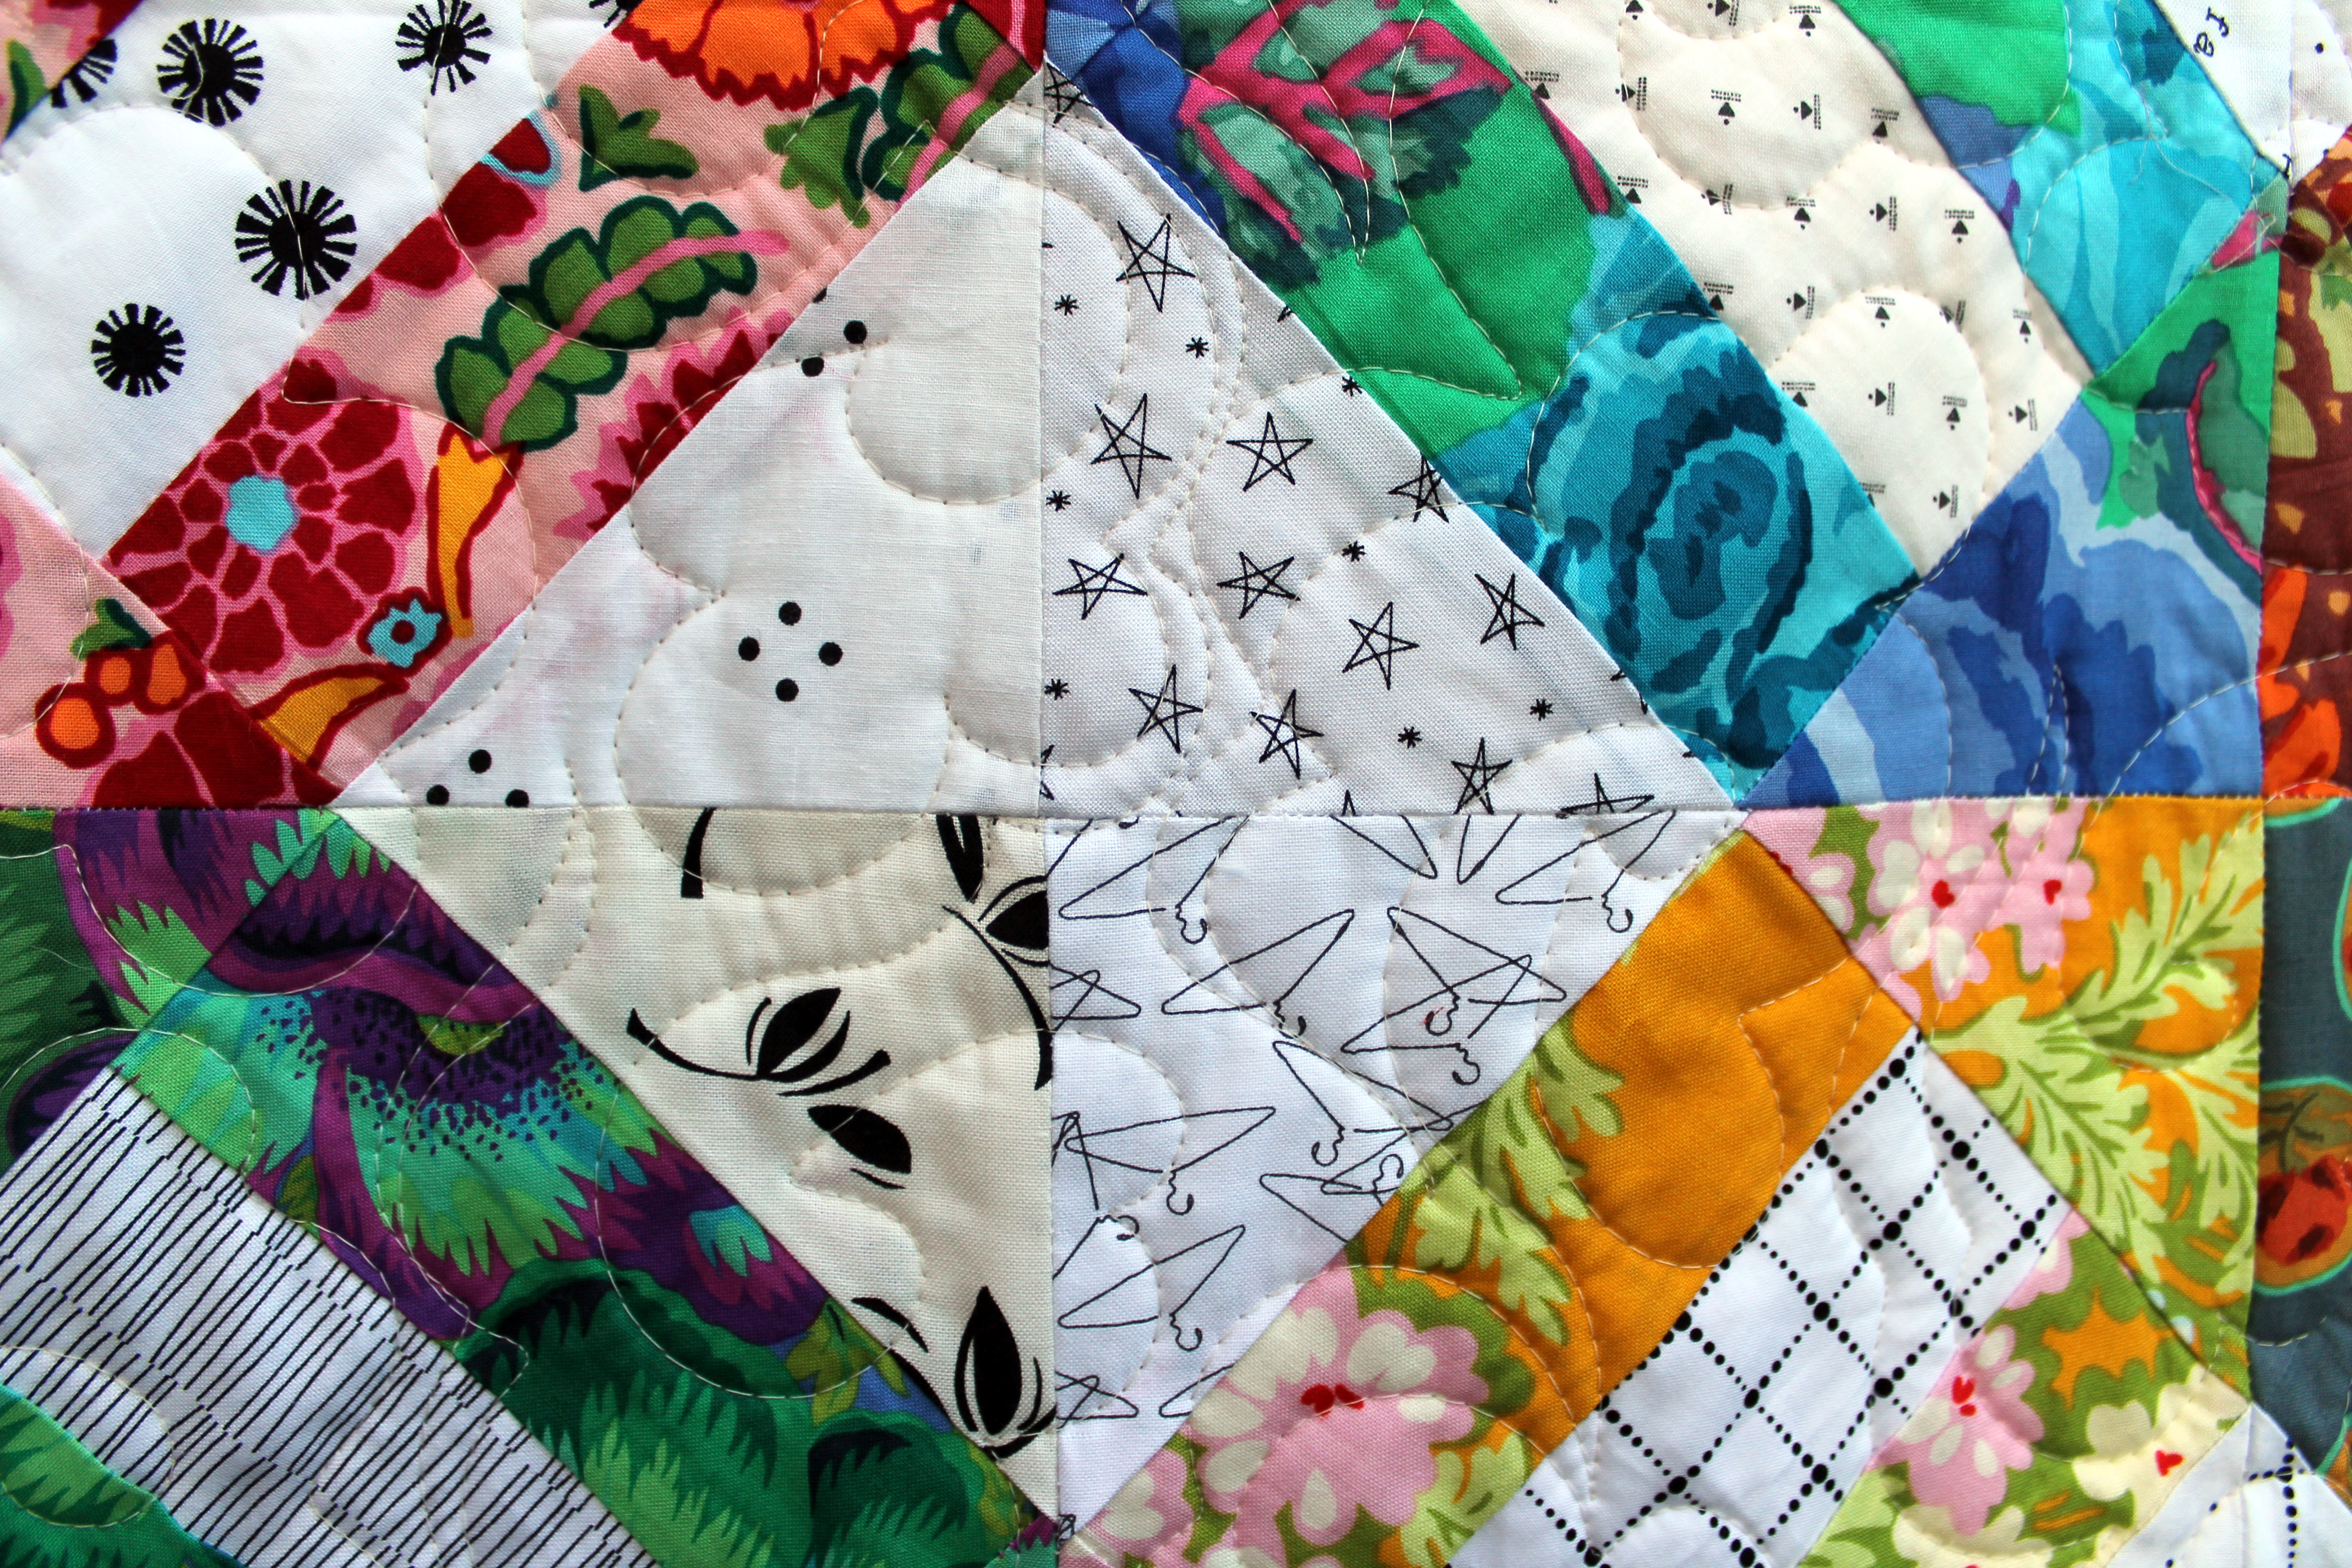
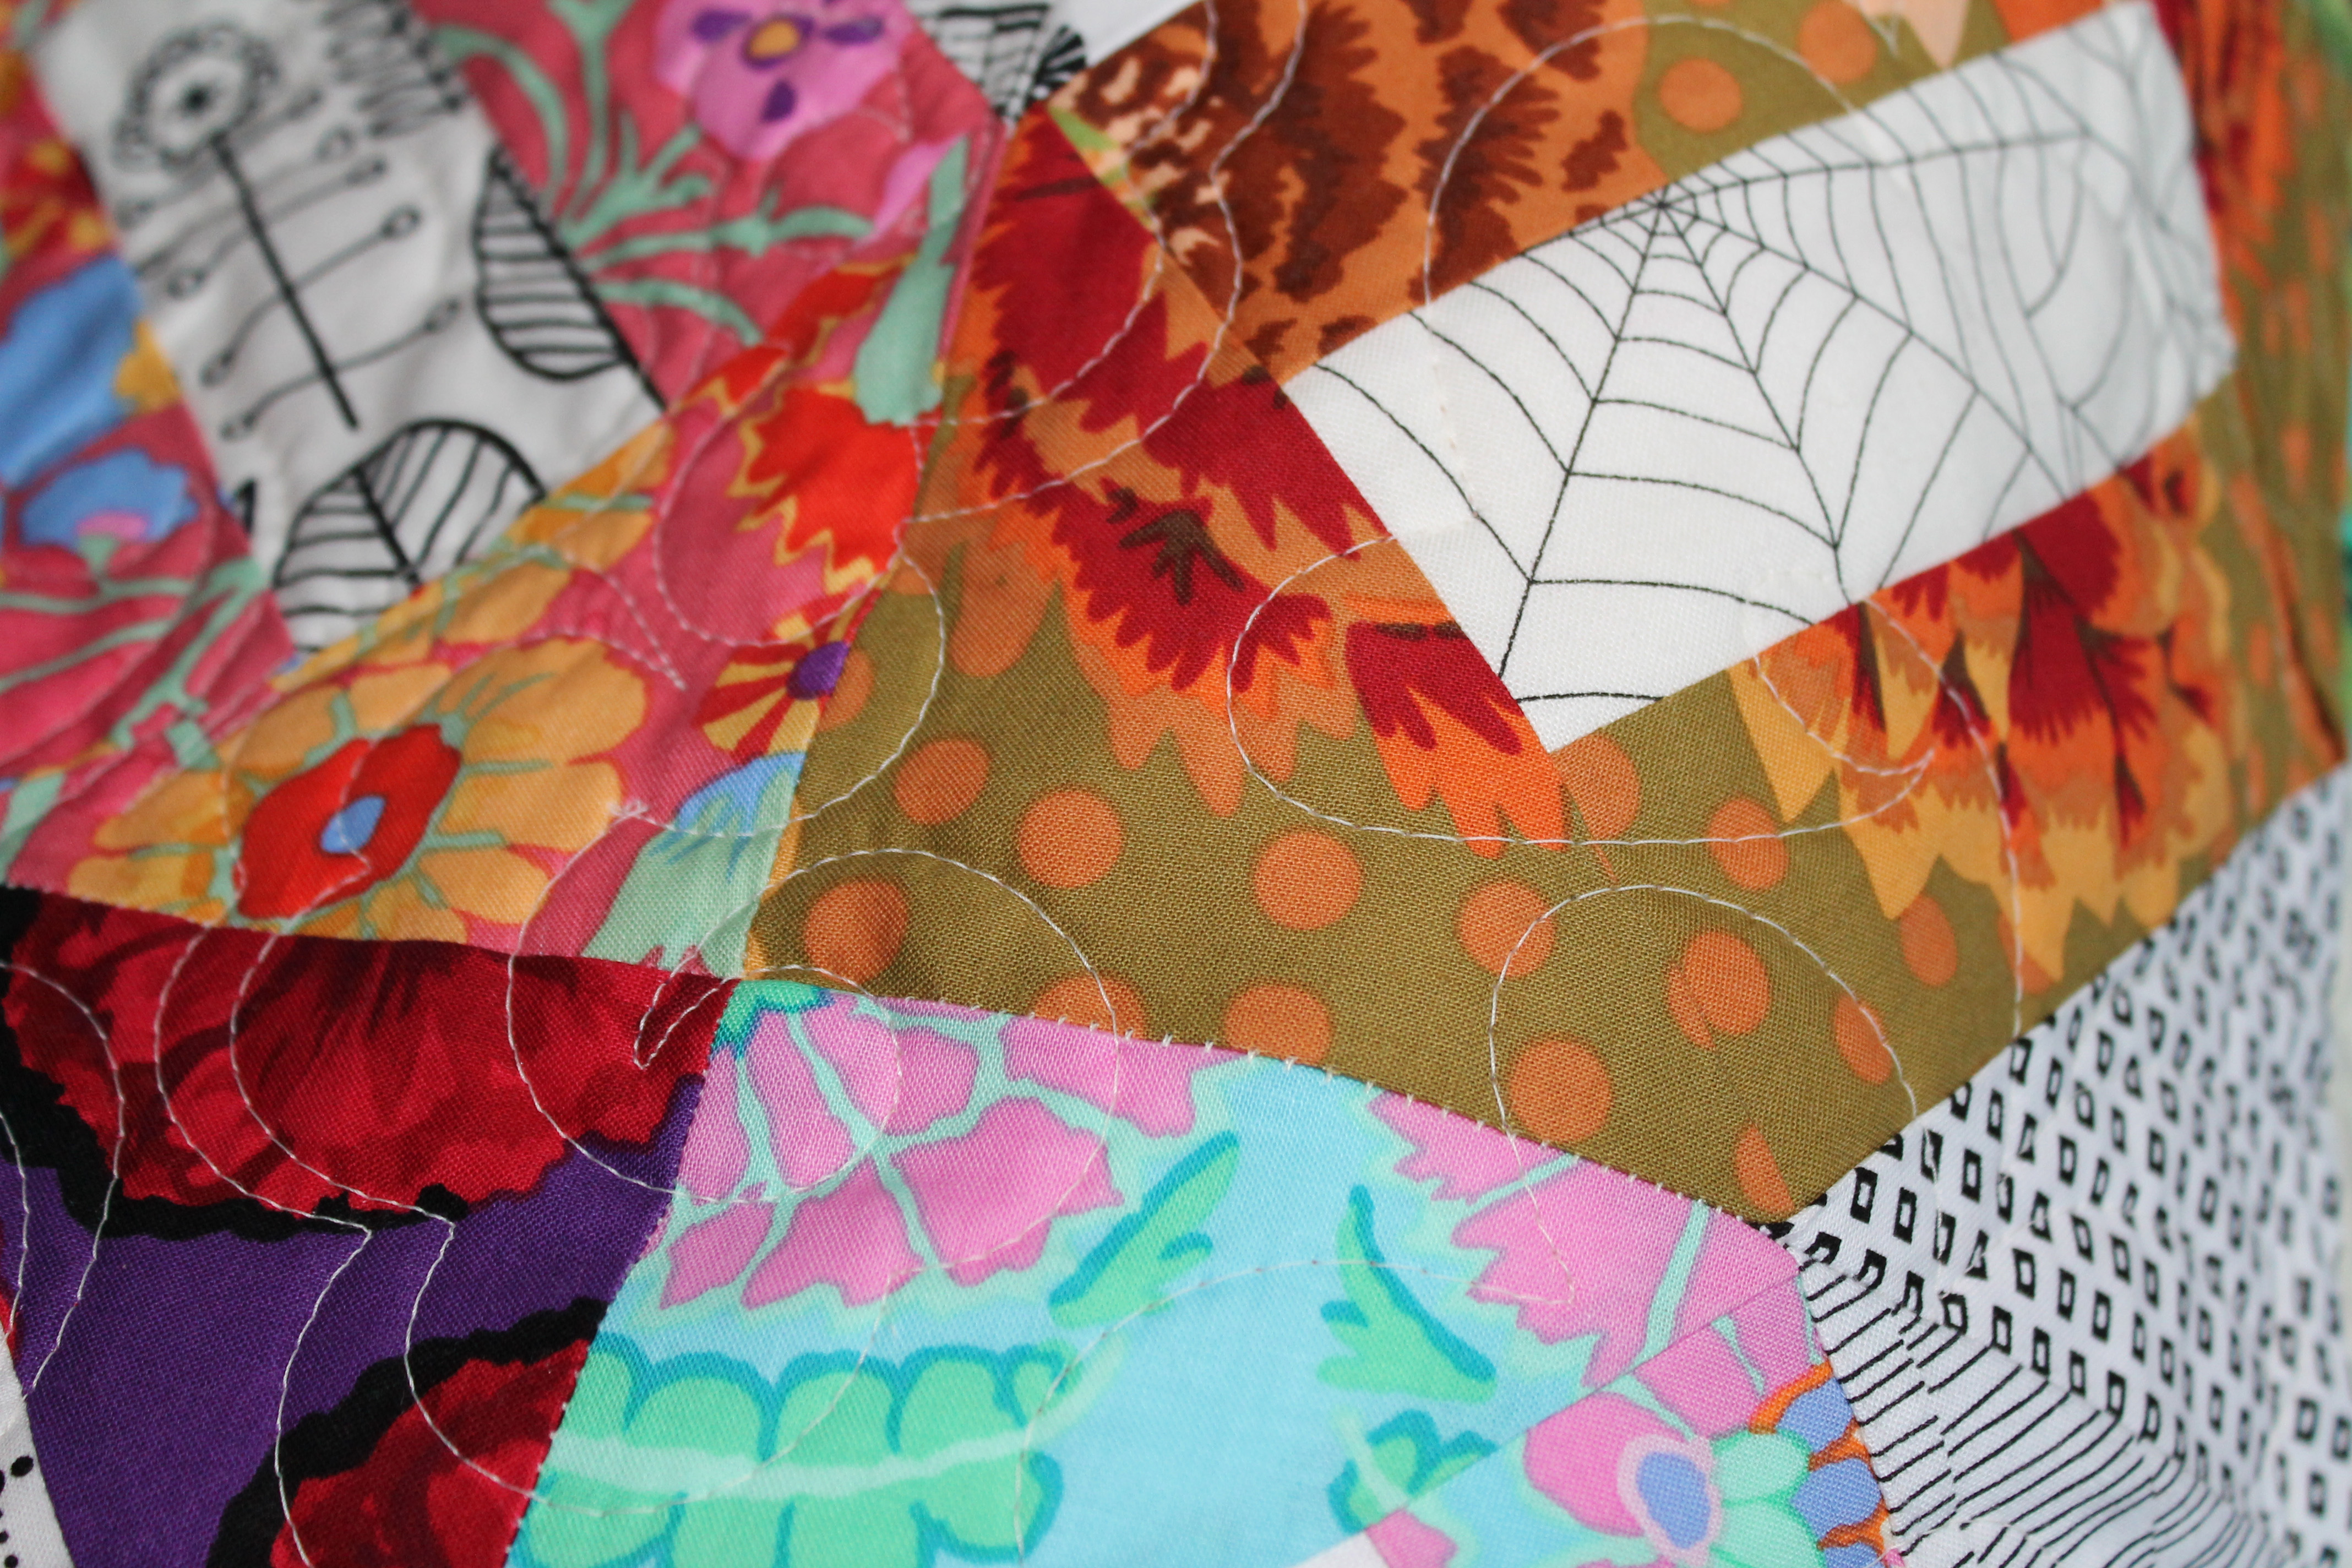
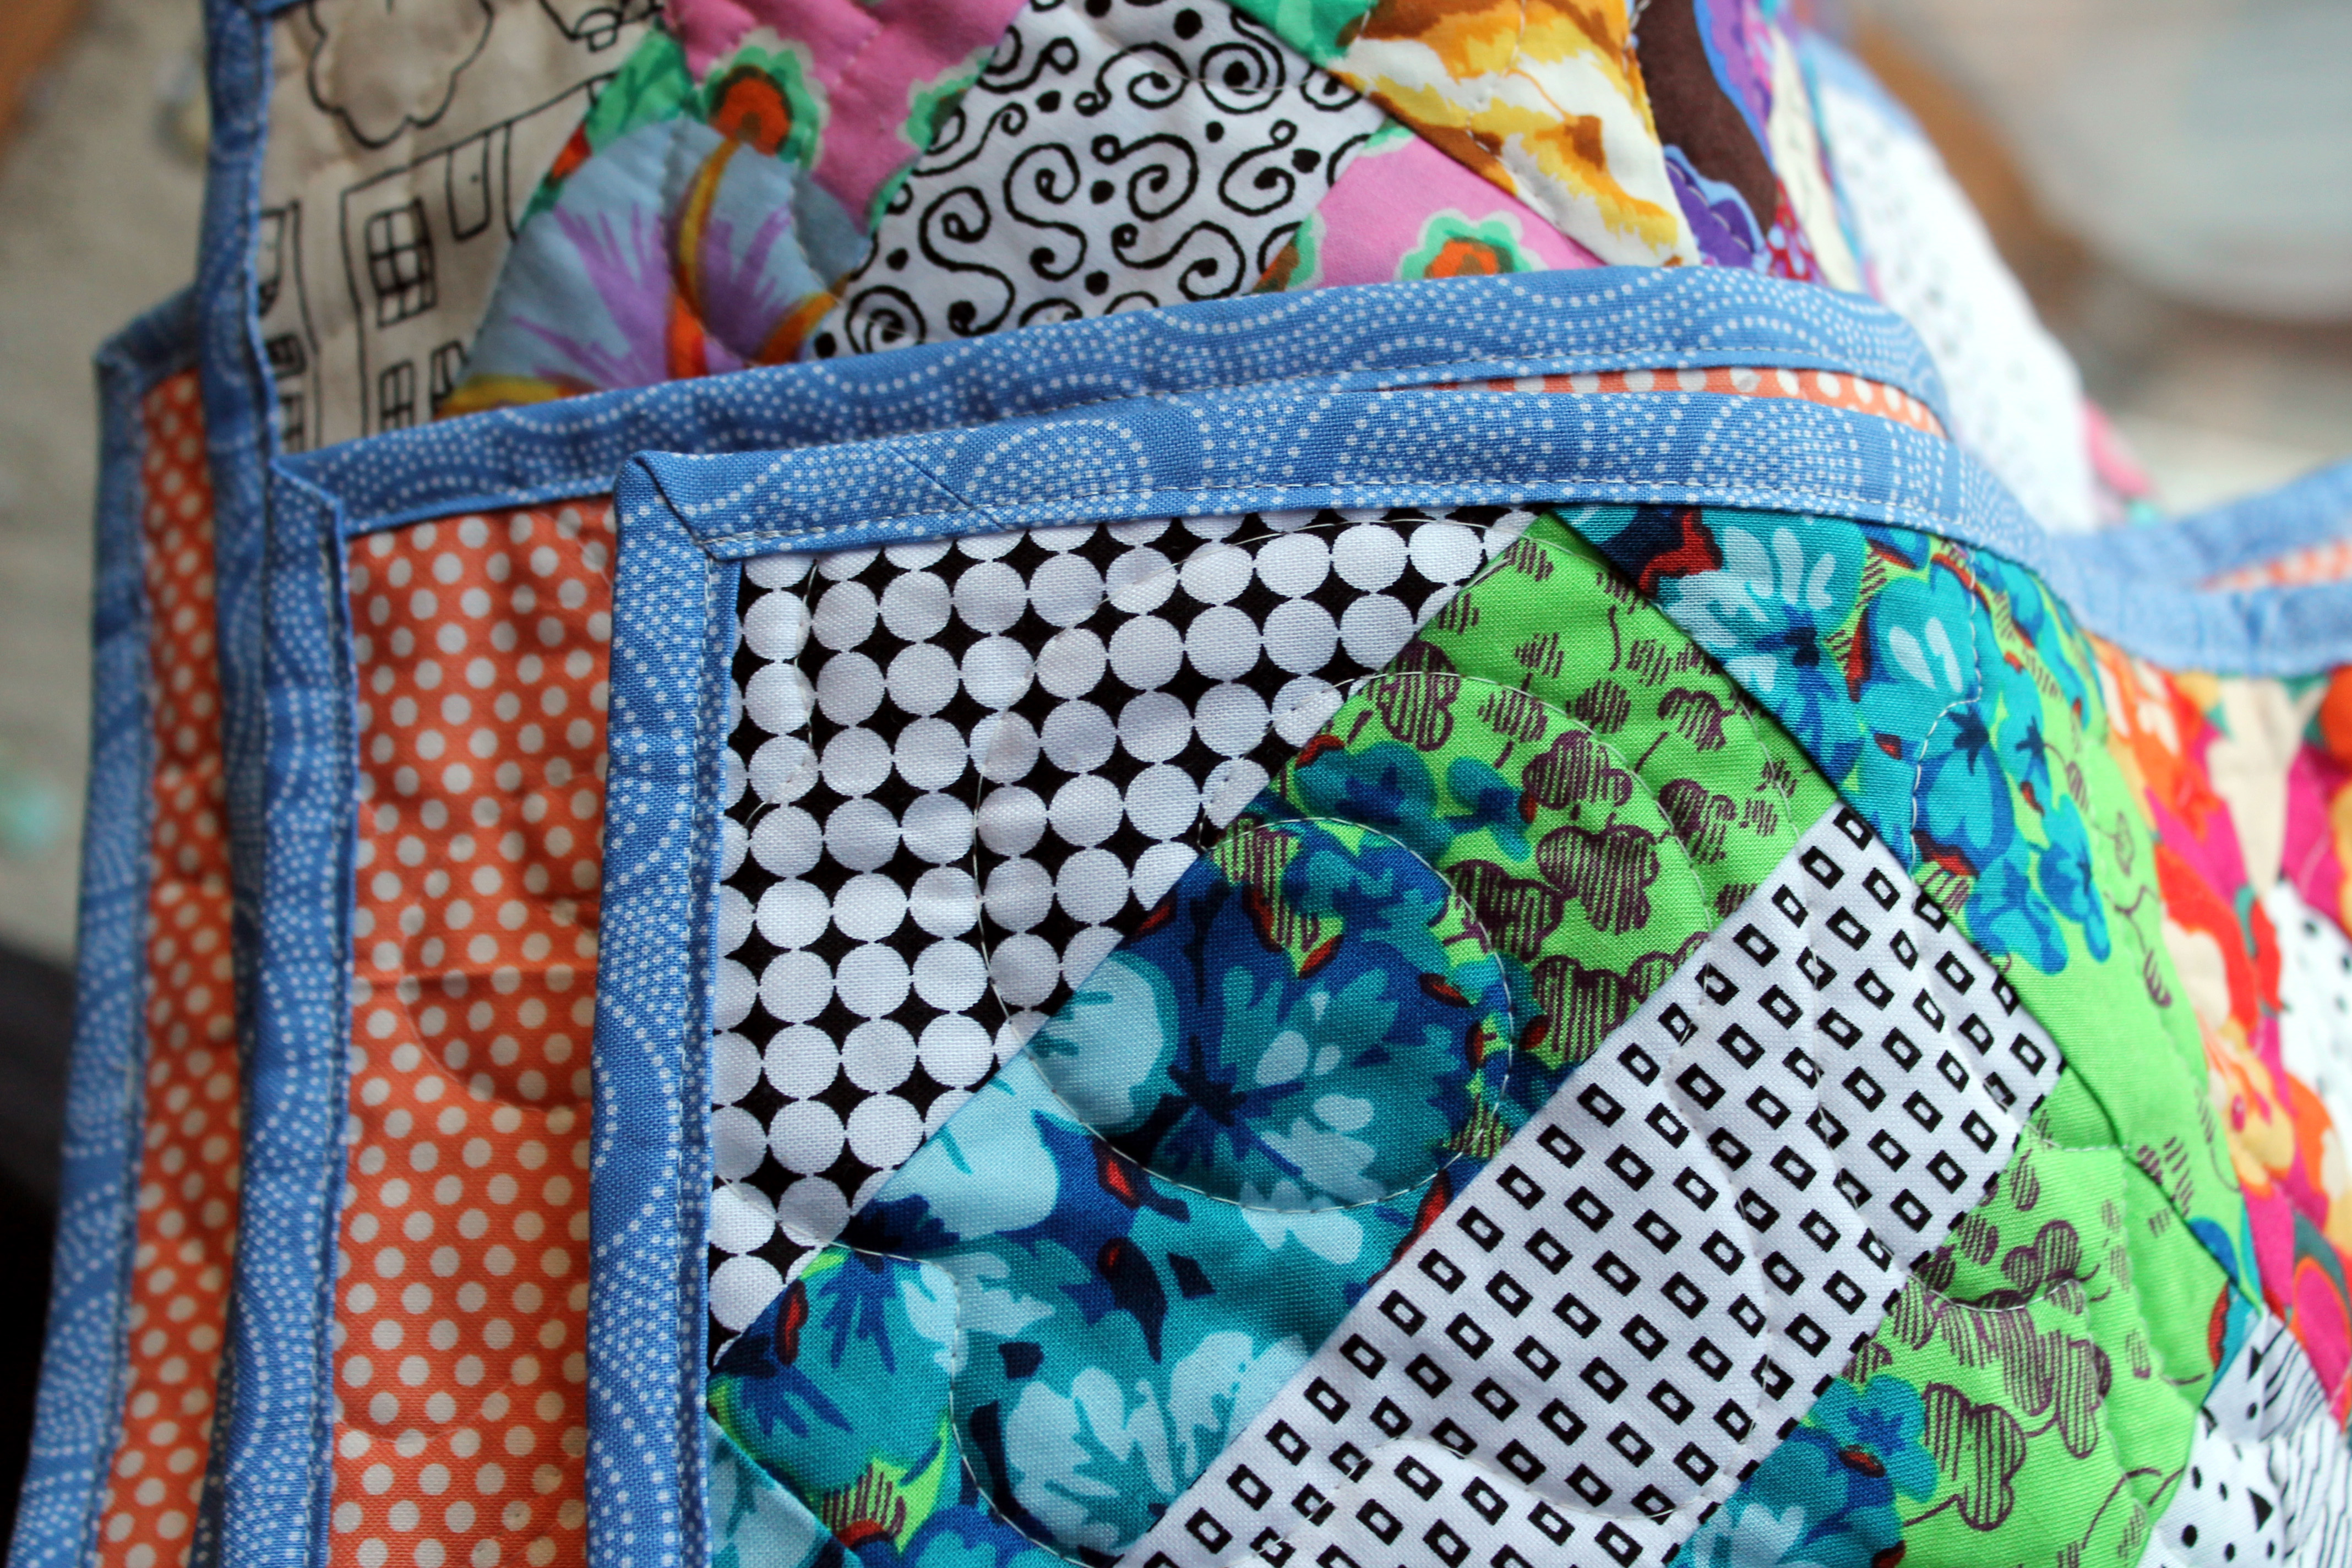
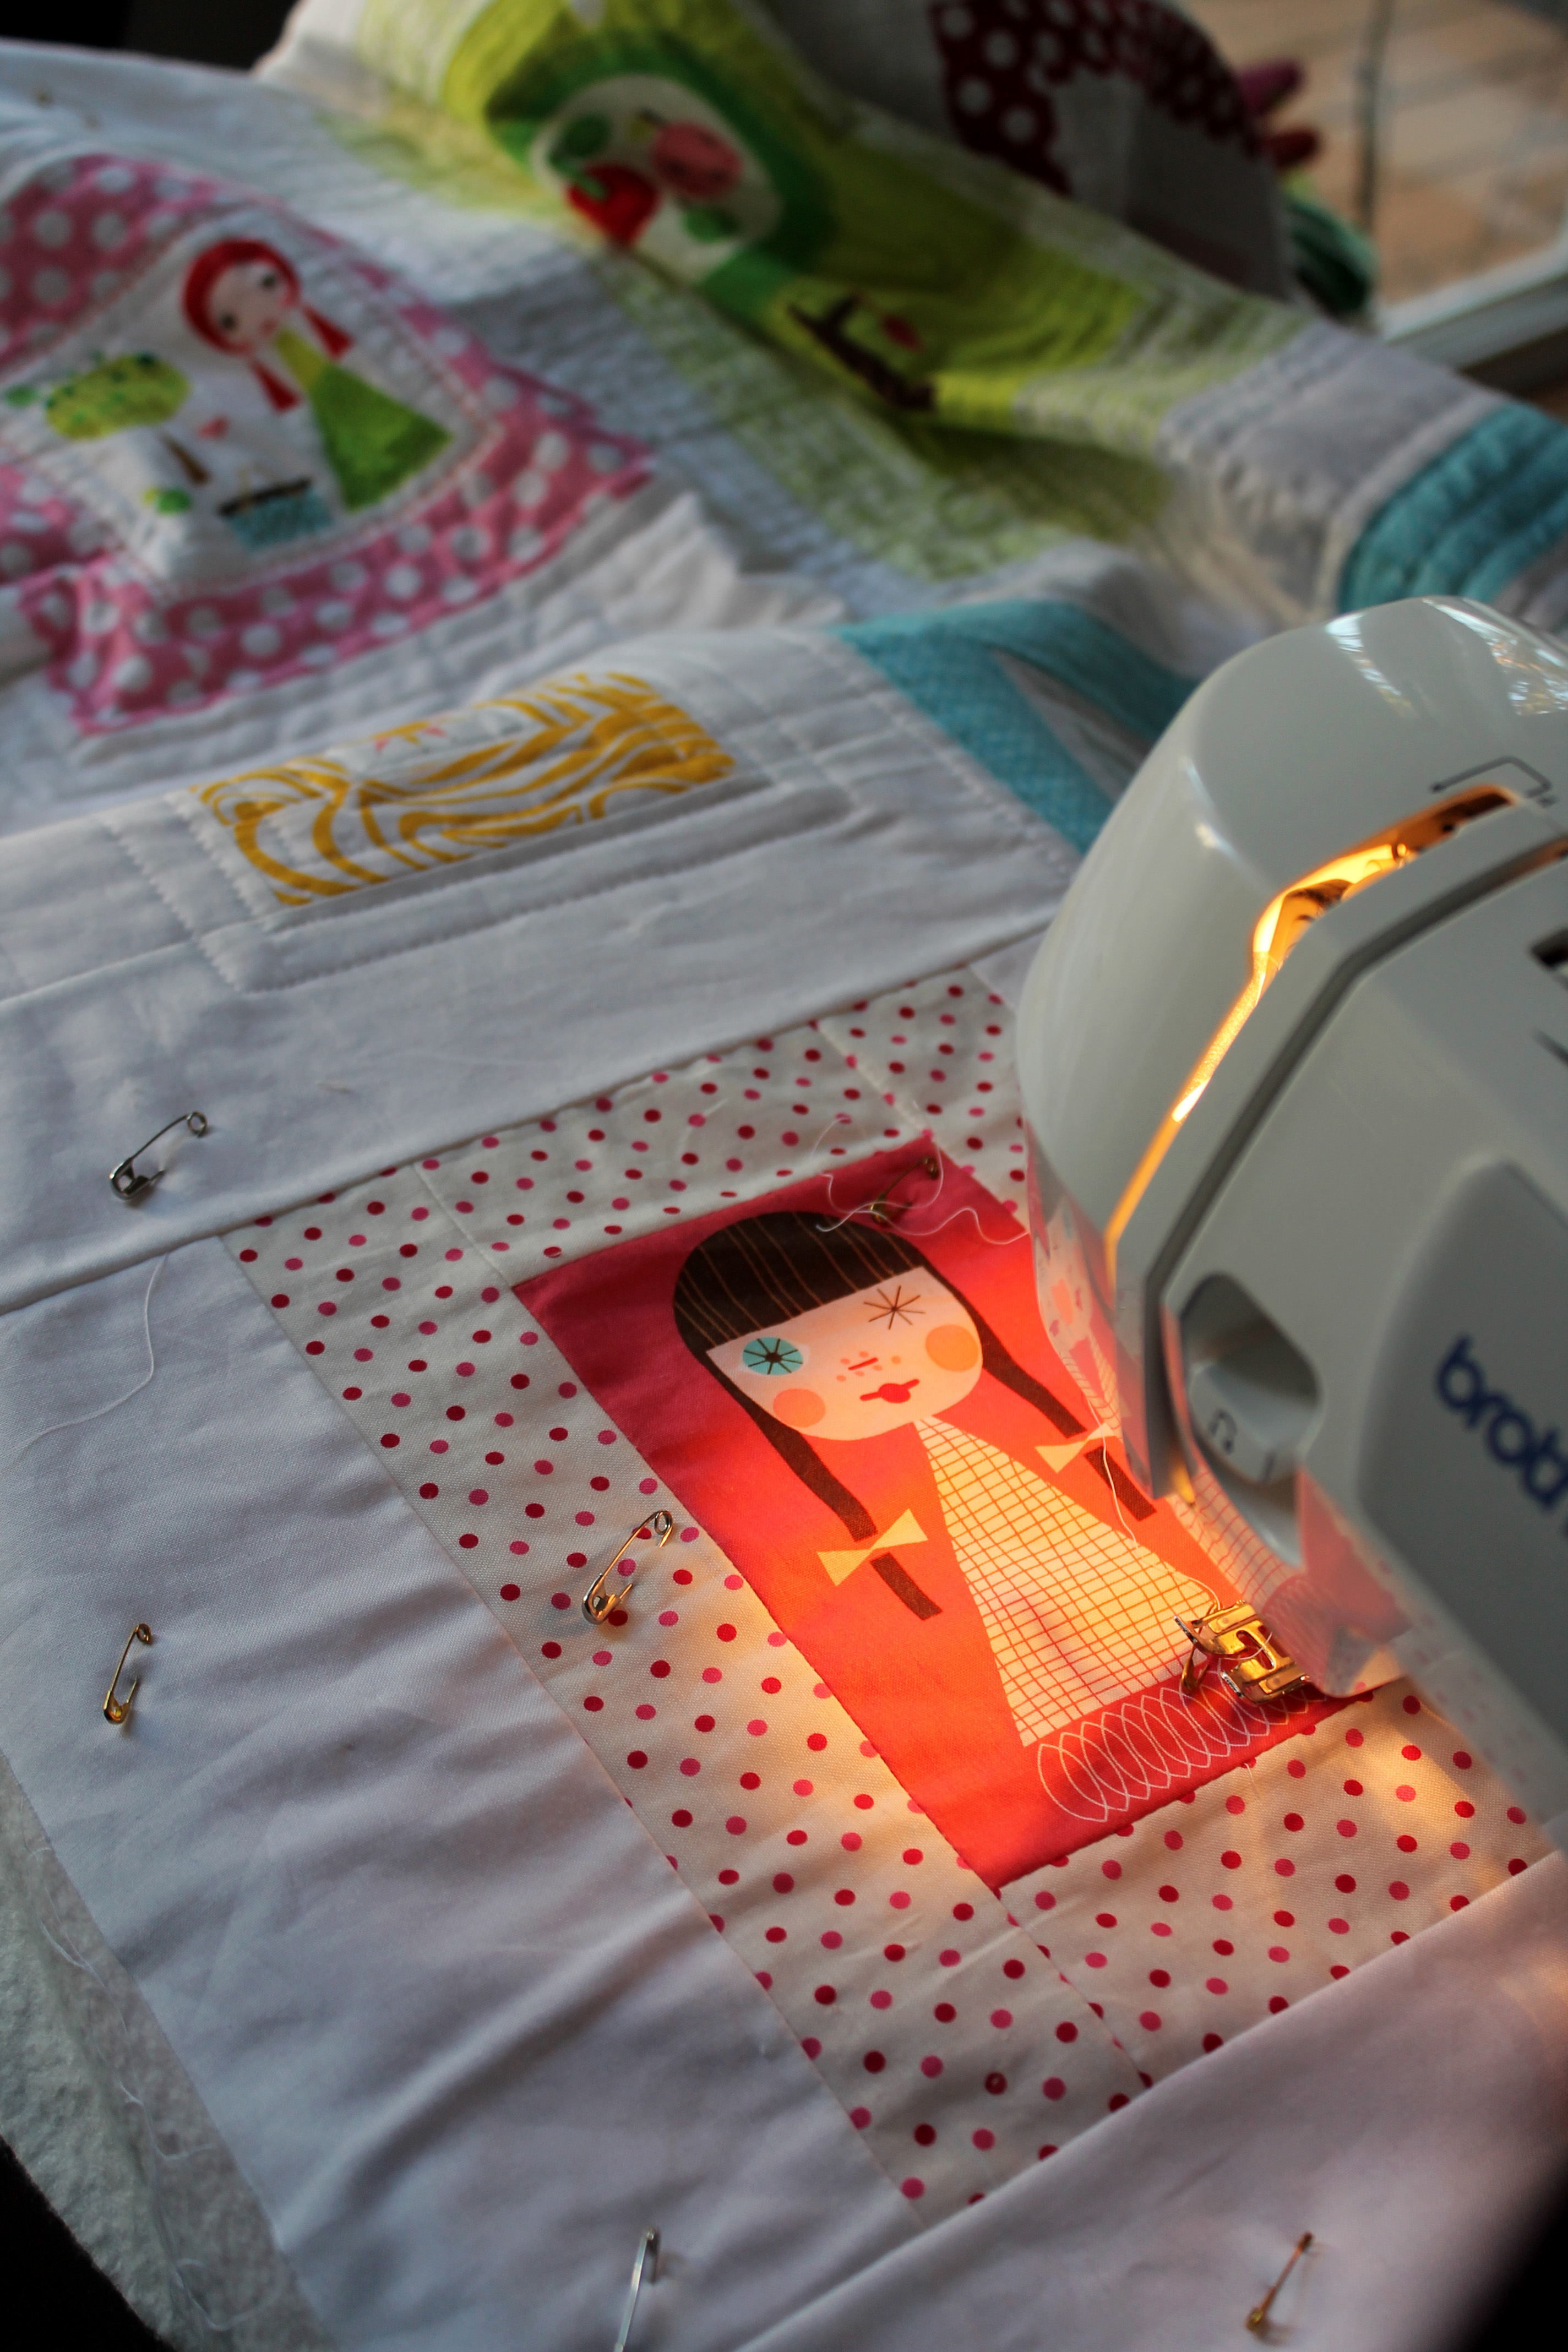
Then I quilted  lines inside the blocks and tried a little free motion pebbles in the white space.  I did not like it, and again my wrist was not up to that much pushing and pulling of fabric through the machine… unpicking number 2.   In the end it was straight lines and boxes.

Appleville quilt detail 2

It does the job, but is not as beautiful as I would have liked.  I am still coming to terms with my quilting shortfalls (which is my actual quilting) and my current physical limitations (my darn left wrist).  I am chomping at the bit to do some proper free-motion quilting to build up my skills.

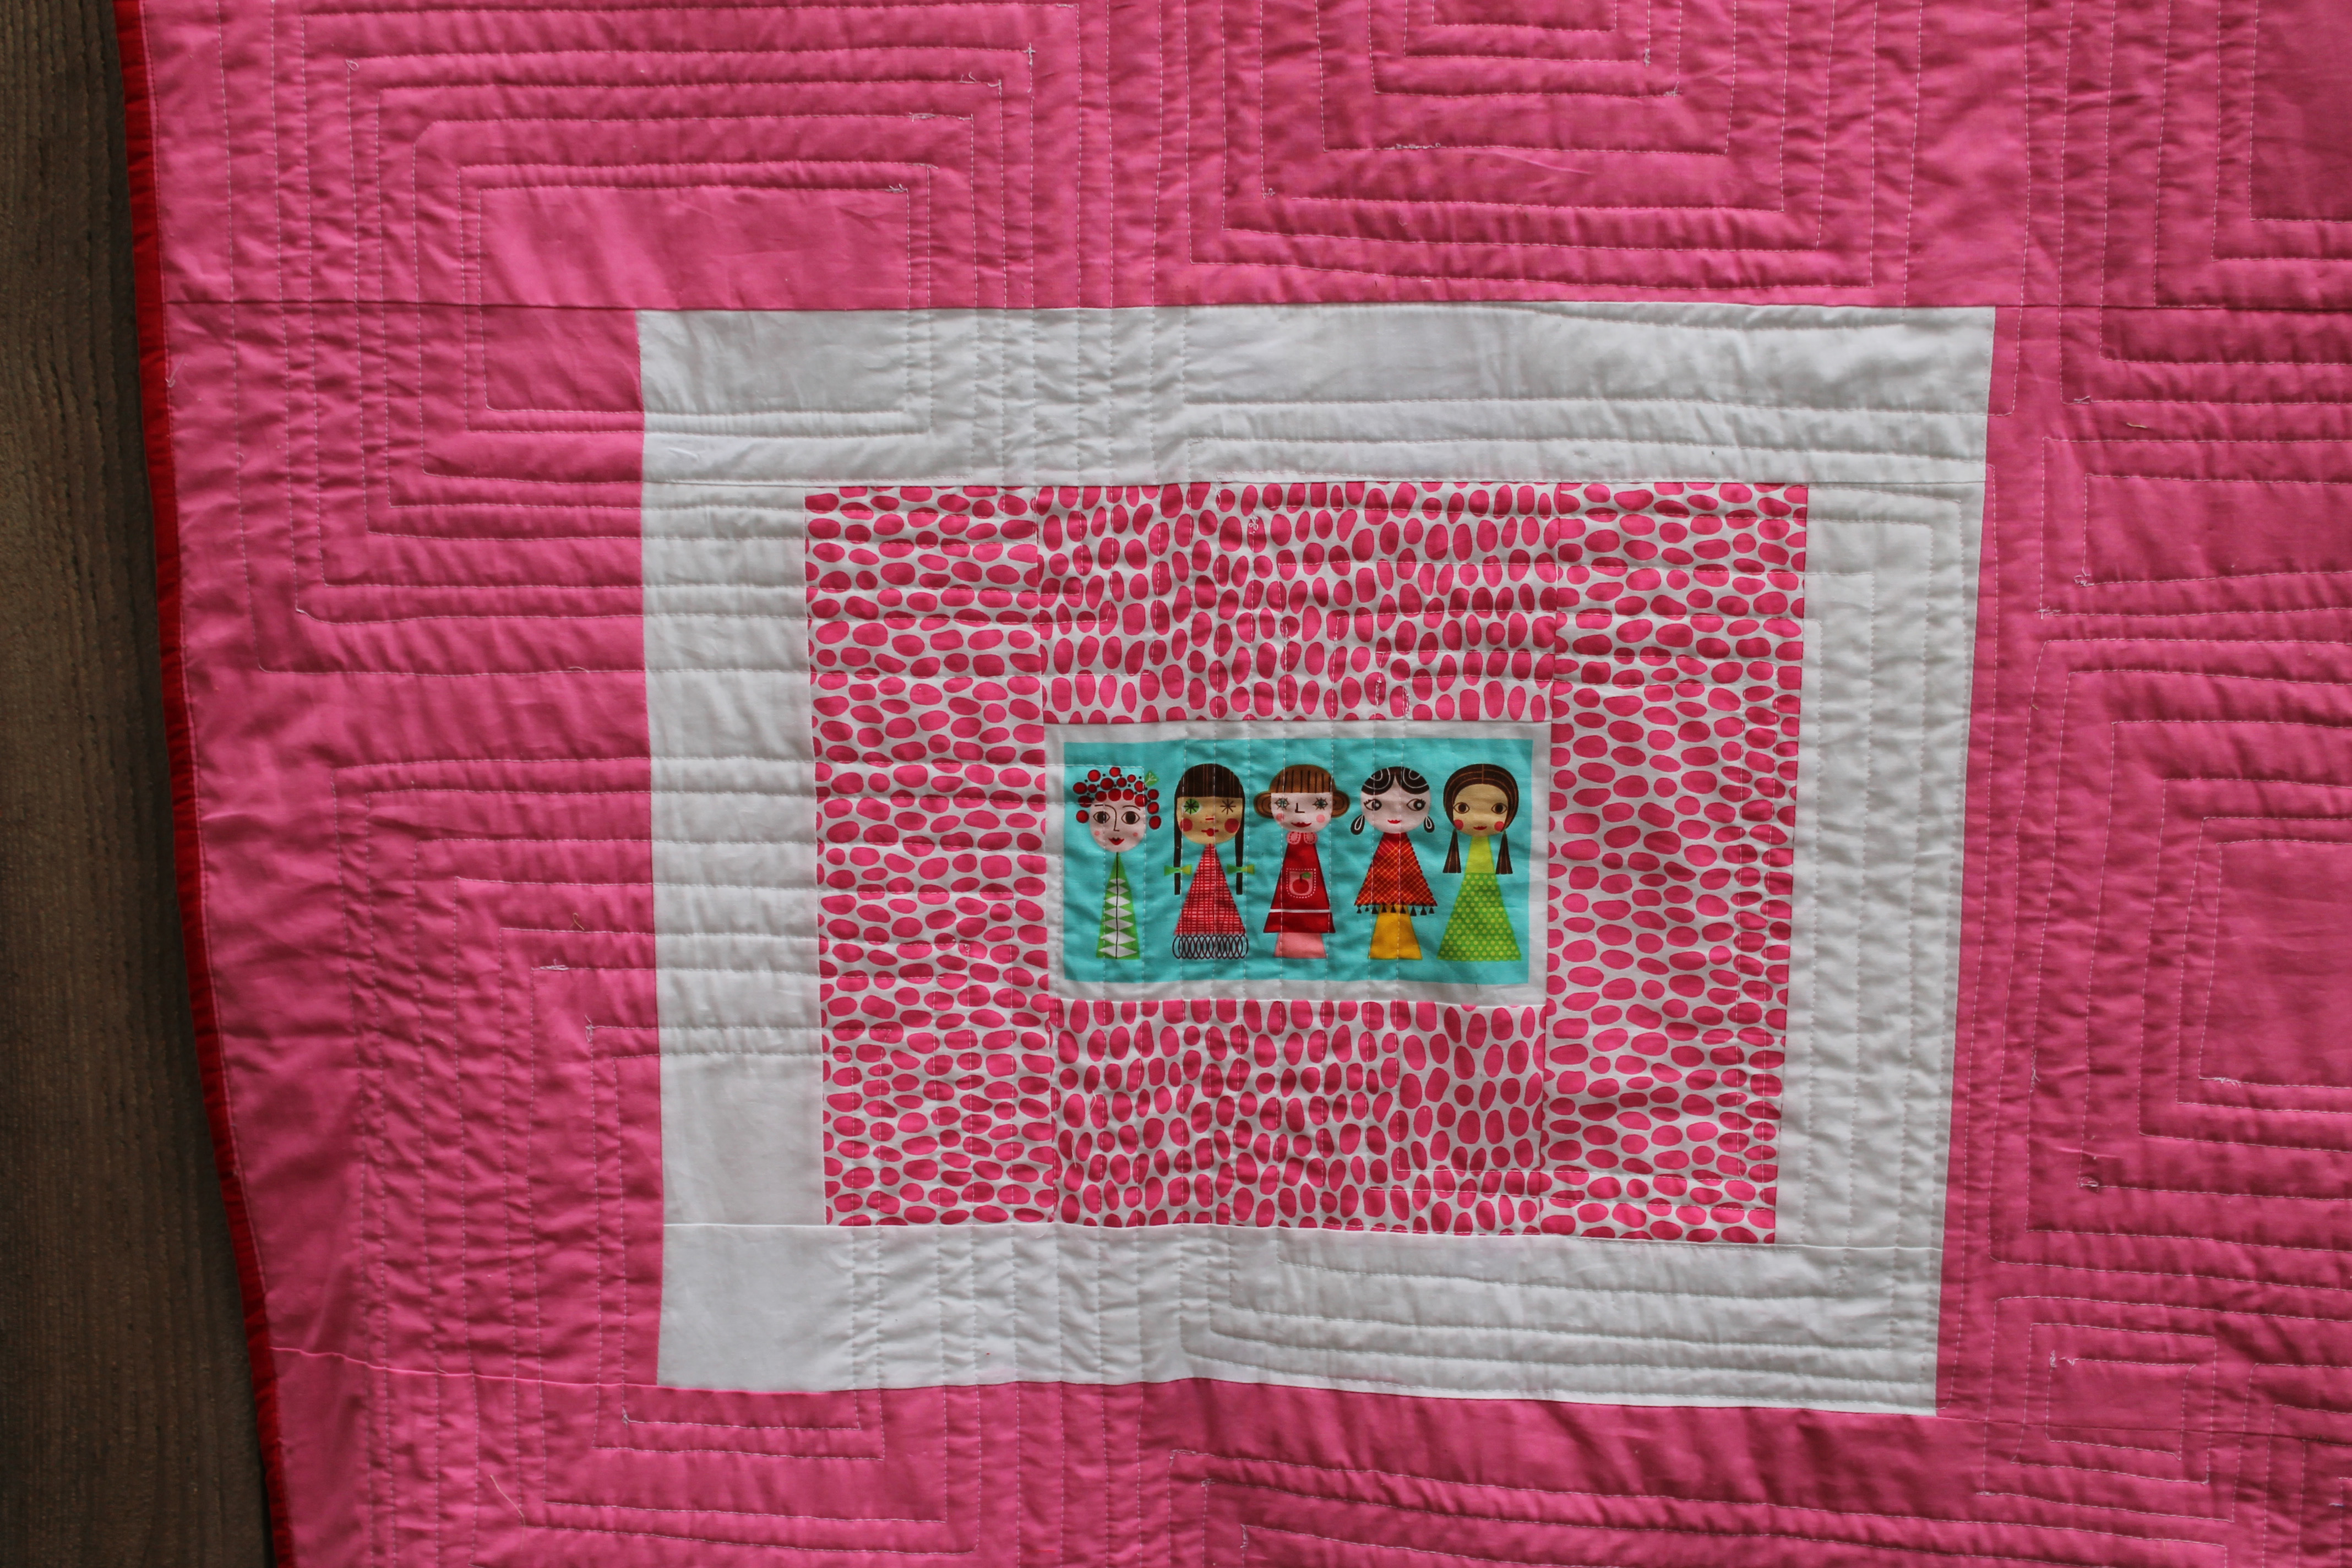
For the back of the quilt I used my favorite printed panel and made it the focal point.

Applieville quilt back

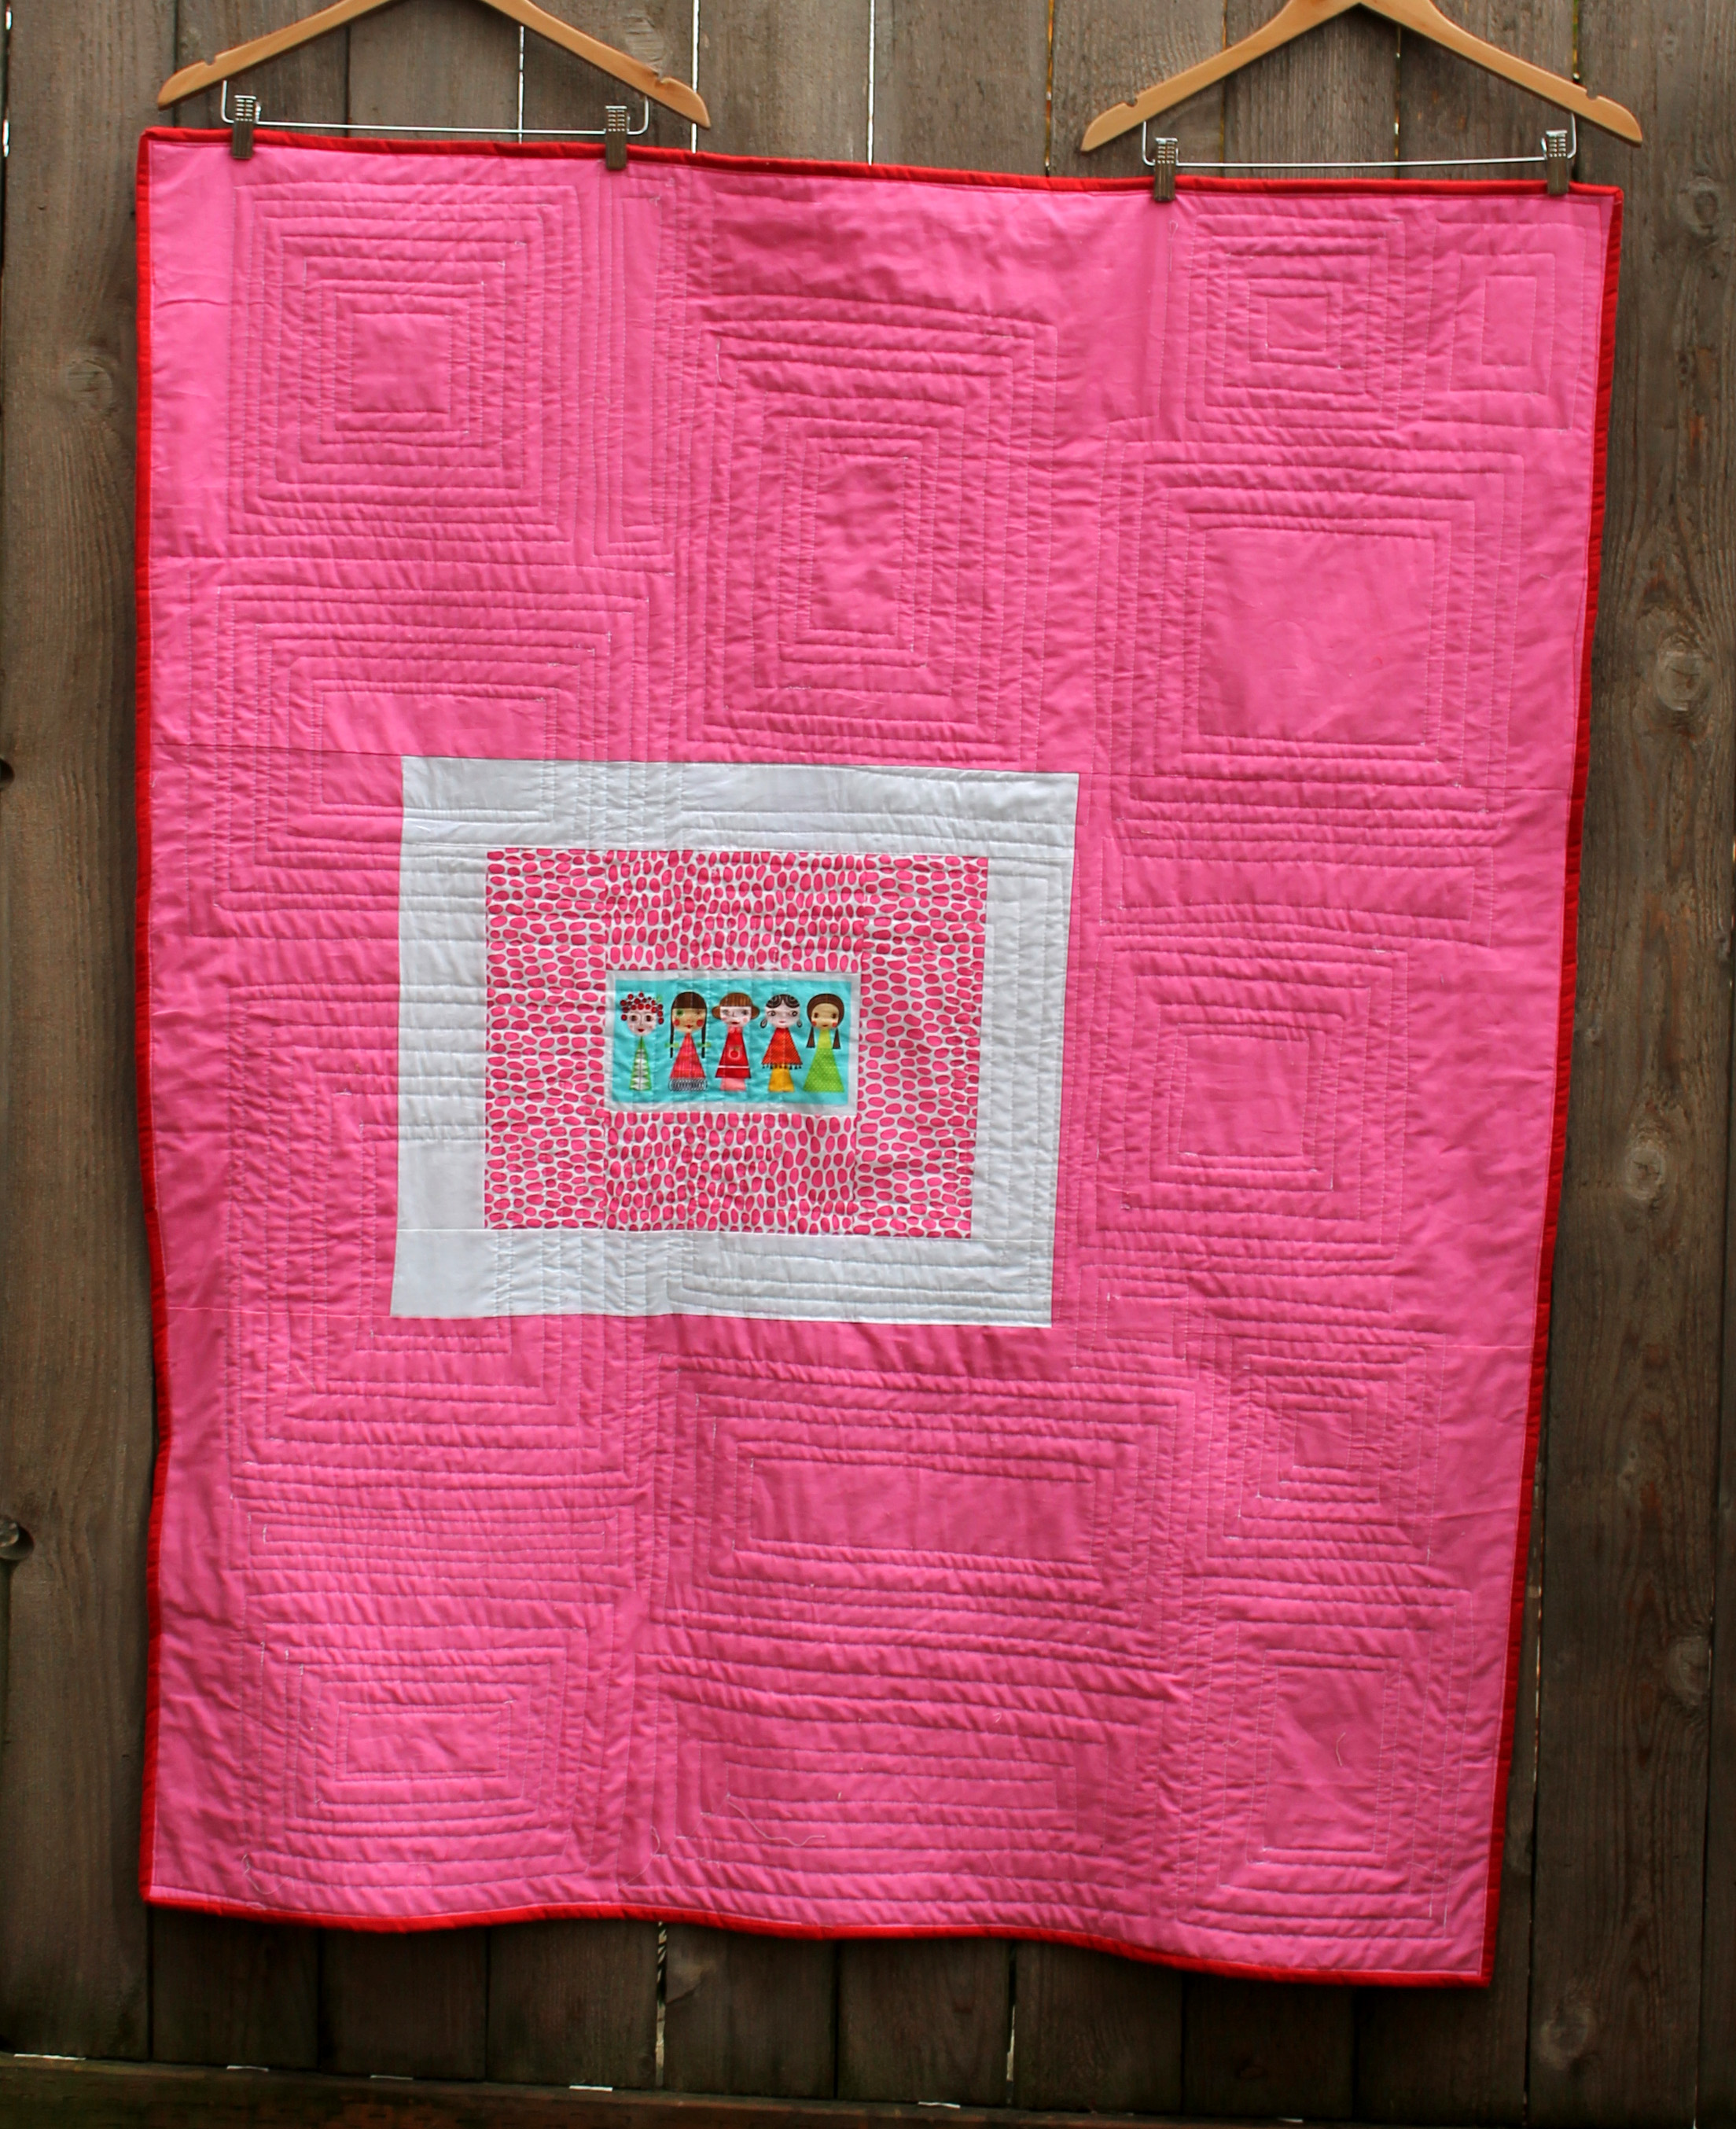
I think it is one of the cutest quilt backs I have done.  And it is all because of this little print.

Appleville quilt back detail

Appleville Quilt Details:

Style:  Modern free form

Fabric:  Appleville by Robert Kaufman & Kona White

Finished quilt size: 47″ x 57″


Playing with Urban Chickens

To celebrate this years Pacific North West MQG Meet up our fearless leader,  Michelle Freedman designed a fun modern block to celebrate… the Urban Chicken.  During the Meet Up we did a charity sew day where chickens ran wild.

Charity Sew Day Urban Chickens

This week I decided to dust off the pattern card and make my own Urban Chicken quilt… below is my plagiarized, annotated and updated version of Michelle’s original pattern.

For each block you need:

1.  Four (4) different shades of the same colour – I decided to stick to green, blue & yellow

2.  White or off white fabric – I pulled all my scrap bag of solid whites out.

Then it is off to work making a block….

1.   Cut one  3 ½ inches  x 14 ½  inches strip of each of your four coloured fabric.  I added an extra 1/2 inch to the strips from the original pattern to allow for some wiggle room (ie. mistakes).

layout strips

2.  From these strips cut one 3 ½ inches x 3 ½ inches  and set aside these squares.

cut square off strip

3.  Sew the four 10 ½ inch strips together using 1/4 inch seam allowance.  Press the seams to one side in the same direction.

sewing strips together

.4. Sew the long ends together to form a tube… these next steps are the same as you would do for a Trip Around quilt.

5.  Subcut the tube into three 3 ½ inch wide units… this is where the excess 1/2 inch of fabric on the strips comes in handy for me.

cut tube

5.  Carefully use the seam ripper to open each unit at a different place.  Arrange the three rows as you like, nesting the seam allows and sew together.  Press the seams open or to alternating sides.

strip blocks ready to go

Then to make the chickens….

1.  Using your white scraps or some generously cut white strips (no smaller than 2 ½ wide) and the four coloured squares you had set aside make some wonky triangles.

set aside squares

2.  Place the white fabric strip over the 3 ½ x 3 ½ inch square right sides together – angling the white fabric from just past center of the square to one corner of the square.  Repeat on the other side.  Do this for all four coloured squares.

chicken pieces for trimming

3.  Press seams on your chicken unit and square it up to the original 3 ½” x 3 ½” size.  When trimming make sure that the top of the triangle has a ¼ inch seam of white.  This will allow you triangles to come to a clean point (learnt this one the hard way).

trim chickens

4.  Arrange your chickens as you like and sew them together to form the fourth strip of the block.

urban chicken block

You can stitch your chickens to either side of your solid blocks.

Urban chicken block 4

5.  Make sure you square off your completed block ensuring it measures  12½”” by 12½”.

To add some variation to your Urban Chickiens, Michelle suggests doing some blocks up without the chickens… that is blocks of just 4 x 4 coloured squares.

I am now off to add some more chickens to my coup.  I am really having fun with this quilt and can not wait to have a finished quilt top to show.

It is my blogaversary… and someone will get the pressies

One year ago I posted my first ever blog post.  I can not believe that 132 posts later I am still going… and absolutely loving it.   To celebrate this milestone, and to say thanks to you all for your kinds words and support over the last 12 months,  I thought I would put together a package of my favorite things as a giveaway to one lucky reader.

First up is my favorite quilting book.. Sunday Morning Quilts by Cheryl Atkins and Amanda Jean Nyberg.  I love so many of the quilts and patterns in this book.

Sunday morning quilts

This is the book that introduced me to low volume quilts… and inspired this log cabin quilt in particular.

low volume modern log cabin quilt

Also is in the package is an introduction kit for making 1 inch hexagons –  a packet of 25 plastic templates and a packet of 2 1/2 inch squares of the gorgeous Waterfront Park by Violet Craft.

hexagons

This packet will help you make a start on your own English Paper Pieced (EPP) crazy… I warn you it is addictive.  This part of the giveaway is in honor of my loud obnoxious hexagon work in progress.

hexagon wip 2

And what prize package would be complete without some fabric.  First up is a selection of 10 fat quarters.  Every scrap quilter knows the value of the fat quarter, it is one of the staples of our stash and the best way to get more variety and colour in your collection.

fat quarter bundle

There is of course some of my stash staples… Lizzy House’s “Pearl Bracelets”, a little “Mirror Ball” by Michael Miller and some beloved black and white fabric.

Denyse Schmidt paper pieced flowersAnd in honor of my recent Zakka flower quilt  I am also including a Denyse Schmidt fat quarter collection.   I choose my favorite fabric from this release,  I just love the blue floral in this selection.

DS Fat Quarters

Someone will win all this and more…

Prize package

So how do I enter I hear you ask… just leave a comment on this post.  One lucky winner will be picked next Sunday (27th October) and the prize will be dispatched to which ever part of the world the winner is from.

Floral Crackers Fabulous Finish

I was so excited last night when I took deliver of my finished Floral Cracker’s quilt.   The fabulous Rachel from 2nd Avenue Studios had used her amazing long arm/free motion quilting skills to complete this project for me.

modern scrap floral quilt

I meet Rachel through the Portland Modern Quilting Guild and fell in love with her quilts. She does the most amazing wonky scrappy creative quilts.  I was a huge fan and when she offered to quilt Floral Crackers for me I was beyond excited.  Rachel also makes a lot of charity quilts and also does long arming quilting of charity quilts for the Guild.  Basically she is a rock star.

Floral cracker finished quilt detail 3I made the blocks for this quilt months ago using my black and white stash and lots of crazy floral fabrics.  i raided my Kaffe Fassett stash, my Amy Butler stash as well as my friend Lisa’s stash.  You can find my original post about the block, along with pattern links on how to make it here.

Floral cracker quilting motif

Rachel used a wonderful free motion flower pattern for the quilting.  The shape is very  “Kaffe” and mirrors several of the fabrics in the quilt.

Floral Cracker quilting detail

I struggled to get decent pictures that do the quilt and quilting justice.  Why do photos never capture the true beauty of a quilt?

Floral cracker finished quilt detail

To back the quilt, Rachel went with a gorgeous light orange dot solid.  It is the perfect simple accompaniment to the crazy busy front.

Floral Cracker quilt back

Rachel also kindly did the binding for me on this quilt with her new Bernina binding magic thingy…. and I love it almost as much as I love the quilting.  As a nod to me she used Kaffe Fassett’s “Aboriginal Dot” fabric.

Floral Cracker binding detail

I know it is kind of cheating but I am counting this as one of my October Project Linus quilts… I did make the top!

FLORAL CRACKER DETAILS:

Technique:   Paper Piecing

Finished Block size:  7 inches

Quilt size:  56″ x 70″

Some Appleville fun

This week I found in my stash a yard of fabric I bought a year or so ago because I fell in love the artwork on it.  It from Suzy Ultman’s “Appleville” range for Robert Kaufman.

suzy ultman fabric

I often buy fun printed fabric because I love it, but do not really know what I am going to do with it.  I struggled a lot with this fabric in particular because it is blocks of different prints, not an overall pattern.    I know I could have cheated and just used it as part of a backing fabric, but that would not show the fun prints off to their best advantage.

So this week to challenge myself, I pulled the fabric out of my stash, determined to make a quilt out of it.  I cut the individual printed sections of the fabric out and went to work.

modern kids quilt block

I grabbed some Kona white, some graphic bright prints and started playing.

Appleville block 2

As I finish a block it goes up on the design wall with the others.

Appleville block 5

Slowly but surely a quilt top is starting to emerge.

Appleville block 1

The blocks are all different shapes and sizes so the layout will be free form.

Appleville block 6

And there will be a lot of white used as the background fabric.

Appleville block 3

But in the end I hope to have a fun quilt top finished, quilted and bound for Friday.

Wish me luck…