Colours of this week are purple & aqua!

This week has been a weird week.  I have not got as much done as I would have liked, as our family is preparing to run away to Australia for a couple of weeks.  In between the packing and the last-minute shopping I did managed to get this quilt finished.

finished double pinwheel quilt

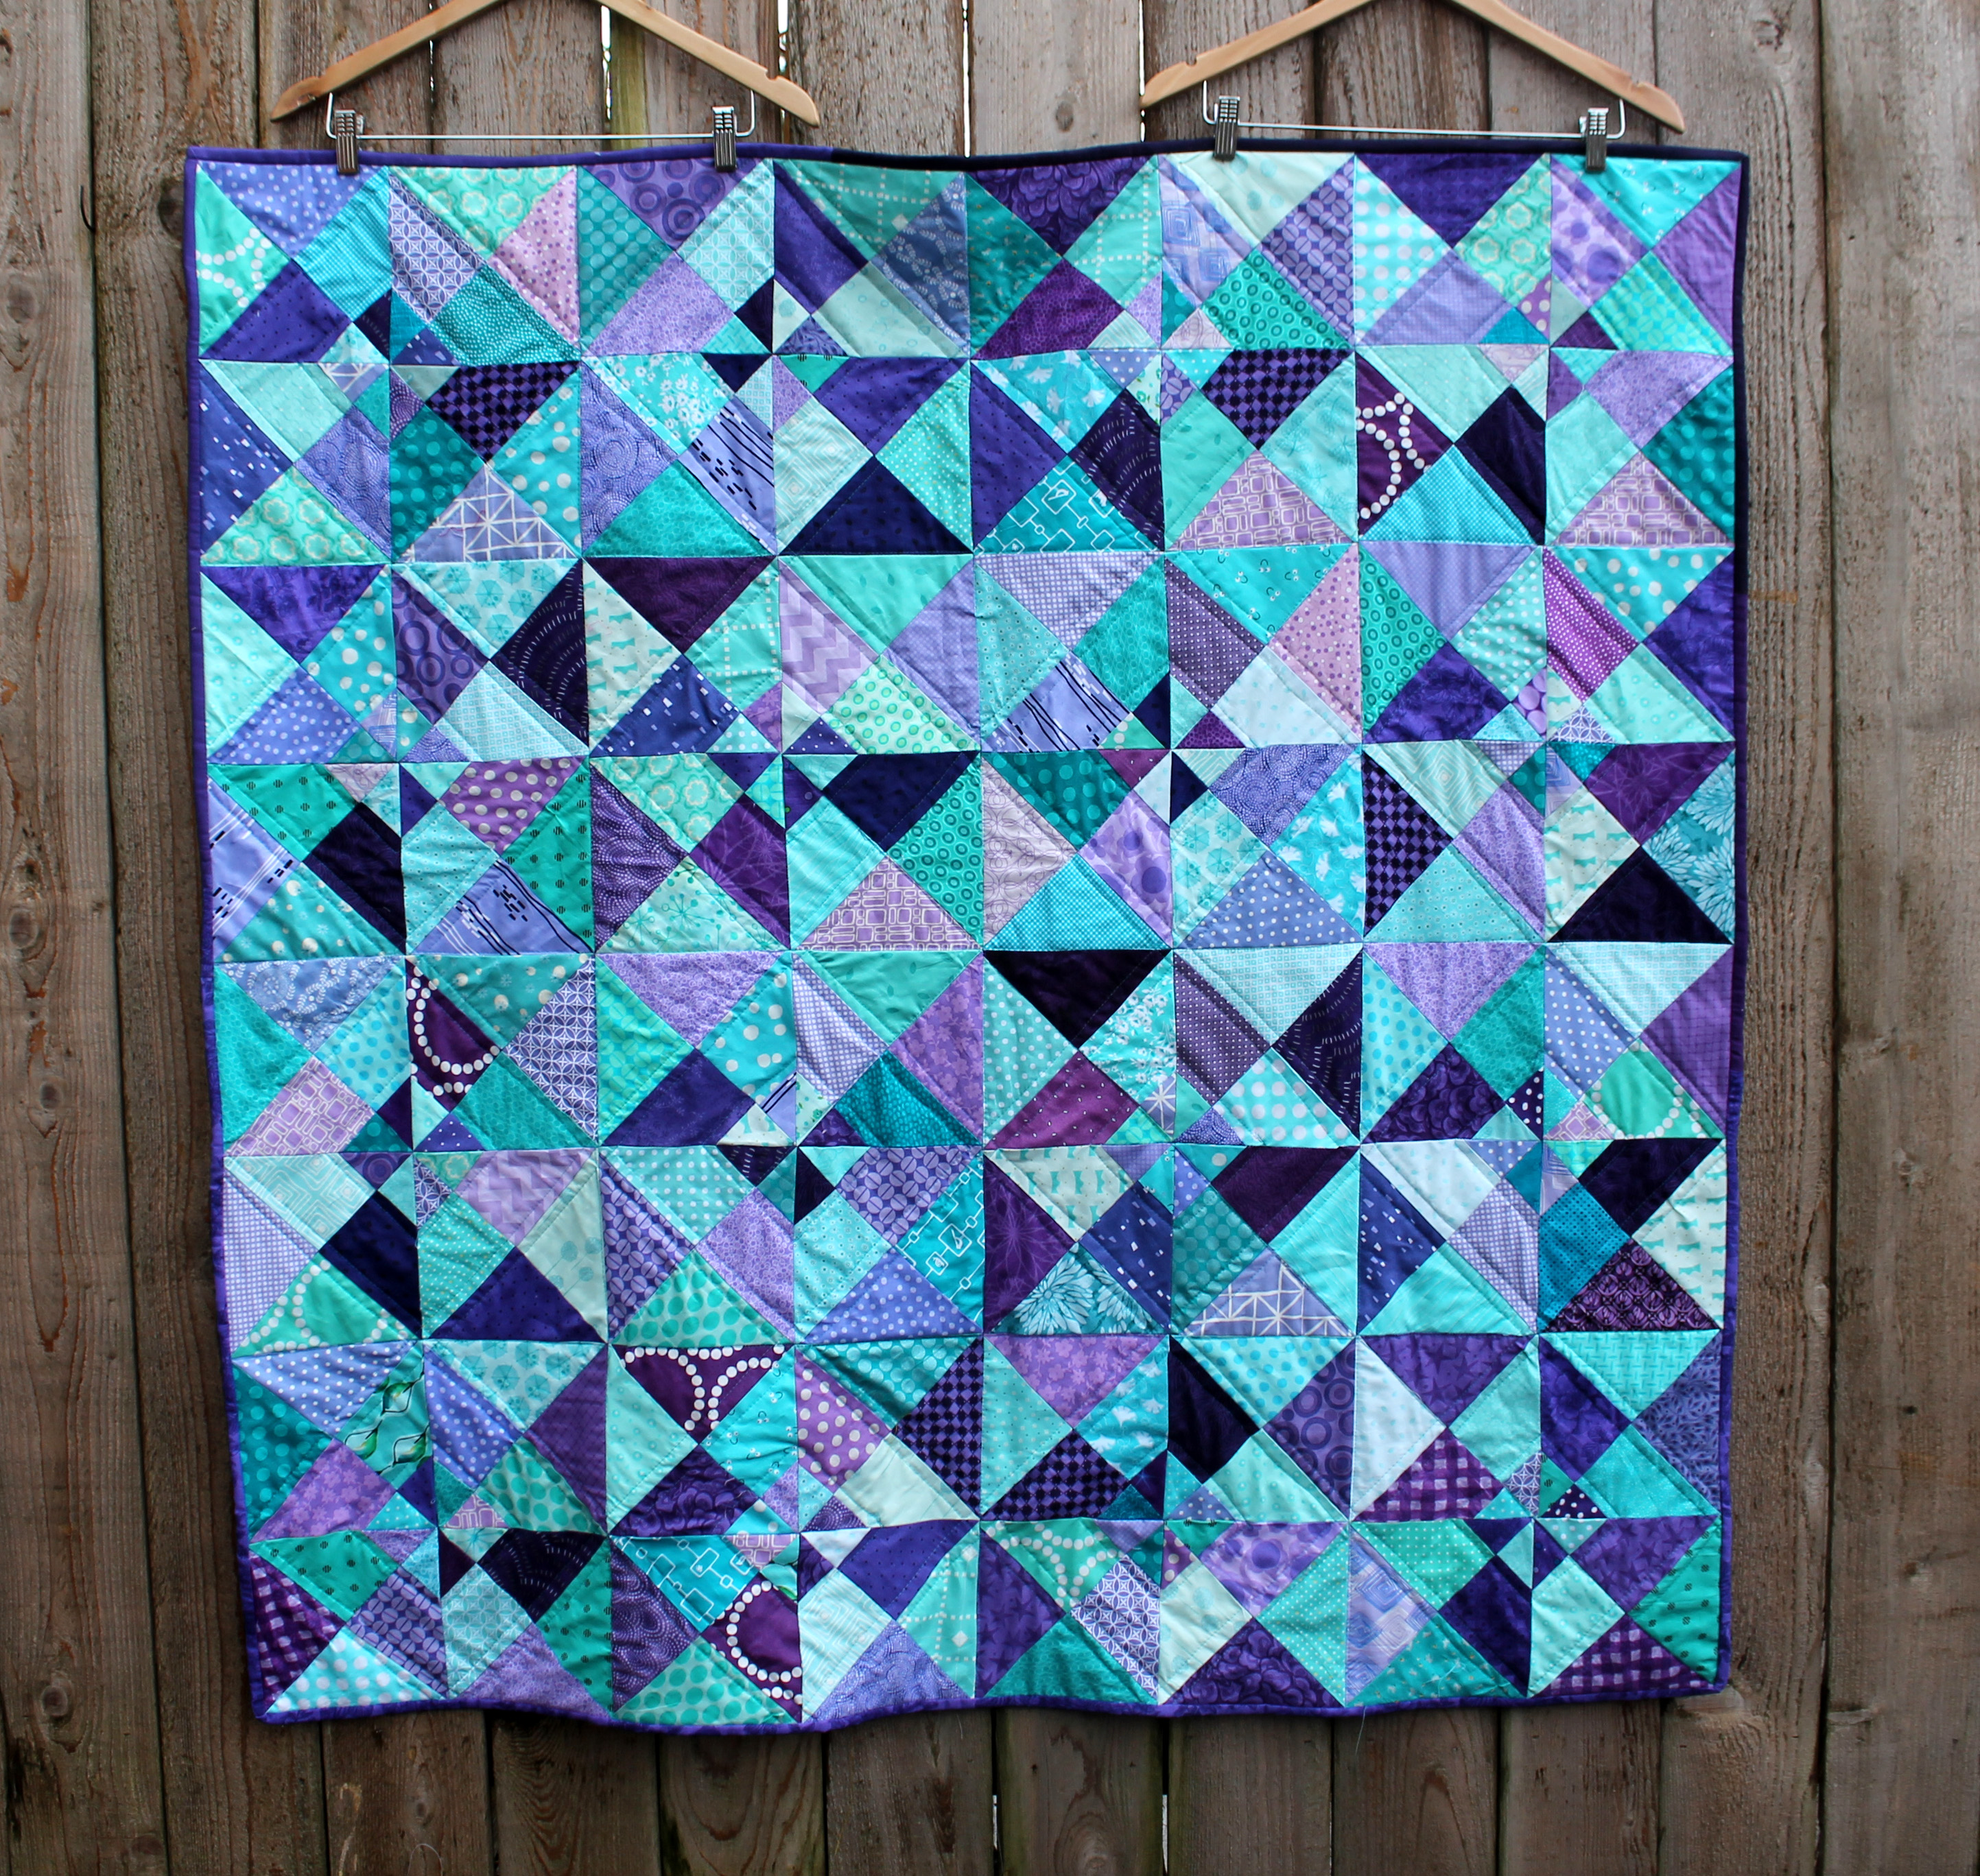
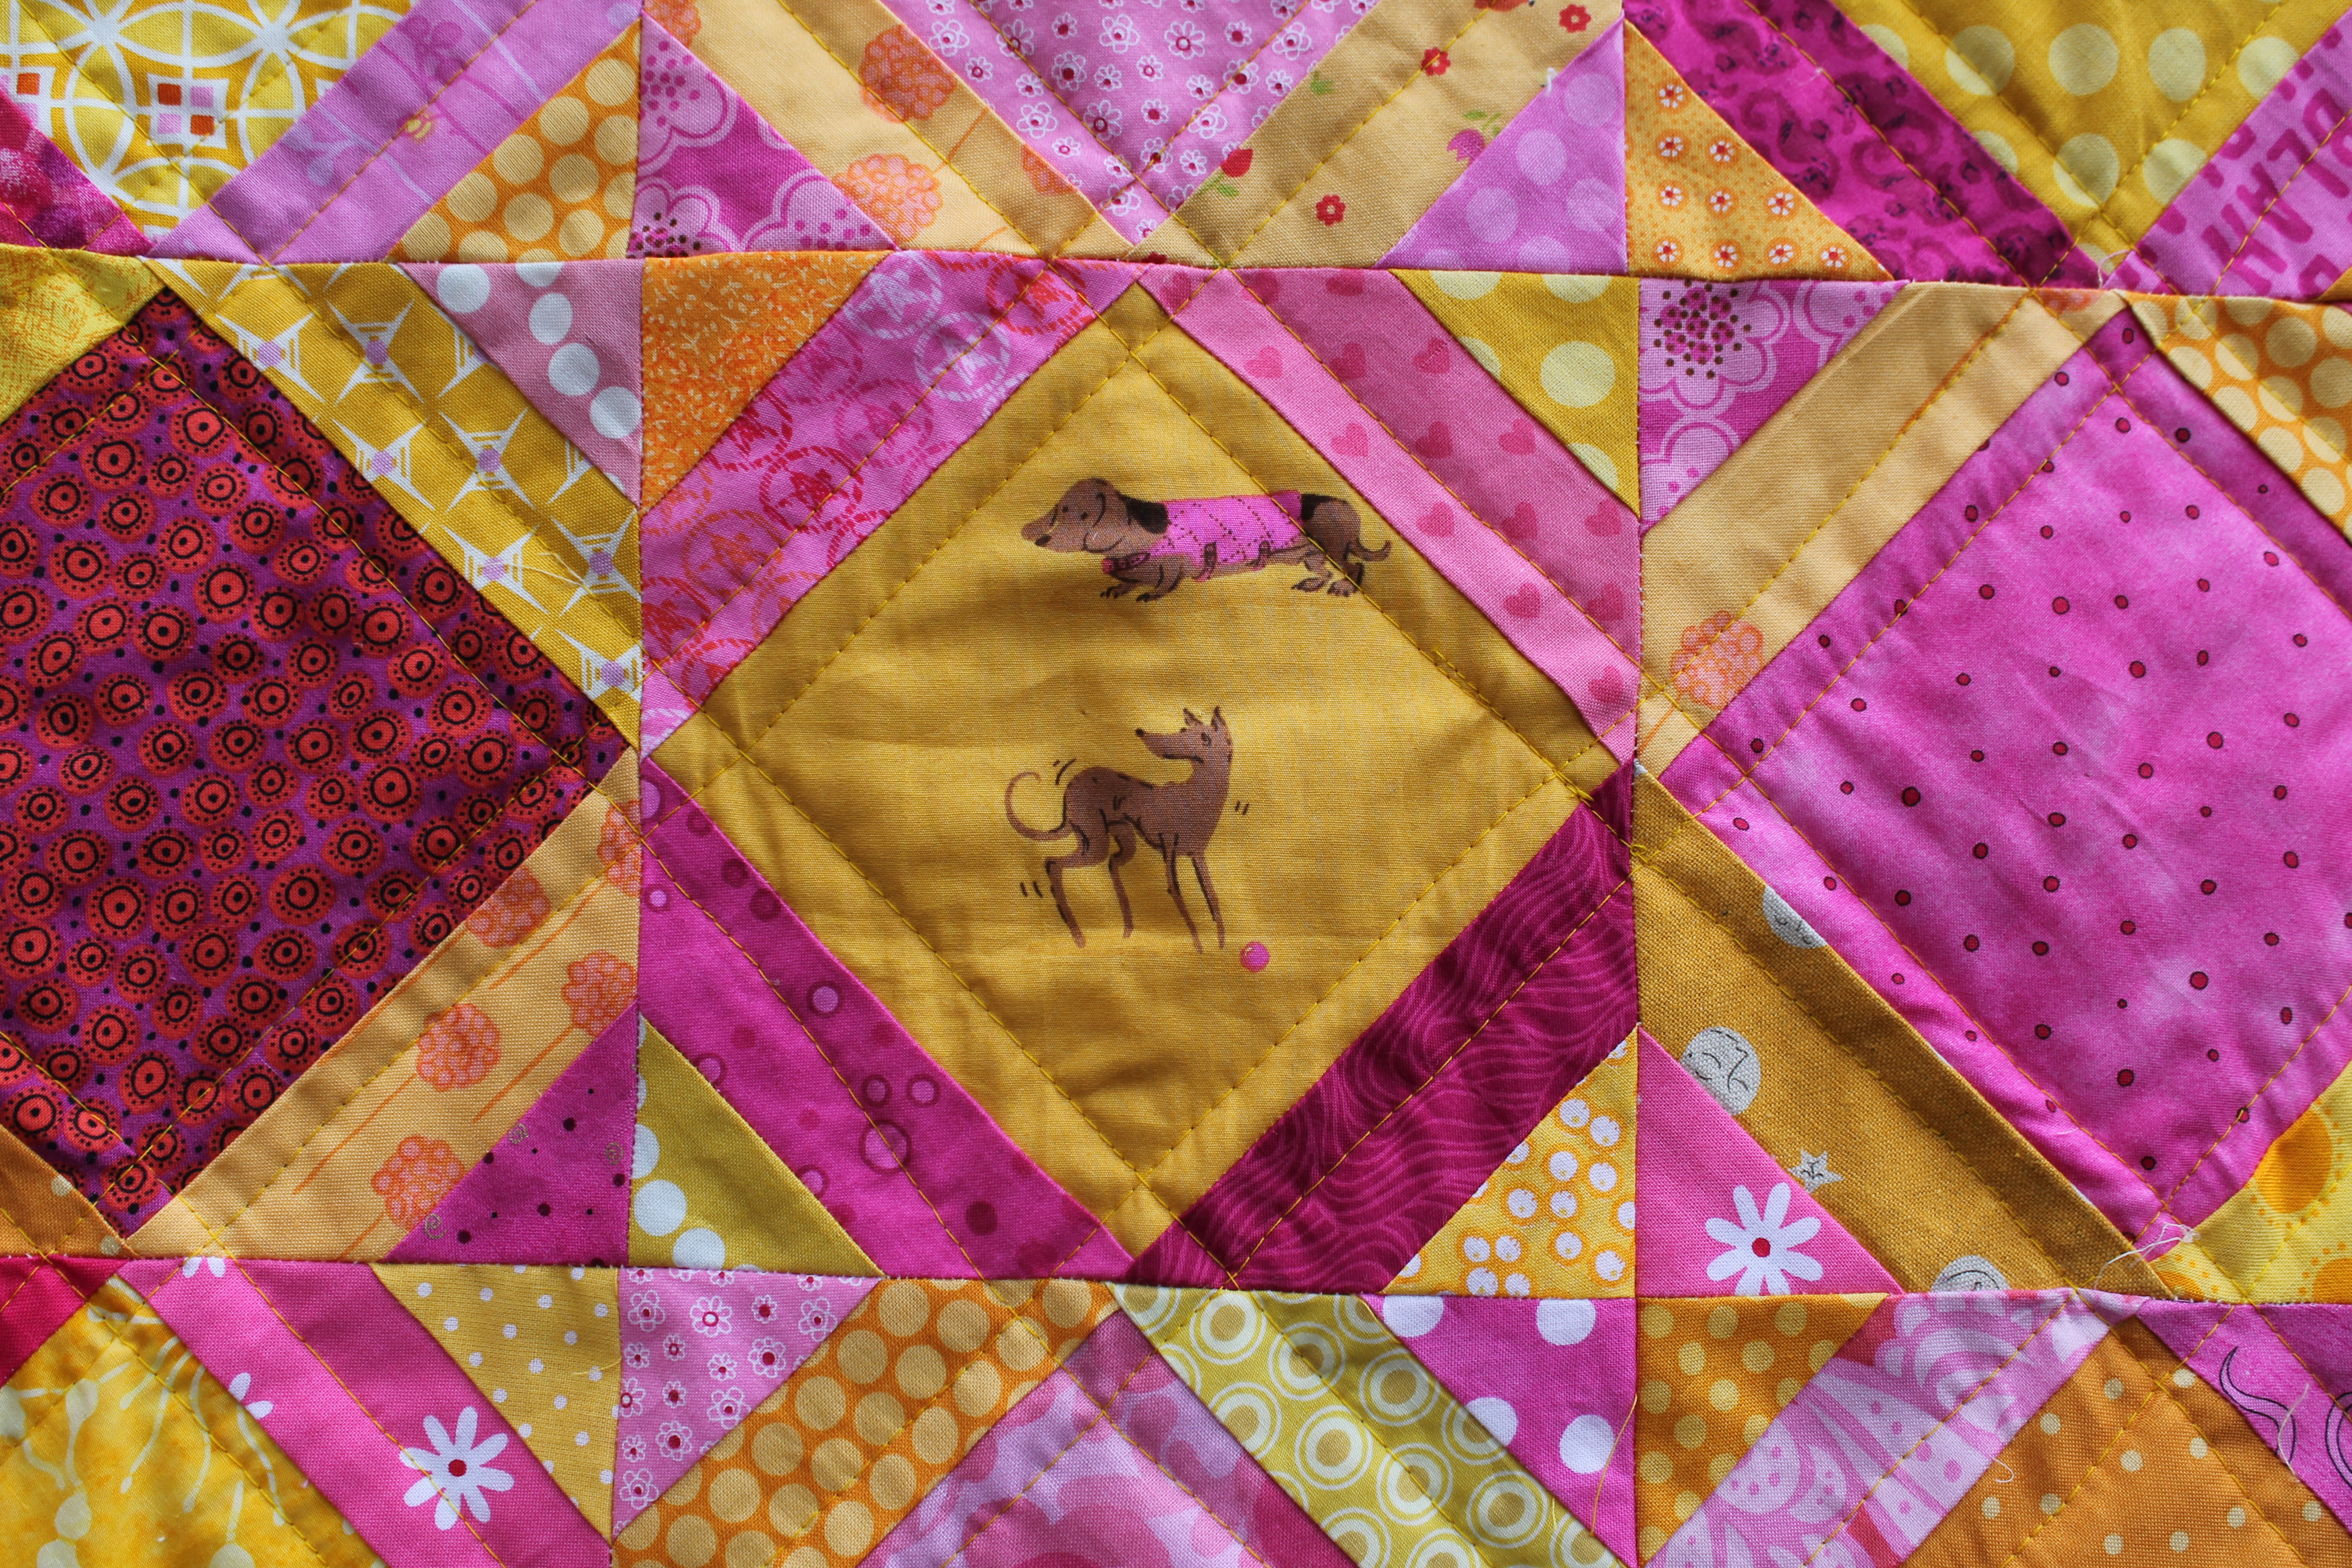
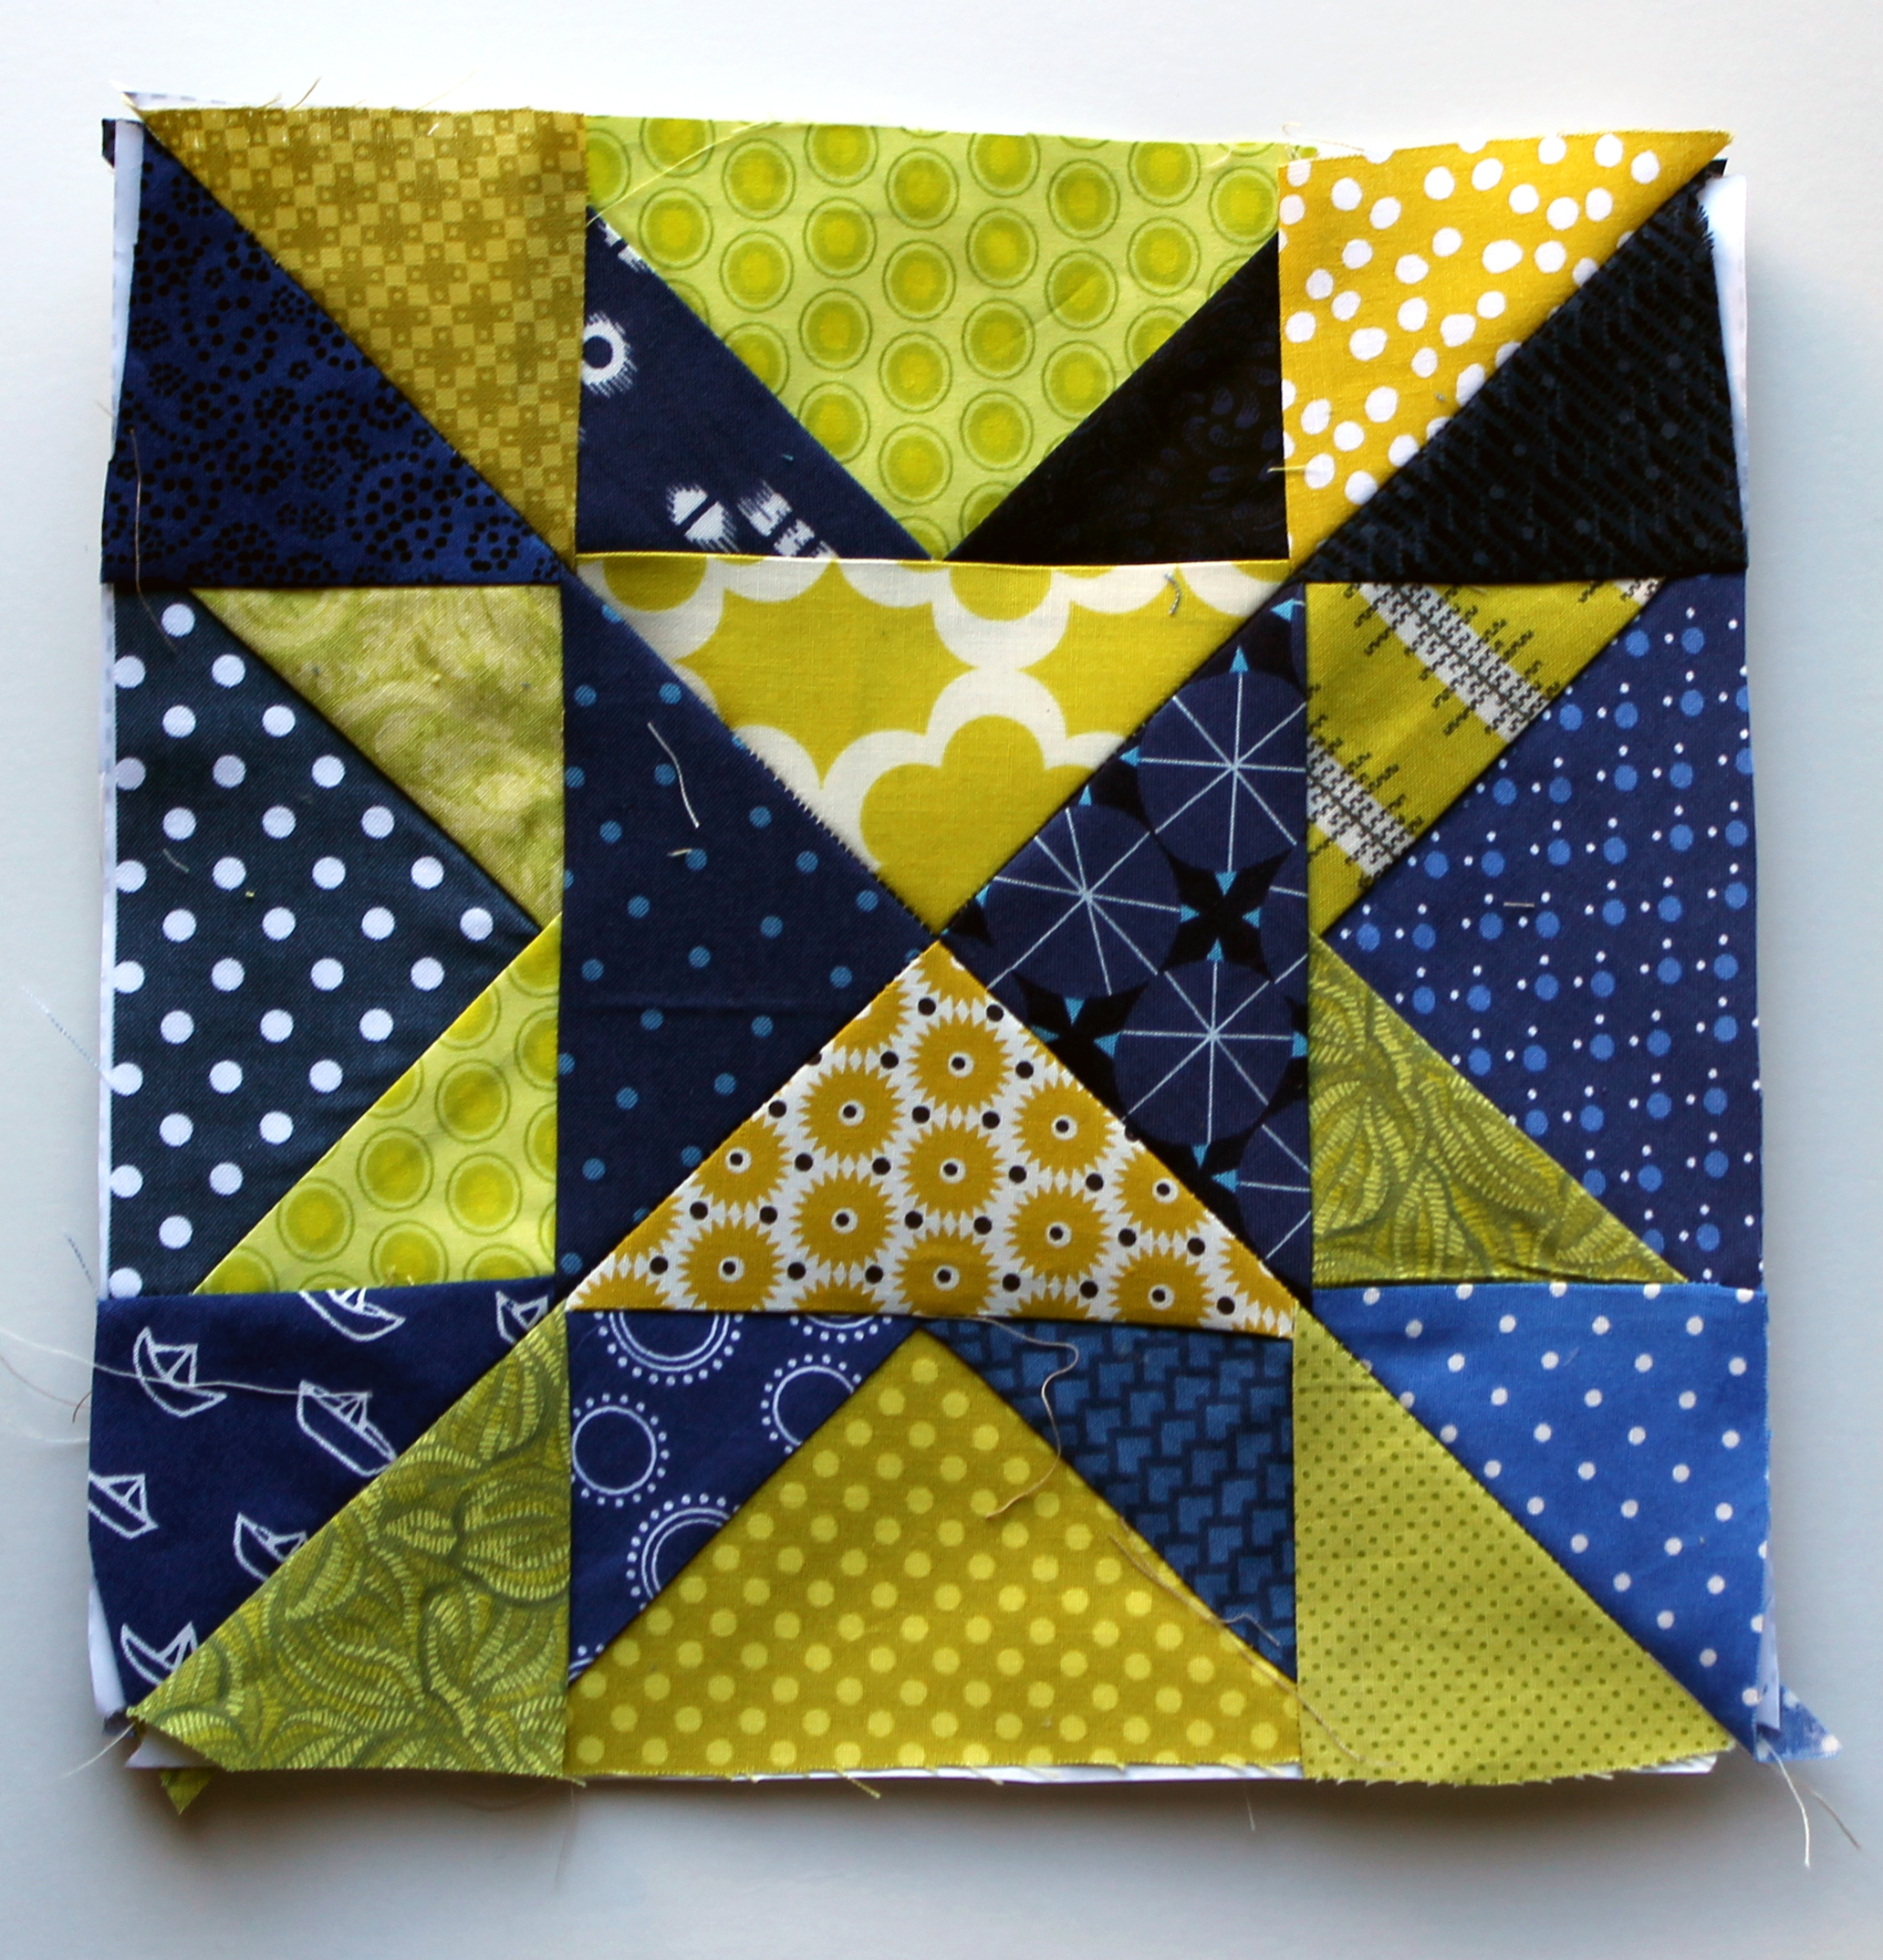
This quilt is made up of 16  of these 12 inch blocks.double pinwheel finished block

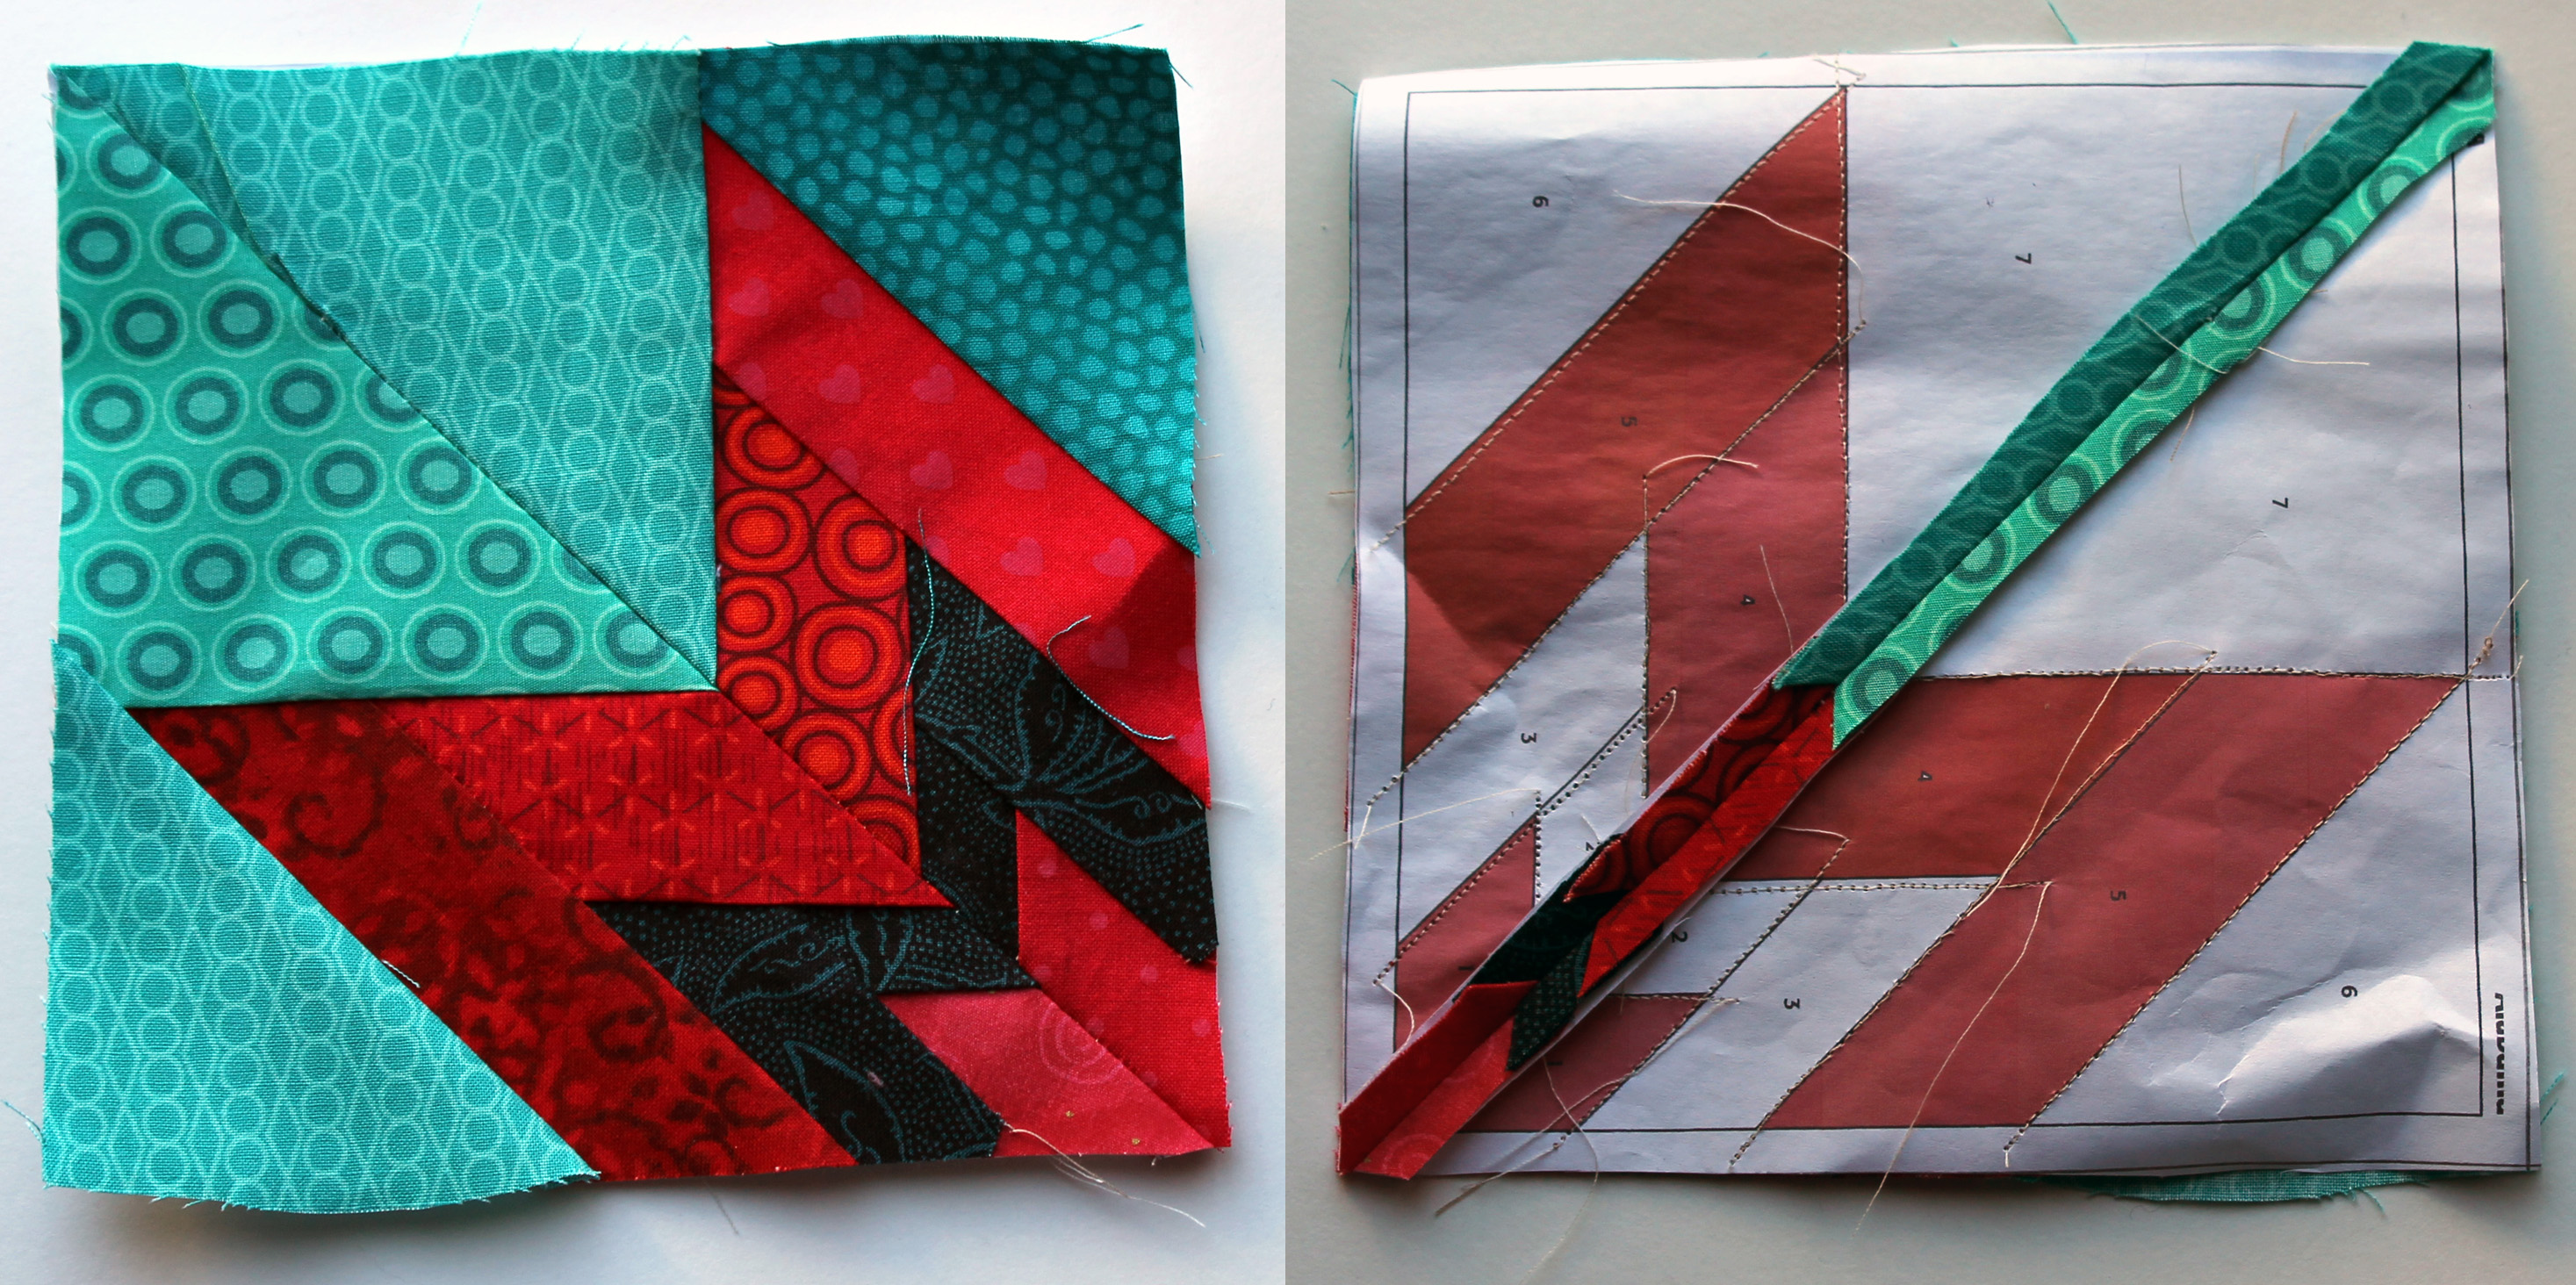
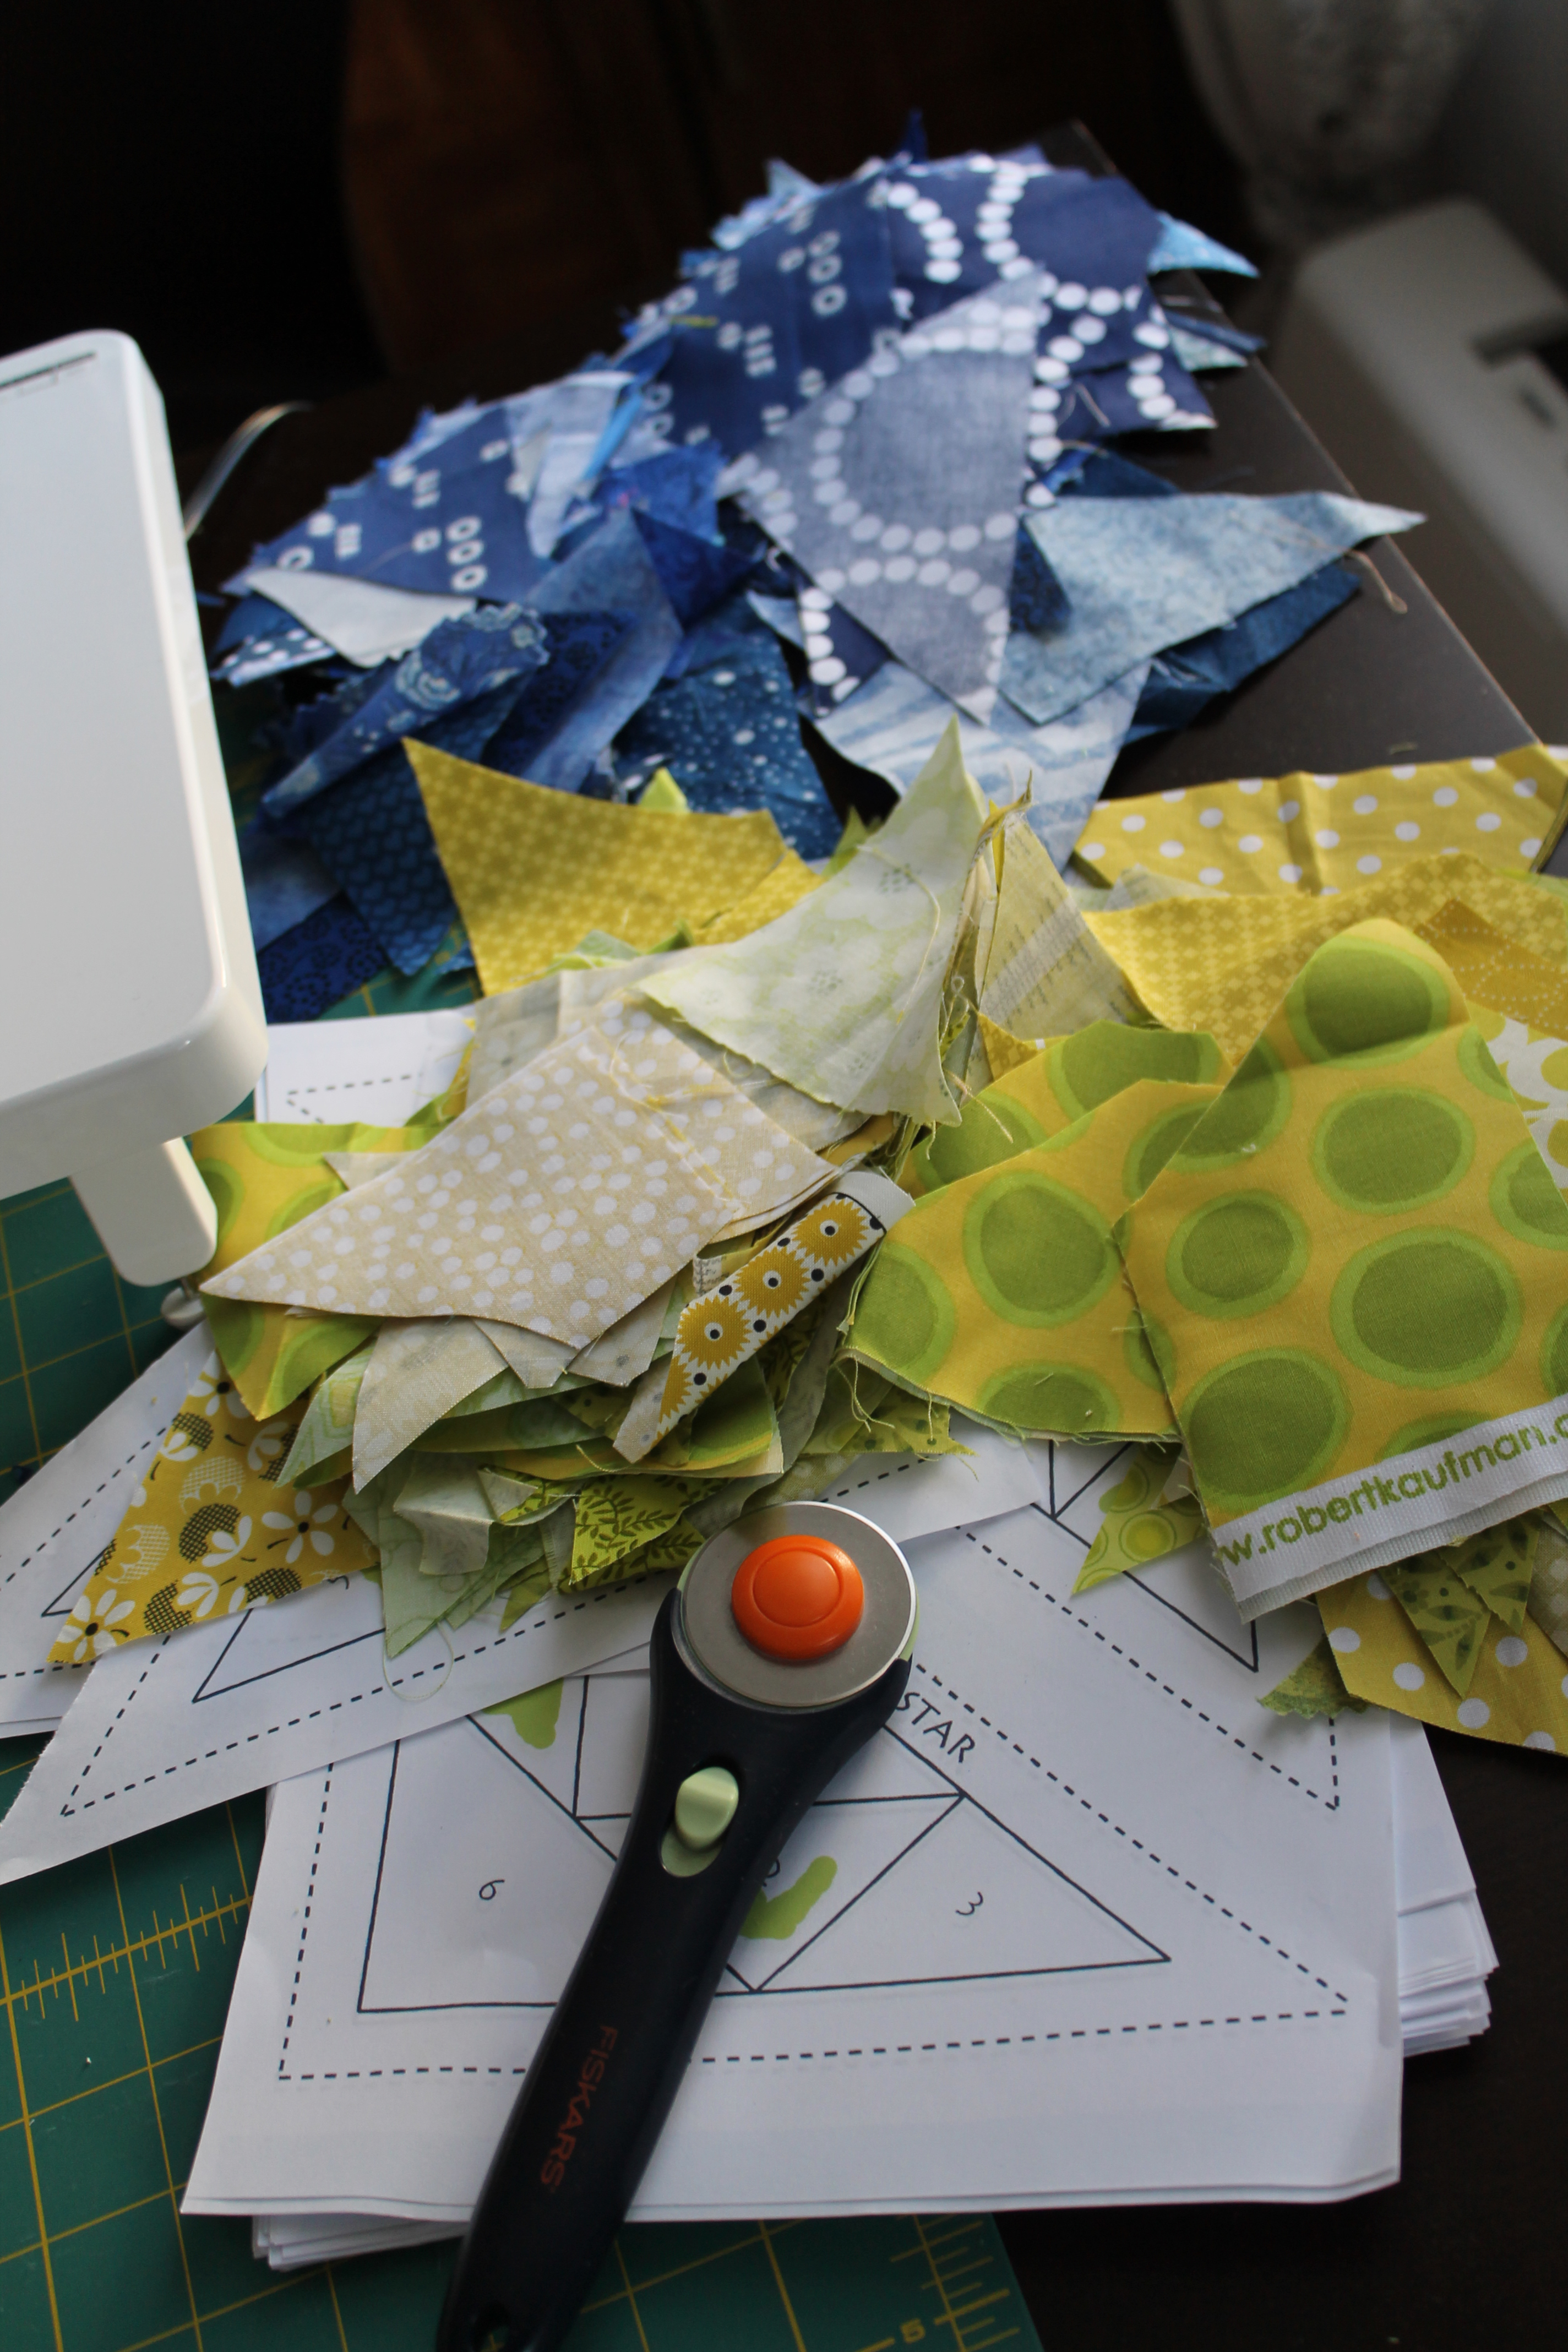
I used a really easy pinwheel paper piecing pattern and lots and lots of scraps of fabric.   There are a number of simpler versions of this block on the web but I love the extra punch of the added pinwheel.  The pattern and dimensions I used are:

purple aqua quilt pattern copy
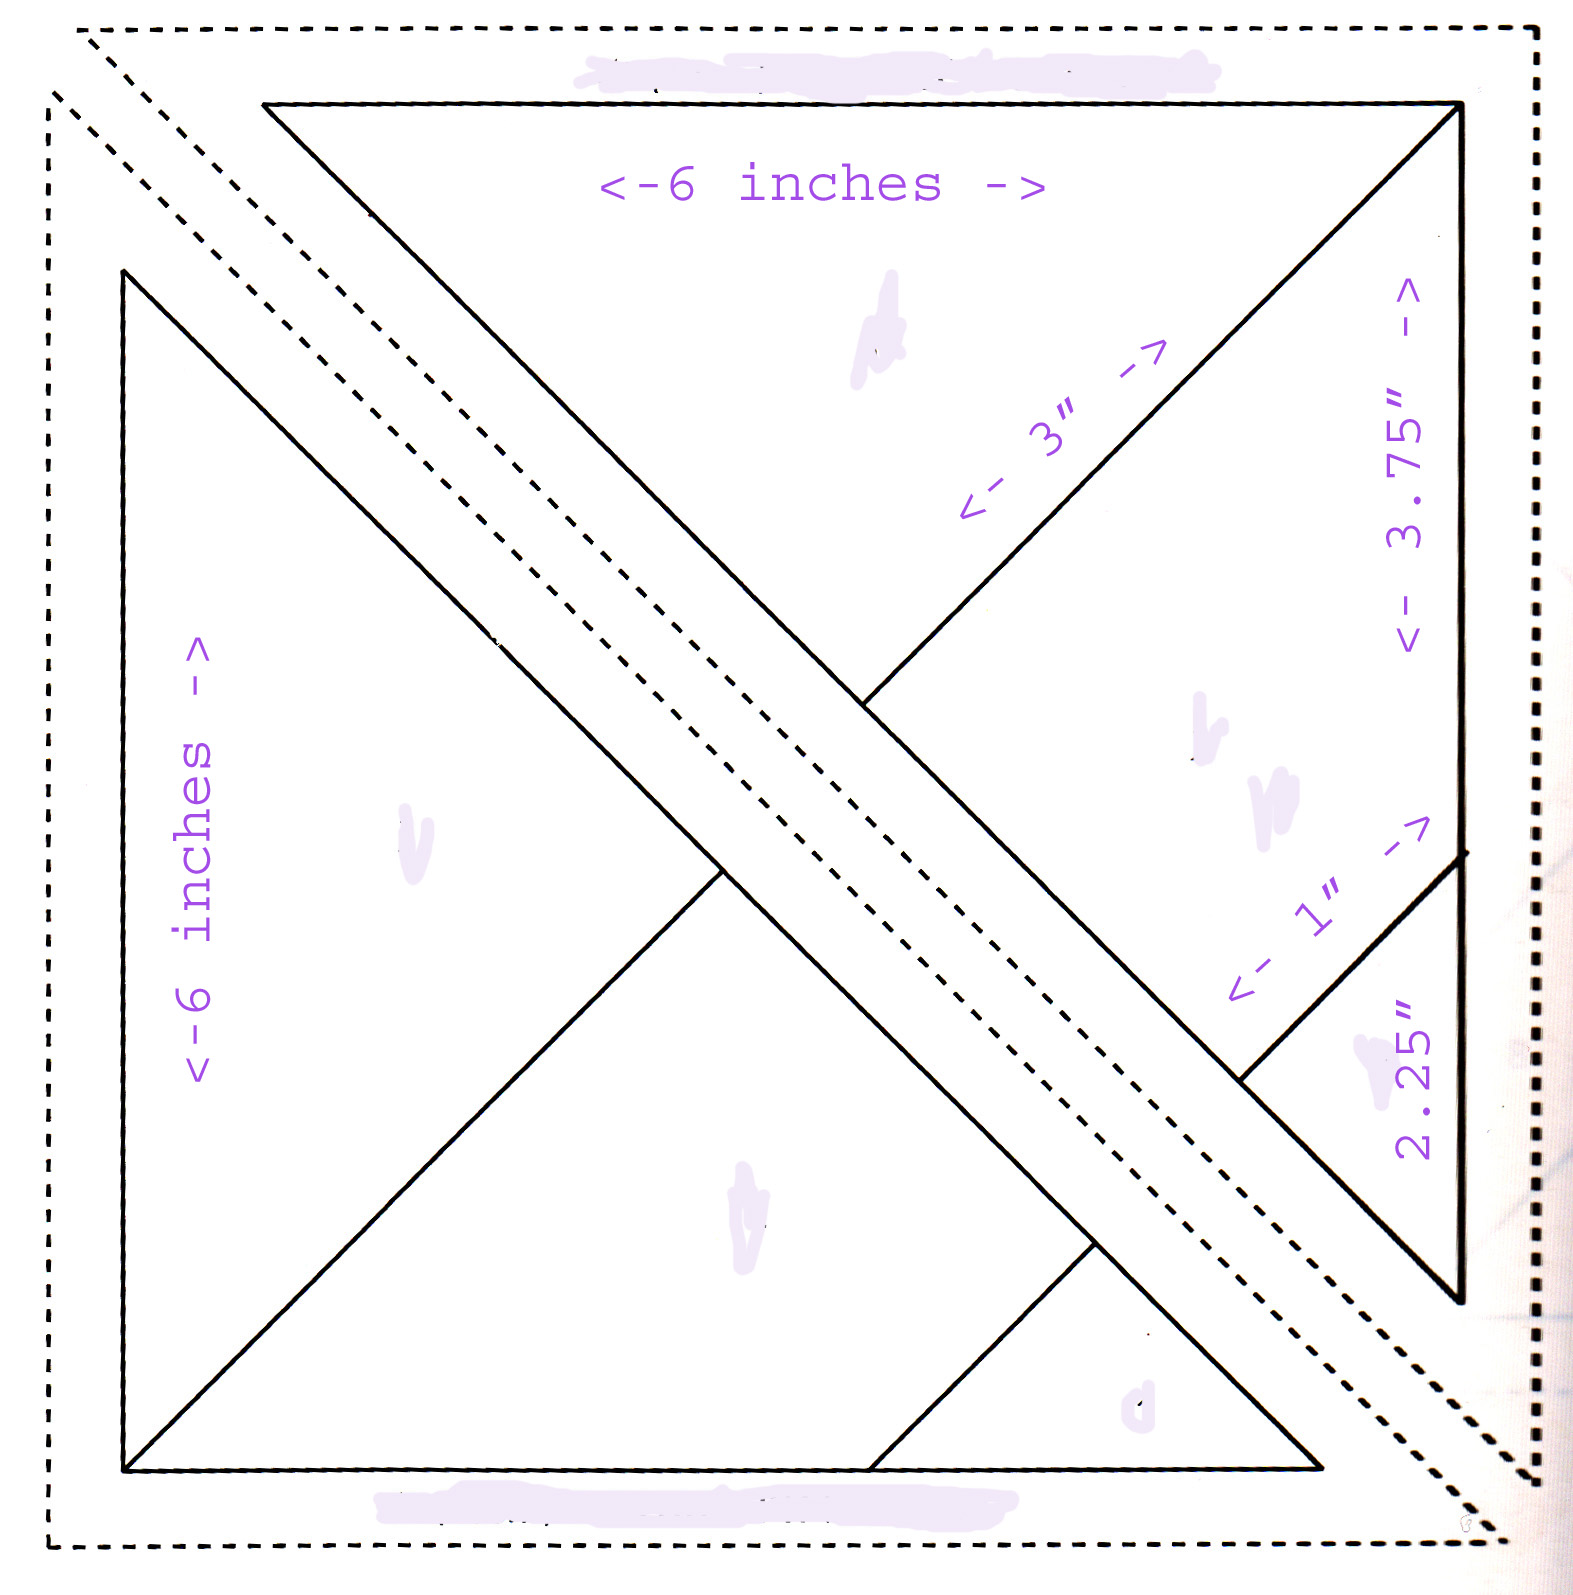
Eight of these pieces make up one of the finished blocks.  If I was to do the quilt again I would probably stick with more strongly contrasting fabrics – the blocks that have the dark purple against the aqua are so much more punchy I think .   The contrast makes the pinwheel pattern really pop.

purple aqua quilt detail

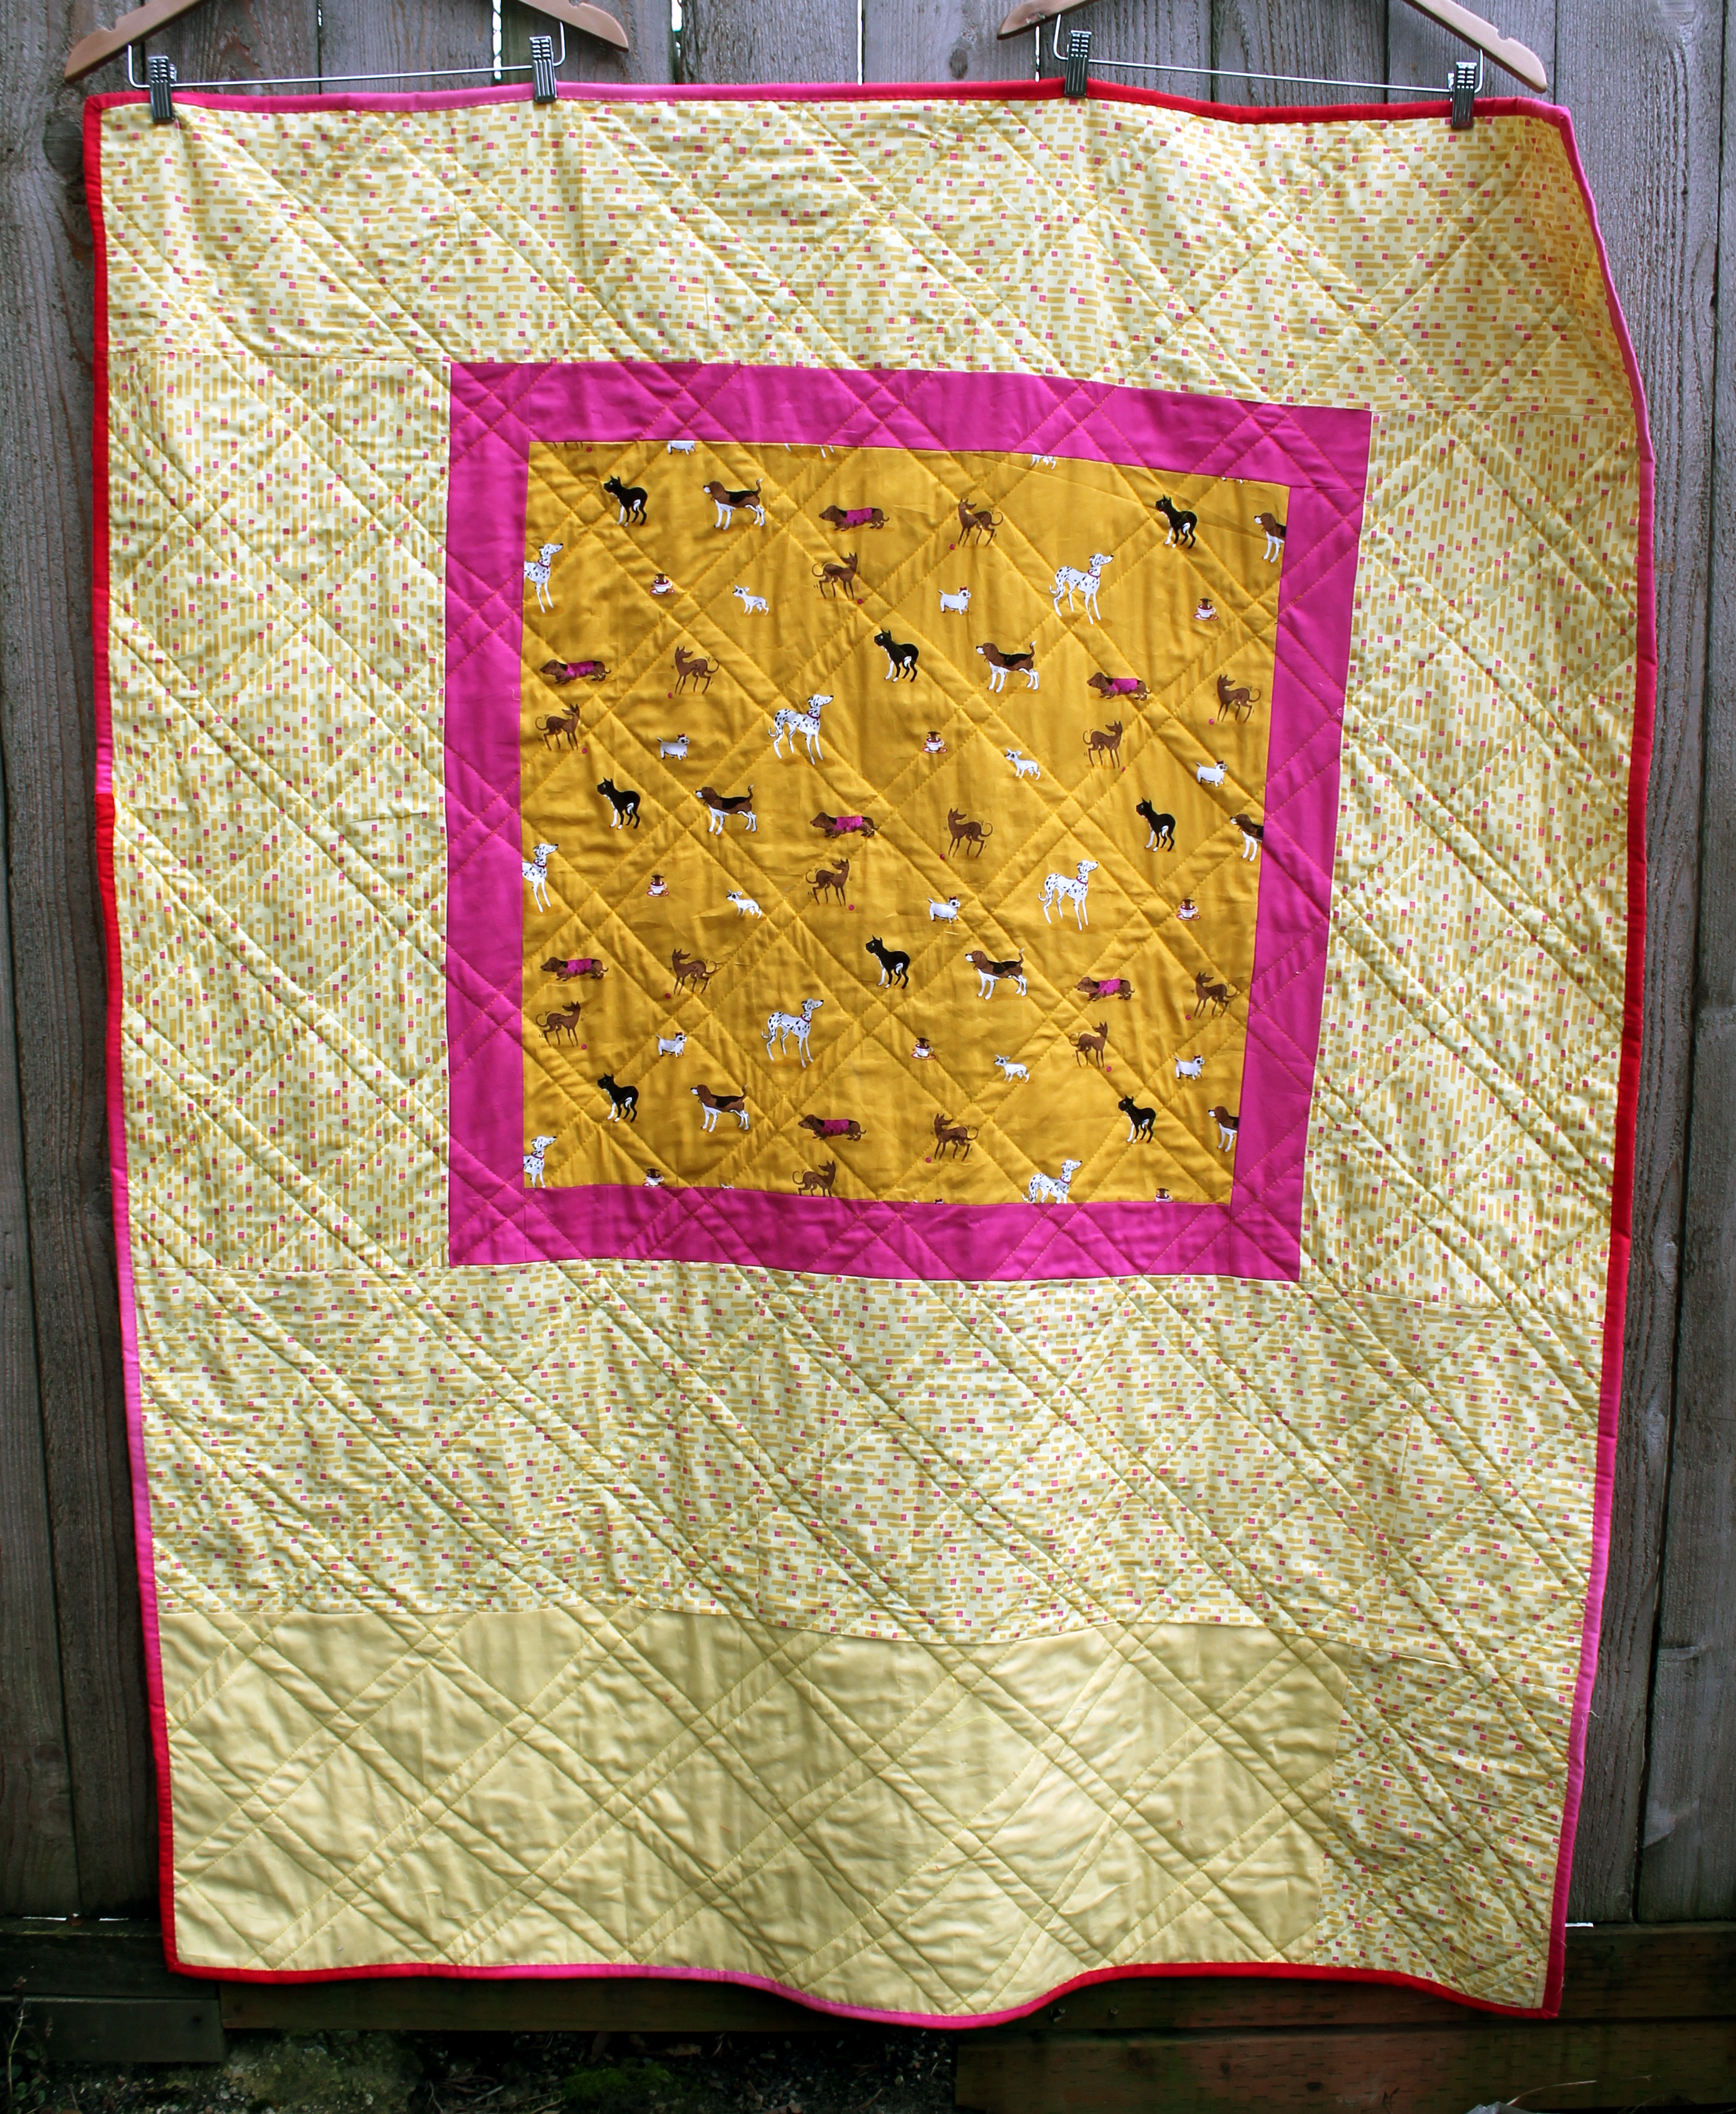
I am still doing just straight quilting…. maybe when I return from vacation I will be sufficiently relaxed to forget the stippling nightmare.  I have to be braver with my quilting.   The backing is  a selection of different fabrics I had in my stash.  Nothing too exciting but I like how it looks, particularly the Erin McMorris “Somersault” fabric.

purple aqua quilt back

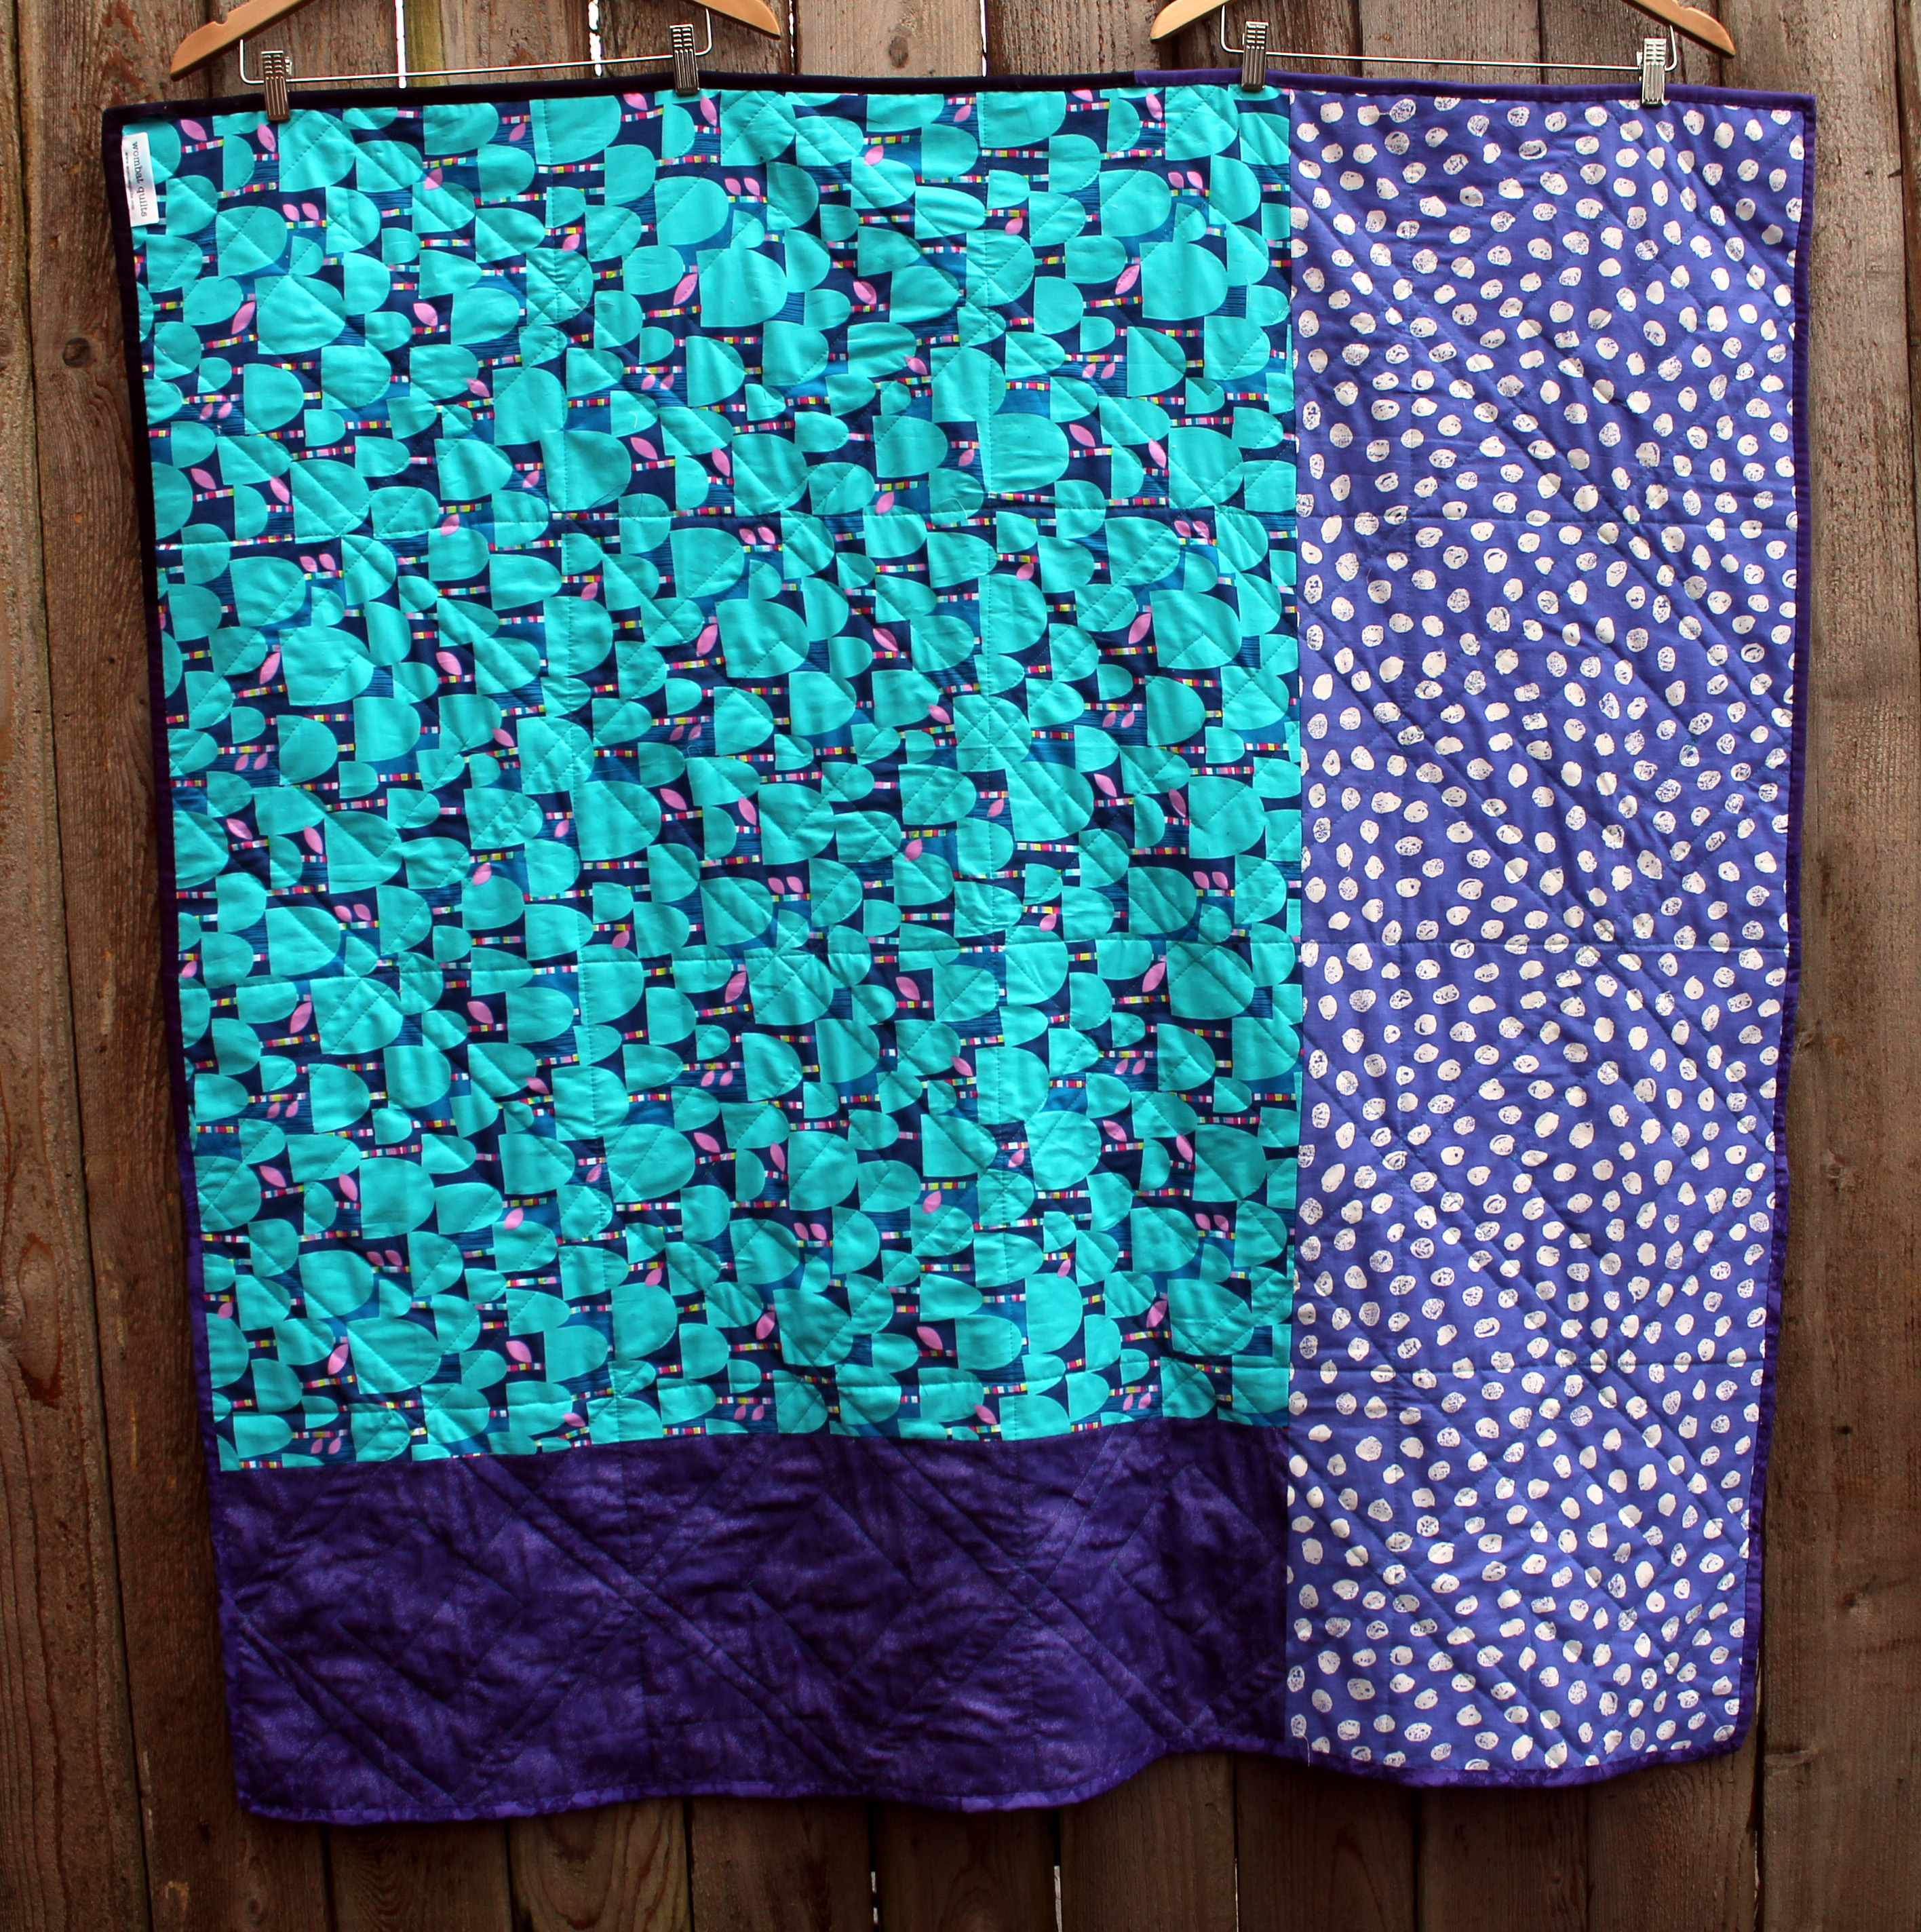
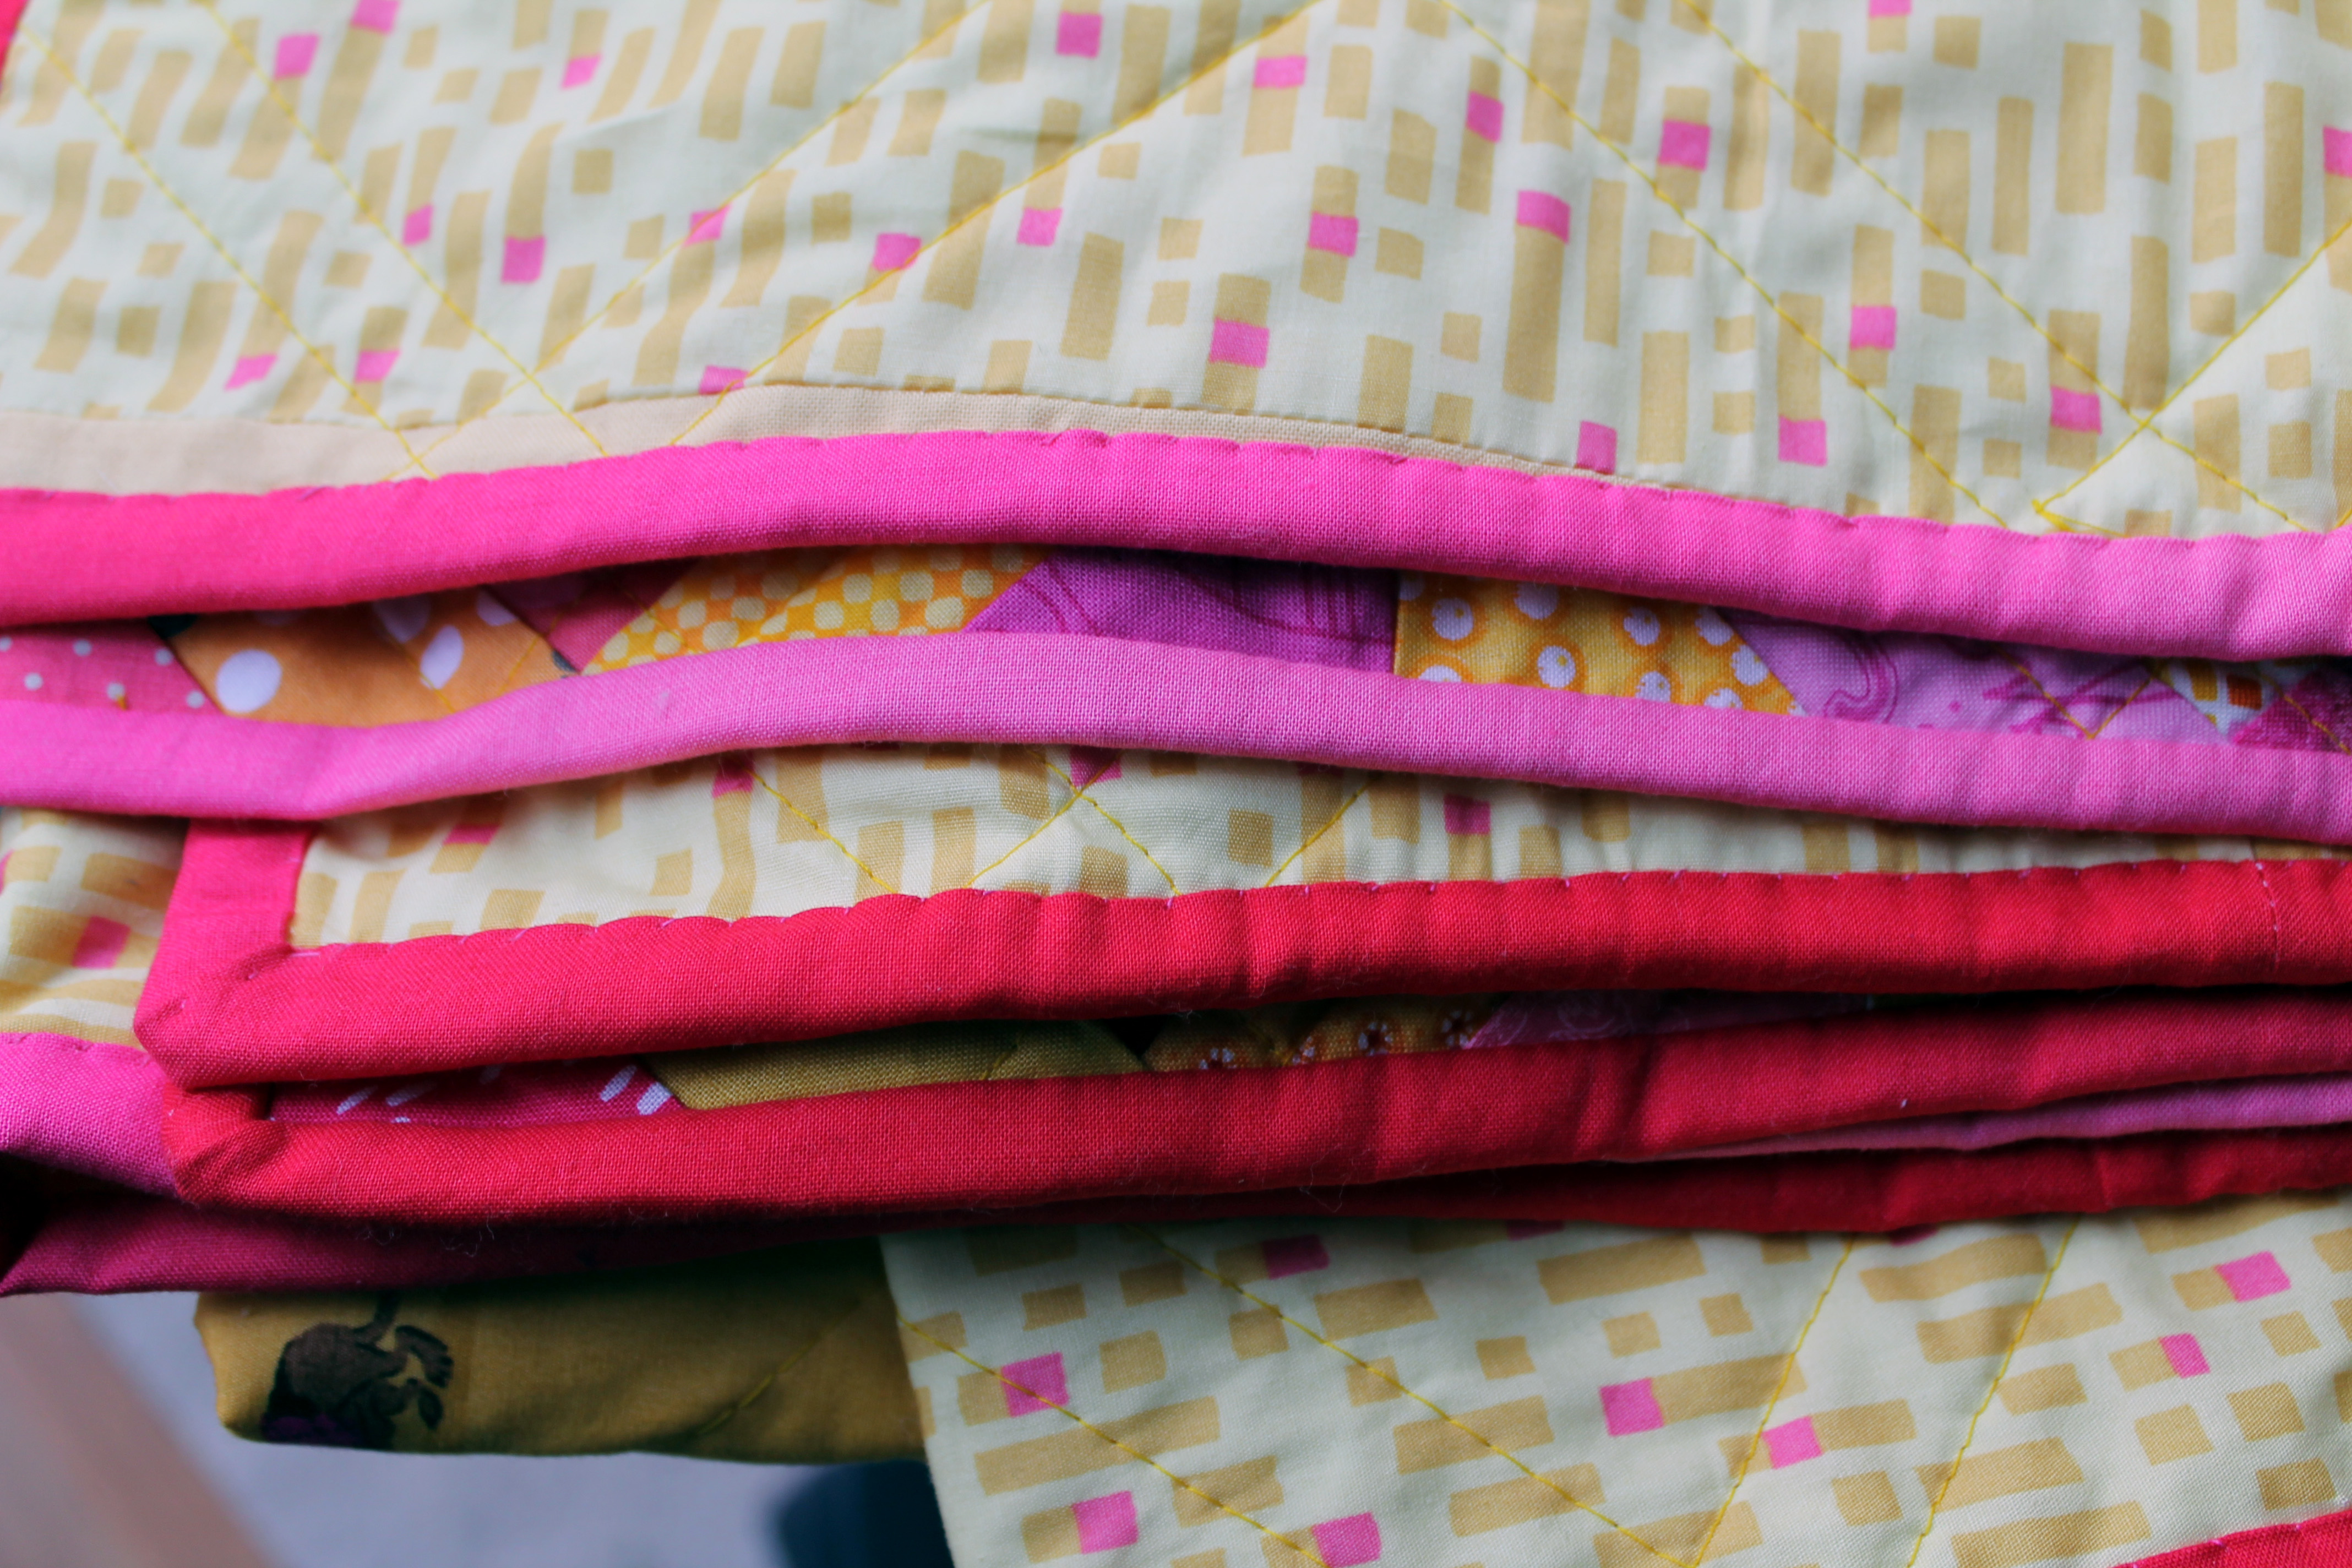
I finished it all up with a scrappy purple binding.  I do love scrappy binding – bits of solids, bits of prints, different shades, different patterns.  The scrappy does not work with all quilts but it seemed to be just right for this one.

purple aqua quilt binding

Now it is back to packing and cleaning…..

Paper Piecing Monday

Well it is Monday….again, which means another block  to add to  my paper piecing star quilt.  This week I opened Carol Doak’s  50 Fabulous Paper Pieced Stars and decided to make the first star I came across (actually the first star in the book), the Alabama Star.

Paper peicing star block 13

I loved the boldness and simplicity of this star.  I used scraps except for the dark inner star – I wanted that to be the same fabric for some reason!  This really was an easy pattern using just 56 pieces.

lock pieces

Now there are only 7 more blocks to go before I call it quits on the red/aqua quilt…. not that I am counting!

Dear Miss Banana

Dear Miss Banana,

I have just finished your quilt.  I hope you like it.

pink quilt finished

I used bright pinks and yellows to make the blocks.  I had fun picking out the fabrics, using lots of different bits and pieces to make it fun for you.  There are some fabulous dogs, as you requested.

dog block details

And some of my favorites including some cute Mariska dolls.

pink quilt detail

I did some simple quilting, which should make the quilt pretty when it is washed and will make it durable, so it should last as long as you need it.   Any repairs over the years either me or your mum can help. Just in case,  your mum can find the pattern for the quilt blocks here.

For the back of your quilt I used more of the doggy fabric you loved along with some fun yellows.

pink quilt back

Then to finish the quilt I found this really great fabric that is different shades of pink so I made the binding out of it. I think it makes the quilt look really cool.

binding

So I hope your like your new quilt.  I put a lot of work and love into it and I hope it keeps you warm and comforted over the years to come.

Love

Auntie Cath

ps.  I now have to find a way to get it to you in Australia.  I am hoping there is some room left in good Uncle Nick’s suitcase, but it may have to be posted to you.  There is no room left in my suitcase – it is full of presents and Lego!

The joys of paper piecing – wip Wednesday

This week I have been working away on a couple more quilts, all of them paper pieced, and it got me thinking about the pros and cons of using a paper foundation pattern for your blocks.

Lets start with the new block I started this week.completed ohio star blcok

I loved this colour combination and I wanted to make a high contrast block where the pattern would be crisp and clean.  It looks so easy but I must admit I managed to commit several of the paper piecing deadly sins.  According to quiltbug.com they are:

• Placing the fabric wrong side up
• Not following the design – putting the fabric in the wrong place. Sometimes this is caused by not realizing you are working on a mirror image block.
• Placing the fabric the wrong way so it doesn’t fit the block when you flip it over
• sewing on the wrong line
• cutting the fabric piece instead of the seam allowance
• cutting the paper pattern
• catching one fabric piece in the seam allowance of another.

quilting work spaceYep yesterday I managed to do most of them…. I am blaming tiredness.  It is simple to commit these faux pas, and with the detailed Monday paper piecing patterns I post, it is more than likely I will have to unpick at least 6 or 7 times while making the block.  Ah the fun.

Then there is the joy that is bits of paper floating around your house.  My floor is currently scattered with little bits of paper that have evaded the vacuum cleaner after preparing my purple and aqua quilt for basting. wip aqua purple quilt

The advantages for paper piecing for me are:

1.  I do not have to accurately cut into my scraps – I can just pull the little bits and pieces, iron them and then use them where they fit.

2.  It helps me with my inability to be precise.  I can, and have accurately measured, cut and pieced quilts but I get frustrated easily when things do not line up.  This is also the reason that I love “wonky” and “modern” as quilting styles!

3.  It allows me to make detailed, accurate blocks that I could not make freehand – in particular my star sampler could not be done without paper patterns.  I do not have the skill to make these patterns without help!

In the end I think extra steps of paper piecing (like ripping the paper pattern off) and the little hiccups (aka the deadly sins) are worth it for most of the quilts I make.  When I started quilting I was overwhelmed by it all and a paper pattern helped me step into the process without freaking out too much.  I am so glad I had that gentle introduction to the process, because now I am confident enough to just go with what ever I want.

I may even, one day, be confident enough to attempt curves!

Paper Piecing Monday

Welcome to part 12 of paper piecing Monday.  My husband asked me how many stars I am going to make for this quilt, he was a little scared I was not going to stop!.  I decided that 20 was the number to aim for.  It will make a 4 block x 5 block quilt which will be a nice size for some kid.

This week I have one of the last compass squares from Quilting on the Square.

Finished paper piecing star 12

The paper piecing pattern can be found here Block_9_Compass_of_Many_colors.

I changed the pattern a little, choosing to use the stripped fabric instead of using another lot of background fabric.  I wanted to try and get a star that was a little different from some of the others I had done.

star 11 paper piecing pieces

The pattern involves 80 pieces of fabric made into 8 triangles.  The finished block is 12 inches (like all the blocks I have posted so far).  I threw the stars together to show you a very rough work in progress shot. I am not sure that it all works together yet, but hope as more blocks are added it will start to look more cohesive.

WIP Compass star quilt