The Row by Row experience

I have only recently become aware of a program that is run over summer here in the USA called the Row by Row Experience.  From June 21st thru to September 8th over two thousand quilt shops around the USA and Canada give away a free pattern, based on a theme.  All you have to do is visit the store to get the pattern.

This years theme was H2O (water) and I was excited to work with my local quilt store, Modern Domestic, to design their Row by Row experience….Glass Half Full.

table runner
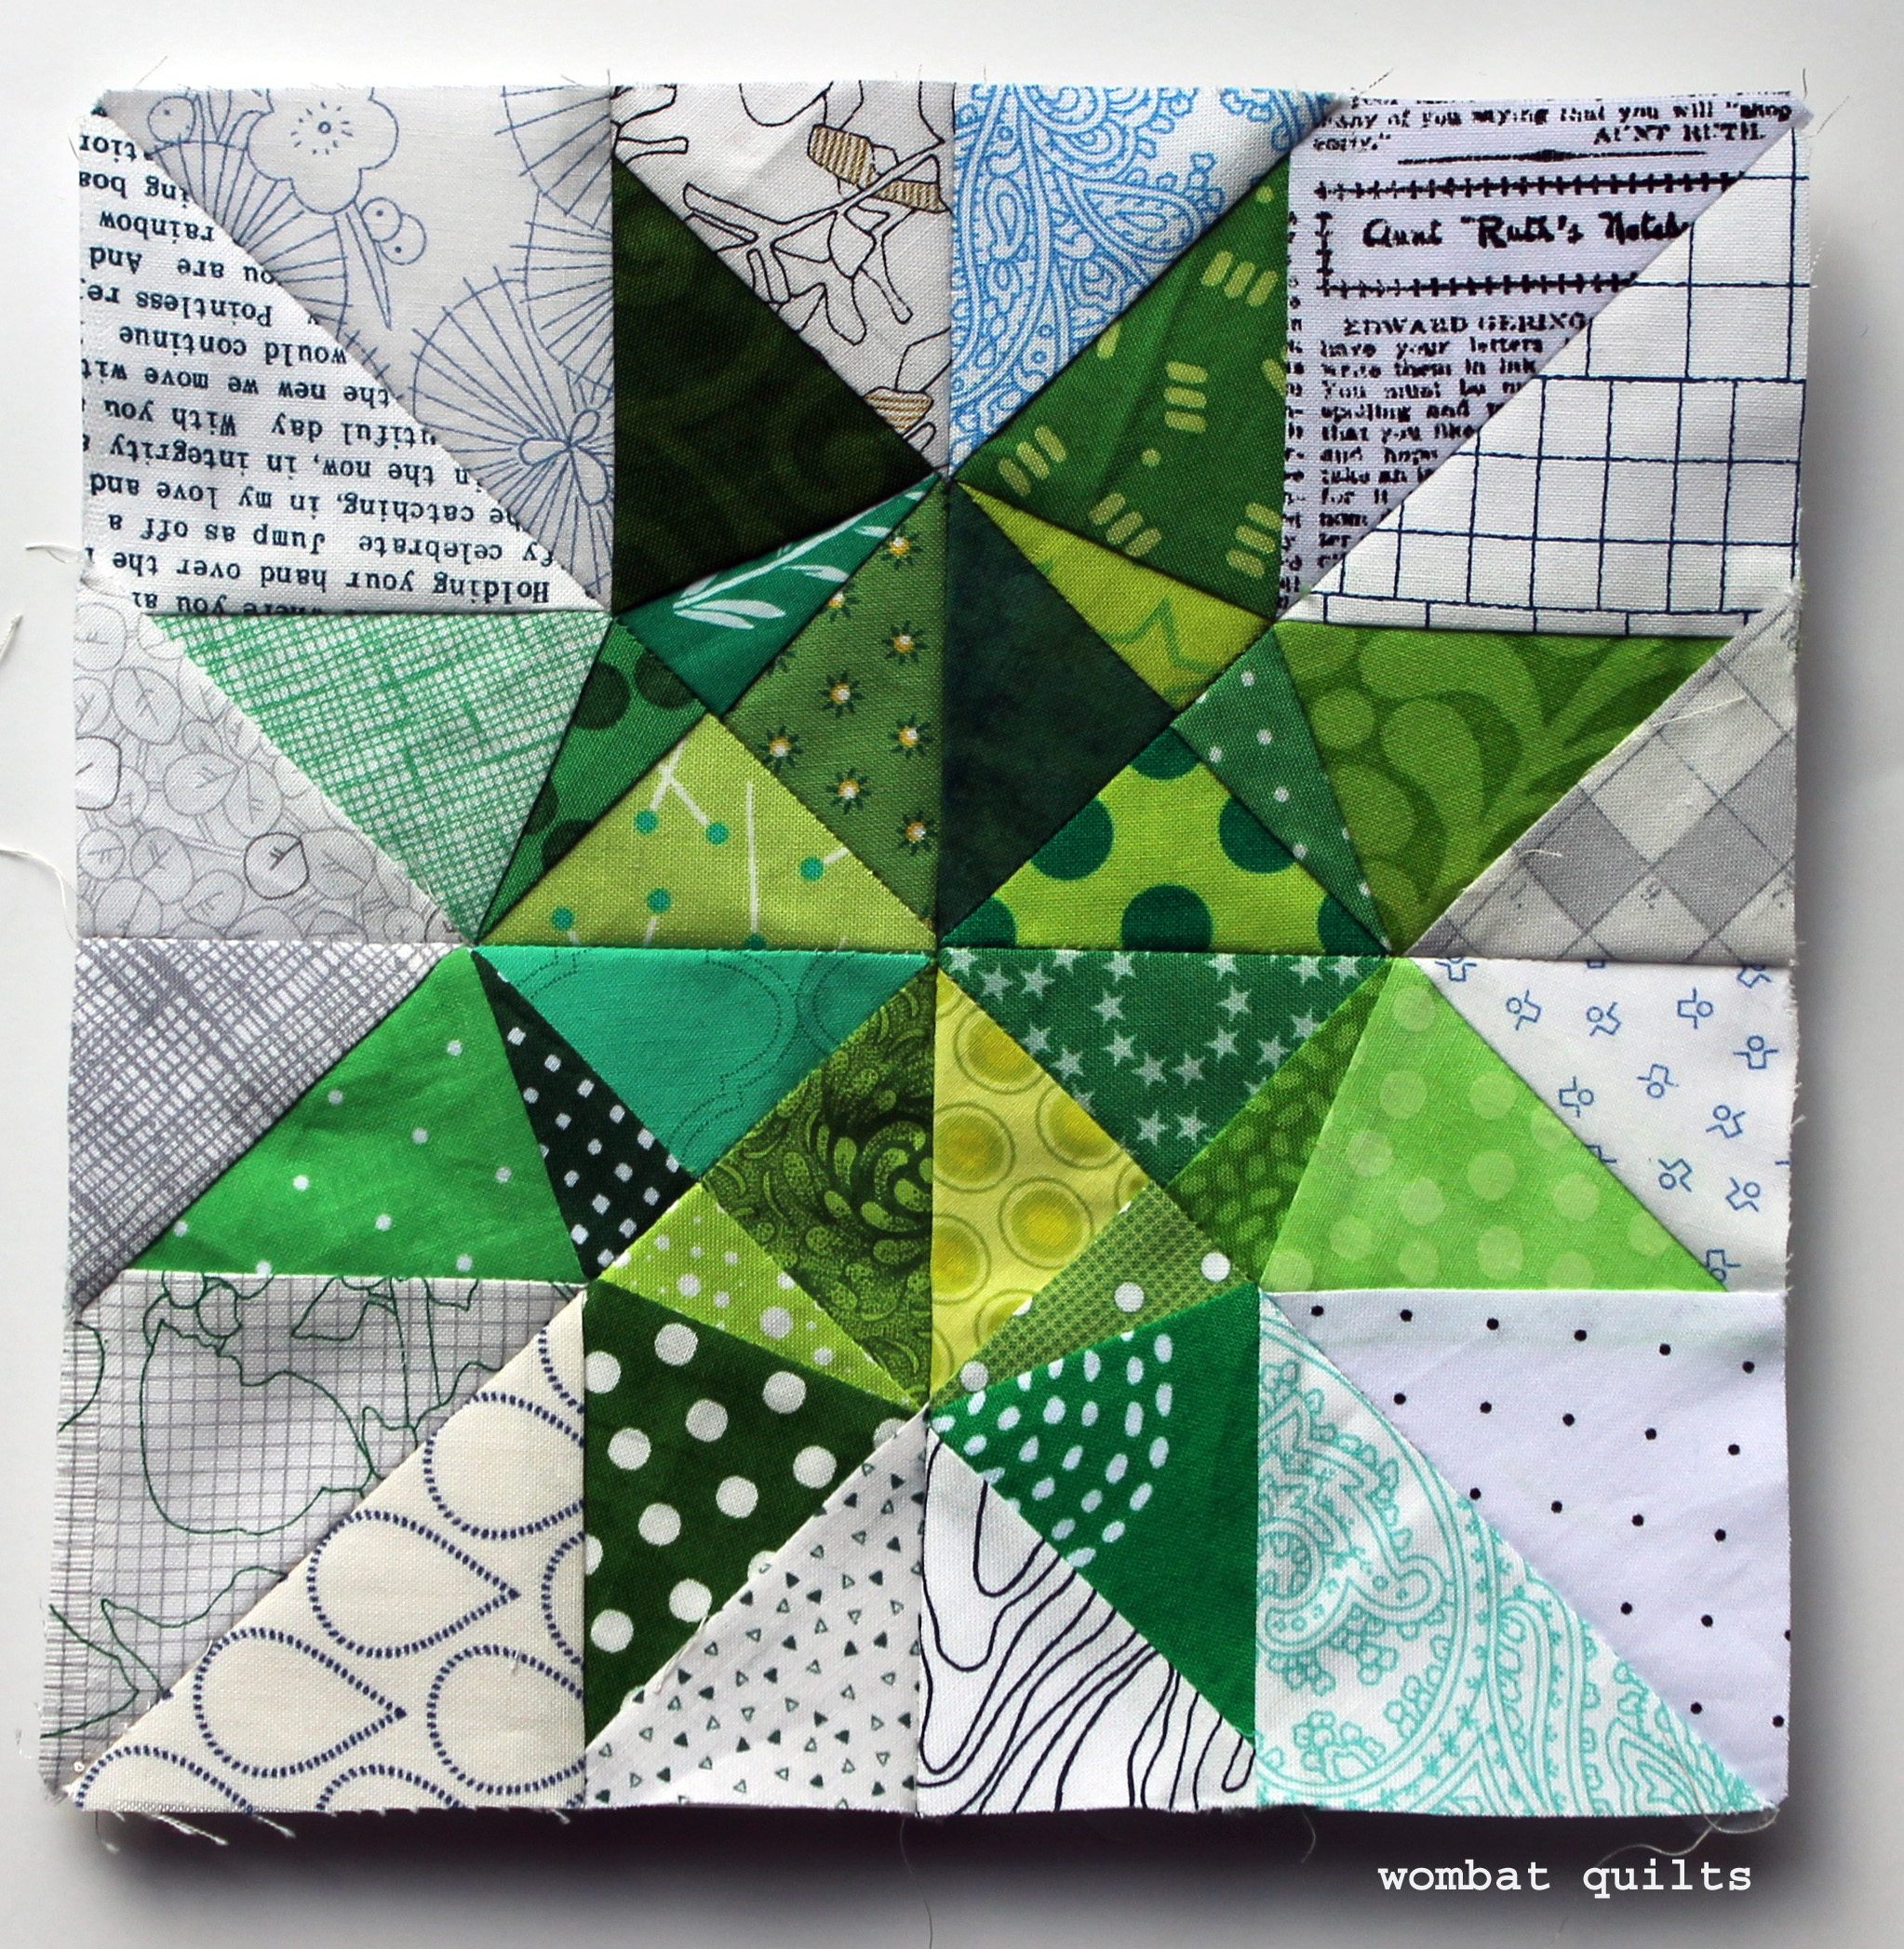
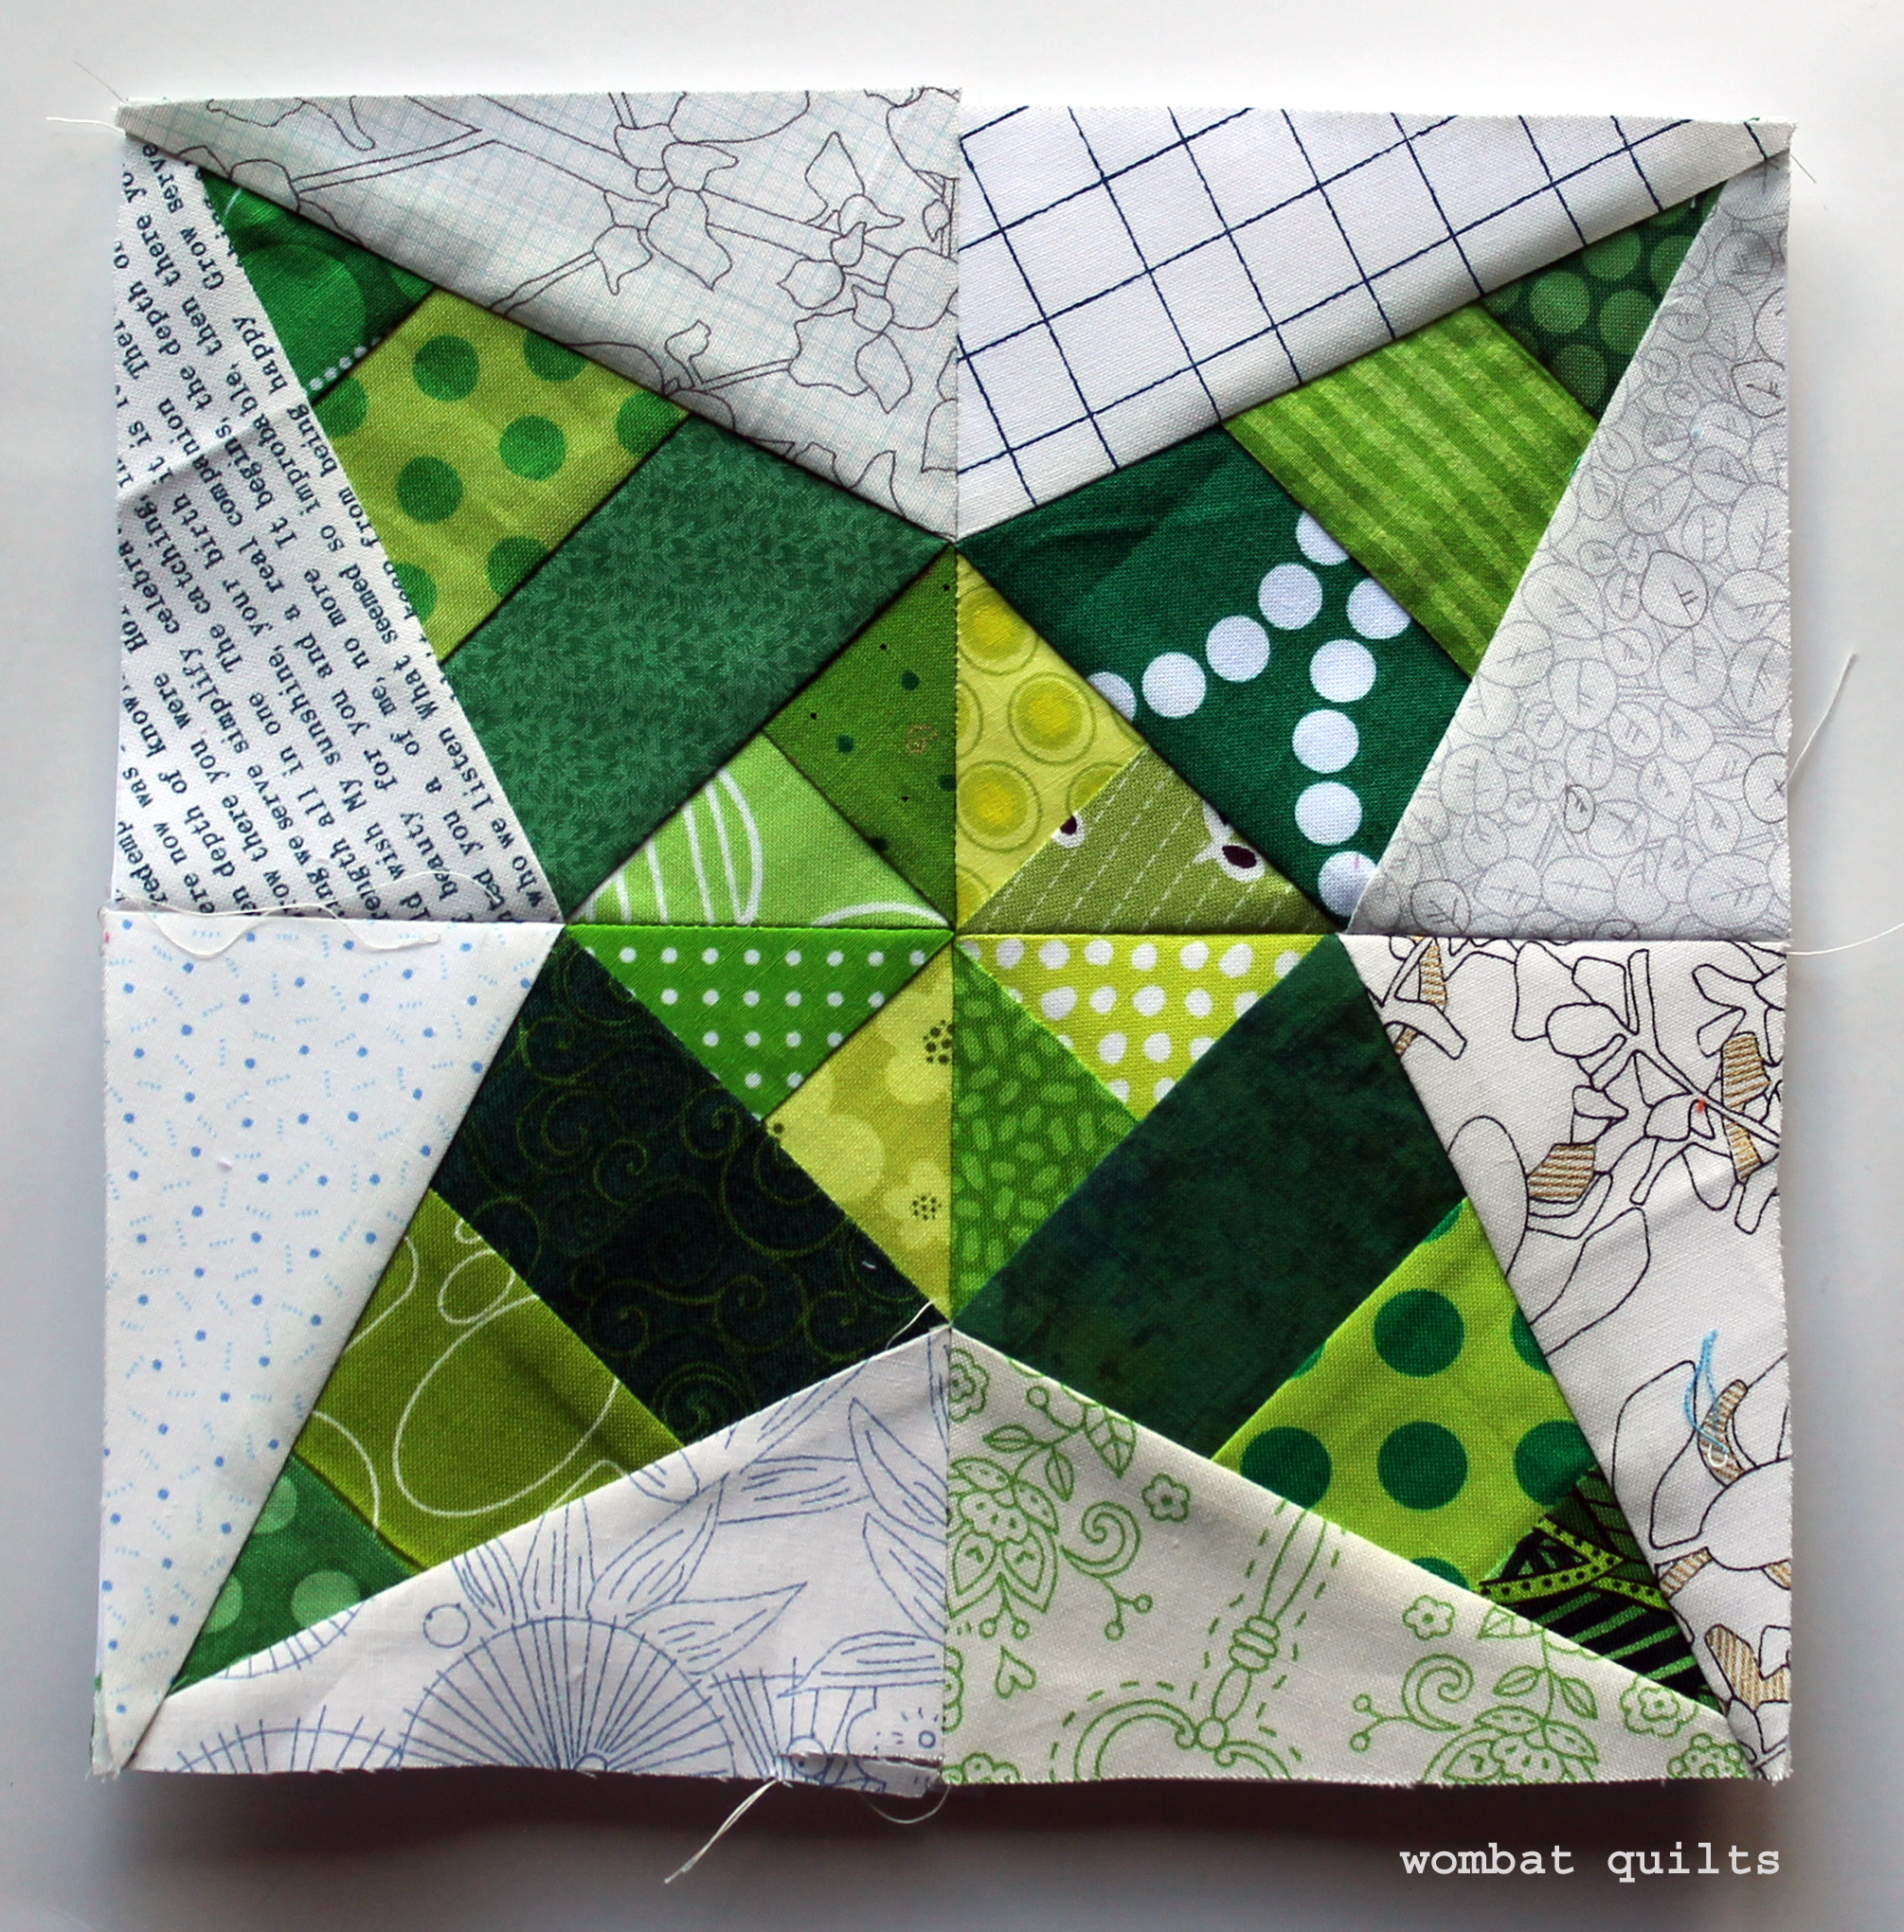
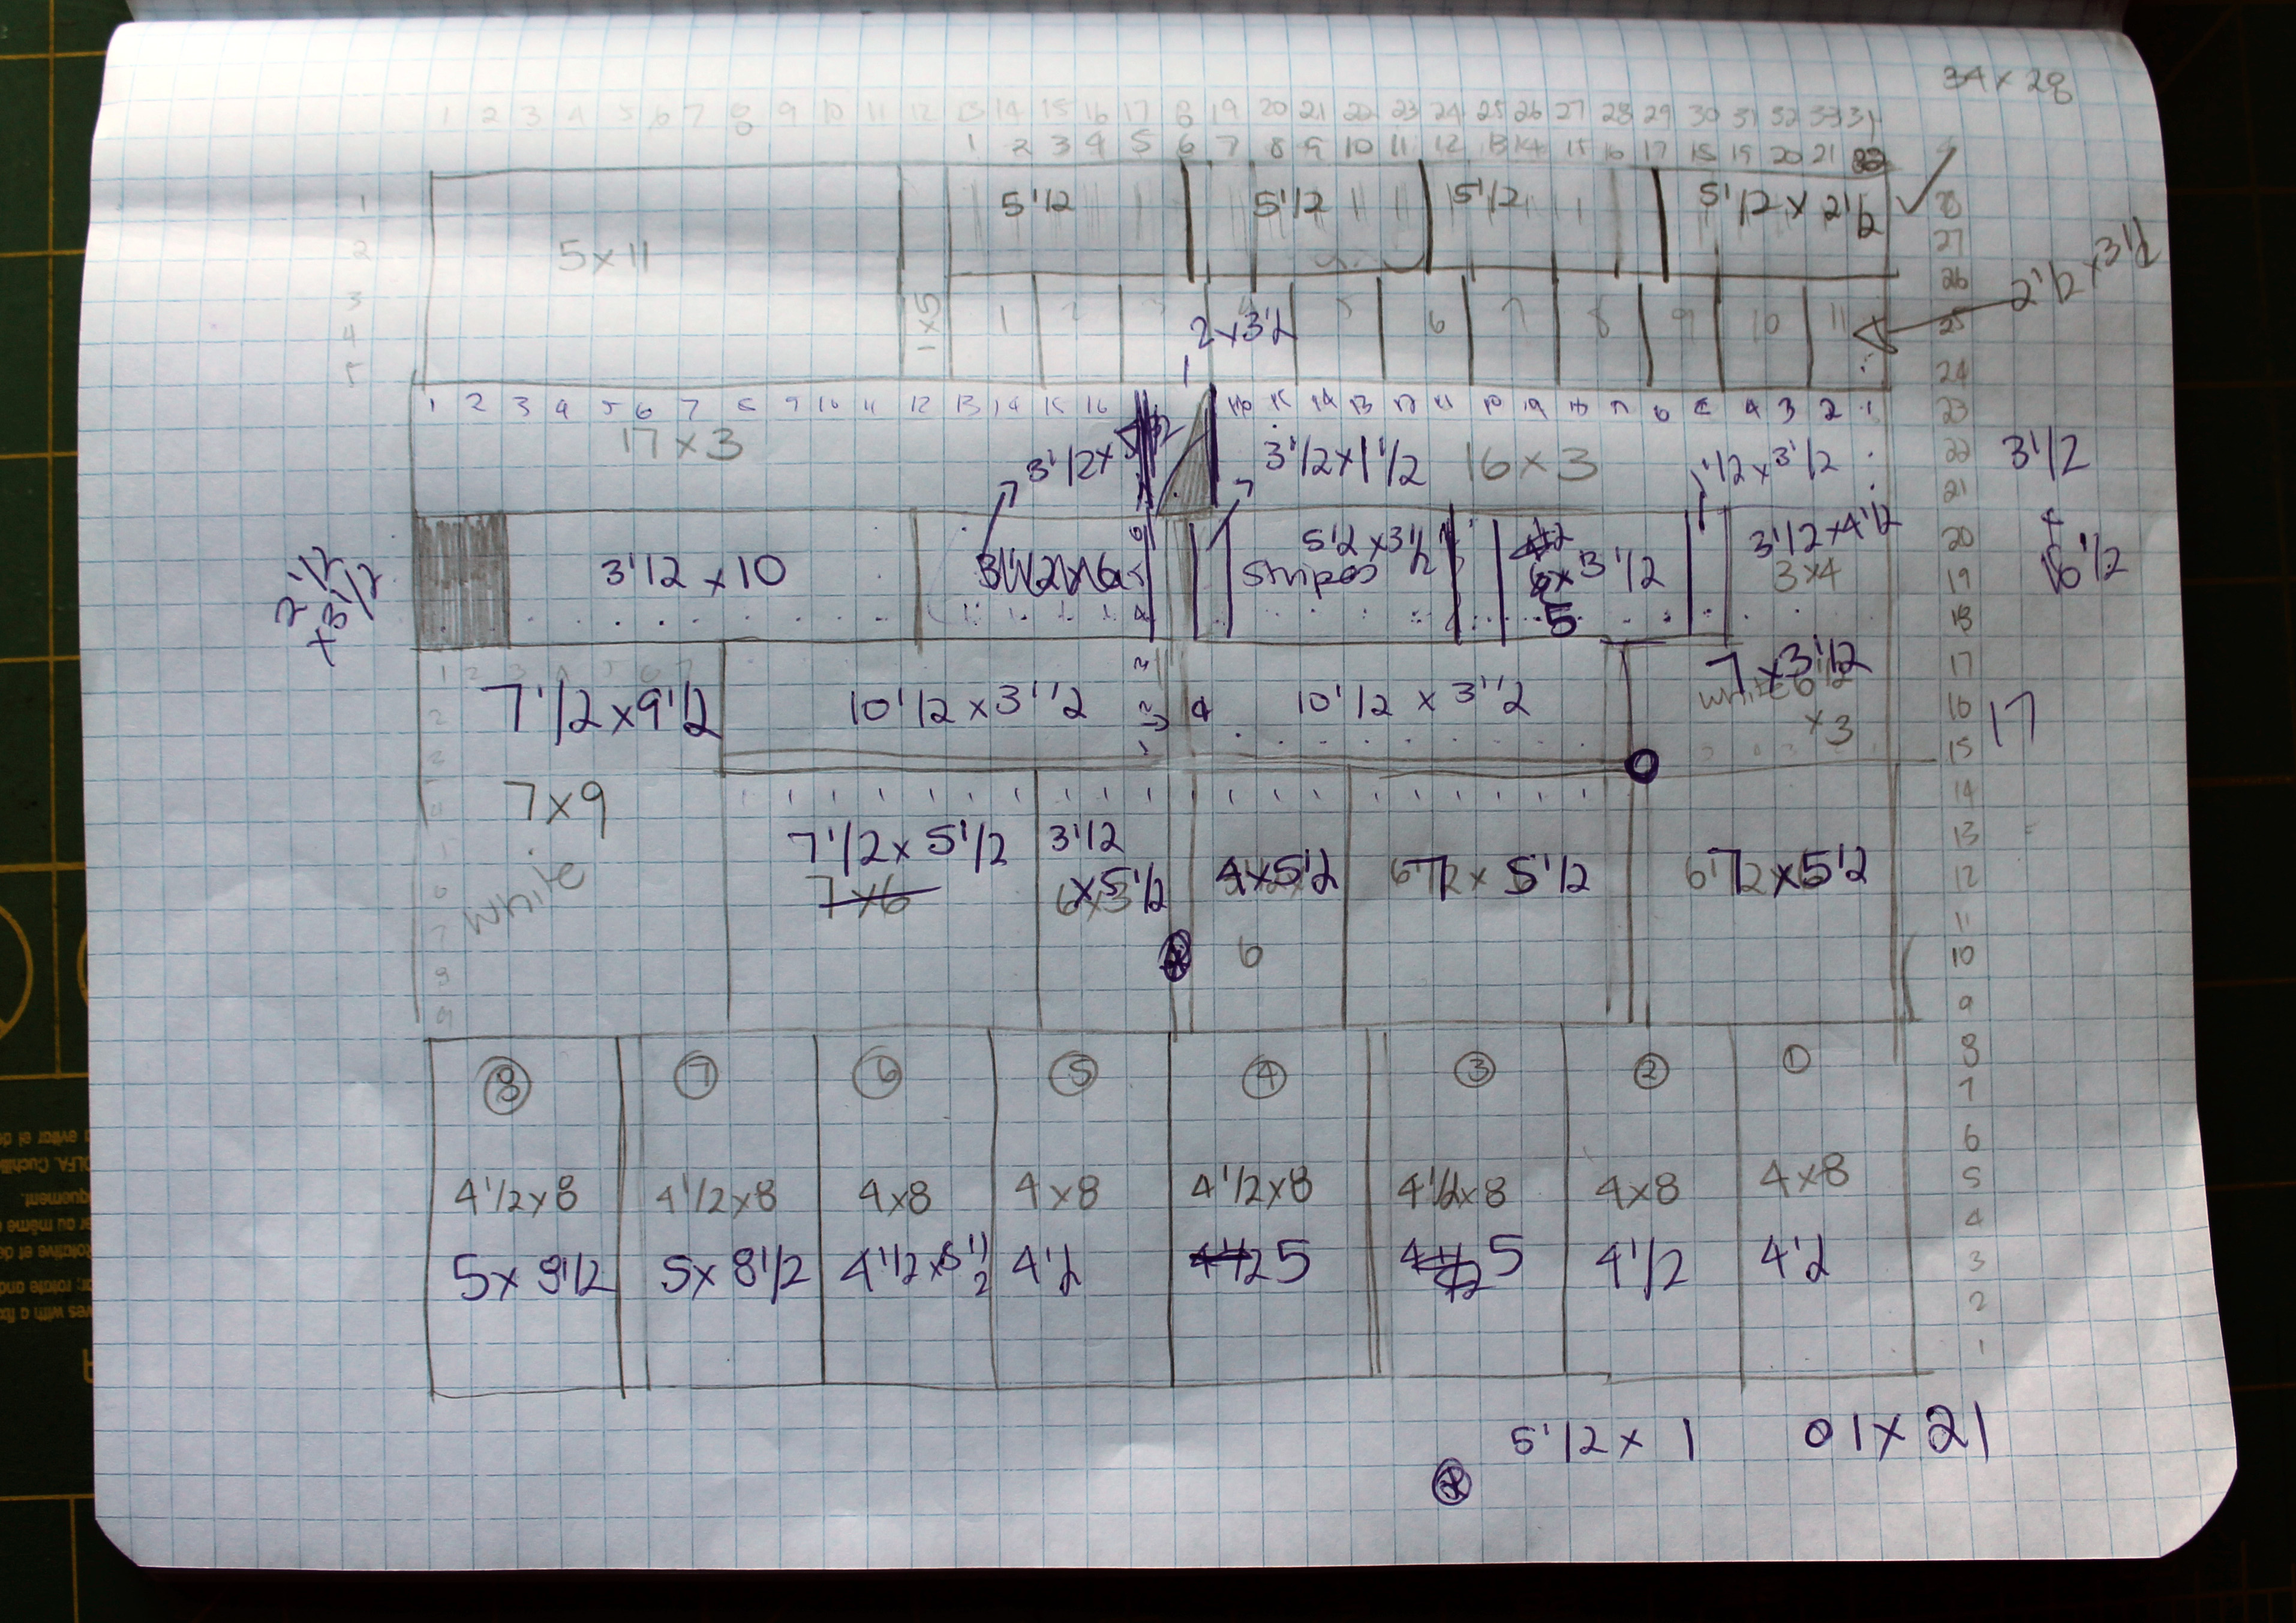
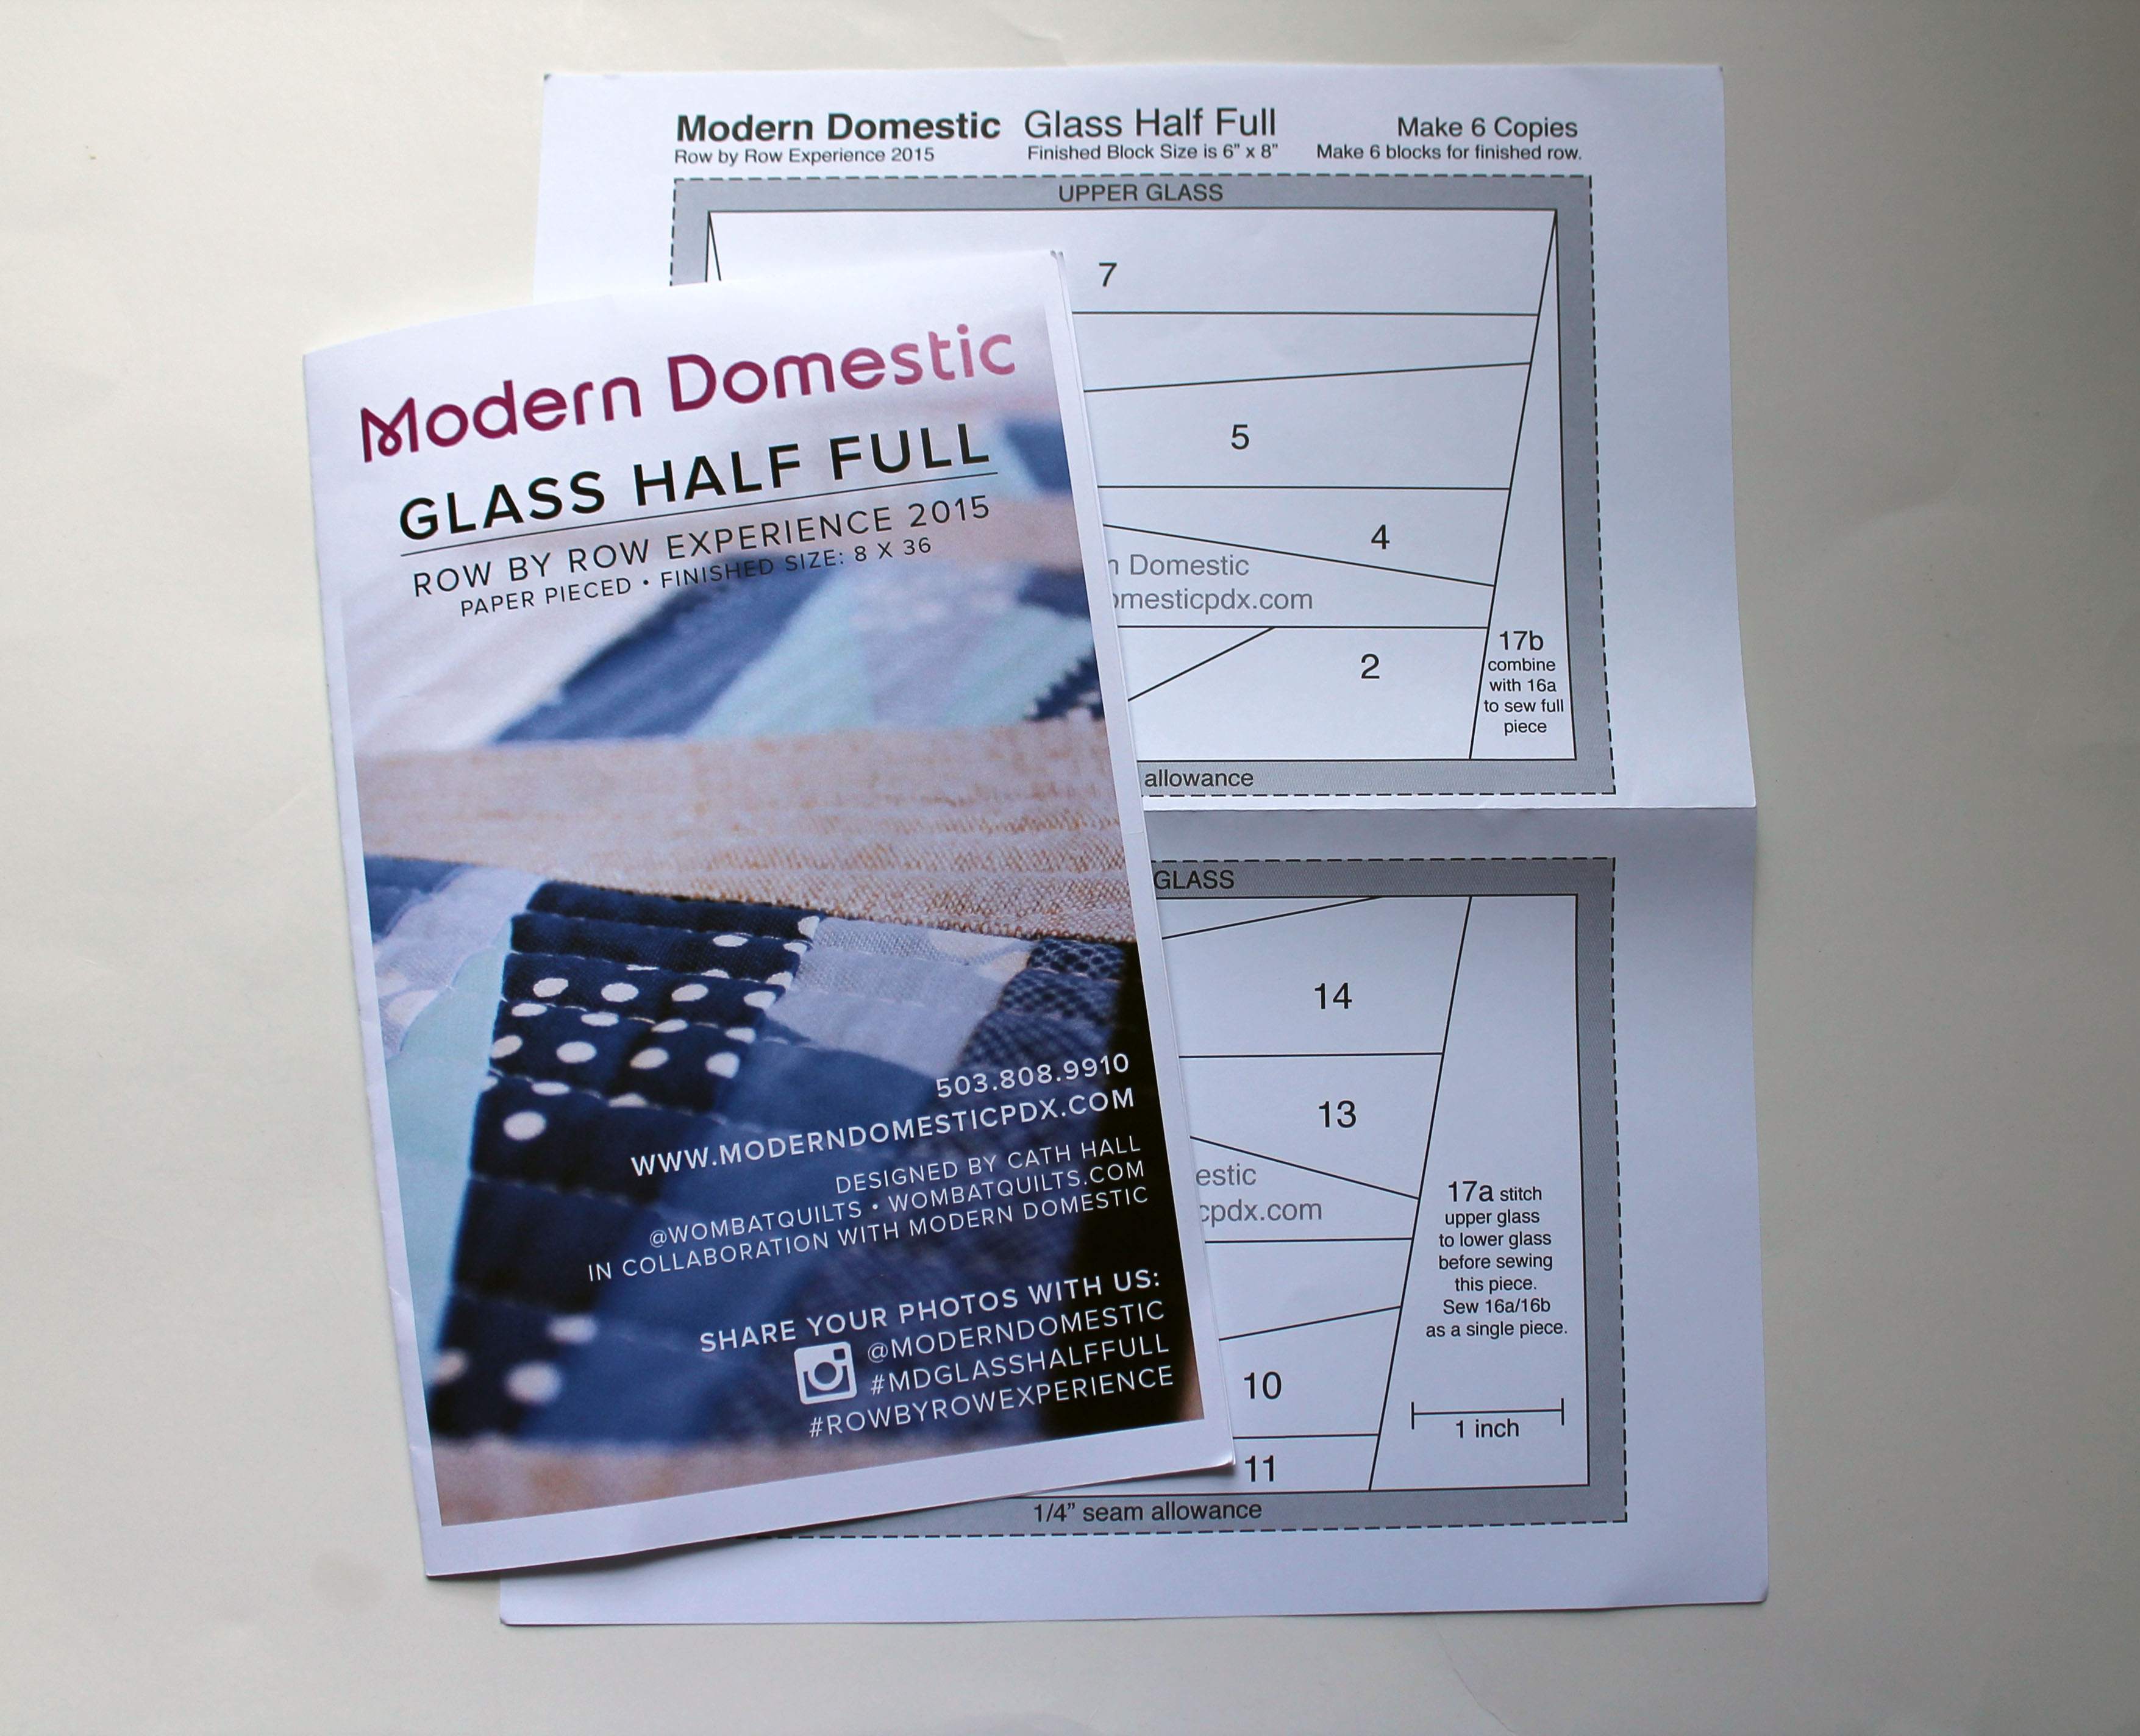
The remit was to design a block that was 8 inches high by 36 inches wide.  I worked with Michelle Freedman to design a paper piecing block based on the idea of a glass of water.

block layouts
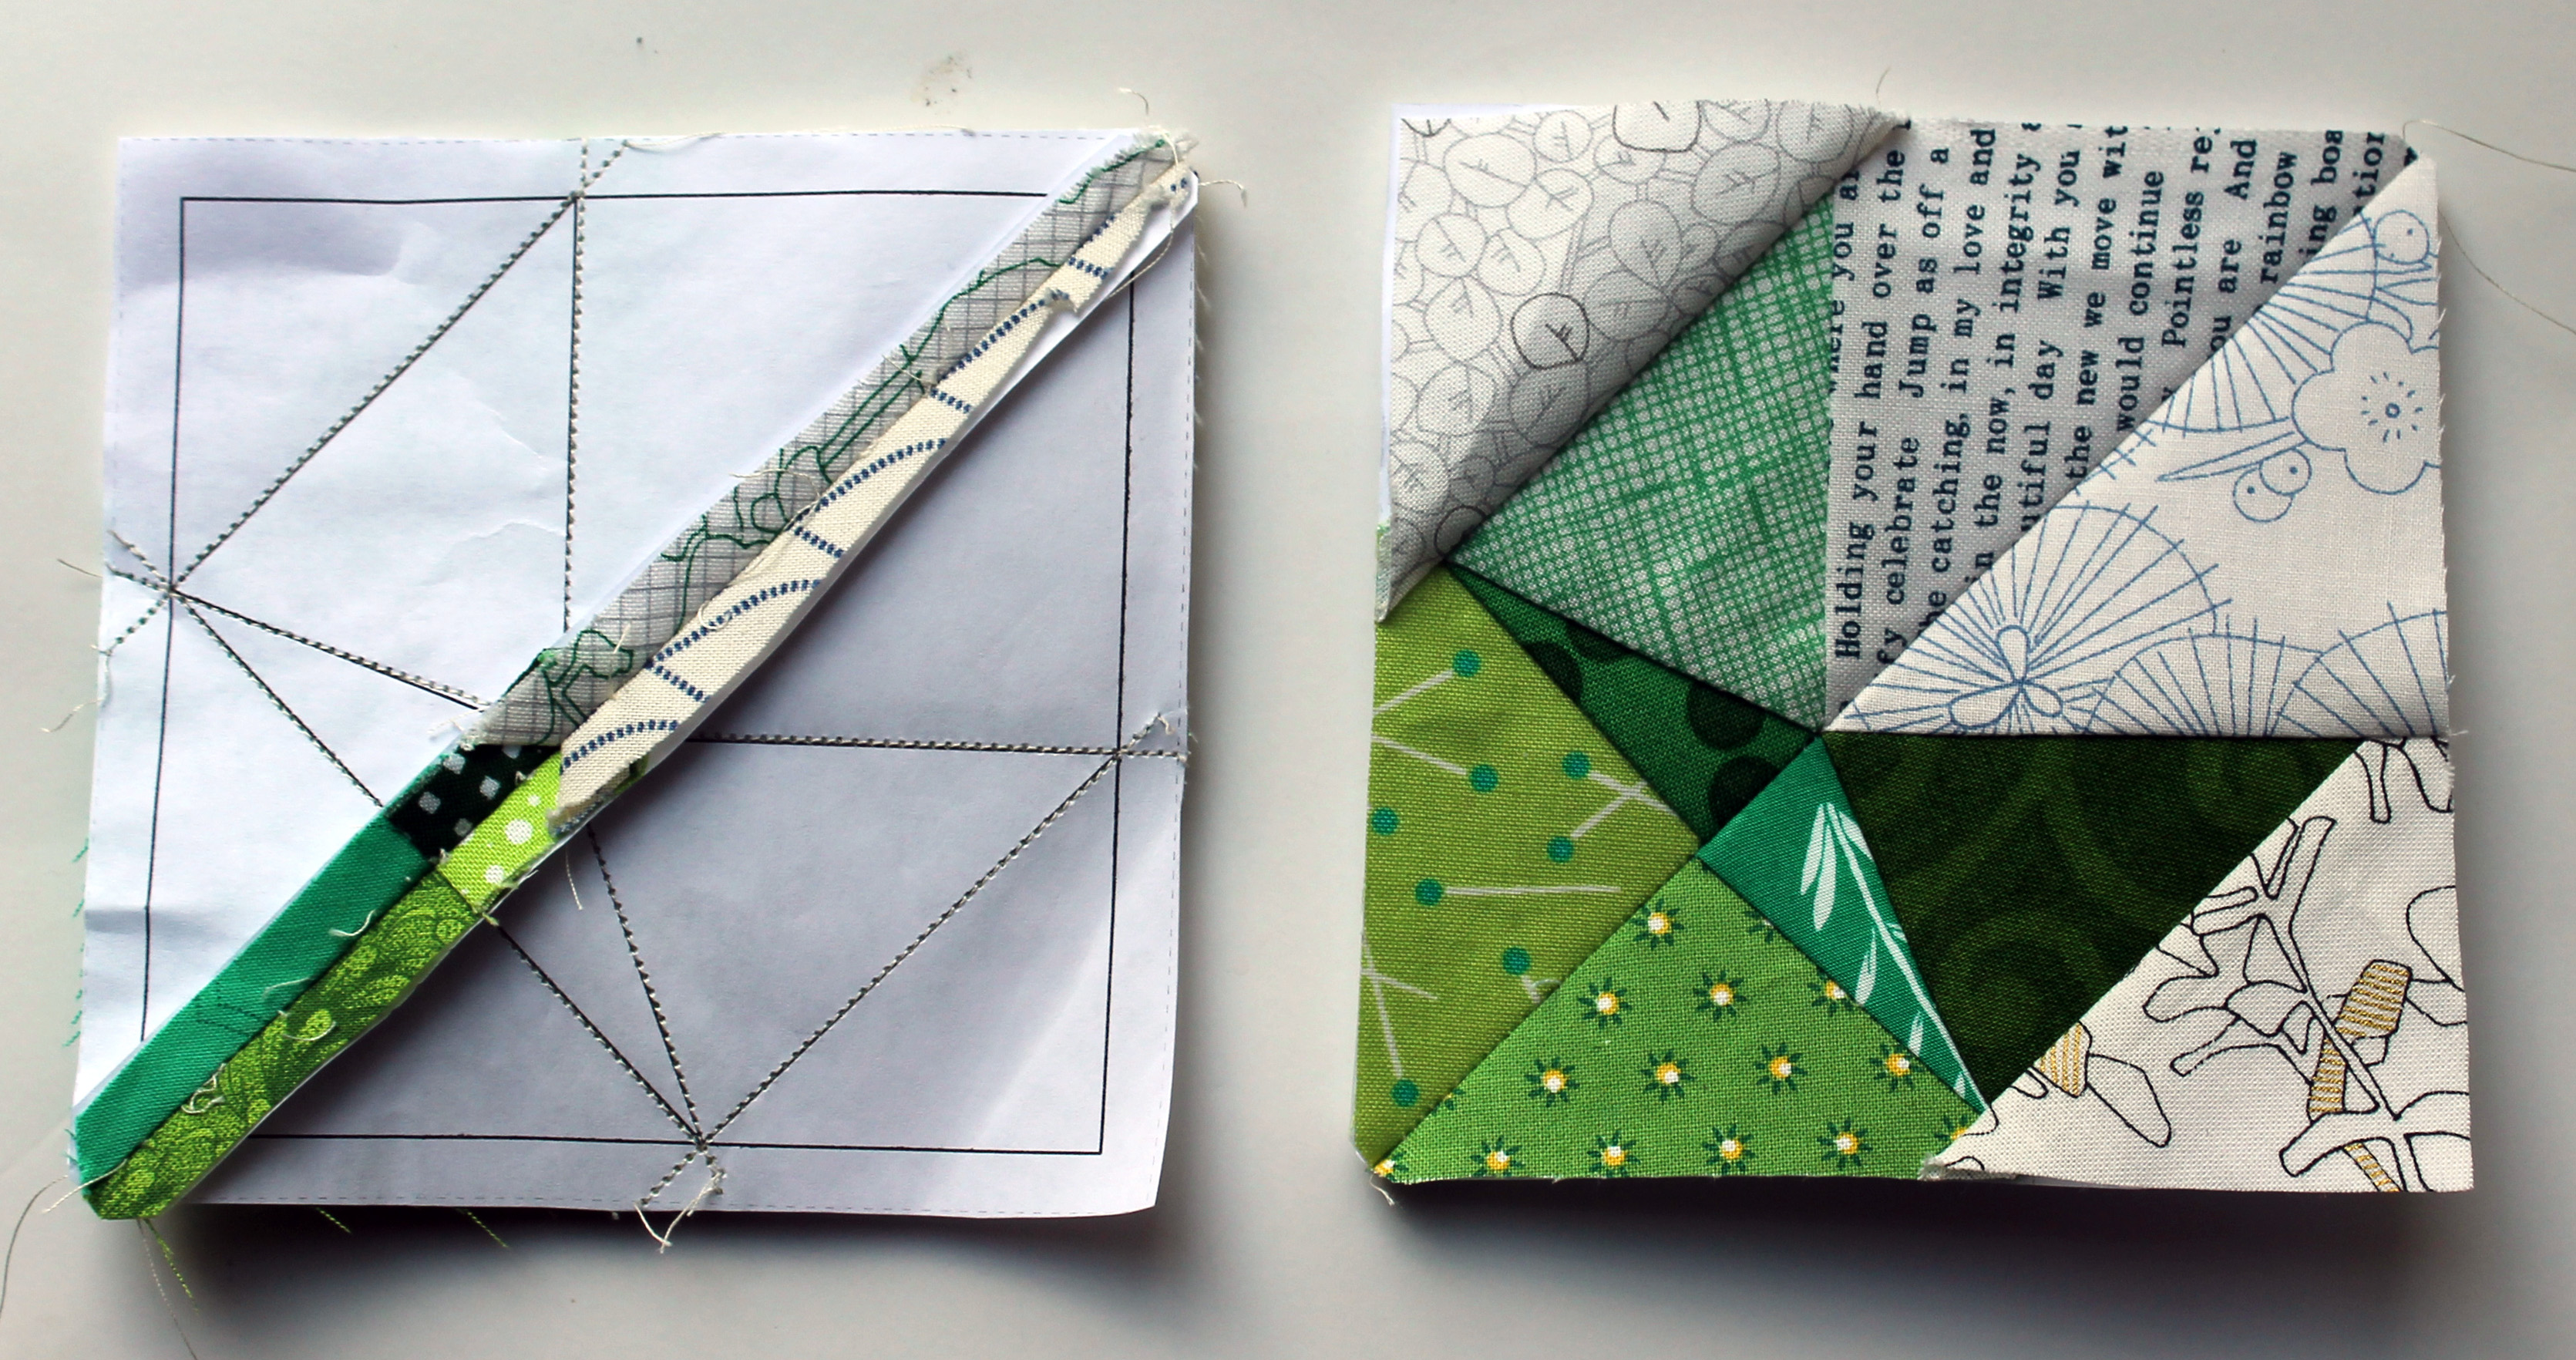
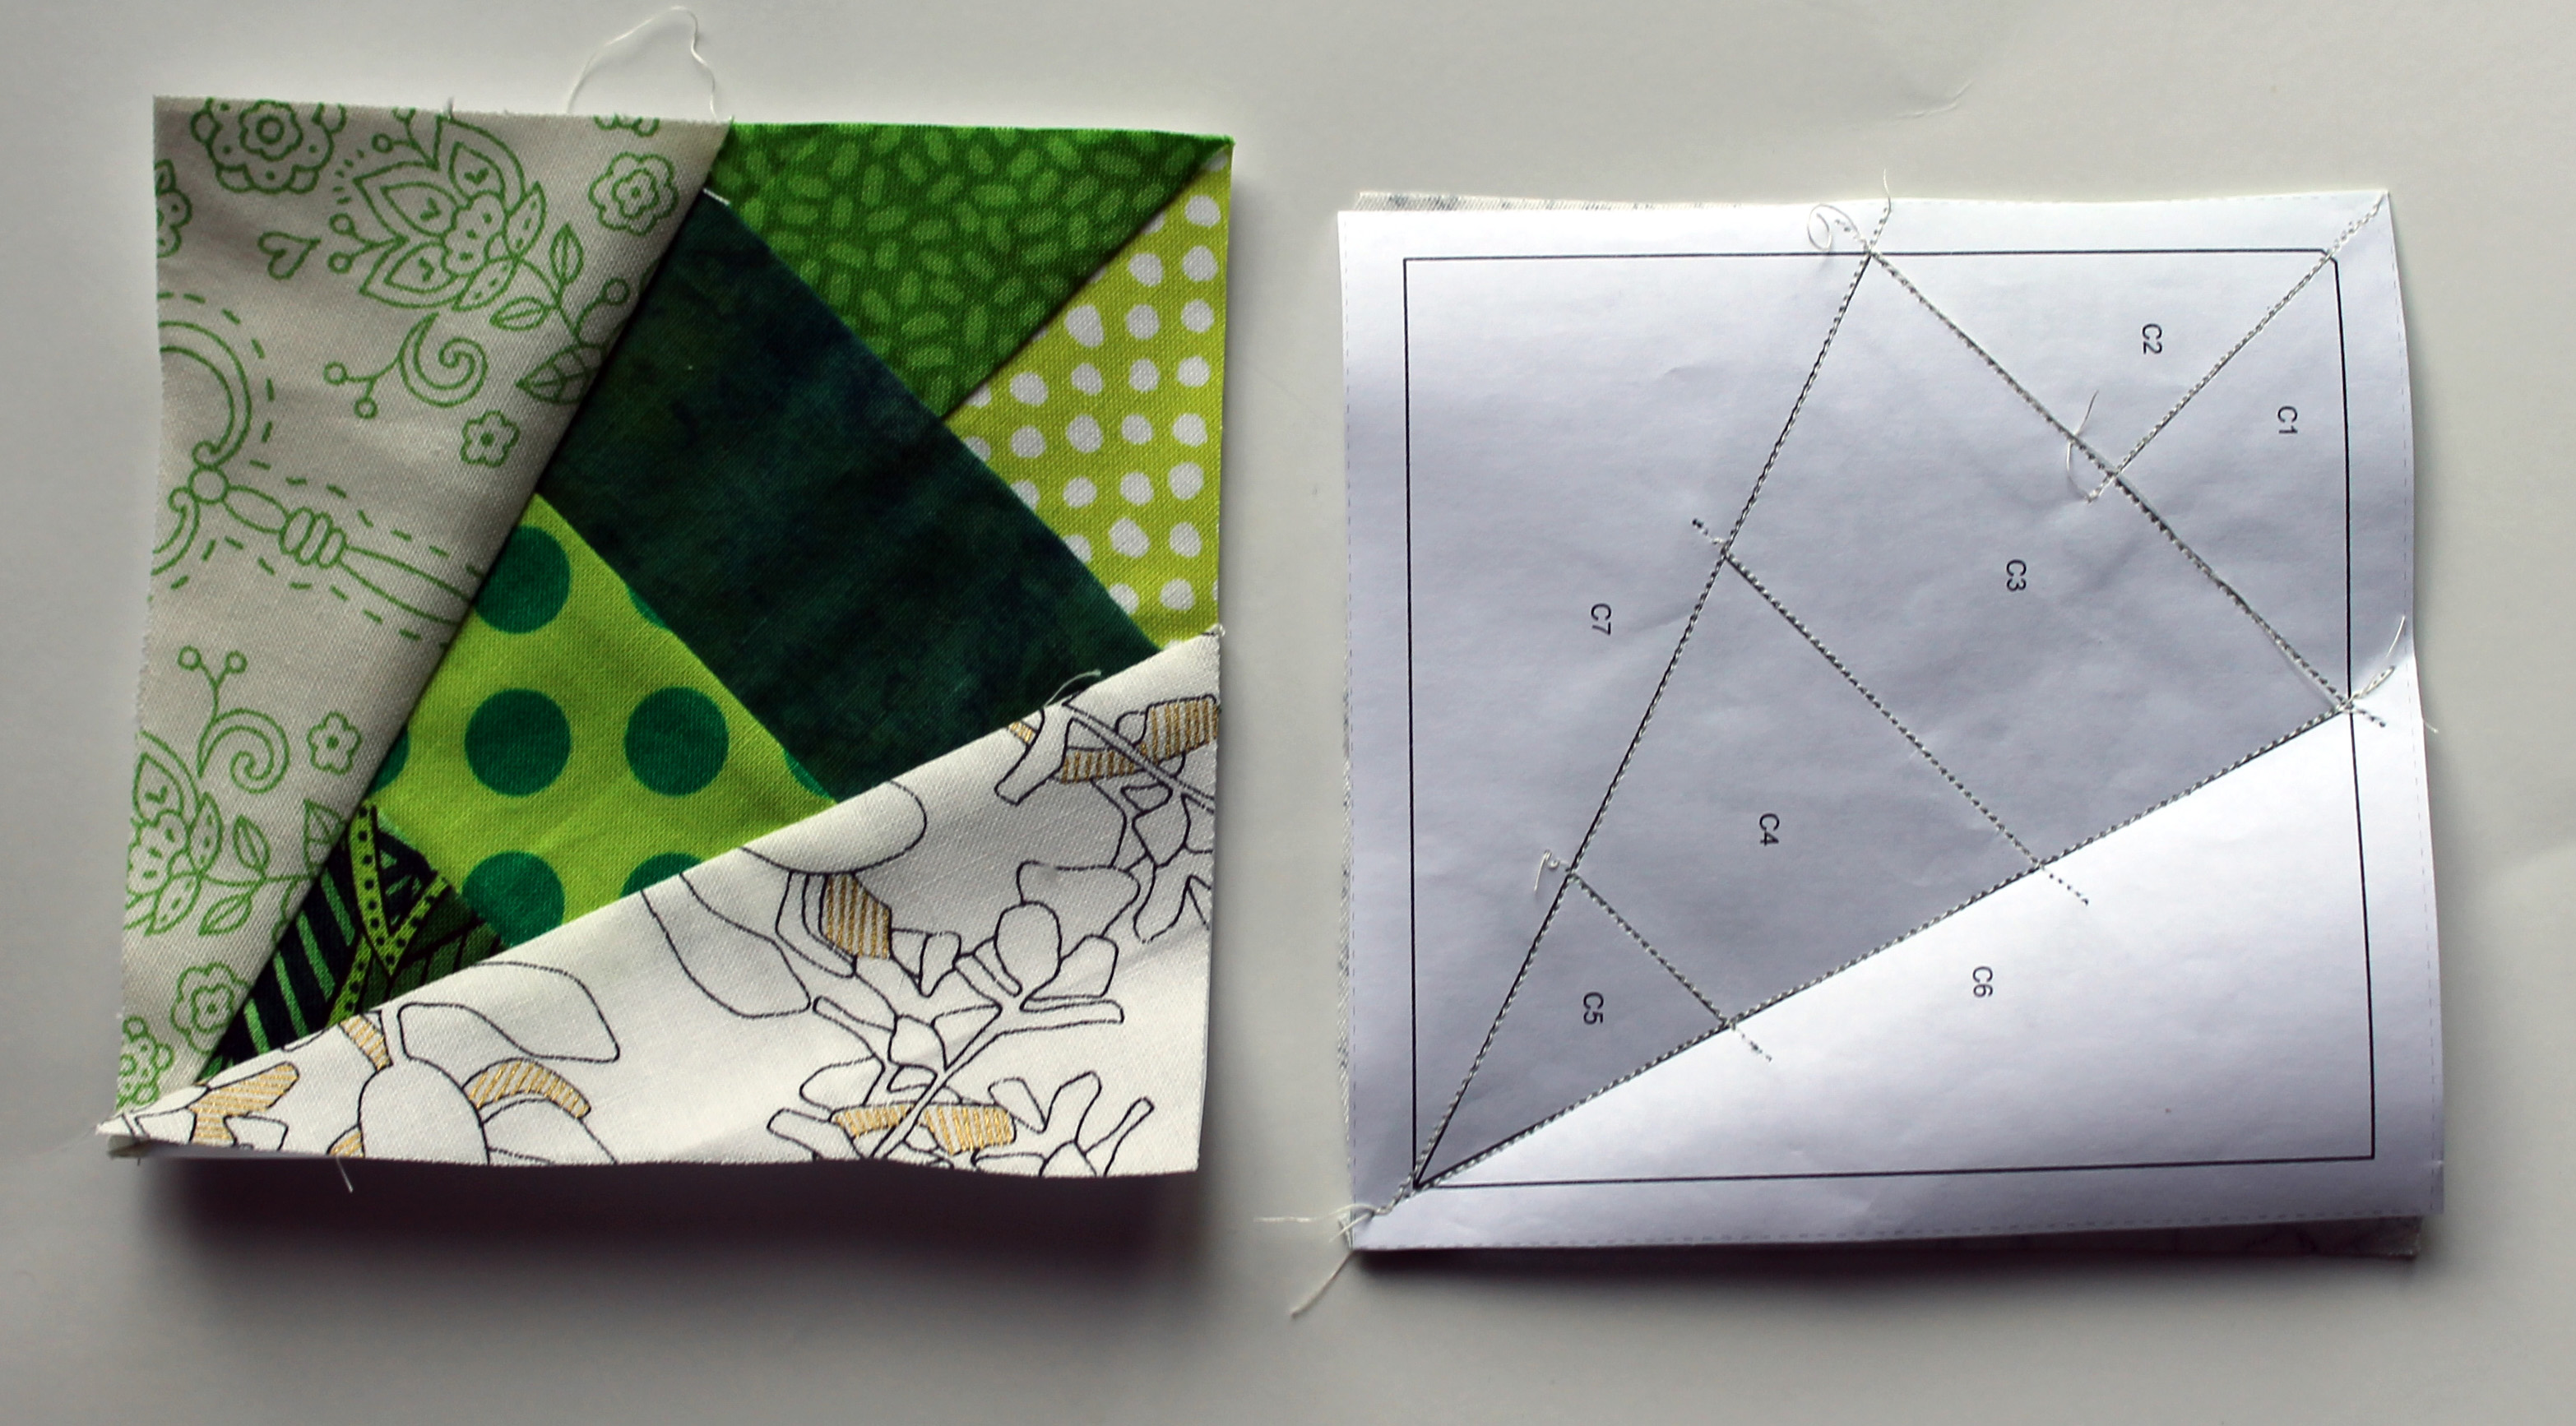
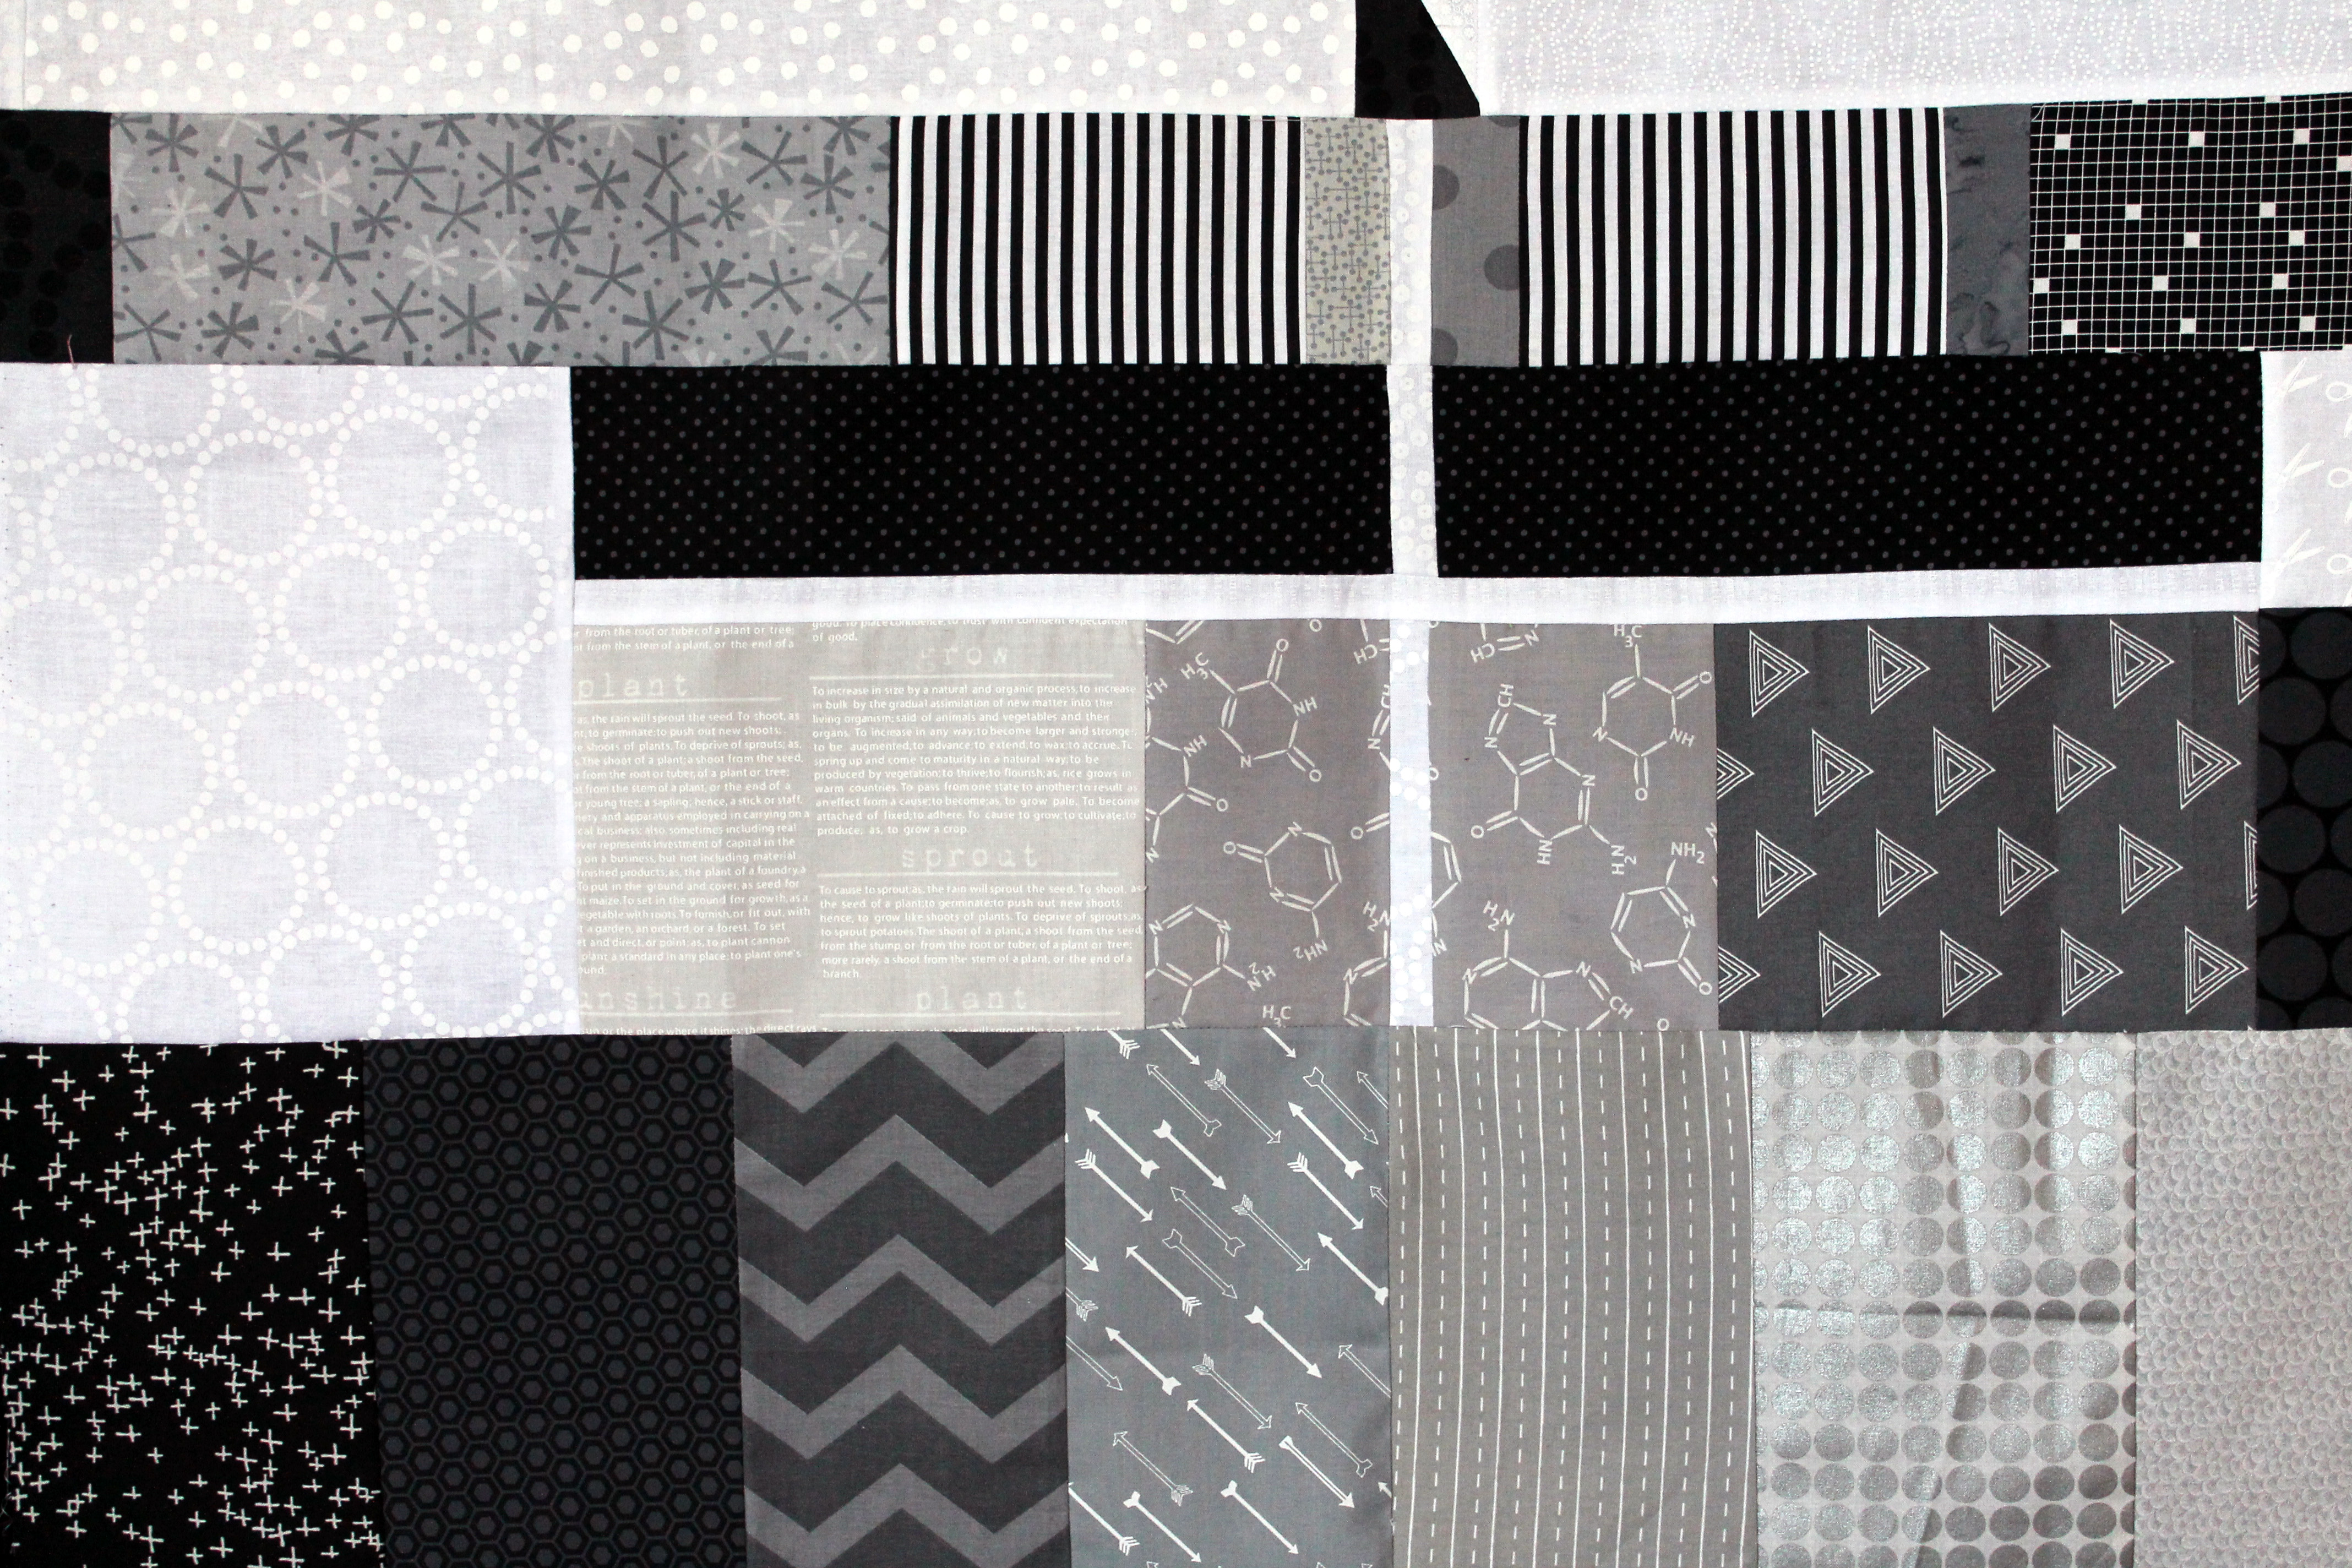
My original block was 6 different paper piecing patterns for the water (you can see the my original test run above).  Michelle then streamlined the idea into just one pattern sheet, which still gives you variety in the water but is easier to distribute.

MD patternYou can pick up this pattern for free from Modern Domestic over the next couple of months.  Most of the stores also have kits available for their blocks, which is helpful if your stash is somewhat lacking in blues!  I turned my row into a table runner by simply adding a border strip…

glass half full blocksIf you are not able to make it to make it to Portland you can check out the Row by Row website to see if your local quilt store is participating… I know there are quite a few stores that have paper pieced their row… including Fabric Depot whose very cool paper pieced block I will definitely be hunting down.

quilting detailAnd if you are outside the USA, don’t fret, at the end of the September many of the stores will make their patterns available digitally.  I will let you know when Modern Domestic’s pattern becomes available.

Designing a paper piecing pattern….

This week I have been playing with a paper piece block that I have designed for a friend’s quilt.  She is a big fox fan and seeing she is getting married in August I thought a quilt was in order.

There are some great fox patterns out there…I  love Elizabeth Hartman’s “Fancy Fox“….but I wanted to make Miss Katie something very special.  Inspired by a print I saw at a local Market Stall, I came up with this block…

Miss K Fox blockI initially sketched the idea in a my gridded notebook, then transferred the idea into the quilting program EQ.  I tweaked a little and then did a test run.

sewing piecesI never print out numbers on the blocks in this initial phase, because part of the pattern testing process is to work out which pieces should be numbered in which order.  In particular the decision of the first piece glued down is important (I select the most awkward shaped piece to start with if possible).

block piecesWhen all the pieces are made I then look at how to make sure that the proportions are right and that all the pieces are okay.  With this pattern I went in and tweaked a few bits … I made the nose bigger and got rid of some extra lines that were not needed.

amending patternI will now go back into EQ and make the changes and finally add the numbers and do another test run.  Then when I am happy I will launch into full-blown fox production mode…. an August deadline is looming and I have a lot of foxes to make!

So before I sign off the winner of the fabric bundle is….

Kirsten who wrote…”I am following along with your progress on this beautiful quilt as green is my favourite colour – all of your stars are just gorgeous and I love the LV backgroundl!”.

So the fabric will be winging its way to Kirsten.  Thanks to everyone who entered.  There was such a great response that I will definitely be doing this again…and soon.

The last green star….

Welcome to Paper Piecing Monday….the final edition of the Green Star series…

fractured starThere is no rhyme or reason for my colour placement on this star… I just had fun and put scraps where ever they fitted.  Some how it seemed the thing to do with this the 20th star in the series.  Yep you read that right, I made 20 green stars and shared 20 patterns.

block partsI had a change of heart this week about how I wanted to layout of the stars in the final quilt, and so do not want to share anything yet.  I hope to play some more this week and have a WIP (work in progress) shot for you next week.

The last 8 inch star pattern can be found here…fractured star pattern.

Do not fret, paper piecing Monday will be back next week, but with something NON star related.

A simpler green star…

Today’s paper piecing Monday I decided to keep it a little simpler – only  a four-part pattern!

free pape pieced patternWith this pattern you can decide to not do the pieced center part (just use one piece of fabric to cover the center triangle).  This give you a different looking star with less bulk in the center.

block piecesYou can find the free paper piecing pattern for this 8 inch block here…Stripey Star pattern.  Only a few more green blocks to go and then I can star putting this top together.


When your old life intersects with your new…

When the Modern Quilt Guilds of the Pacific Northwest were recently invited to submit quilts for a Quilt Show in August I was a little apprehensive.  The guild lines were that the quilts could use black, white and the shades of grey in between and as you can tell from my quilts I love colour.  We were allowed, if we wanted, to add one colour in one place but that was it.

I pondered this challenge for a month or so and then one day, as I was talking to an old friend it hit me what I could do.  You see in my previous life I was in film and a key essential tool in the camera kit was always a grey card.  This card was used to white balance and focus the camera (back in the old days before digital took over!).  A grey card would make the perfect quilt for this project….

So I found an image similar to the cards I used to use…

greyDid some crazy quilts maths… not something I usually do and not something that comes easily to me…

quilt mathsPulled some greys from my stash…

grey stashAnd went to work.  The end result was this…

WQ grey card quiltI am thrilled with how it turned out.  I was really impressed with the depth of my grey stash, which allowed me to do some fun colour graduation….

graduating greysI cheated a bit and used some black and white stripes for the focus bars… I was not going to be able to get that kind of sharp precision with piecing… (but it is driving me crazy that photos in this post seem out of focus unless you click on the image to enlarge it….@%*$#^! WordPress….AUGH!!!!!

grey card detailI also managed to get my favorite prints, Mirror Ball and Pearl Bracelets into the mix.  Now all I have to do is work out how I want to quilt it.  I was thinking of echoing the circle on the card in the quilting but that is as far as I have gotten so far.  I do know that I am going to add one tiny splash of colour in the binding.

I am really thrilled with this mini quilt (it is 36″ long by 28″ wide)… not because it is amazing or beautiful or revolutionary.  I love it because it has such meaning for me.  As I stepped out of my film career I stepped into quilting… and this quilt represents that life change for me.