A do.Good finish…

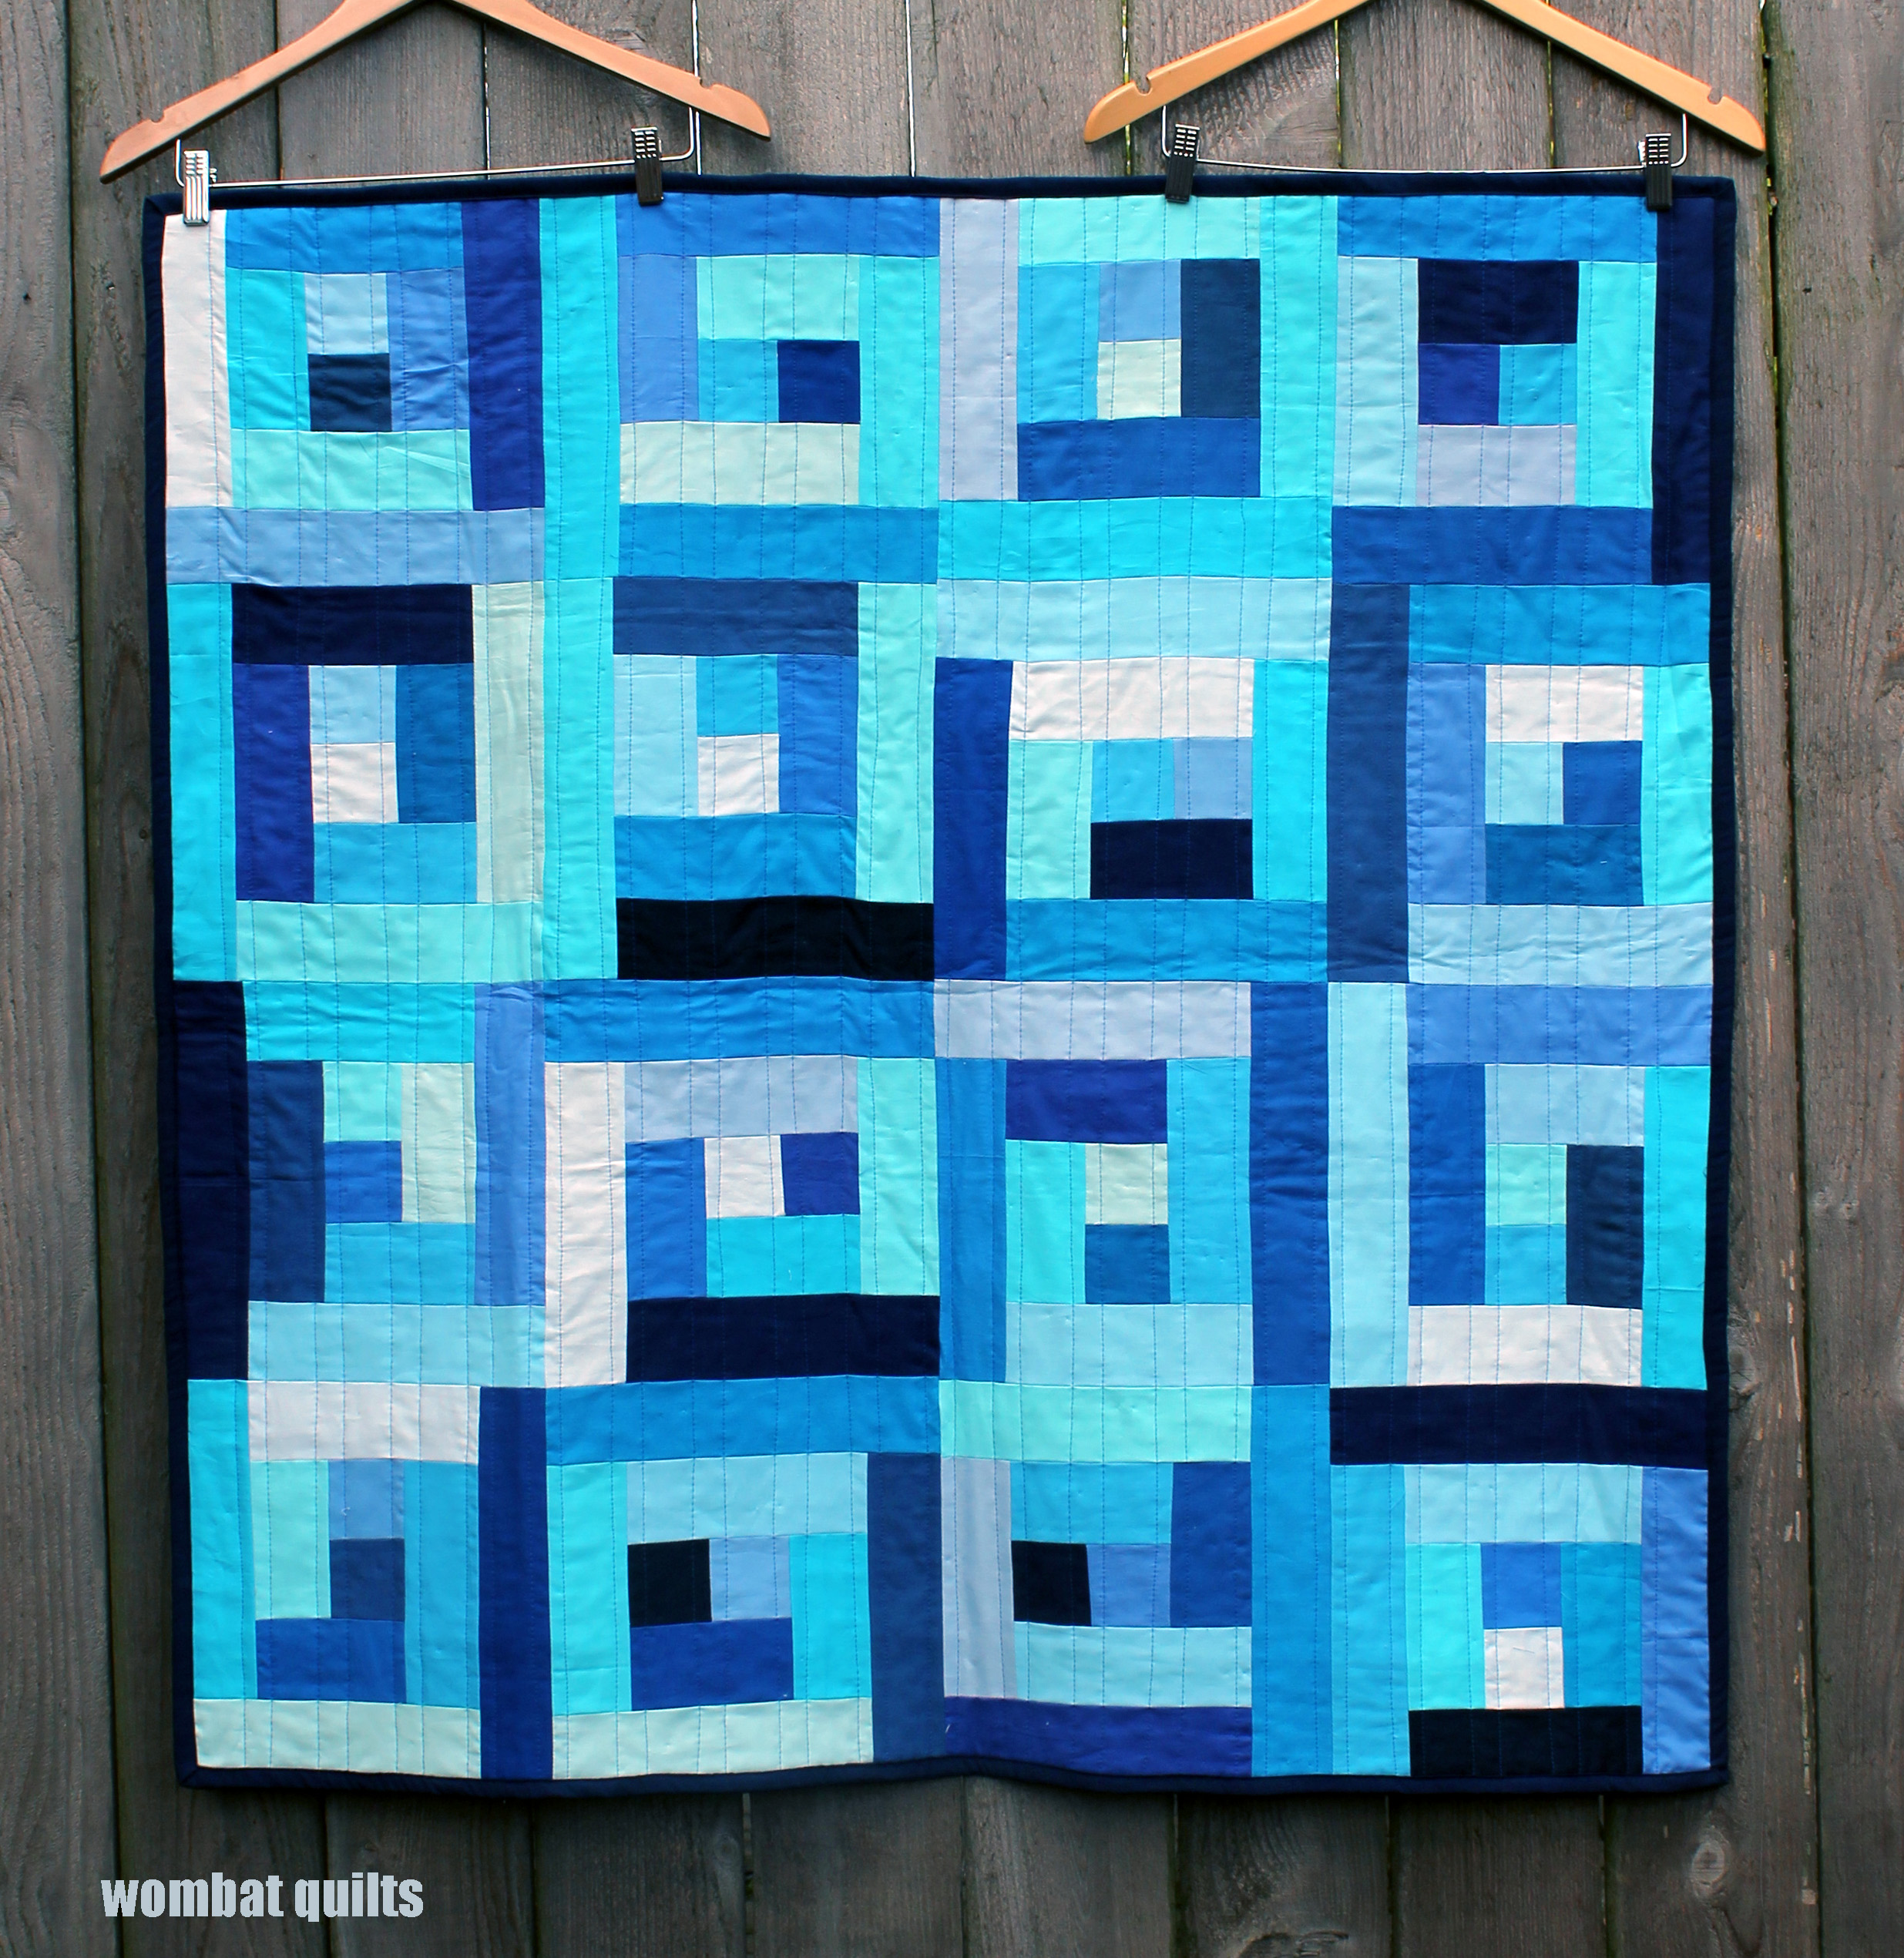
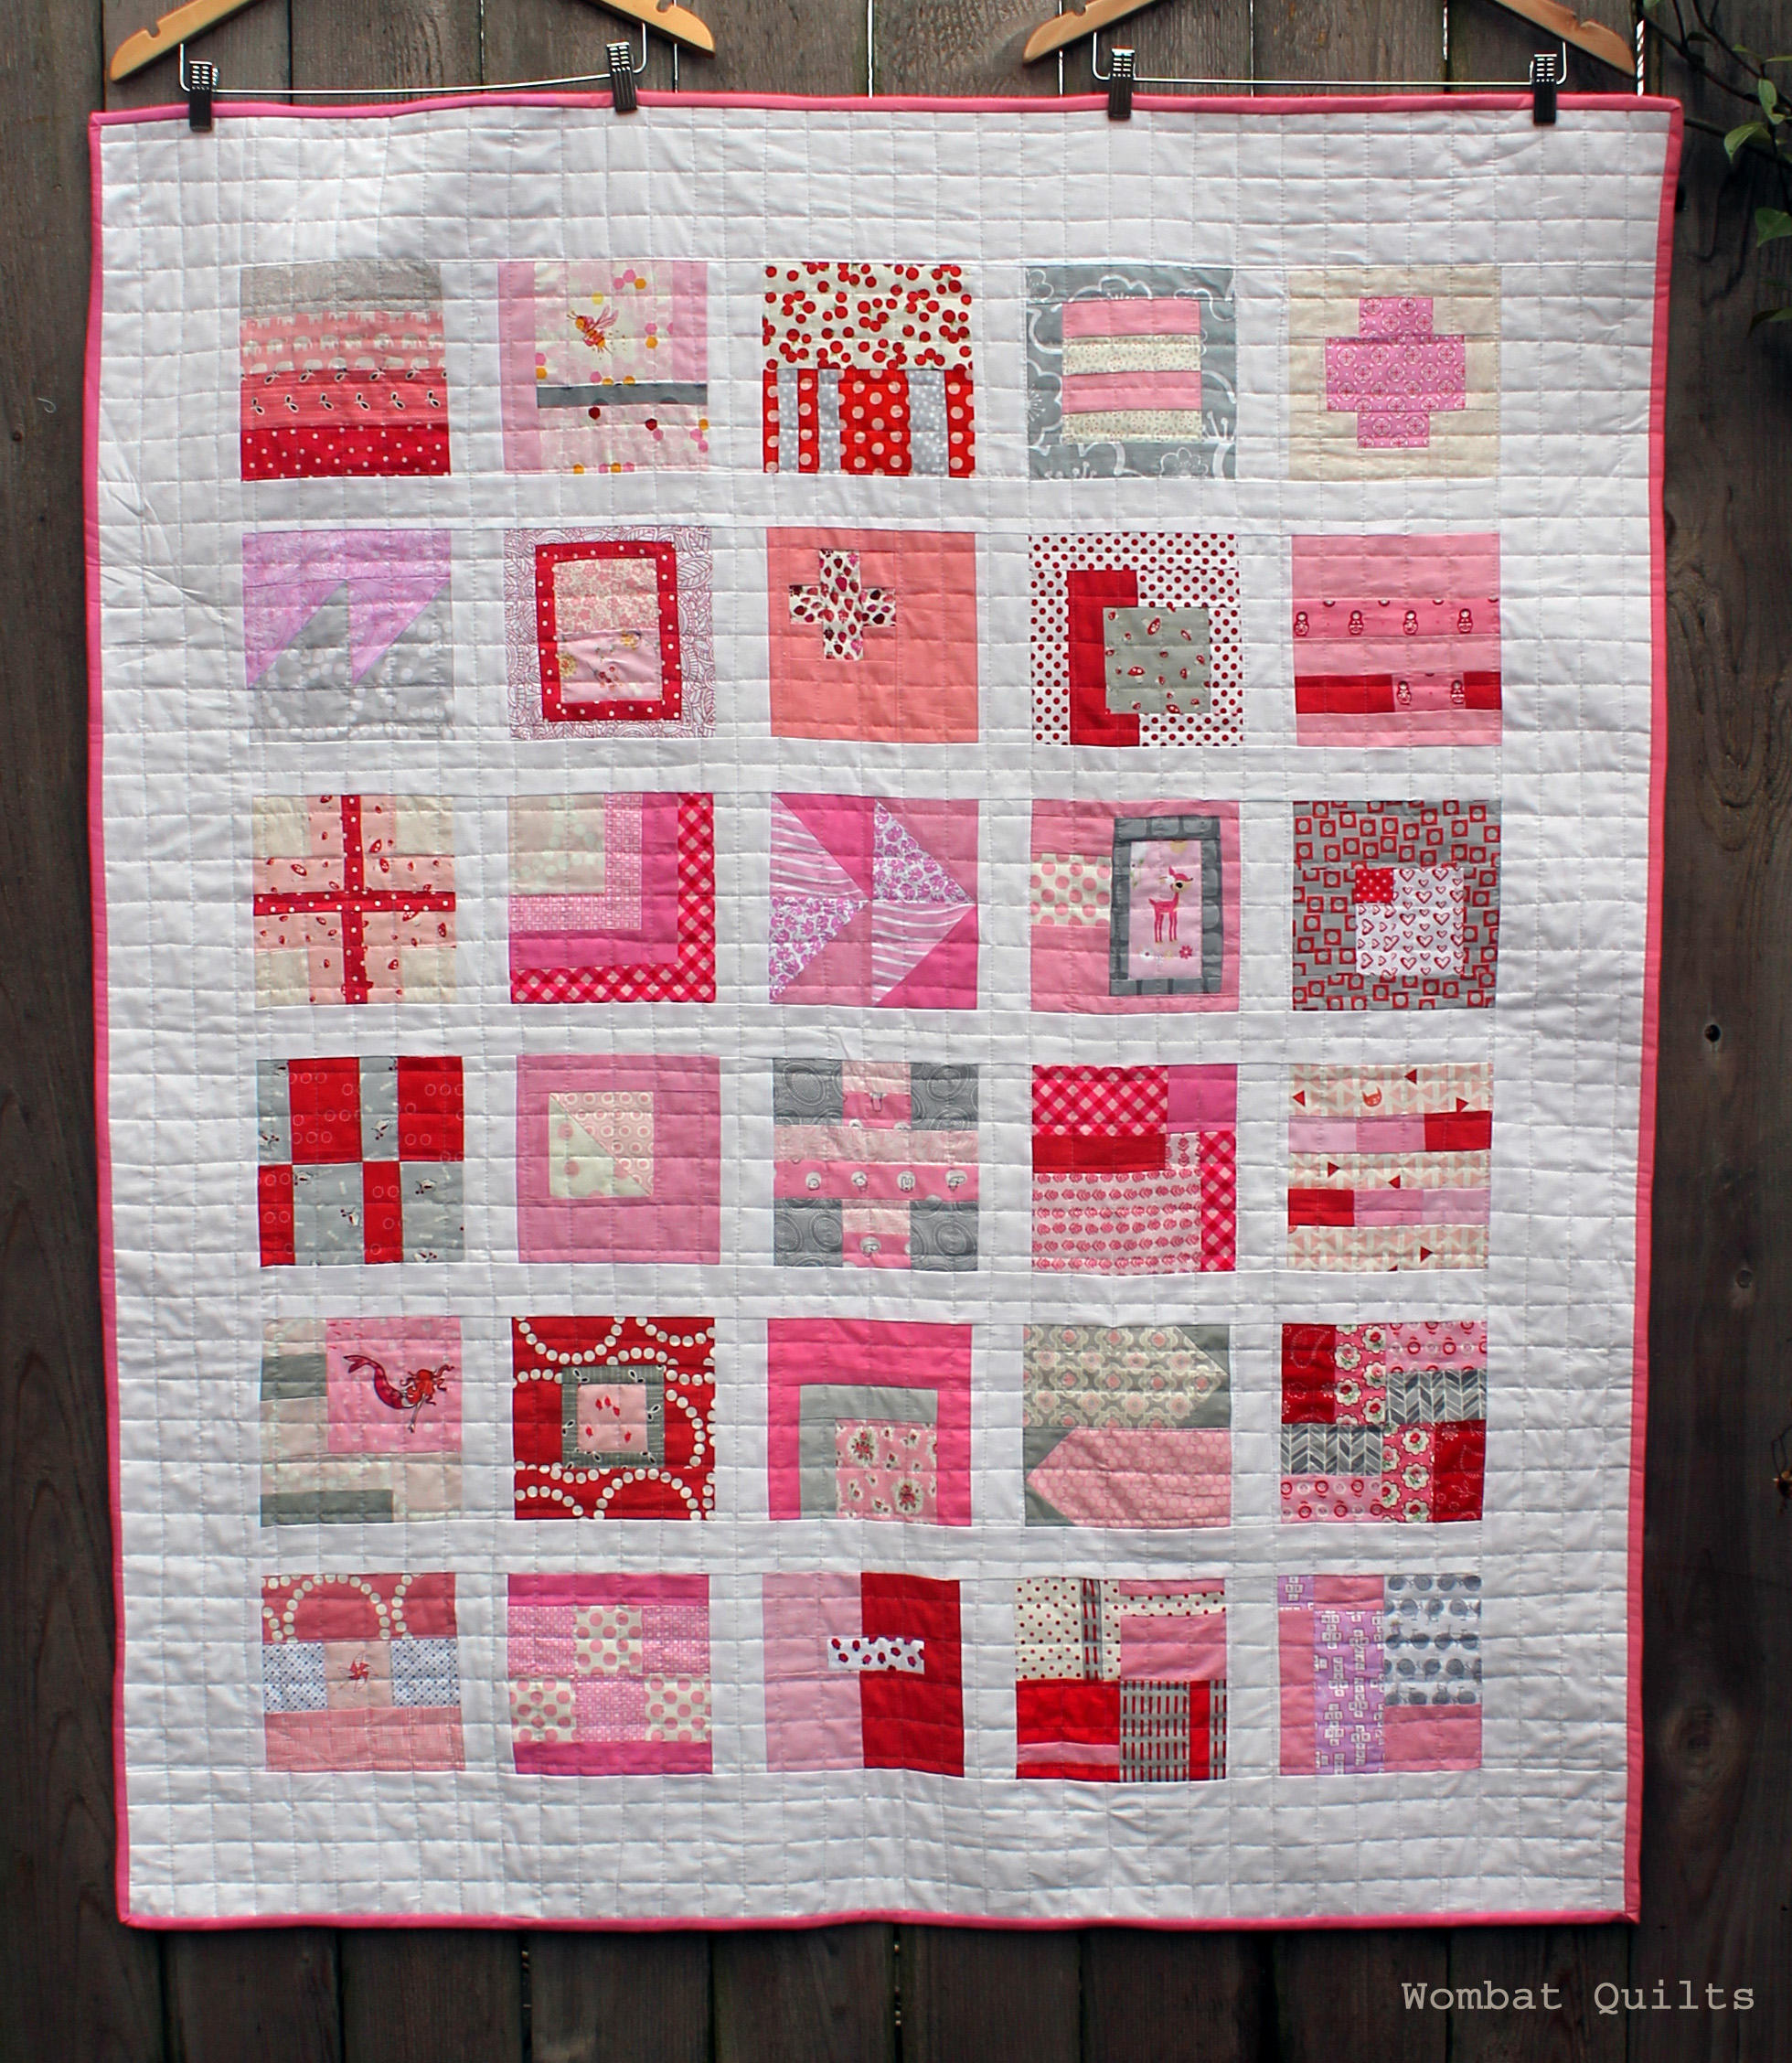
Okay it took me a while but I finally got the do.Good.Stitches Icicle quilt done…. so without further ado here she is….

do good stitches quilt
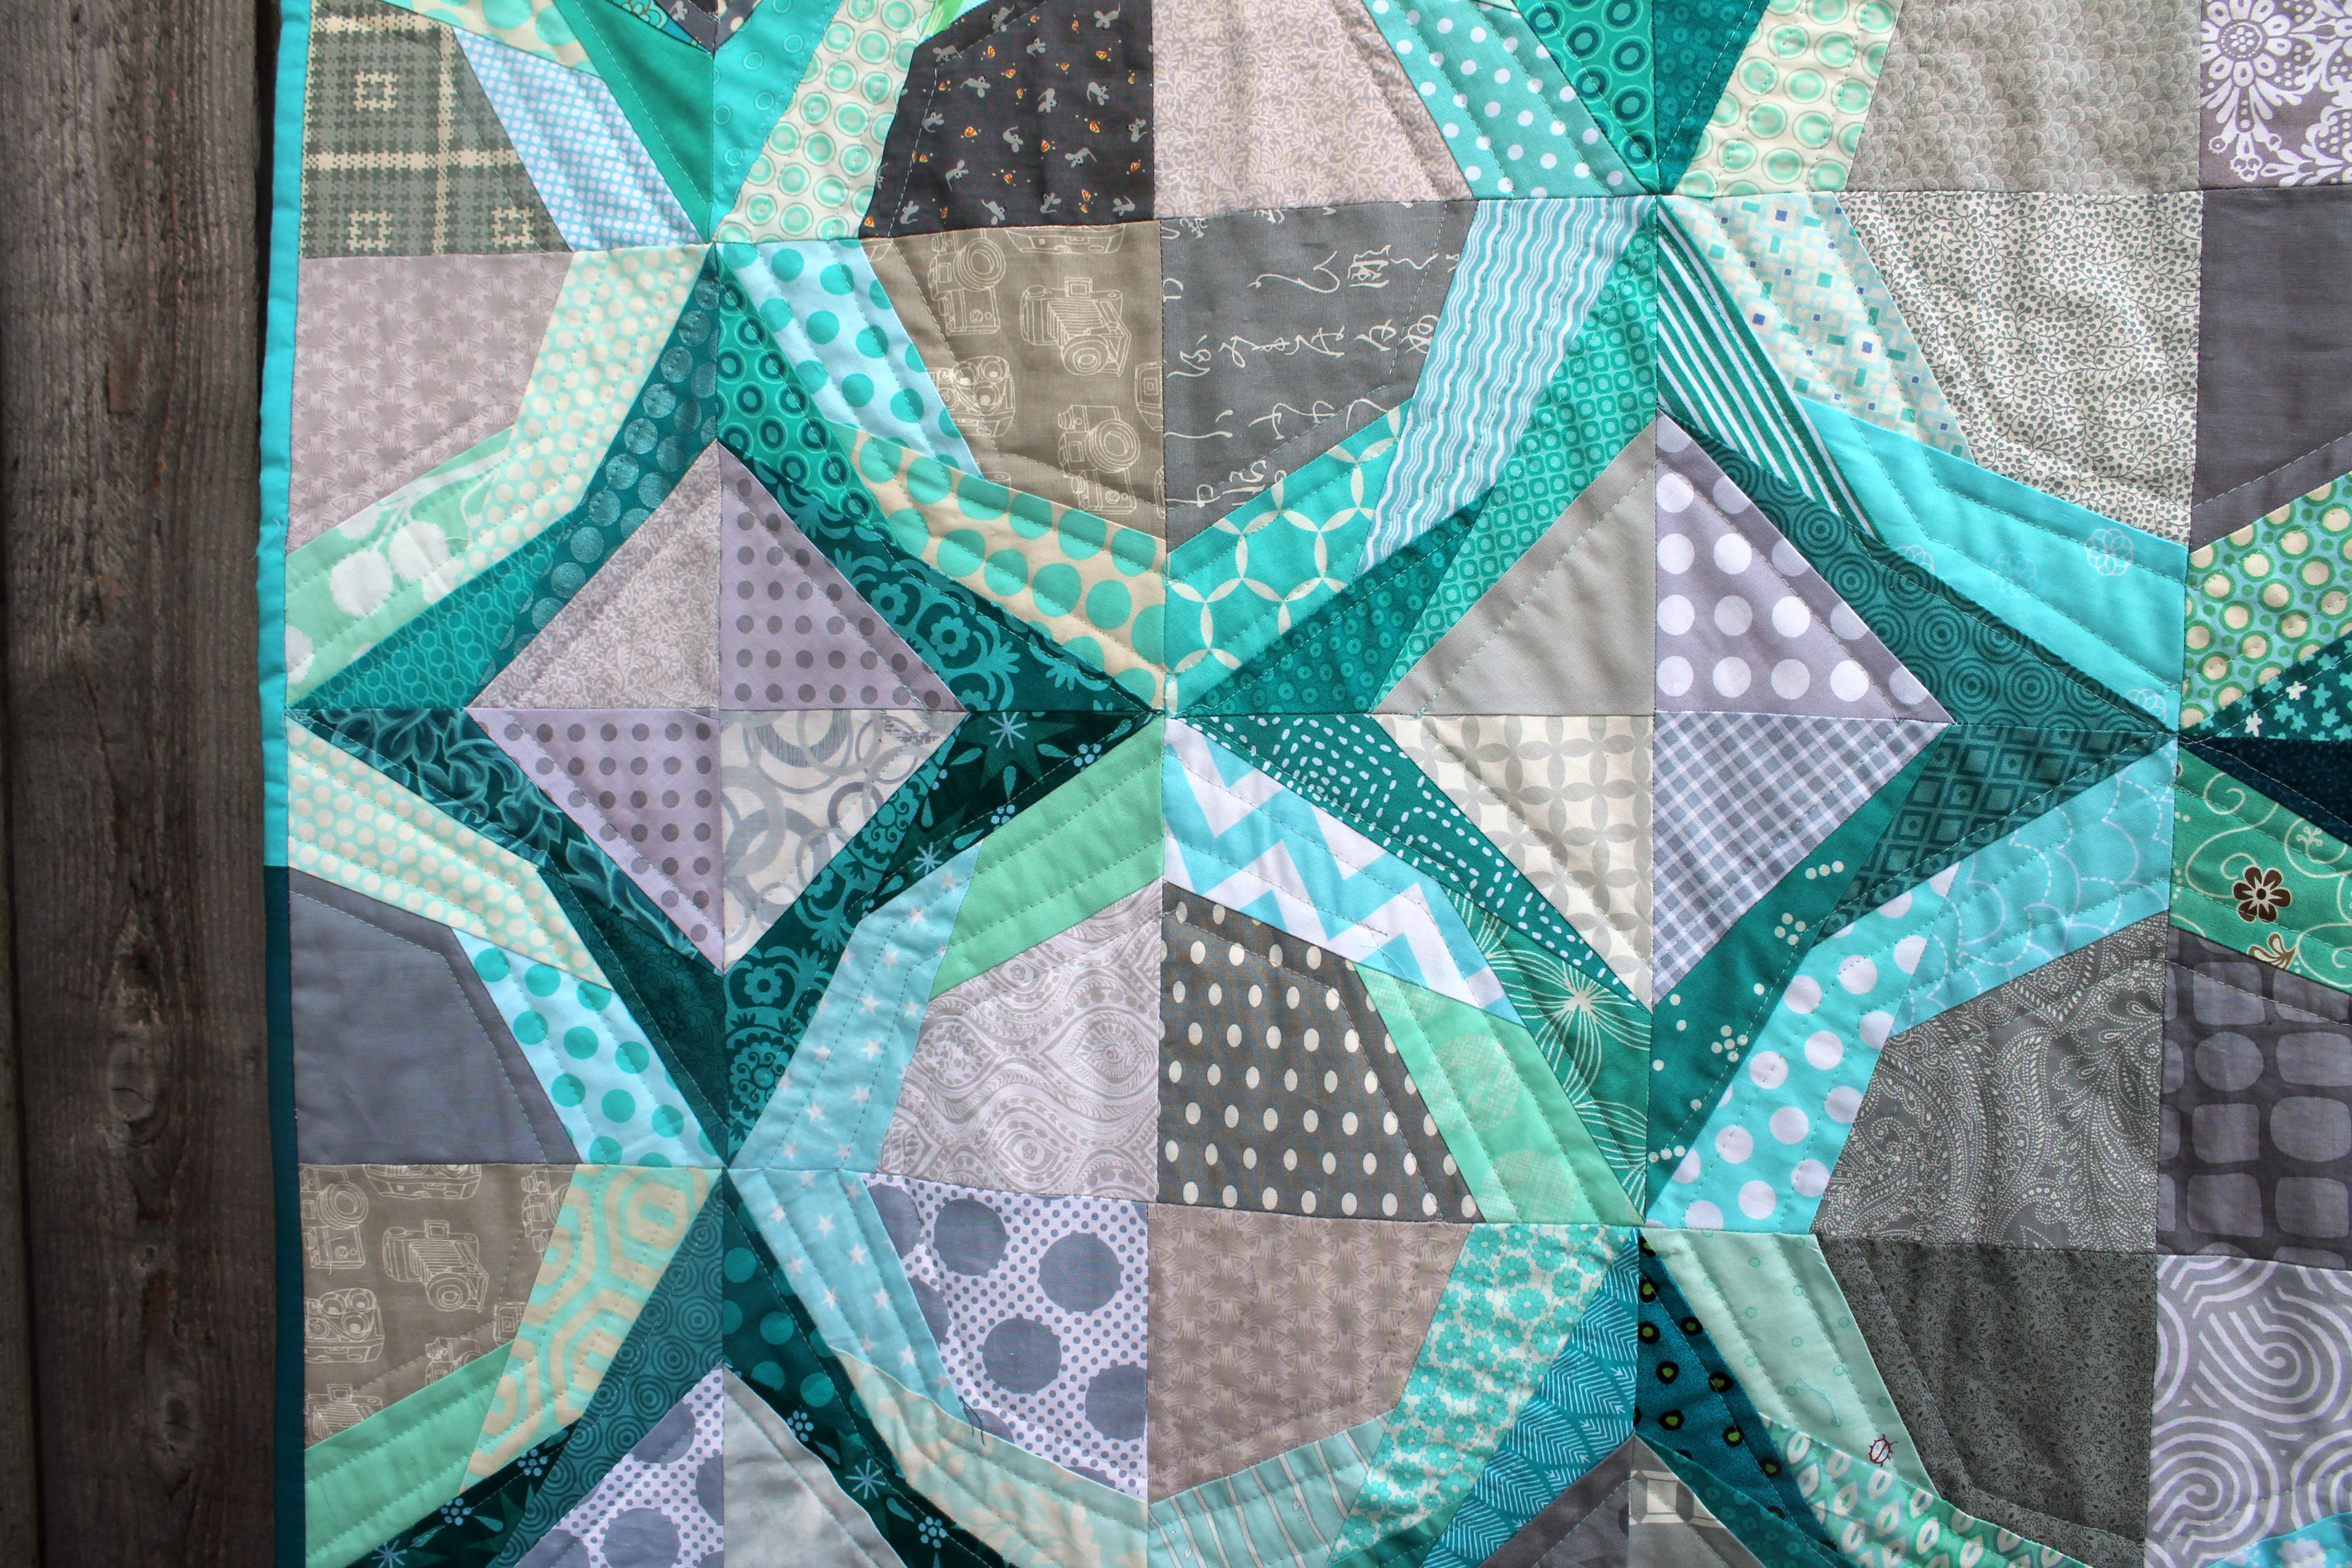
This quilt started life when I was doing Julie @ 627Handworks “Block Rockin” paper pieced blocks.  I loved how the Icky Thump block looked and decided it needed to be a quilt all its own.

Paper pieced block
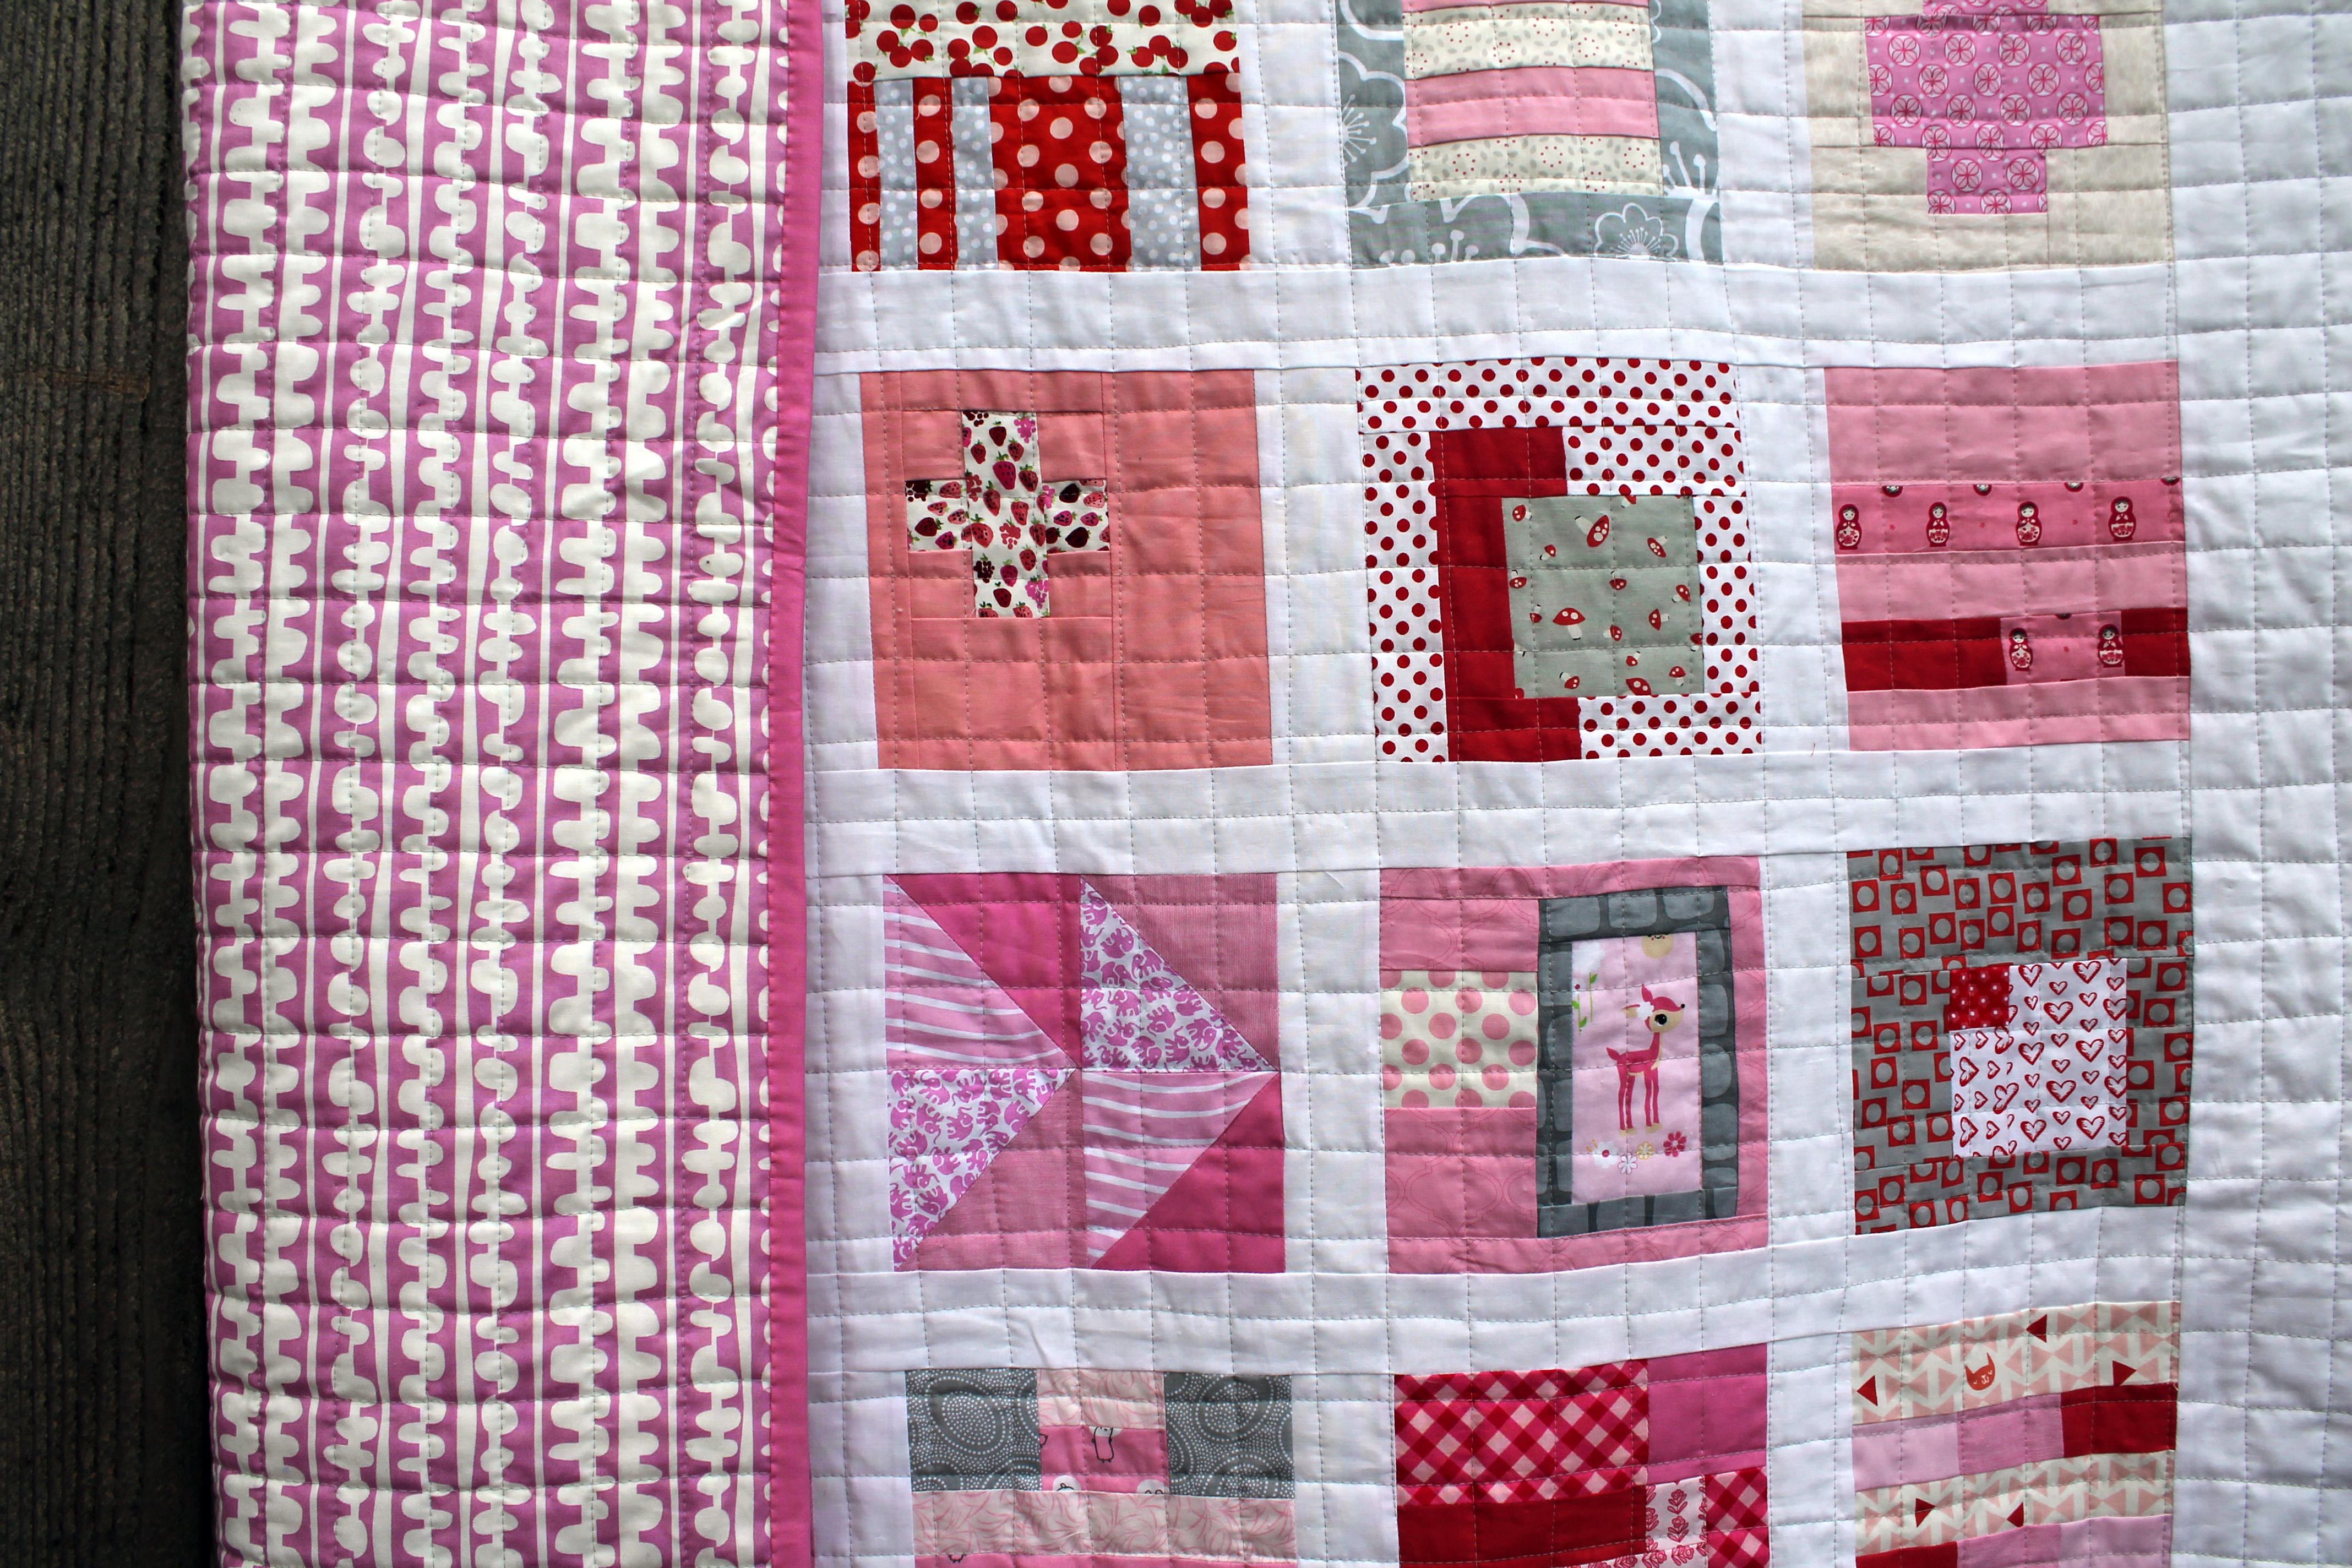
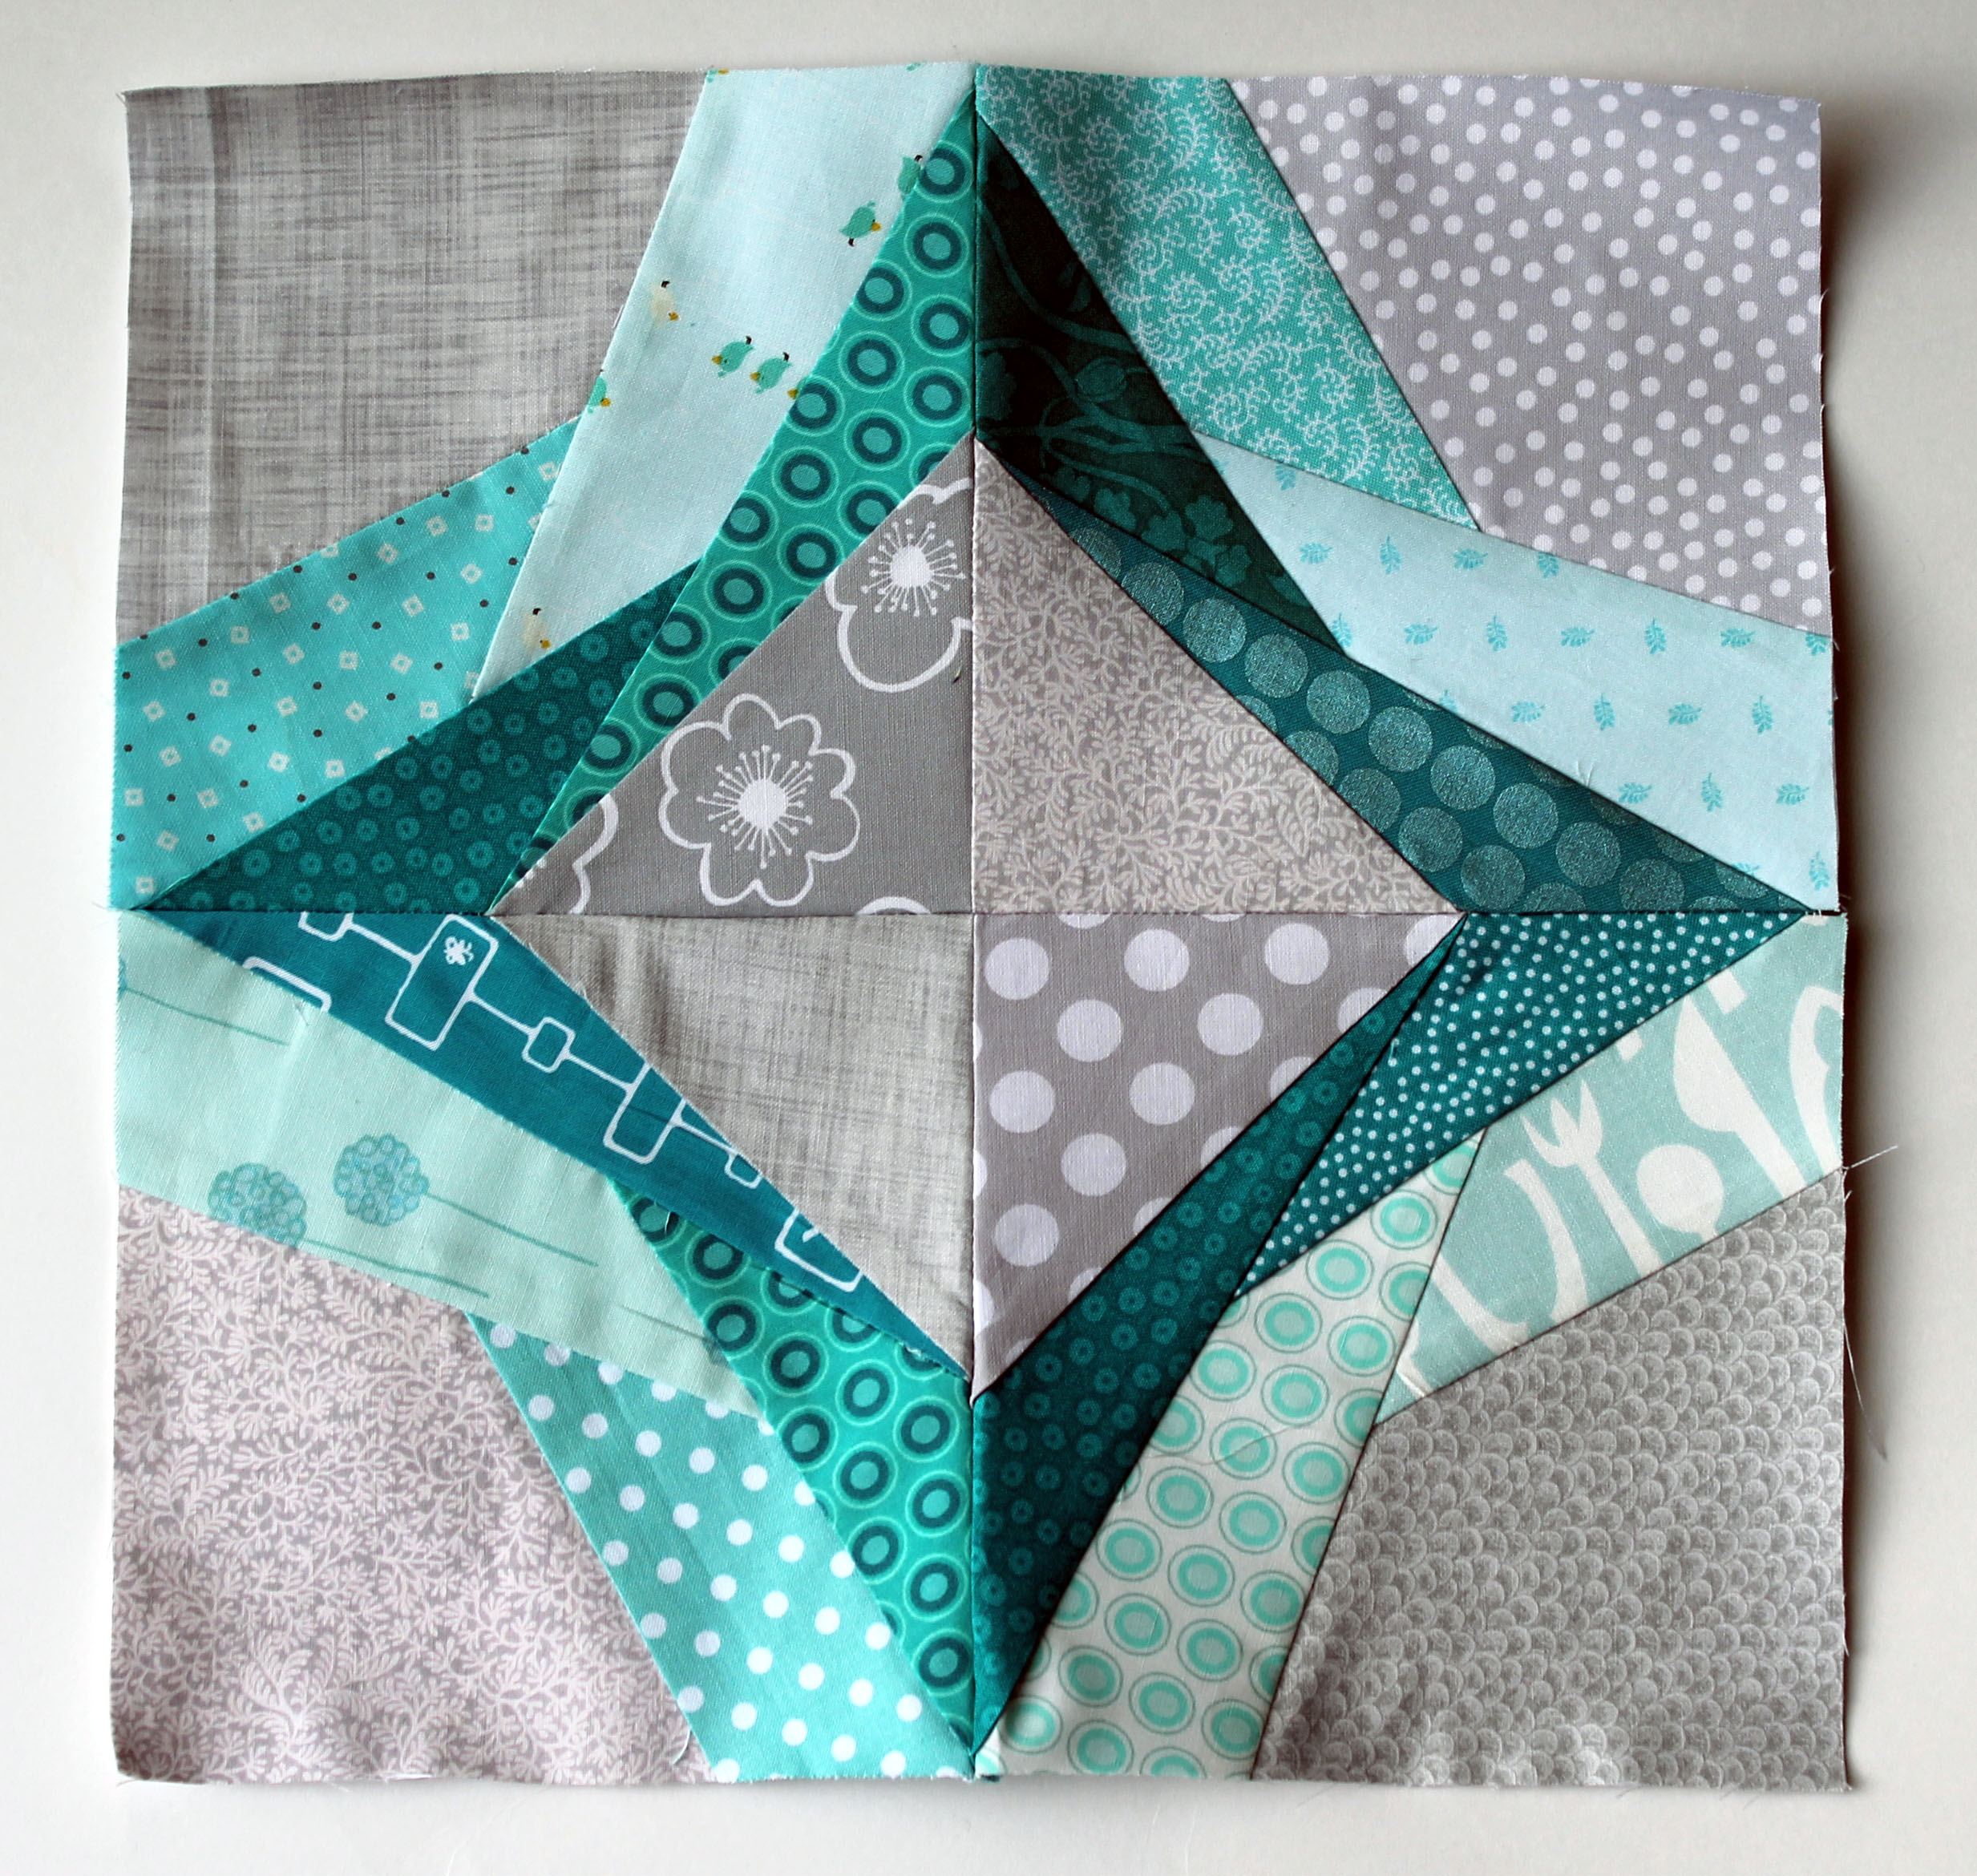
With the help of the Hope Circle of do.Good.Stitches a Icky Thump quilt was made.  It was a fun process seeing how different quilters took on the paper piecing challenge and what lovely fabrics they had in their stash.  I infatuated with these tiny mice in particular…

mice fabric
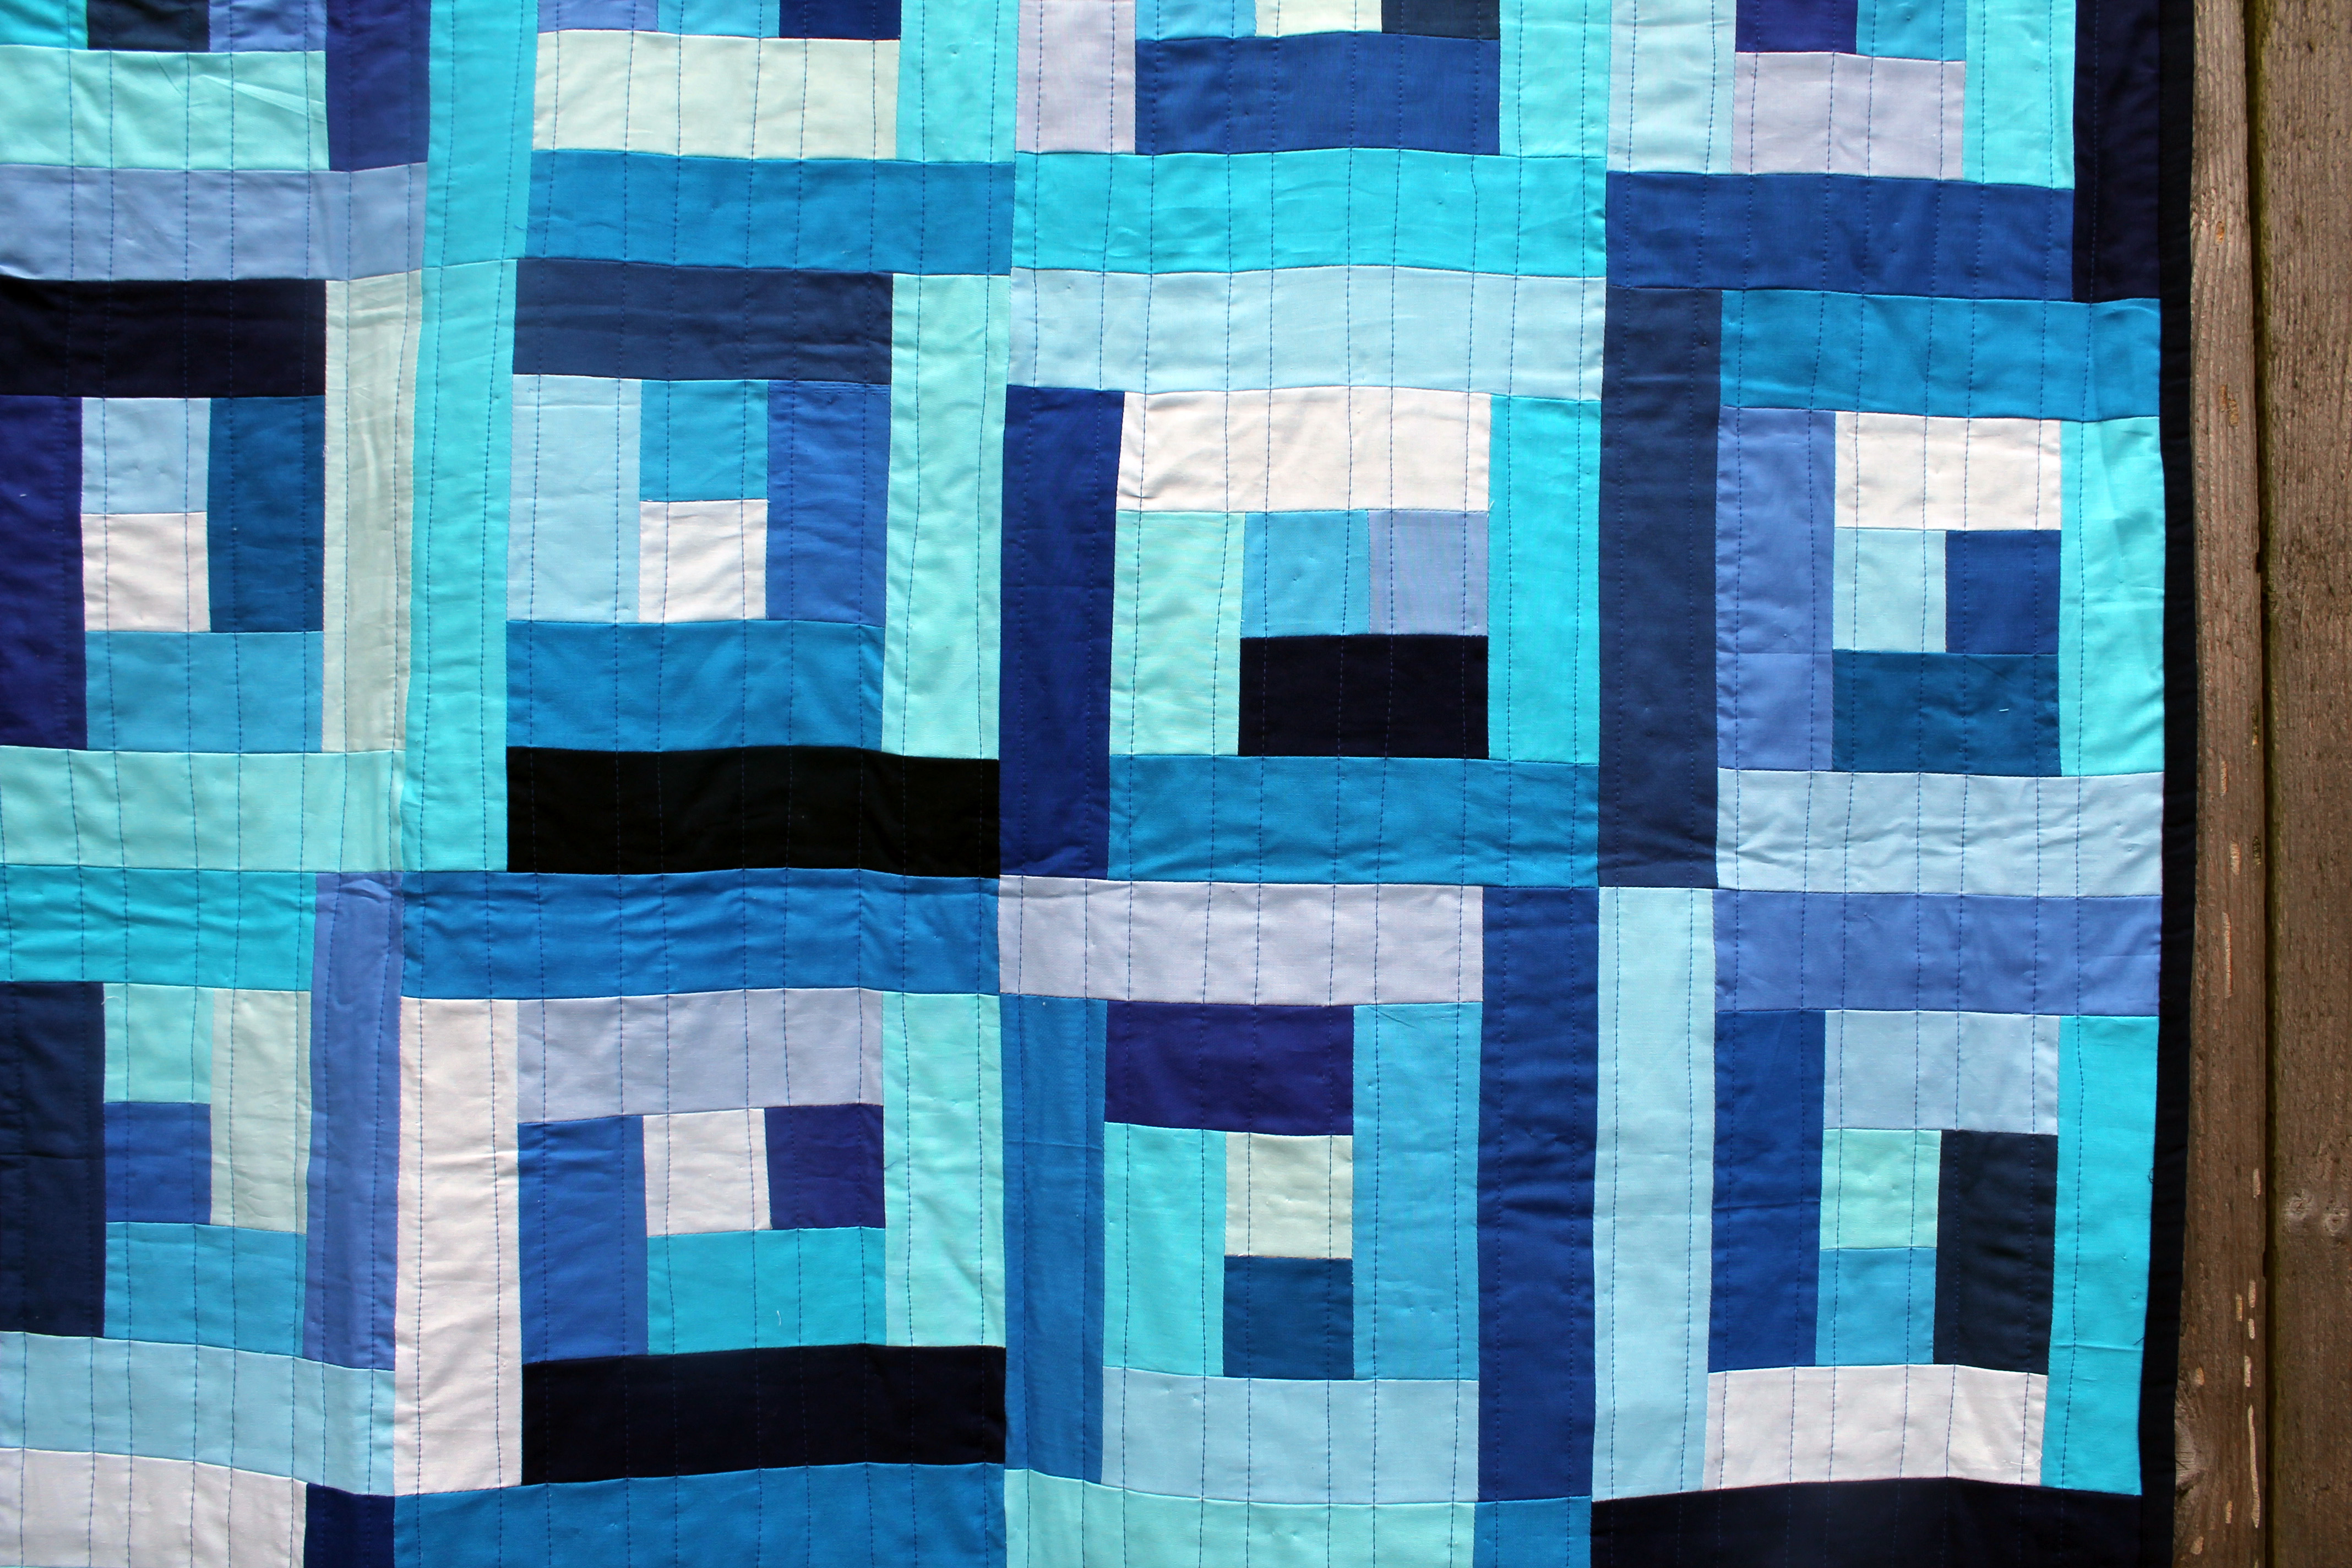
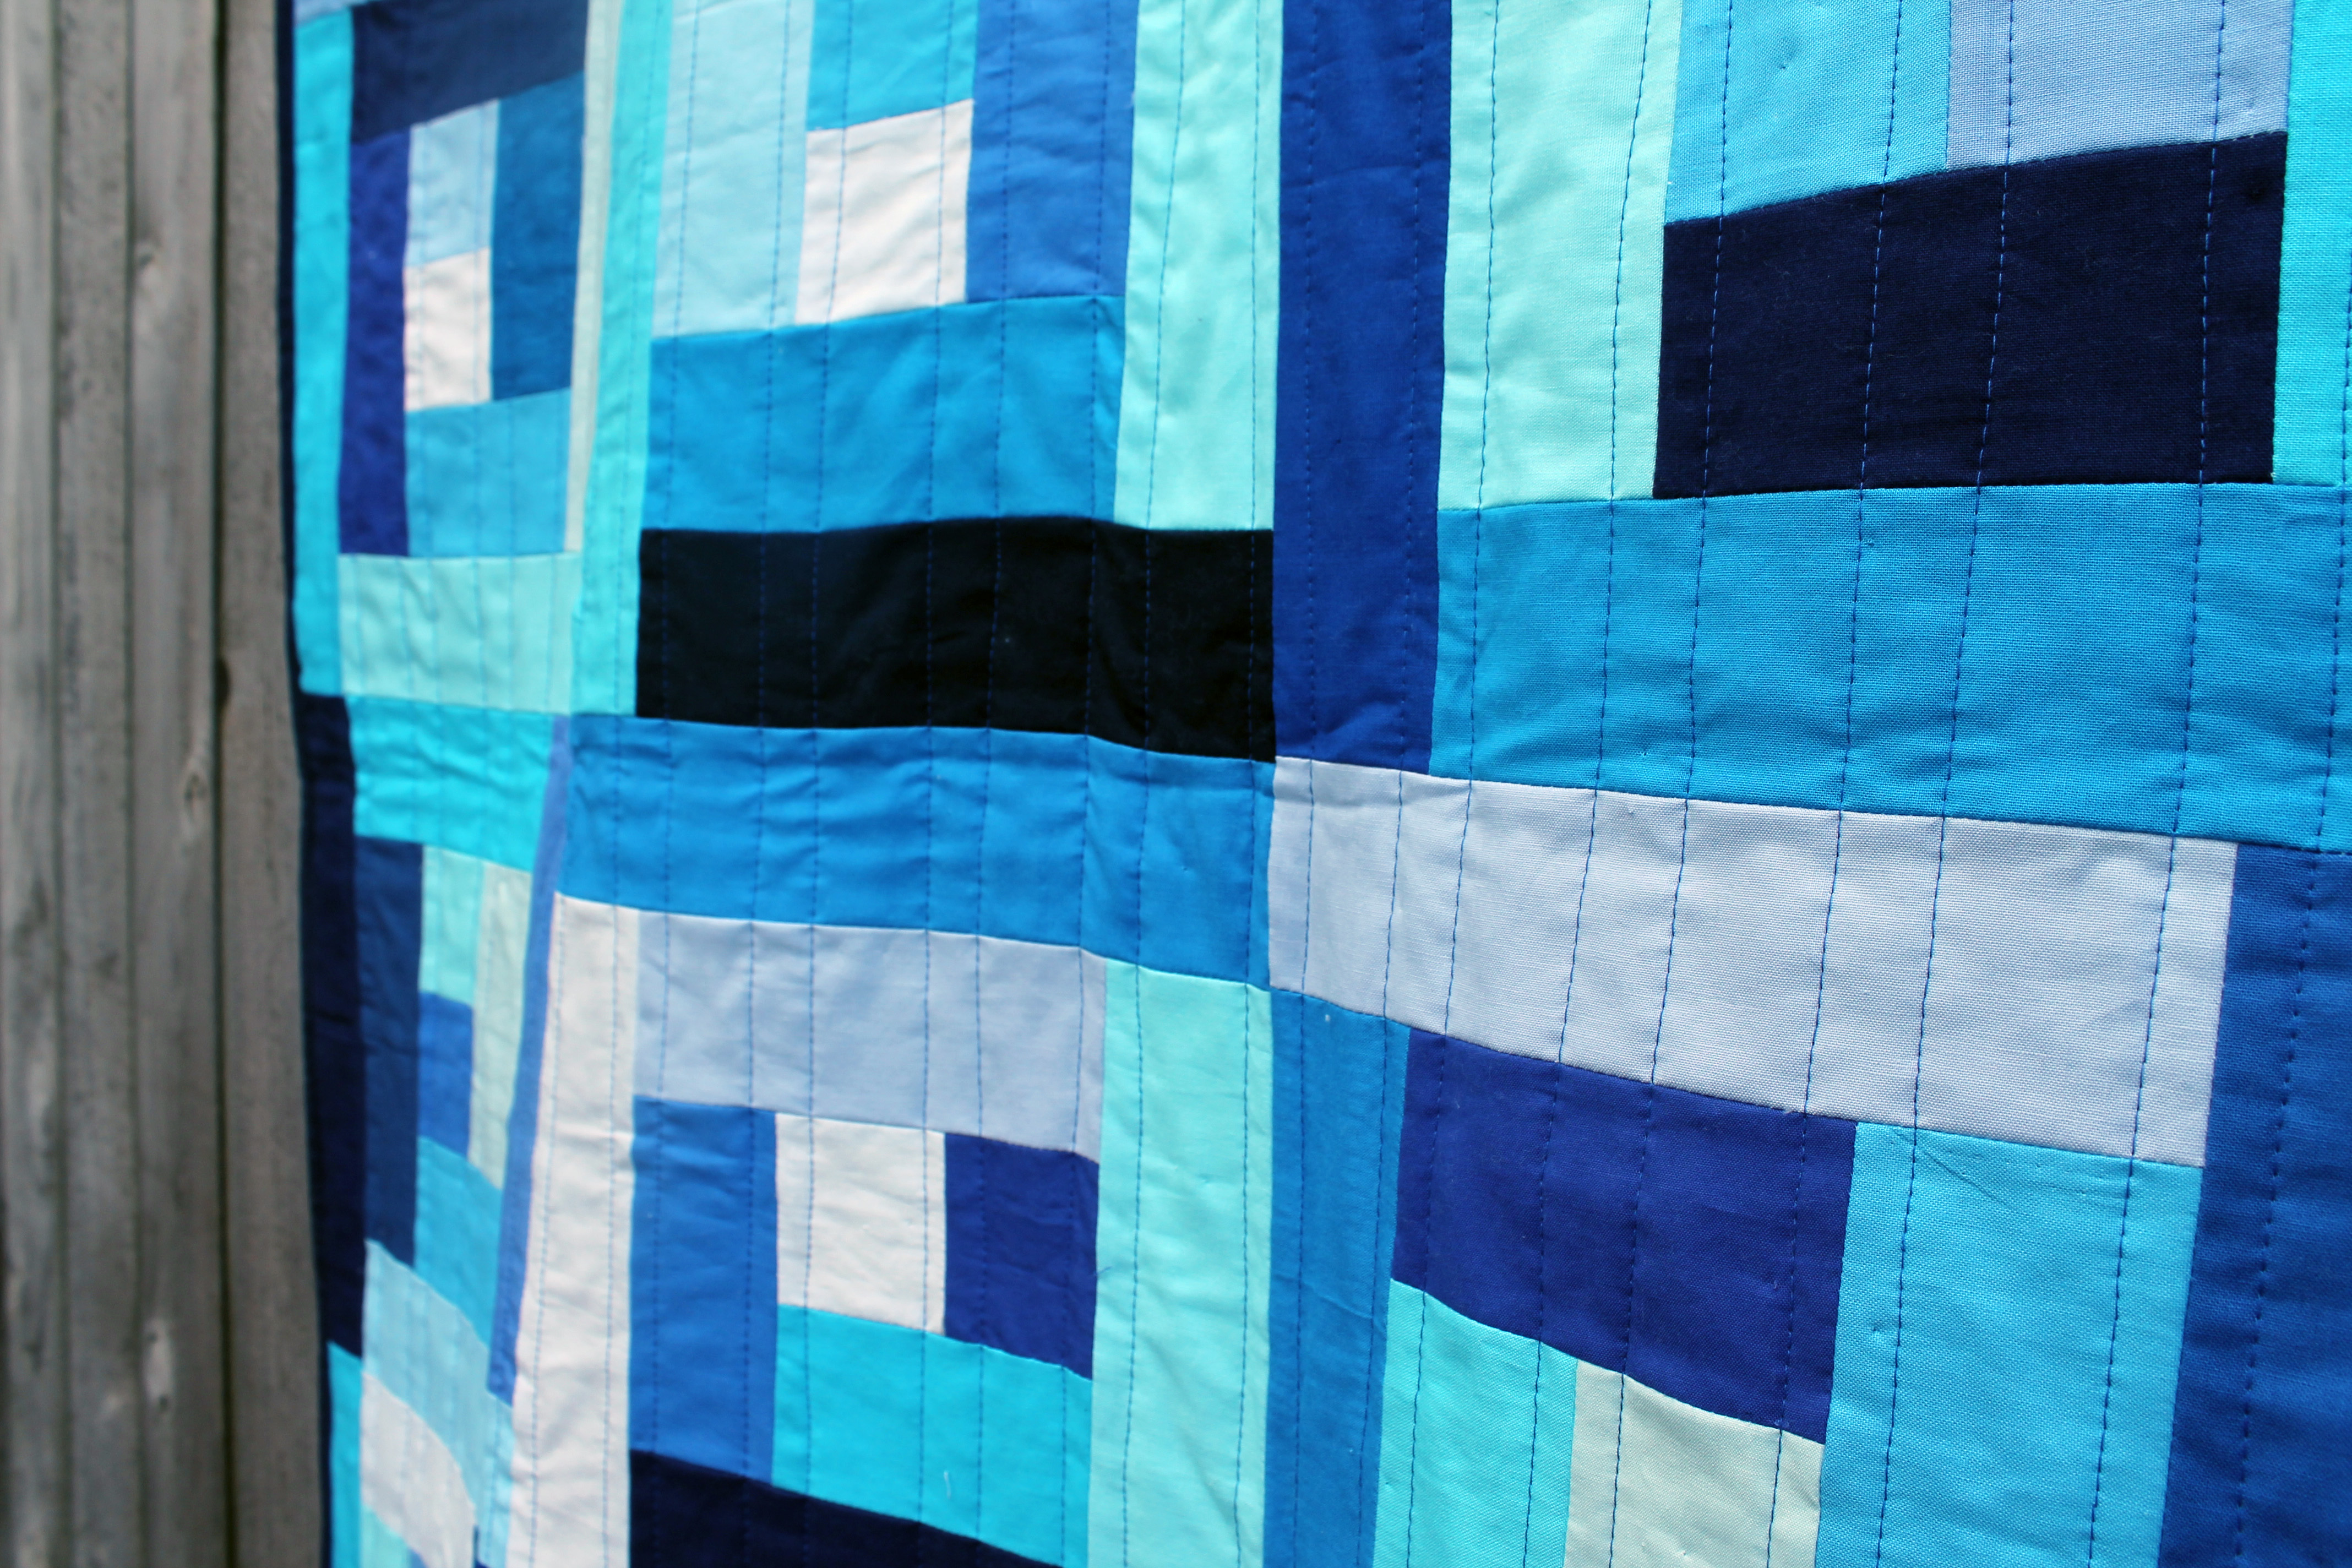
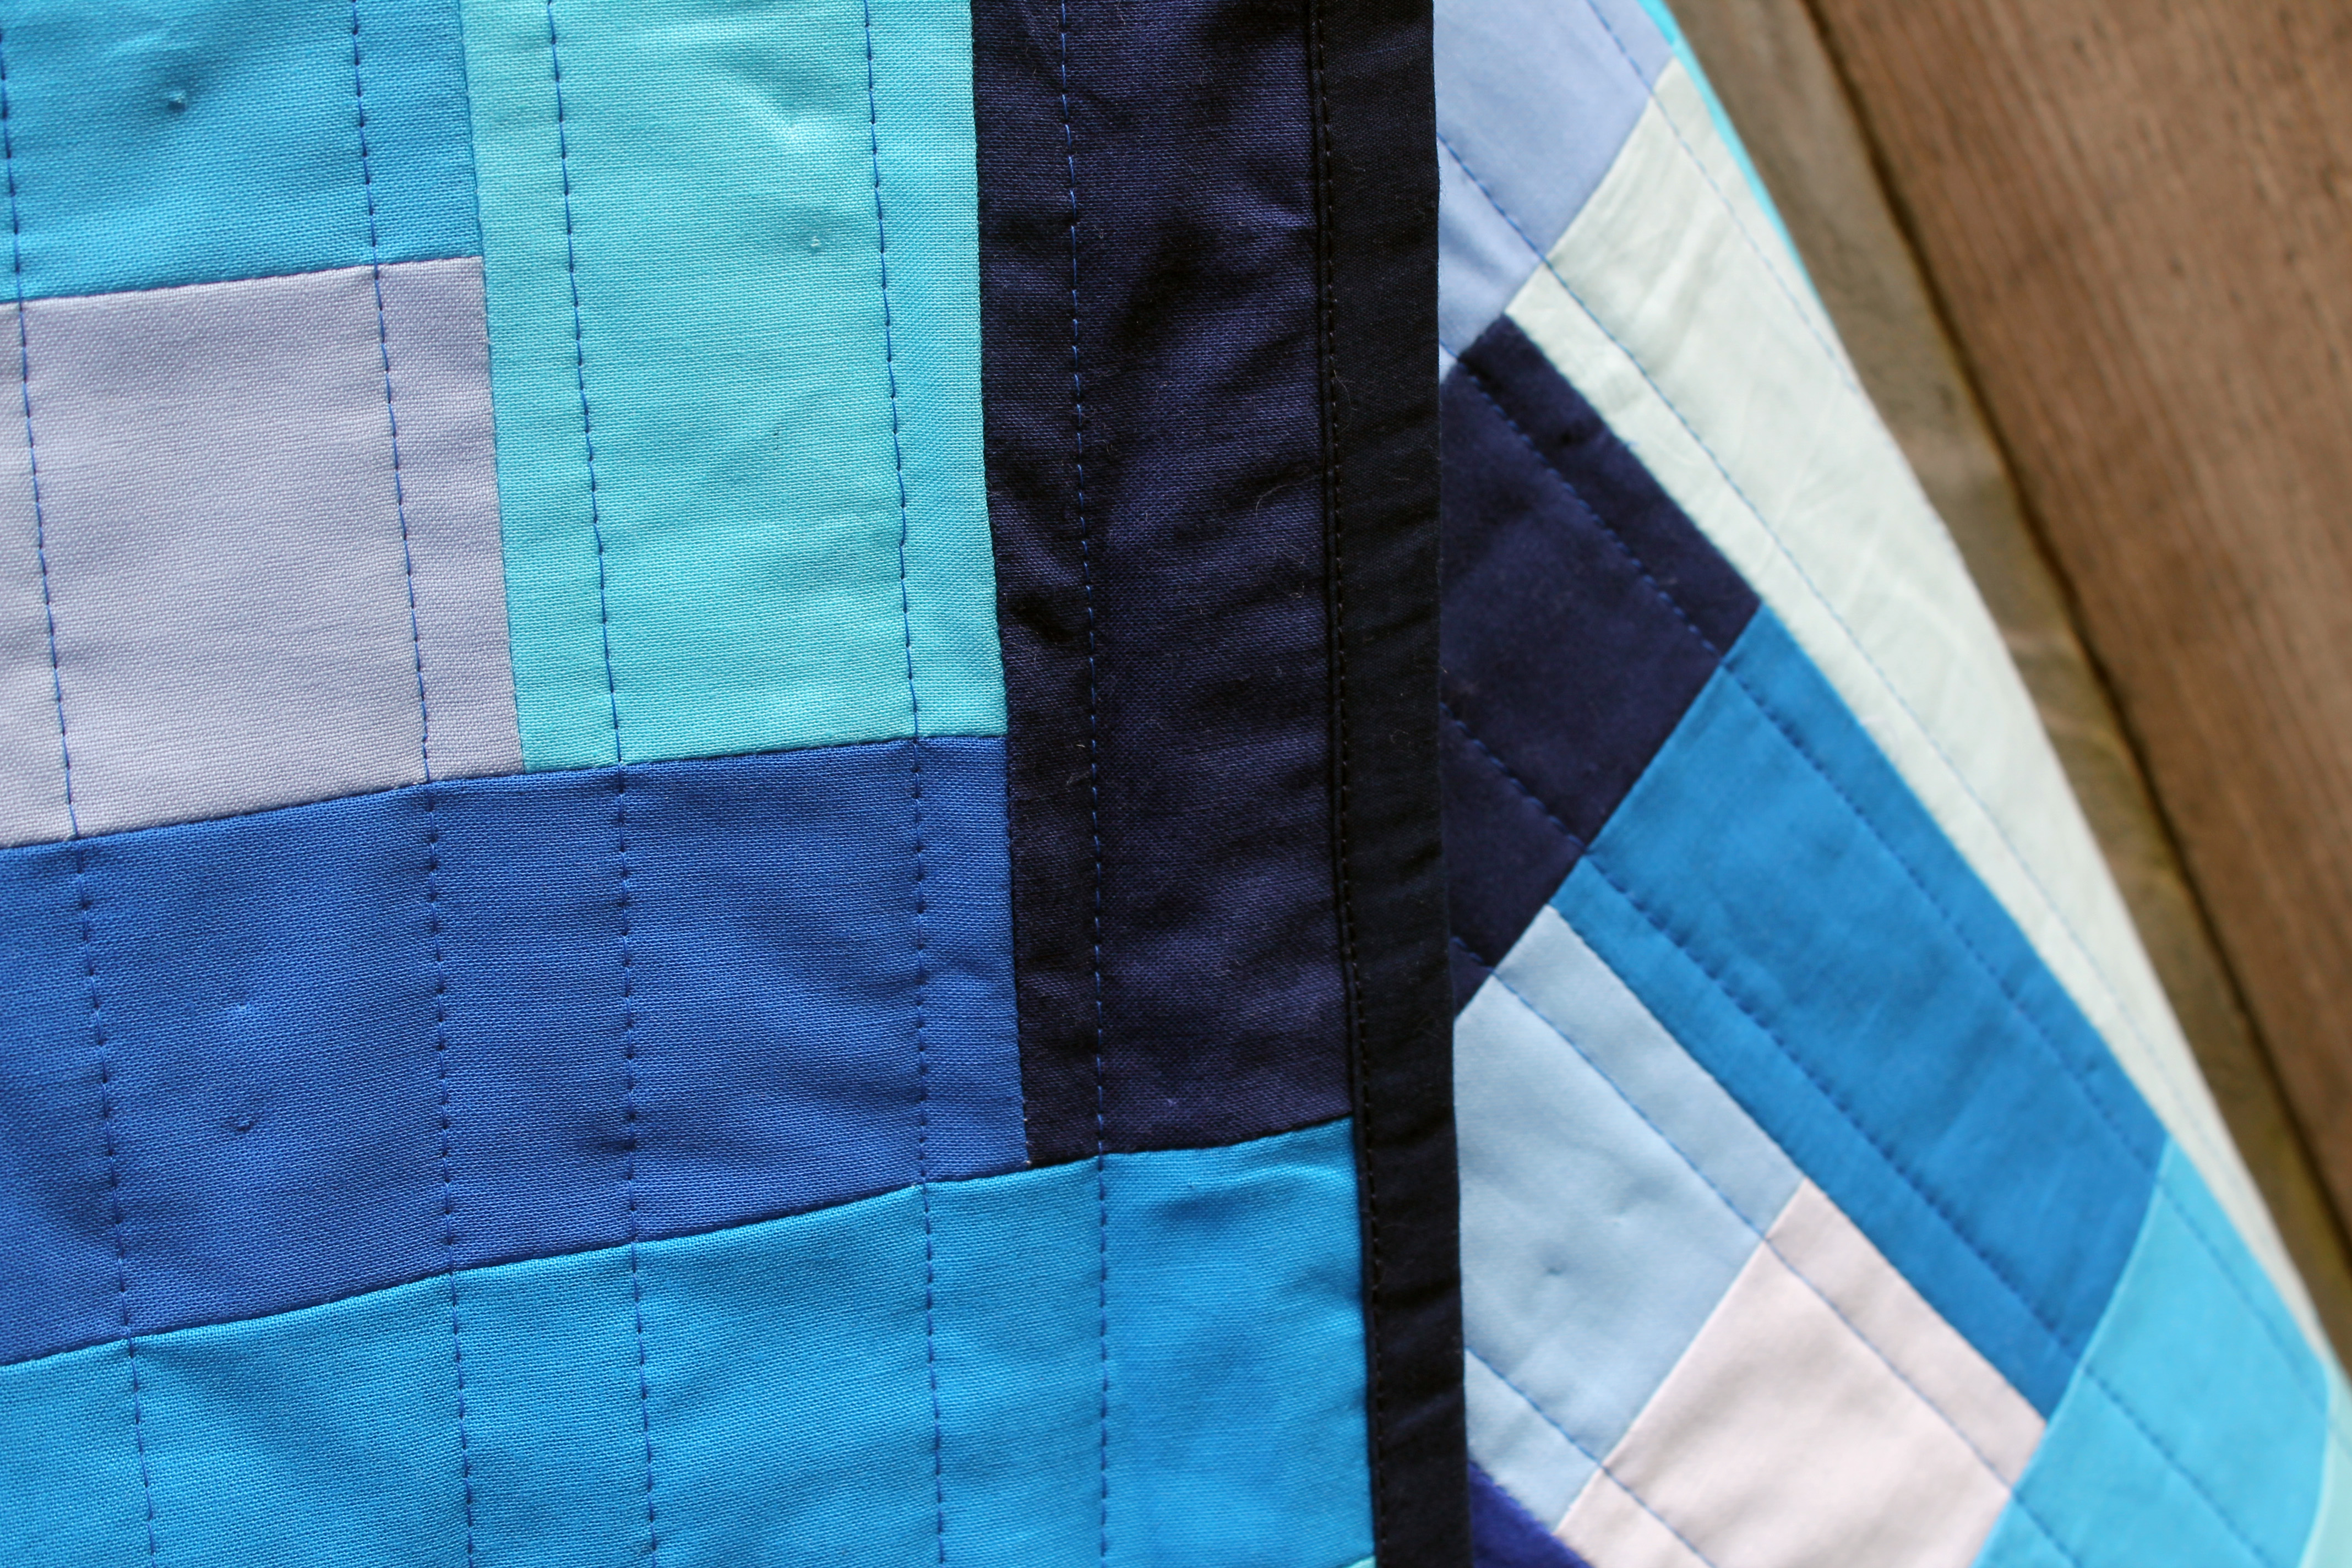
It took me a while to decide how I wanted to quilt this top up.  I ummed and ahhed for weeks about what to do and finally decided to quilt to enhance the star pattern.

finsihed icicles quilt detail
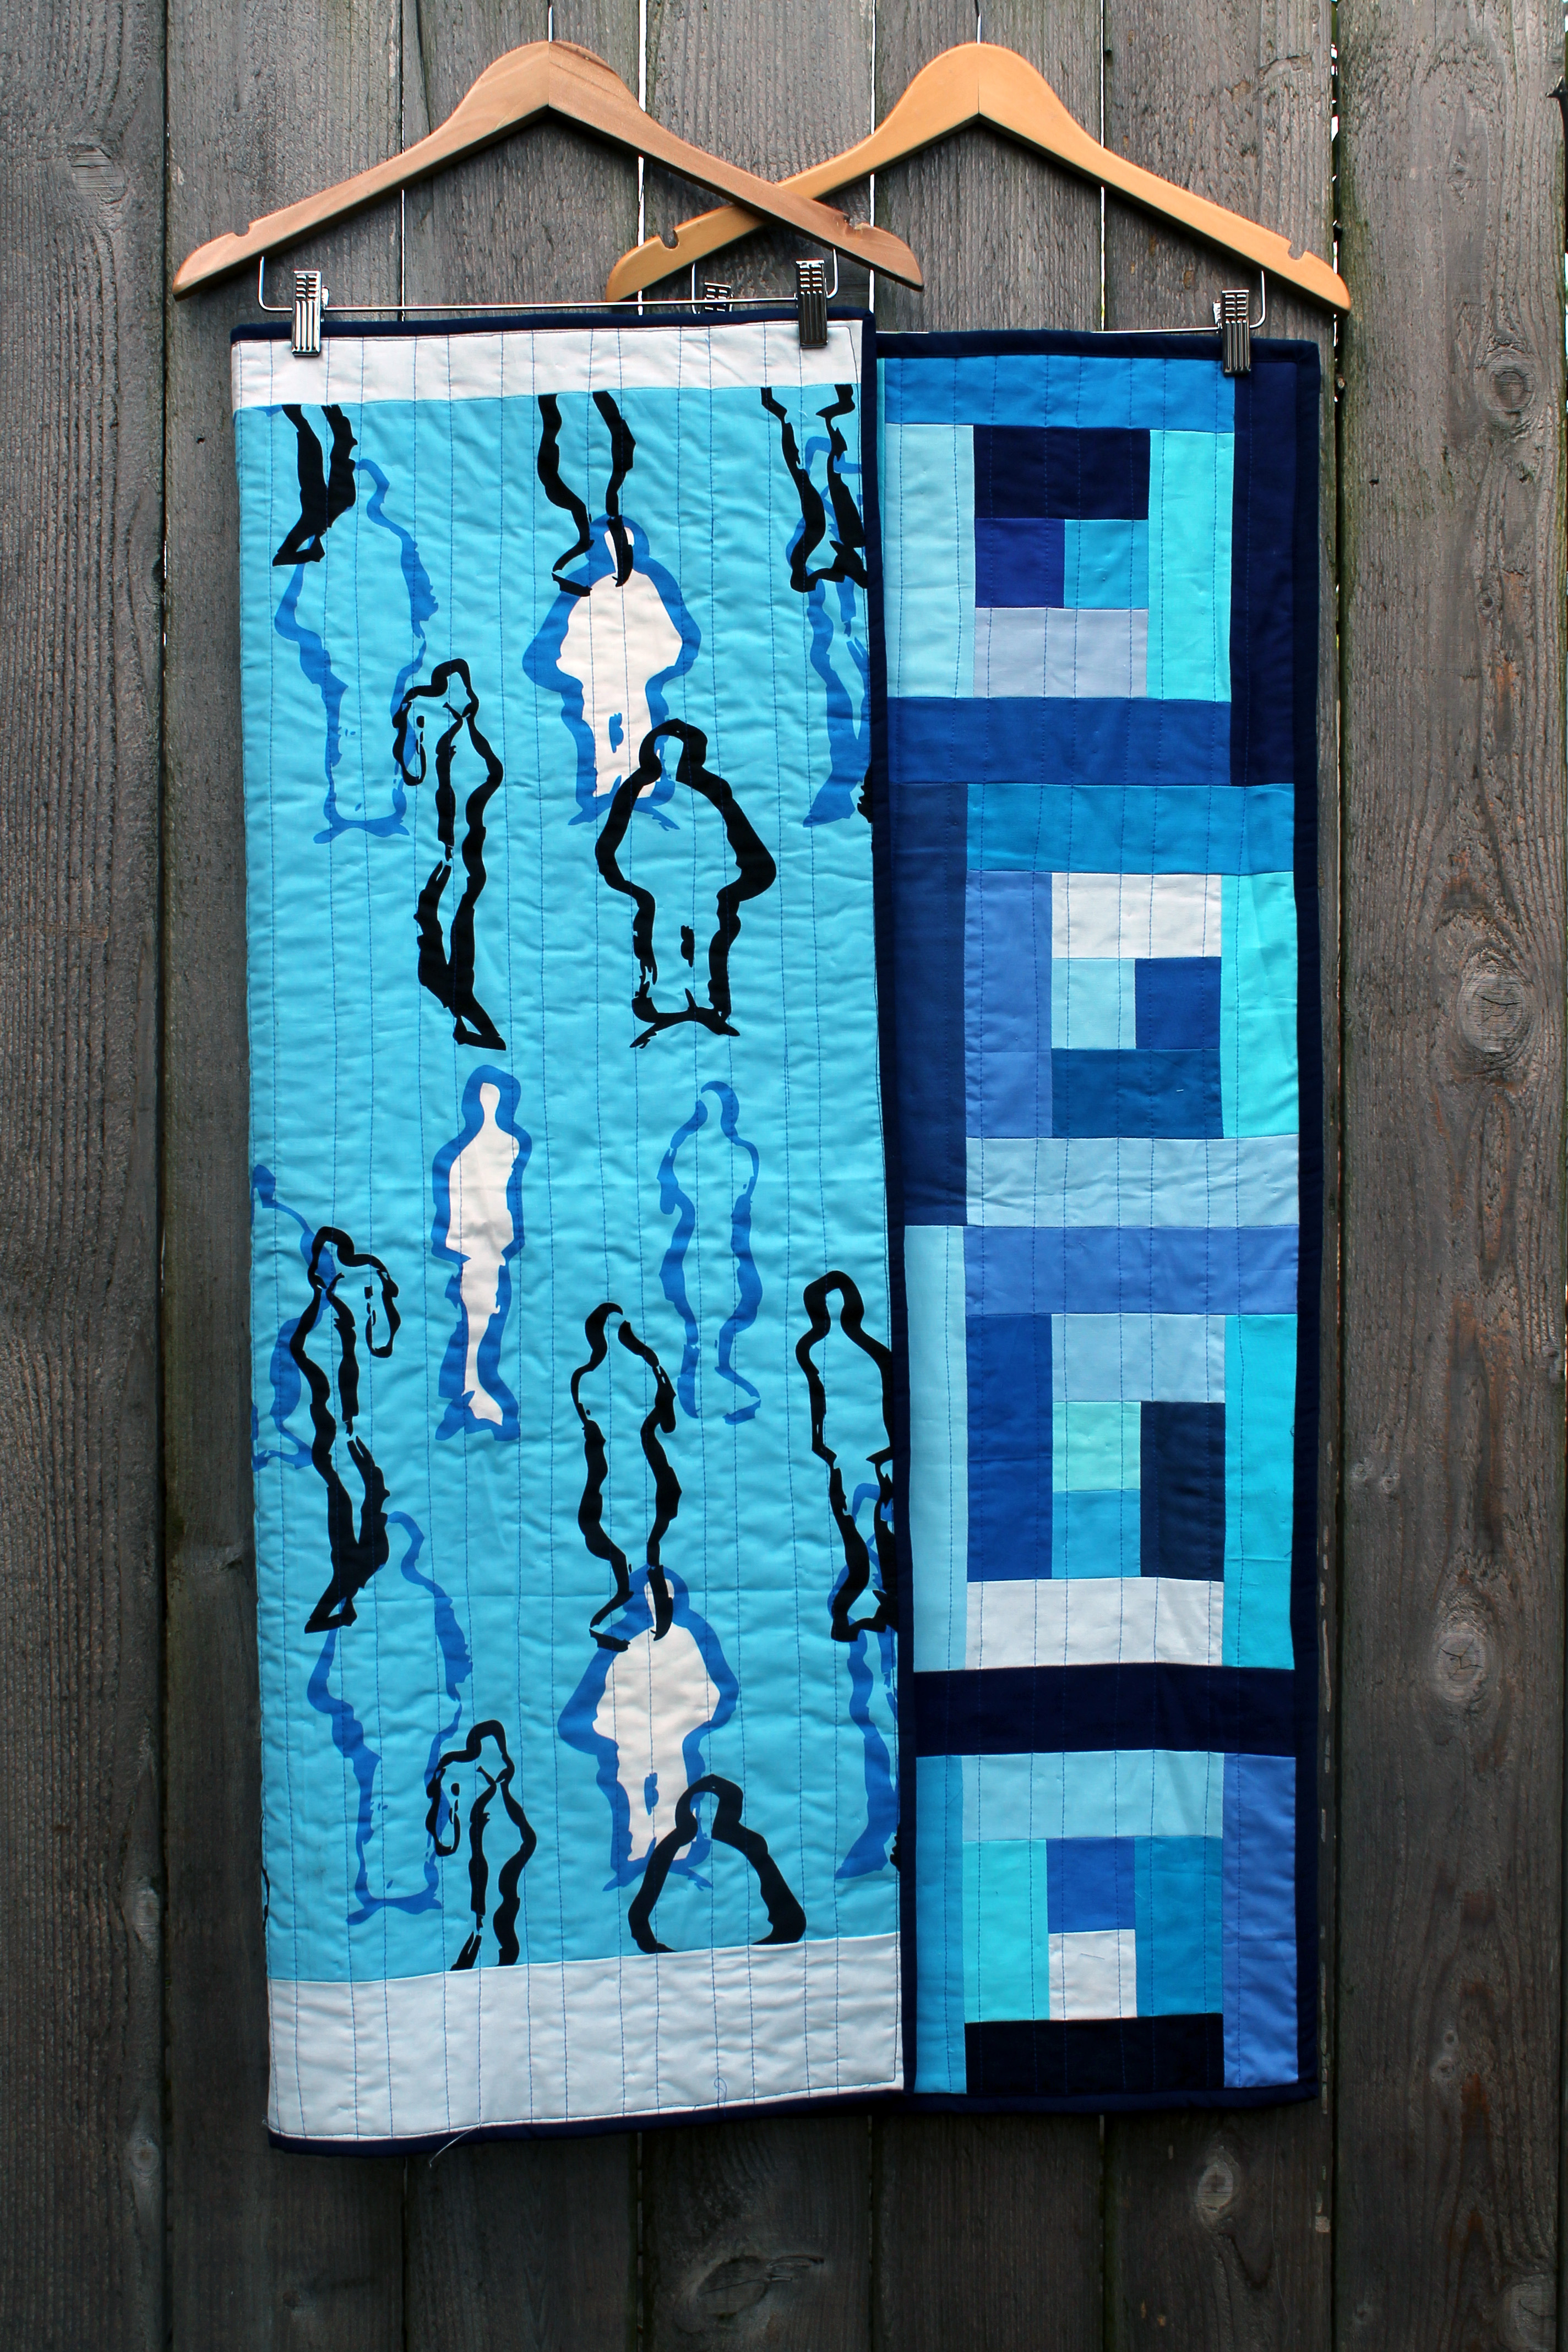
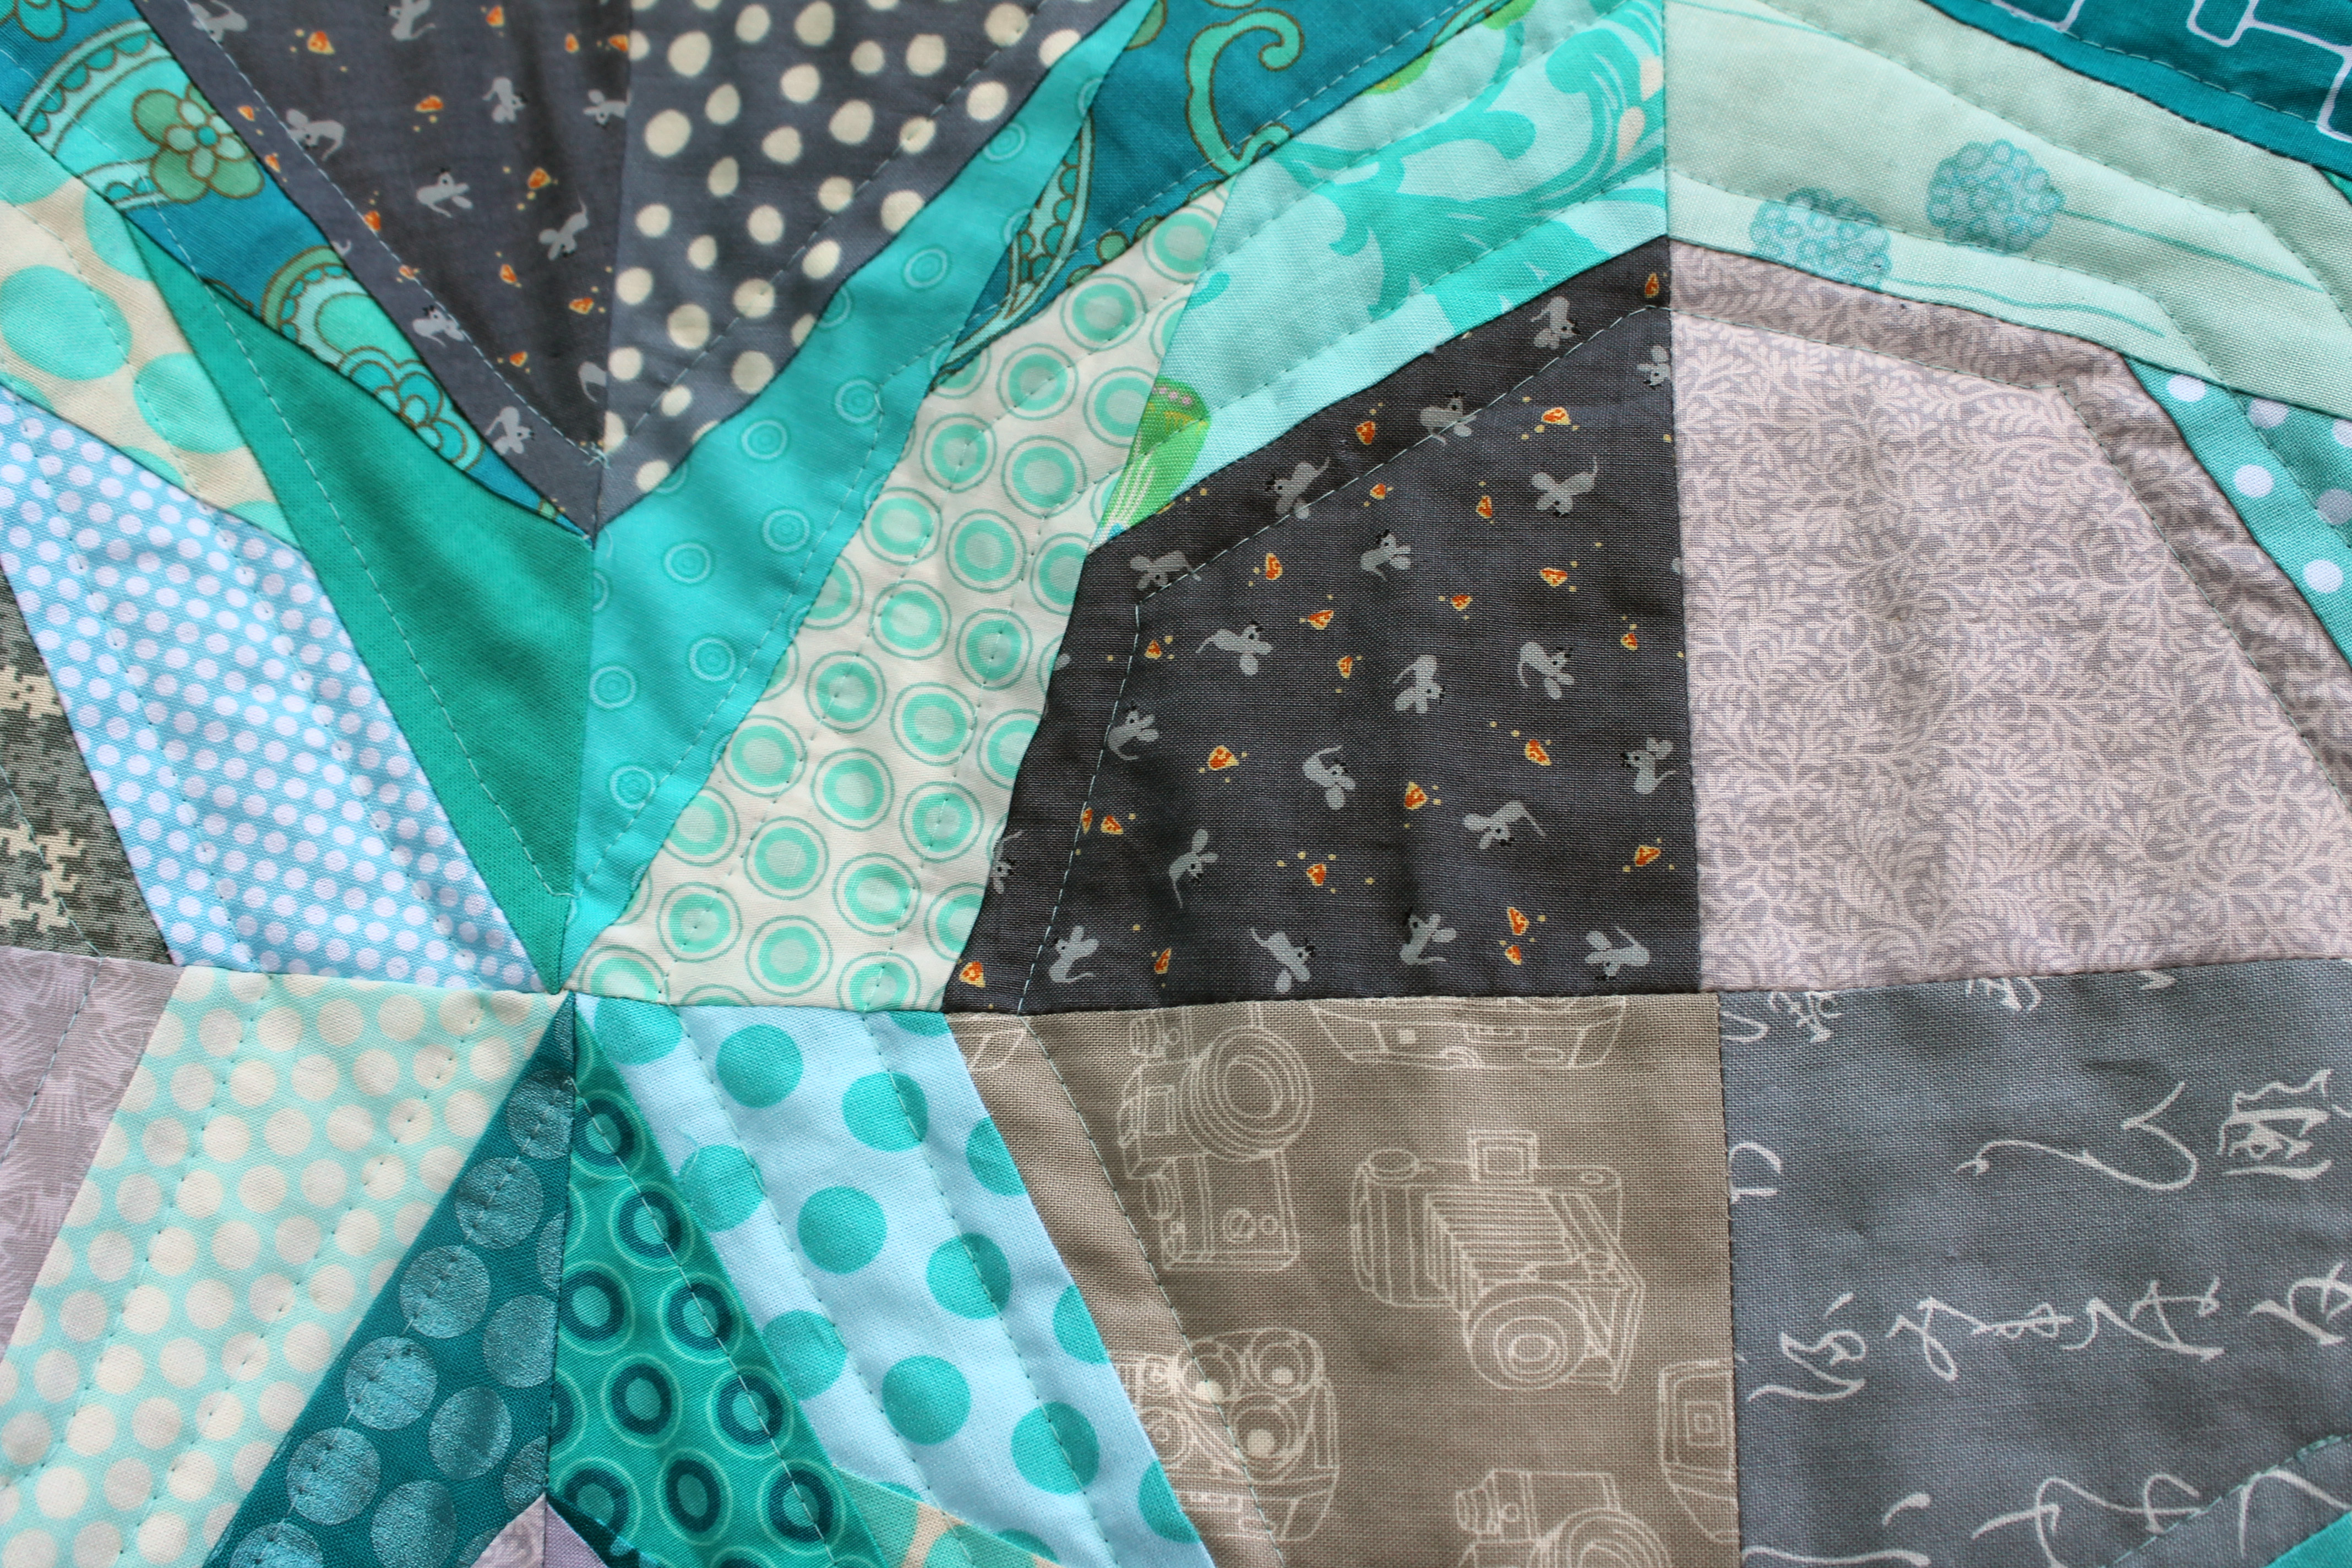
I was not completely sold on this quilting until I turned the quilt around and looked at the back…

finished quilt back
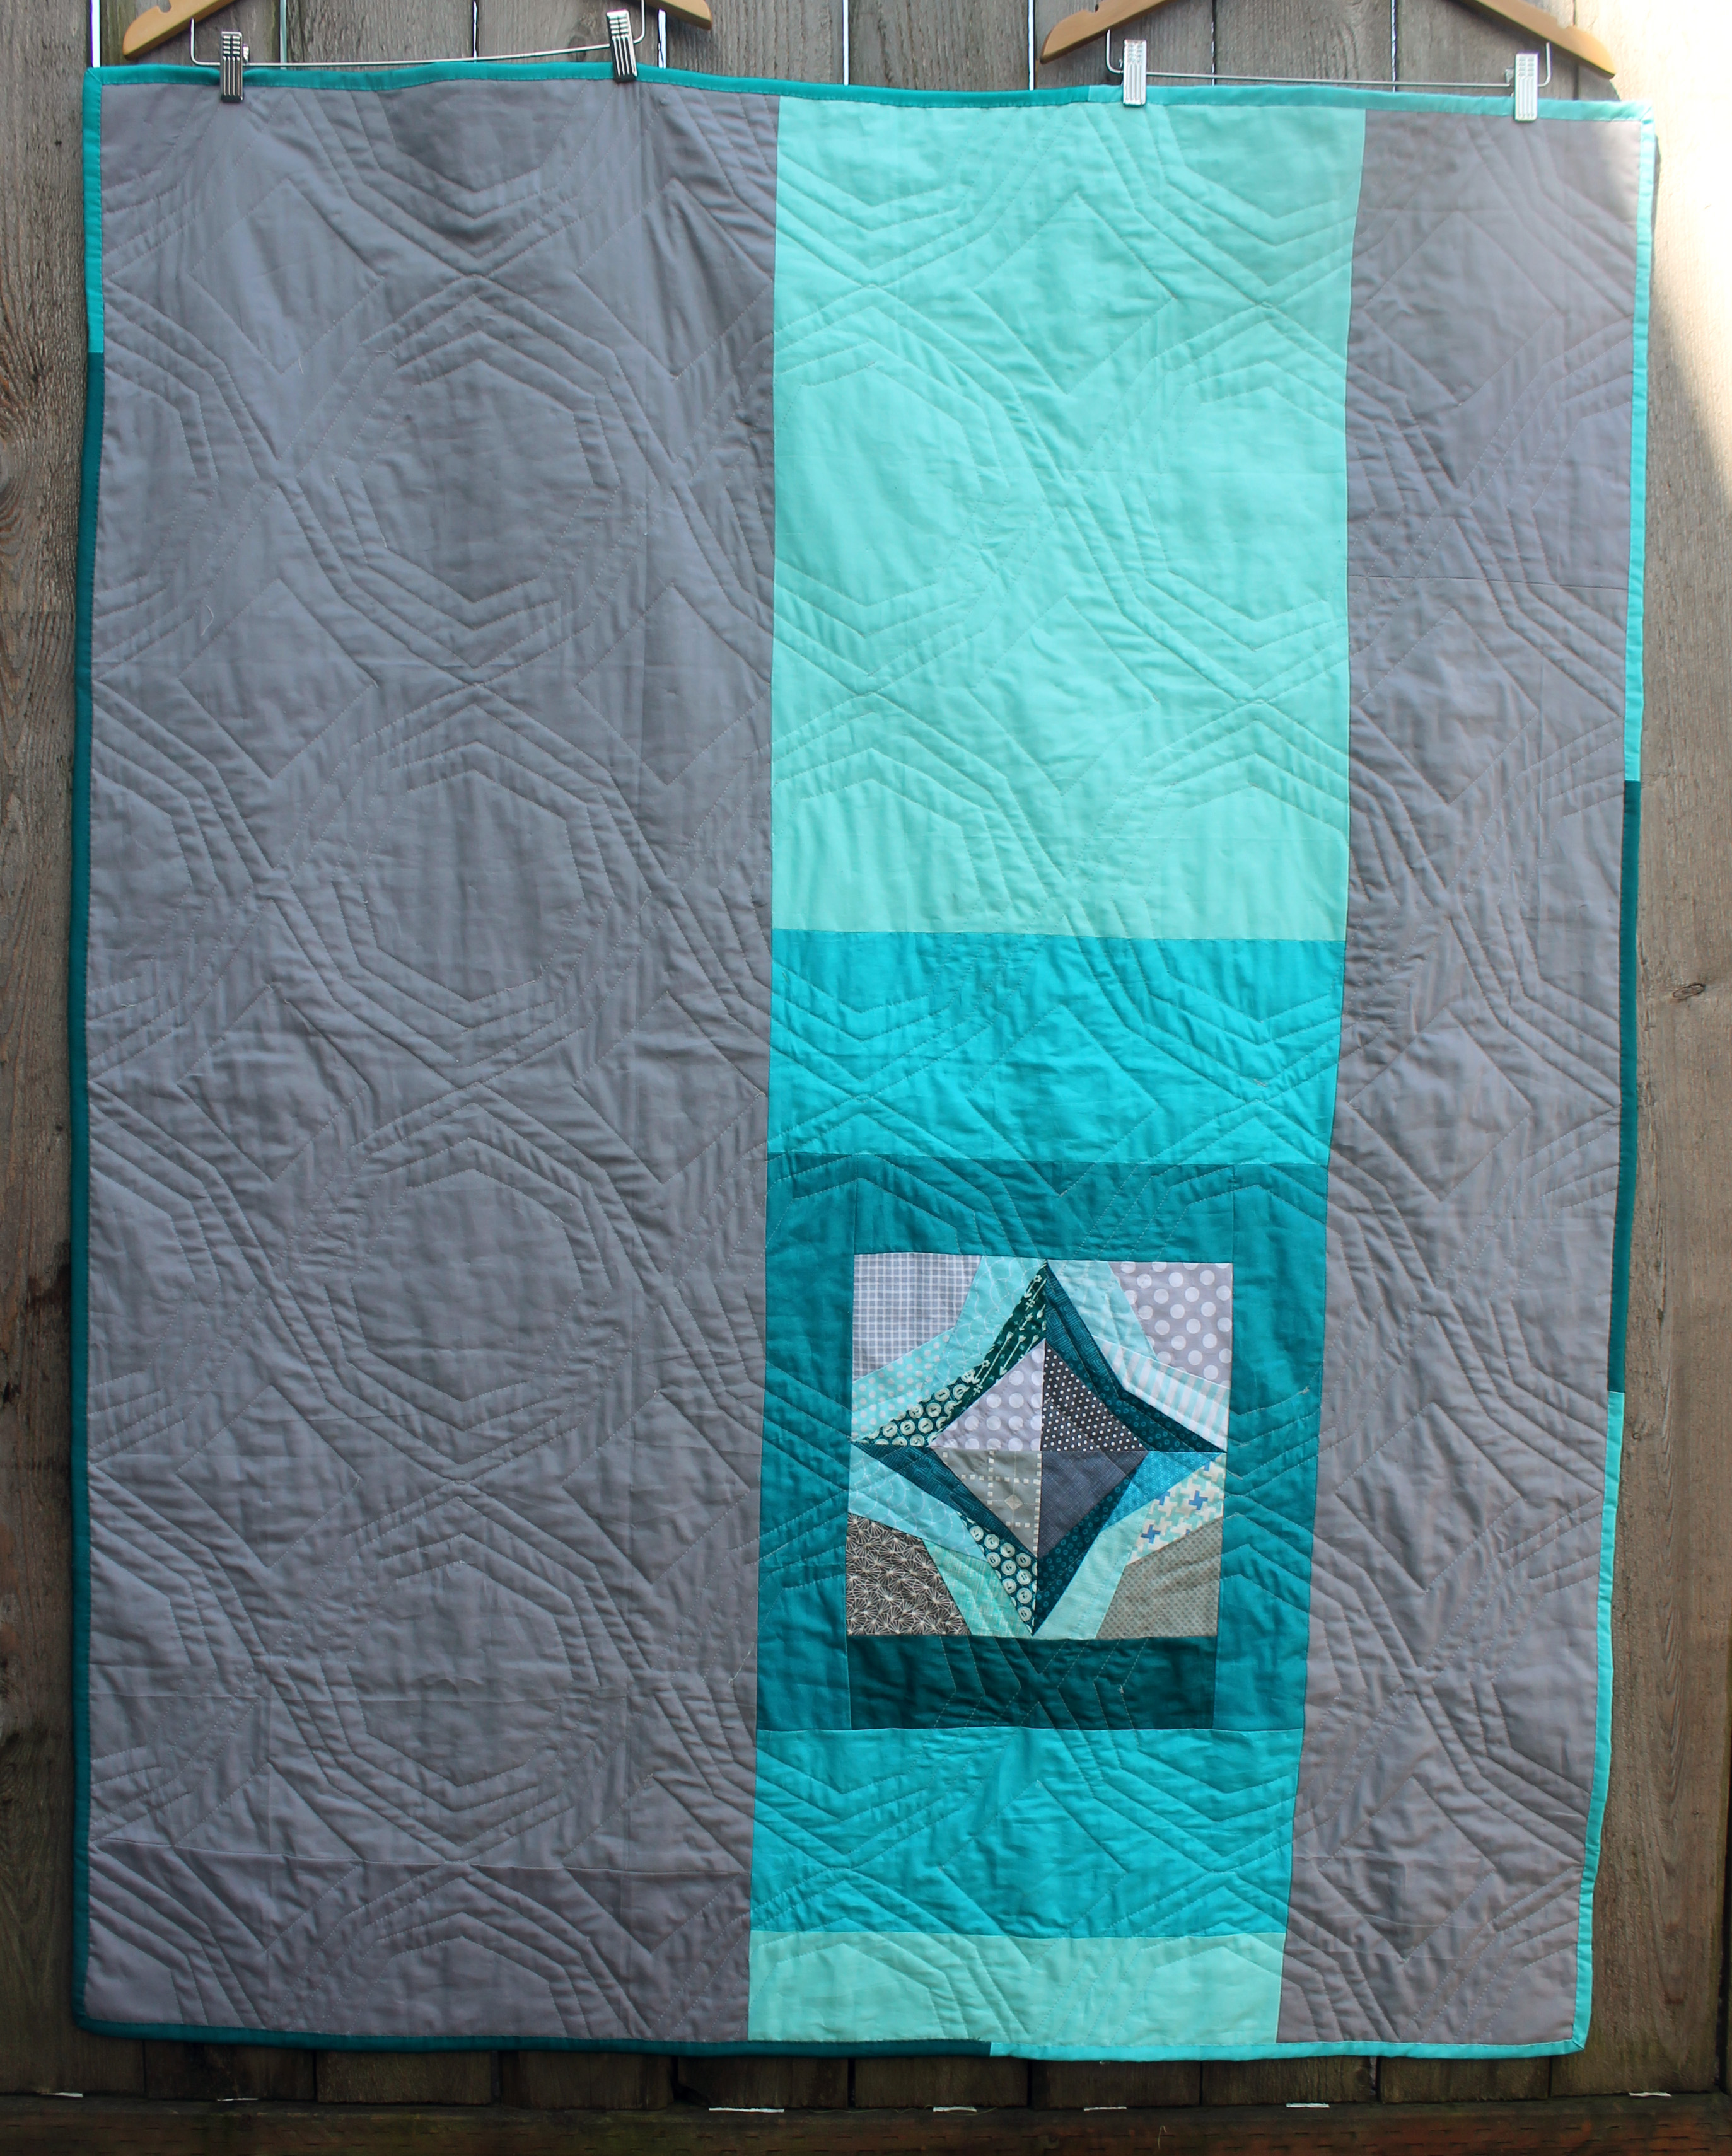
..the quilting really works on the back.  Now I know I am not noted for my quilting prowess, as my darling friend Lisa confirmed yesterday (I piece like a champion but quilt like a beginner)… but I am chuffed with how this looks.

finished quilt back detail
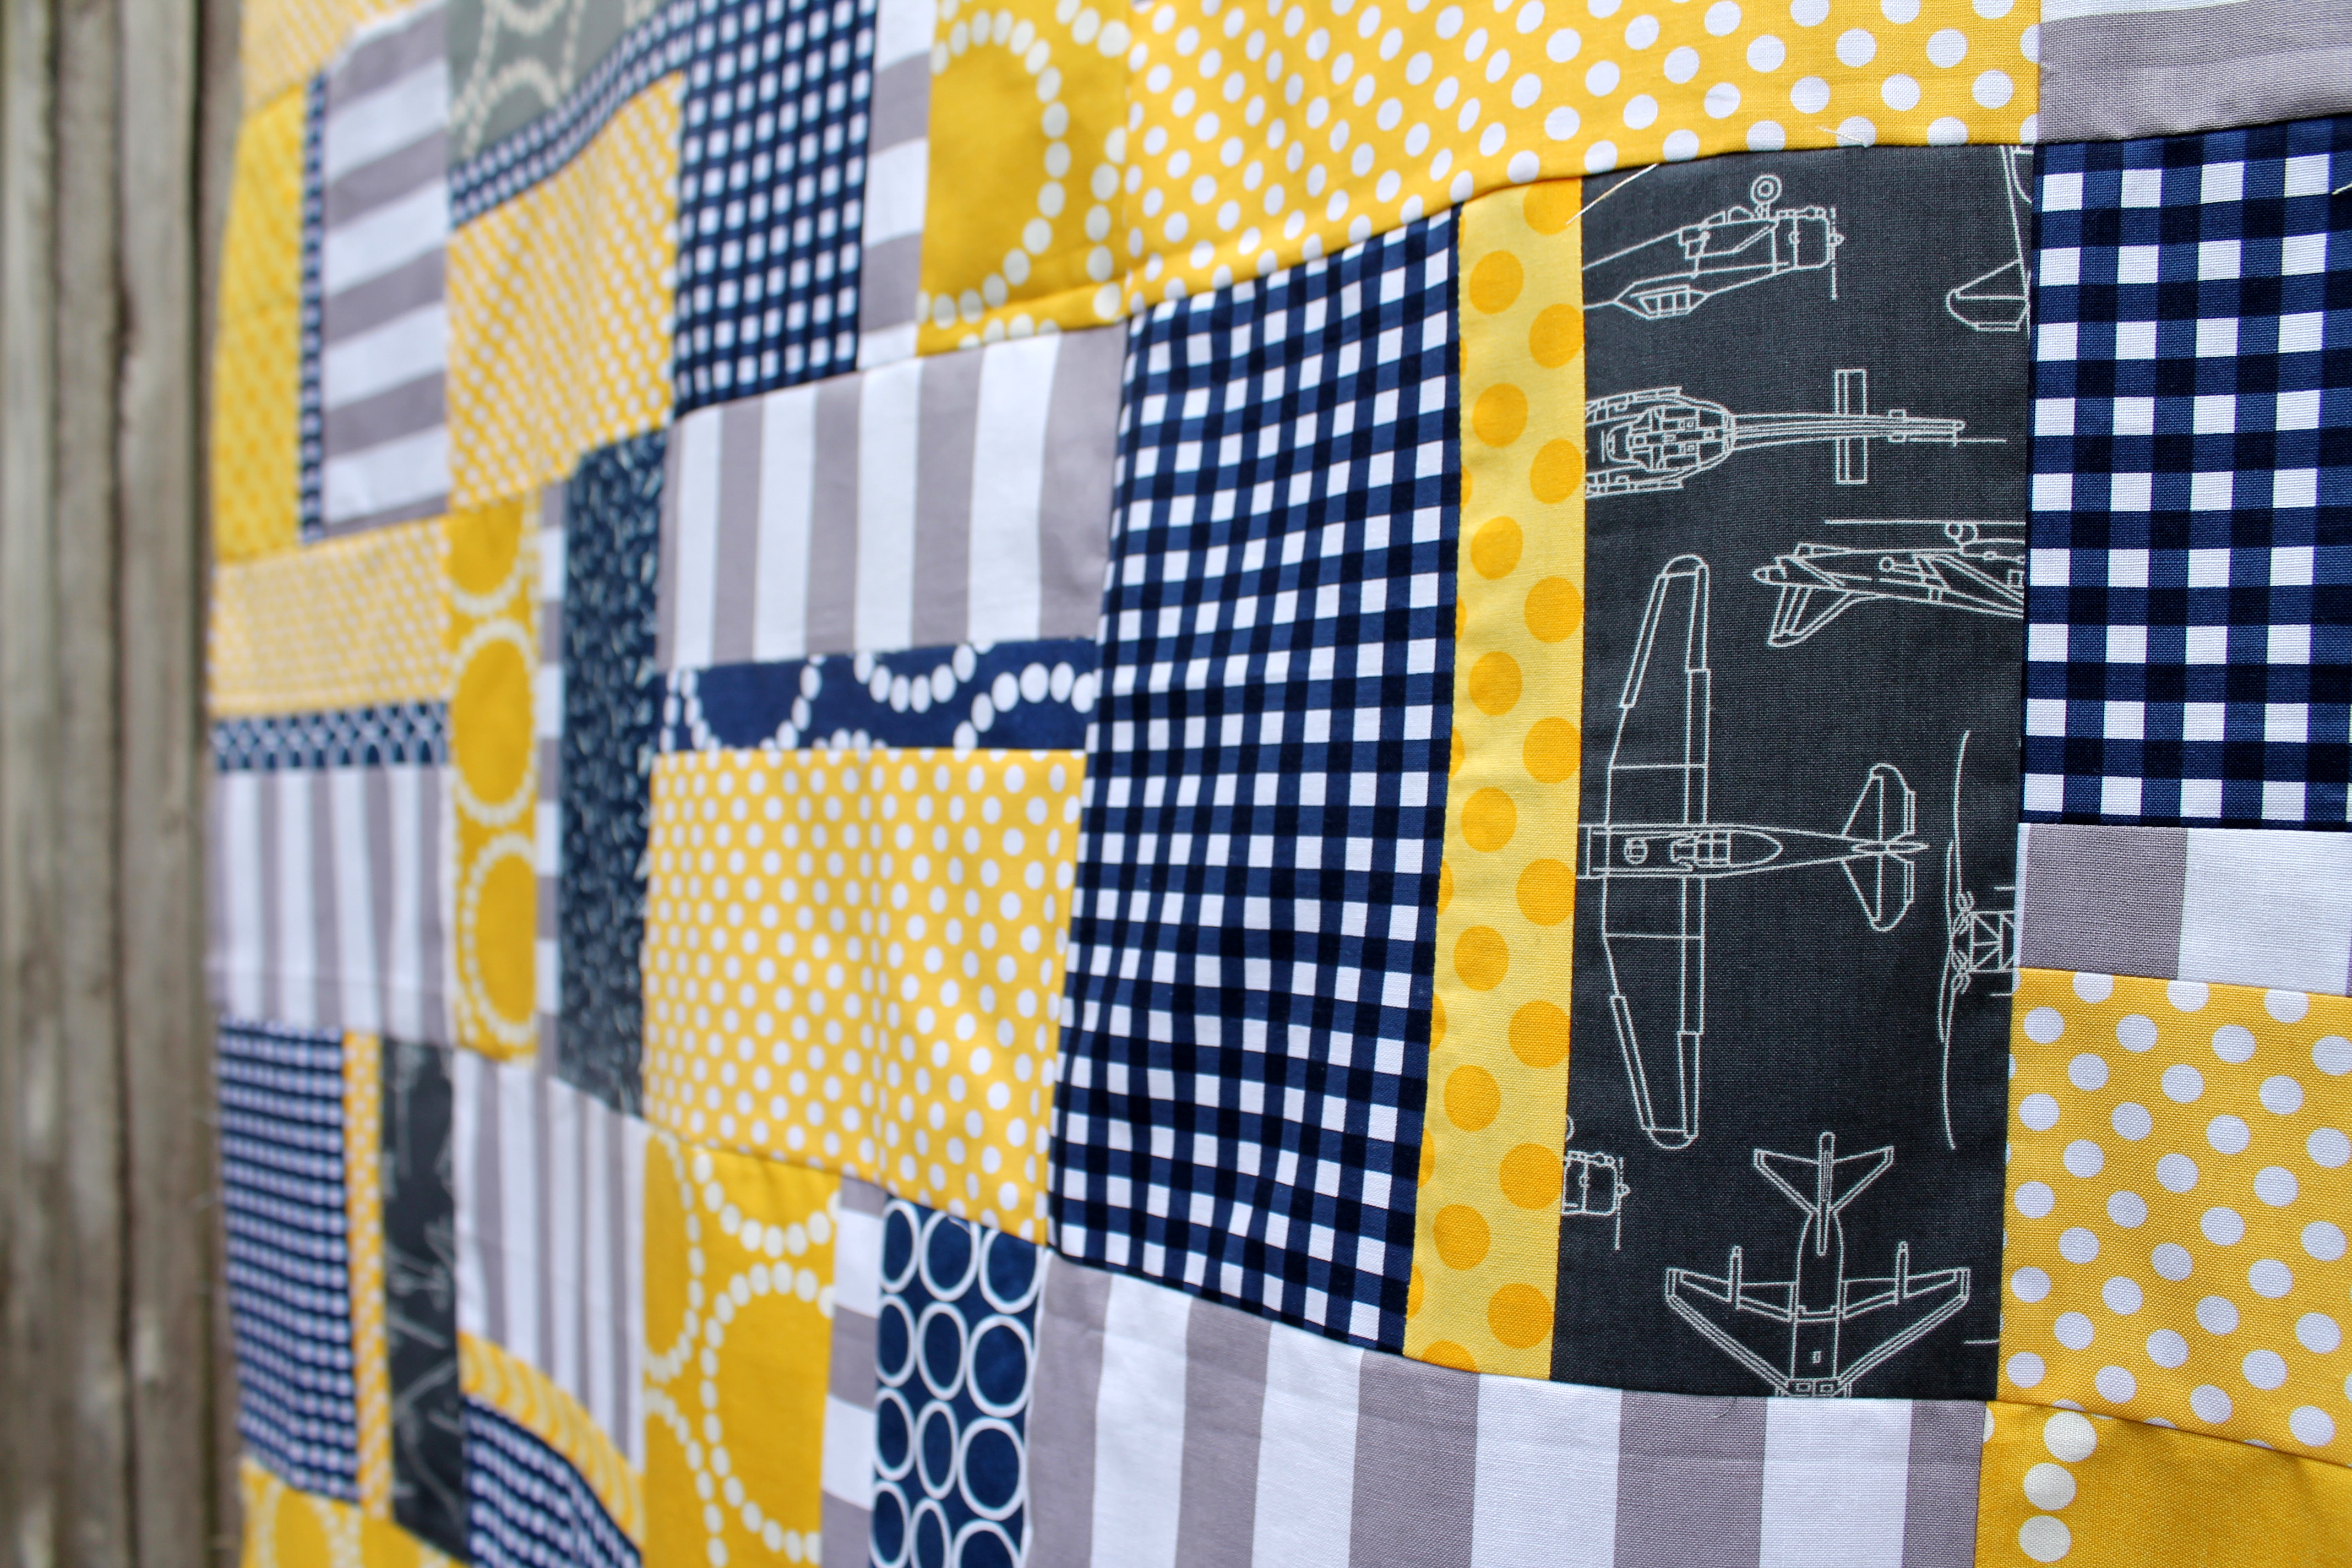
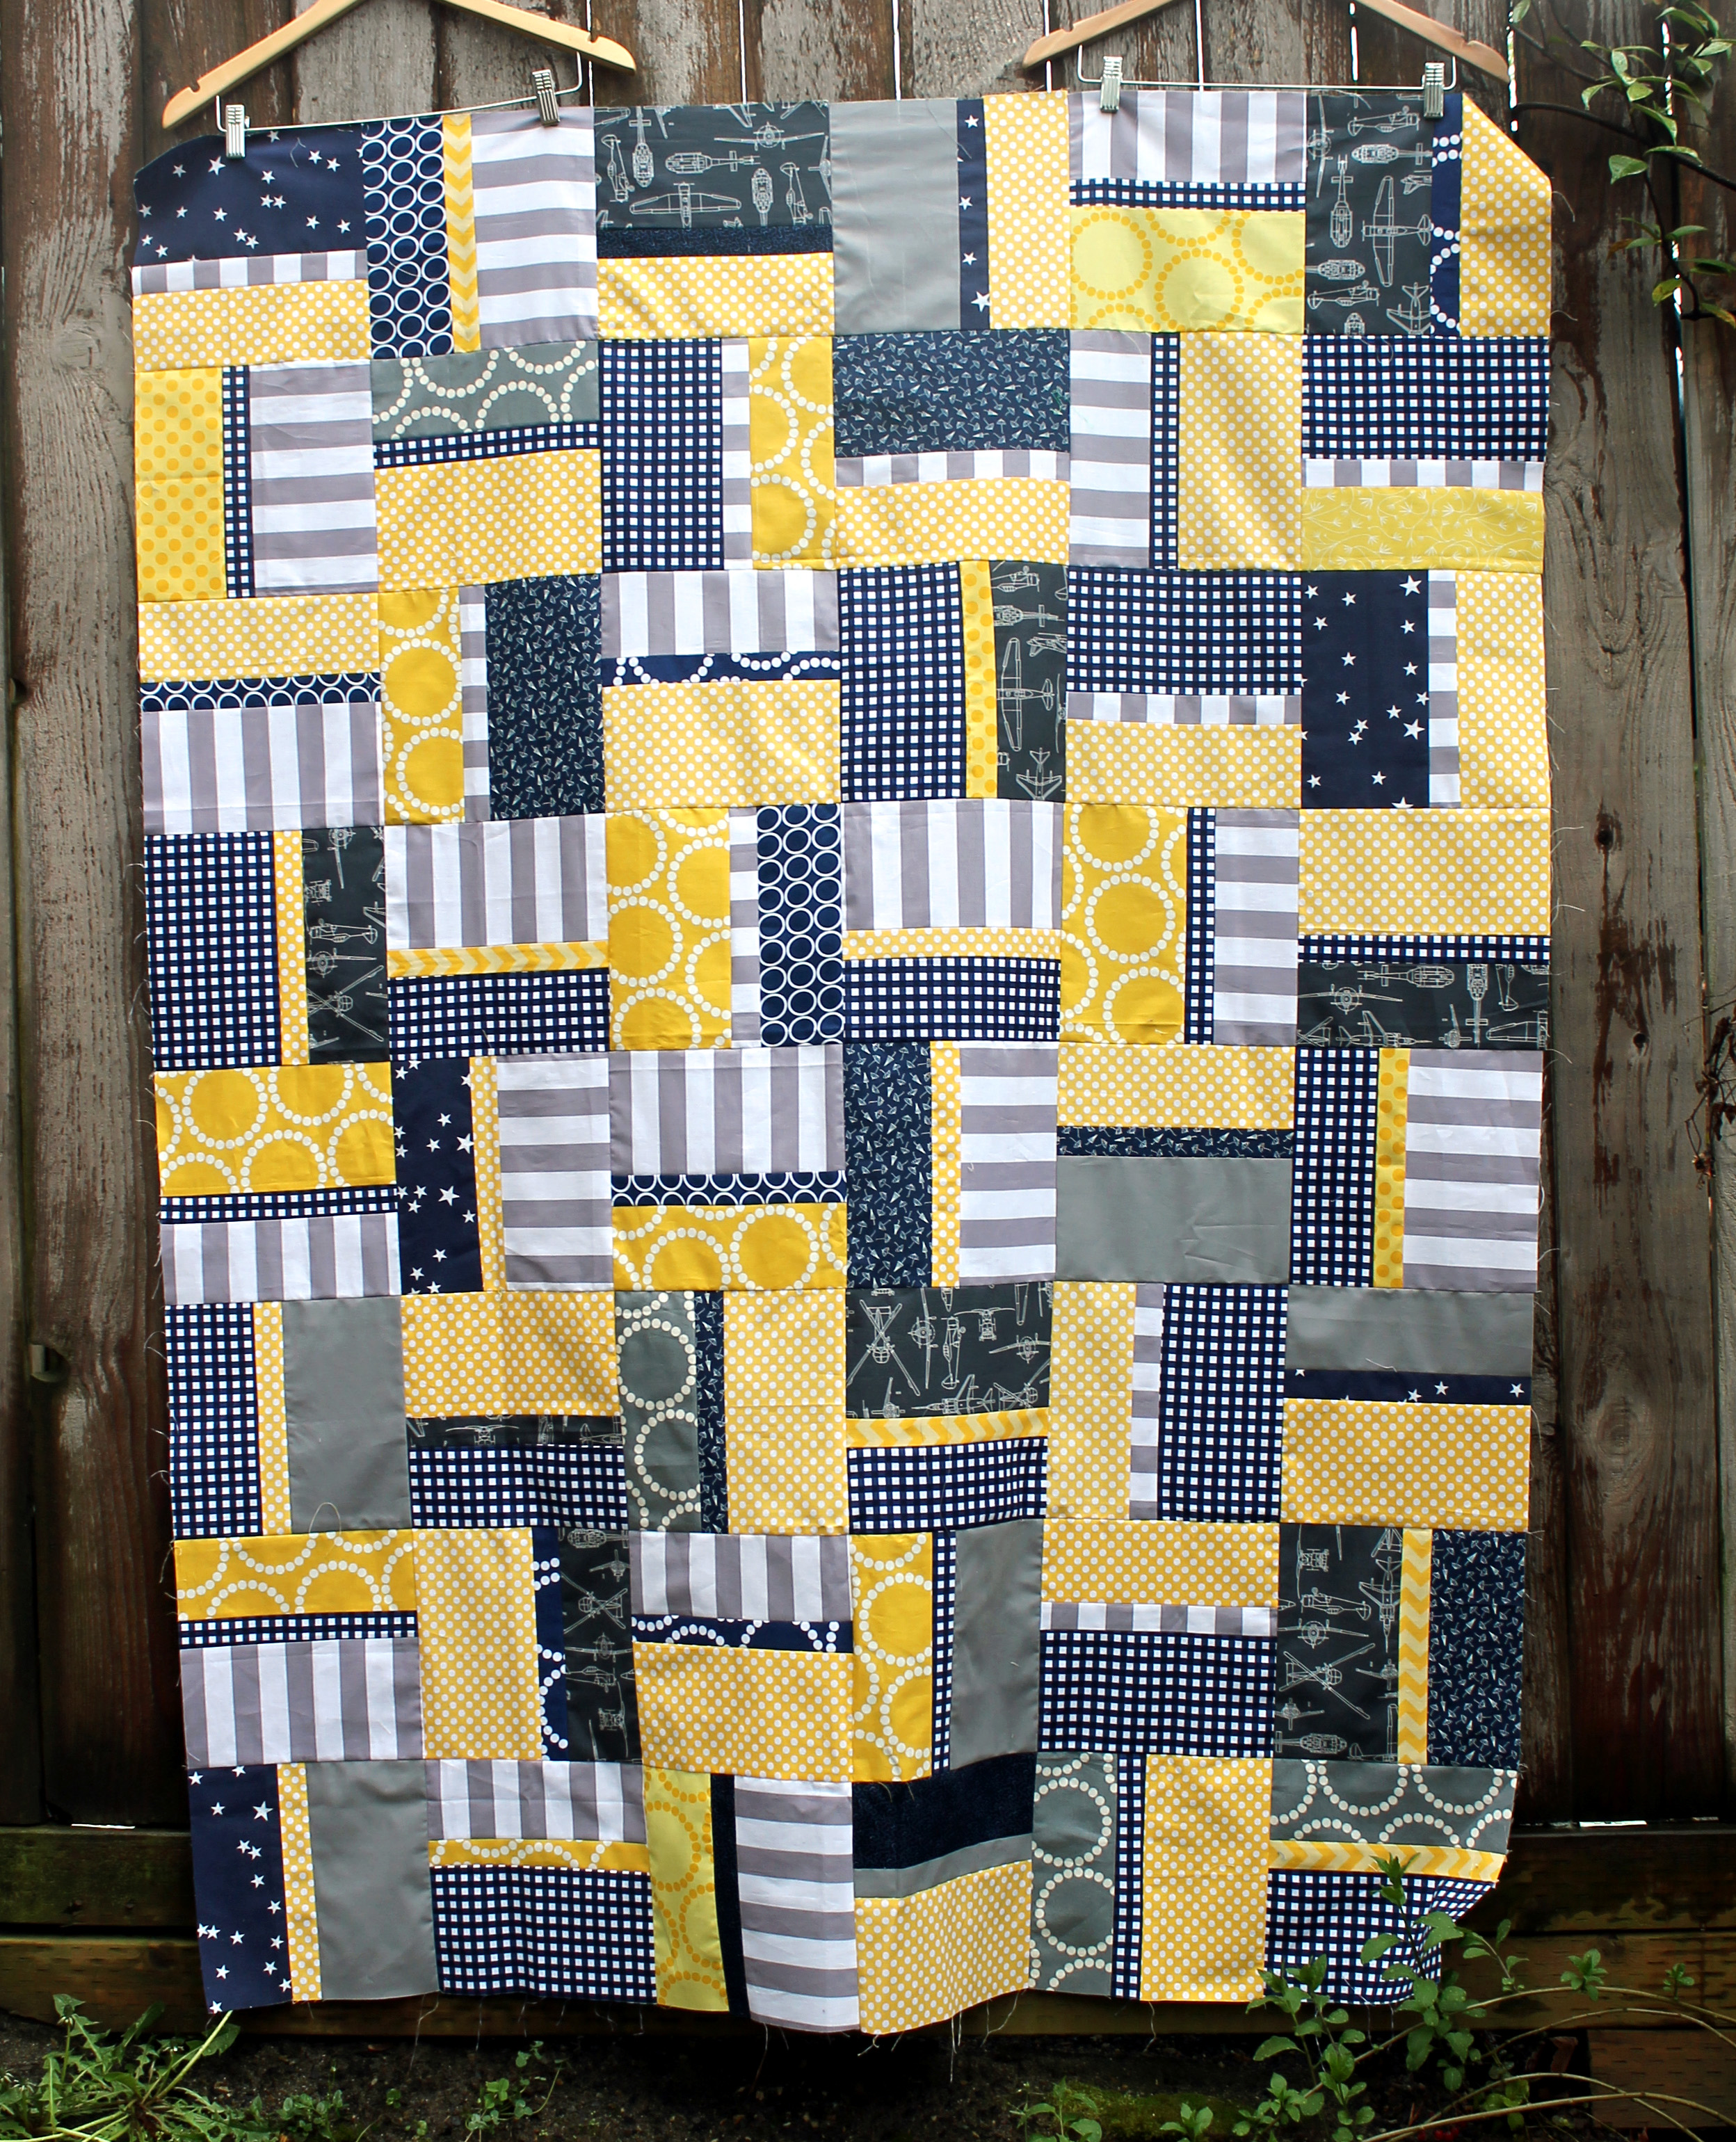
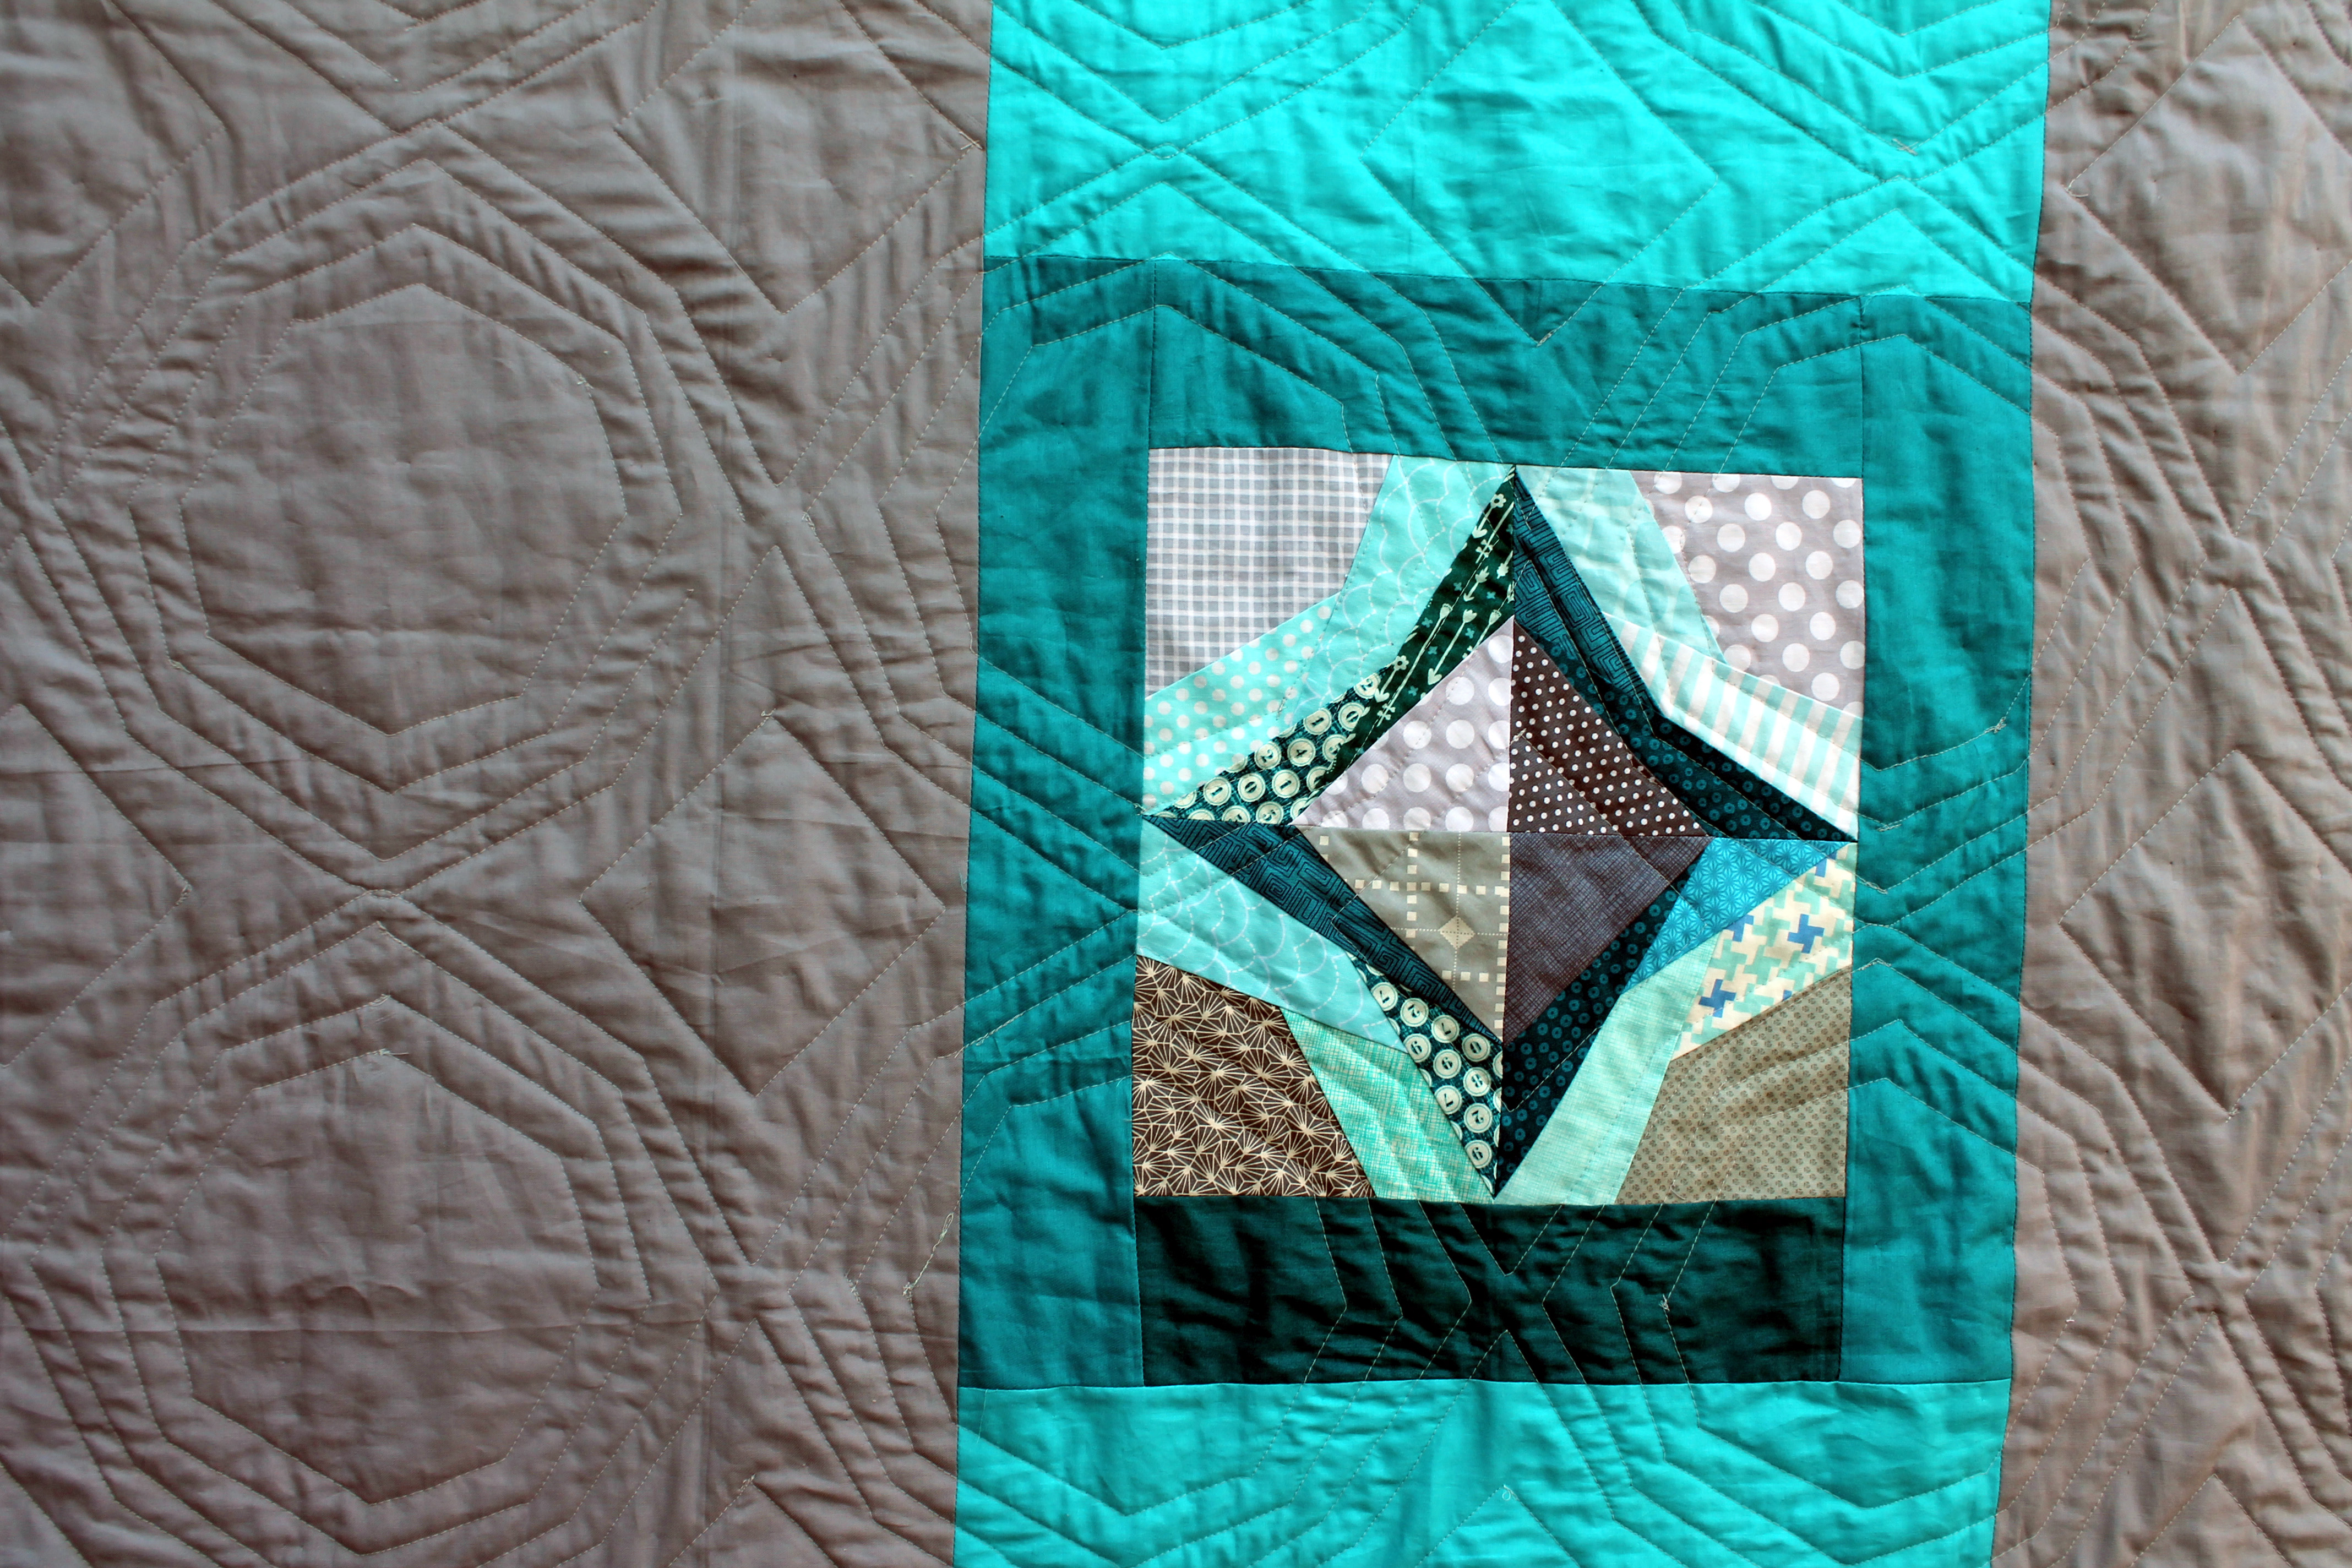
For the backing I used one of the blocks I was sent that was a little small and made it the focal point.  This way everyone who contributed a block is represented in this quilt.

finished quilt binding
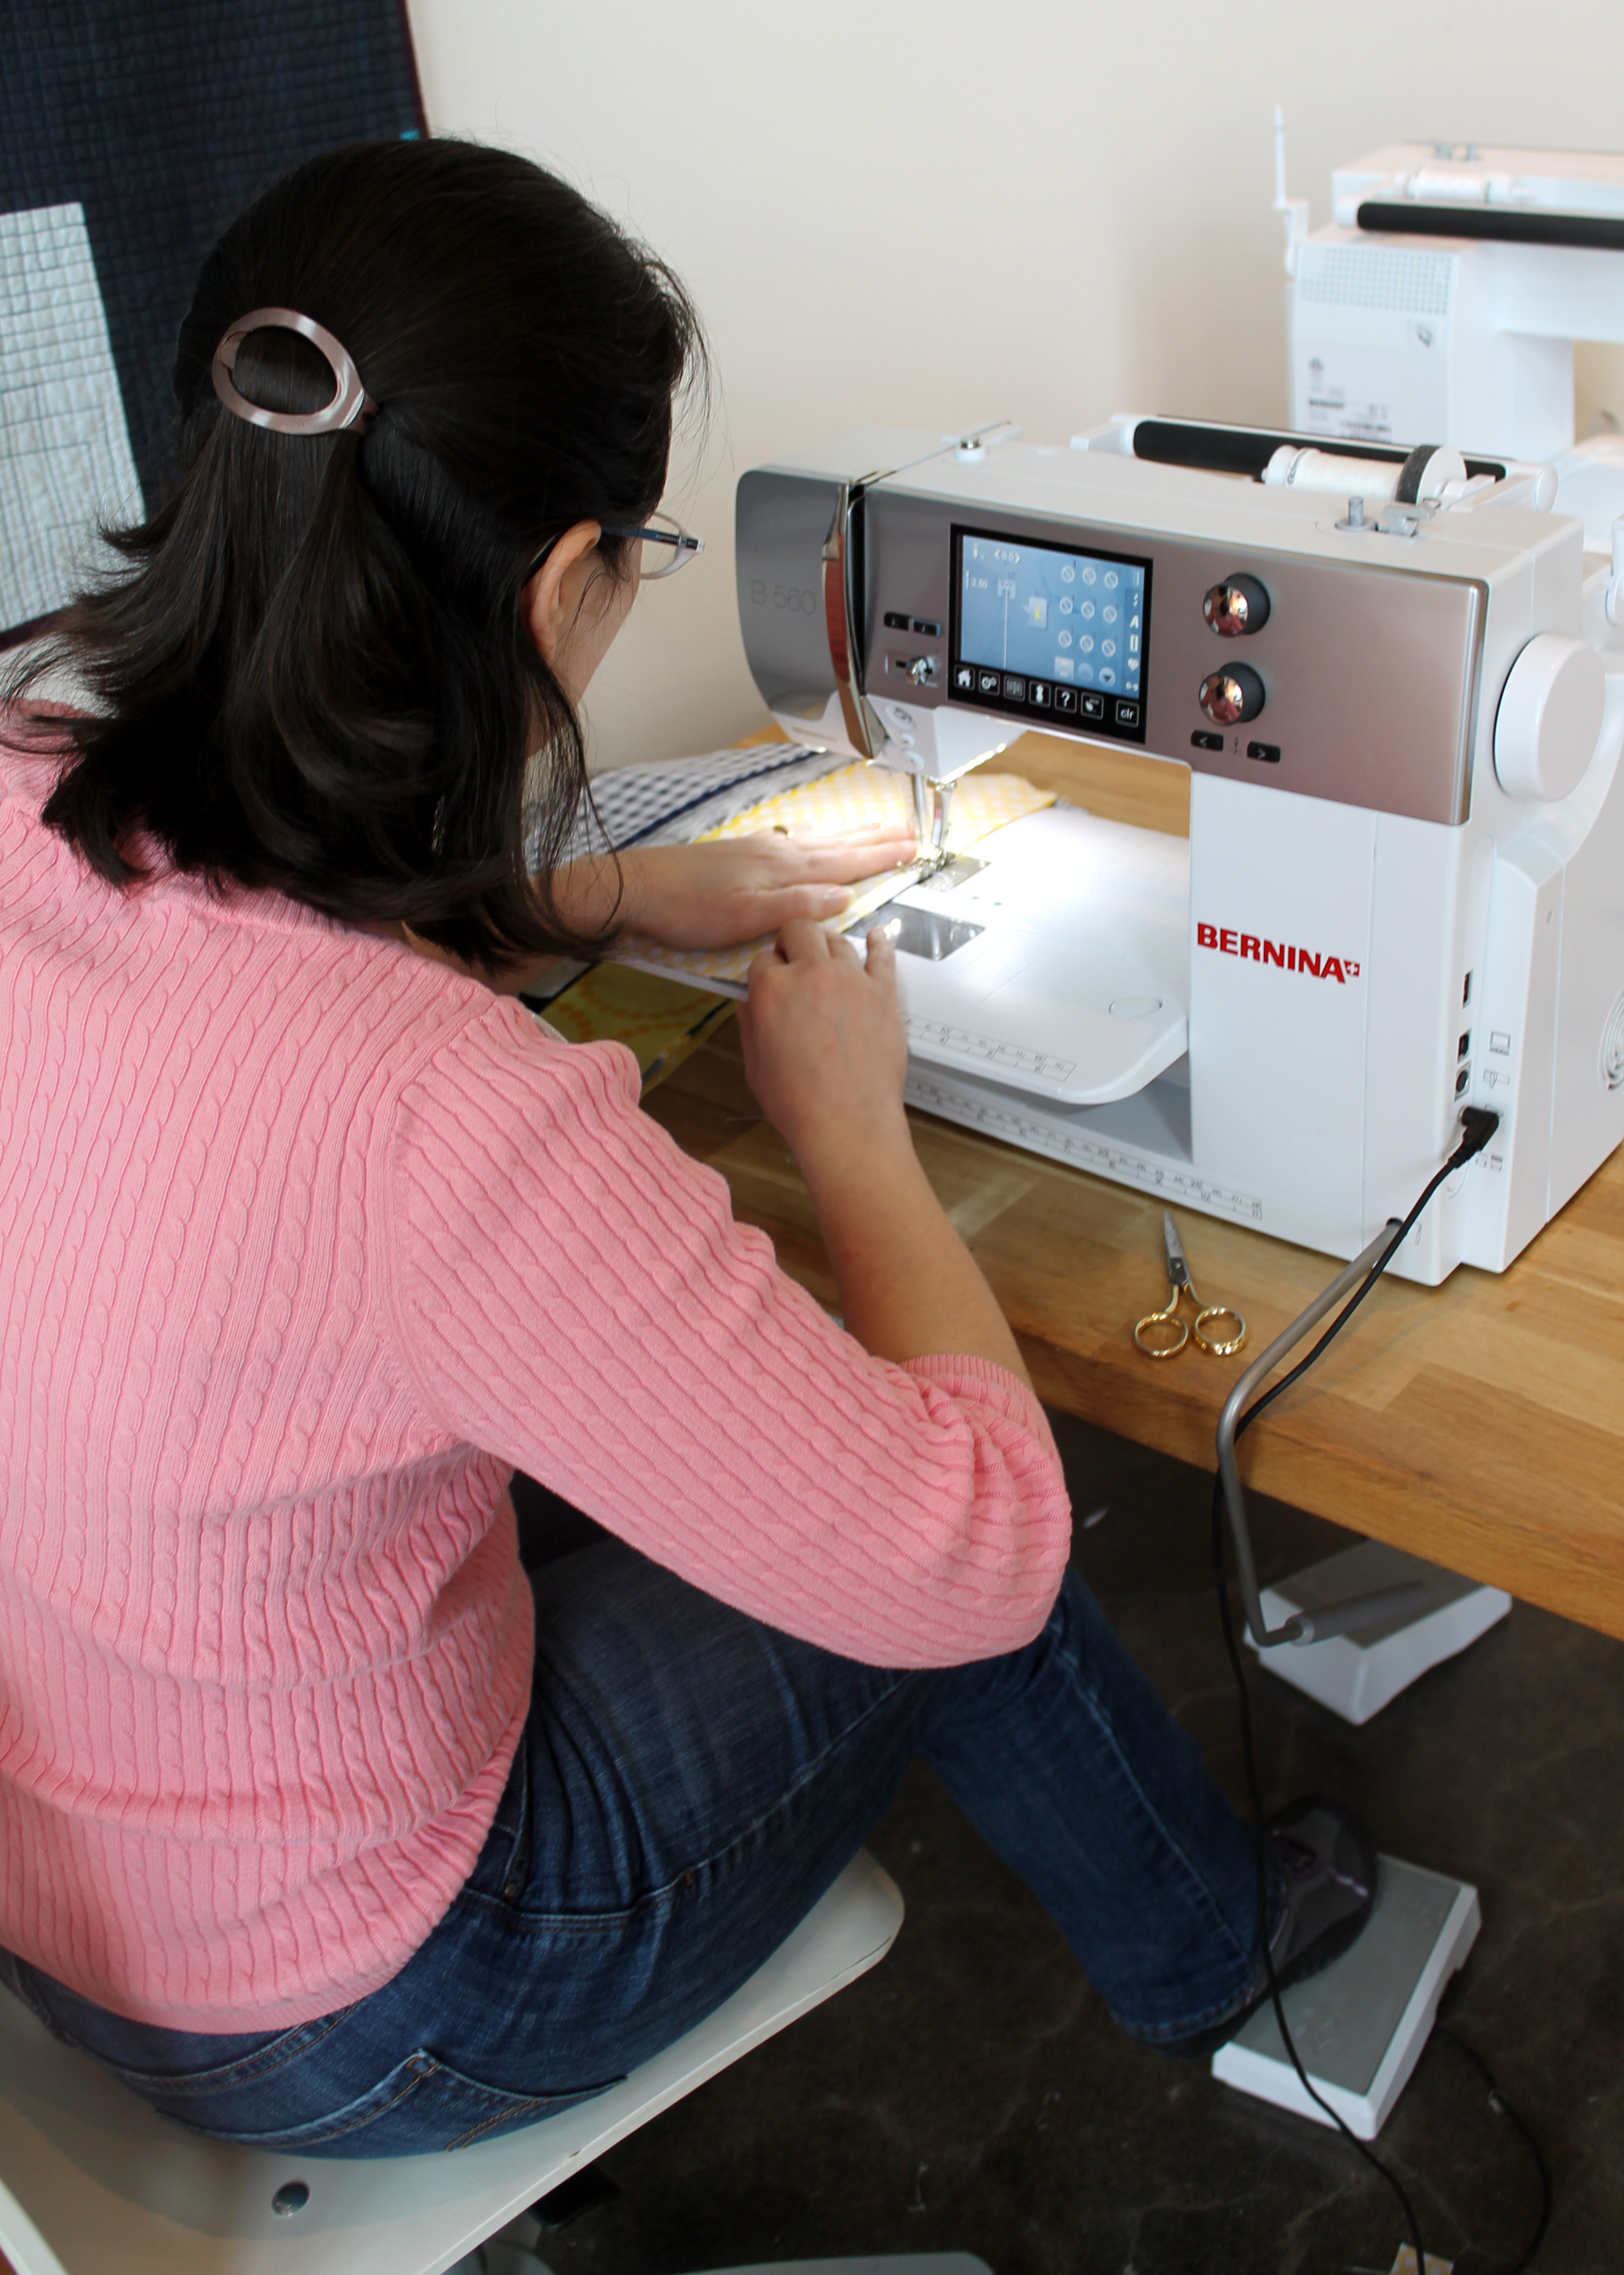
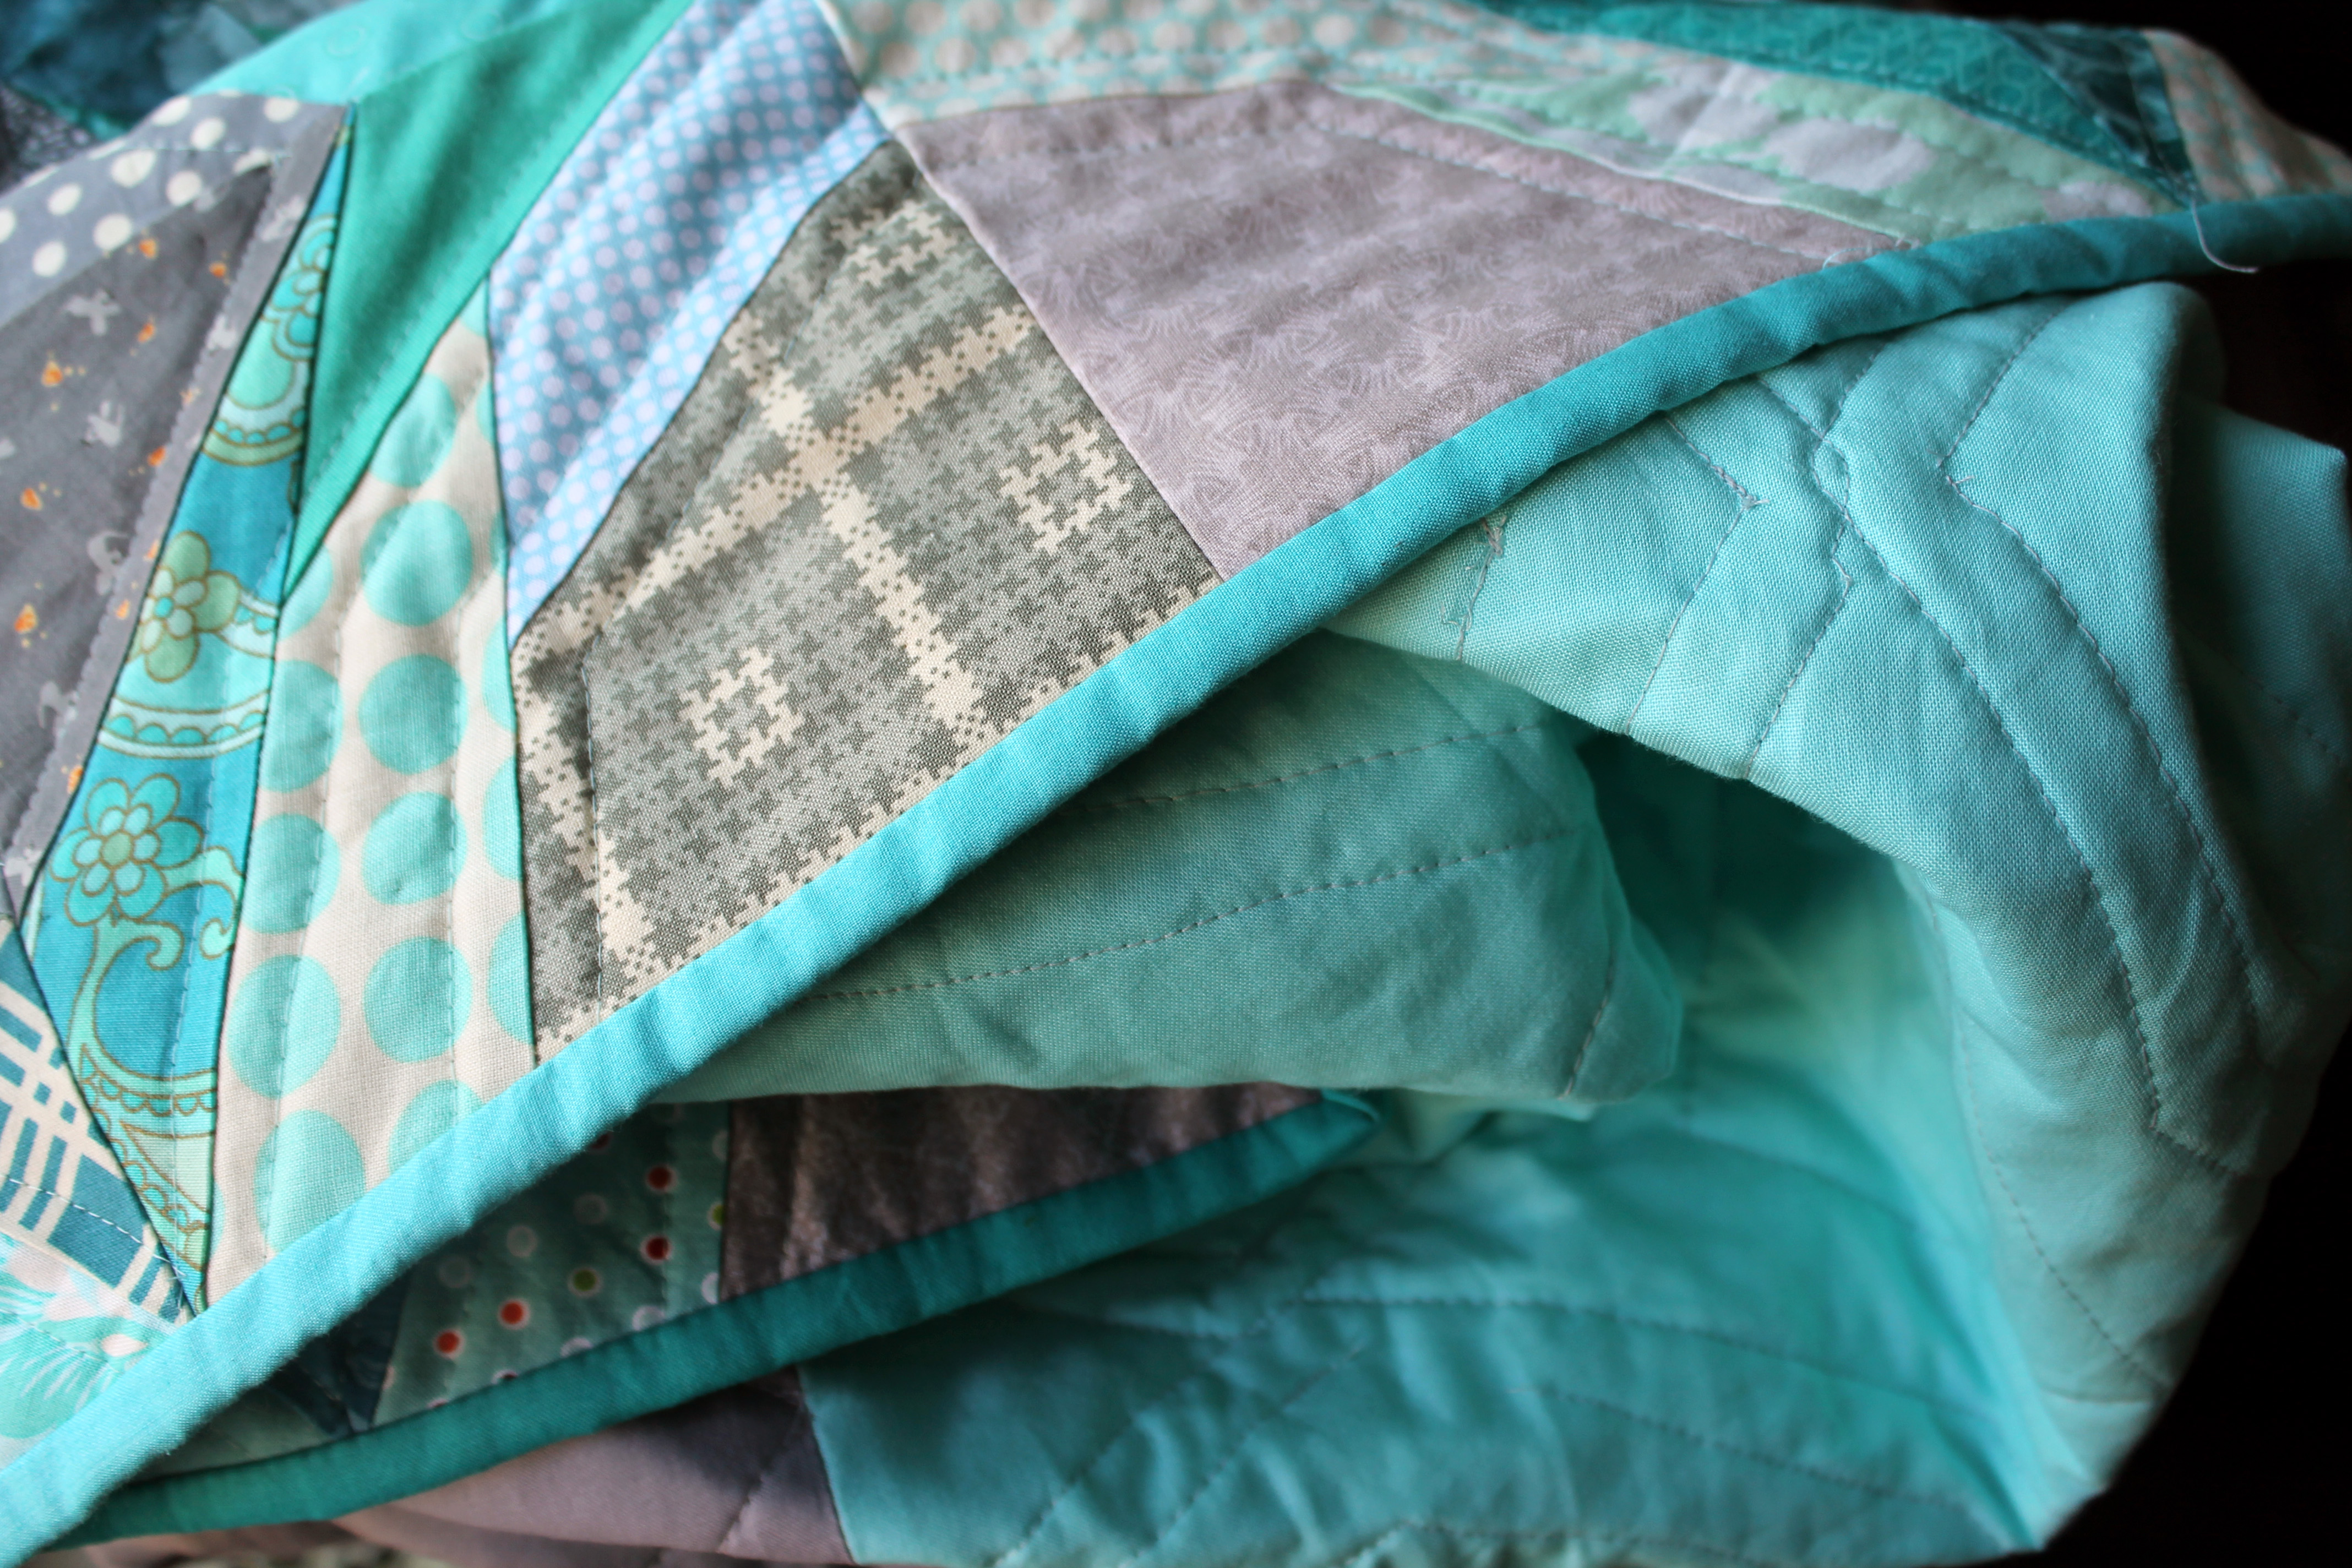
Finally I hand bound the quilt using some solid scraps I had.  It was a lovely exercise to put the finishing touches on this quilt by hand.  Another do.Good quilt ready to head off to do good!

Quilt Stats
Pattern:  Icky Thump paper pieced pattern
Finished quilt size:  48 x 60 inches
Fabrics: various
Backing: Kona Medium Grey and various others.

Whoo we have a finish…

It has been over a month since I posted my last finished quilt and I am feeling a little slack for not finishing something up sooner… life really just kept getting in the way.  But after some quilting and binding I am pleased to present…

finished baby blue quilt…my baby blue log cabin quilt.   This quilt was made using scraps left over from the quilt I made my sister-in-law and the top was put together in record time… and then just sat with my other UFO’s until I took pity on it last week.

finished baby blue quilt detailI loaded some electric blue thread into my machine, attached my walking foot and started quilting.

finished baby blue quilting detailLots of straightish lines later the top was quilted.  For the back of the quilt I used a piece of IKEA fabric I had in my stash that seemed to work well.

finished baby blue backing 2The finishing touch was some solid navy binding… nothing too fancy but I think it was what was called for.

Finished baby blue bindingSo I have my first finished quilt for April.  “Baby Blue” will be heading to Project Linus this month, as our chapter has a shortage of baby quilts at the moment… and I am off to sew more little bits of fabric together.


Paper piecing Monday missing in action…

This week Paper Piecing Monday was usurpered by Portland Modern Quilt Guild’s Charity Sew Day.. sorry.  I have decided on a new paper pieced quilt and have designed the first block for it, but have not had a chance to test the pattern… but I promise it will be ready for next week.

In the meantime I thought I would share some of the fun of yesterday…  where a group of PMQG members took over one of the class rooms at Modern Domestic for the day and made quilt tops.

Michelle sewing awayWe had a collection of fat quarters and fat eighths left over from the Riley Blake challenge and our challenge was to make some quick and easy quilt tops out of them. Rachel from 2nd Avenue Studios and I spearheaded this adventure and we quickly settled on a modified rail fence and three of the fabrics from the Challenge – the yellow dot, the navy check and the grey stripe.

Fabric detailWe supplemented the Riley Blake with some other graphic prints in our colour way, all boy appropriate, as our Charity needs teen boy quilts (yes I am the one that added the Pearl Bracelets!).

finished PMQG charity quilt topThe pattern is ridiculously easy and very very effective.  In a nutshell we…

1.  Cut a generous nine-inch strip of our chosen fabrics…

cutting fat eights2.  Cut our nine inch strips into sections of 5 inch, 3 1/2 inch and 1 1/2 inch pieces.  We made sure we had a variety of each colour in ever size.

block layout copy3.  Selected the strips for our block making sure there was one of each colour… then using a scant 1/4 inch seam we sewed the pieces together to get our finished 9 x 9 inch block.

finished rail fence blockYou can easily build in some wiggle room with this block by cutting your fabric strips from your yardage at 9 1/4 inches wide (it is a little harder with fat eights, but with the fat quarter cuts we cut 9 1/4 inches from the 21 inch width).

If you are struggling to get a scant 1/4 seam allowance you can add some wiggle room the other way, by cutting 5 1/4 inch or 3 3/4 inch pieces… and then trim the finished block as needed down to 9 x 9 inches.

And viola you have a fun, easy but striking quilt top.

PMQG Charity quilt detailThanks to everyone’s efforts we managed to get two tops finished yesterday… in between the socializing, laughing and cake eating.  Not a bad way to spend a Monday I must admit.


Tula Pink Friday

This week I managed to get my Tula Pink quilt basted, quilted and bound.  Yipee.  This quilt has been a work in process since May last year…I would do a few blocks here and there when the mood took me, till I had 30 blocks ready to go.

quilt top snowI actually got the quilt top finished during the snow storm a few weeks ago but it took me another couple of weeks to get her basted and then quilted.  I am beginning to notice that I am not as fast to baste and quilt as I am to piece.  Okay I admit it I love to piece quilt tops…quilt them, not so much.  Anyway I soldiered through and this was the result….

Tula pink quiltI love the blocks and that Tula Pink City Sampler blocks are a great project to dip in and out of.

quilt detail 2Some of the blocks are really simple and easy, others a little more complex.  I did not do some of the crazier blocks in the book…I am leaving those to the next quilt…

quilt detailWhen it came time to quilt my top up I decided to got with a light grey thread for quilting.  In hindsight I maybe should have stuck with white as the quilting is really highlighted which creates two issues for me…

1.  It distracts from the pretty blocks I think…and

quilting detail2.  It highlights that my quilting may not be completely straight.

Favourite blockIt was a huge learning experience for me and I think the quilt still looks cute, despite my missteps.  It is backed with some lovely Lotta Jansdotter fabric from her “Echo” line.

quilt backingAnd hand bound with two different Kona cotton pinks… scraps I had left over from another project.

Tula pink bindingI am definitely making a blue version of this quilt so I can do more blocks from the book and so I can slip in the Tardis block.  I will take what I learnt from this quilt and apply it wisely.


Rocking my wonky world…

A couple of weeks ago I spent a very fun day at the monthly PMQG Charity Sew meet up.  The event is held at the fabulous Modern Domestic (my new home away from home) and I got to spend many happy hours sewing on a beautiful Bernina 560.  In a day of wonderfulness the most amazing thing was having my wonky star world rocked by  one of my fellow PMQG sewers, Cherri.

Wonky Stars have been a fun staple in my sewing repertory for a while.  It is s a quick and easy way to make fun kids quilts and if you peruse my “Finished Quilt” tab you will see a few of them in there.  So for years I have been cutting out my 5 inch squares, using my scraps to make star points and calling it good… but no longer. Here is how the new wonky stars block goes…

1.  Take eight 5 inch x 5 inch squares of your background fabric… in this case various whites and creams.

5 inch square whites

2.  Grab a pile of scraps in your colour scheme…for this exercise red.

pile of red scraps

3.  Sew random fun bits of scraps together to make a squarish shape, making sure that it is a bit bigger than 5 inches square.   Anything goes at this point.  You can fussy cut…wonky log cabin or just improv.  Then trim your random scrappy square down to 5 x  5 inches.

trim center block

4.  Make four points to you star using the 5 x 5 inch background squares as your foundation and larger scraps for the star points.  Trim as needed to get a 5 x 5 inch square.

trim star points

5.  Sew the block pieces together – 4 plain corner pieces, 4 star point pieces and your fabulous scrappy center piece.

laying out the block pieces

6.  For an added extra bit of wonky fun at the Sew Day we then trimmed our blocks down to 12 1/2 inches square.  This step allowed us to put the stars a little off center and added another element of randomness to the layout.  The blocks work just as well trimmed down to 14 x 14 inches too.

trimming the star

And voila you have a fabulous wonky star with a scrappy center piece.

wonky star block

I can not believe I did not think of this technique myself.  It is genius and the best way to use those little bits of fabric in your scrap bin.  It was such a fun exercise this week to take all the wonky stars everyone made at the Sew Day and put them together into one loud, fun, wonky top.

wonky stars quilt top

There is a combination of solid centered stars and scrappy centered stars in this top and I think it works nicely.

charity wonky star detail

And every star is so very very different.  There was a lot of fun techniques used for the scrappy centers…

charity wonky star 2

Because it is a kids quilt we went with bright colours, novelty prints and lots of fussy cutting.  My favorite block is scrappy and fussy cut…

favourite block

The finished top is 60 x 60 inches square and the next step is to find a fabulous PMQG member to quilt this beauty, or maybe we can throw it on the long arm at our next Charity Sew Day.