Some Random block fun…

I am desperately playing catch up on my Bee blocks and other projects that have been sitting around too long.

First up I have caught up on my Do.good.stitches blocks which included this fun ditty…

pinwheel block
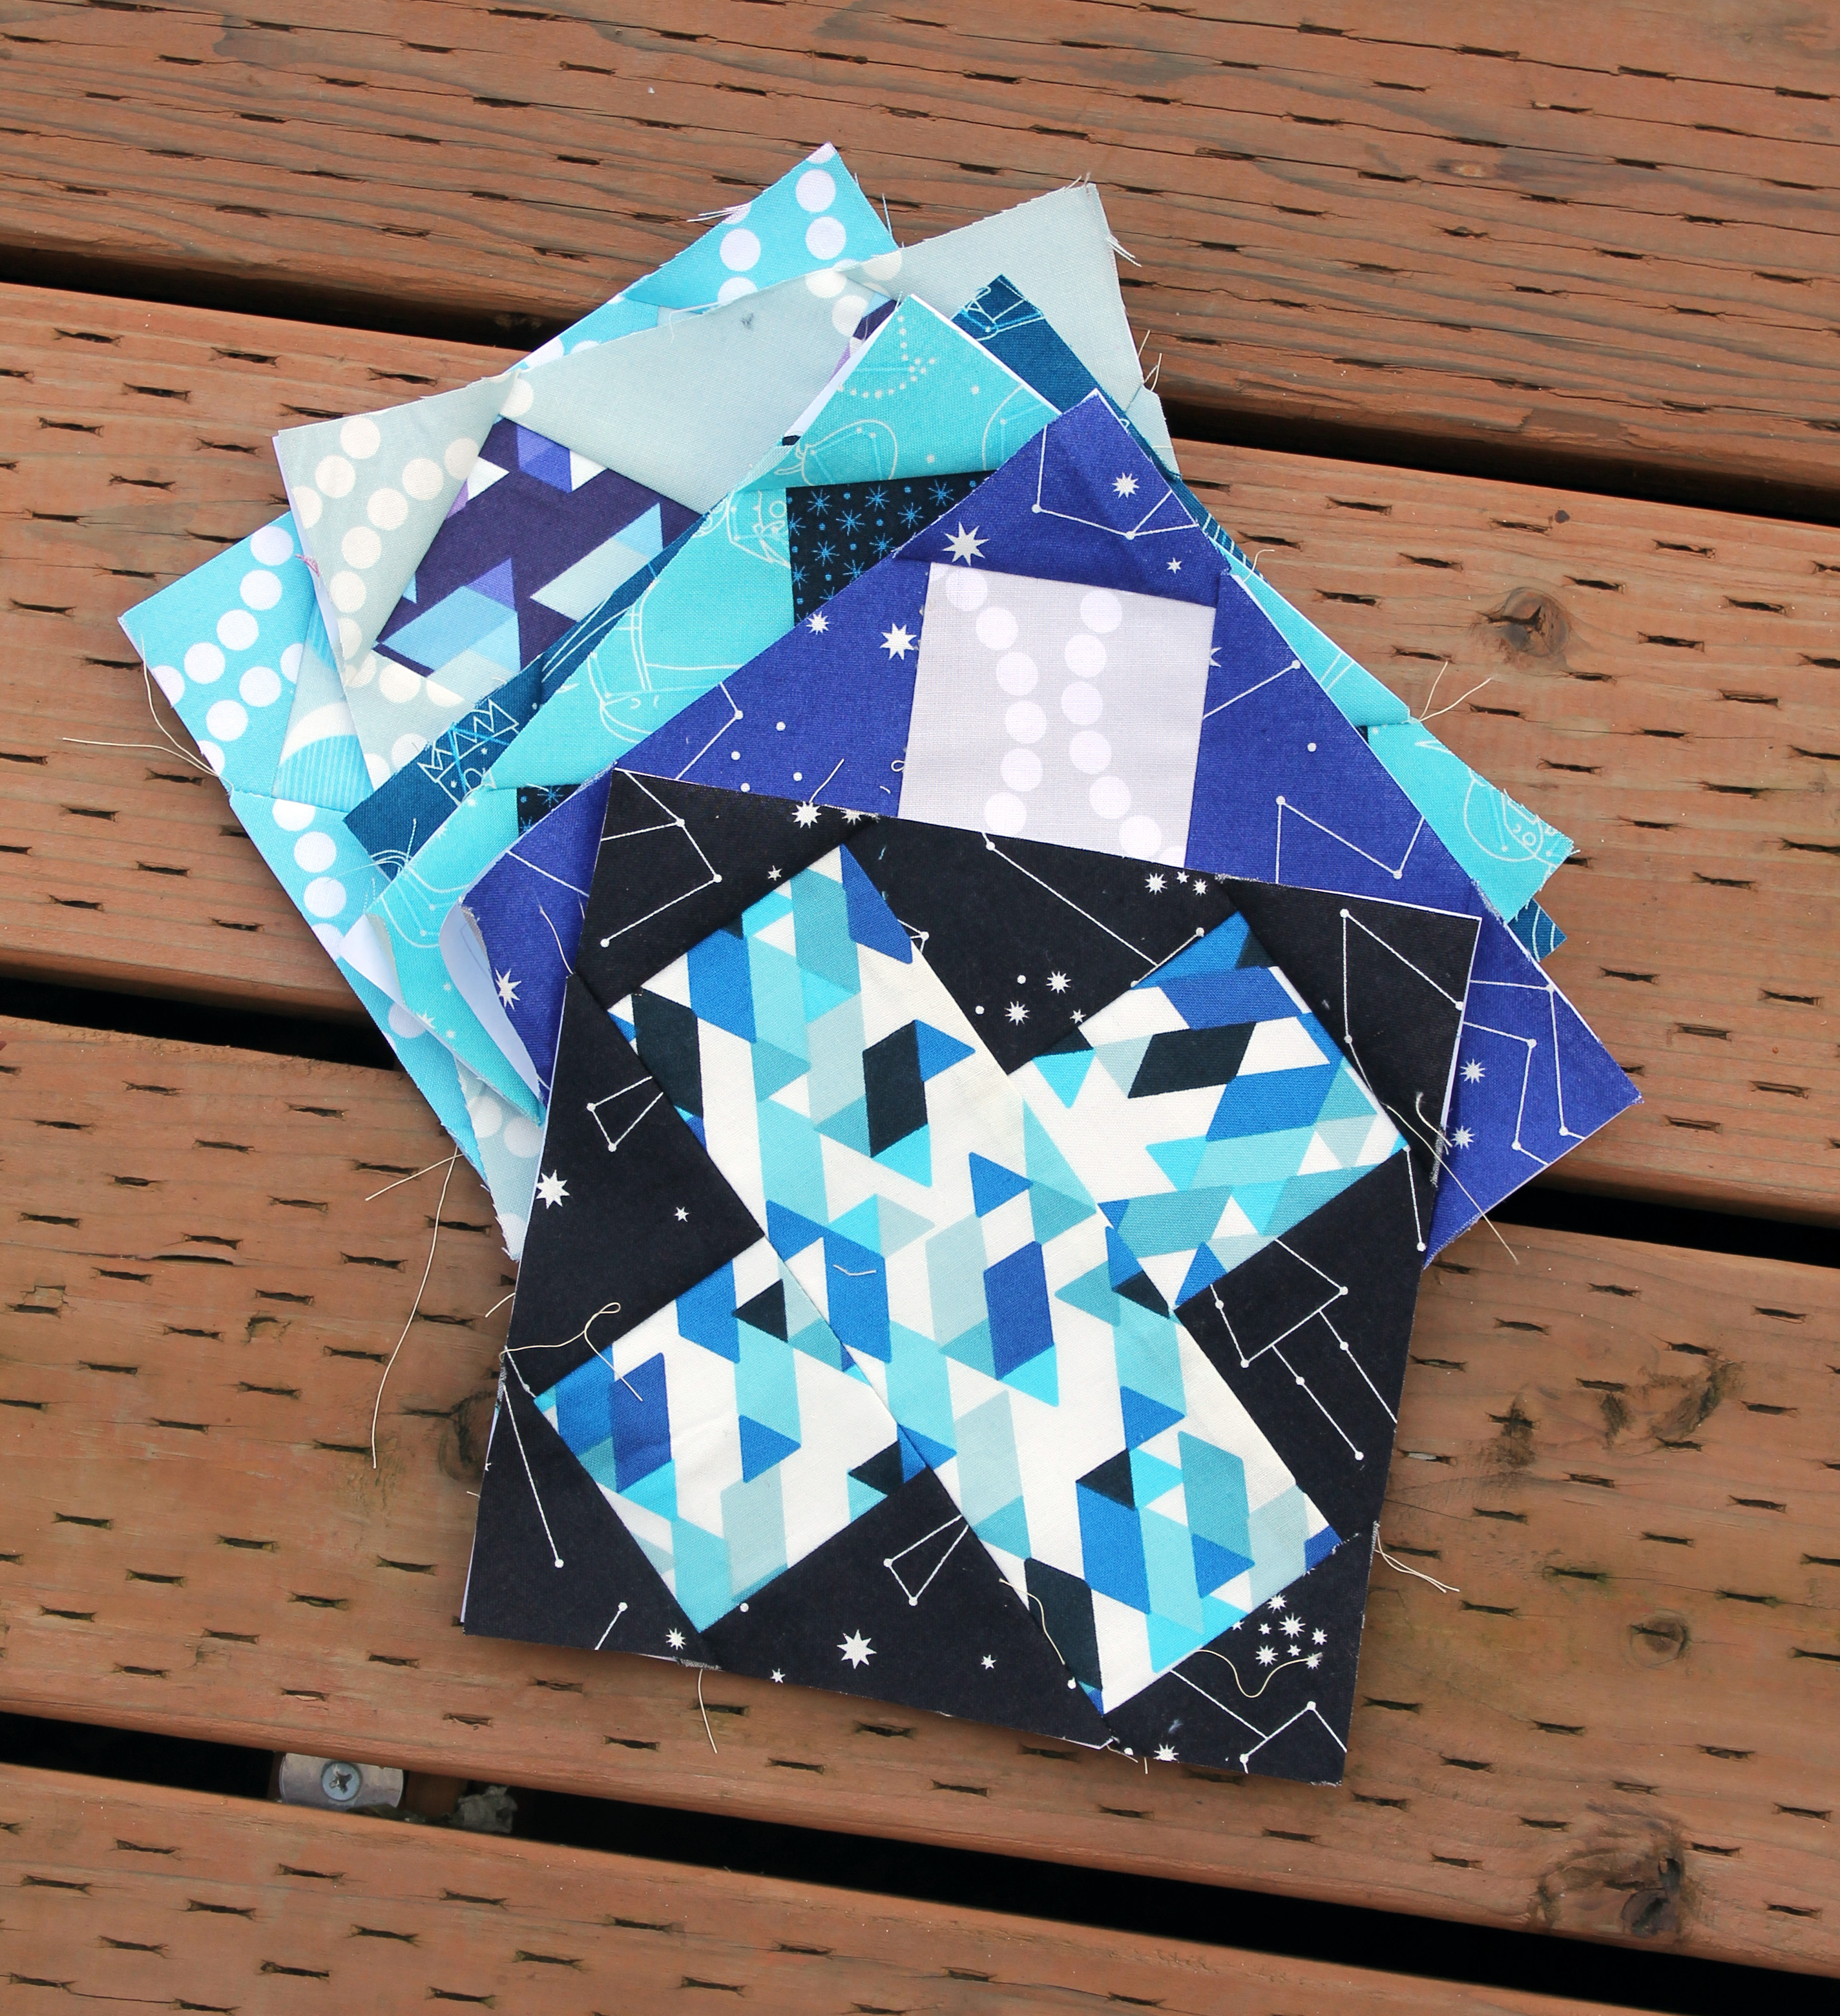
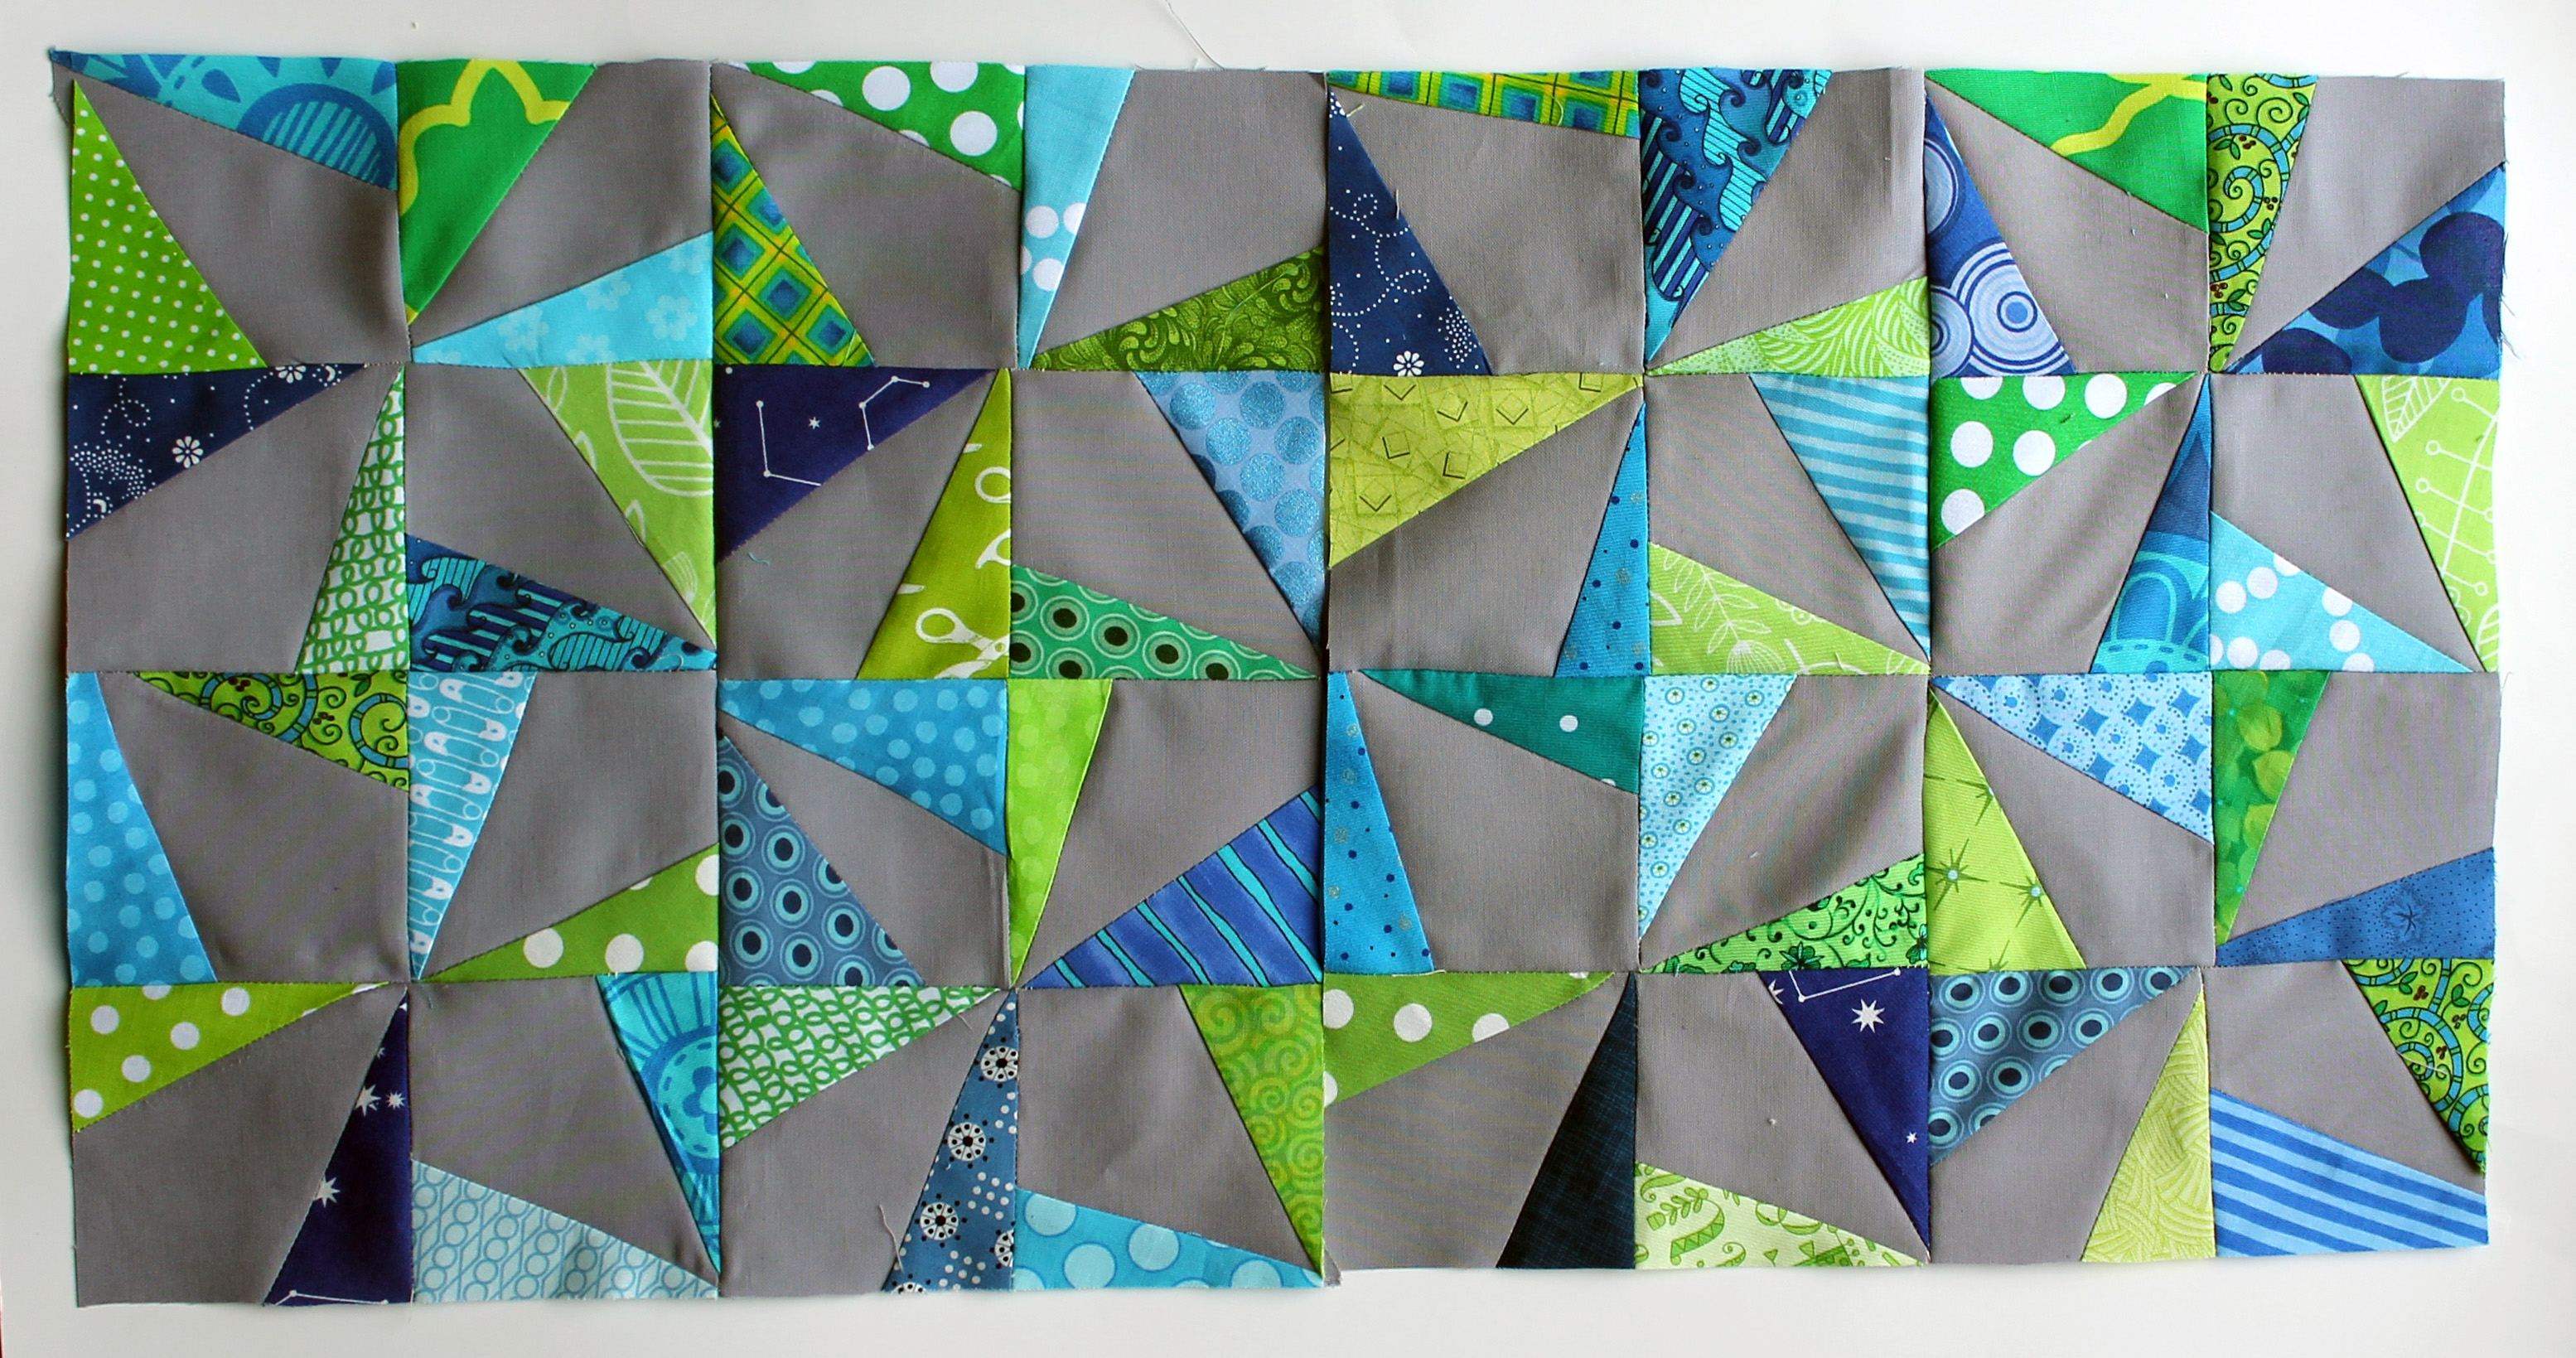
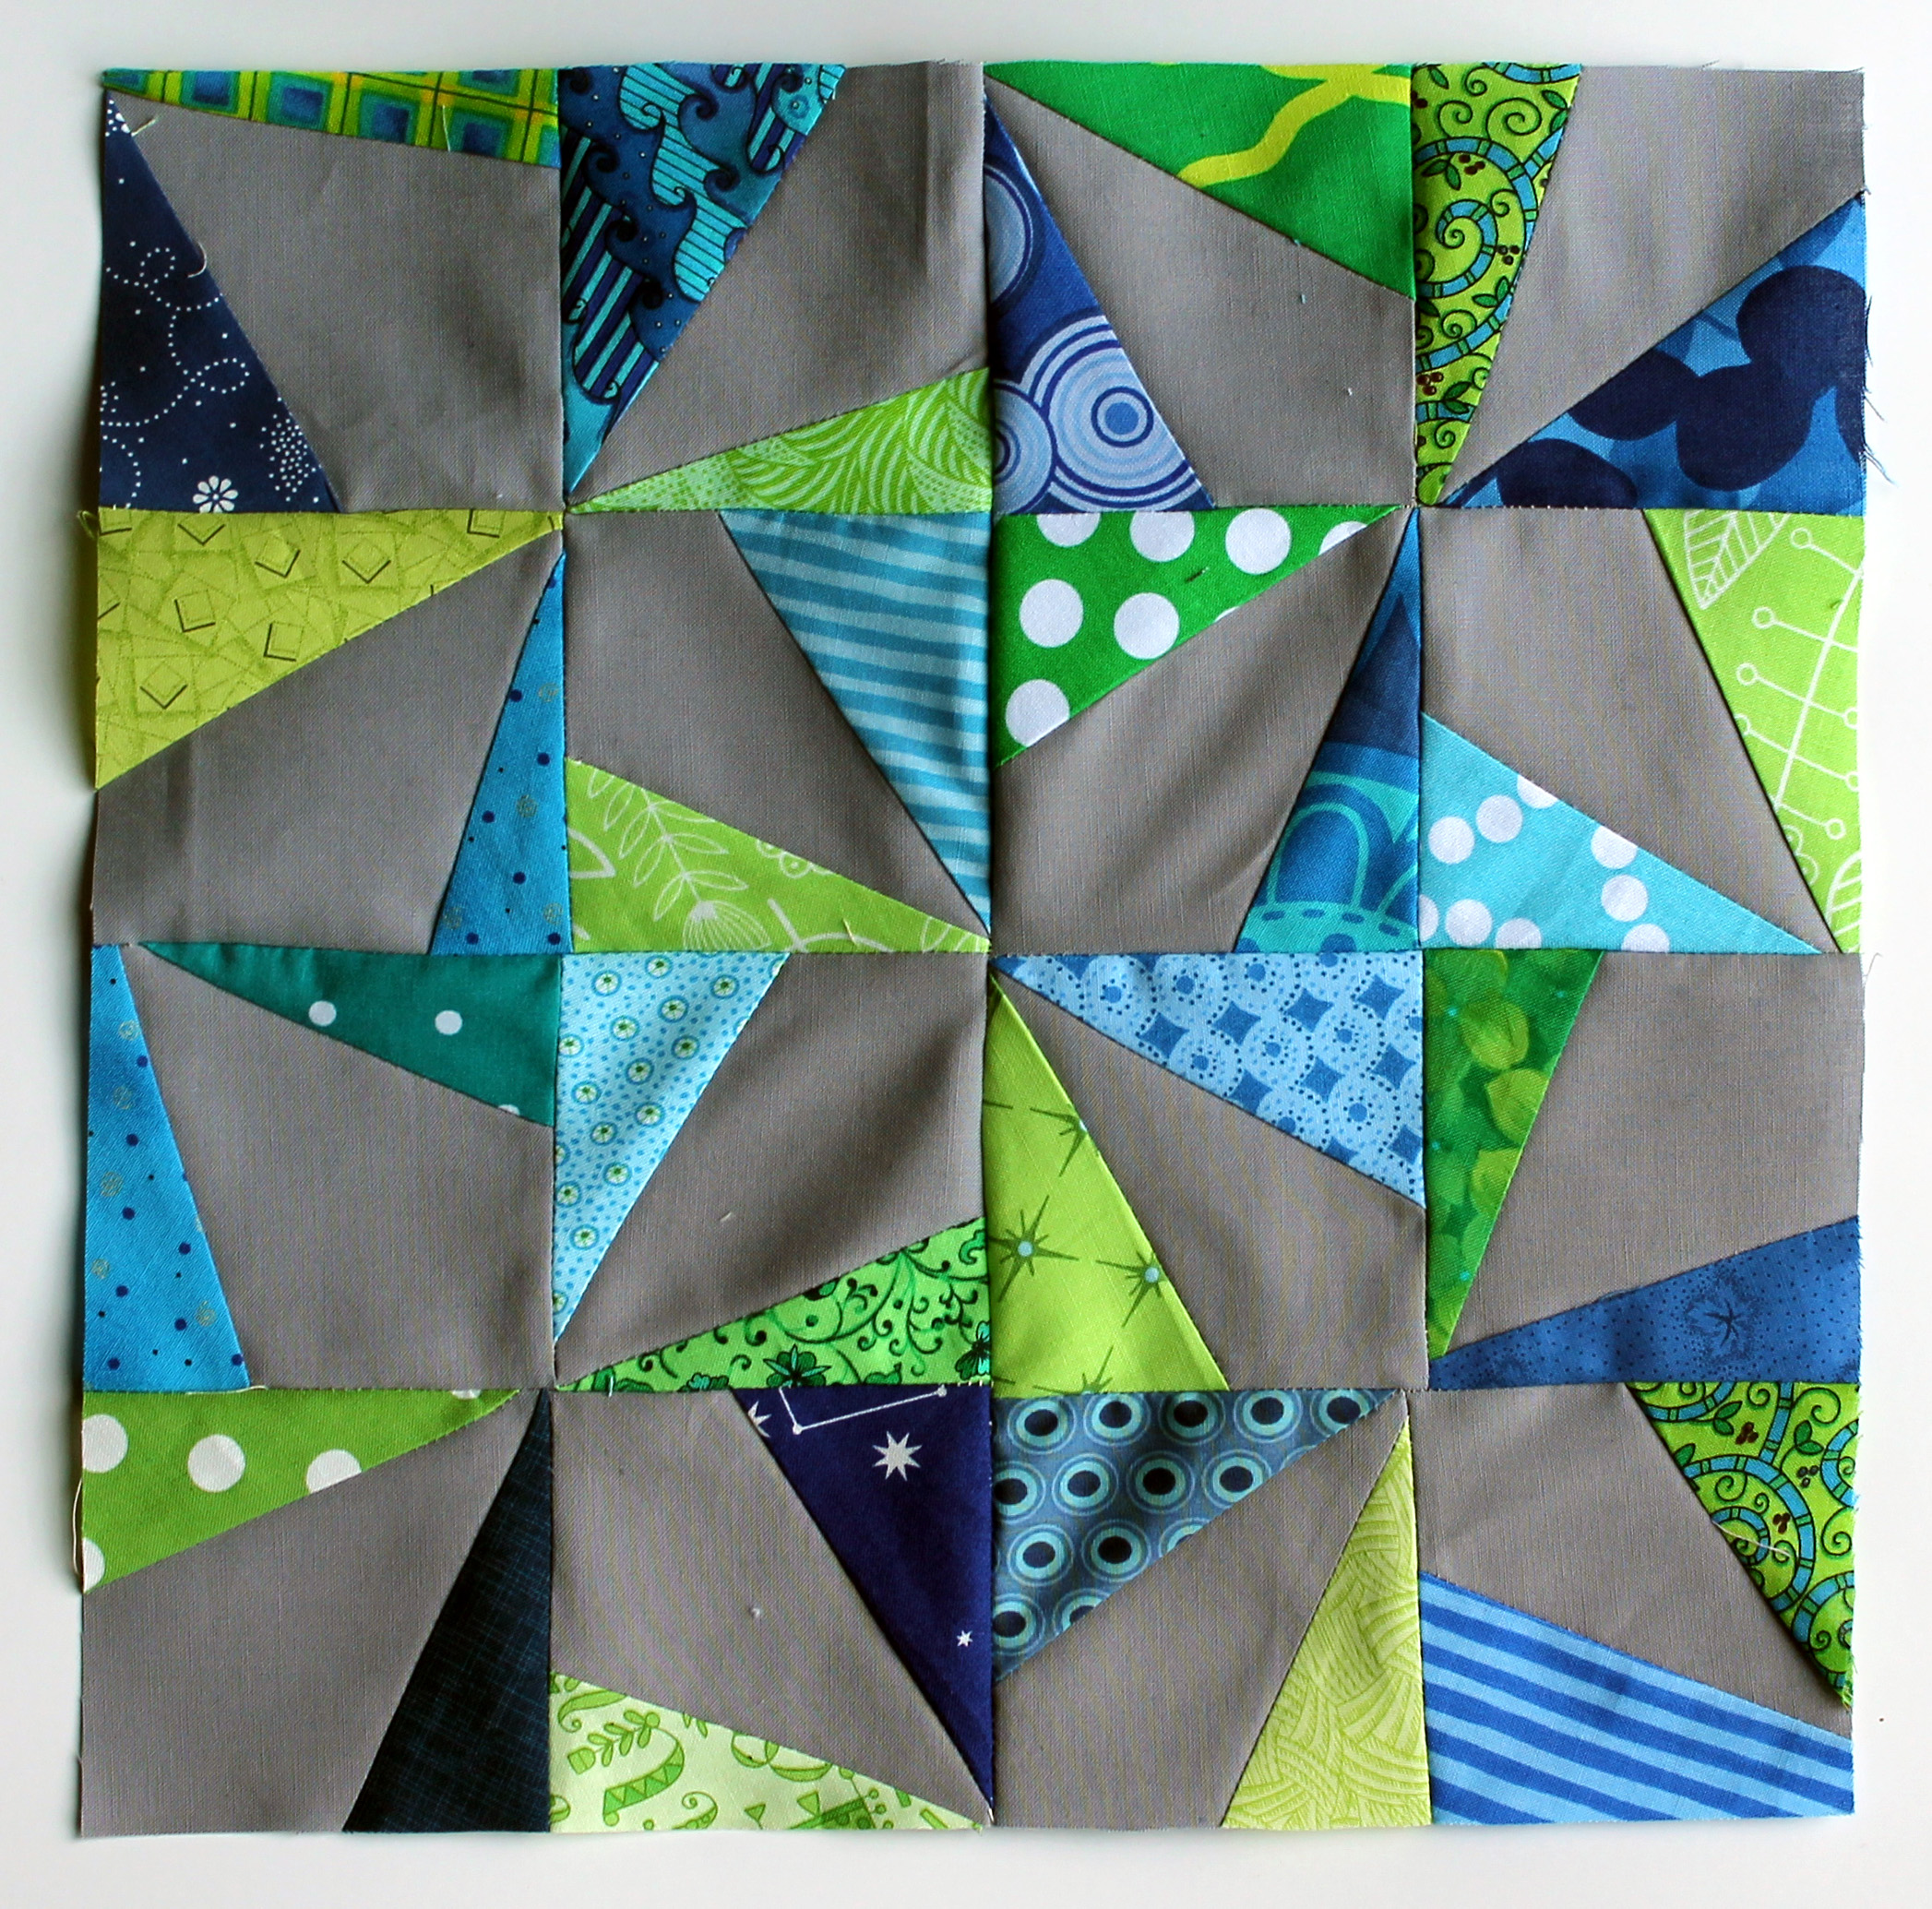
A wonderful wonky pin wheel.  The pattern is from Greenleaf Goods who have a great tutorial on their site.  It was a fabulous scrap buster and I am looking forward to doing my own version.

Pinwheel blocks
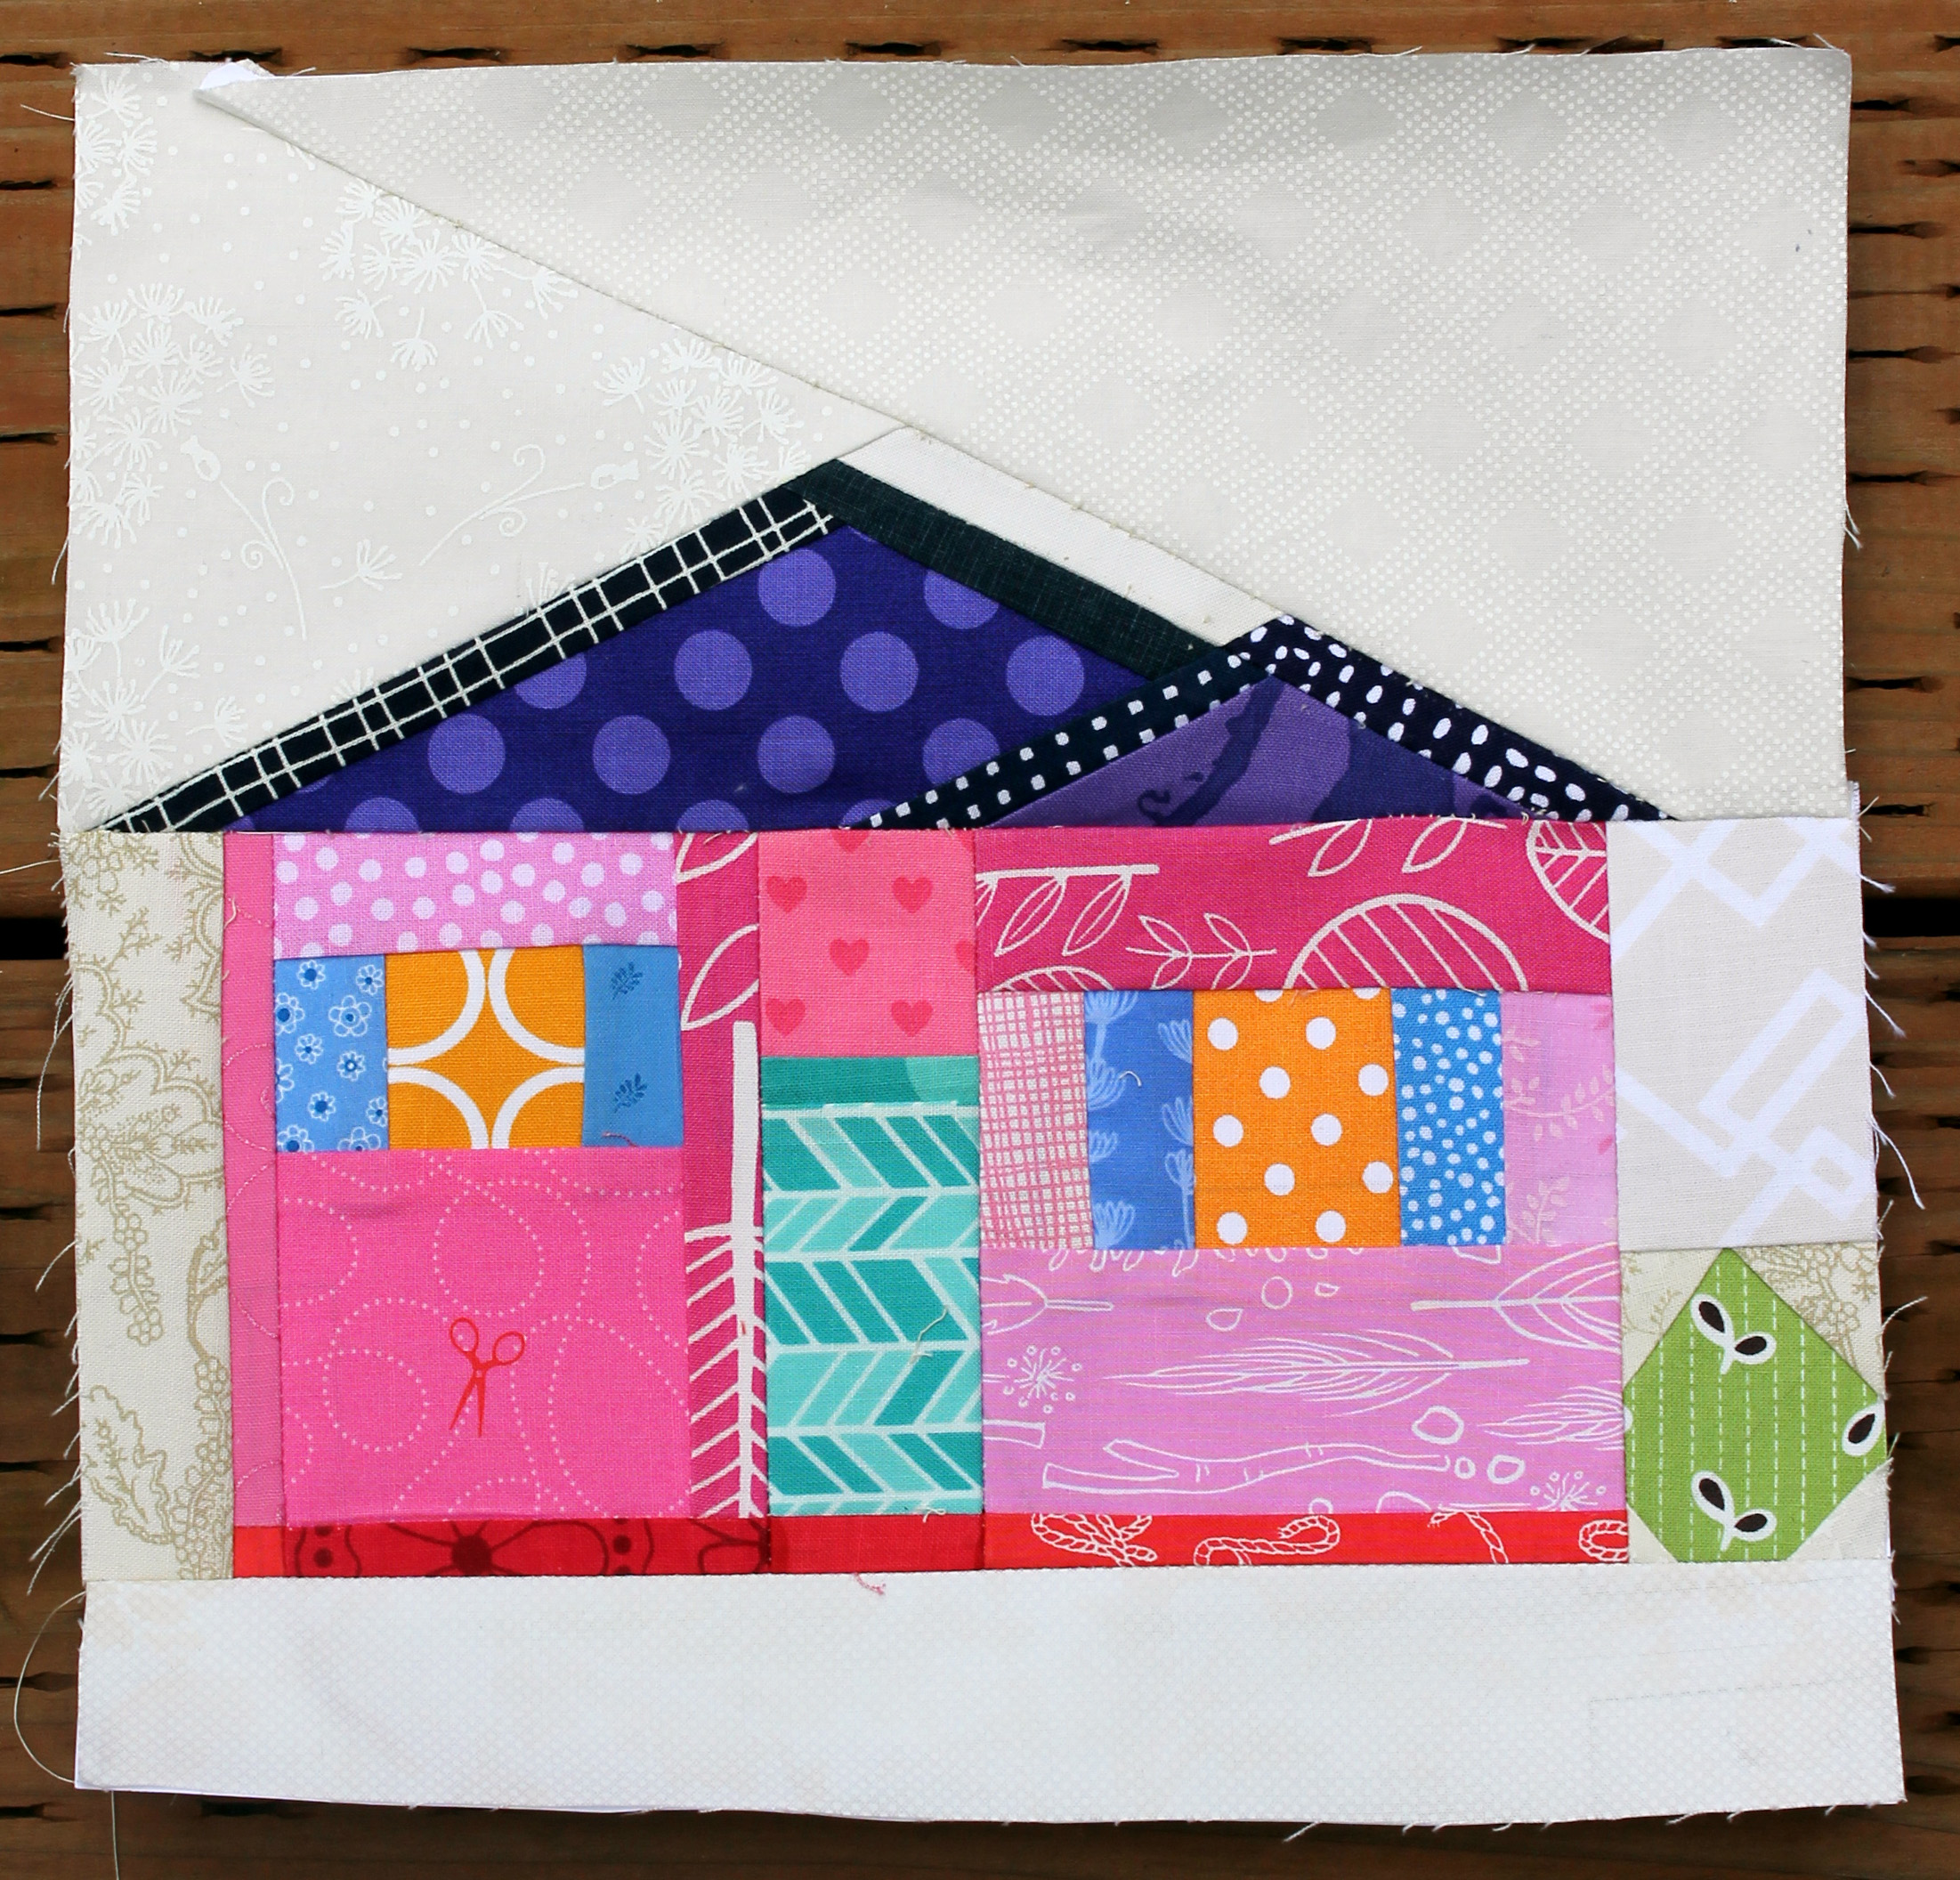
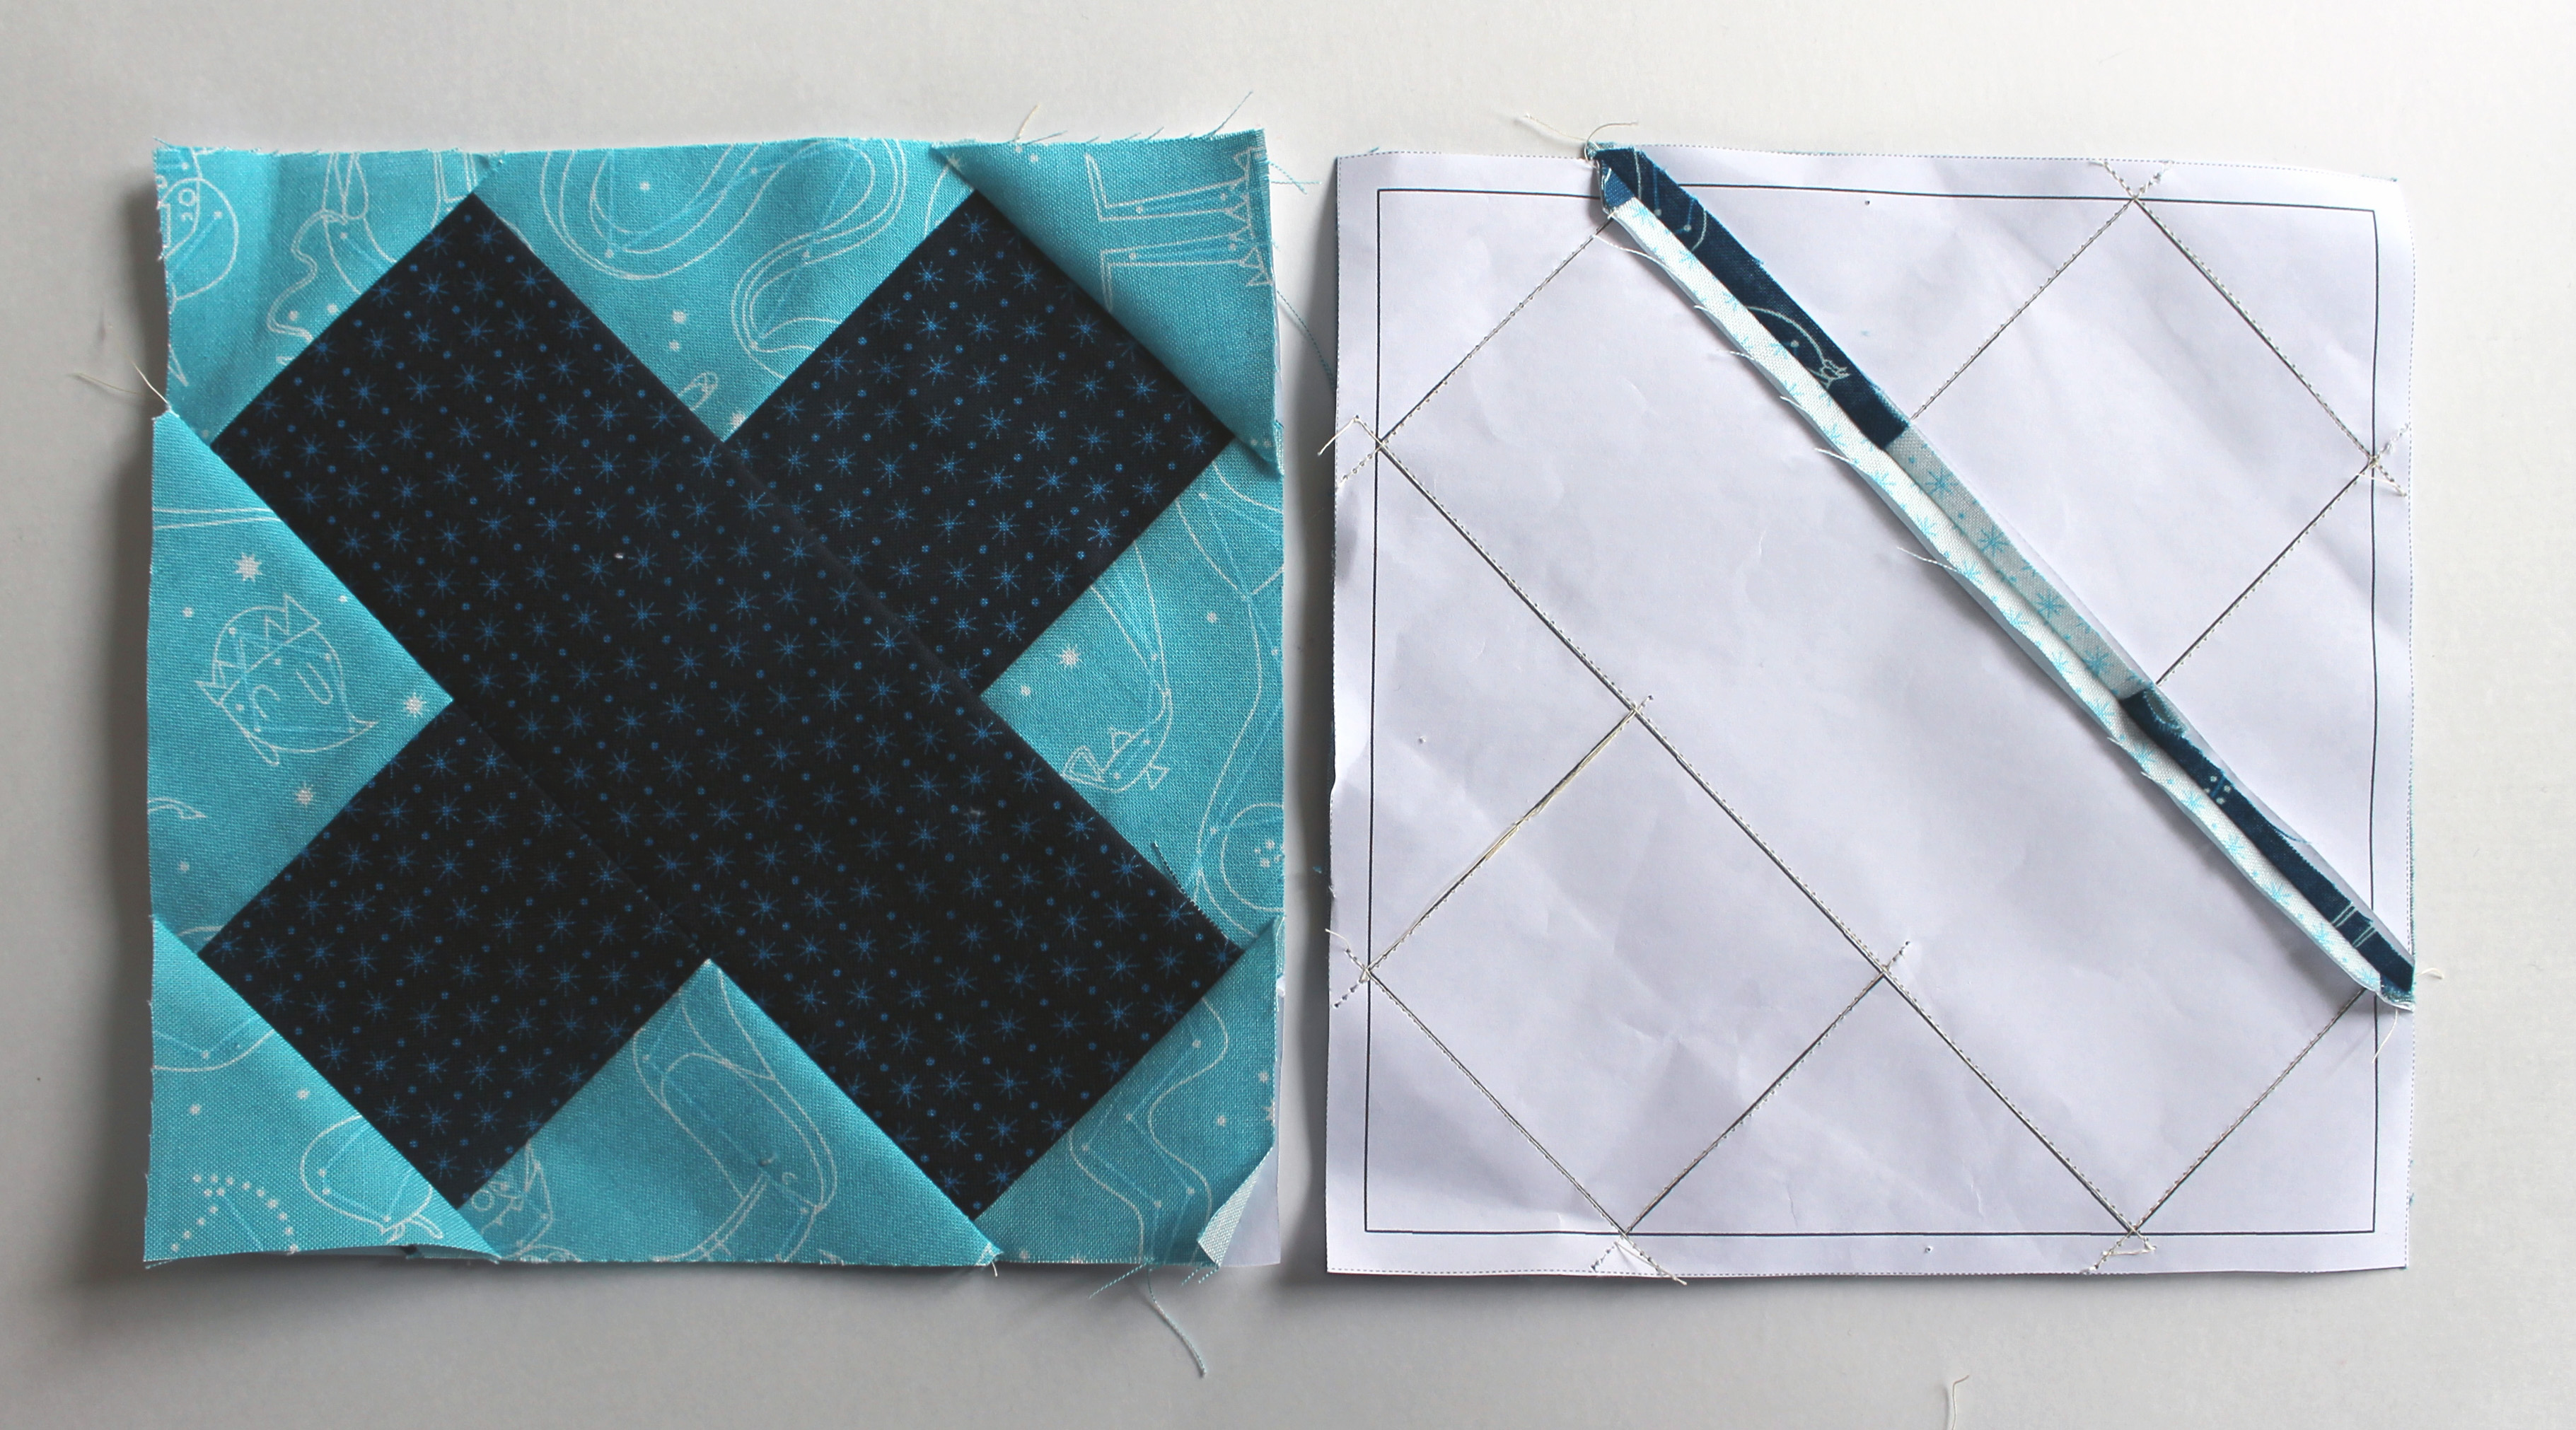
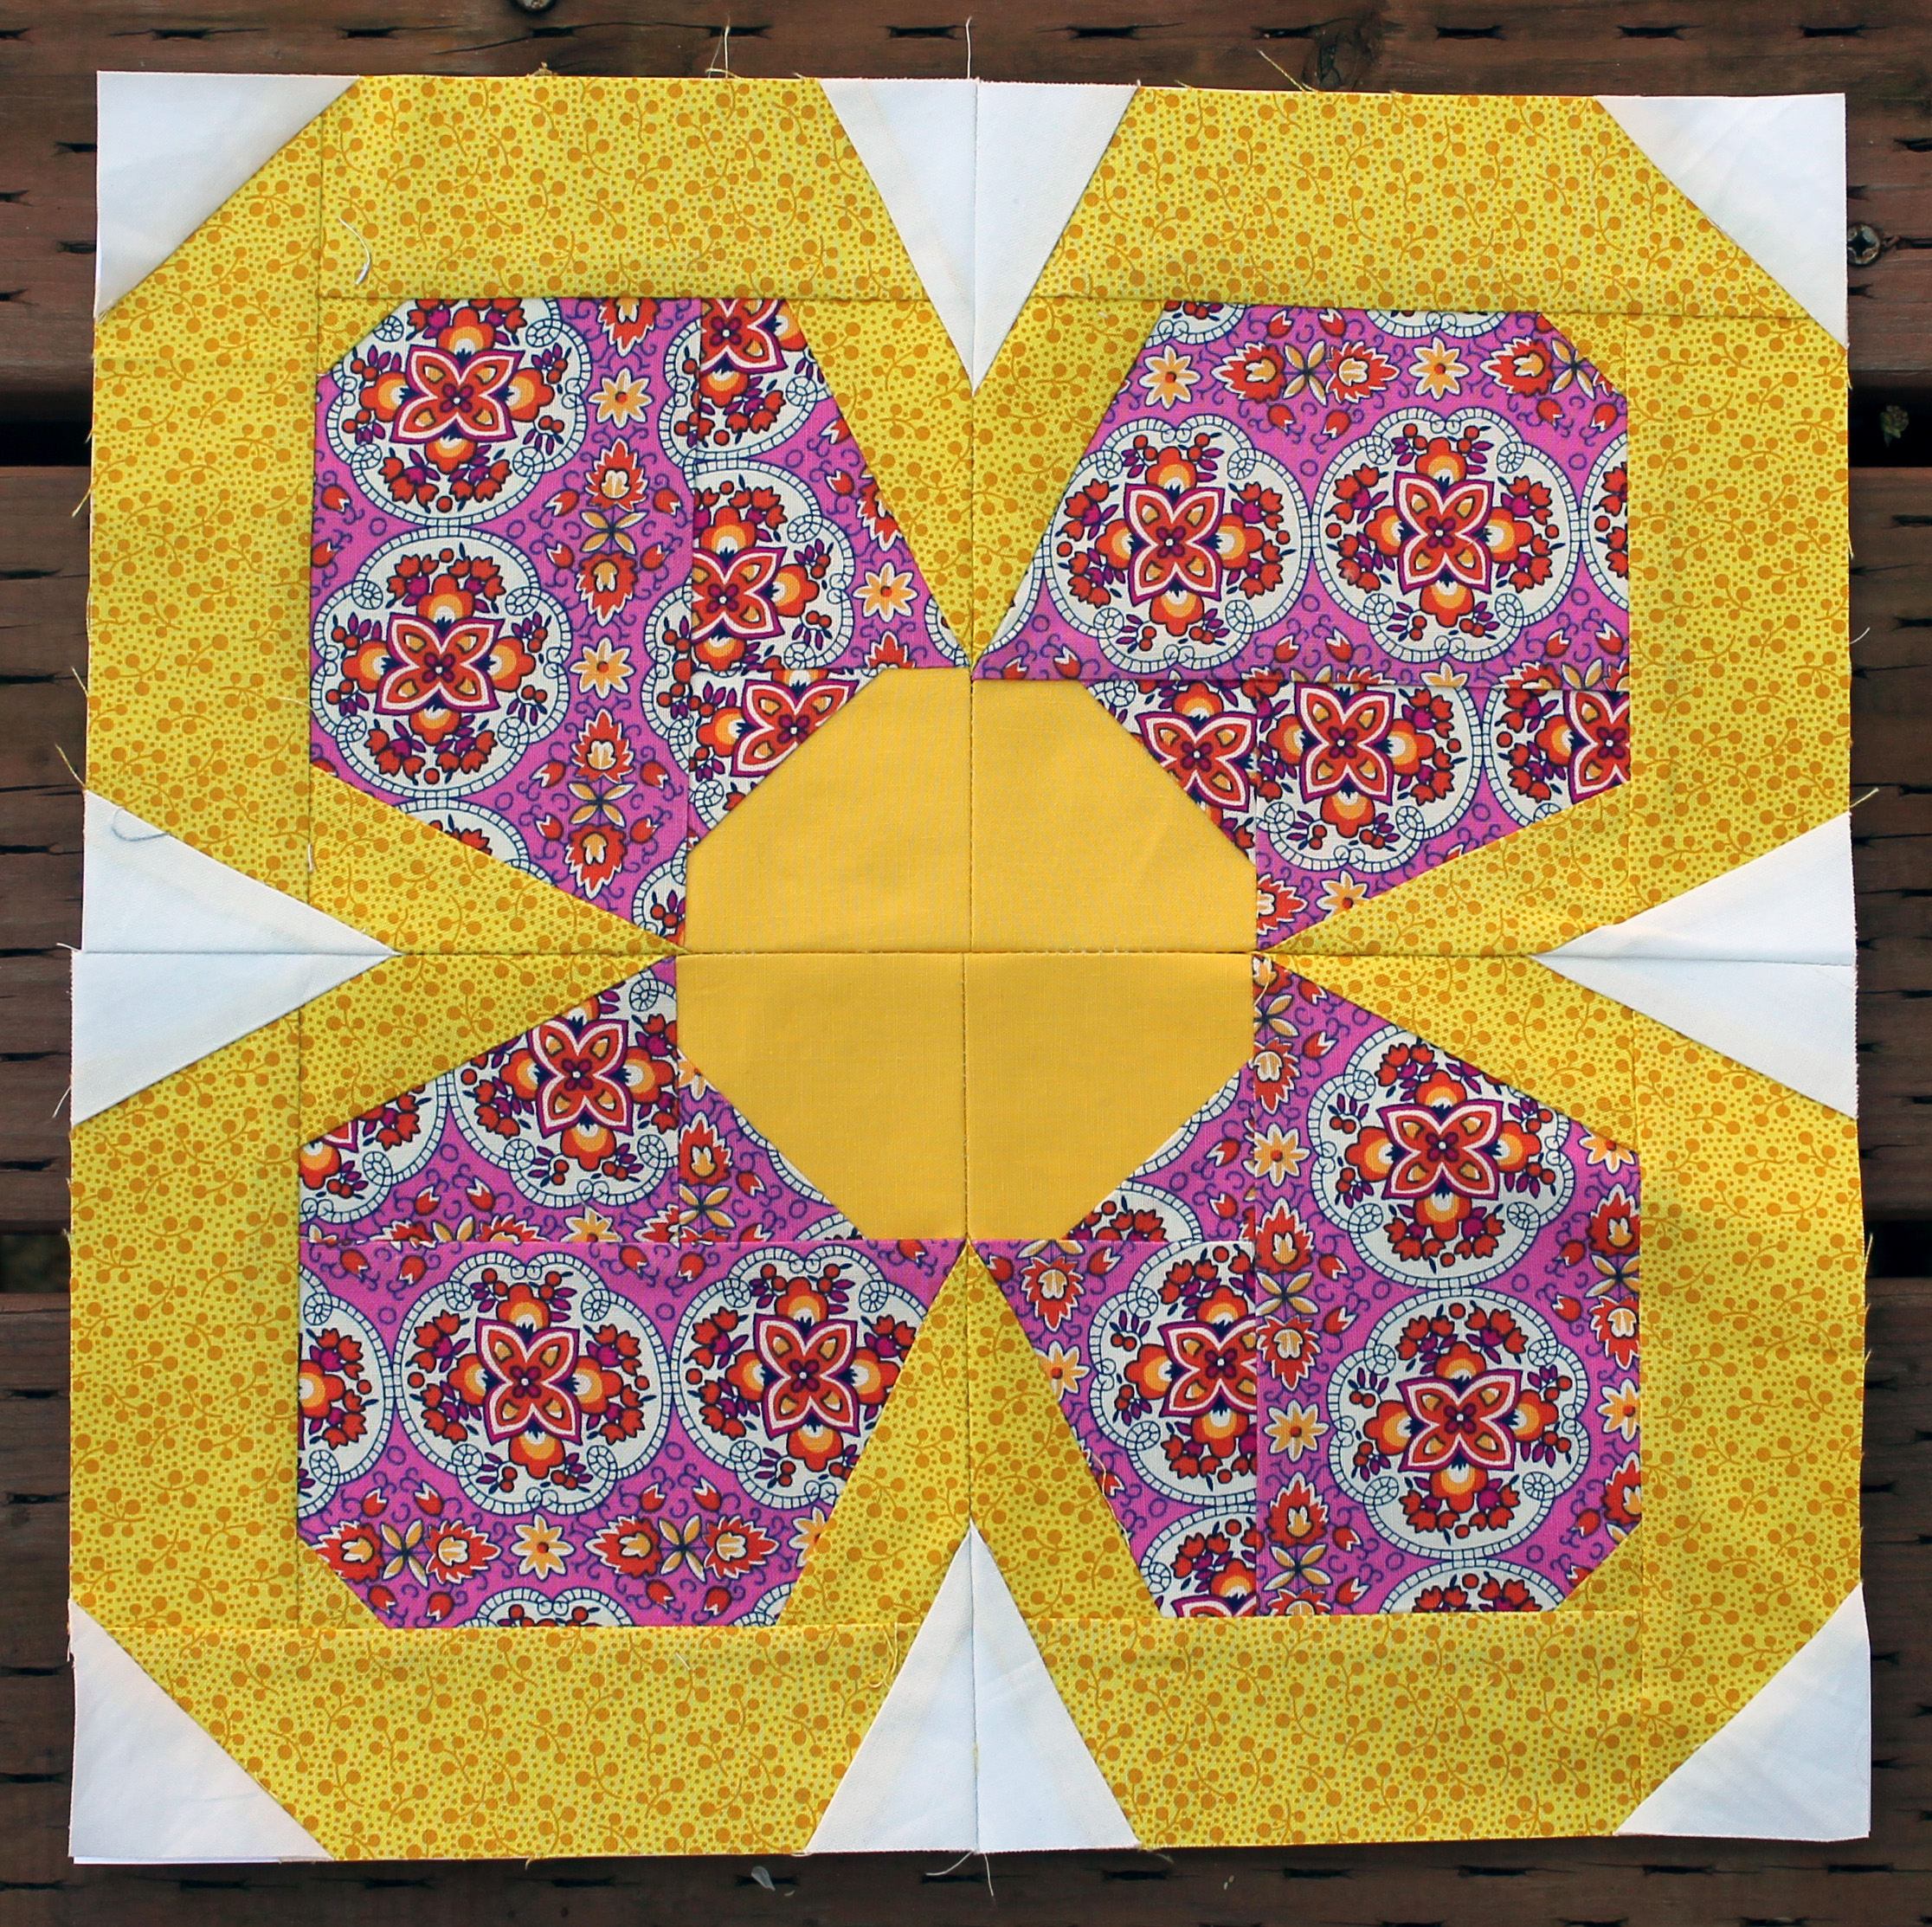
The other do.Good.stitches block that I have just finished up is the fabulous Granny Square block by Blue Elephant Stitches.

Granny Square 1
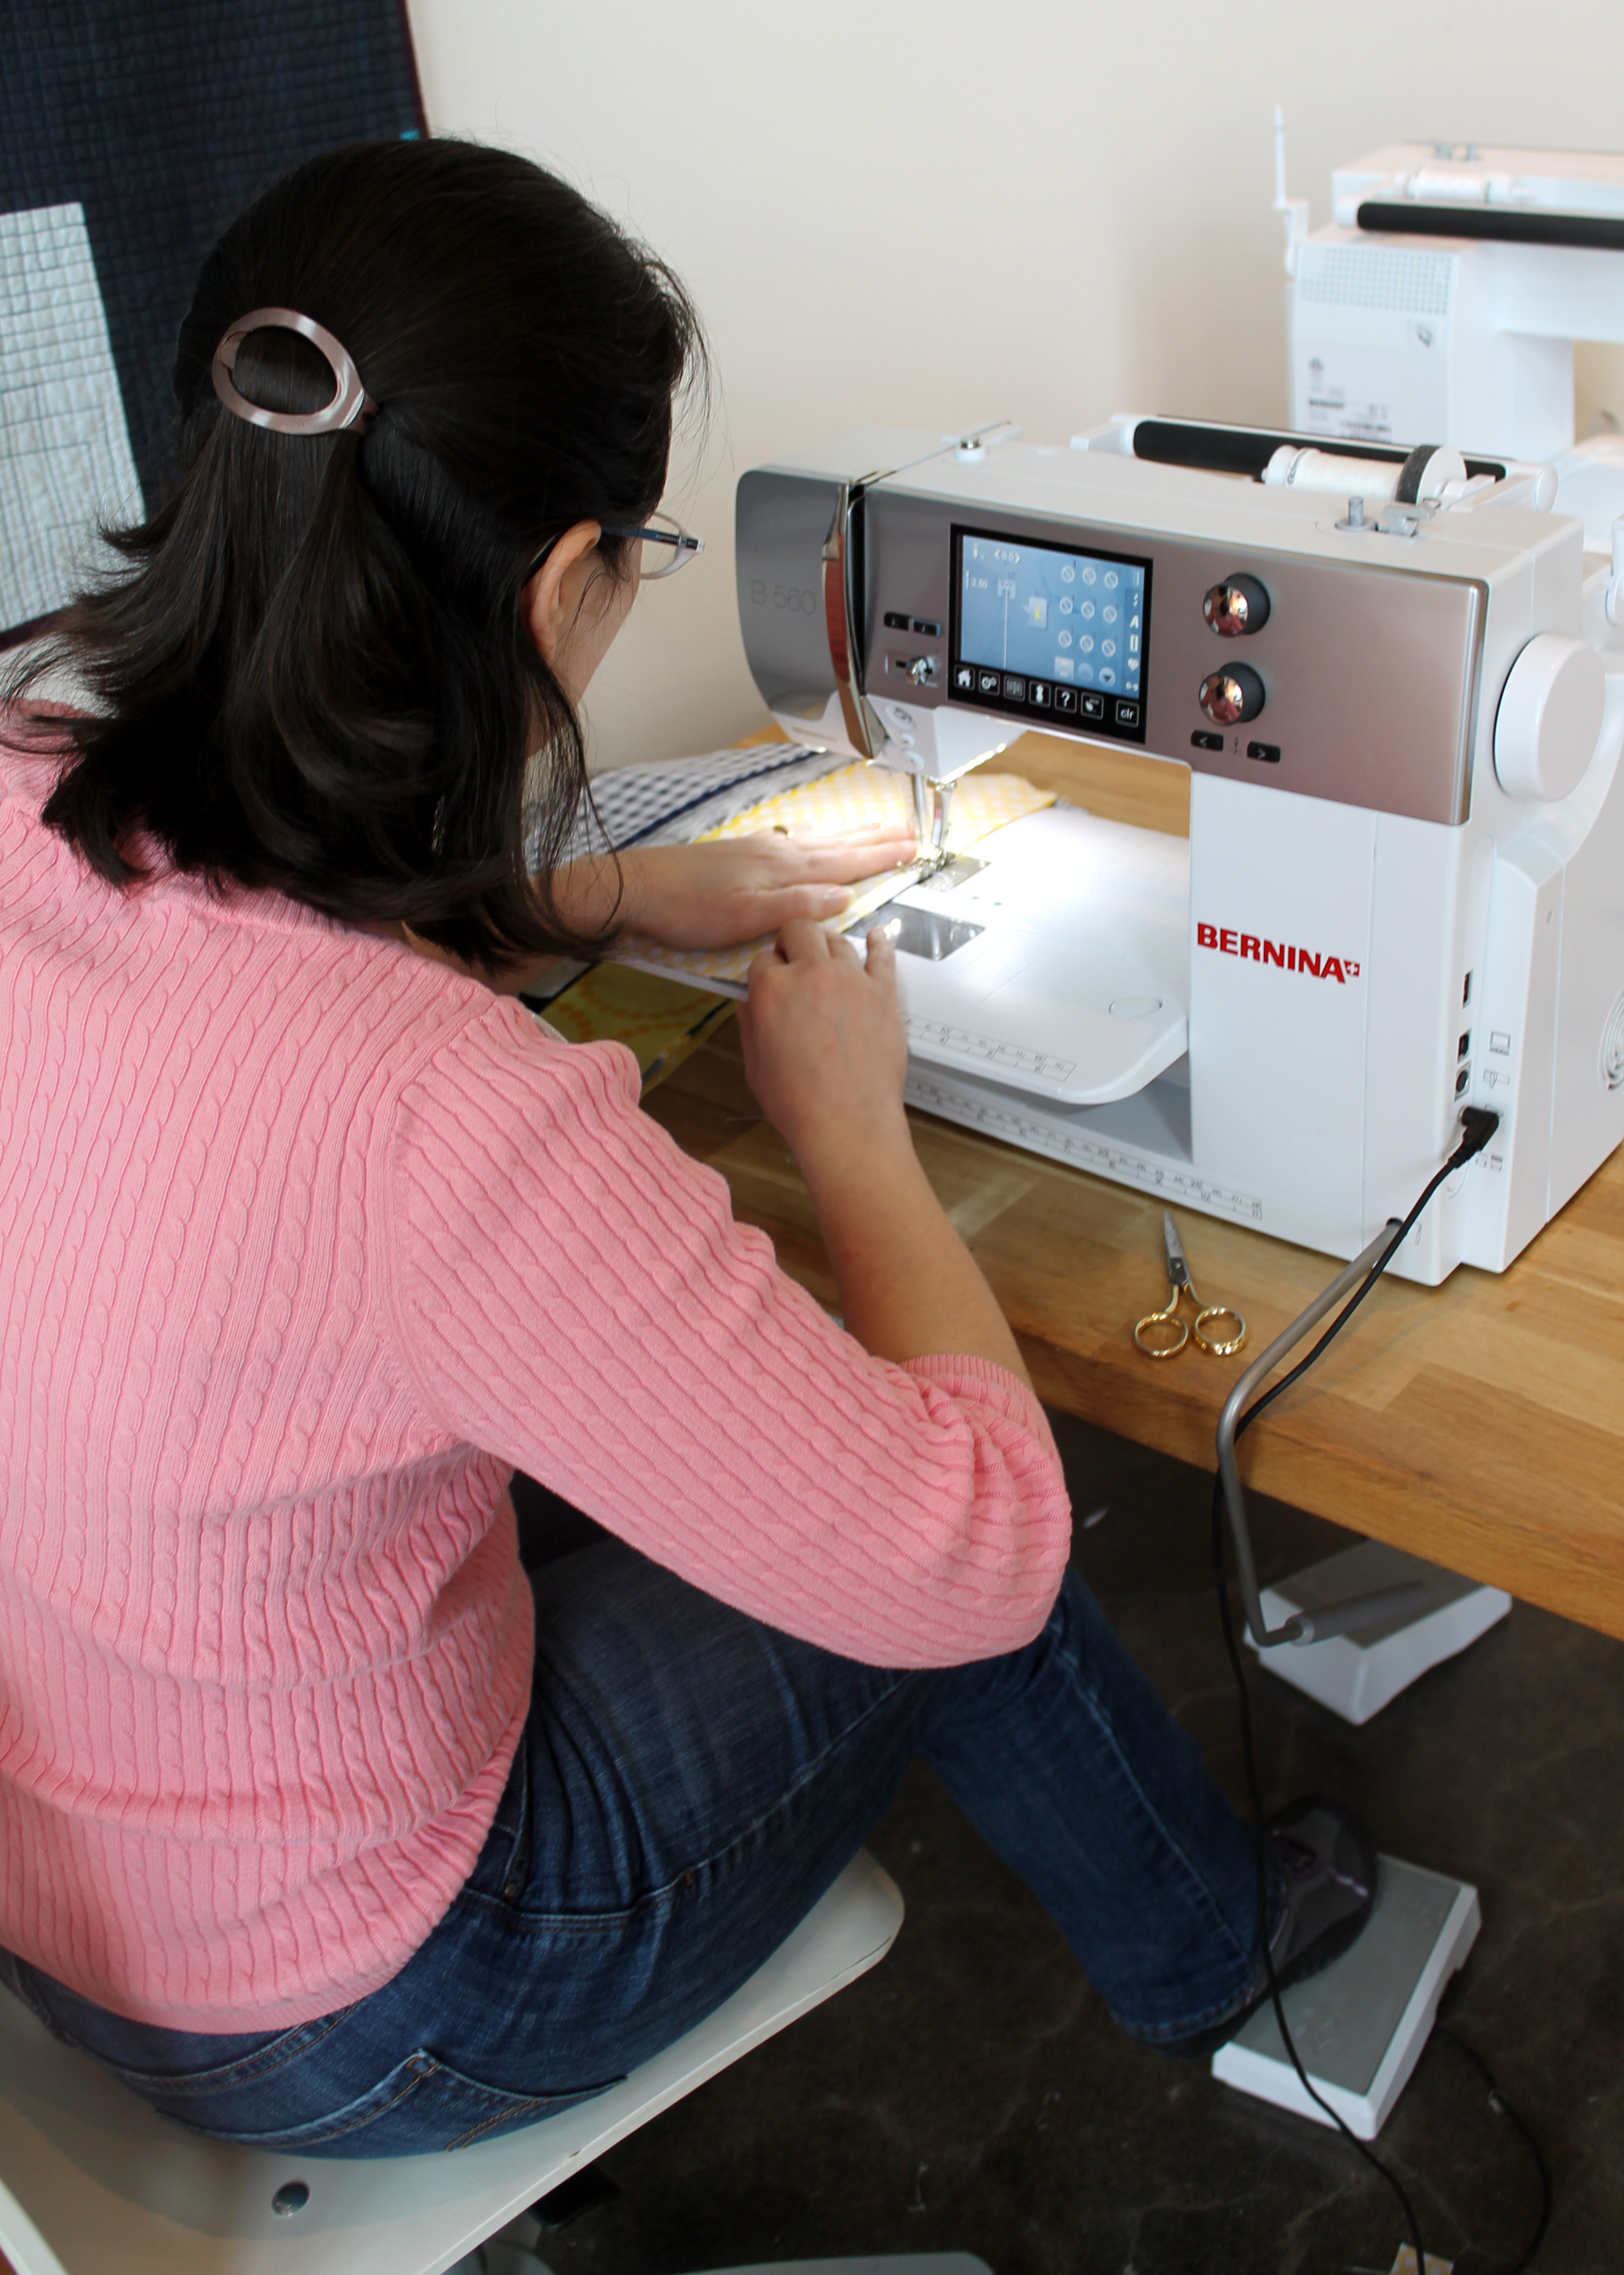
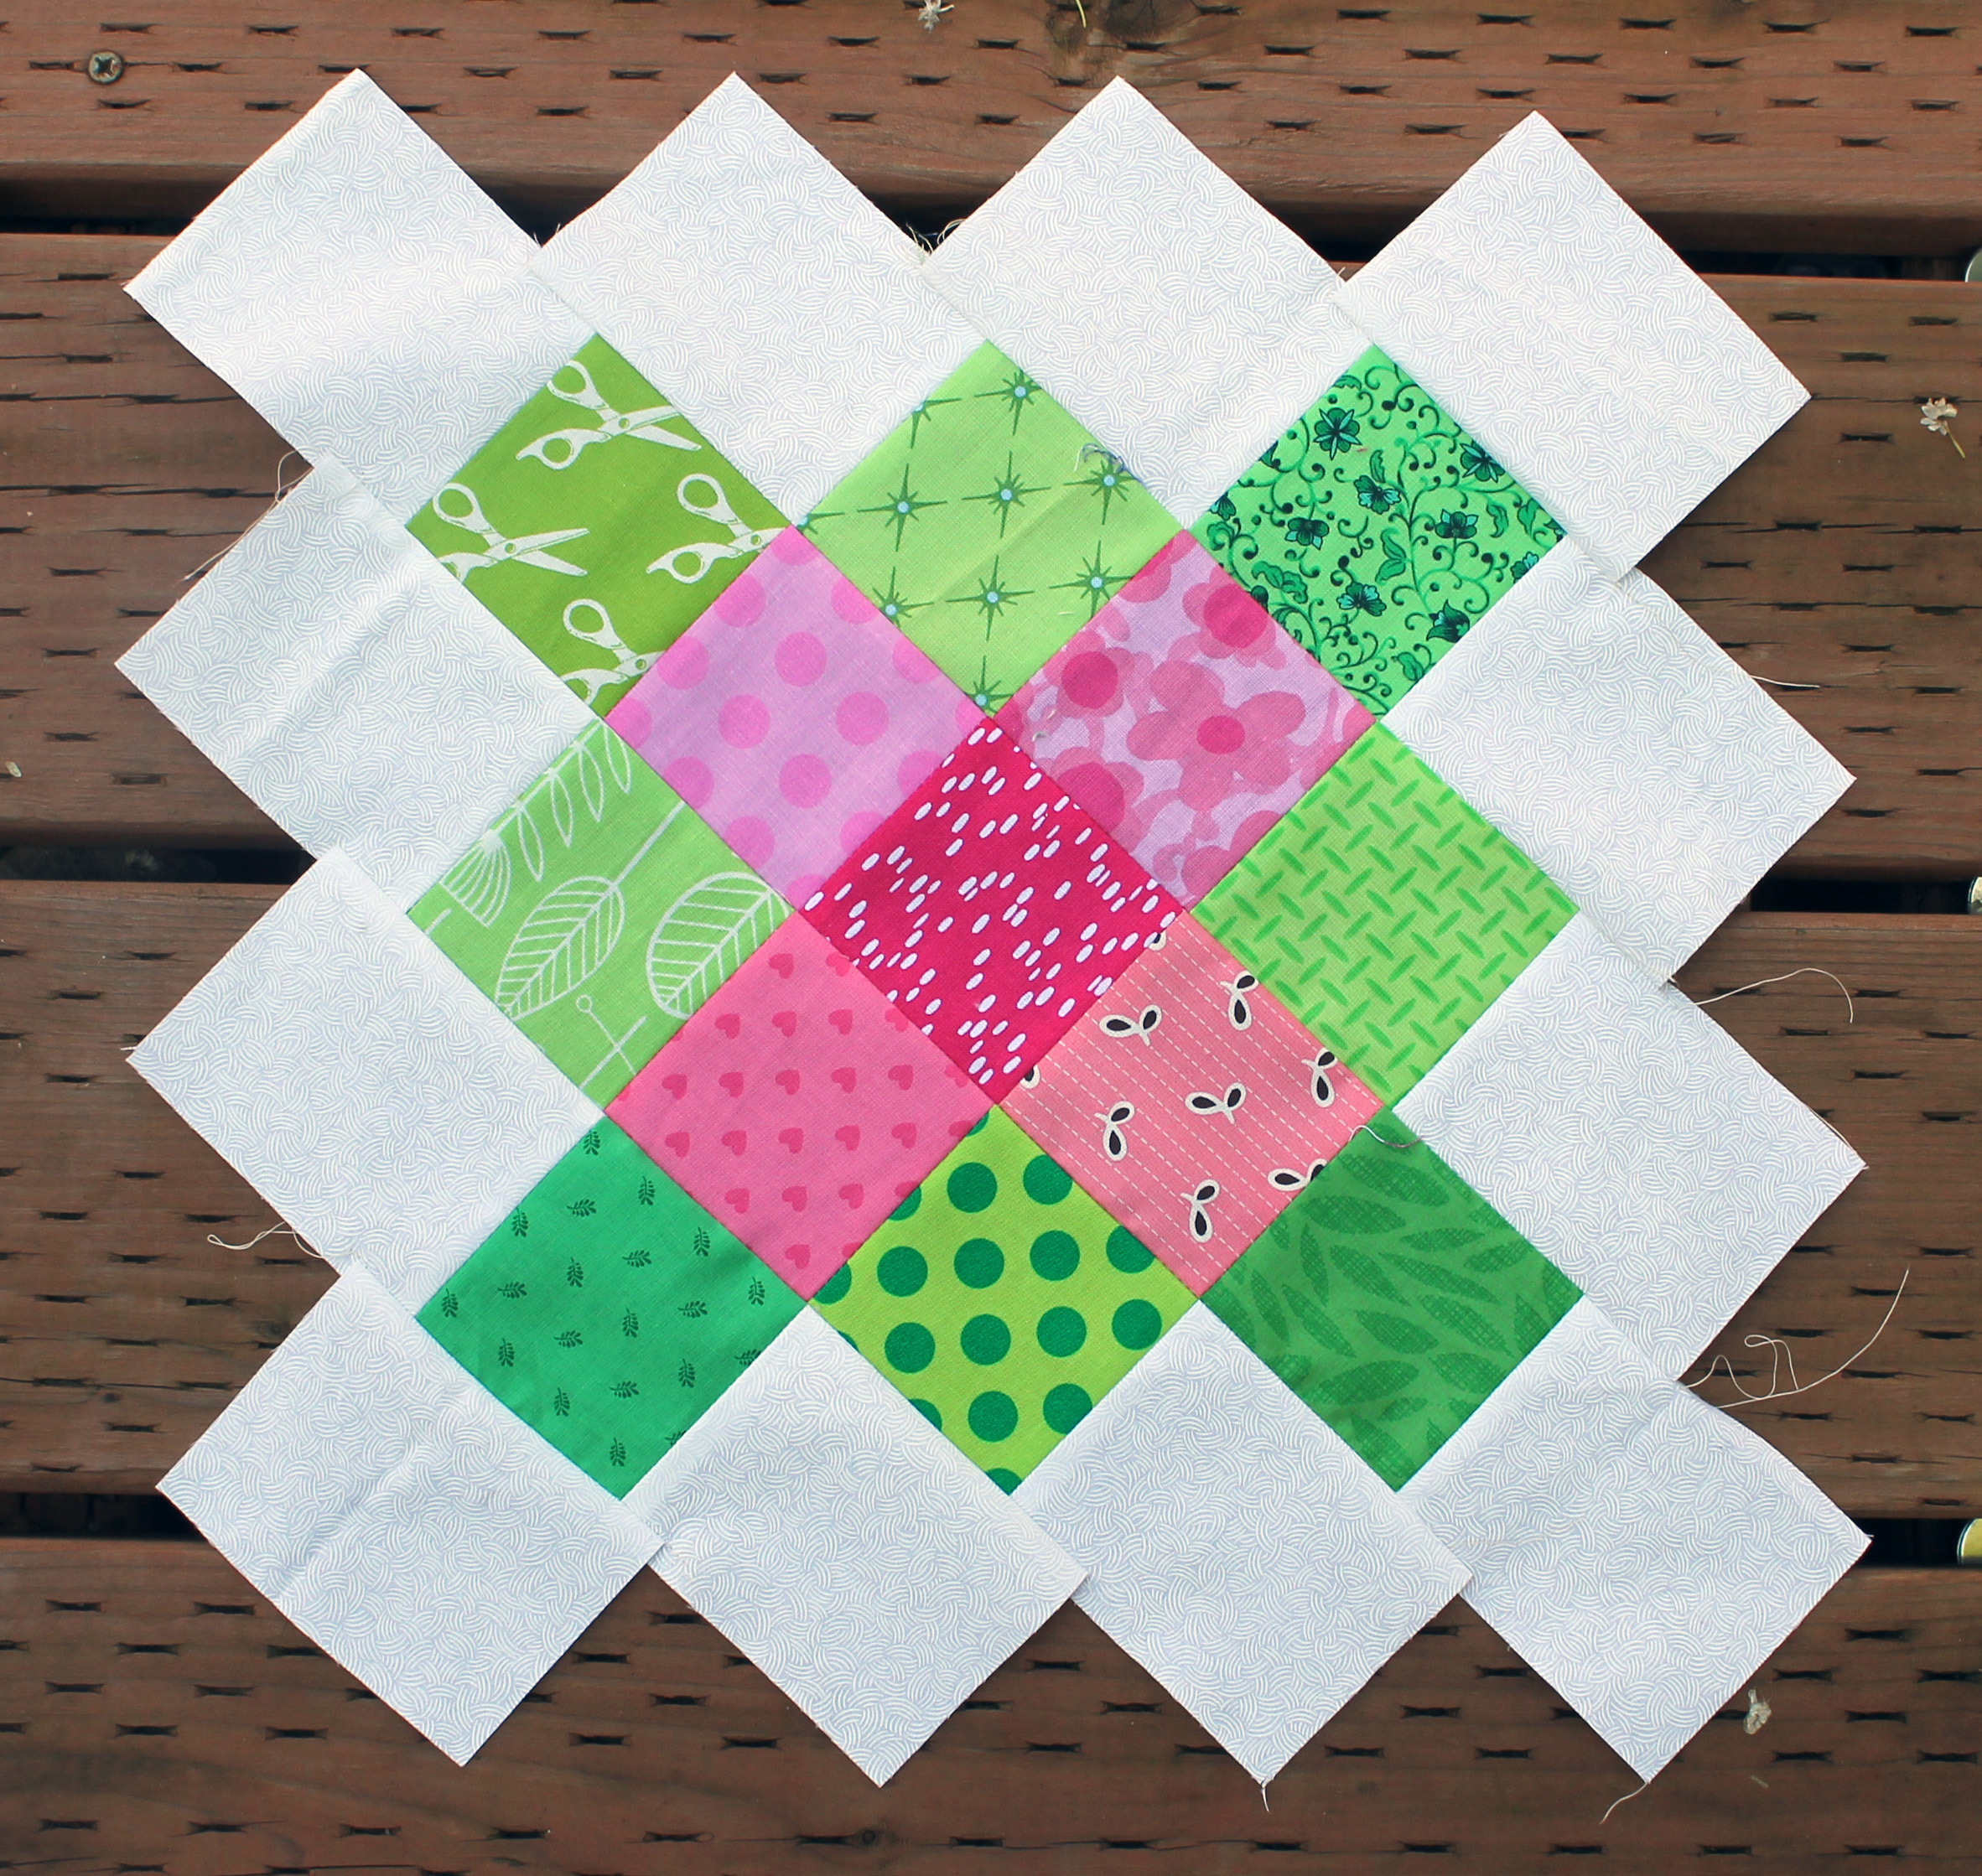
I have made this block a couple of times but love the instructions that my fellow Bee member added… Heather told us to make the white squares extra long… we added 3/4 of an inch to the pattern.  This extra wiggle room makes trimming the block so much easier than the original pattern.

Granny square 2
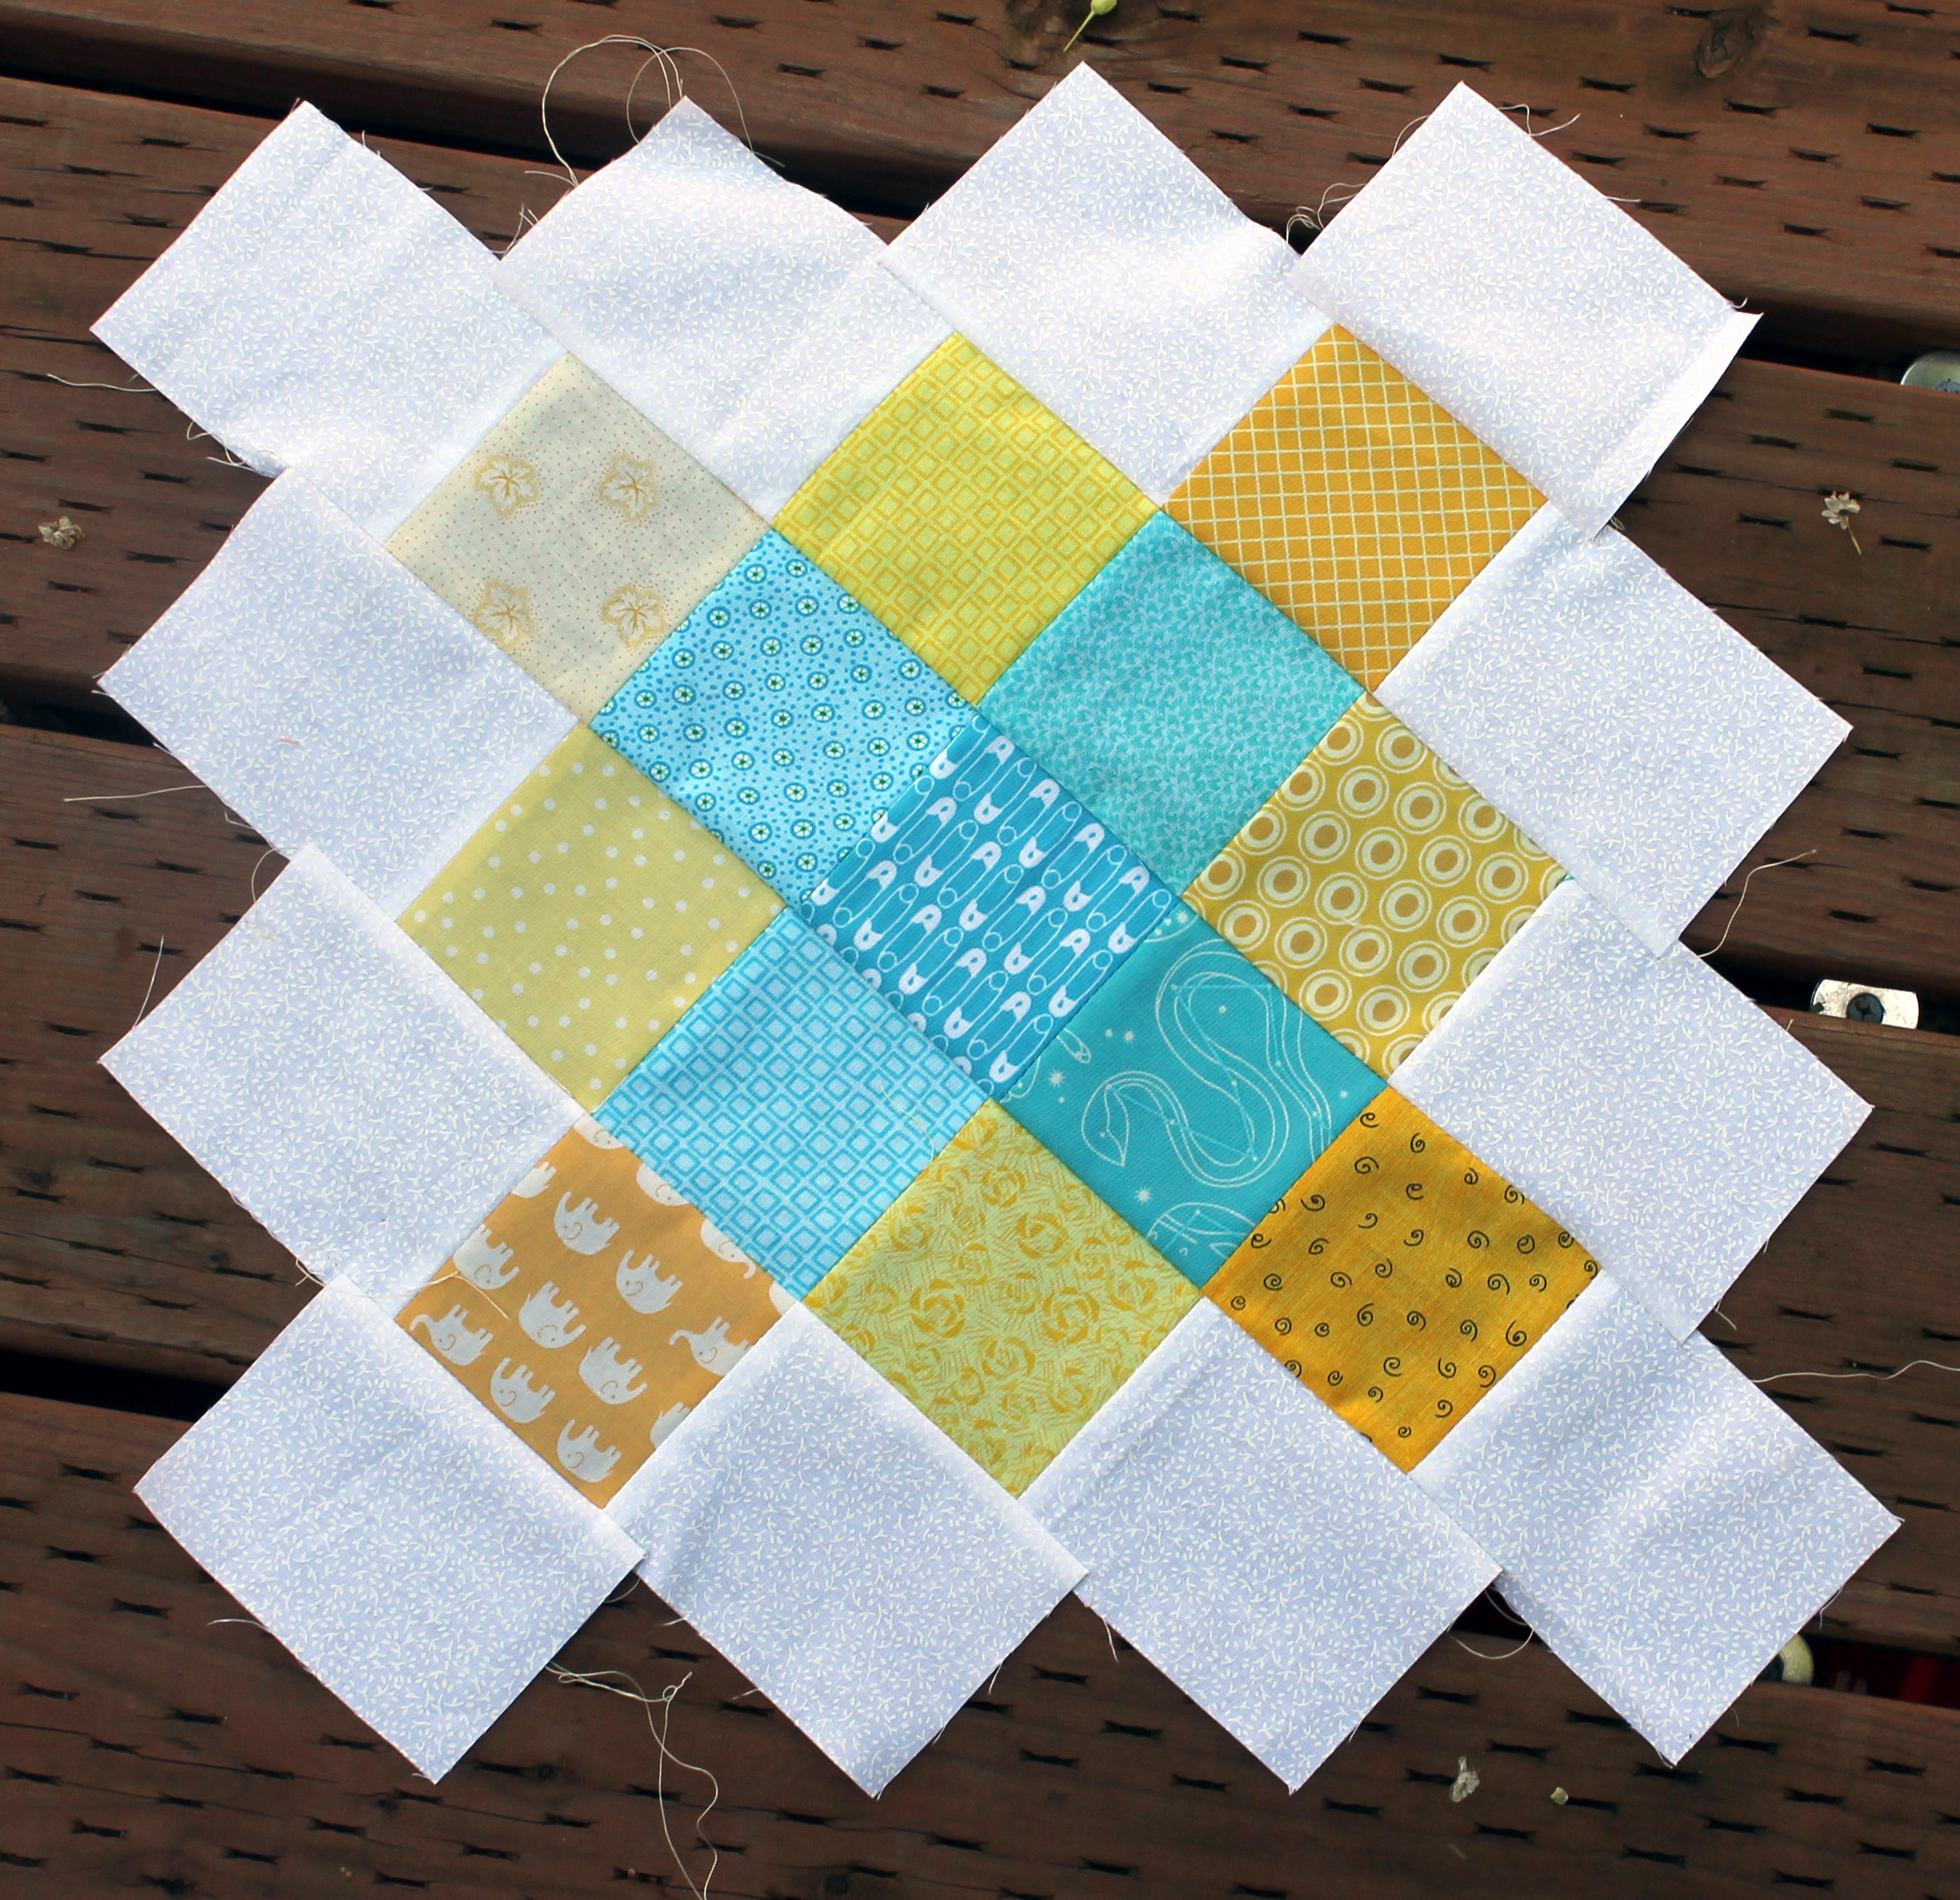
We also used 3 inch blocks instead of 2 1/2 inch squares and I am now fired up to use some of my 3 inch square scraps to make more of these blocks.  But first I have to finish my original Granny Square quilt.

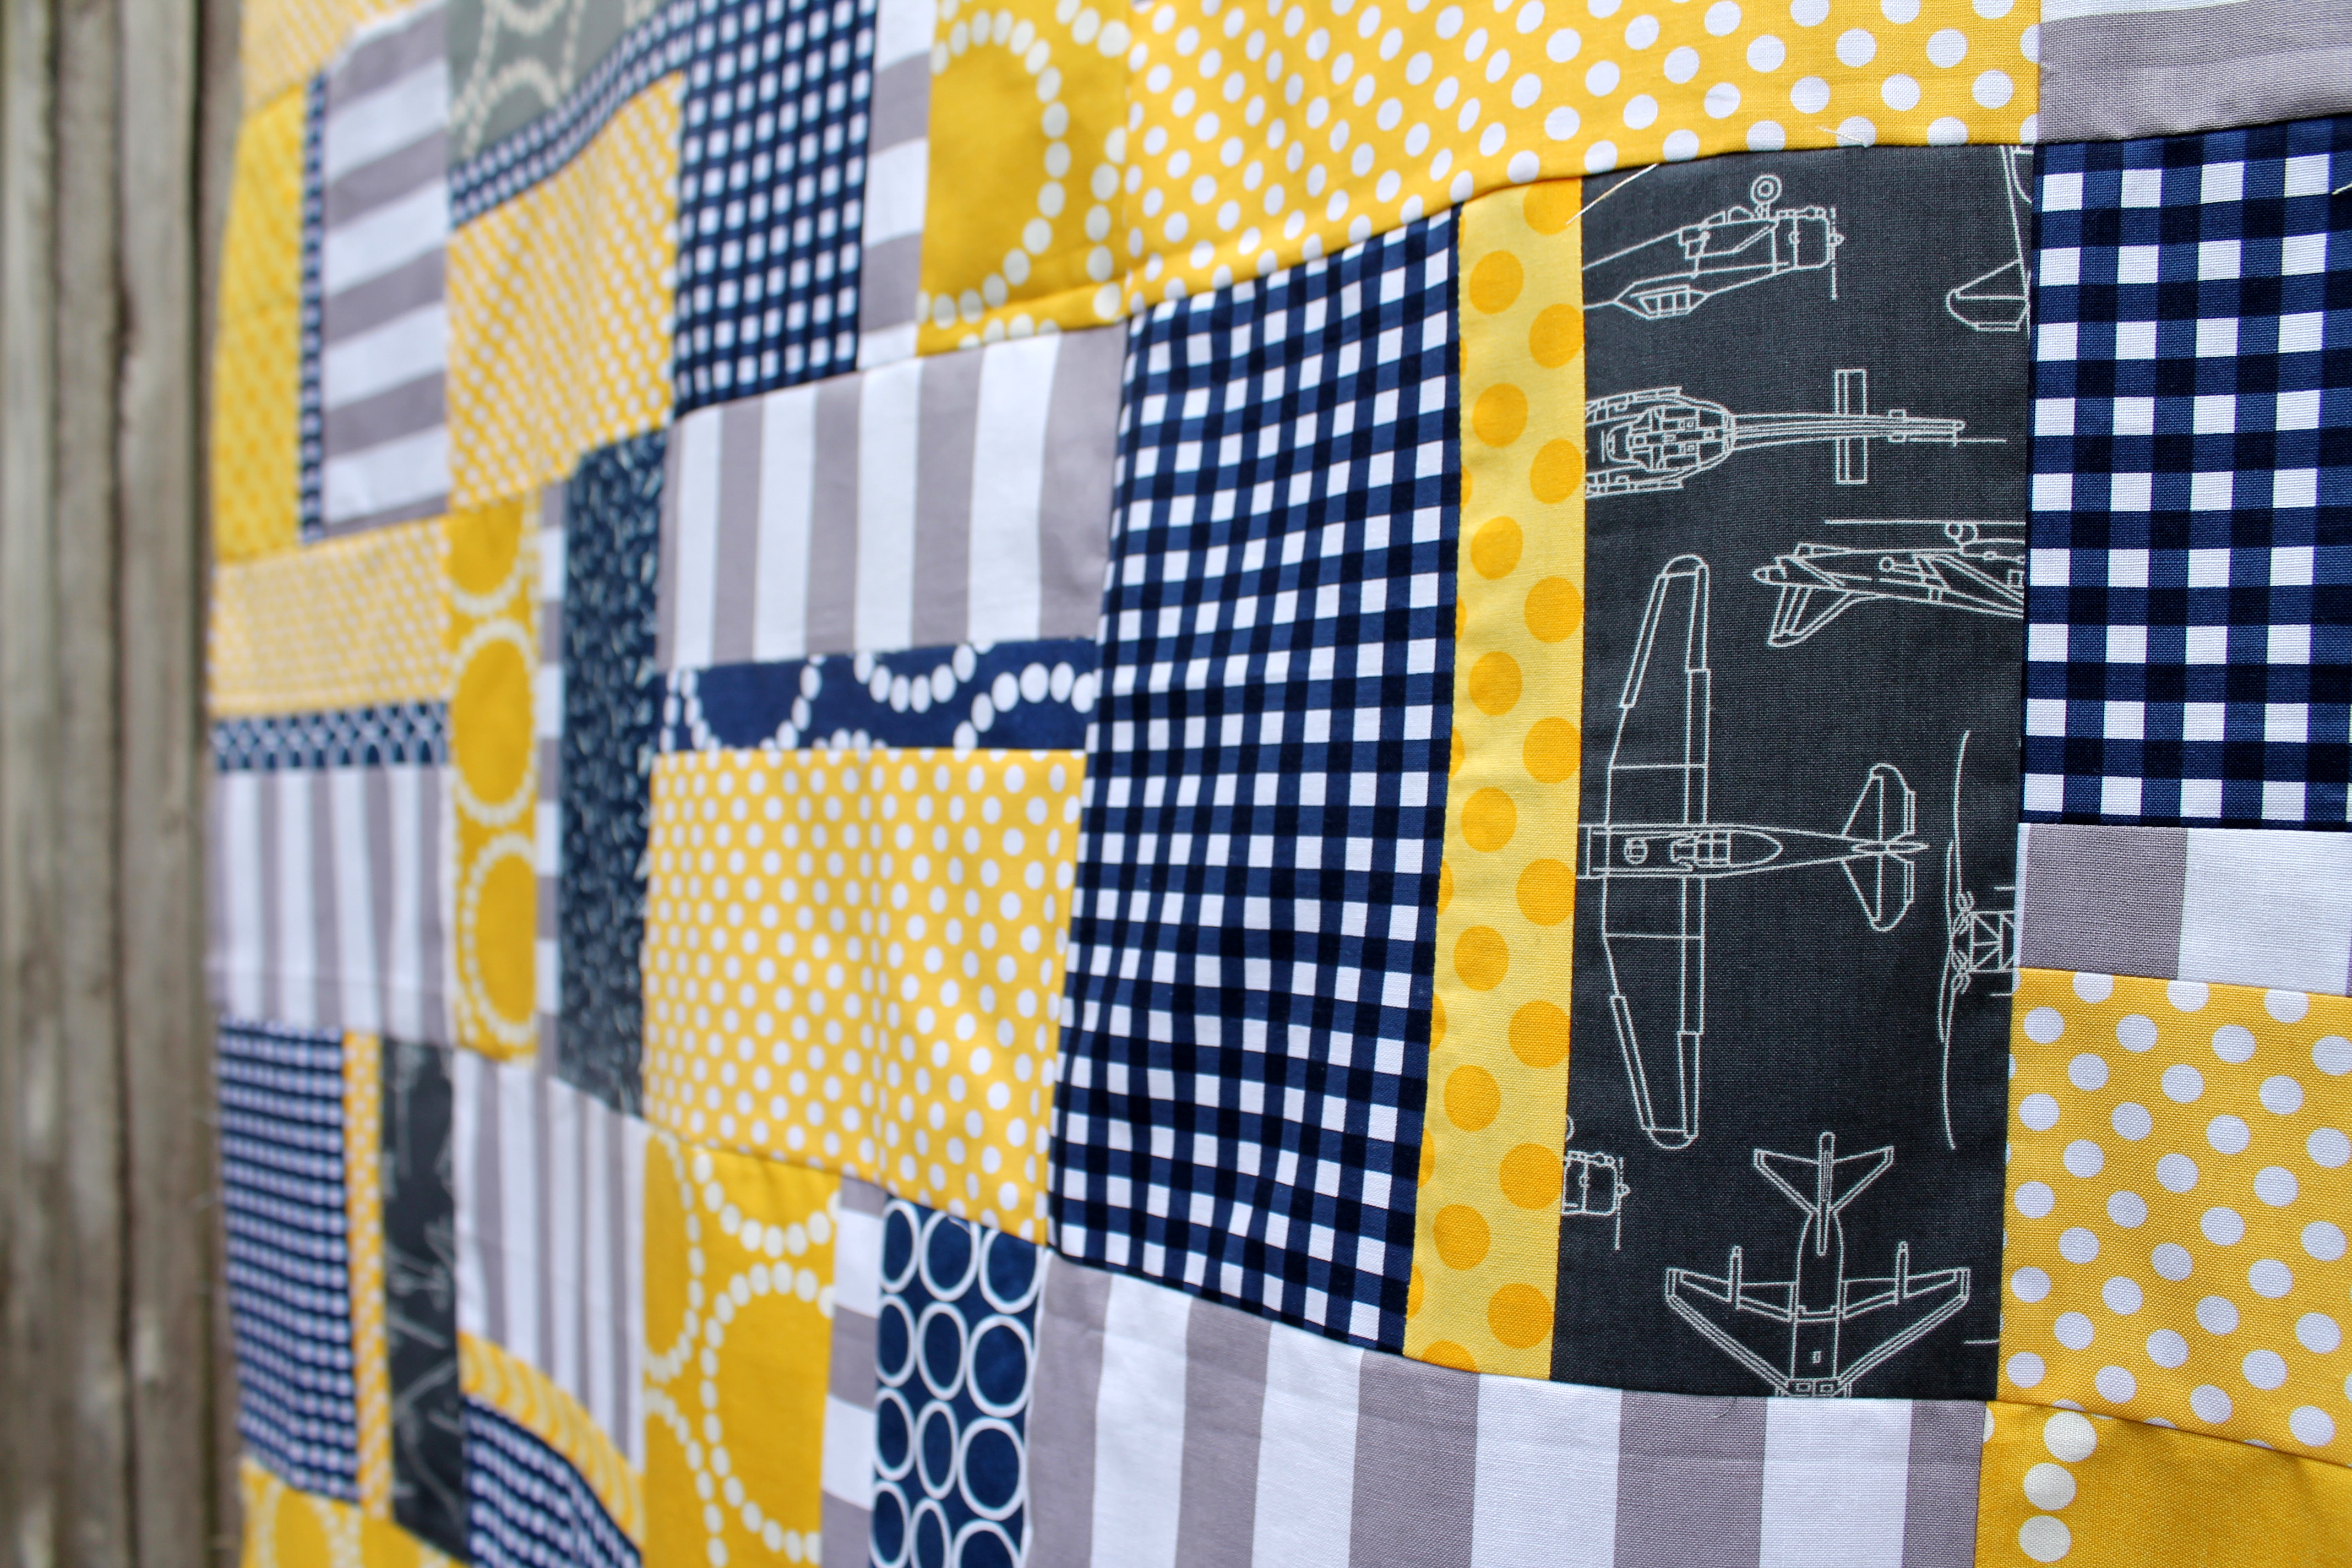
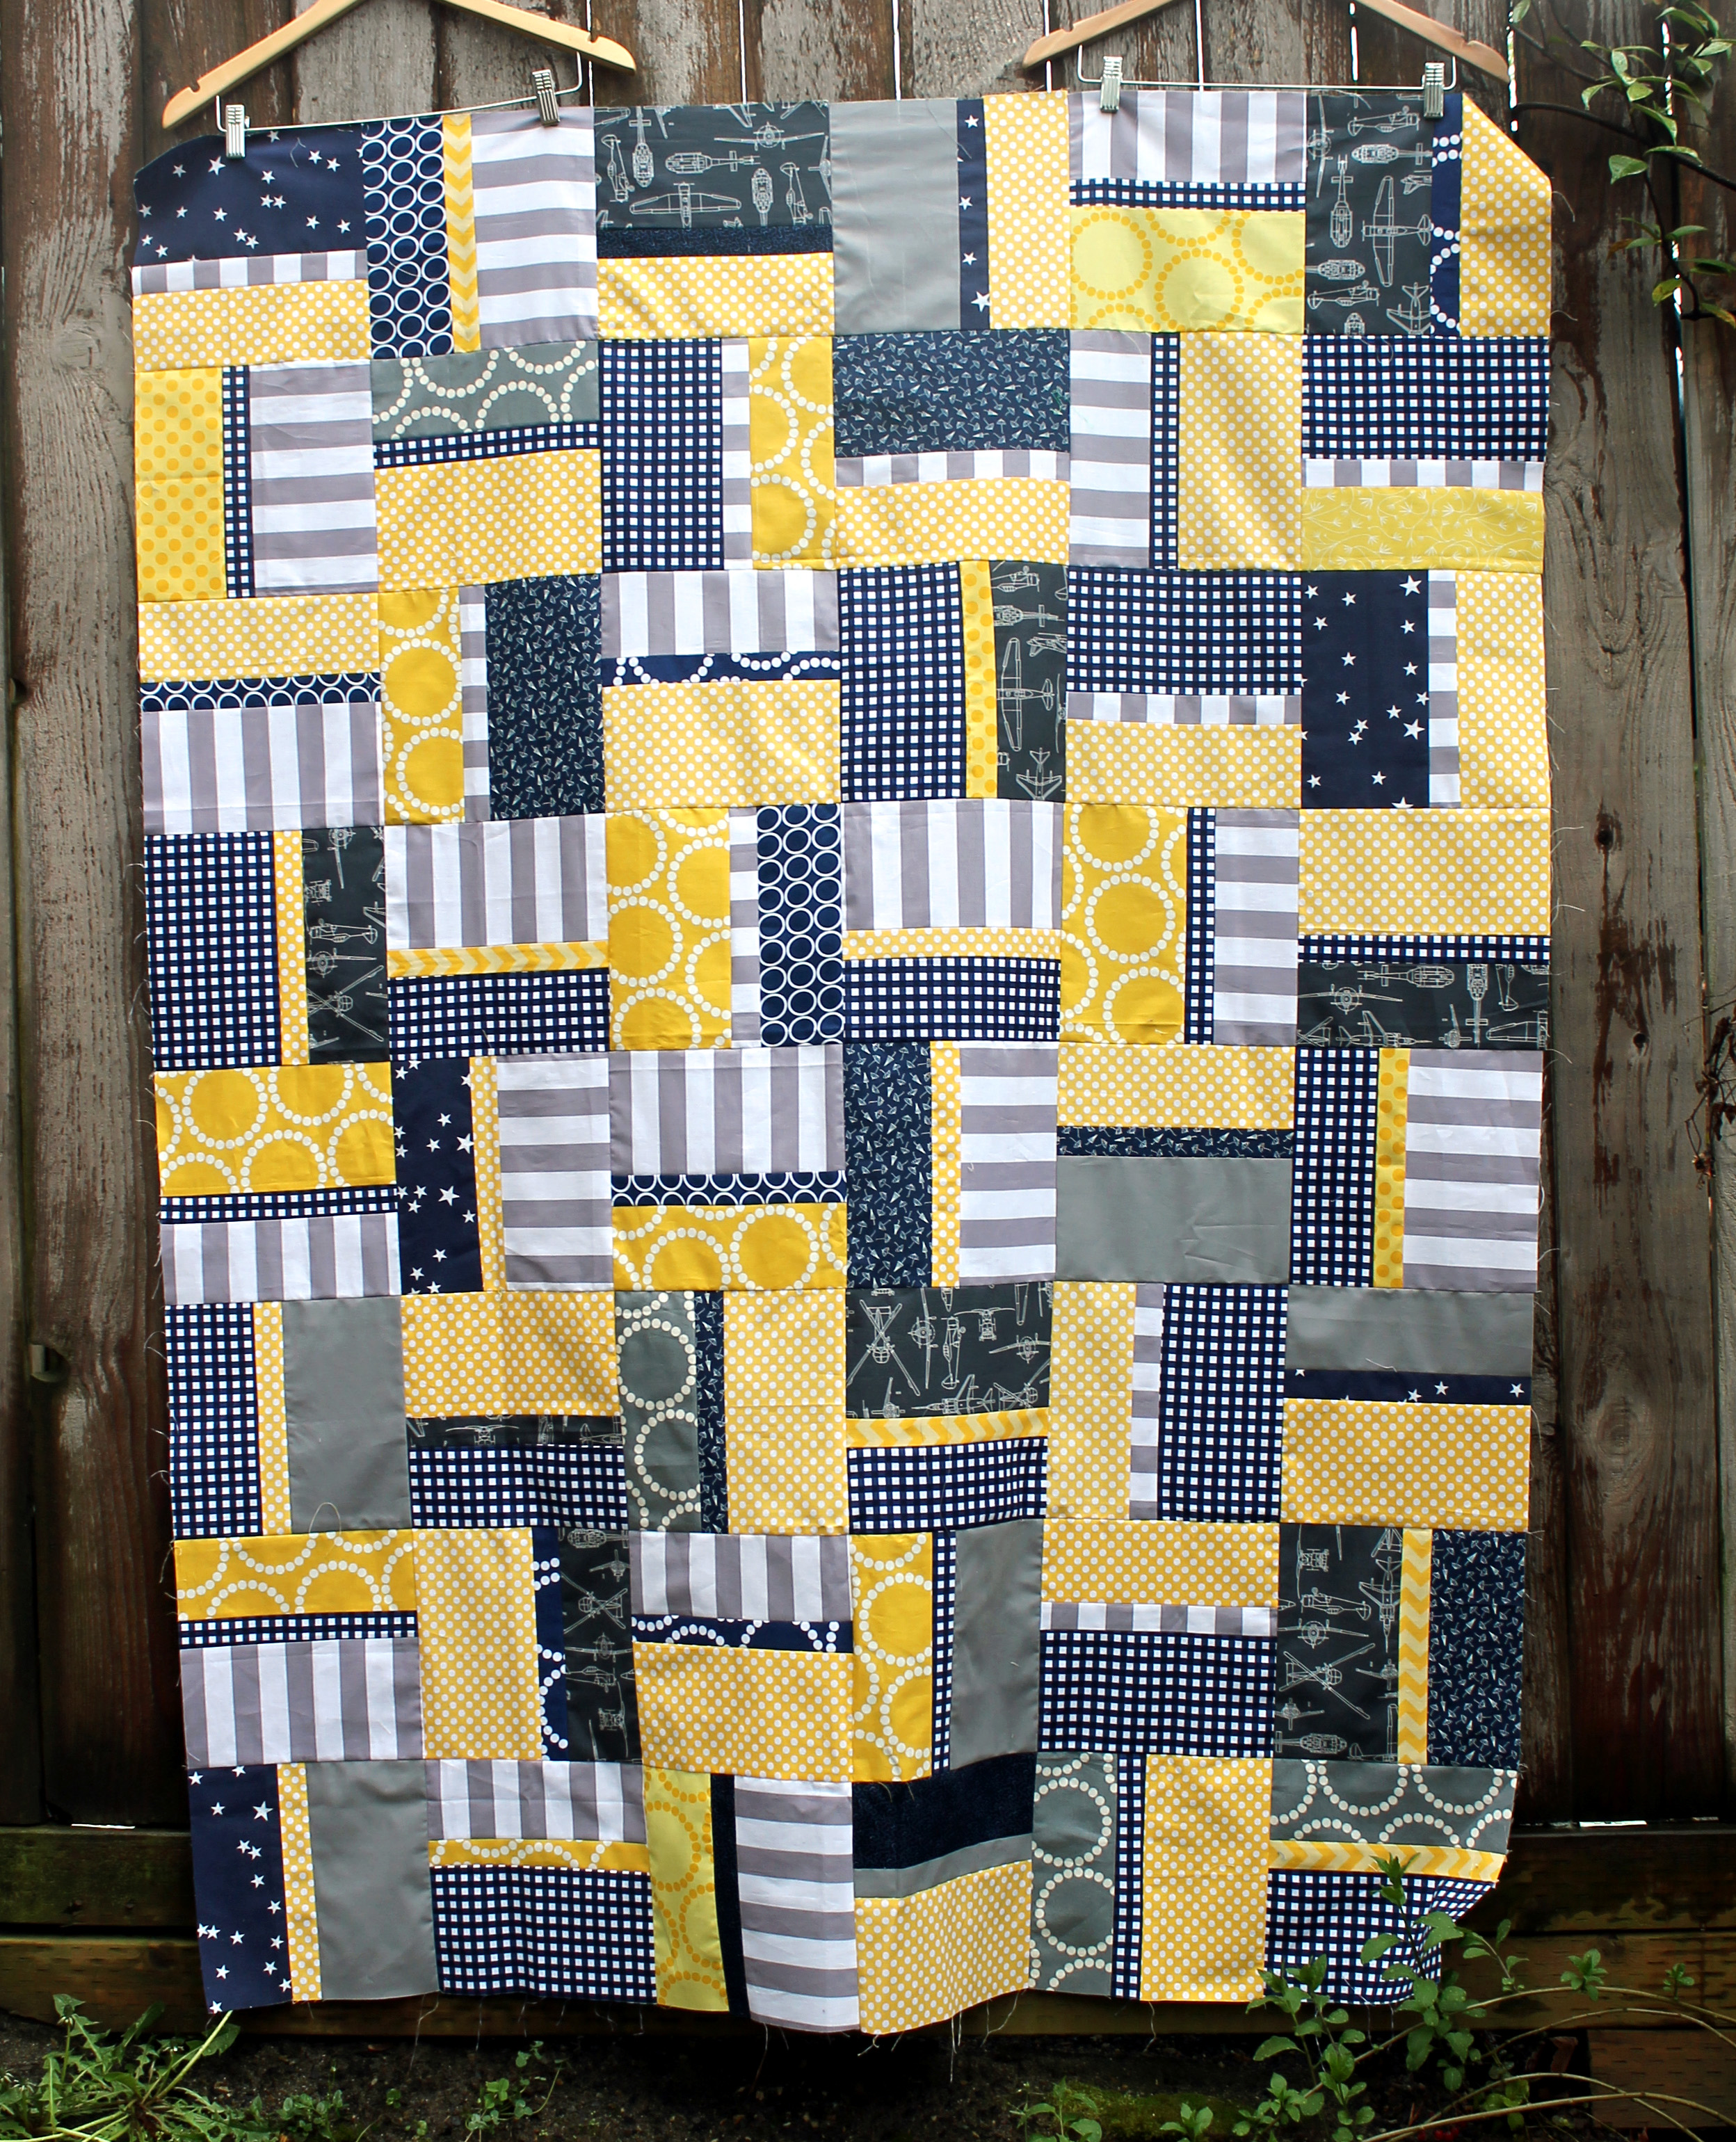
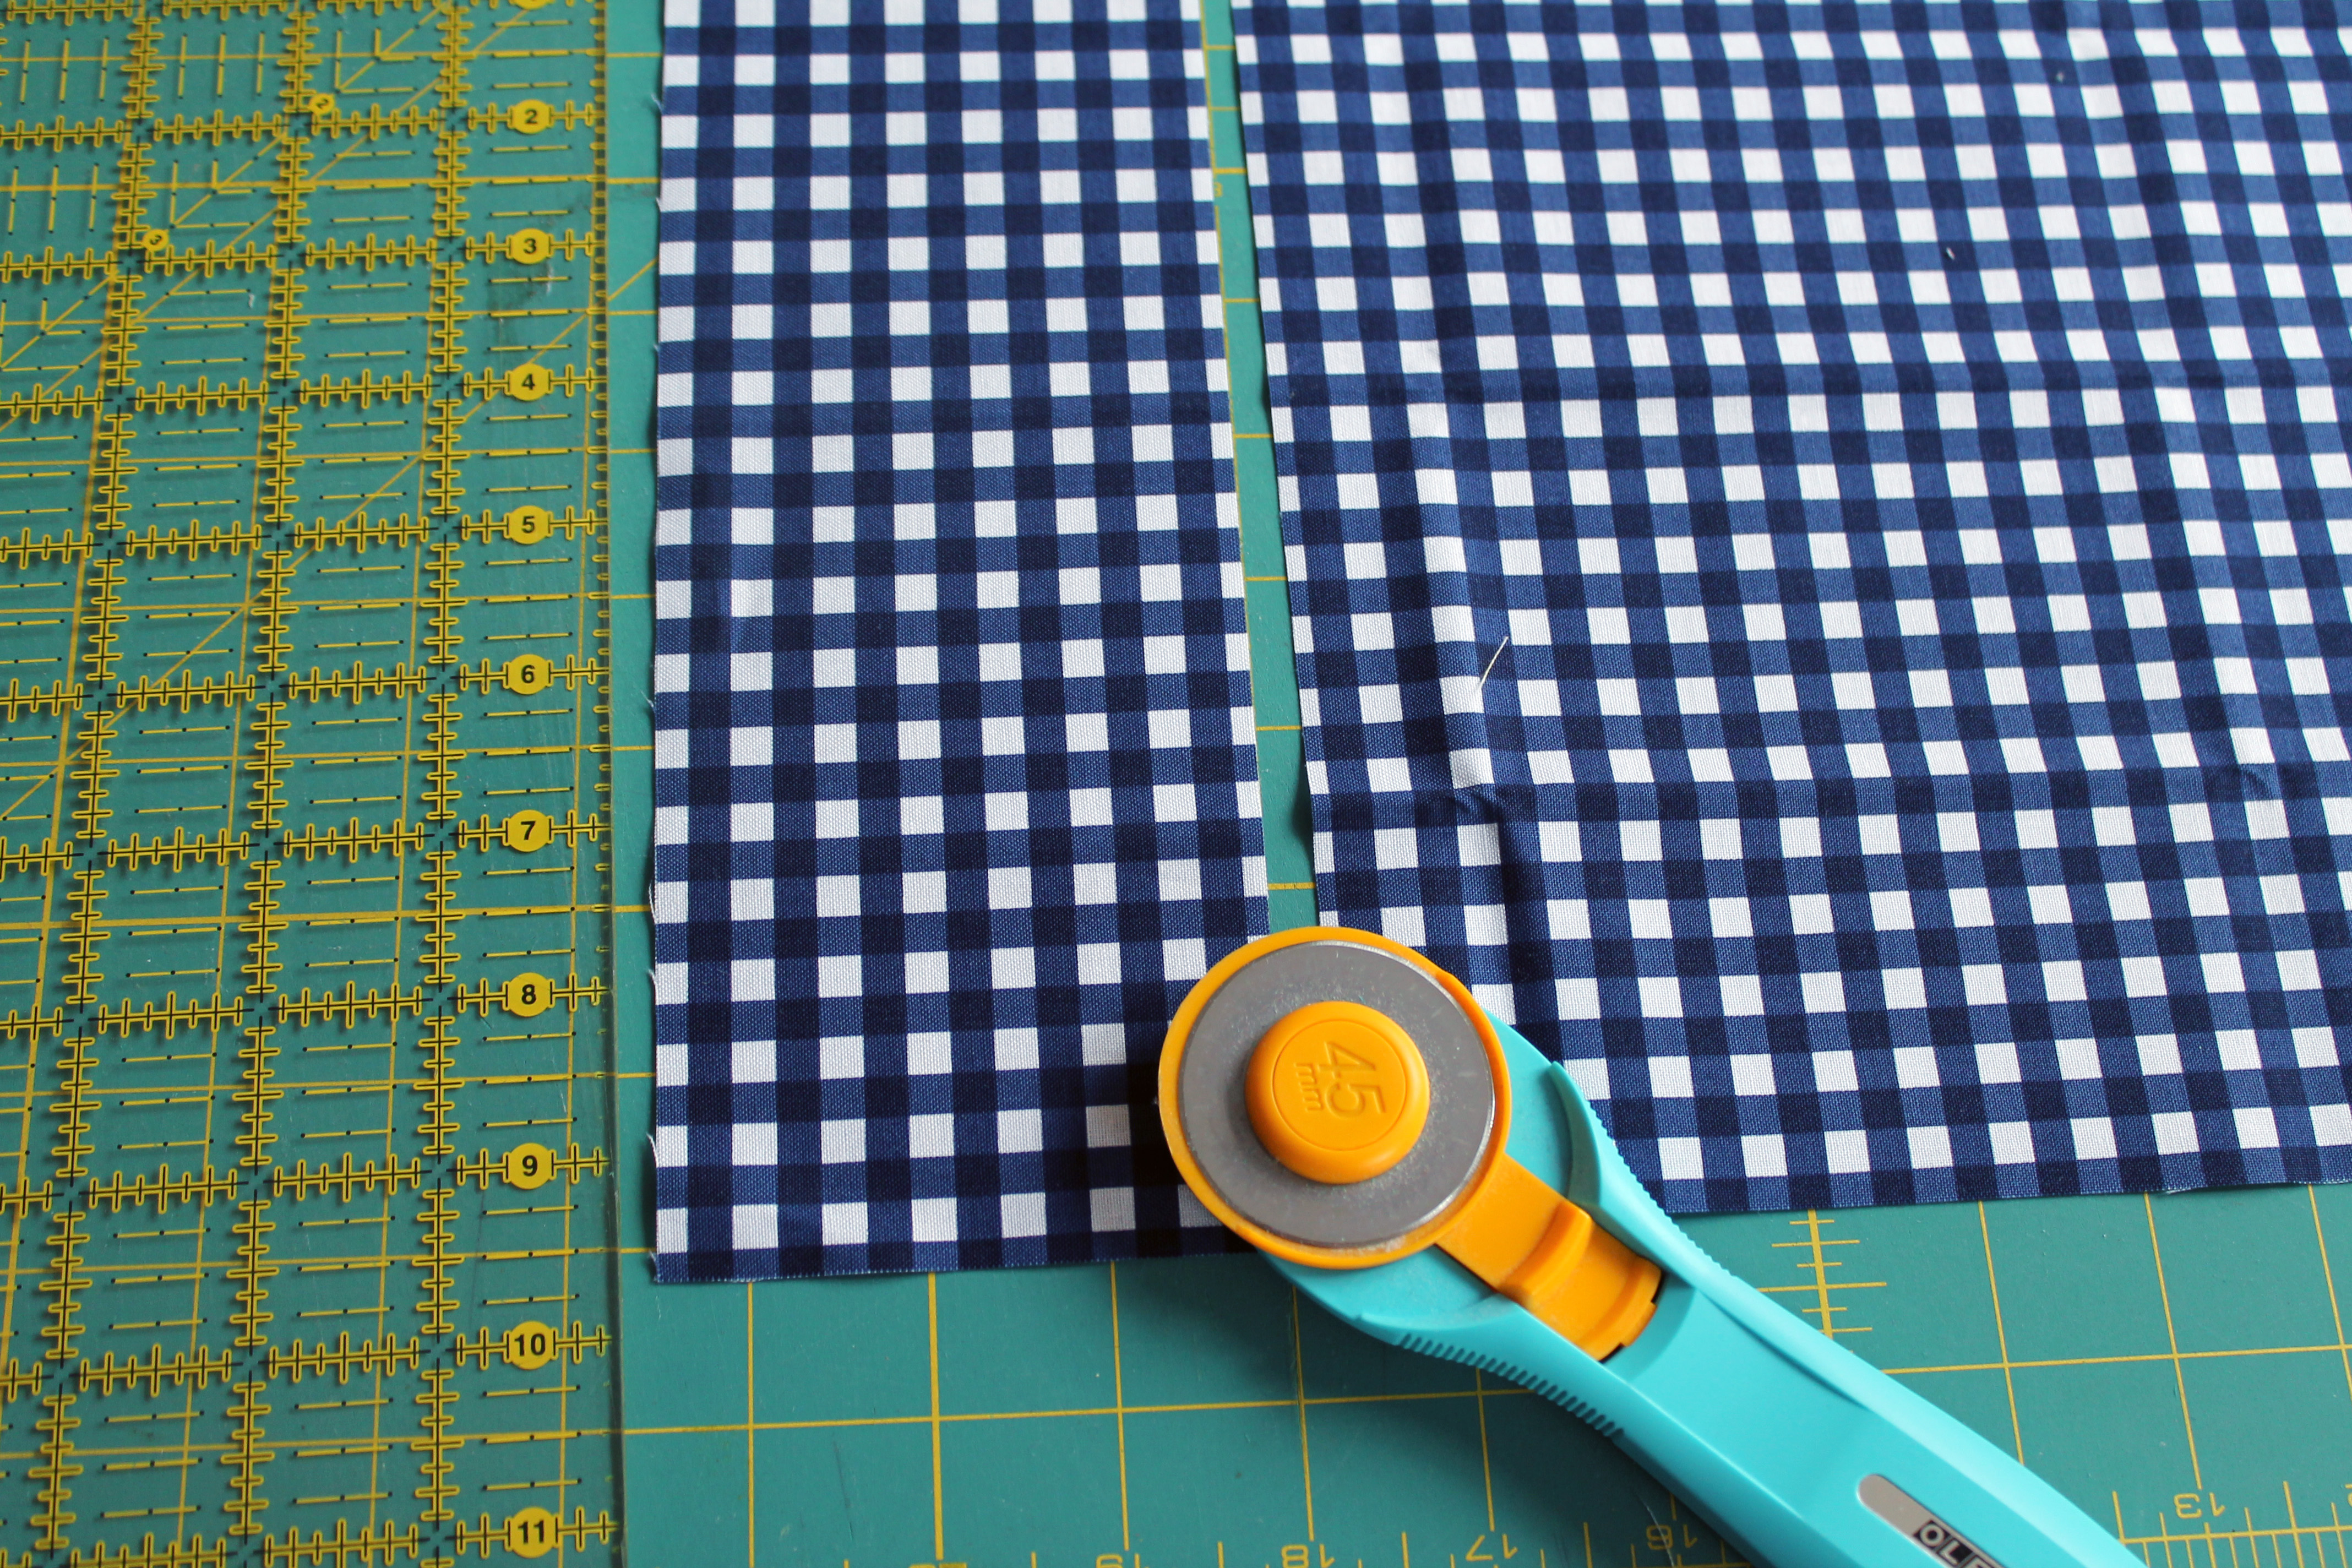
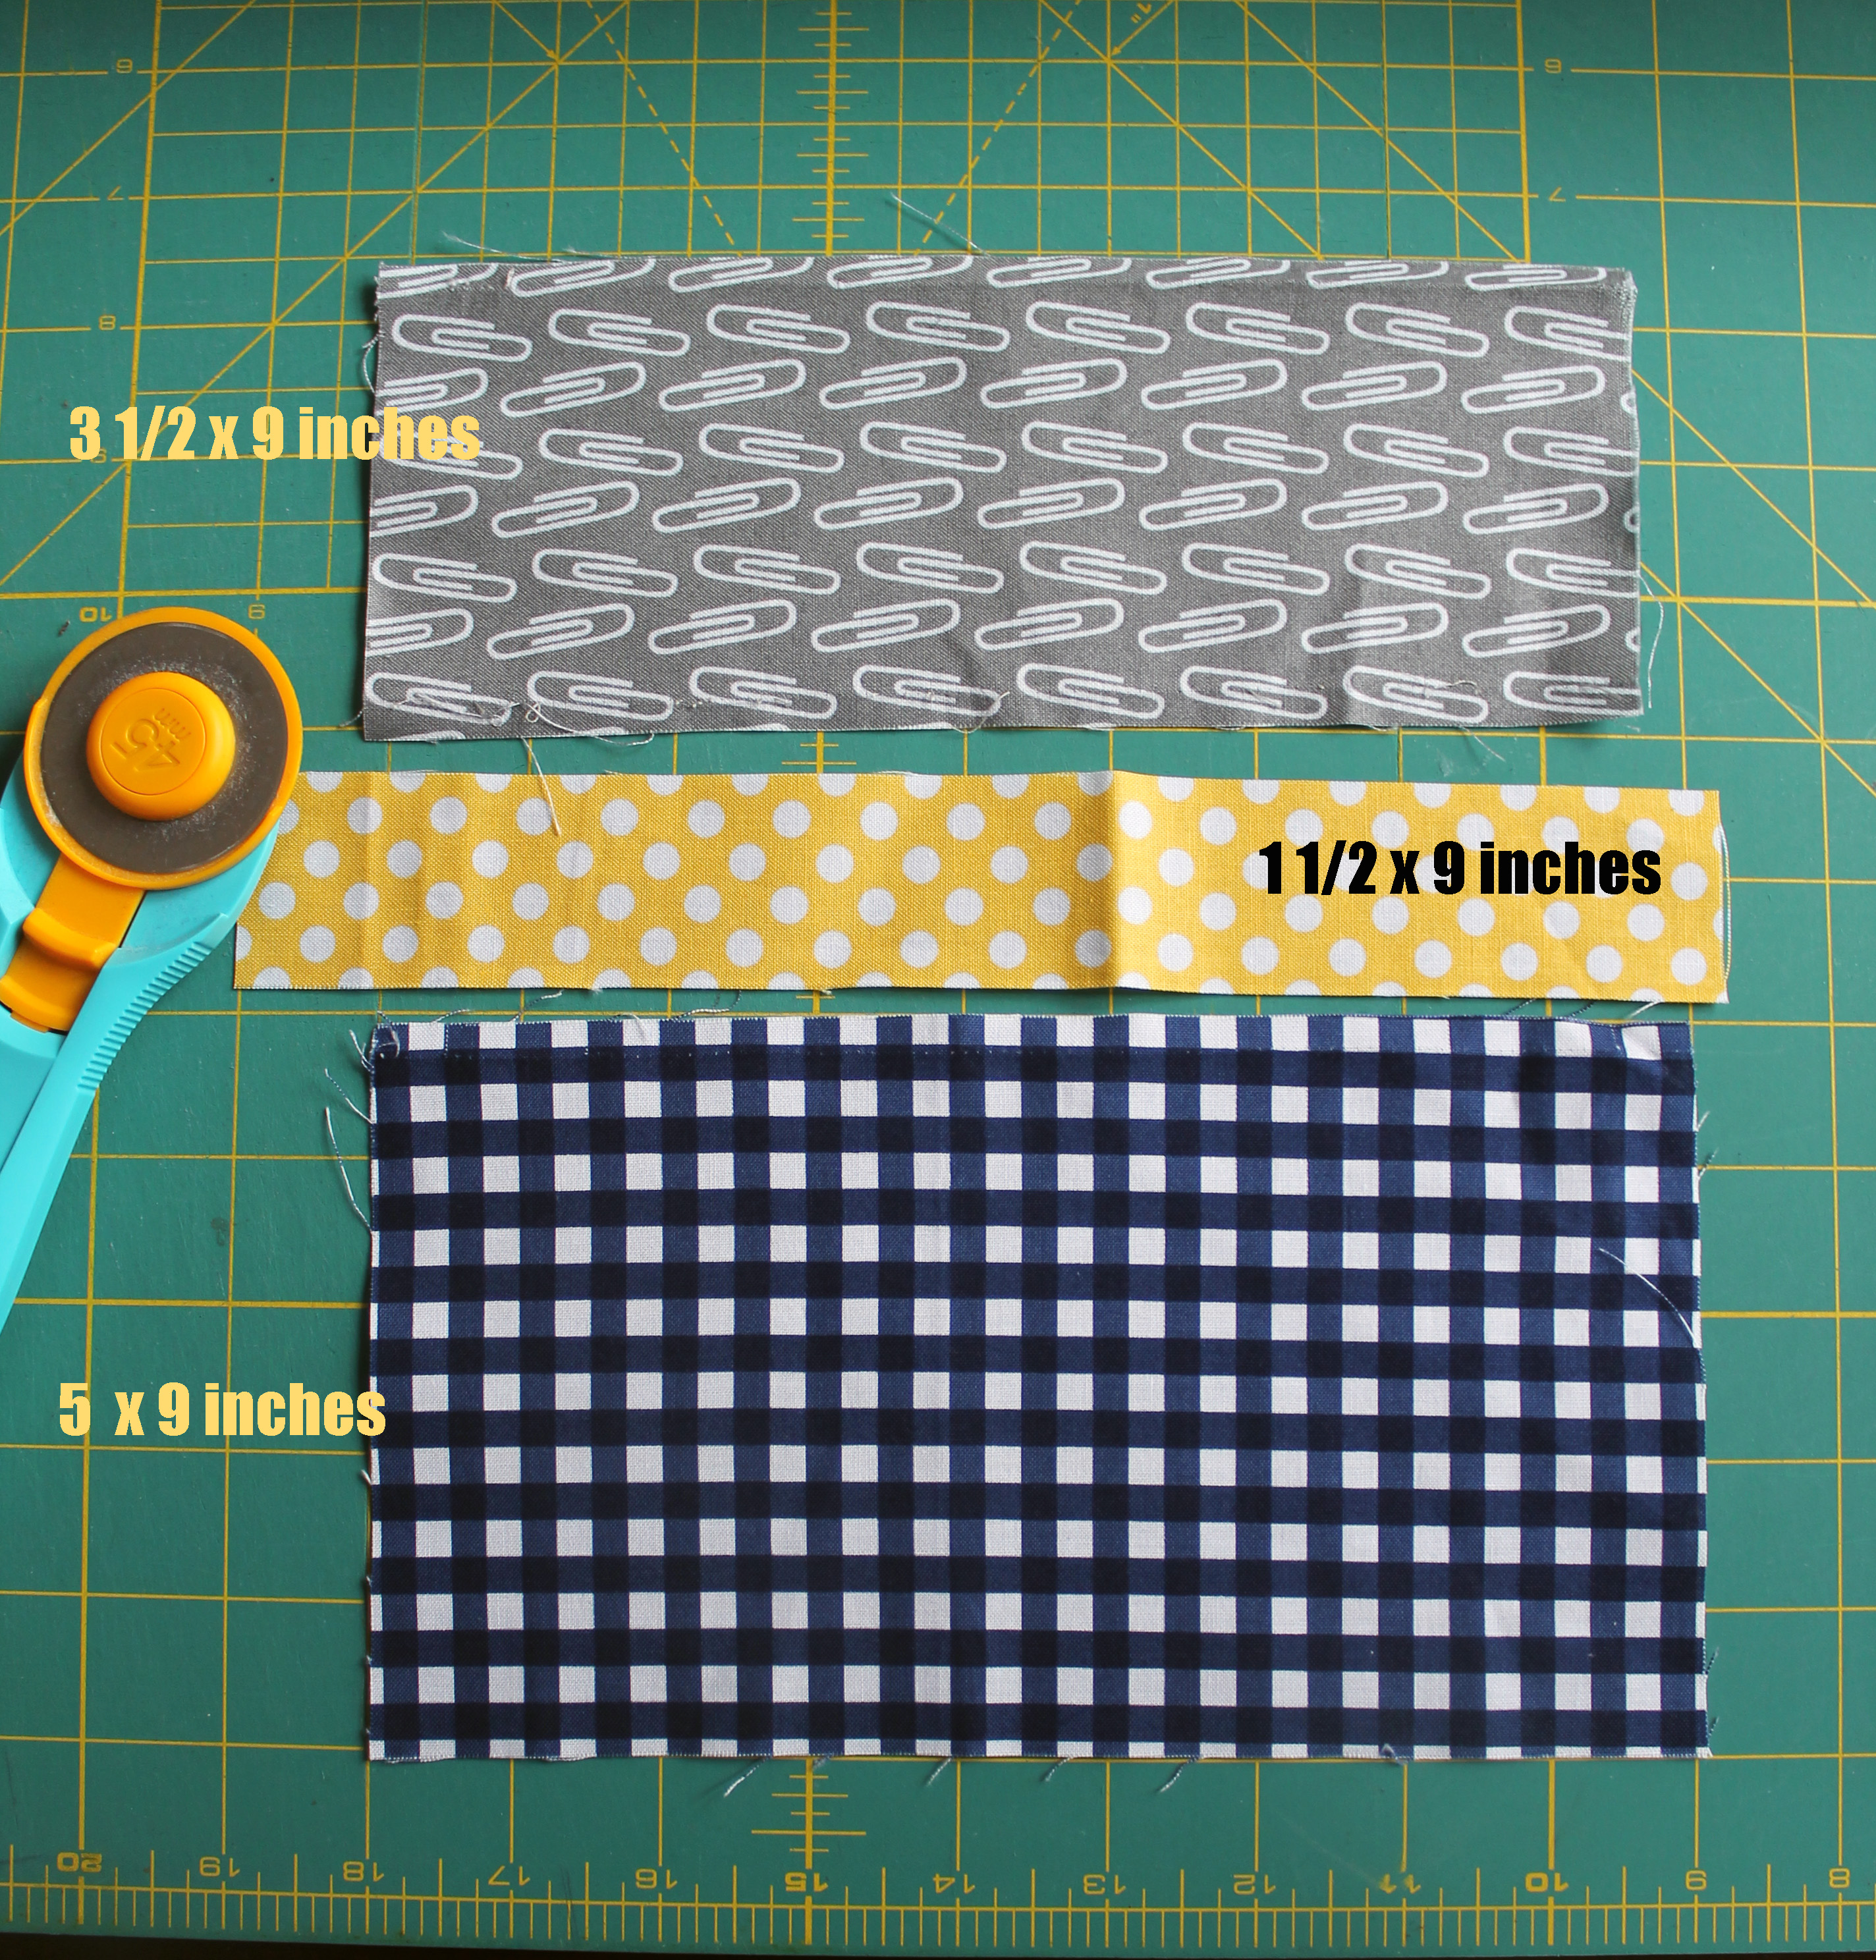
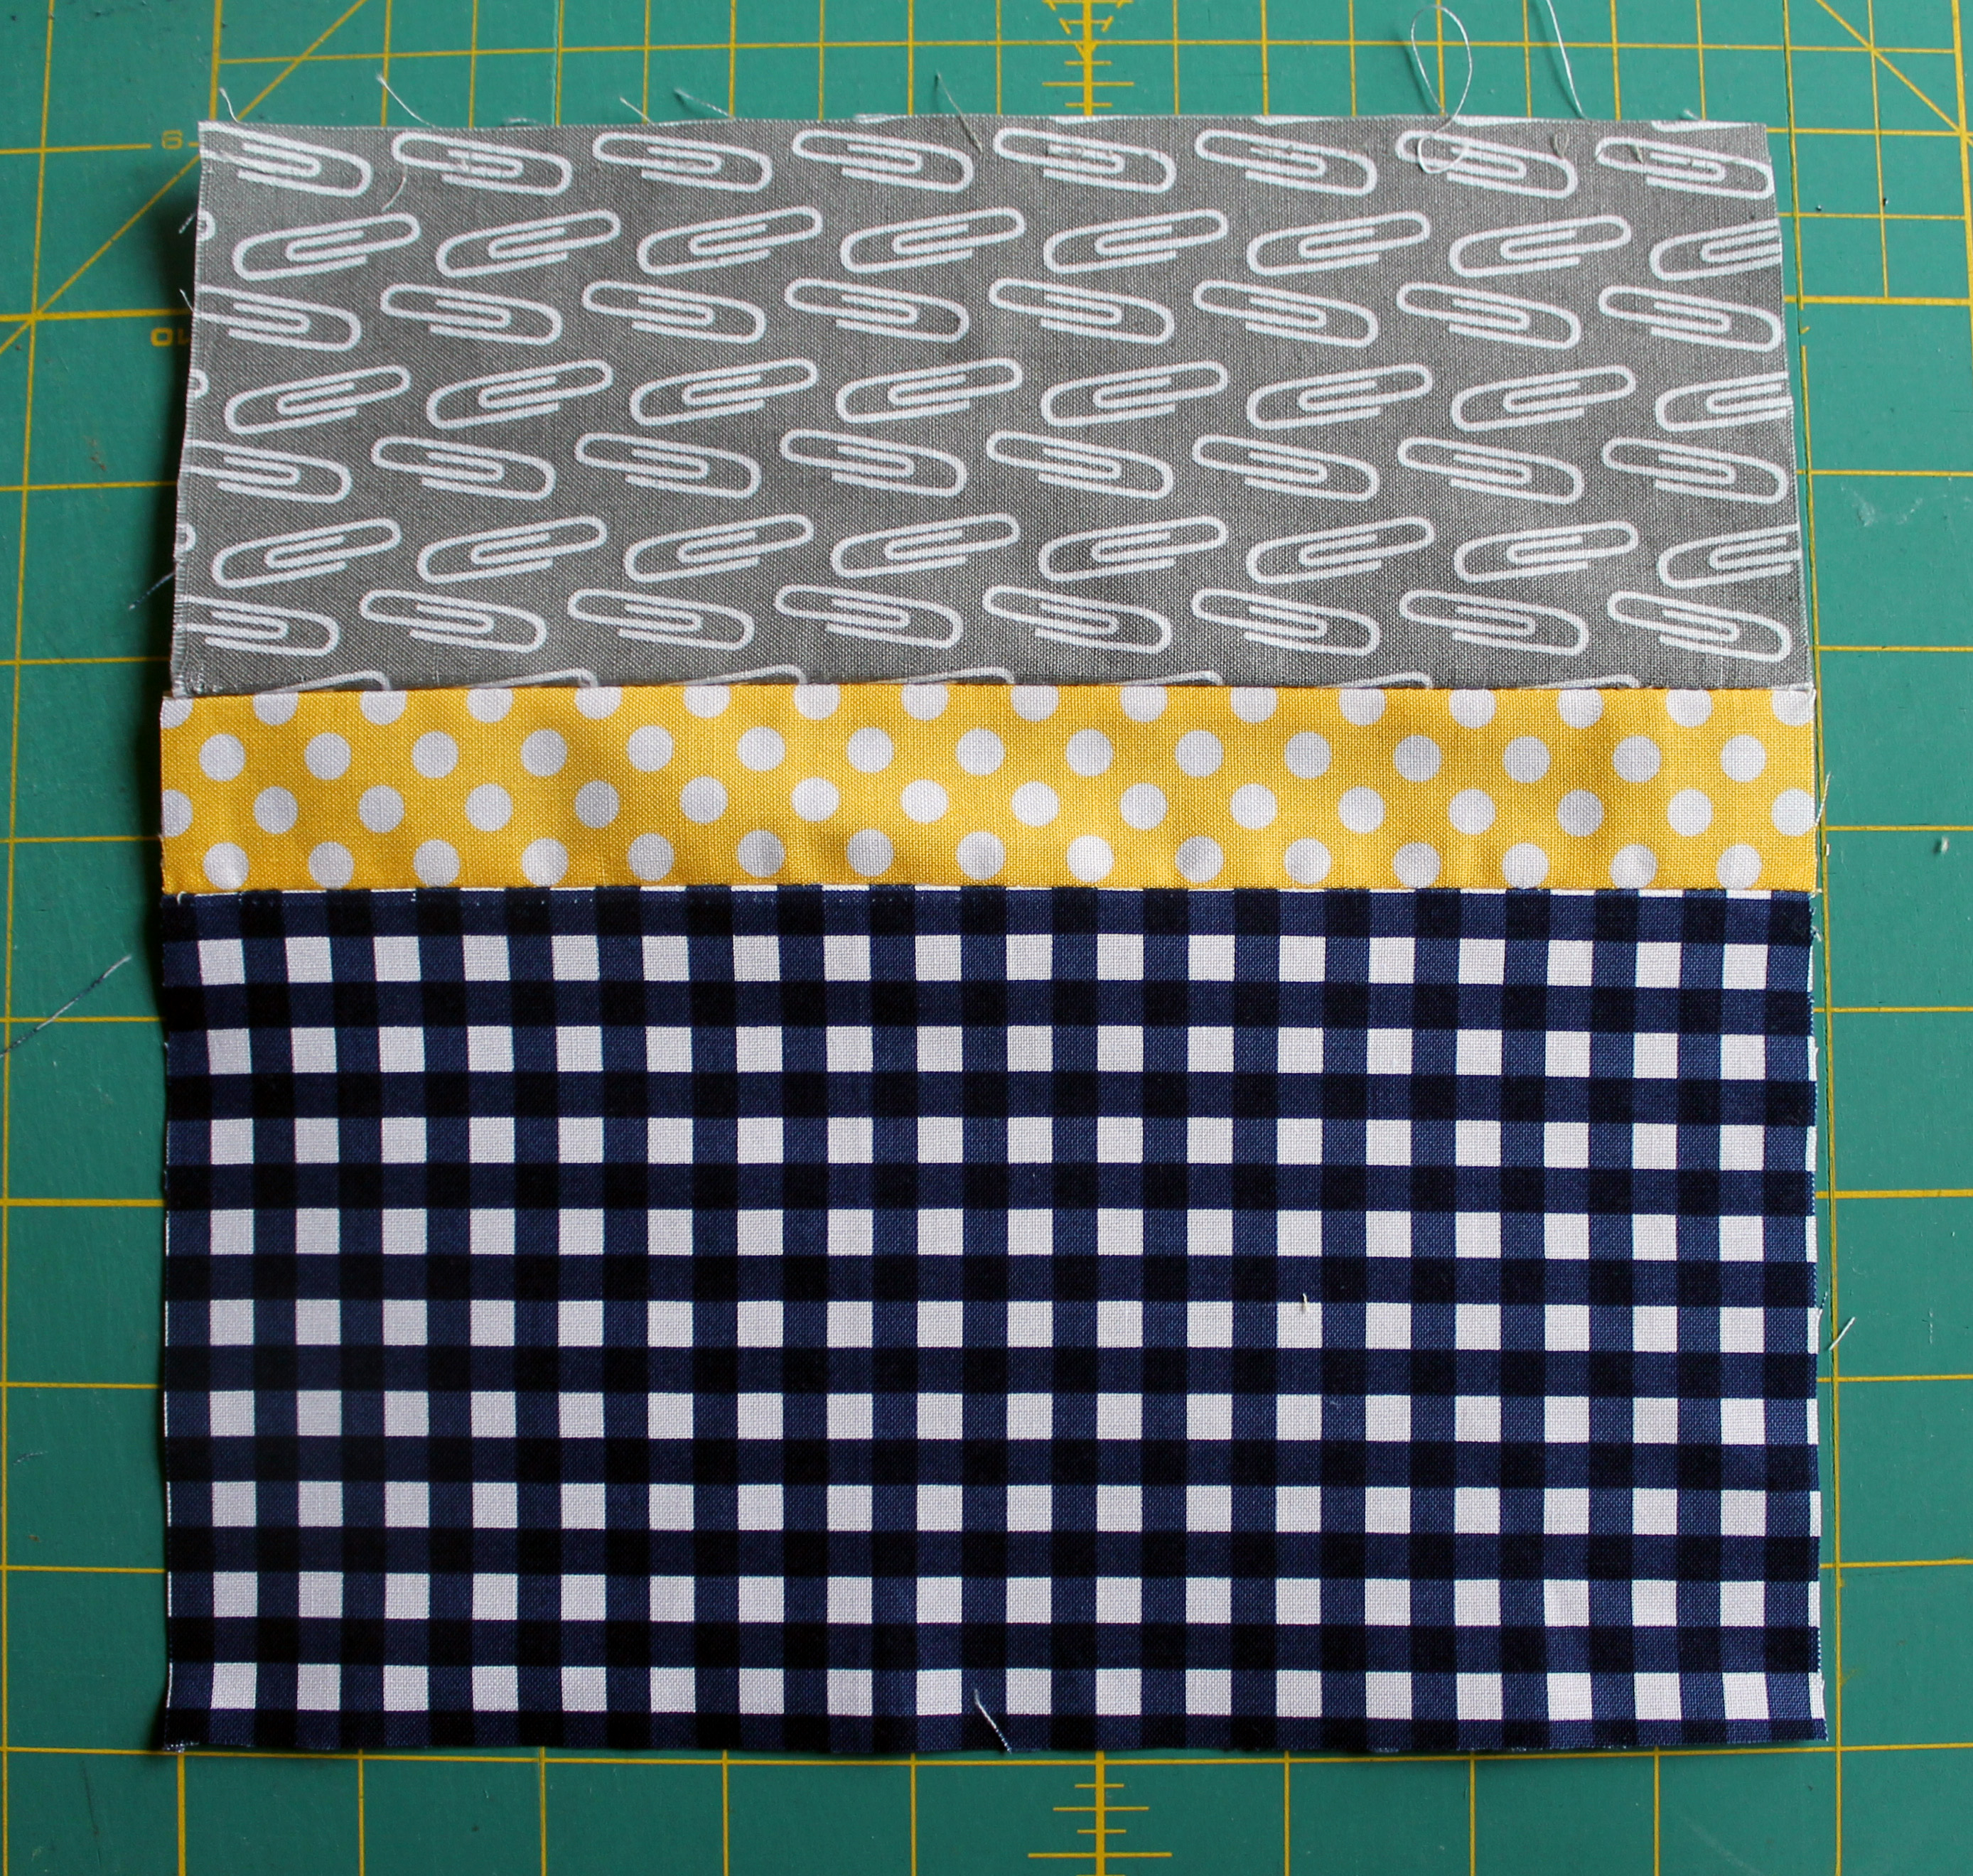
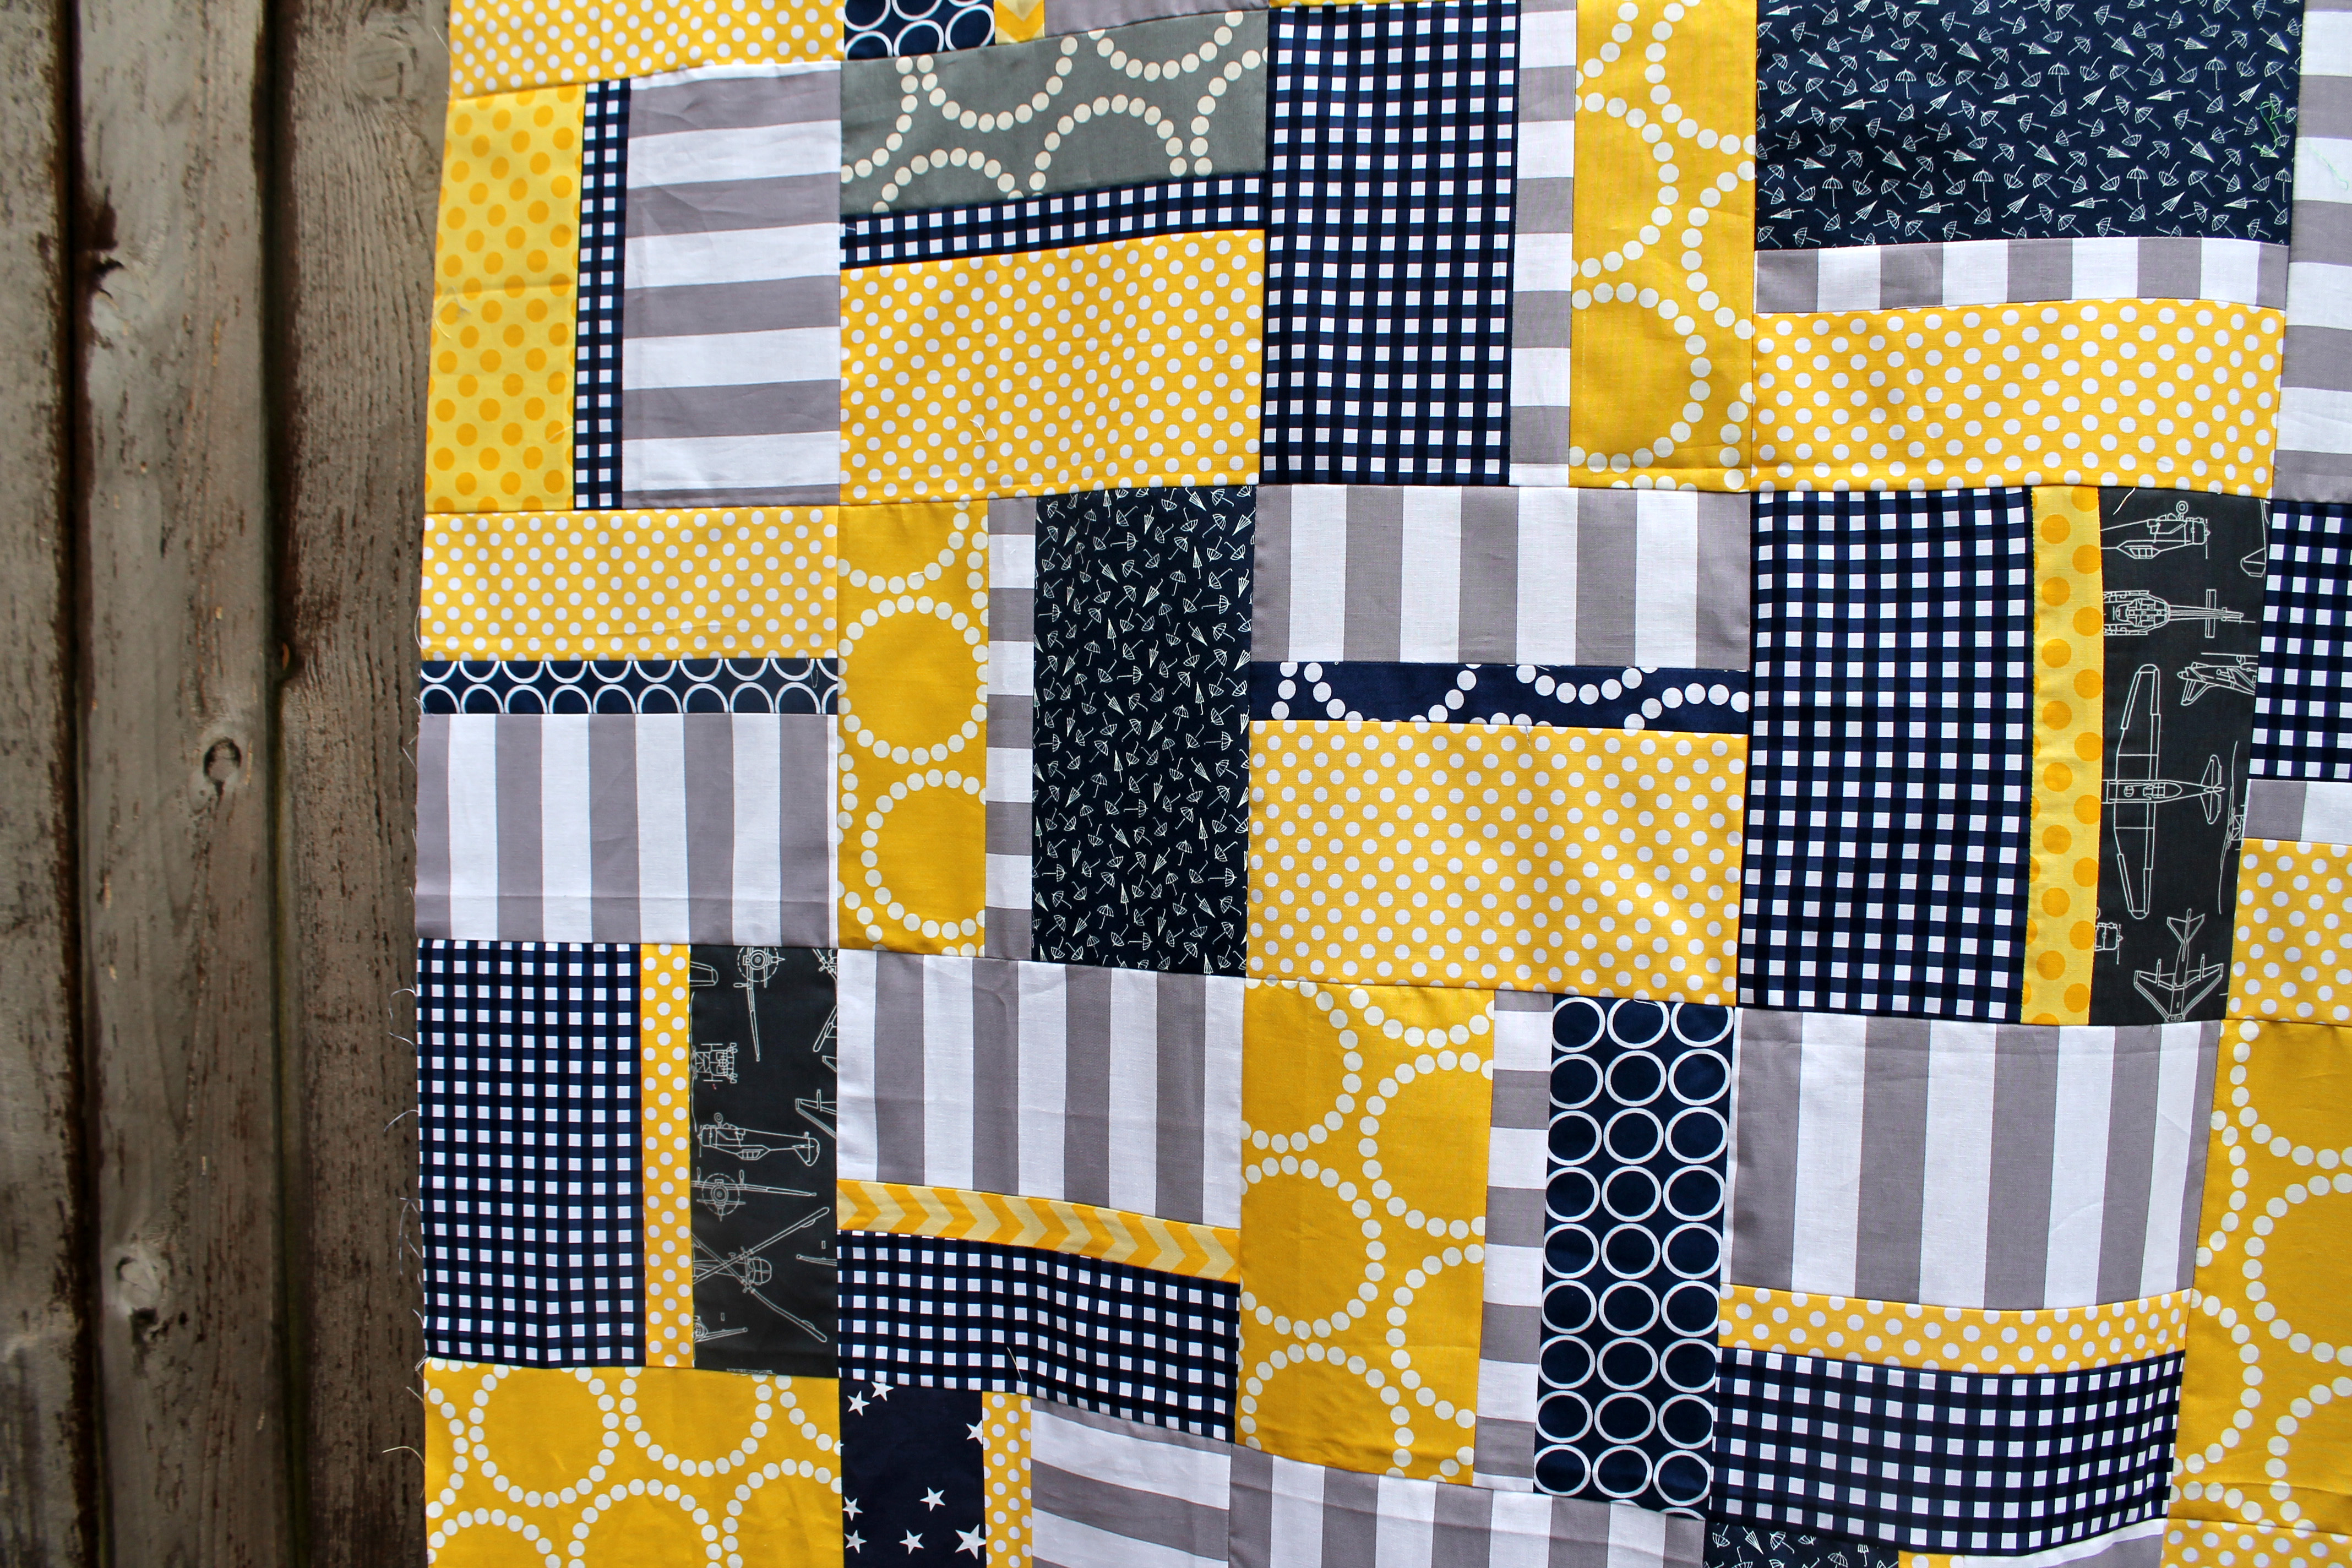
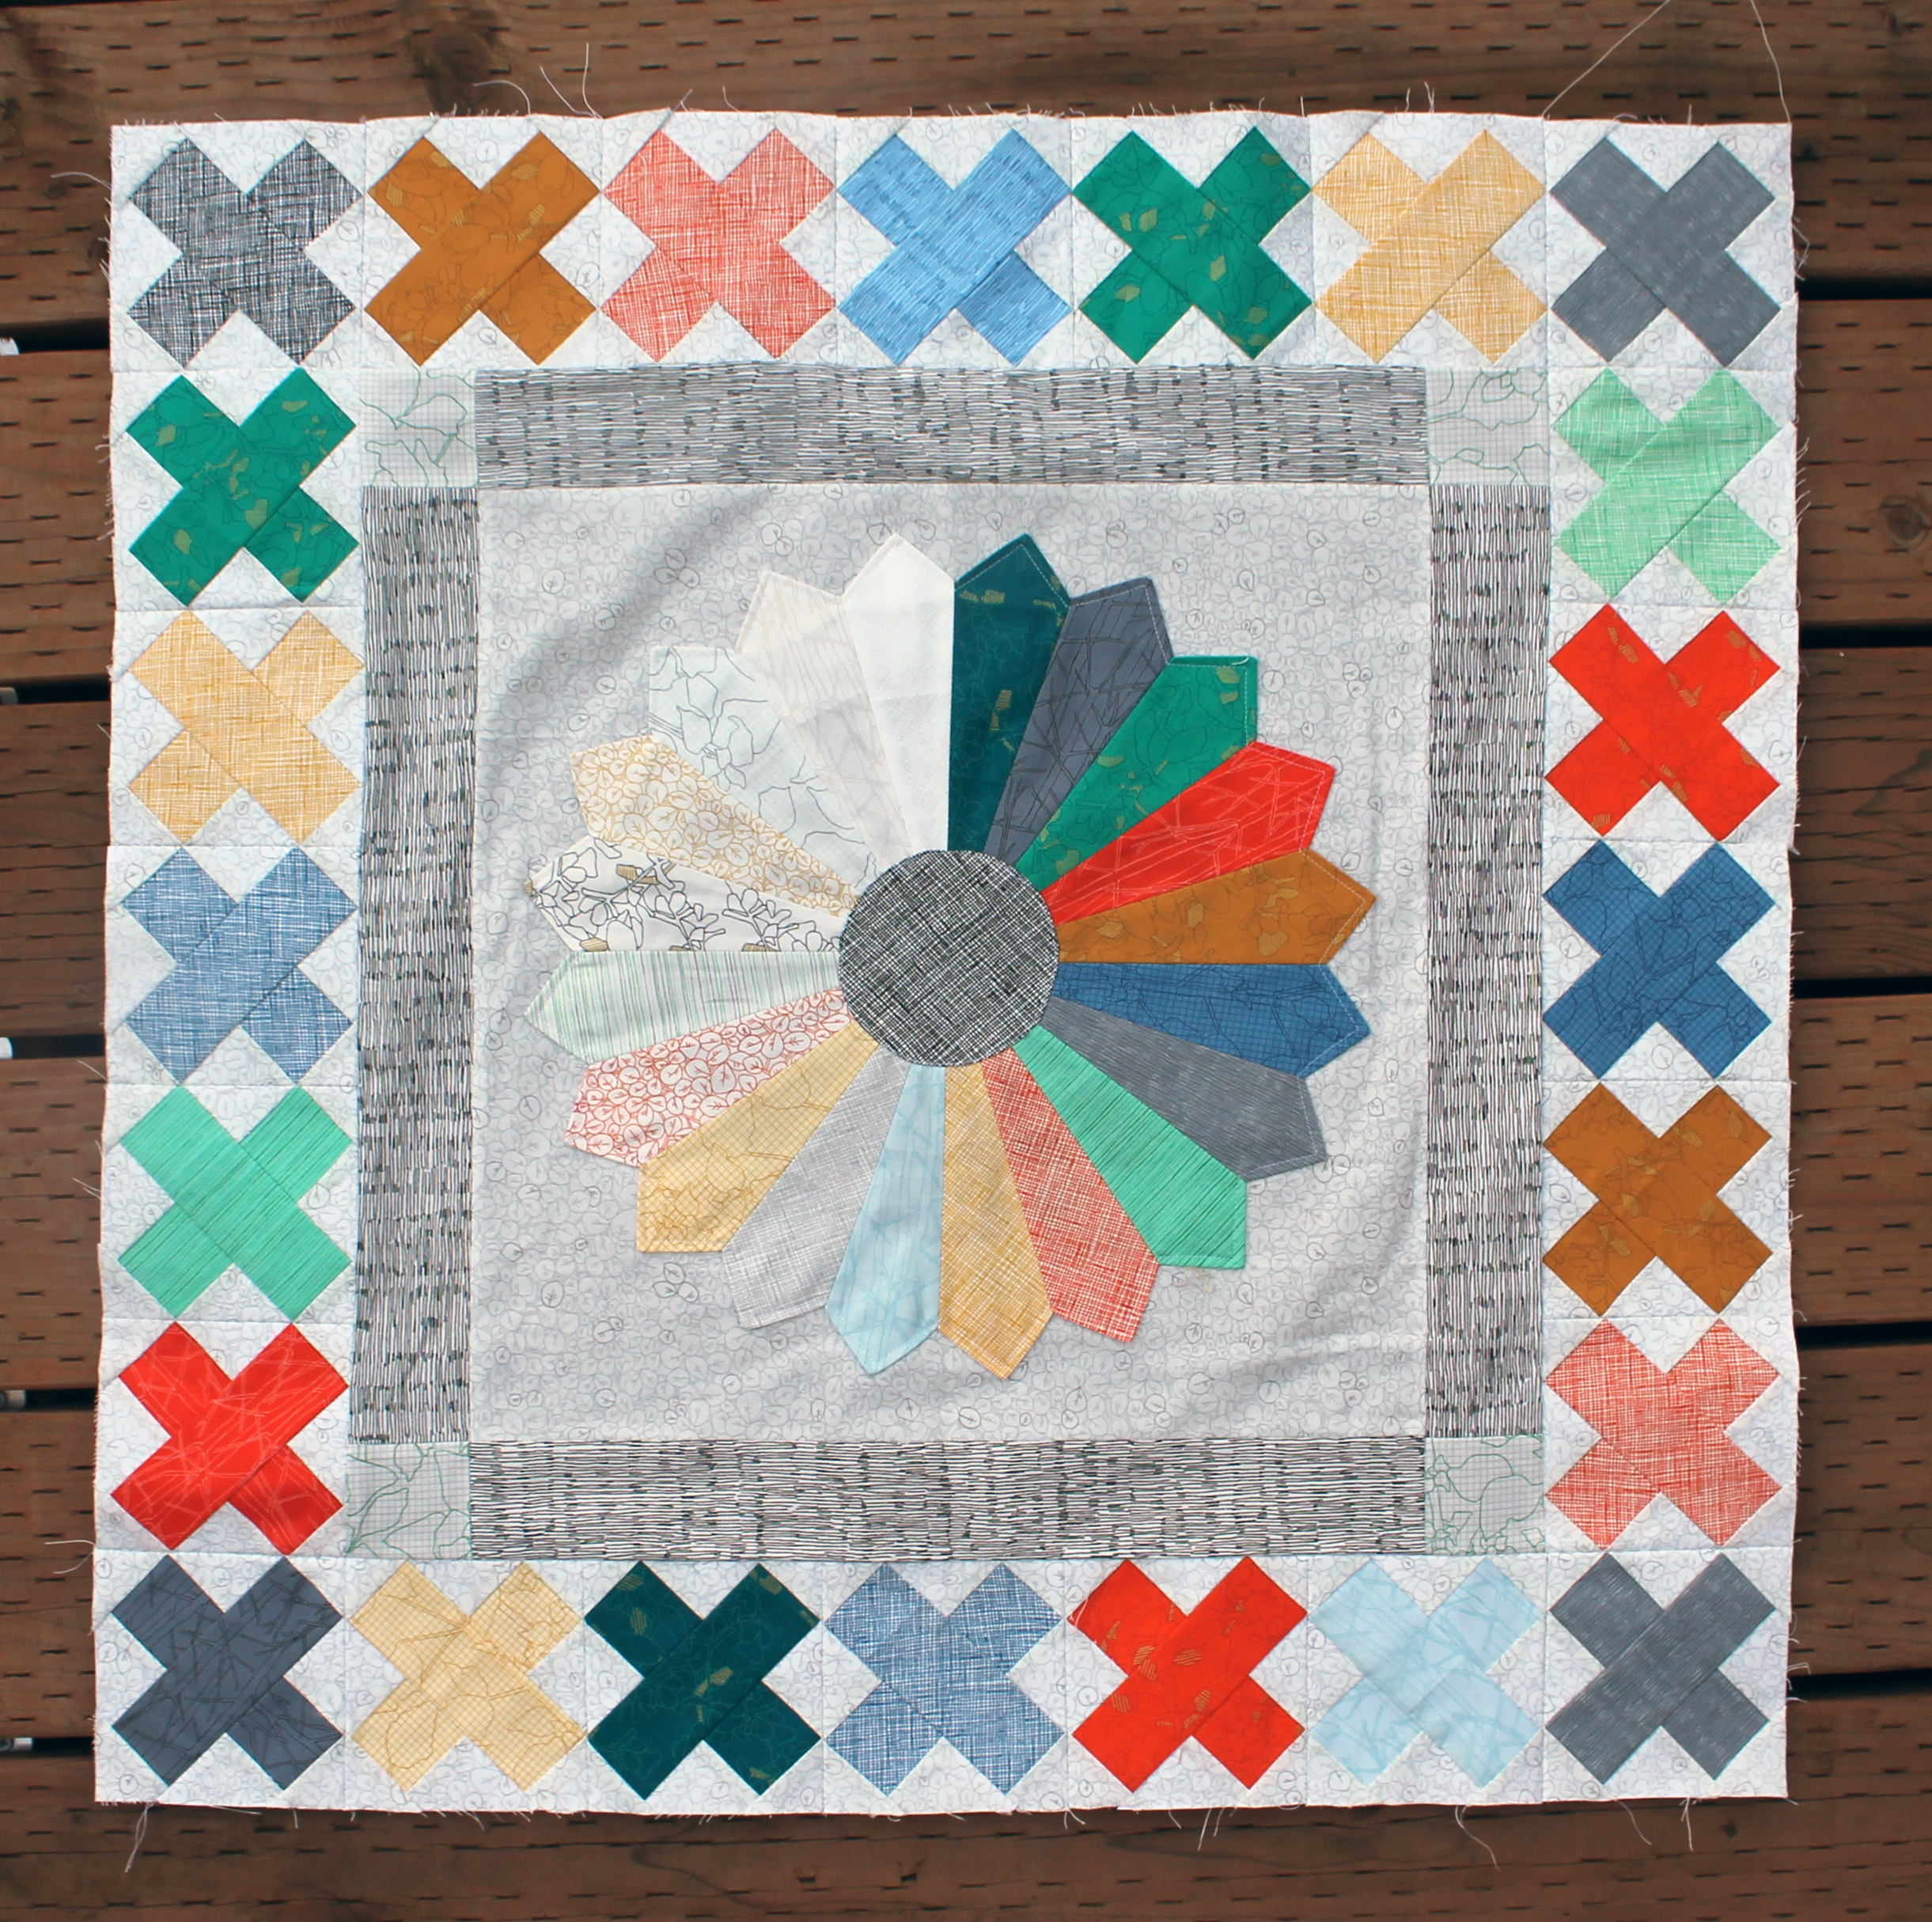
My Granny Square quilt is still on my 2014 To Do list but this week I did make some progress on the list … I am determined to finish my Denyse Schmidt Zakka flower quilt.  I have made the last of the blocks…

Zakka flower blockAnd now I am onto sashing.  I am hoping to have the top done for a Finish Friday… really hoping.

And of course because it is Wednesday I am linking up to Lee at Freshly Pieced..

Building some more houses…

Paper piecing Monday is back this week, after a flu induced hiatus, with another house block…

WQ House block 2This 10 x 10 inch paper pieced block was a not as complex as my last block… I am getting better at this house designing thing.  I simplified some of it to make sure that I was not dealing with too many little bits.

house block piecesThe roof construction was the only fiddly bit for me.  You can find the paper piecing pattern here….WQ house Block 2.

More houses next week… and I also include a wip with the blocks done so far.

Paper piecing Monday missing in action…

This week Paper Piecing Monday was usurpered by Portland Modern Quilt Guild’s Charity Sew Day.. sorry.  I have decided on a new paper pieced quilt and have designed the first block for it, but have not had a chance to test the pattern… but I promise it will be ready for next week.

In the meantime I thought I would share some of the fun of yesterday…  where a group of PMQG members took over one of the class rooms at Modern Domestic for the day and made quilt tops.

Michelle sewing awayWe had a collection of fat quarters and fat eighths left over from the Riley Blake challenge and our challenge was to make some quick and easy quilt tops out of them. Rachel from 2nd Avenue Studios and I spearheaded this adventure and we quickly settled on a modified rail fence and three of the fabrics from the Challenge – the yellow dot, the navy check and the grey stripe.

Fabric detailWe supplemented the Riley Blake with some other graphic prints in our colour way, all boy appropriate, as our Charity needs teen boy quilts (yes I am the one that added the Pearl Bracelets!).

finished PMQG charity quilt topThe pattern is ridiculously easy and very very effective.  In a nutshell we…

1.  Cut a generous nine-inch strip of our chosen fabrics…

cutting fat eights2.  Cut our nine inch strips into sections of 5 inch, 3 1/2 inch and 1 1/2 inch pieces.  We made sure we had a variety of each colour in ever size.

block layout copy3.  Selected the strips for our block making sure there was one of each colour… then using a scant 1/4 inch seam we sewed the pieces together to get our finished 9 x 9 inch block.

finished rail fence blockYou can easily build in some wiggle room with this block by cutting your fabric strips from your yardage at 9 1/4 inches wide (it is a little harder with fat eights, but with the fat quarter cuts we cut 9 1/4 inches from the 21 inch width).

If you are struggling to get a scant 1/4 seam allowance you can add some wiggle room the other way, by cutting 5 1/4 inch or 3 3/4 inch pieces… and then trim the finished block as needed down to 9 x 9 inches.

And viola you have a fun, easy but striking quilt top.

PMQG Charity quilt detailThanks to everyone’s efforts we managed to get two tops finished yesterday… in between the socializing, laughing and cake eating.  Not a bad way to spend a Monday I must admit.


An interesting Colour Play challenge

First up a little bit of background before I show you what I am playing with this week….  Last week I gave a presentation on Playing with Color in quilting to the Portland Modern Quilt Guild.  I talked a little about color theory and a lot about the colour schemes that quilters can borrow from the art based theory, as well as ones we have come up with on our own (like Low Volume).   During the presentation I also talked about ‘neutrals’, those fun, versatile colours that play nice with nearly every colour they meet.  It was during this part of the presentation that this weeks challenge presented itself…

So I was talking about the standard neutrals – white, cream, grey, brown and of course navy blue, which is my favorite neutral…though it is not really an official neutral.  I rambled on about how navy is my response to my personal aversion to black as a neutral.  I find black harsh and though it gives great contrast, I do not tend to use it unless I absolutely have to and always opt for navy or dark grey instead.   I will, on occasion, condescend to use black and white prints but never straight black.

As I was making these statements I realised that I should not be making such a harsh judgement on black without at least giving it a go.

So I choose a pattern and went to work…

hunter star patternI went with the traditional Hunters Star block and used the paper piecing pattern by Quilters Cache.  It seemed like the perfect pattern to make use of the high contrast of my colour choices.

hunter star block piecesThe block pieces join together to make these wonderful stars… and we all know how I feel about stars!   When you add a number of blocks together you get to see the bigger pattern which is stunning.

hunter star wipI have to admit I am thrilled with how this “experiment” turned out.  I think because I am using scraps and different blacks, the colour is not quite as harsh as a solid black, and the blue just seems to pop off the quilt.

So going forward I am not saying I will be abandoning navy blue any time soon but I may give black more than a fleeting glance next time I am pulling fabric.  So is this aversion to black just me or do others share my feelings?  Have you used it in any of your quilts?

As it is Wednesday I am linking up with Lee at Freshly Pieced for WIP Wednesday


Lots of X’s

This week my quilting life has been full of just one block – a paper pieced X block of varying sizes.

paper pieced cross blockI made the original block pattern, a 4 inch x 4 inch block,  for the next border on the PMQG medallion quilt.

Botanics fabric lineI used the  PMQG Medallion Border paper piecing pattern to make the border for the group medallion which is taking full advantage of the fabulous Botanics range by Carolyn Friedlander.

bontanics medallion quilt wipDon’t you just love the center Dresden flower – my clever fellow PMQG officer, Kelly of Blue Bird Sews made it.

After finishing the first 24 X blocks for the Guild Medallion I turned around and did another 48 X blocks to make the border on my Medallion….

medallion quilt wipYep you read right… I had to make two lots of cross blocks to get my border done, because I did not measure my paper piecing pattern before I started sewing.  My printer had “scaled to fit” my first set of block so they were just slightly smaller than 4 inches.  Lesson for the day:  always measure your printed pattern before you start work.

For some unknown reason I then thought “wow wouldn’t be fun to try a larger cross with some Lizzy House fabrics” and in a moment of insanity started making these blocks…

Constellation crossesI was at least smart enough to blow the pattern up to 6 x 6 inches and I am liking how this quilt is starting to look.  You can find the pattern for the larger crosses here…  Cross block pattern.

Believe it or not I am contemplating adding some smaller 4 x 4 blocks to my Constellation quilt to bring a nice variety to the top.  If I do not get too sick of these blocks, I will have a wip update in a couple of weeks.