Double Plus Block

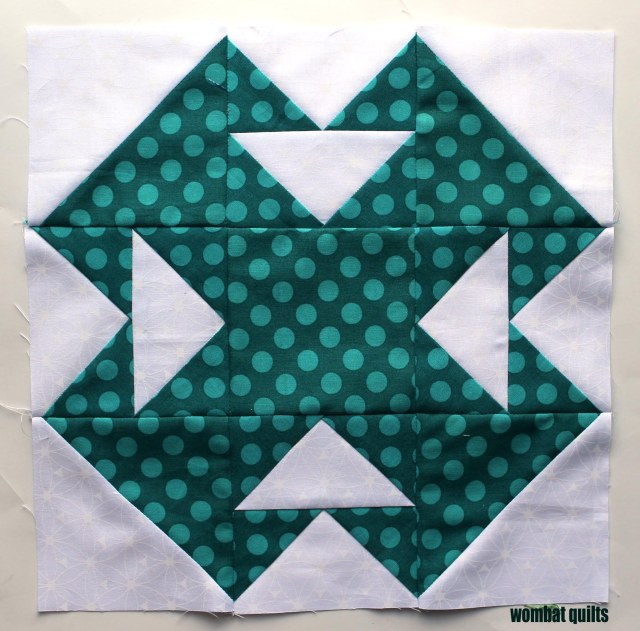
After another absence I am back…this time with a block for my Do Good Stitches Bee.  It is my month to set the block and after much back and forth I came up with this block….

double plus block

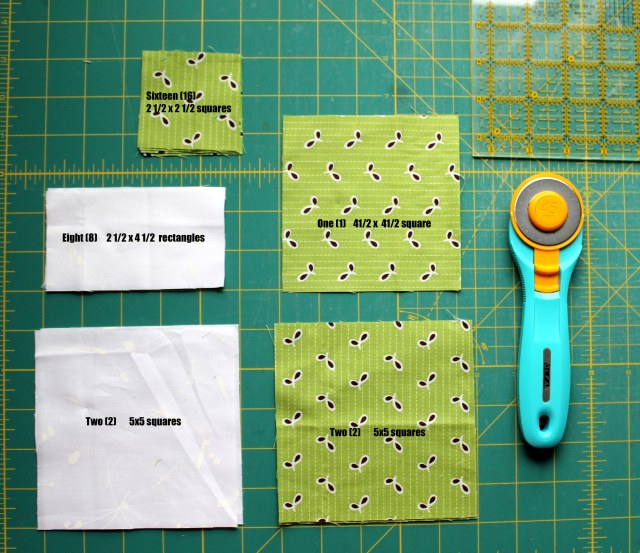
To make this 12 1/2 inch block (unfinished) you will need:

5 (five) x 3 1/2 inch squares of your main color
10 (ten) x 3 1/2 inch squares of low volume prints
5 (five) x 1 1/2 inch squares of your secondary color
4 (four) x 1 1/2 inch squares of low volume prints

STEP ONE – Make the small cross

smallcross

  • Layout your 1 1/2 inch squares in the desired layout.
  • Sew the three squares in three rows.  Press seams as desired (I pressed mine open).

IMG_1596

  • Sew the rows together again pressing seams as desired (I pressed my seams open).
  • Trim the finished block to 3 1/2 inches square.

trim block

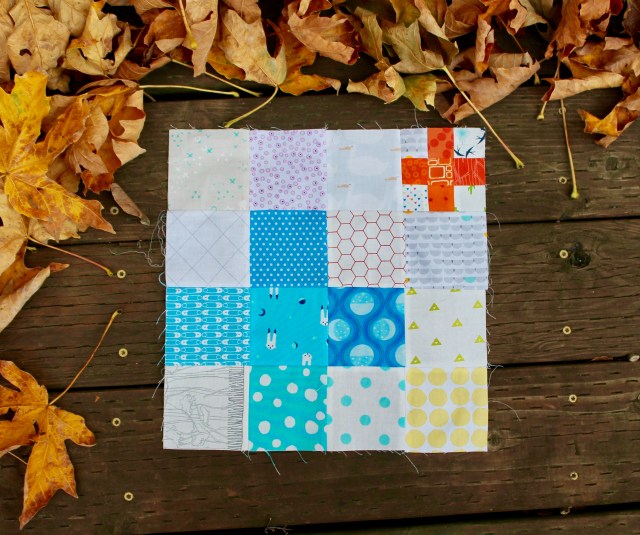
STEP TWO – Make the block

Layout your block as below…

blocklayout

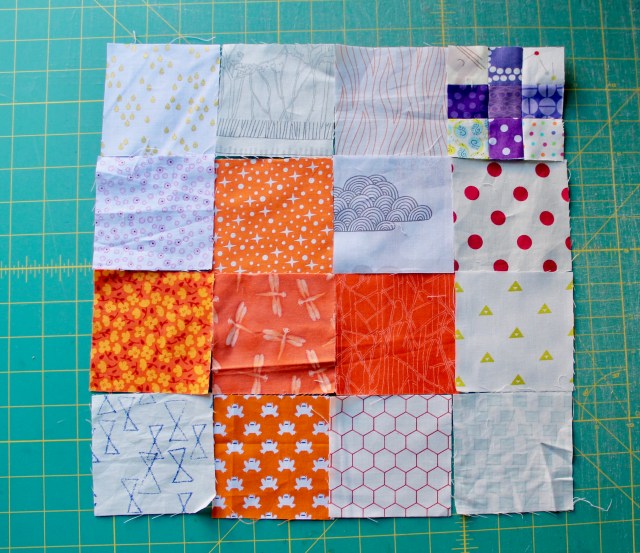
  • Sew your squares into rows and then your rows into a block.
  • Iron your seam as desired – I ironed mine open to get the block to sit as flat as I could.
  • If required, trim final block to 12 1/2 inches. Repeat the process until you have as many blocks as you need….

Our quilt will be a rainbow of color, with each block having two bright colors per block… but I think it would be fun to do a block with just two colors – one for the big blocks and one for the small blocks.

As a caveat to this blog post it is the first one I have done on my new MacBook.  My old computer gave up the ghost a couple of weeks ago (one of the reasons I have not been posting) and I am still finding my way around this machine.  My hope is a new computer will encourage me to post more… heres hoping!

Back with a block…

After a flurry of online activity, life once again got in the way of blogging but I am back again, this time with a block pattern for my Do Good Stitches circle.  You see in June I am the designated quilter which means I pick the colour scheme and block for my fellow DGS peeps to work with…

I never make this decision easily… I always ‘um and ah’ between a couple of block options… sometimes making test blocks to see what my idea looks like.   This month I settled on the colour scheme quickly…

CW_MoodBoardMonday_BluesGreens

and pulled these fabrics to match from my stash….

fabric pull

but struggled to pin down what sort of block I wanted to make.  I finally settled on a simple 12 inch block which Is called a Double T and dates back to 1882 I believe e…

finished T block

To make one block you will need to cut:

cutting instructions

This 12 inch block uses two different types of block components – flying geese and half square triangles (HST).  So lets start with the HST…

For these components you will need the two white 5 inch squares and the two green 5 inch squares.

mark down center

Using a fabric marker (I use my trusty Frixon marker) mark a diagonal line down the center of both the white squares..

Place one white square and one green square pattern side together and then sew down both sides of the center line using a scant quarter inch…

sew down each side

Then cut down that center line using your rotary cutter…

cut down drawn line

You now have two half square triangle pieces….  iron the HSTs with the seams open.

trim block

Then trim your ironed HST to 4 1/2 inches square.  For each block you will need 4 half square triangle components.

Next component is the flying geese…and you can make these one of two ways – either using traditional piecing or paper piecing…  the cutting instructions above are for the traditional pieced version.  If you are paper piecing you can cut a little more generously – say about 1/4 inch more on all the geese pieces.

Lets start with the traditional version…. first mark up all of the 2 1/2 inch squares with the same diagonal line you used in the HSTs.

geese corners

Place the small green squares pattern side down on the corner of your white triangle pieces.  Sew down your diagonal line…

Trim the excess corner fabric off your rectangle and press the green corner up on your block, pressing your seams open…

geese corner 2

Place the second 2 1/2 inch square on the opposite side of your rectangle piece and again sew down the marked line, trim and press seams open.  You will need to make two of these geese blocks for each flying geese component…

flying geese unit

If you would like to use paper piecing to make these components you can download the pattern for these 4 1/2 inch flying geese here… Flying Geese components

paper piecing option

Once you have made your block components lay your block out like this….

block components

I then sew the components together in rows…. and press the seams to the side, making sure that the bulky side of the geese is laying flat.

block rows

I then sew the rows together and viola you have a block…. and in a month or so I should have a collection of blocks from my fellow Do Good Stitches peeps which will become a pretty quilt top.