More green…

Surprise… I am back again with another installment of Paper Piecing Monday…. and today’s block is another nice one (though I may be a little biased!).

fan star


When I designed the pattern it reminded my of the fan block, which is why the block is called Fan Star… though when I sewed all the pieces together I must admit a better name would have been Pinwheel star.  Naming the blocks is the hard part for me.

Fan star piecesAny way you can find the PDF paper piecing pattern for this 8 inch block here….Fan star. Now I did promise a wip photo but this week kicked my butt and I have not done it yet… next week, I promise.

The continuing adventure that is 8 inch stars…

Welcome to another riveting edition of Paper piecing Monday… okay there was a little bit of hyperbole in that statement, but I am really enjoying making these stars, and today’s pattern is no exception…

stamp star

I call this one Stamped Star because it feels very solid… not at all delicate like last weeks. The star is 24 pieces and would look cool, I realized after I had finished the block, with a light center rather than the dark.

stamp star pieces

You can find the PDF pattern for this star here…Stamp star.  Next week I will try to get a wip shot of the stars so far.  They are looking cool up on the design wall…but I still am not sure what I am going to do with them all!

A special finish….

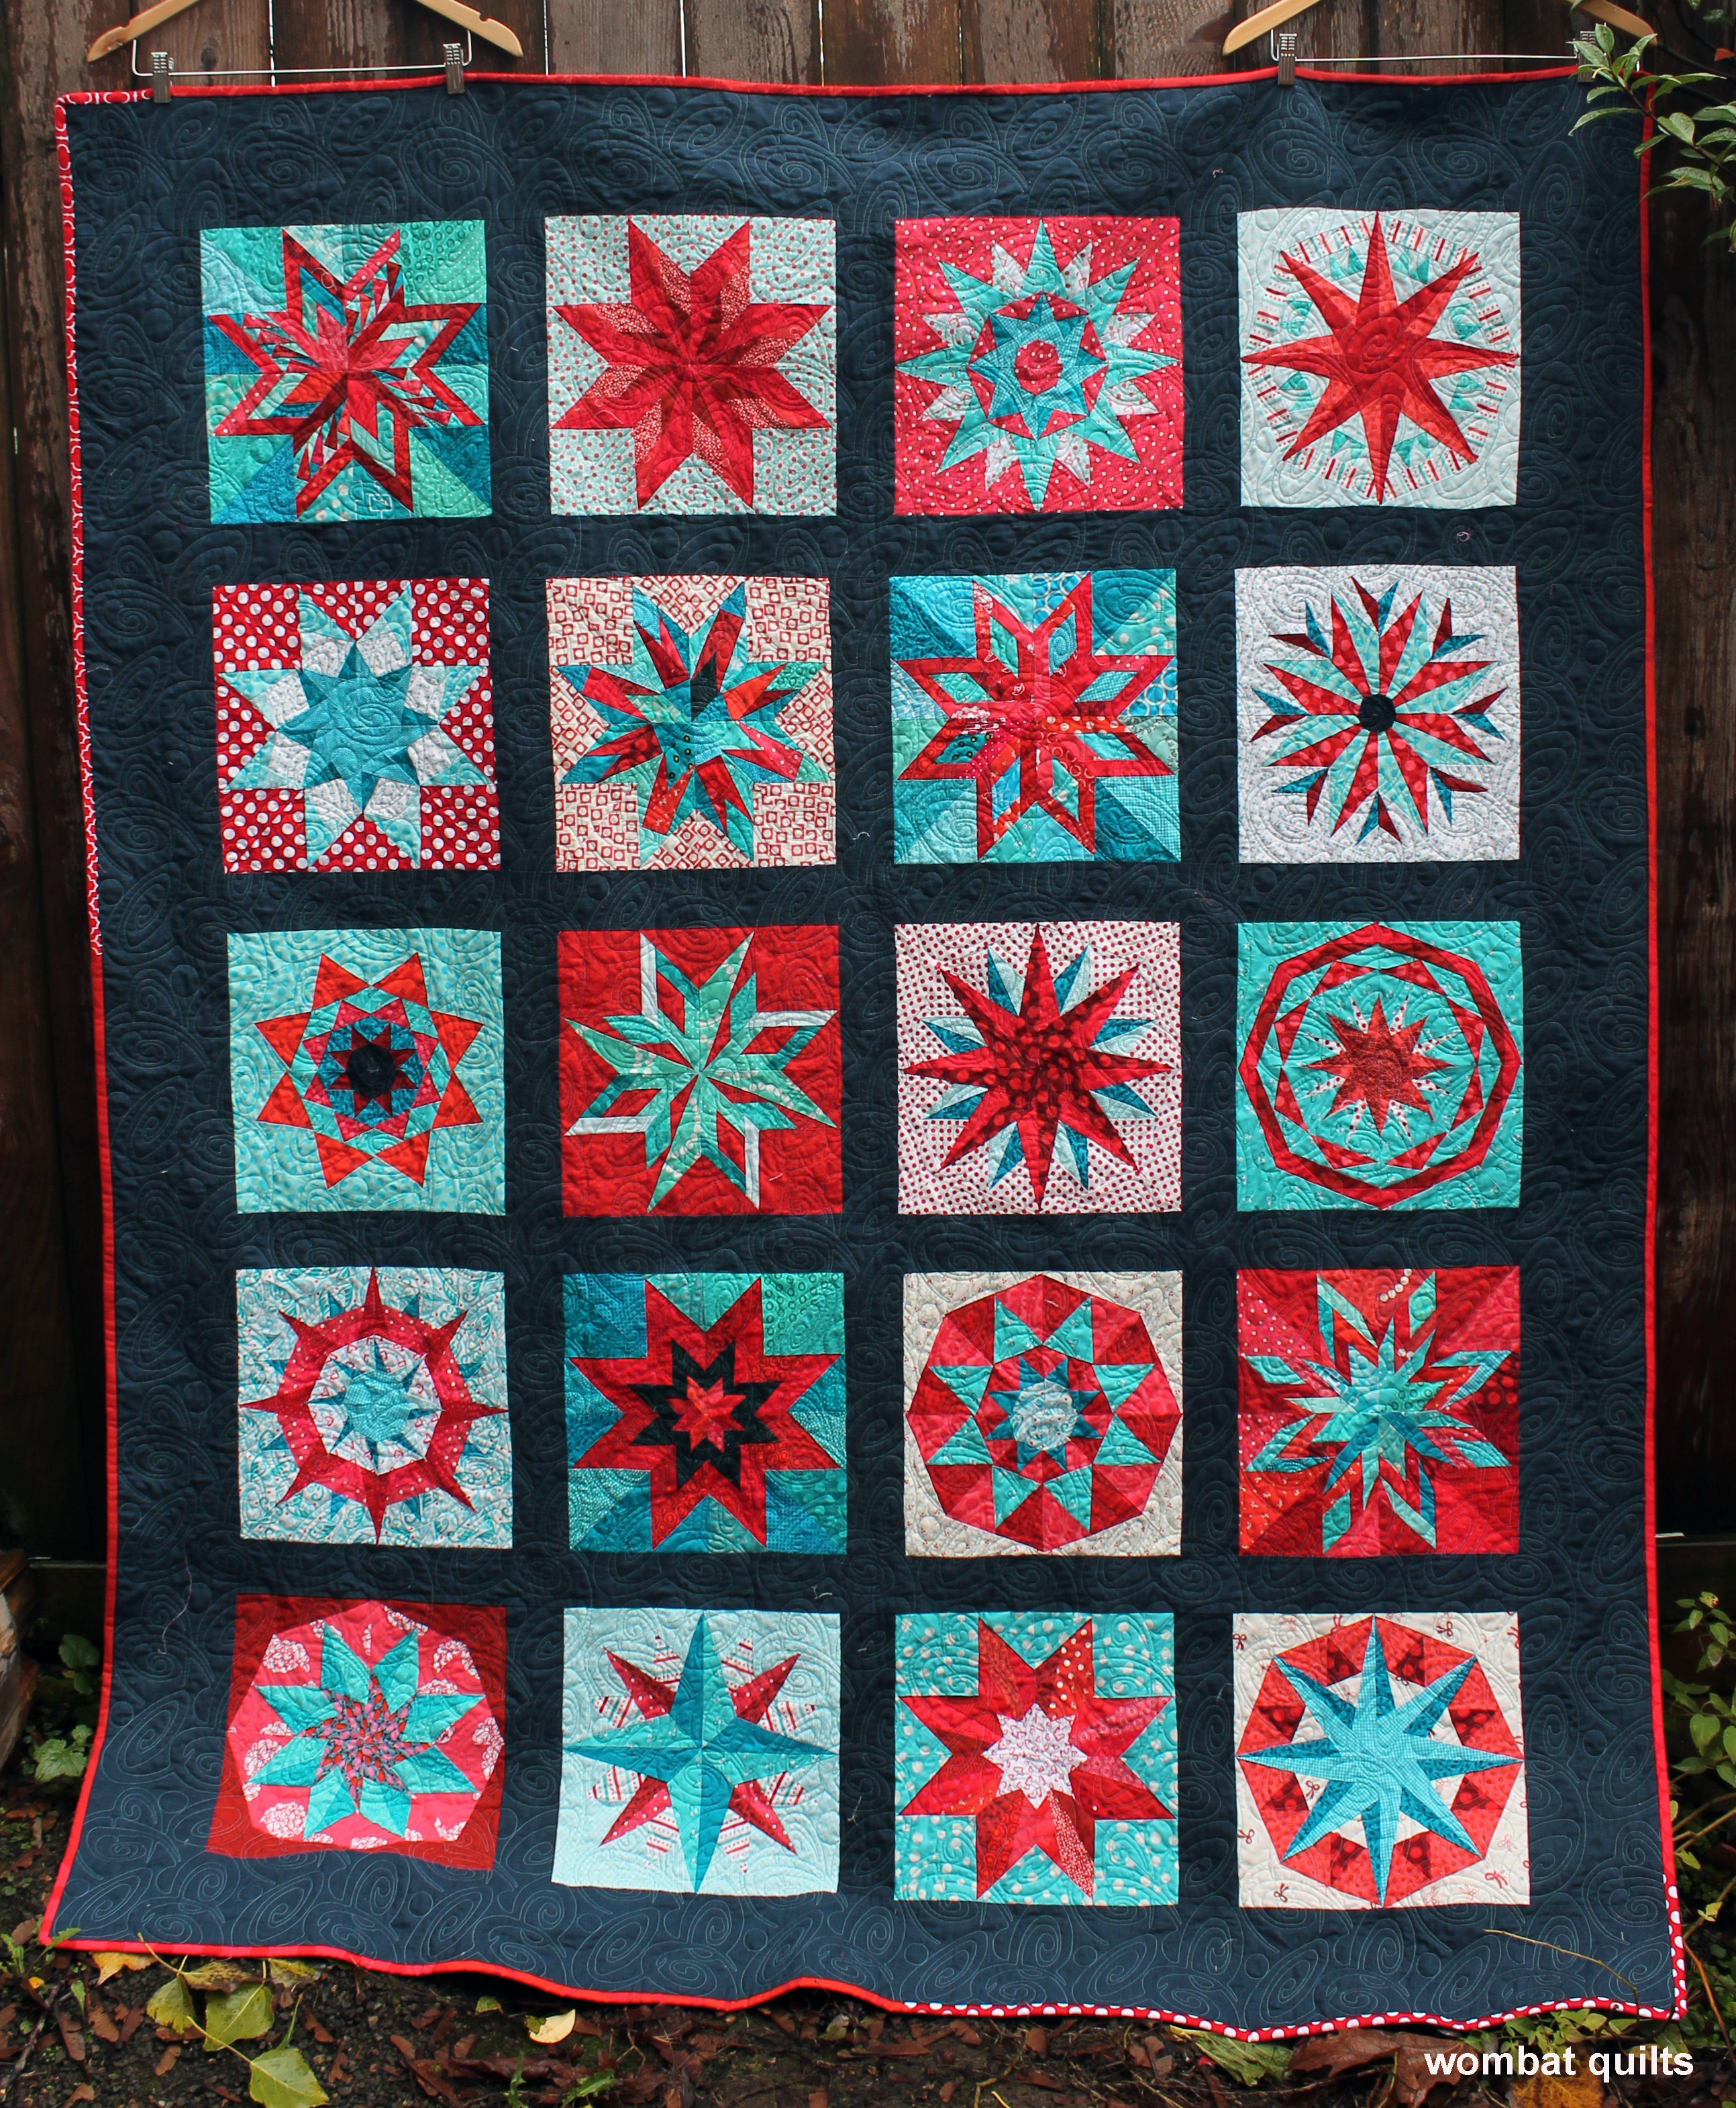
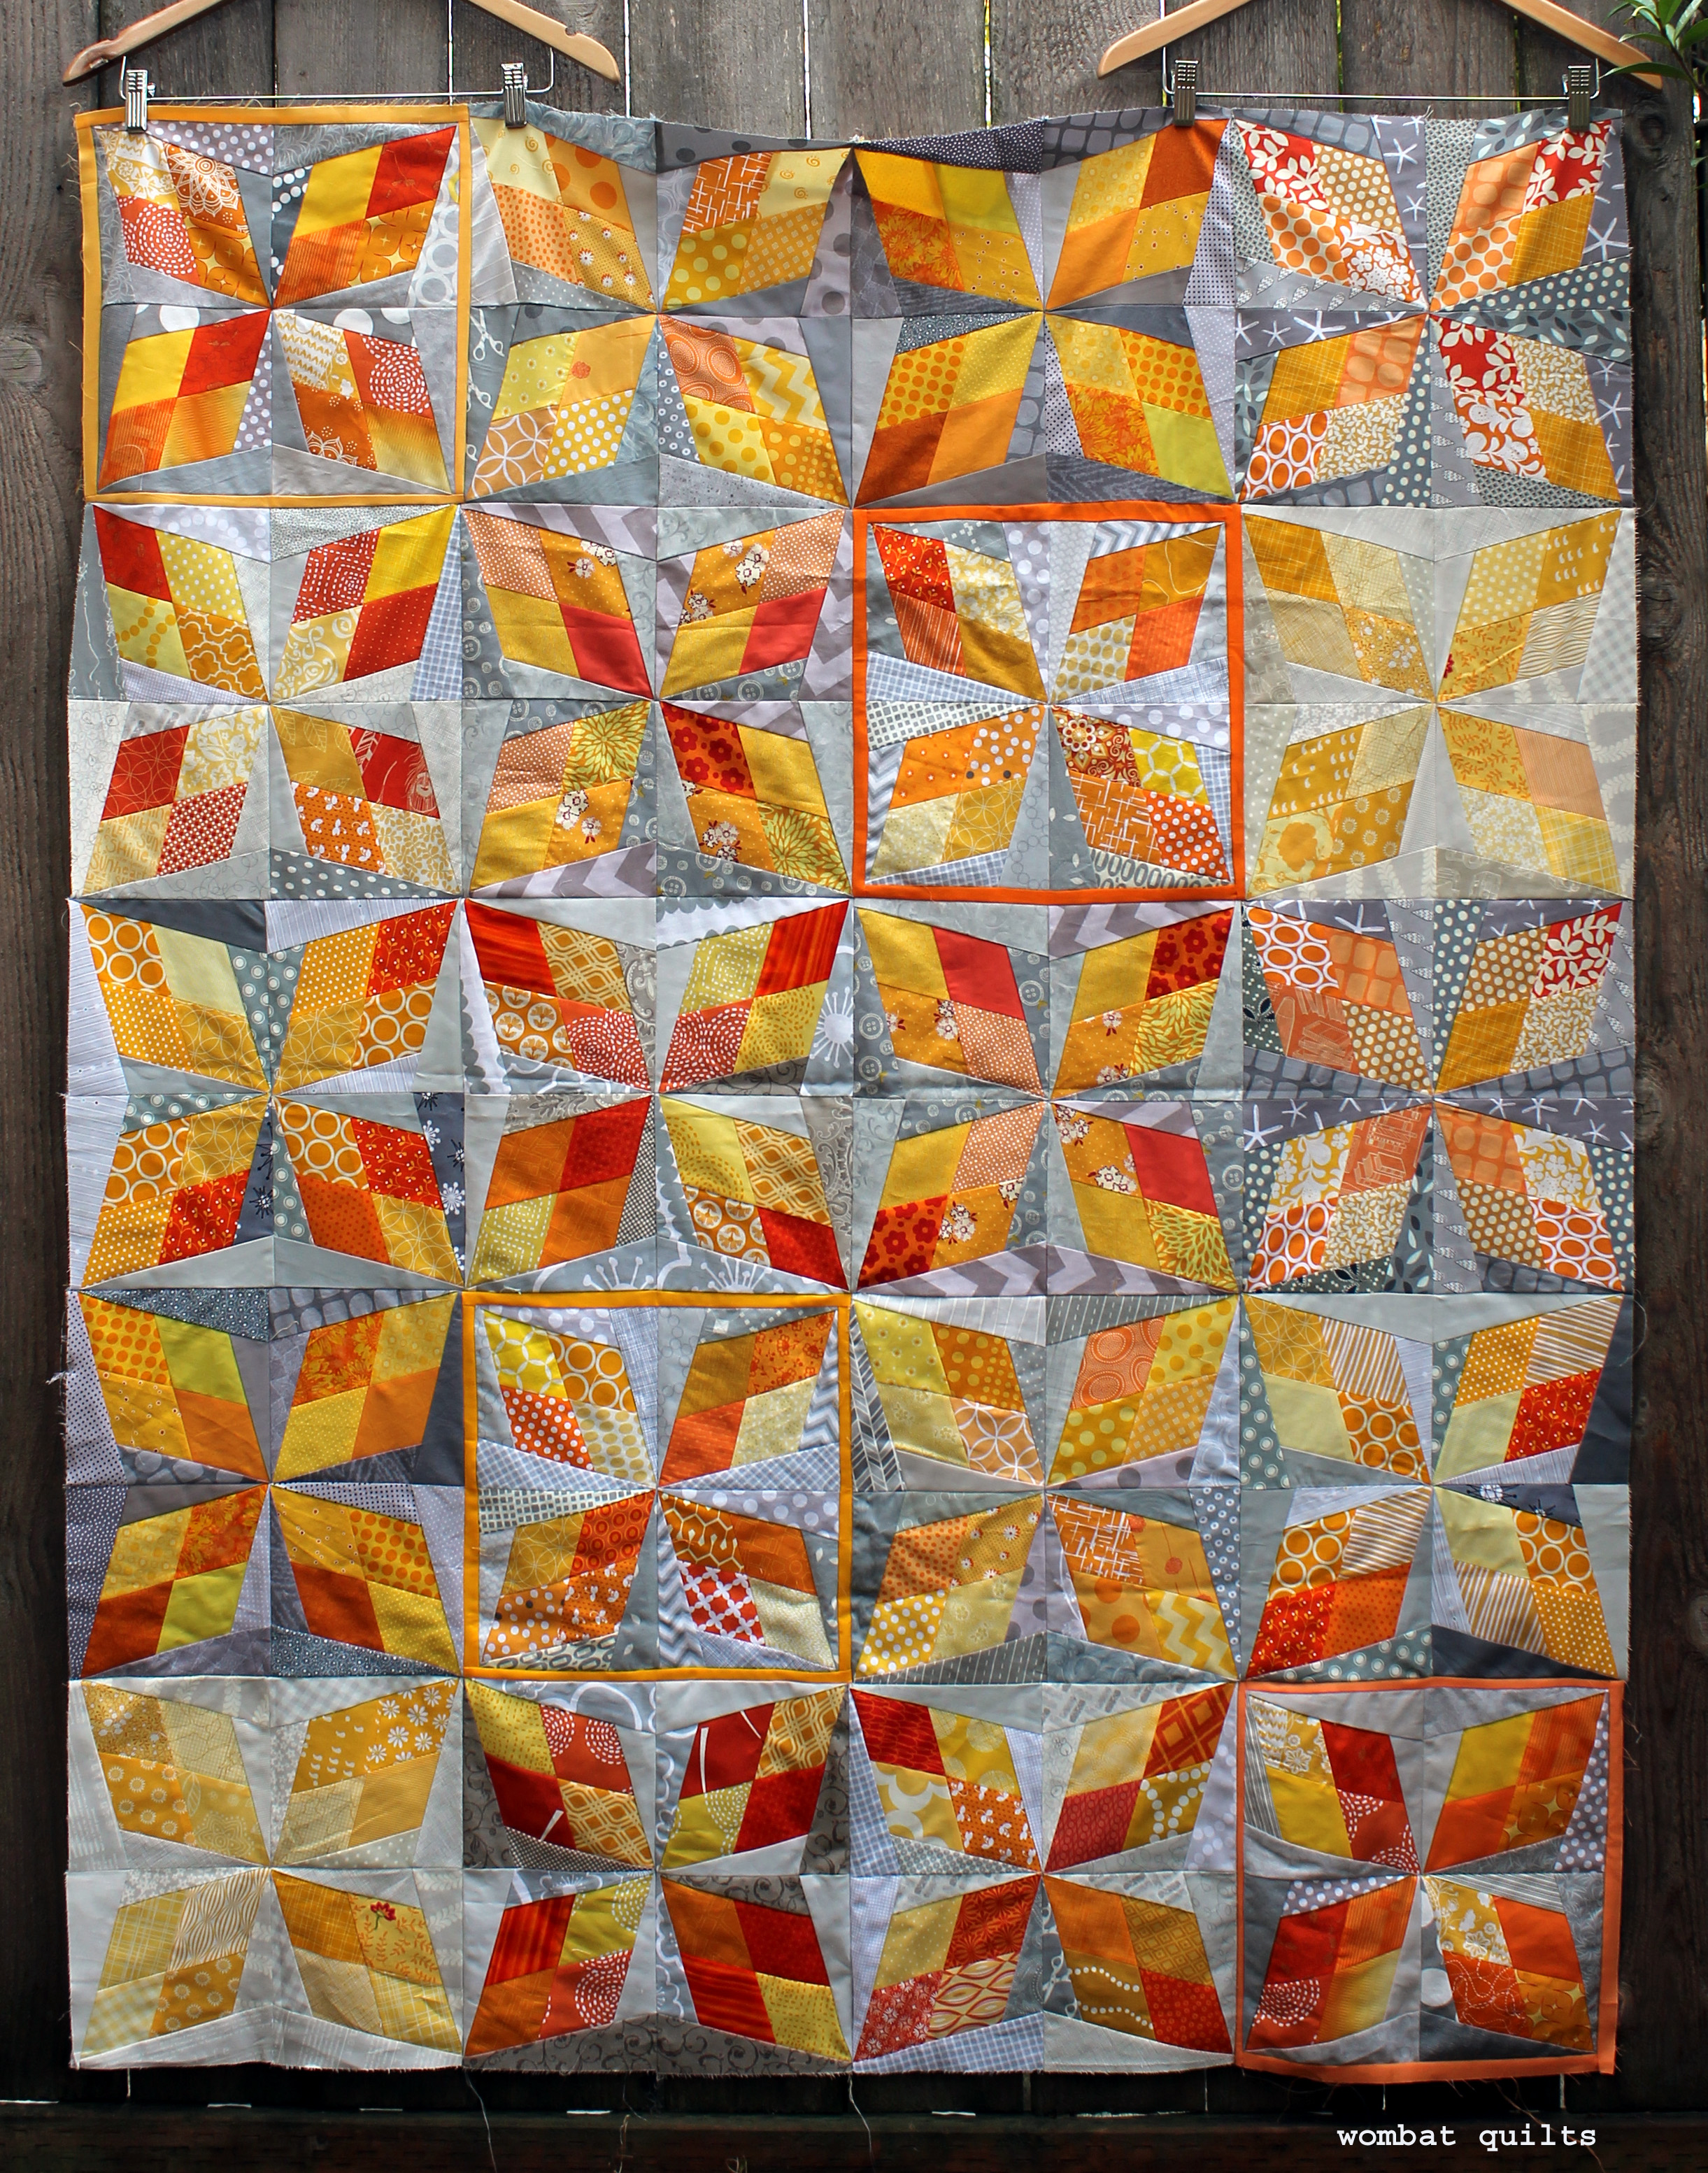
This week I managed to finish up the second quilt I am taking home to Australia…this one is for my mum.
Red star quilt
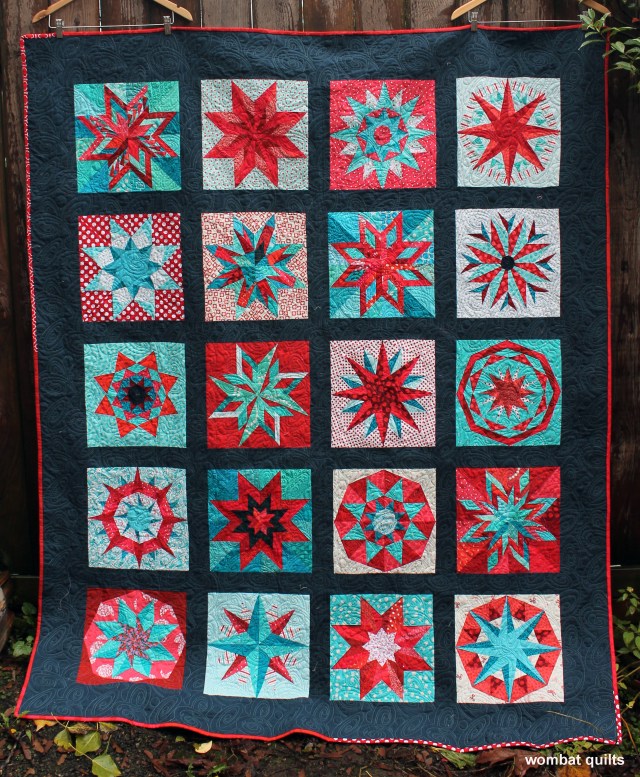
So my Mum knows that this quilt is heading her way as a birthday present (yes she knows it is coming to her, because I am hopeless with surprises!)… her favorite colours are red and aqua so it is perfect for her…plus this quilt, with its beautiful stars and hours of work needed to go to someone special.

Red star quilt detail

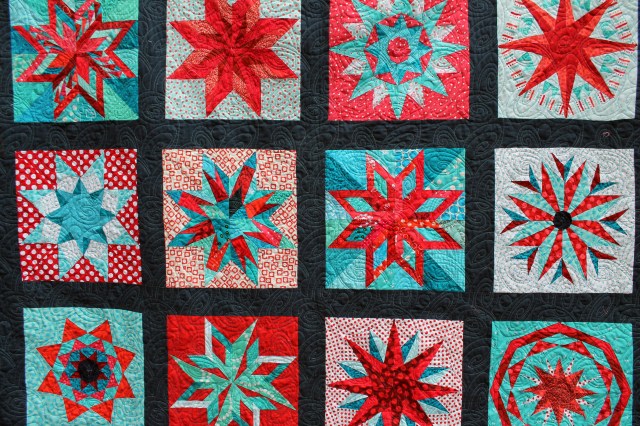
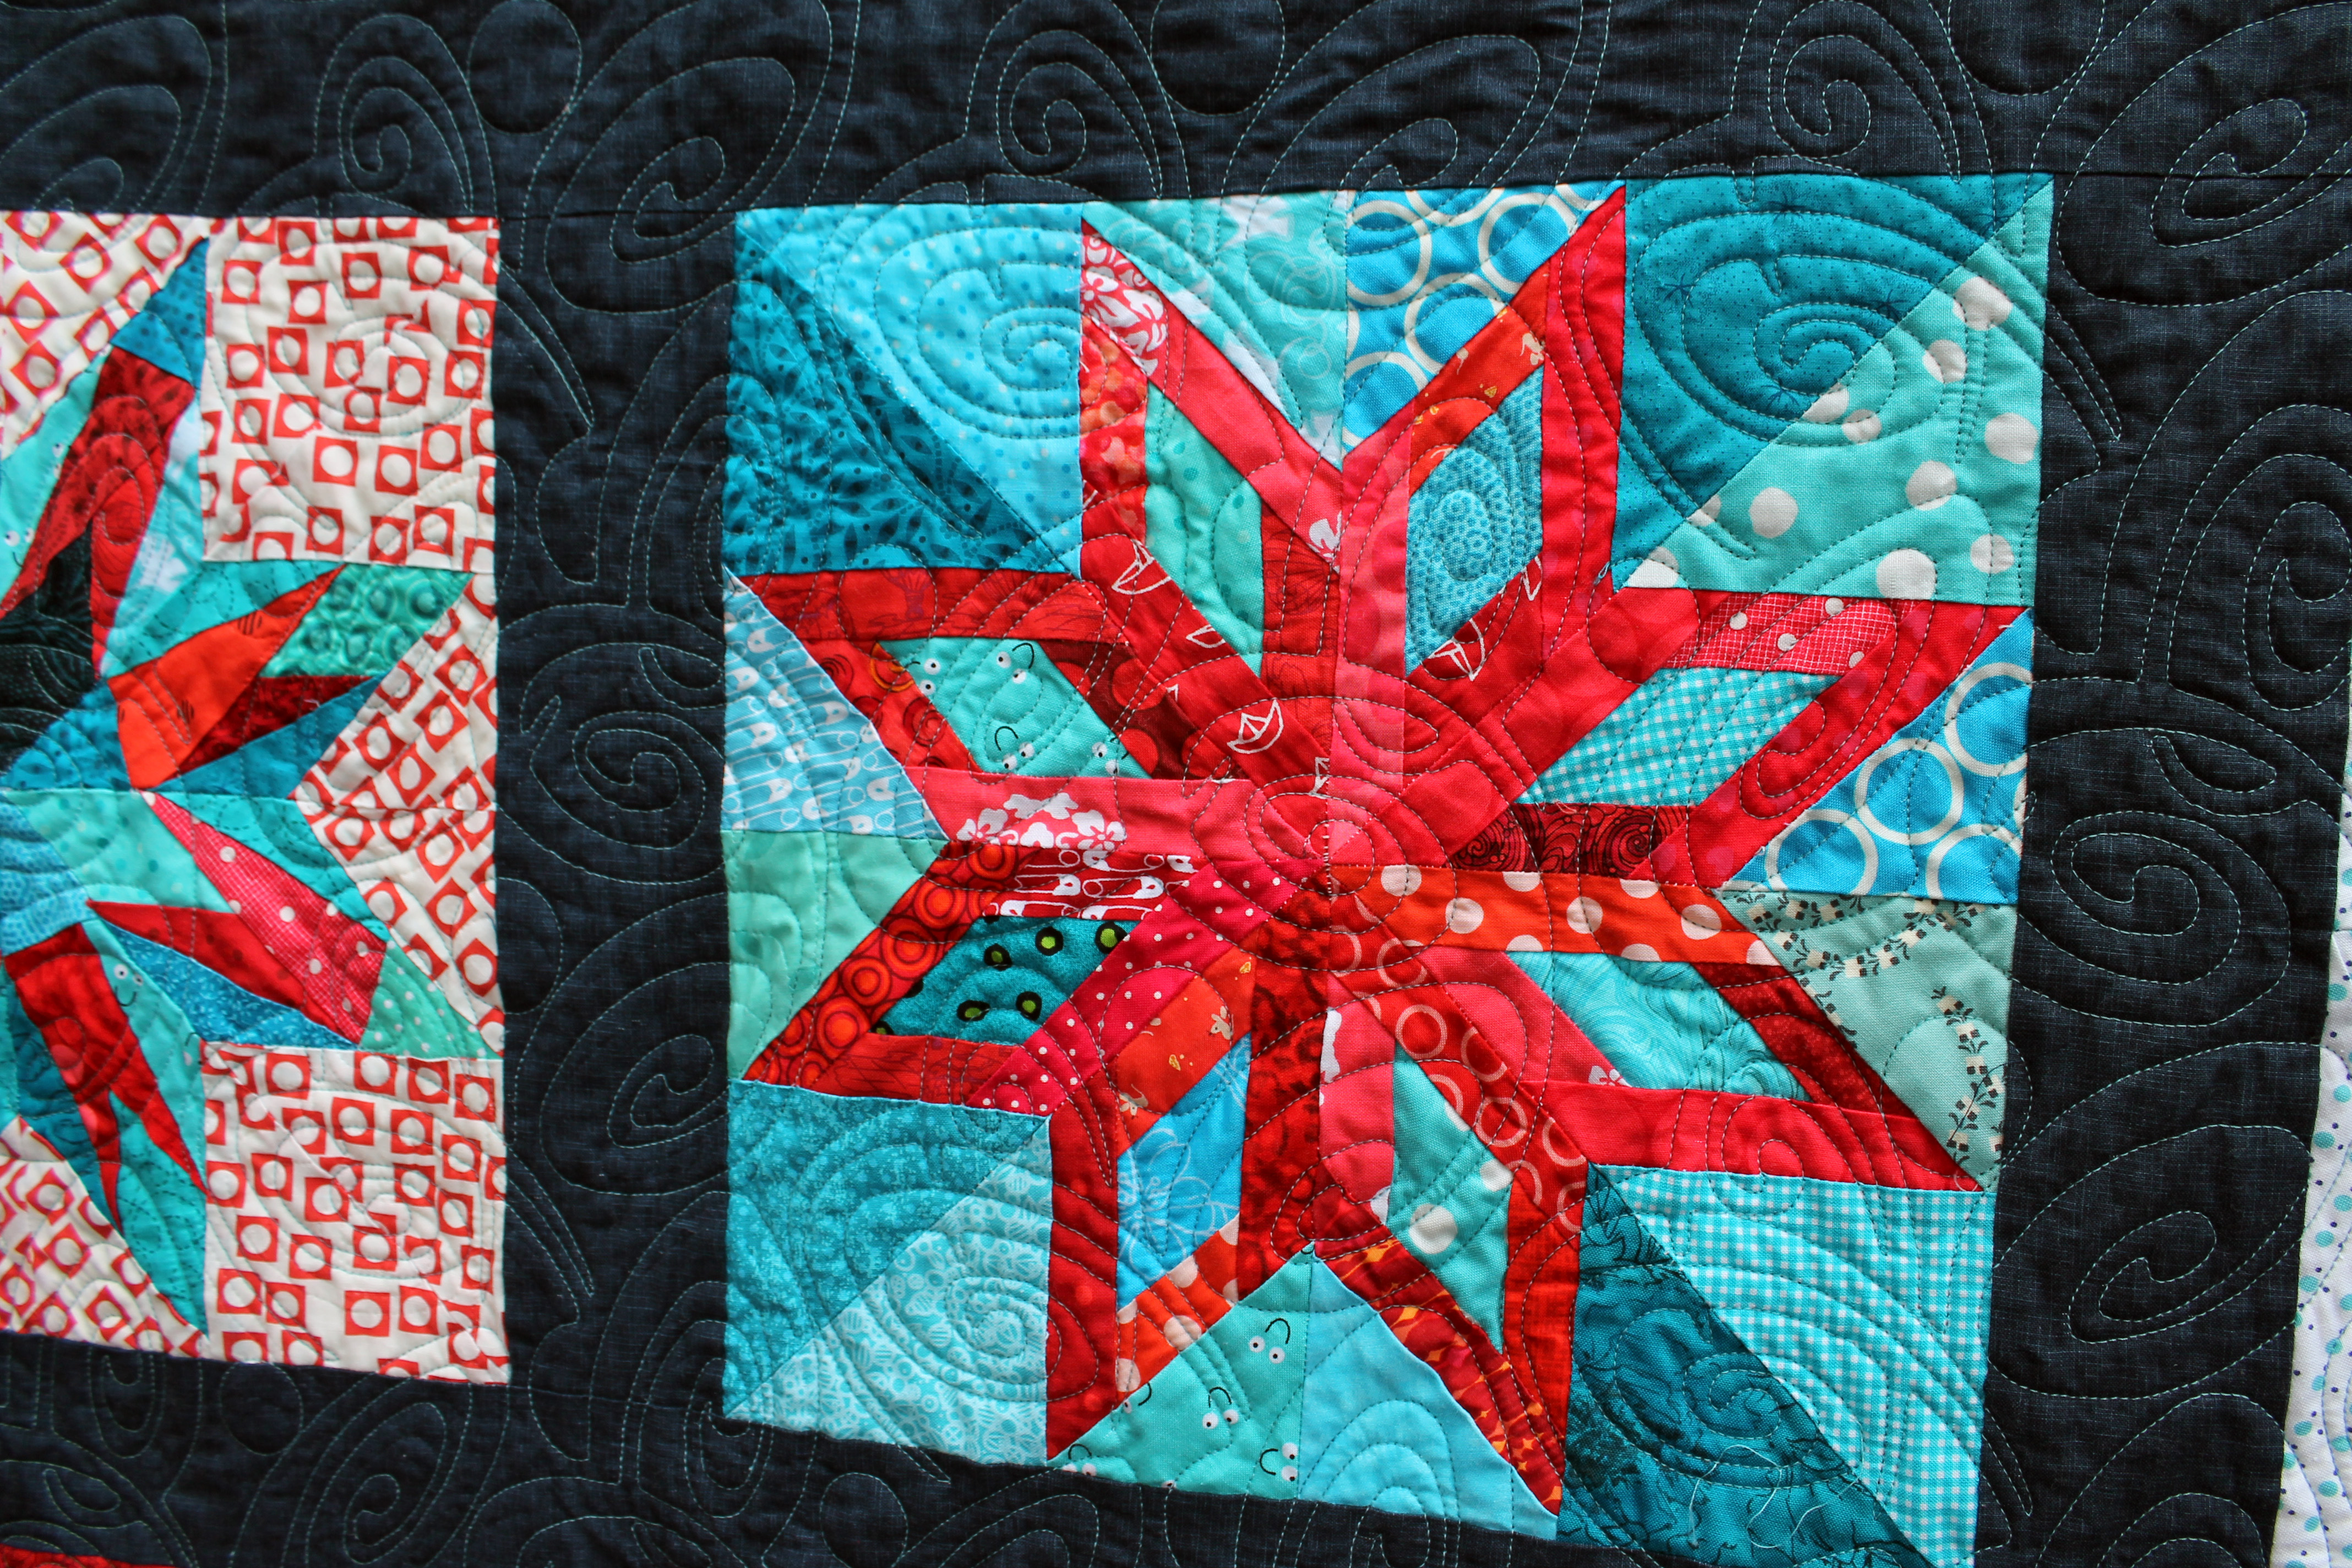
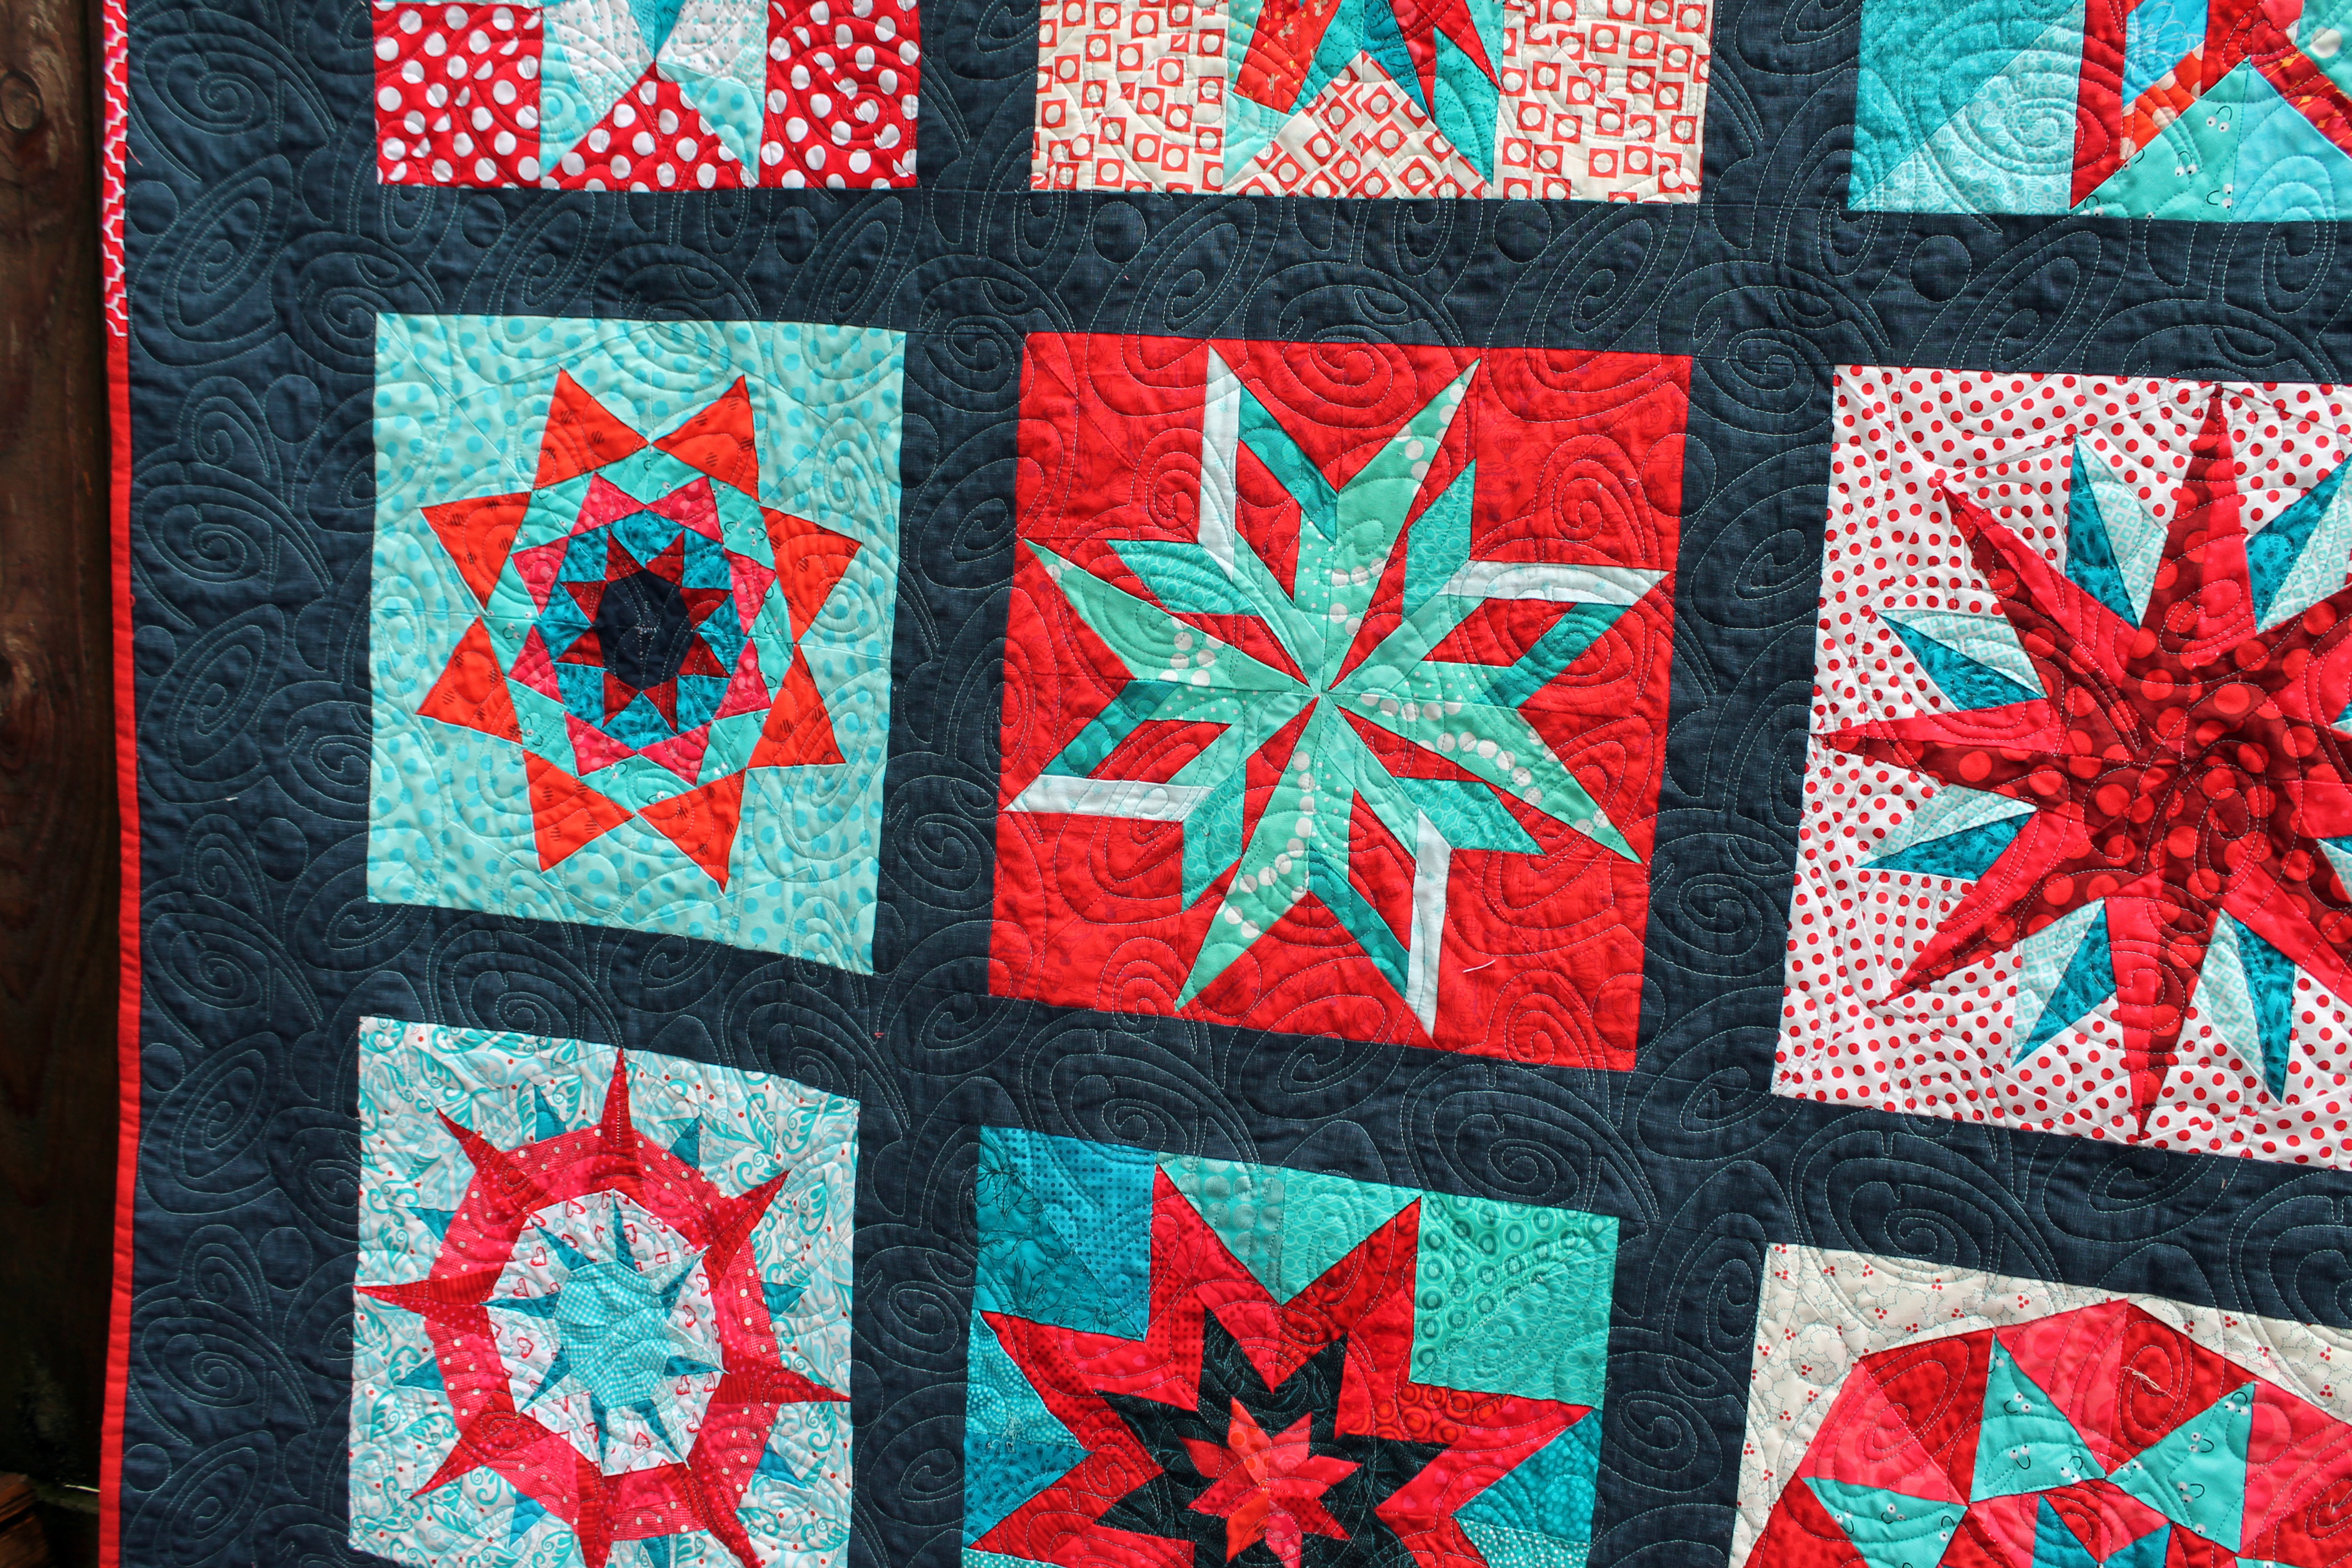
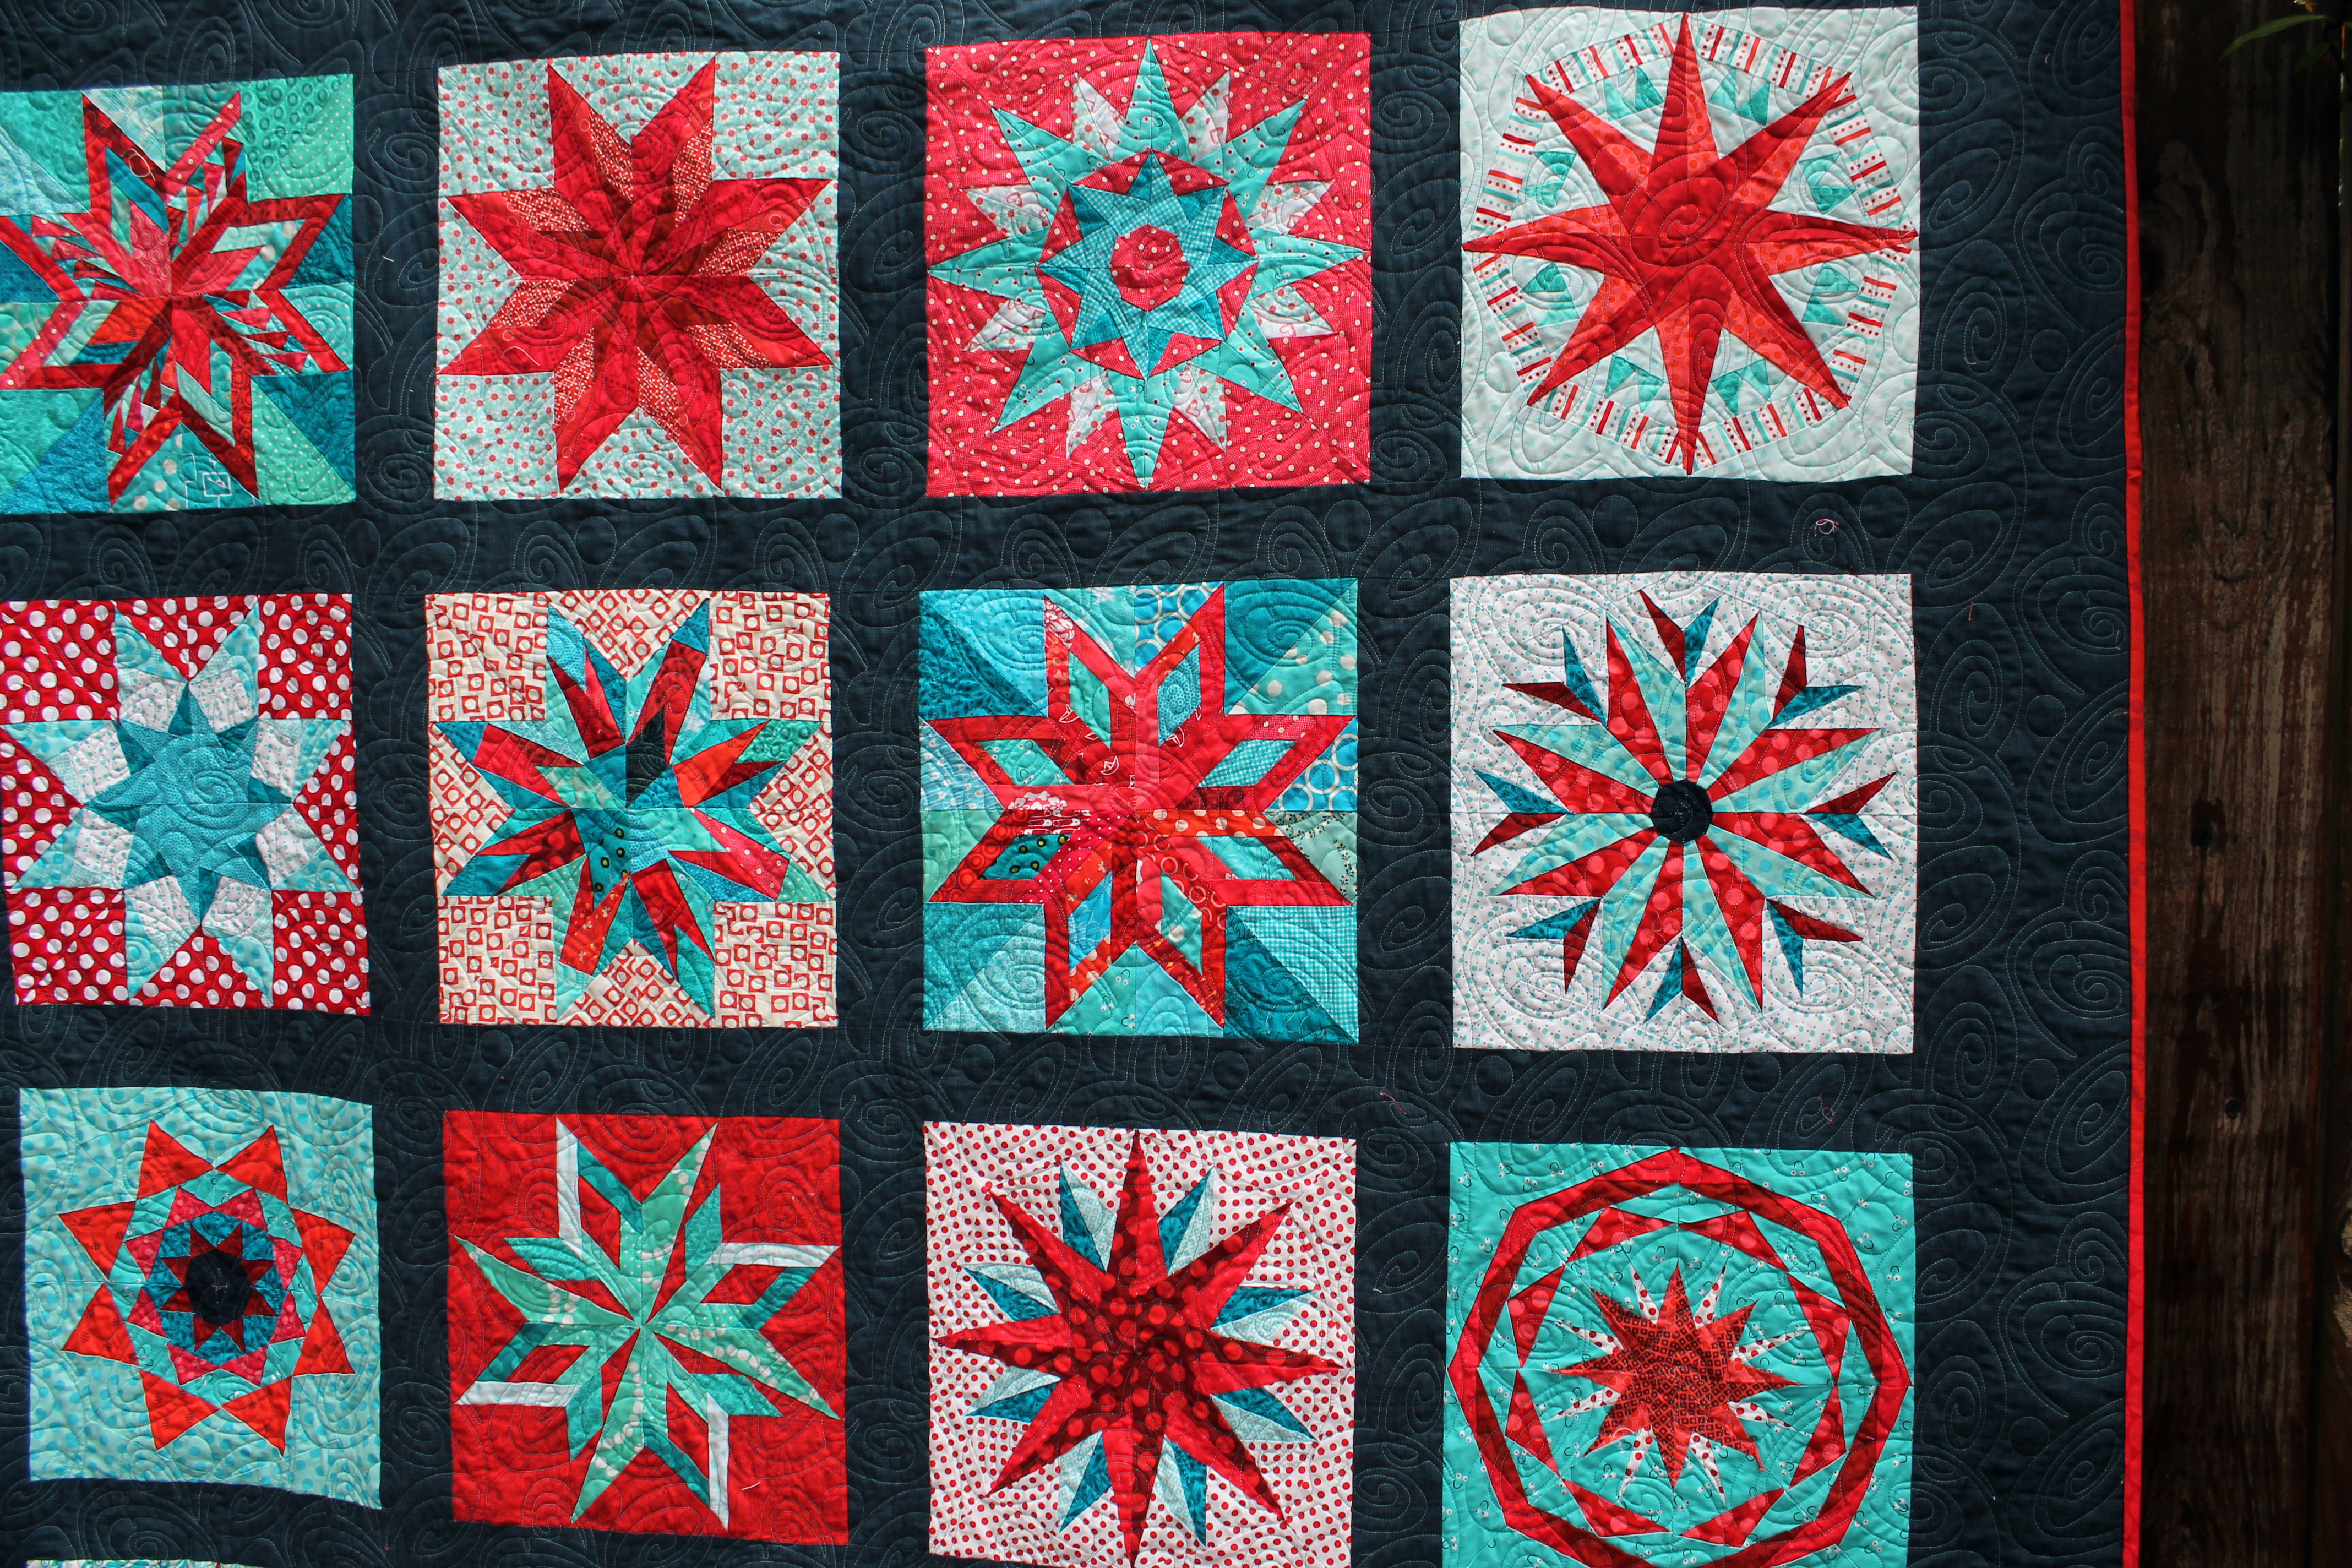
20 paper pieced stars, a couple of yards of Robert Kaufman Quilters Linen, spools and spools of thread and countless yards of red and aqua fabric and we are done.

red star quilting detail

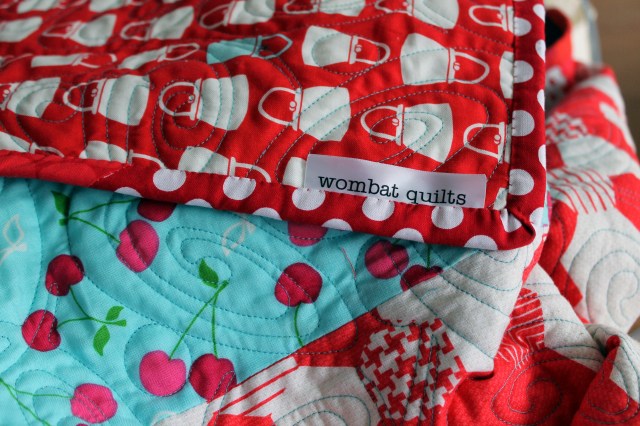
I was smart enough to send this quilt out to be quilted and the fabulous Nancy Stovall did an amazing job.  I actually left the quilting pattern decision up to Nancy and she choose a wonderful swirl that gives great movement to the stars.  I love it.

Red star quilt detail 2

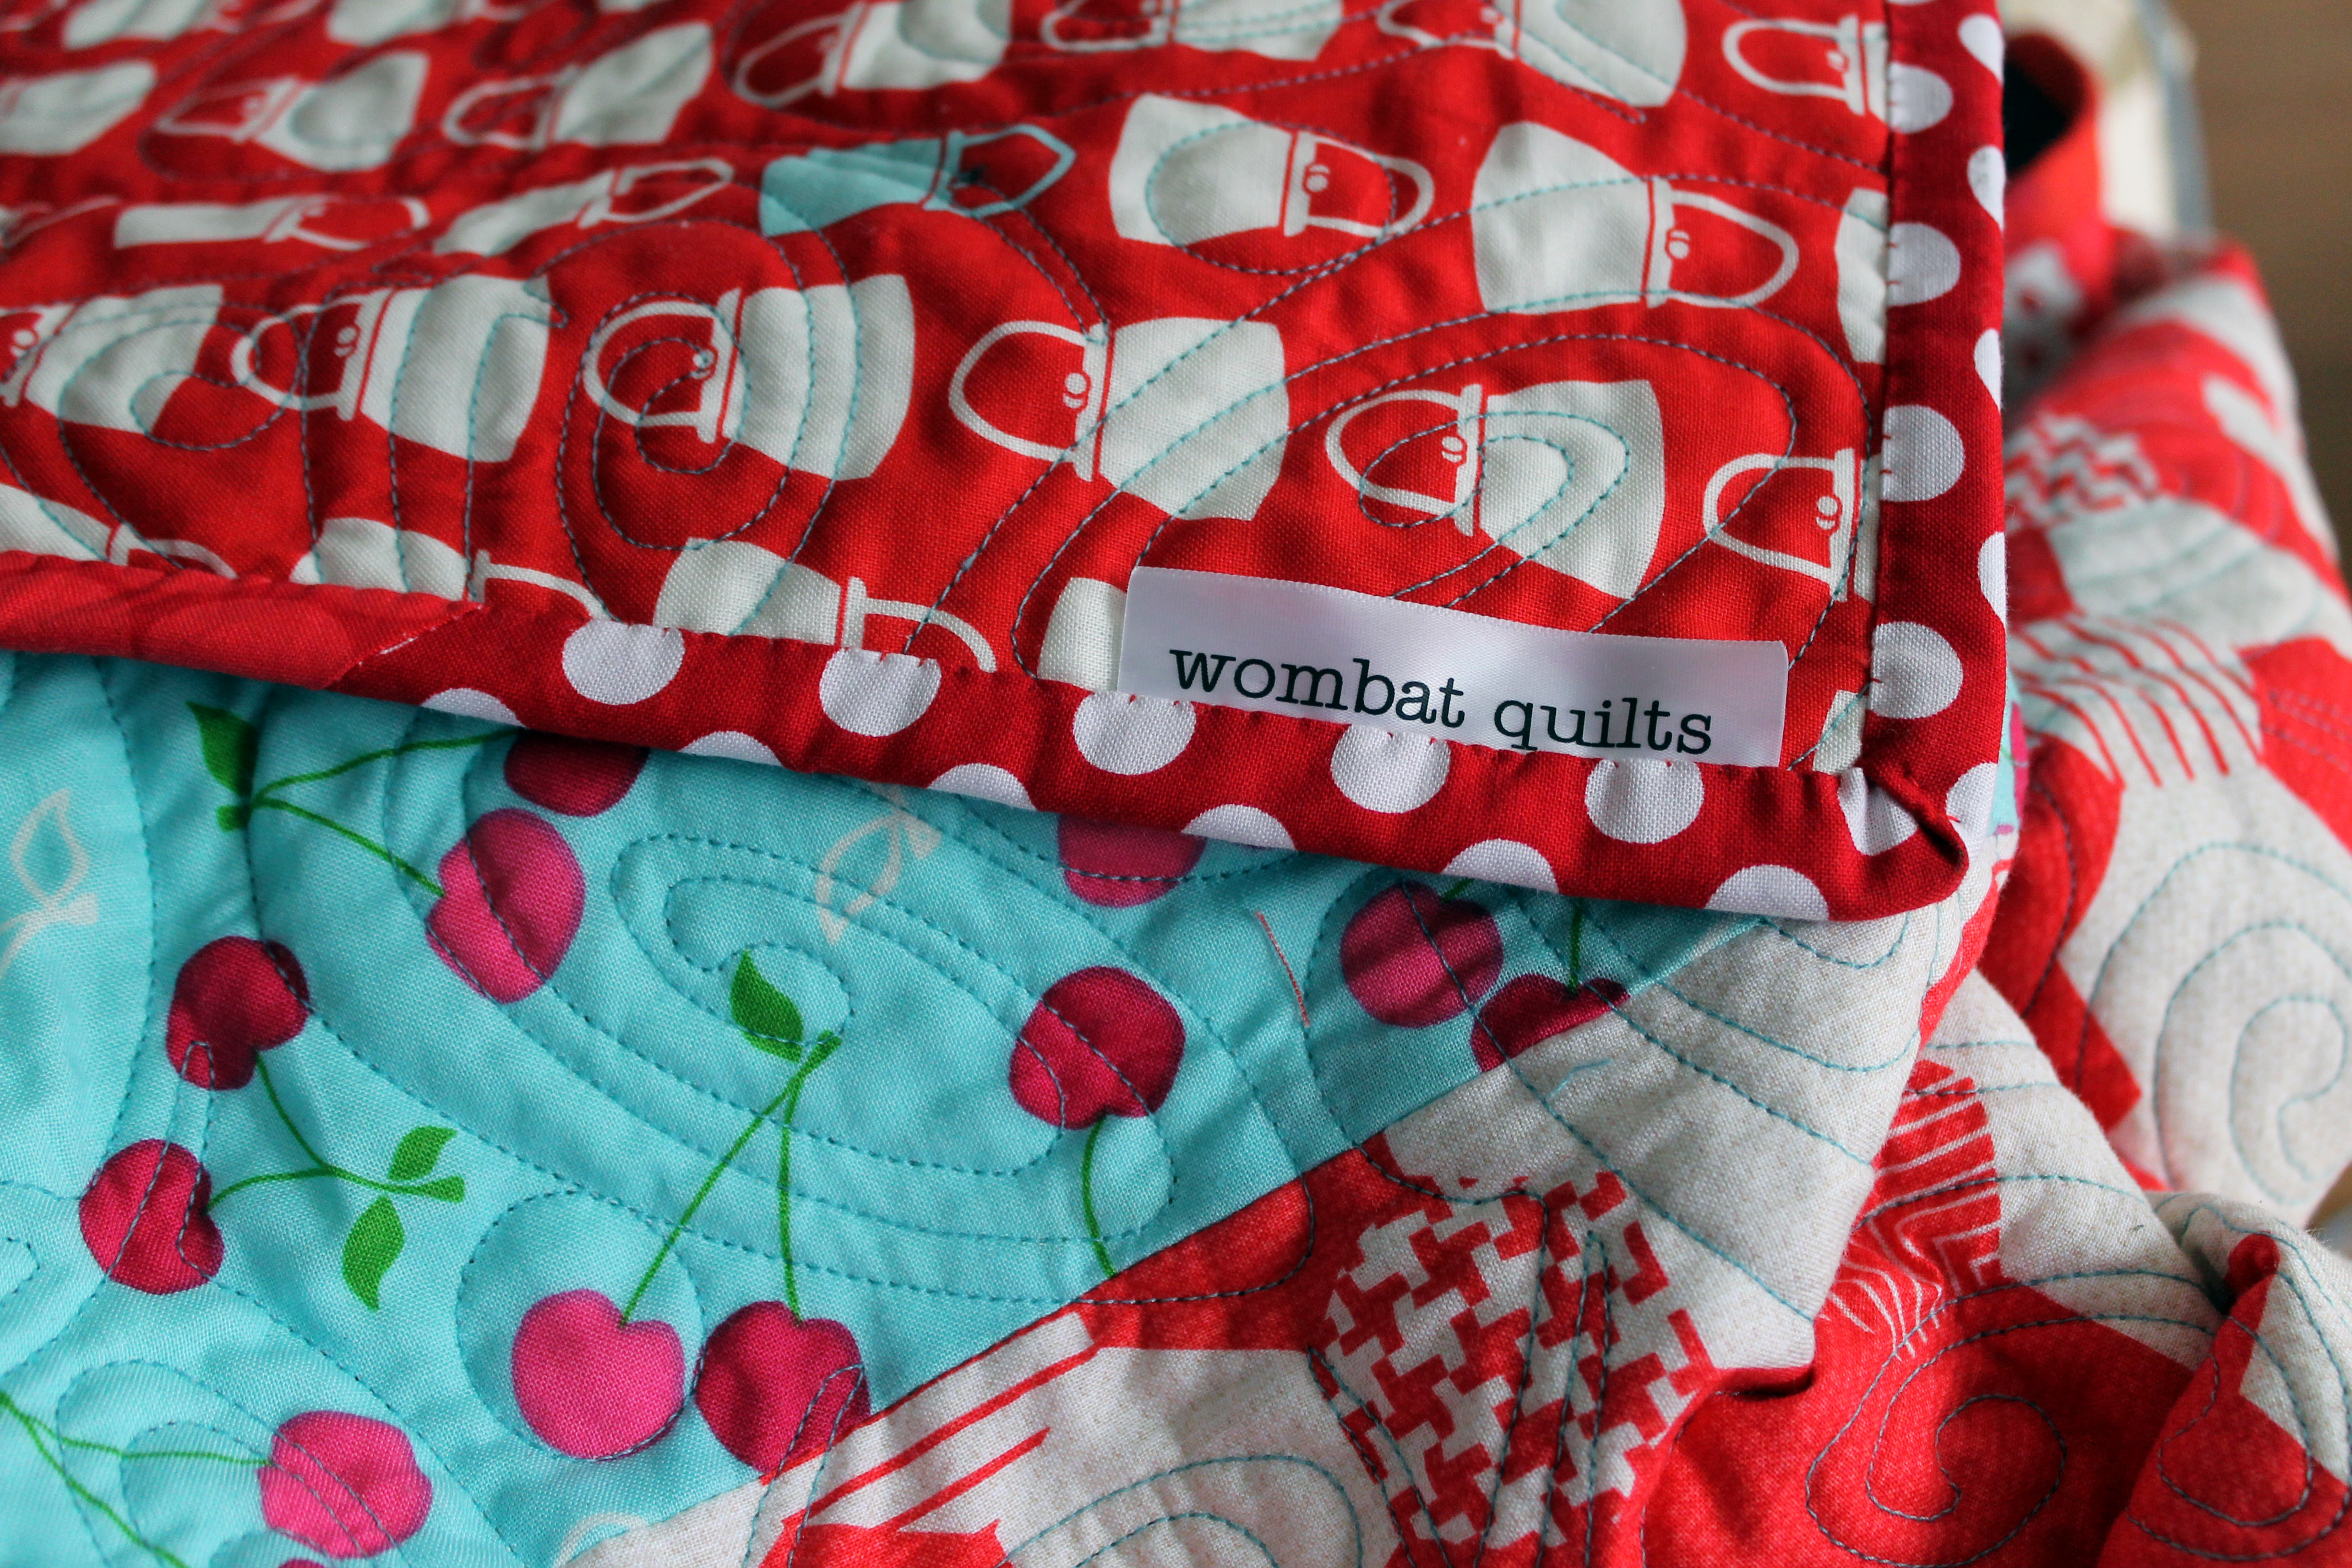
For the back of the quilt I used a bunch of yard and half yard red and aqua prints from my stash. I also embraced the scrappy with the binding, using a variety of red prints to tie the quilt together.

red star binding

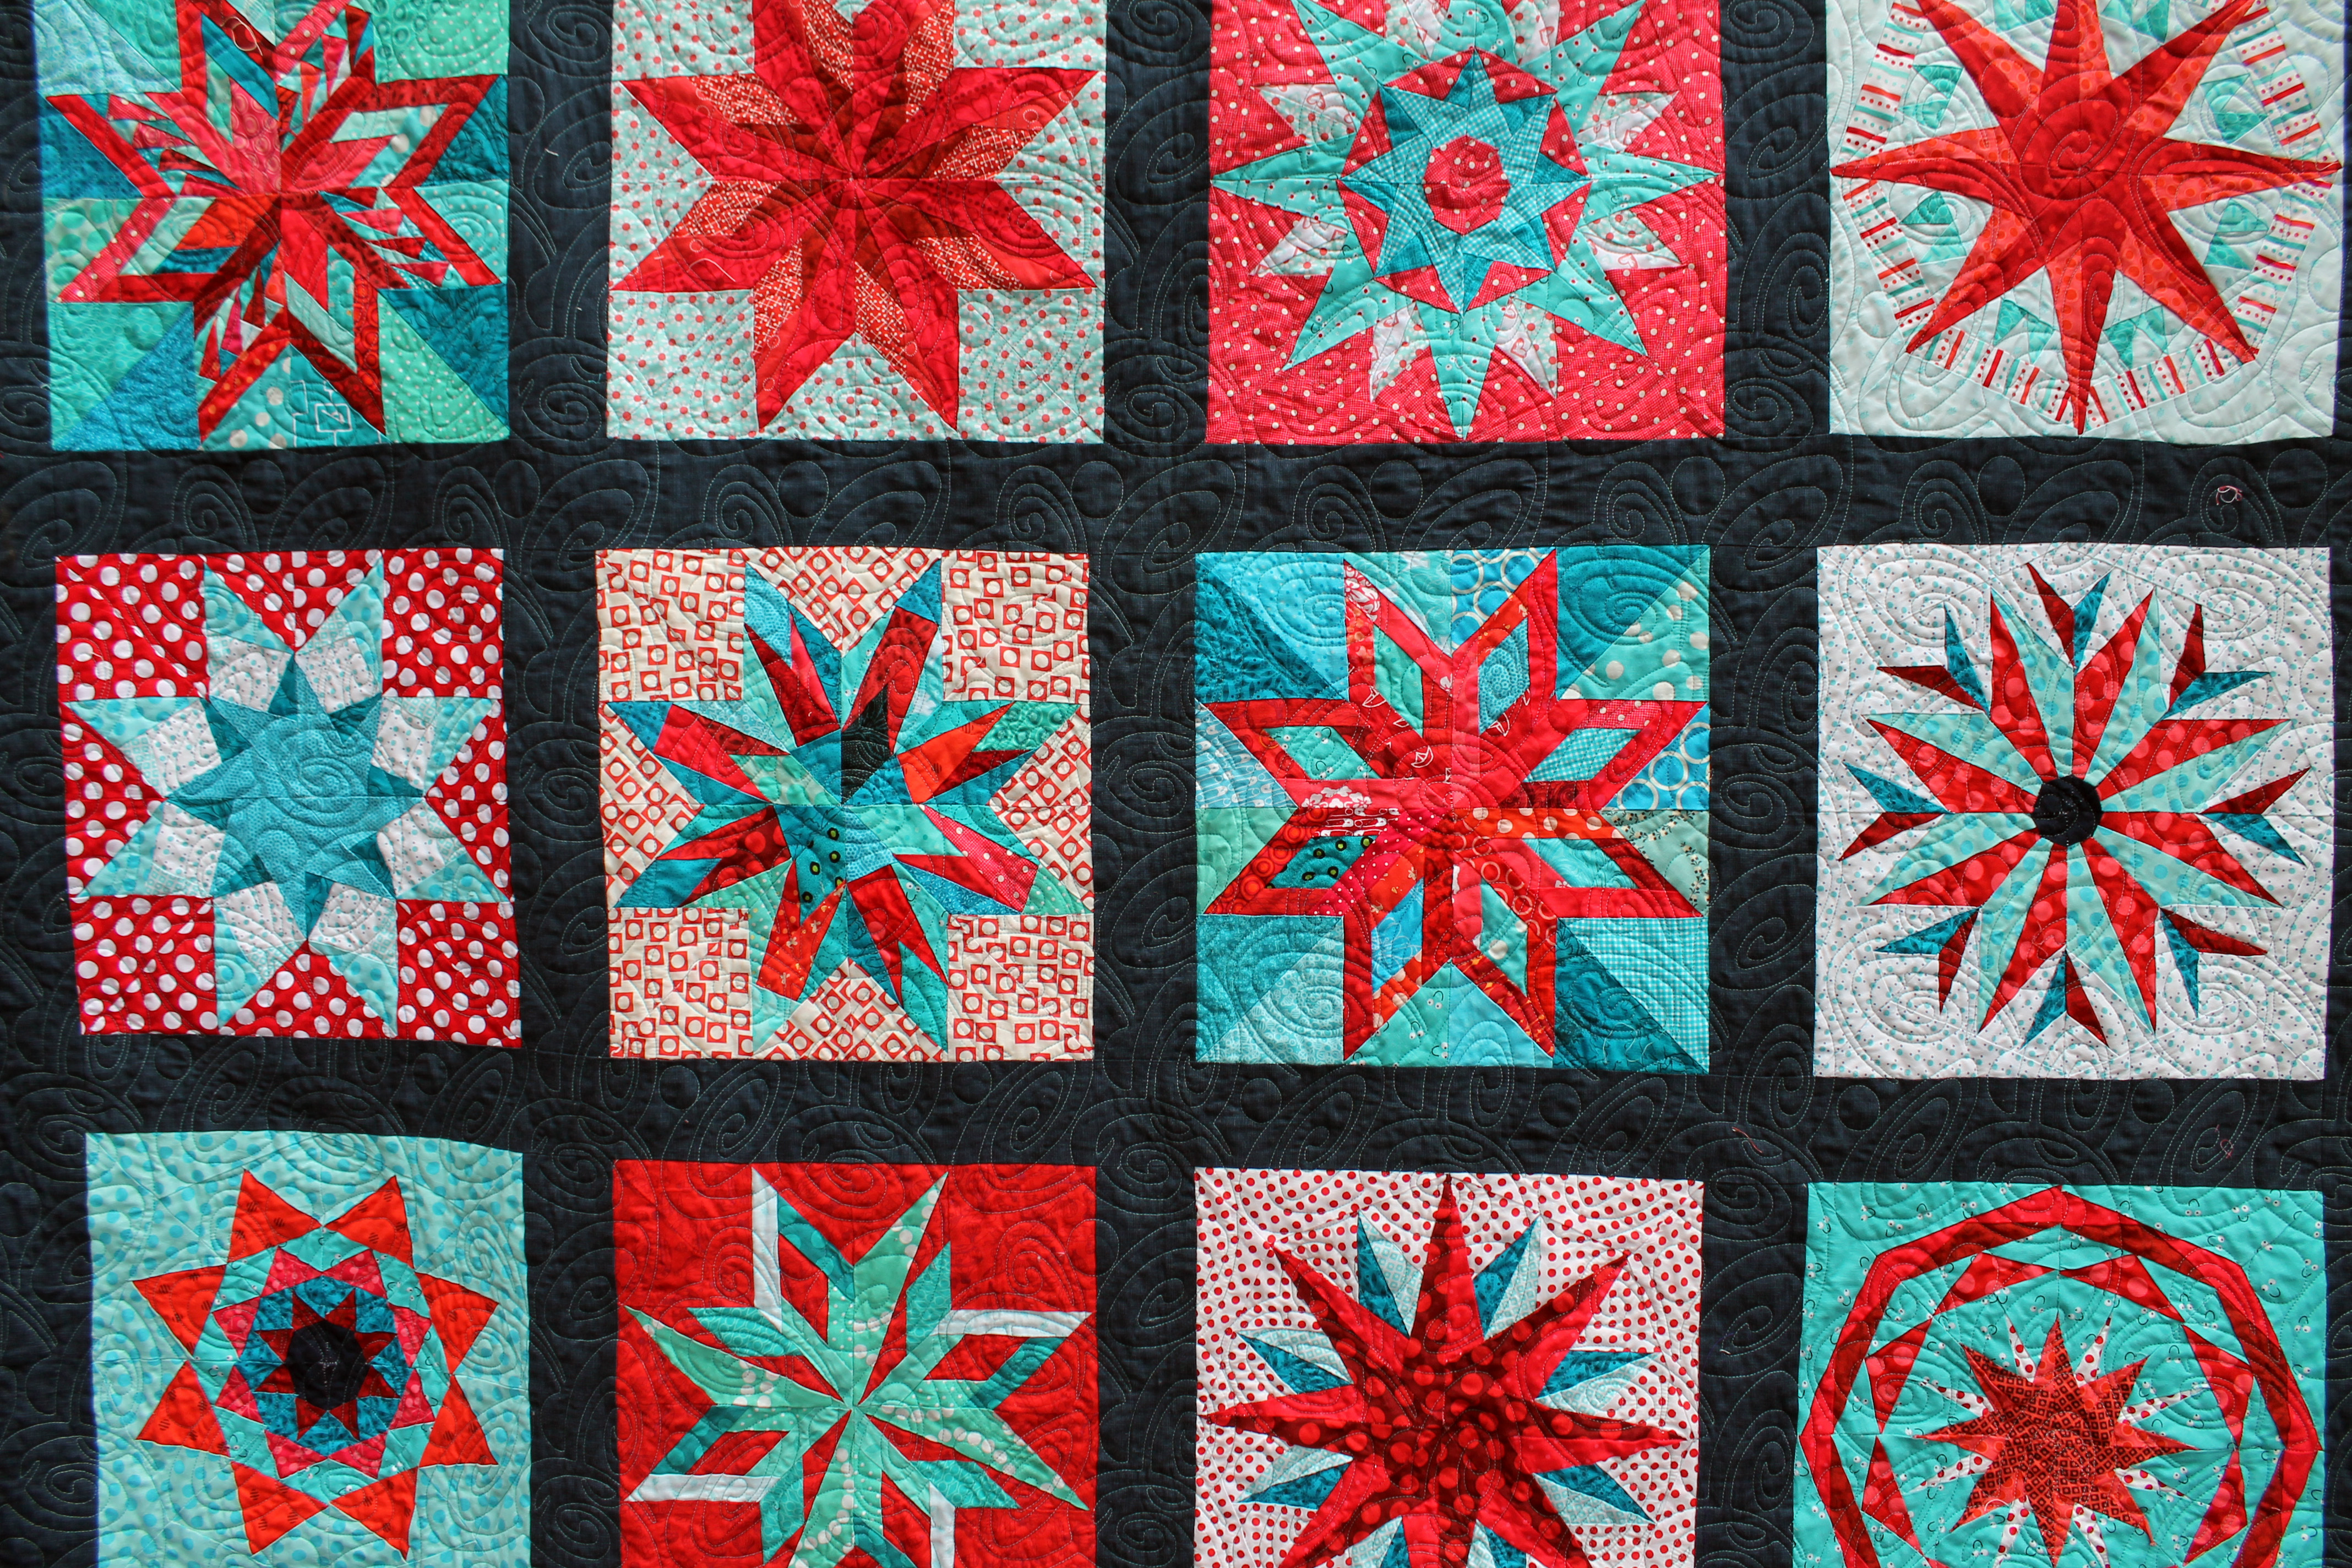
As I was binding the quilt I got a chance to look at every star more closely, and reflect on what I have learnt.

quilt detail 1

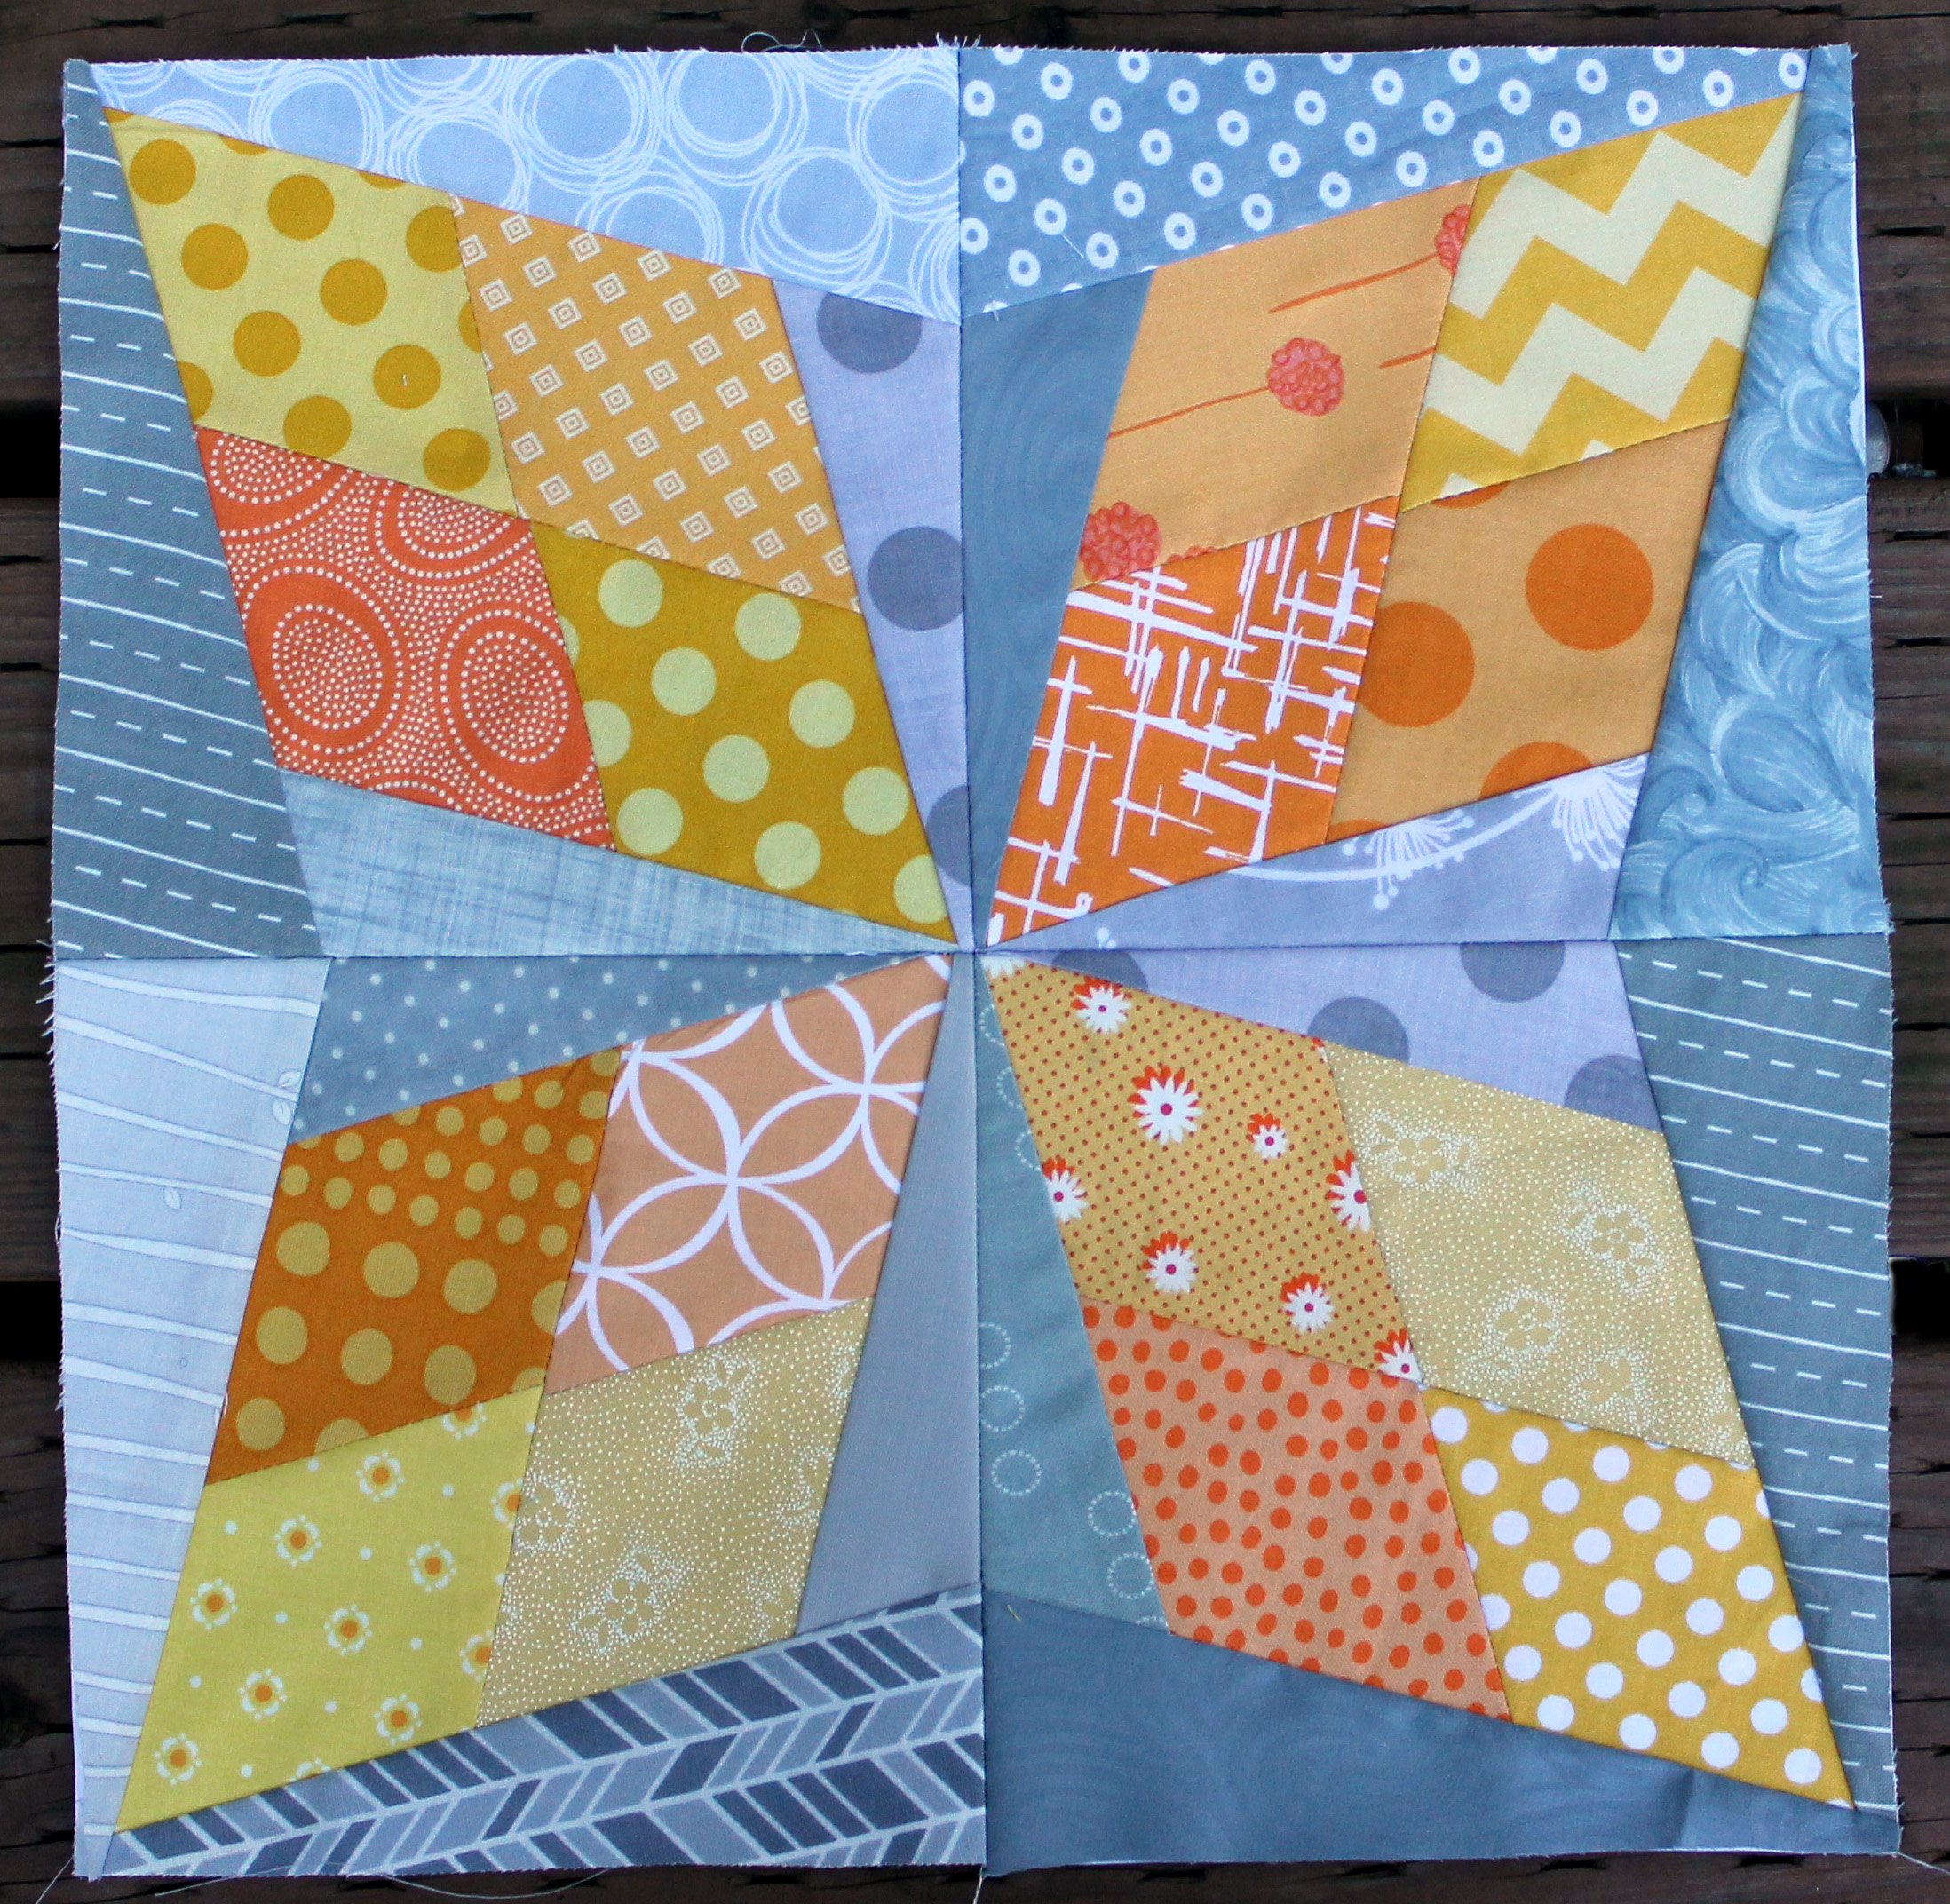
My first couple of stars were a little rough….I did not use small enough stitch setting on some of them which means that some stitches at the seams are visible.  I also was not as careful with the bulky joins in the some of the stars – I did not iron the seams open properly leaving a bulbous lump in the center of one or two stars.  But 20+ stars in I was a pro – I had embraced scrappy, had finessed my process and was making kick butt stars.

This quilt really does represent a wonderful journey for me… and I am thrilled that my mum will get to keep it.

Quilt Details:

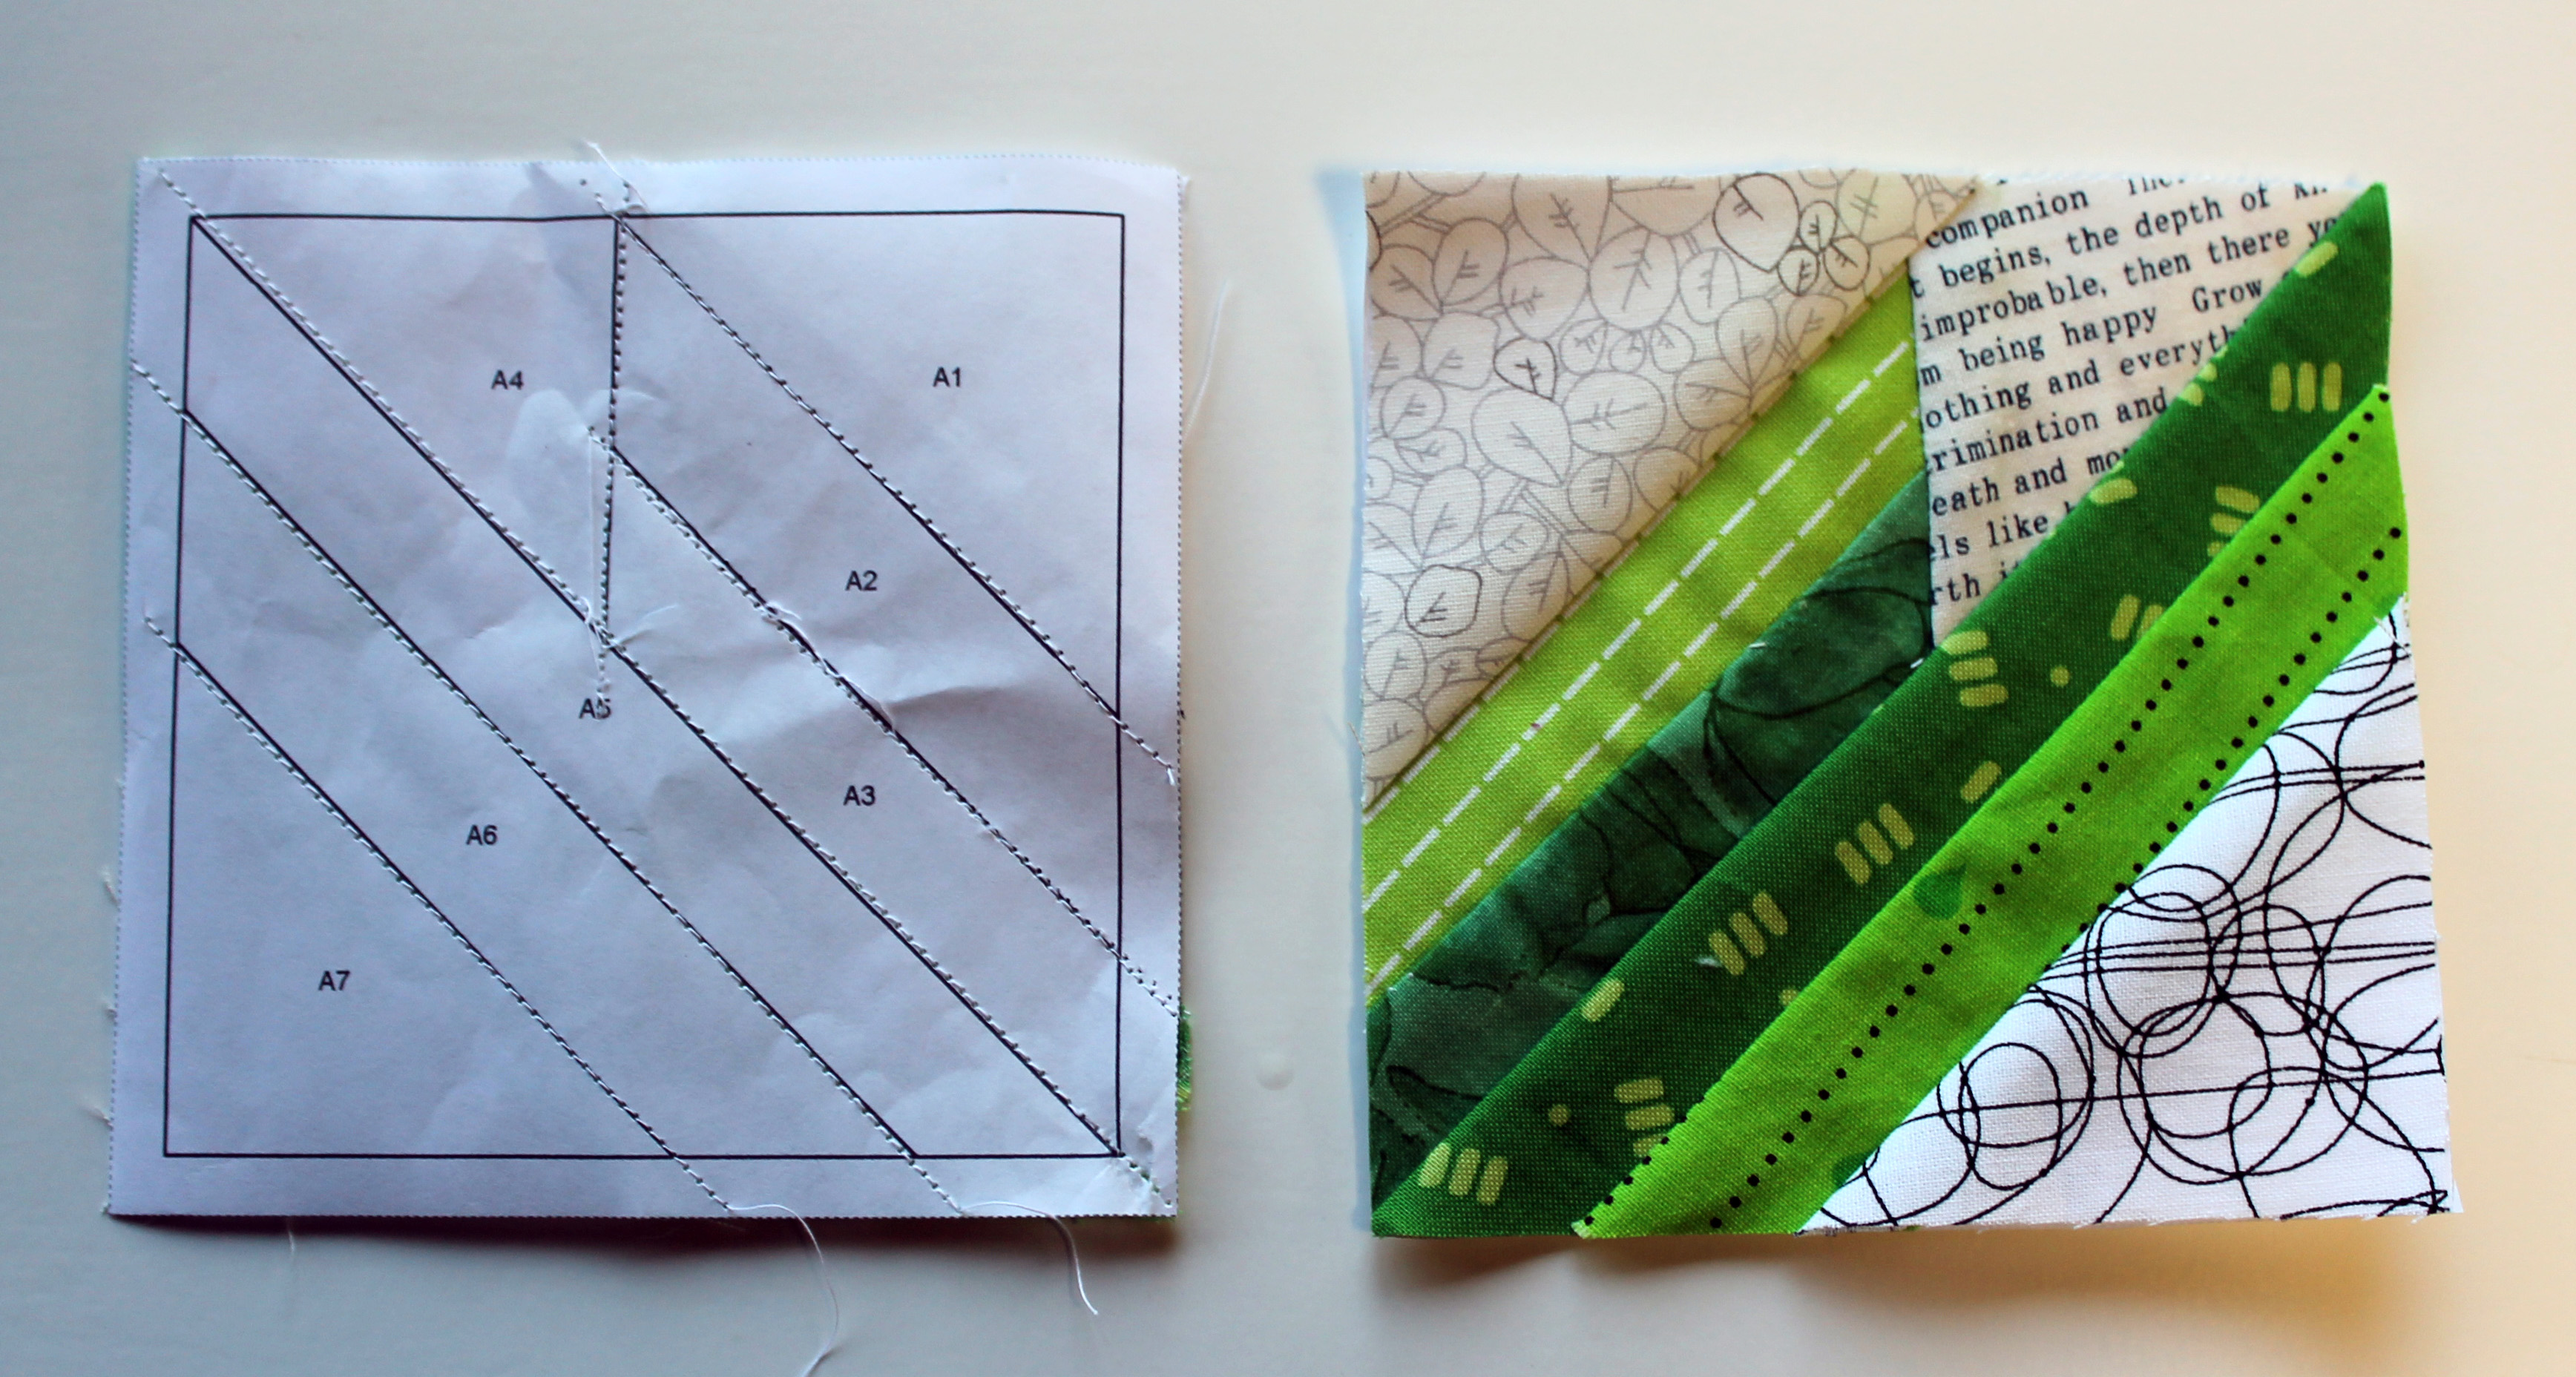
Technique:   Paper piecing
Pattern:  various stars by Carol Doak and Quilting on the Square
Quilting:   Nancy Stovall of Just Quilting
Finish size:  65 x 80 inches
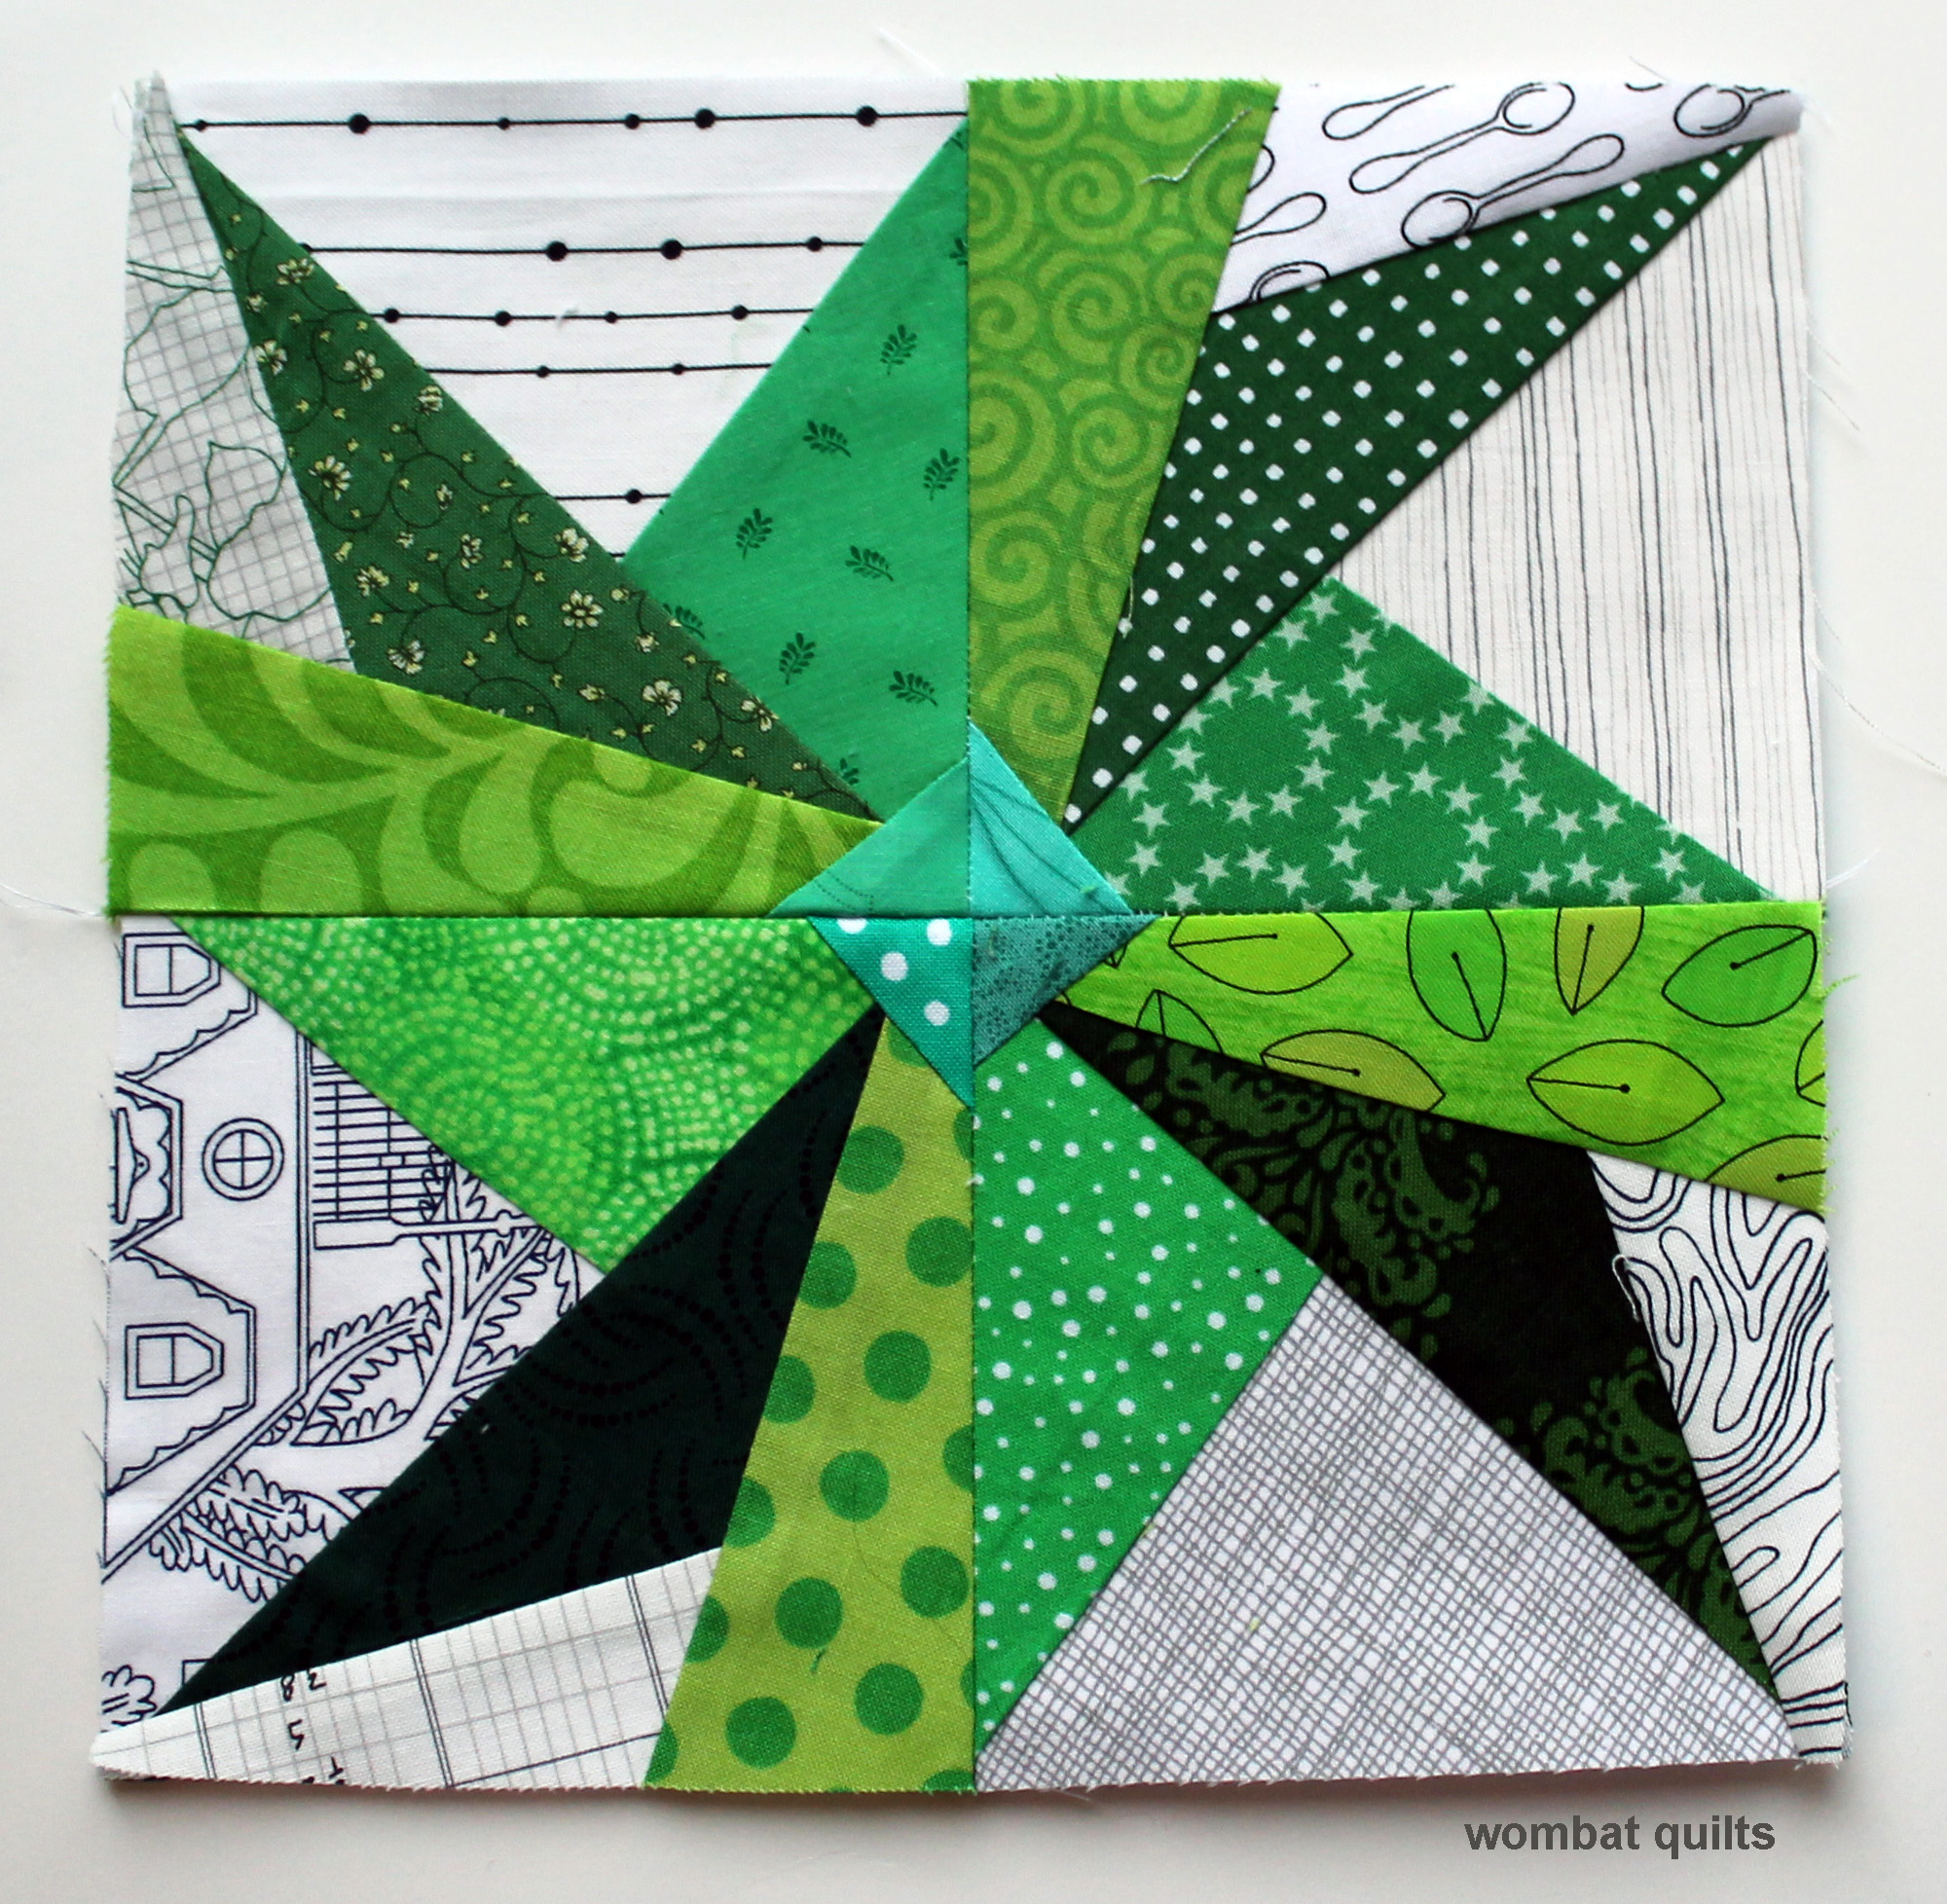
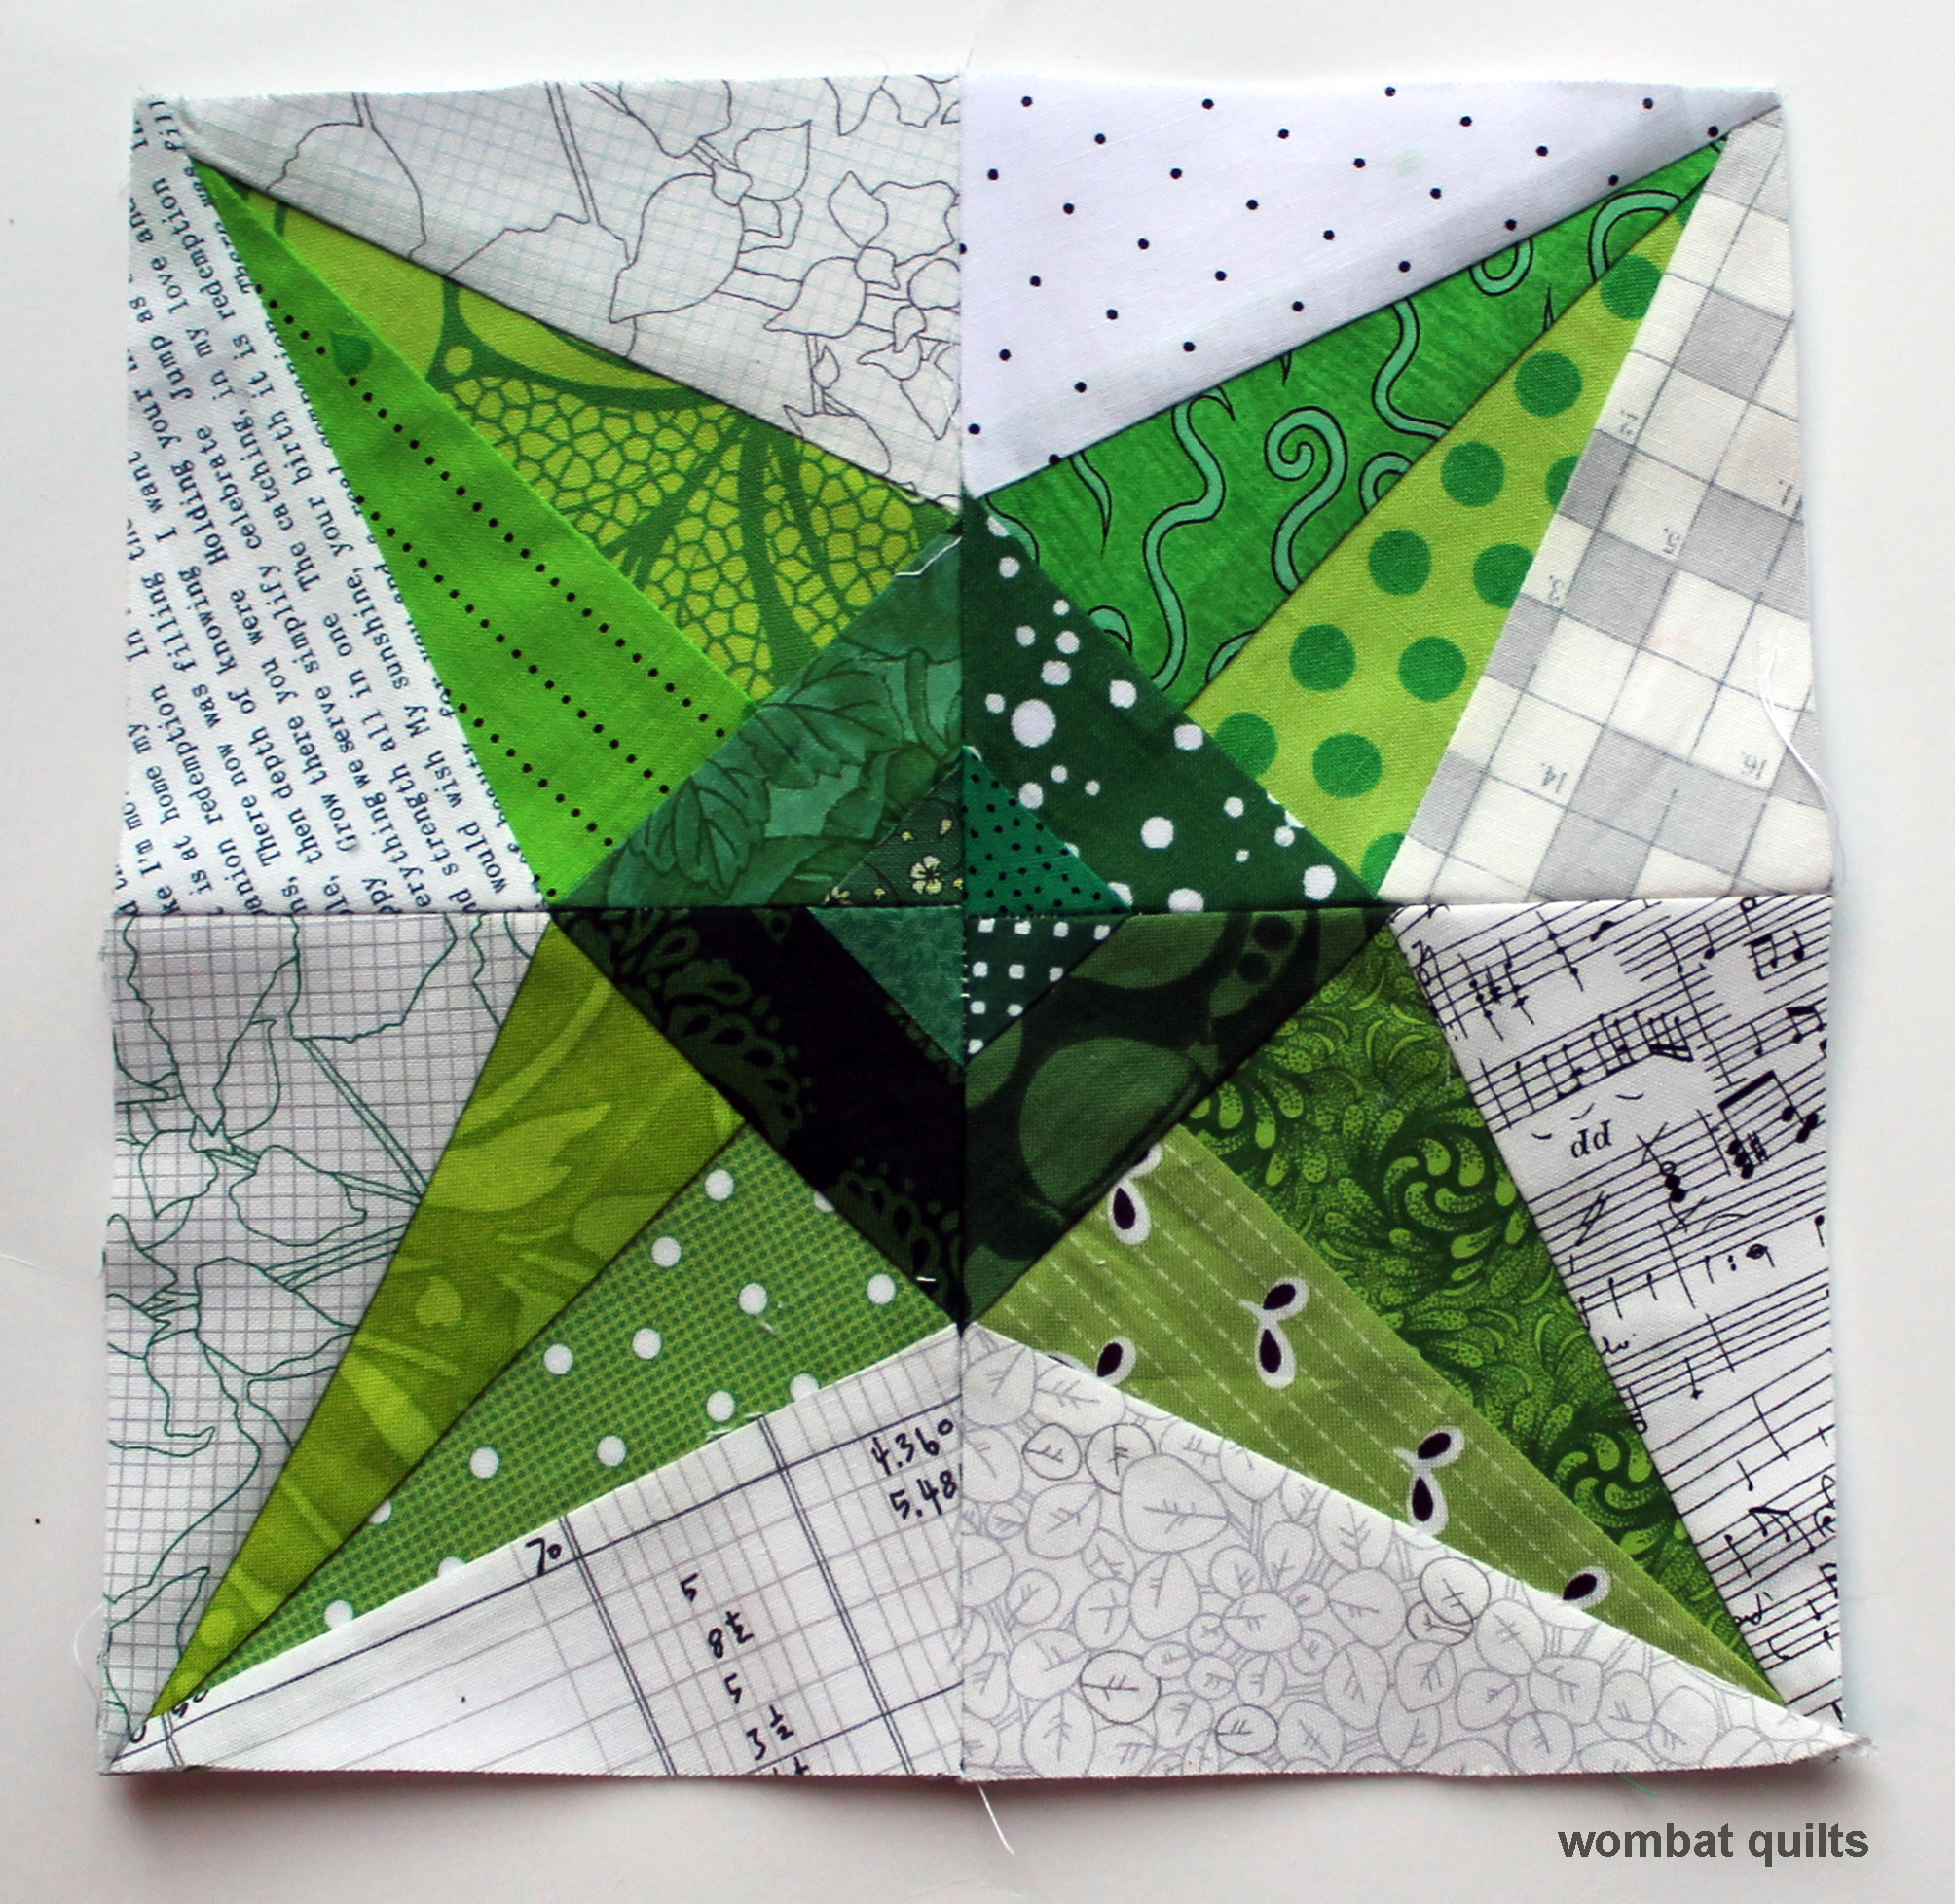
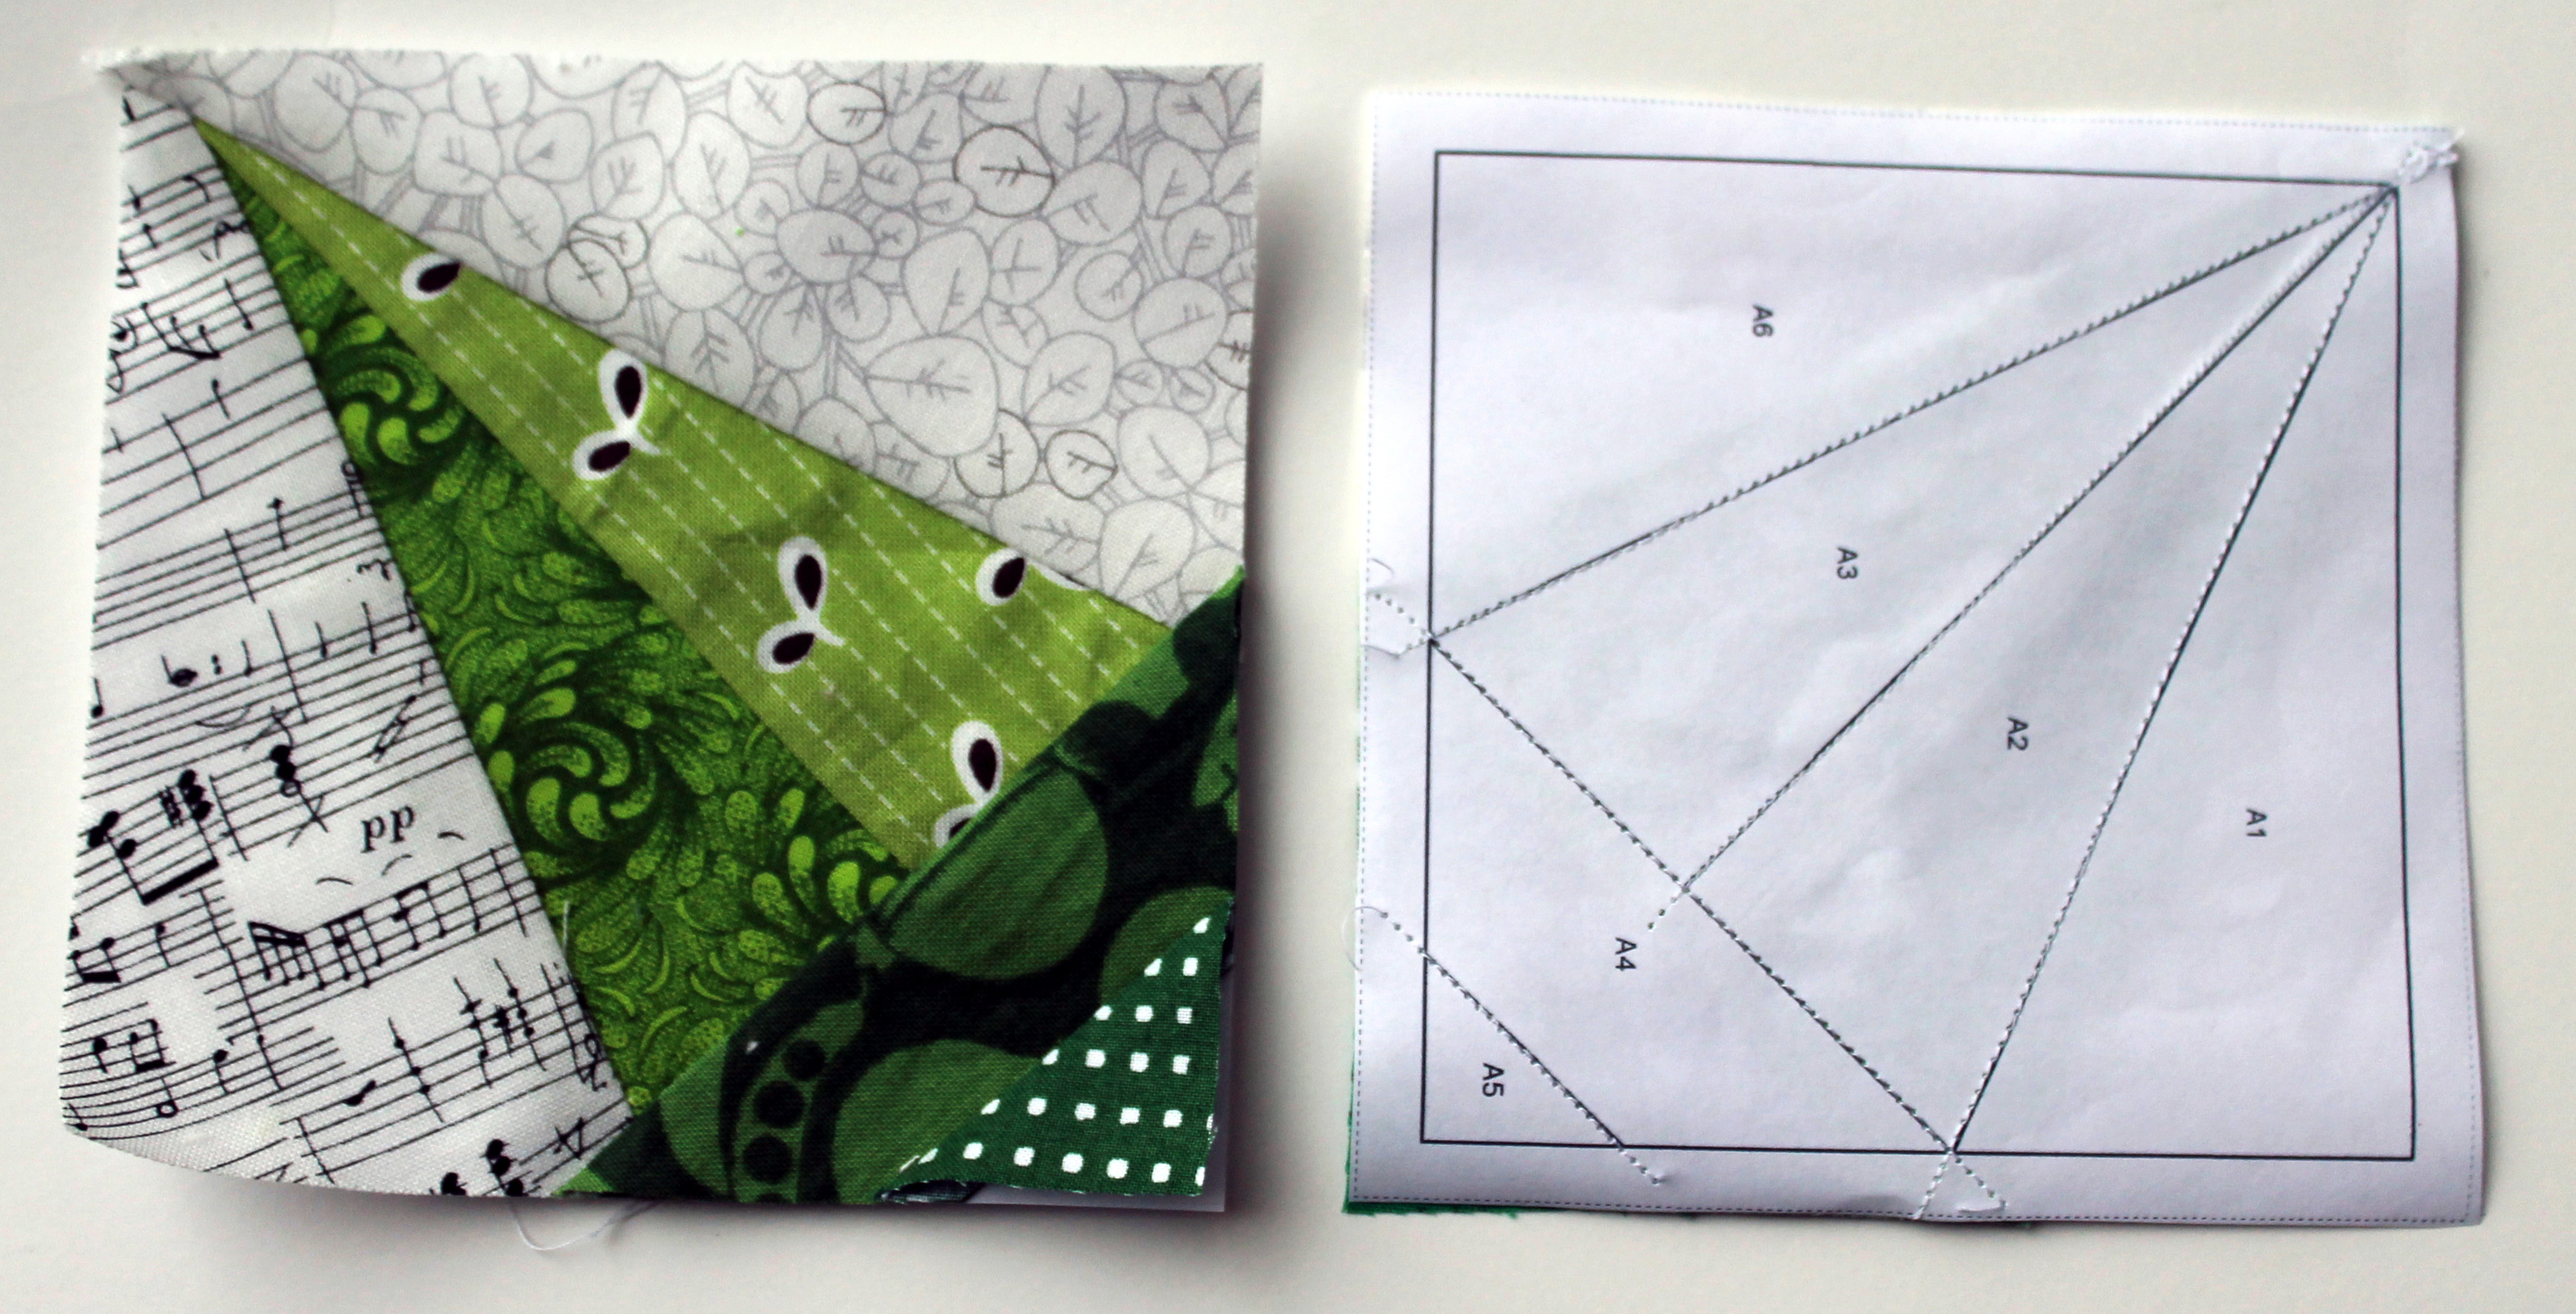
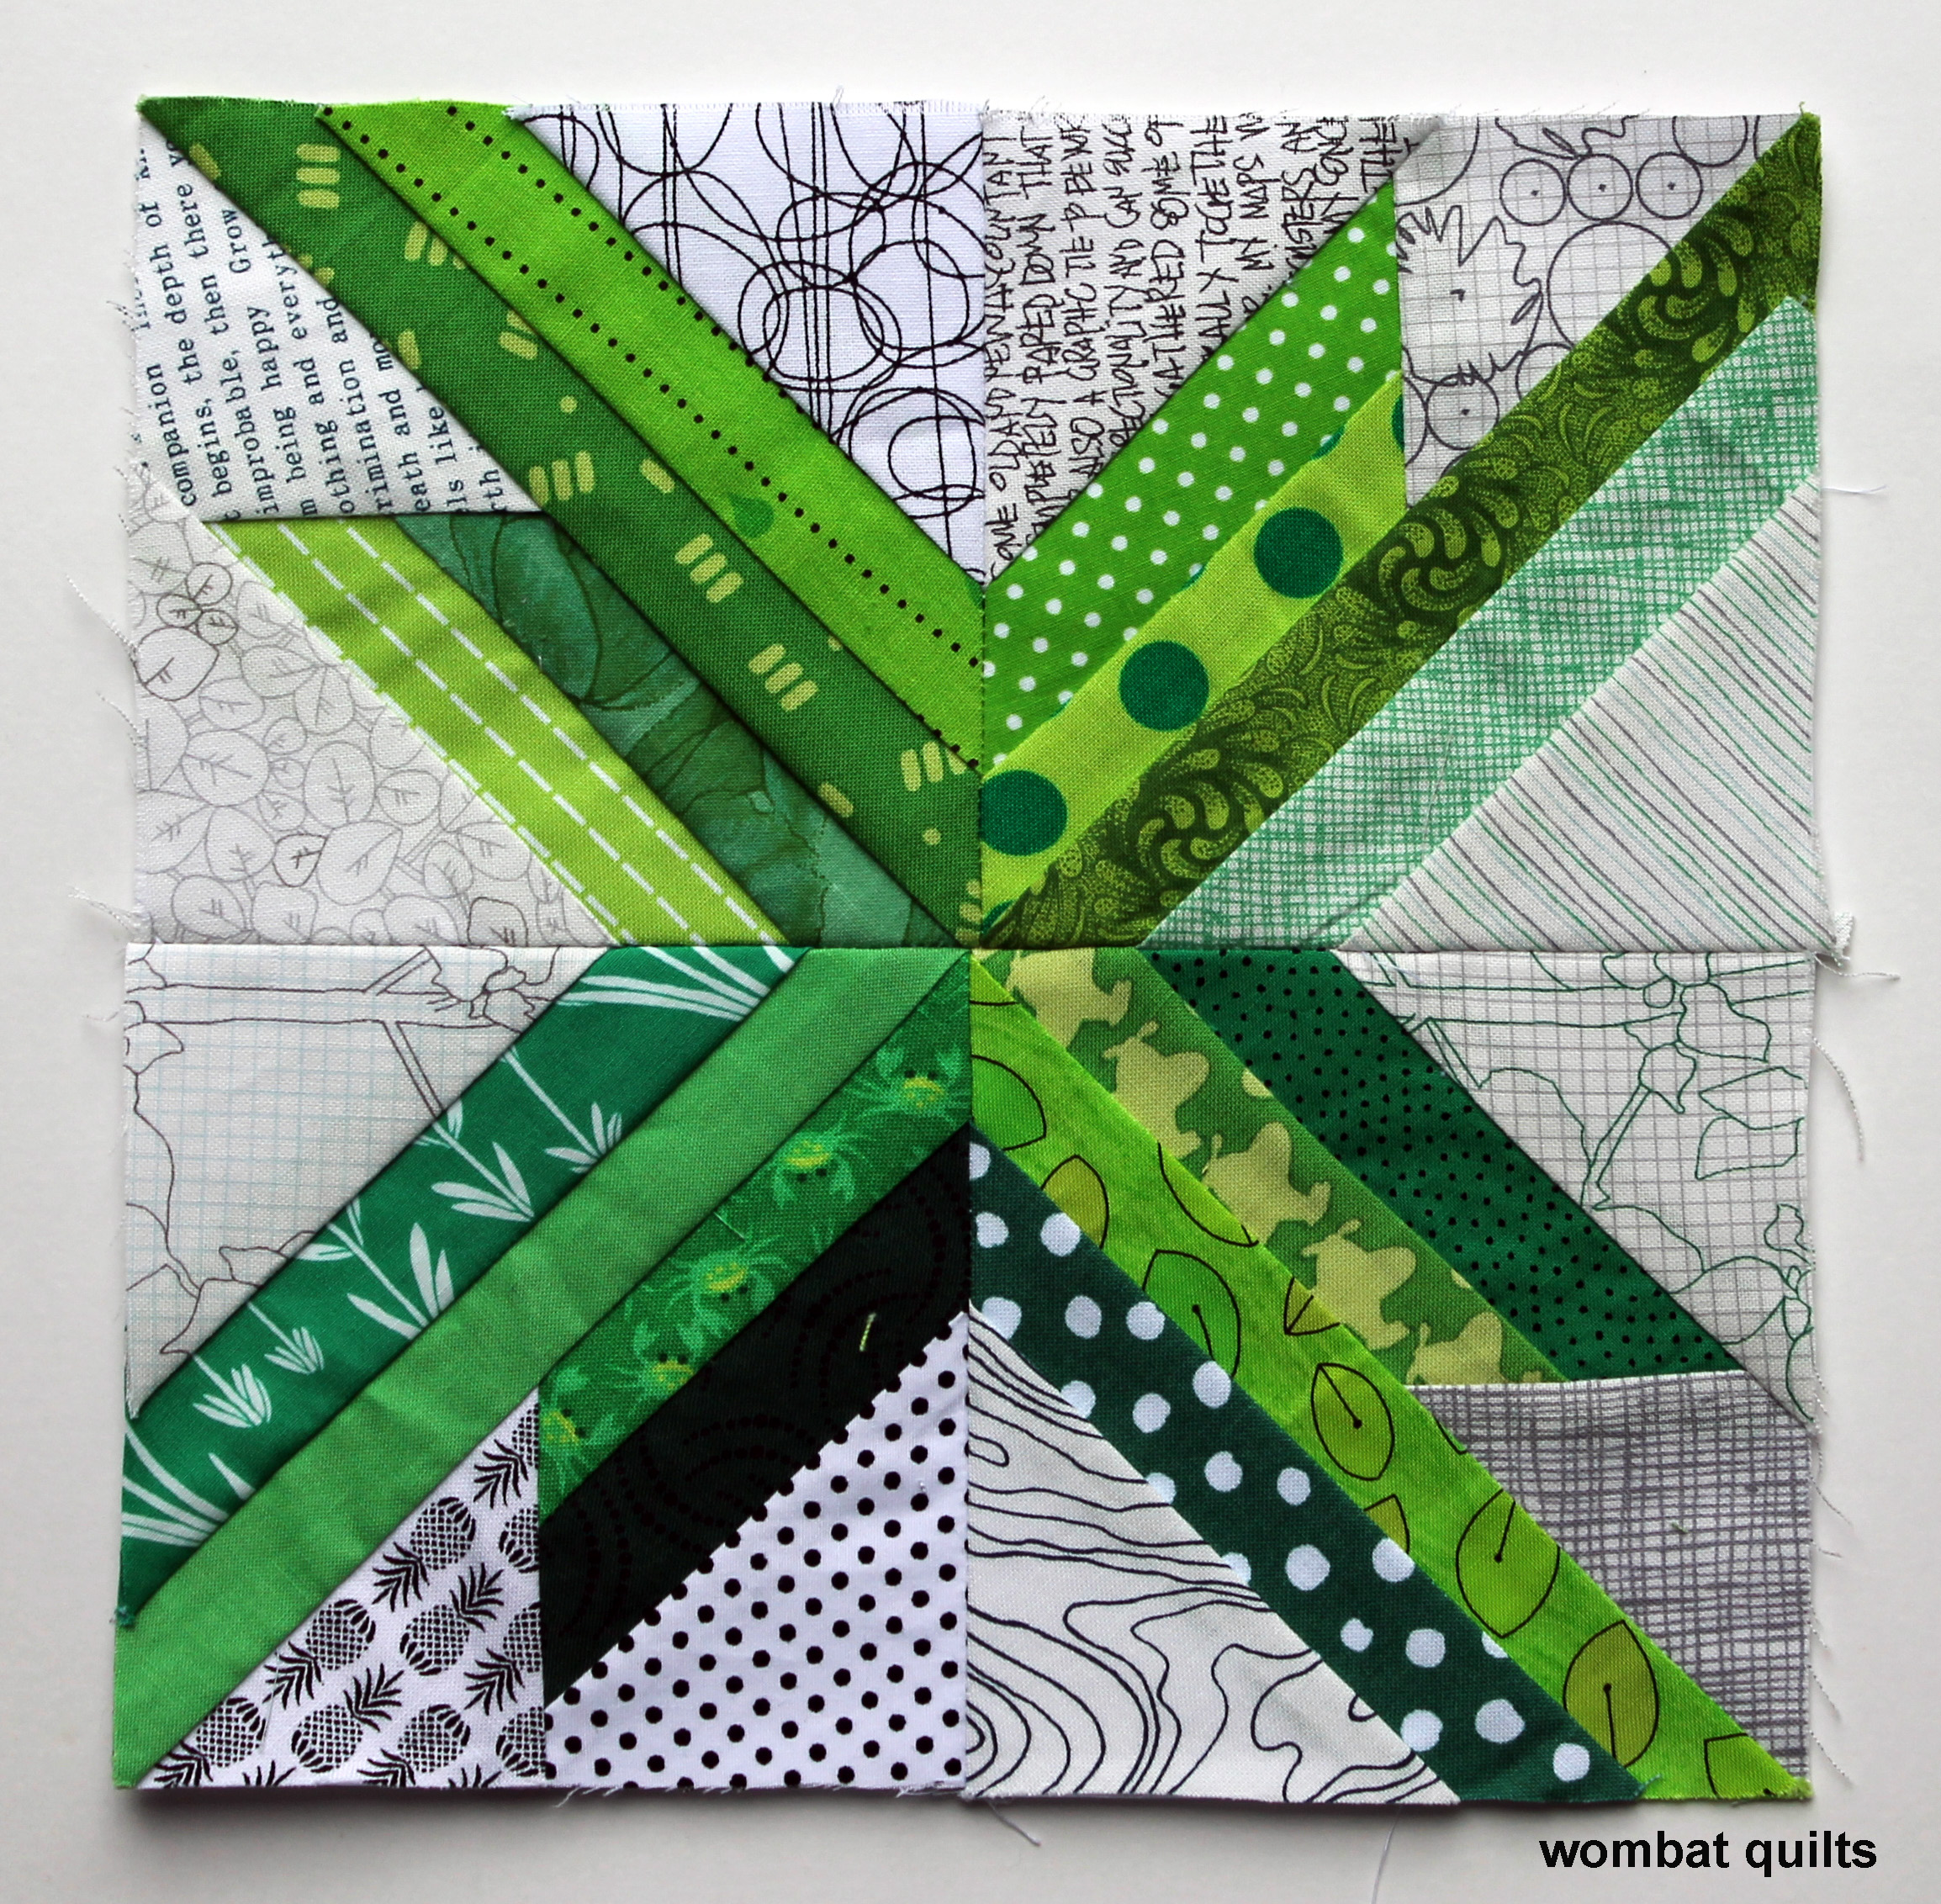
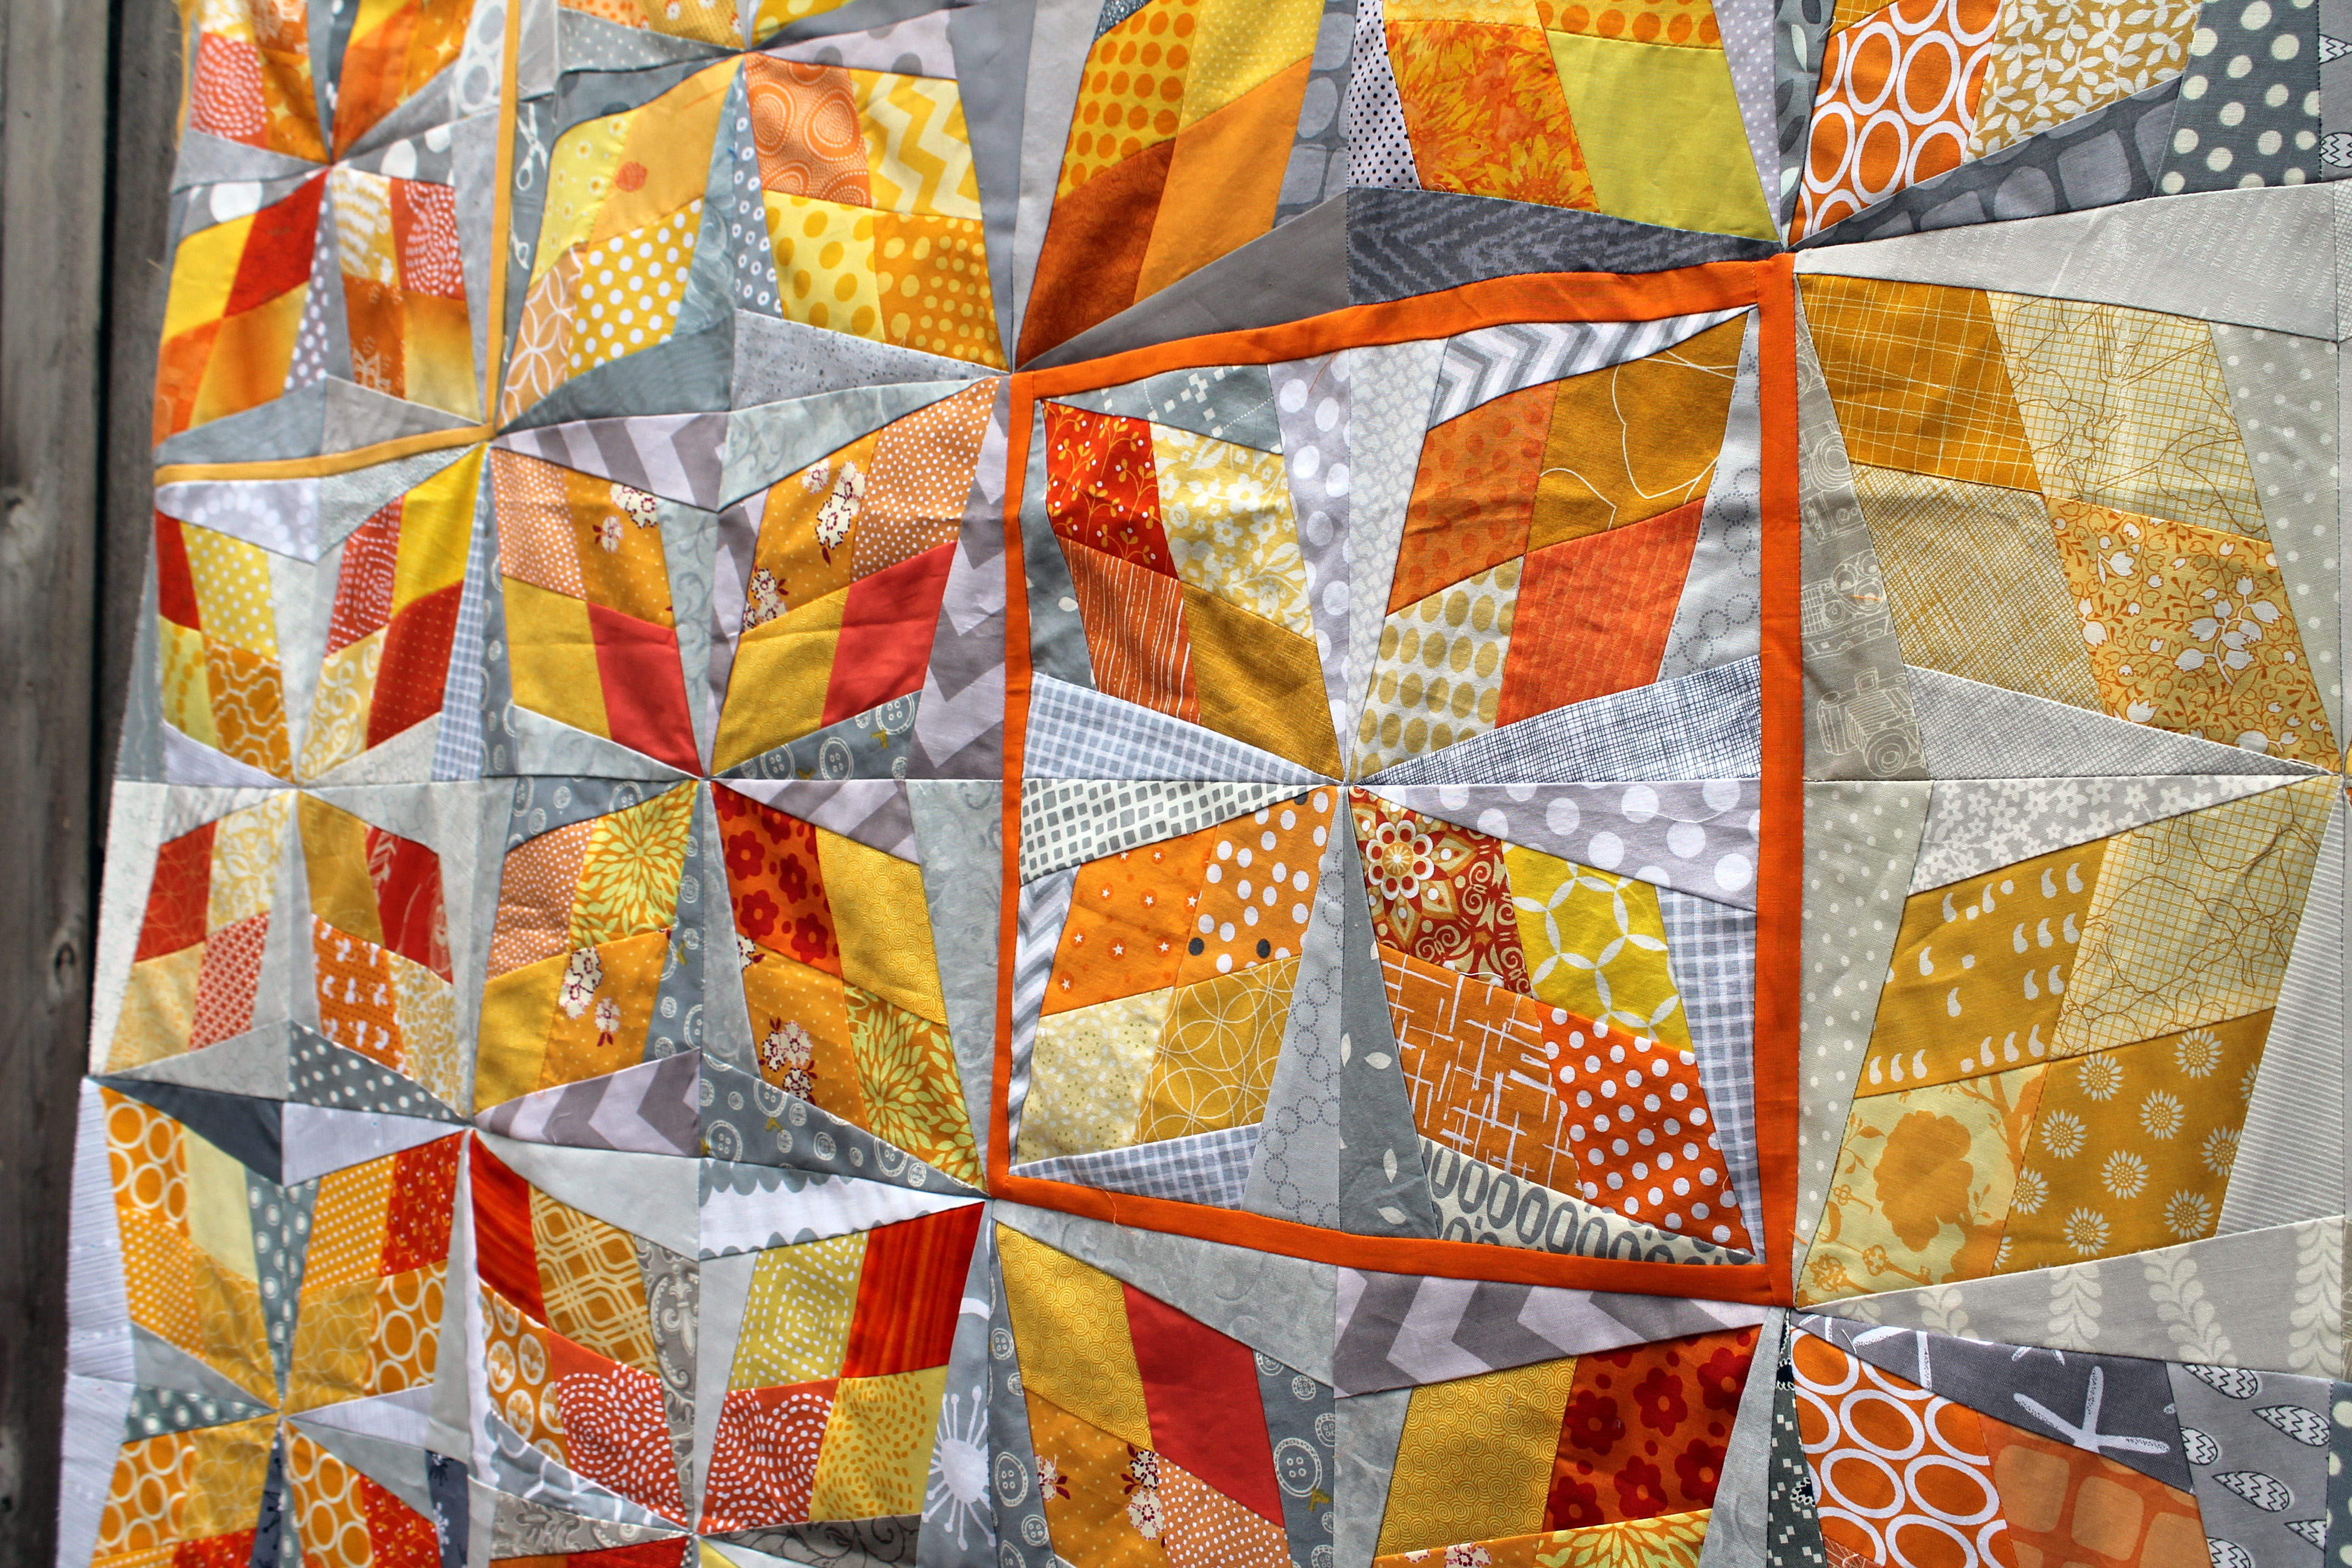
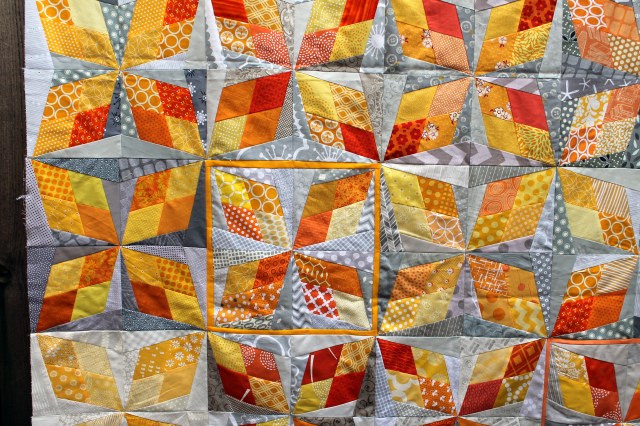
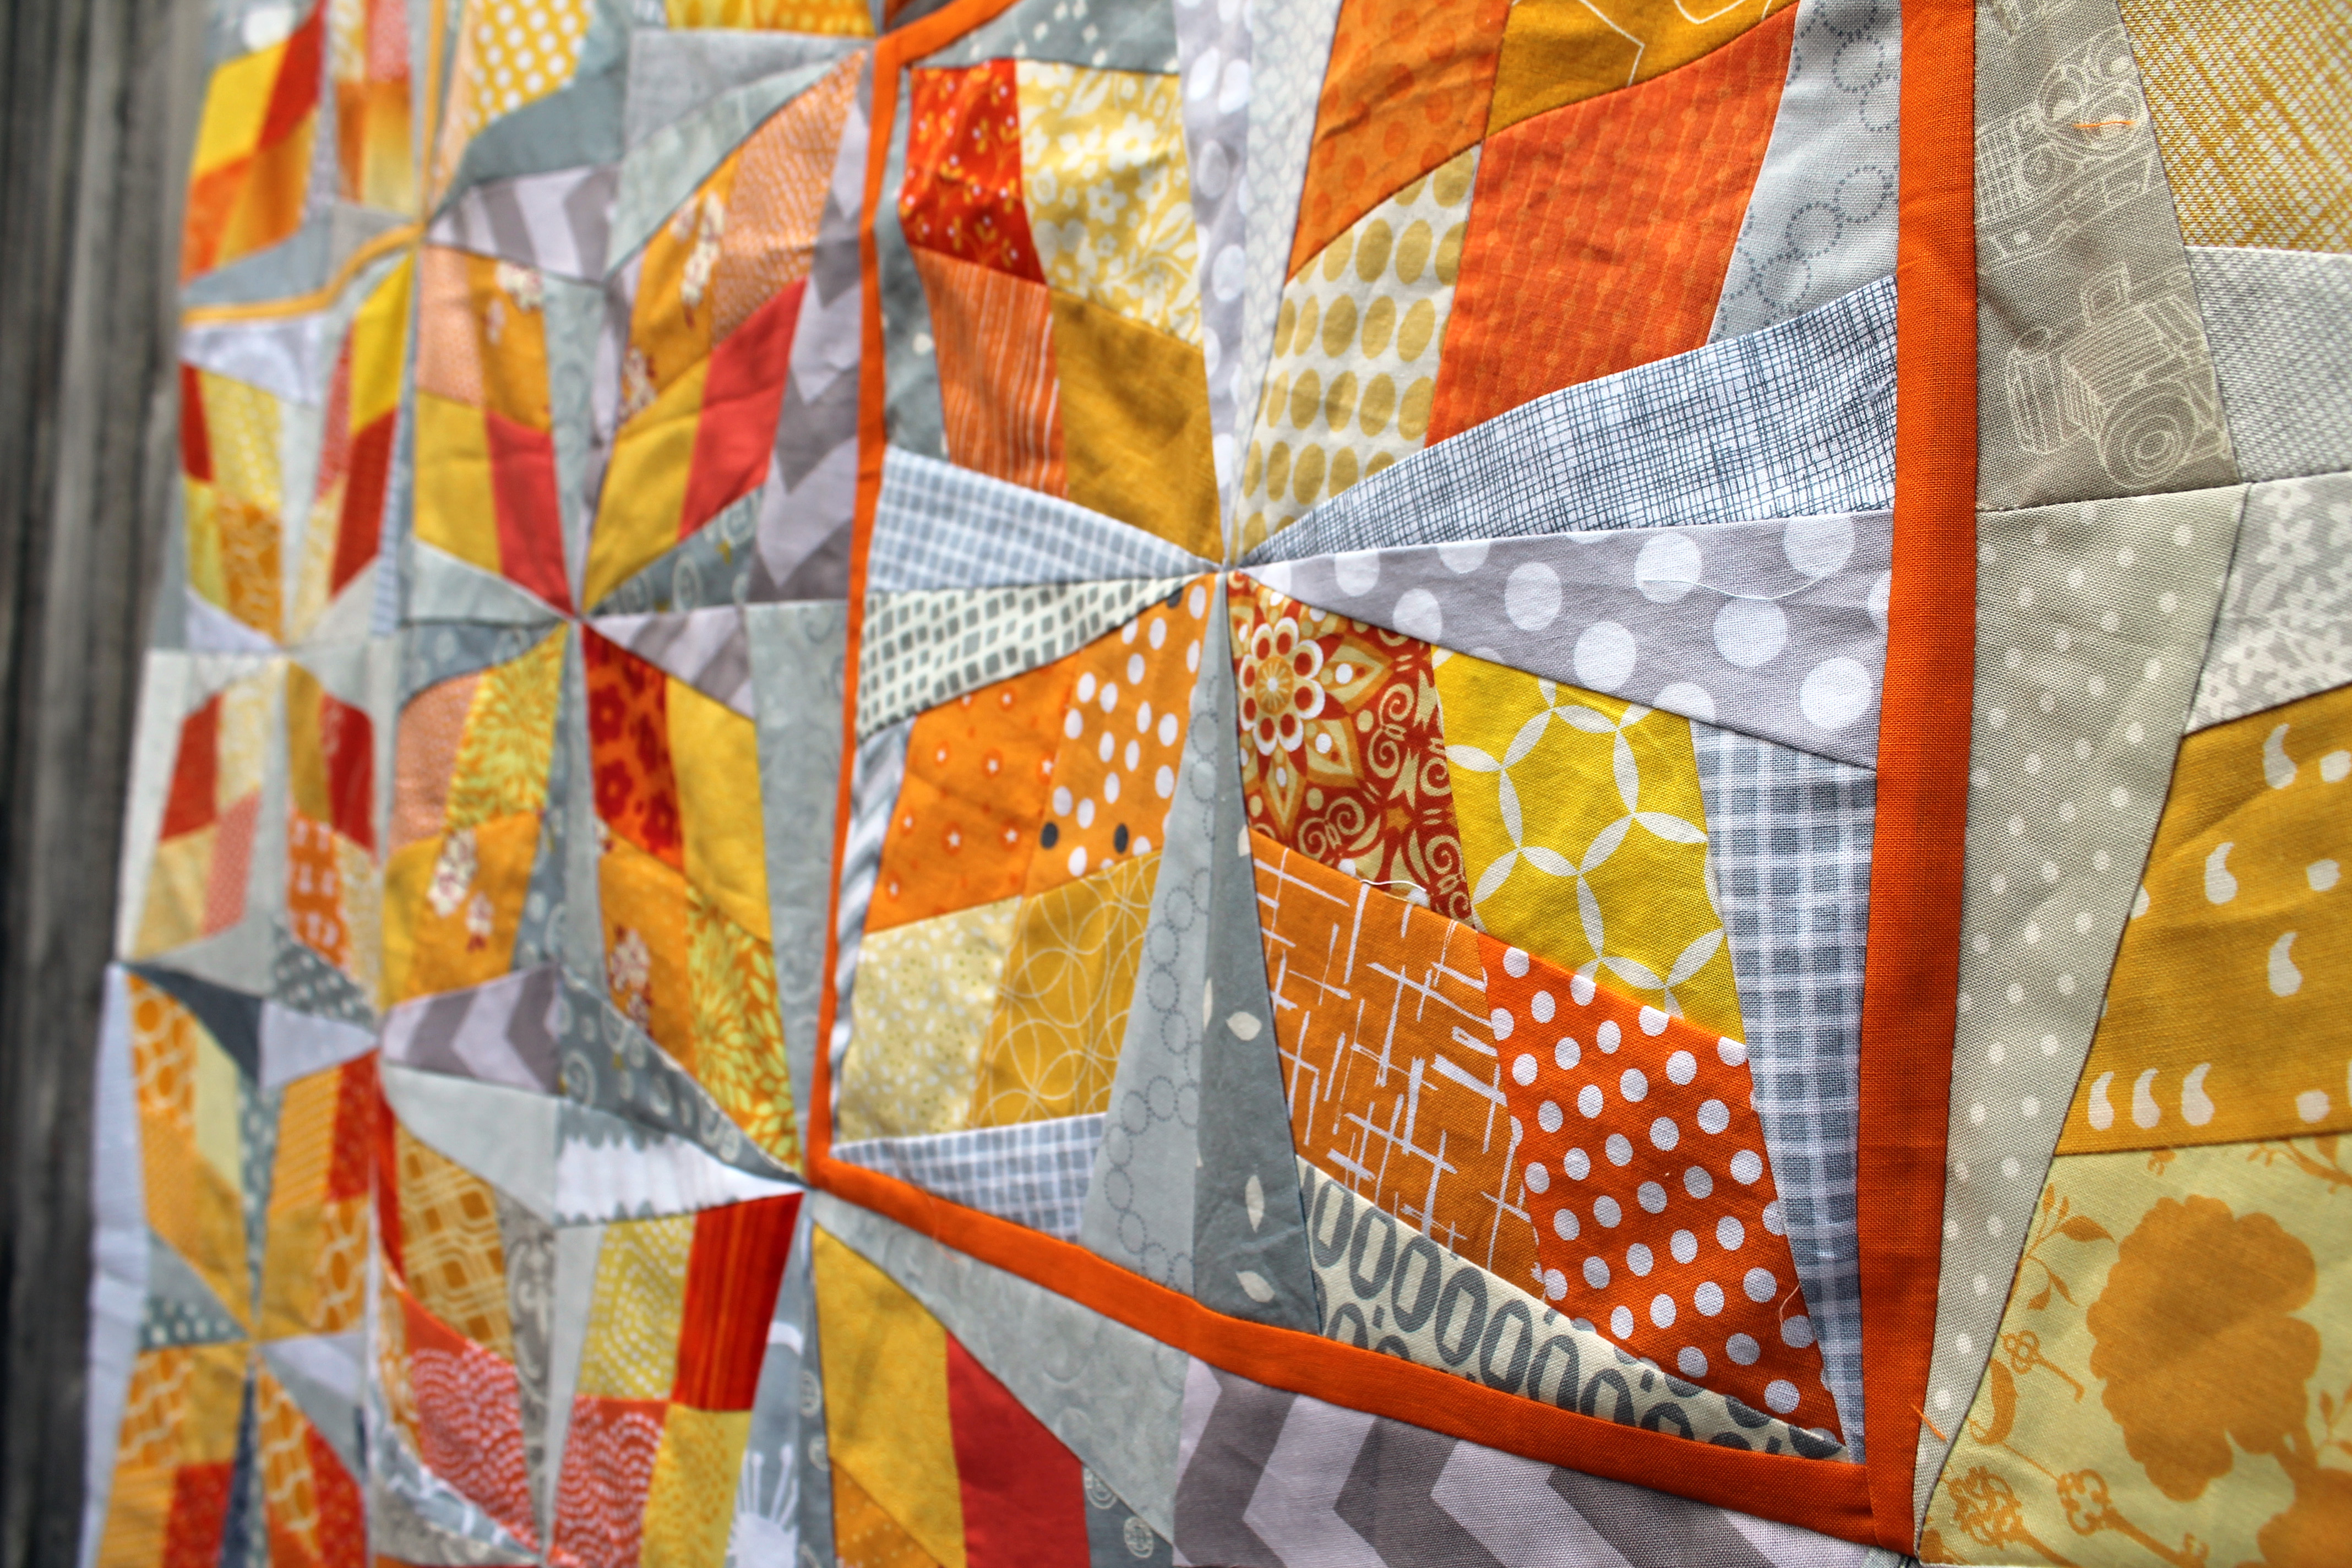
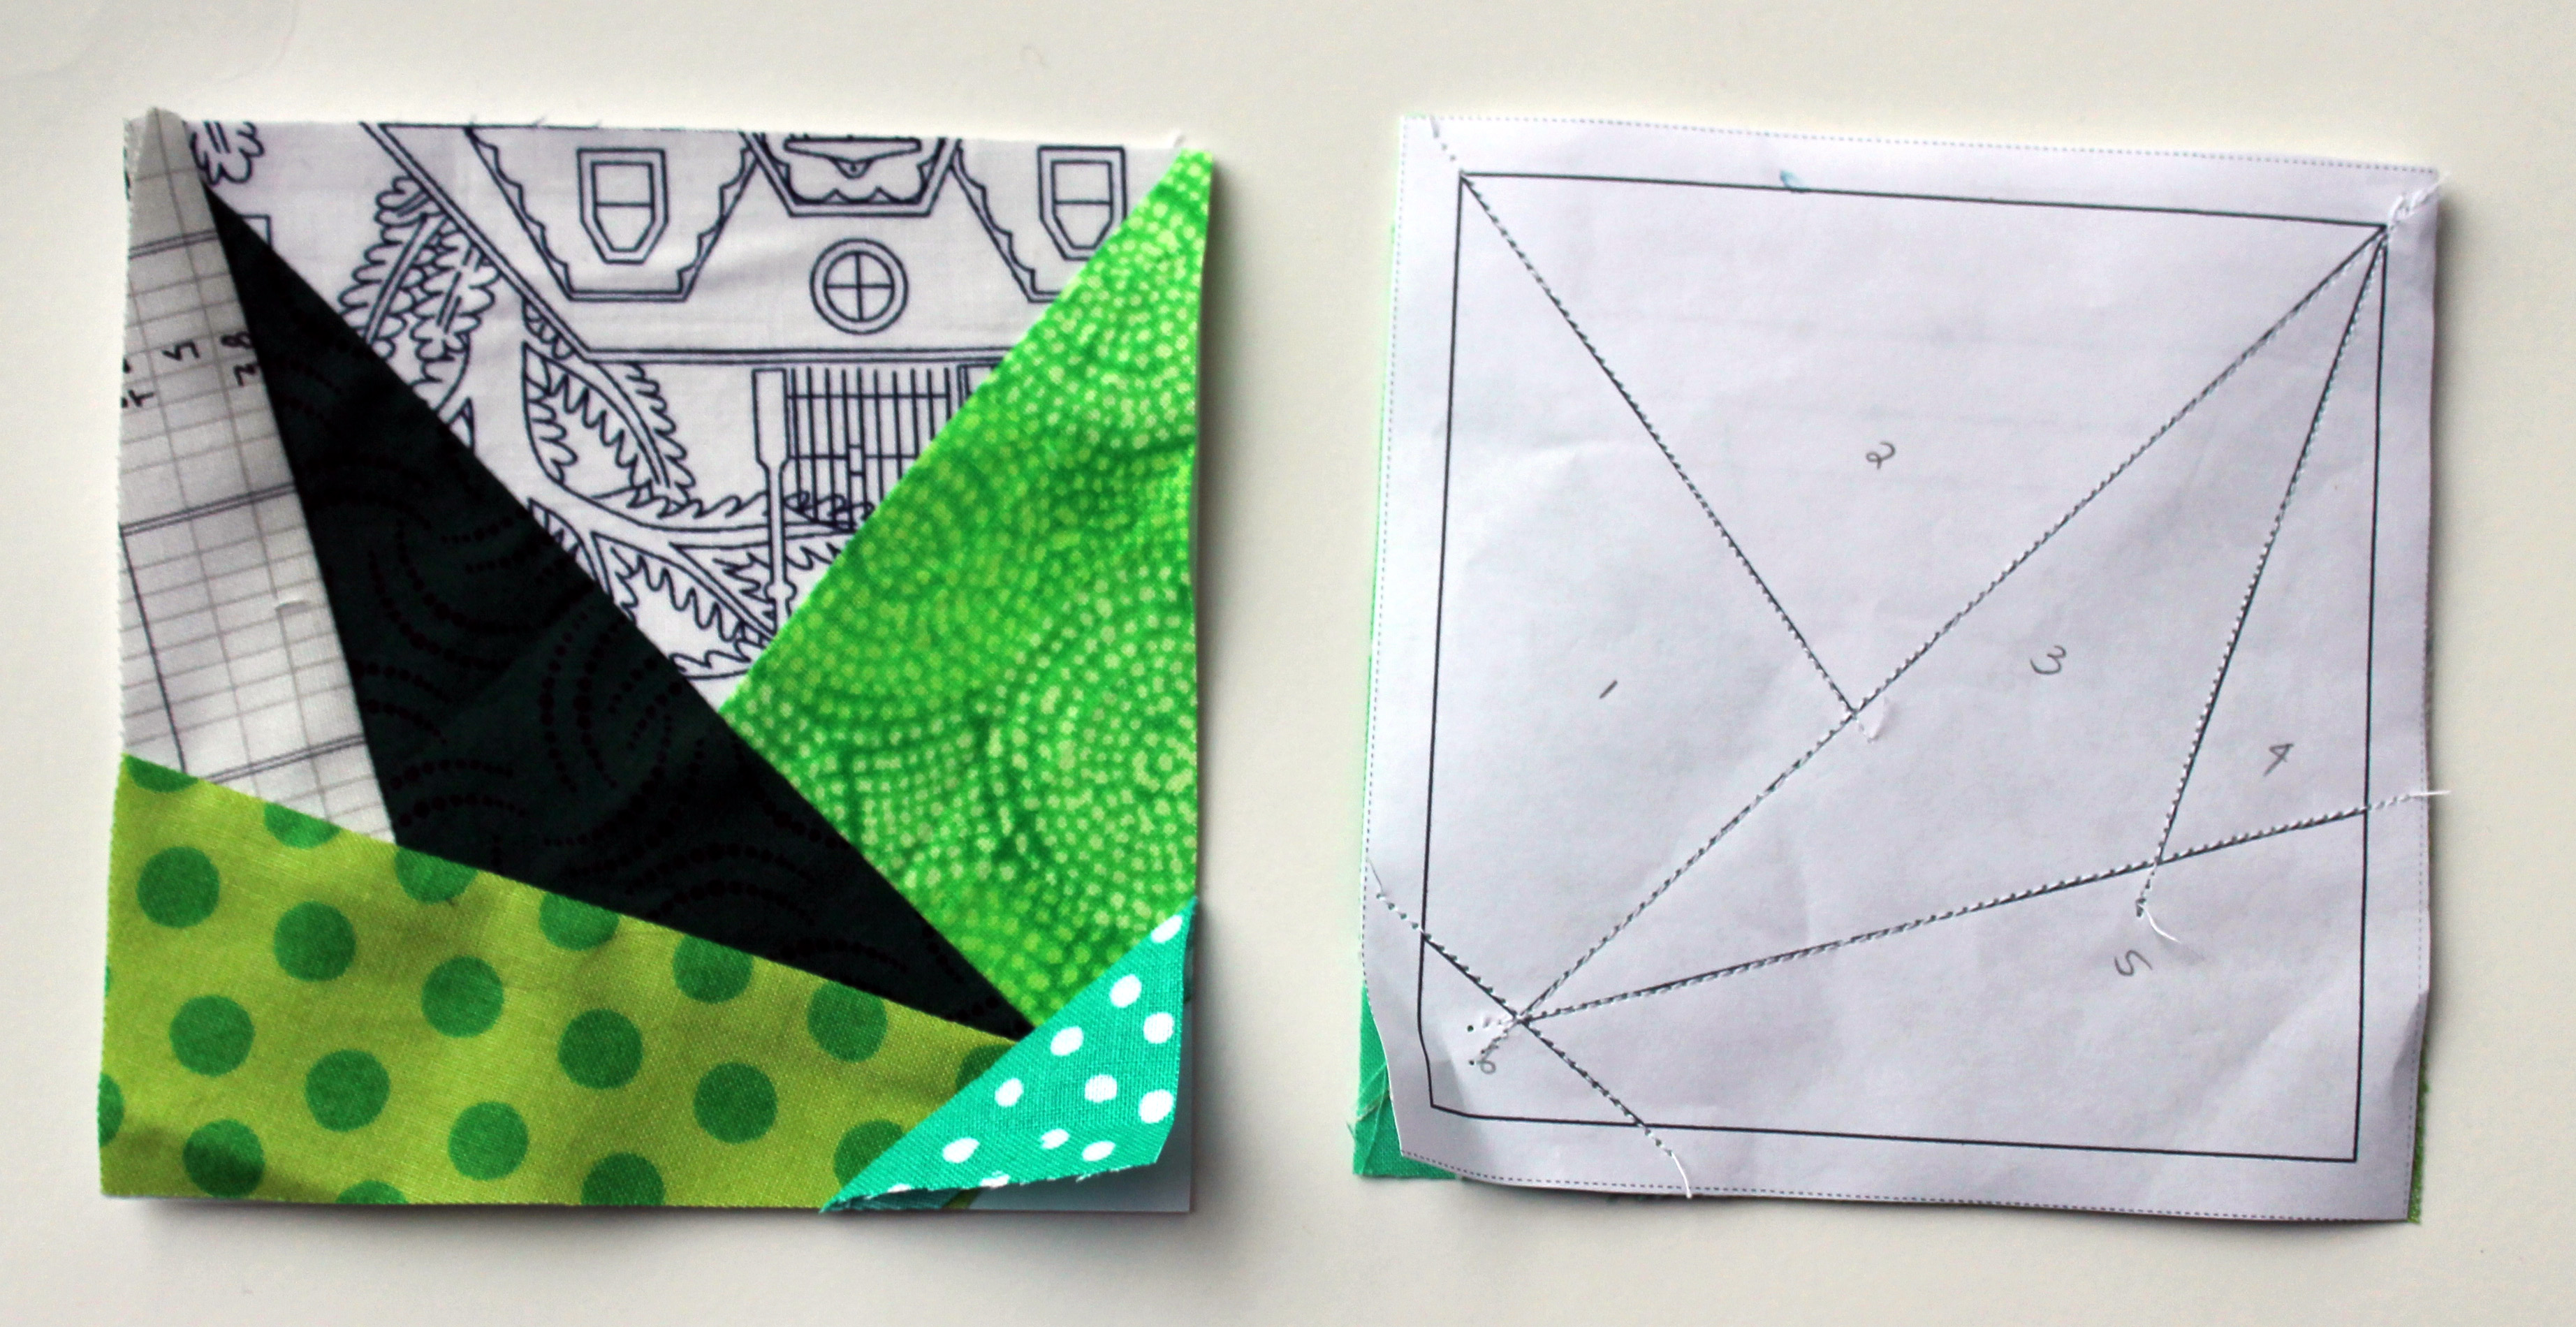
Straight Star…paper piecing Monday

This week’s paper piecing star is a easy, fun one…

Straight star block

The straight star is another relatively simple 8 inch star block…using just 28 pieces none of which are weirdly shaped or angled.  A PDF copy of the pattern I used can be found here….straight star pattern.

Straight star pieces

I used a random selection of green stripes from my scrap bag… but I think you could get some interesting effects with this star by carefully placing the dark and light pieces.  The effect of a whole quilt with this block would be fabulous I think, so it has been added to my “To Do” list.

Tune in next week for another fun 8 inch star….

It was a Do Good kind of week…

This week I managed to finish up one of the Do Good Stitches quilt tops I have in progress.  This quilt started with this wonderful block….

scrappy quilt block

I found the paper piecing pattern at Freshly Pieced and fell in love.  I set it as my block for August and then watched with delight as my fellow Hope Circle members sent in their blocks.    A little bit of sewing and voila a quilt top was created…

scrap quilt top

I loved the subtle variations in colour that were added by other members.  The deep orange adds such a pop and the soft quiet yellow gives the eye a resting place.

Resizing blocks

You may also have noticed some fun little sashing on the top.  I love this touch, but it was not planned.  When I set this block, I forgot that several of our Circle’s member had not done paper piecing before… and I had forgotten to give instructions on downloading the paper piecing pattern.

You see if you print a PDF straight from the website it prints out slightly smaller than standard.  You need to download the PDF to your desktop/computer and then print from the download to get accurate sizing. Arkansa quilt detail 2

Also if you select the print dialogue box “print to fit” when you send the document to print it will also print out slightly smaller than needed.  In the end the best thing to do is measure your pattern before you start sewing it, to make sure it is the correct size.

Arkansa Quilt detail

The four blocks that were slightly under size got a special border which added a wonderful pop of colour to the top.

So many times in my creative life I find little mistakes or hiccups make me think more creatively…make me rethink my original vision…force me to think outside the box.   The end results have always be so much better than my original plan.  This has been true with my painting, my film making and my quilting.

I am also linking up with Finish It up Friday over at  Crazy Mom Quilts.