Some bad habits…

Some bad habits have formed over here at Wombat Quilts.  I seem to have got out of the routine of documenting what I am up to, and in turn out of the habit of blogging.  After a stern talking too from my darling husband I am trying to get back into the swing of writing more regularly…

The good news is that I have a plenty of finished quilts to share.. because I have not blogging does not mean I have not been making….

So turning over this new/old leaf I am starting this Friday with a lovely work in progress I have just finished…

finished green star quilt

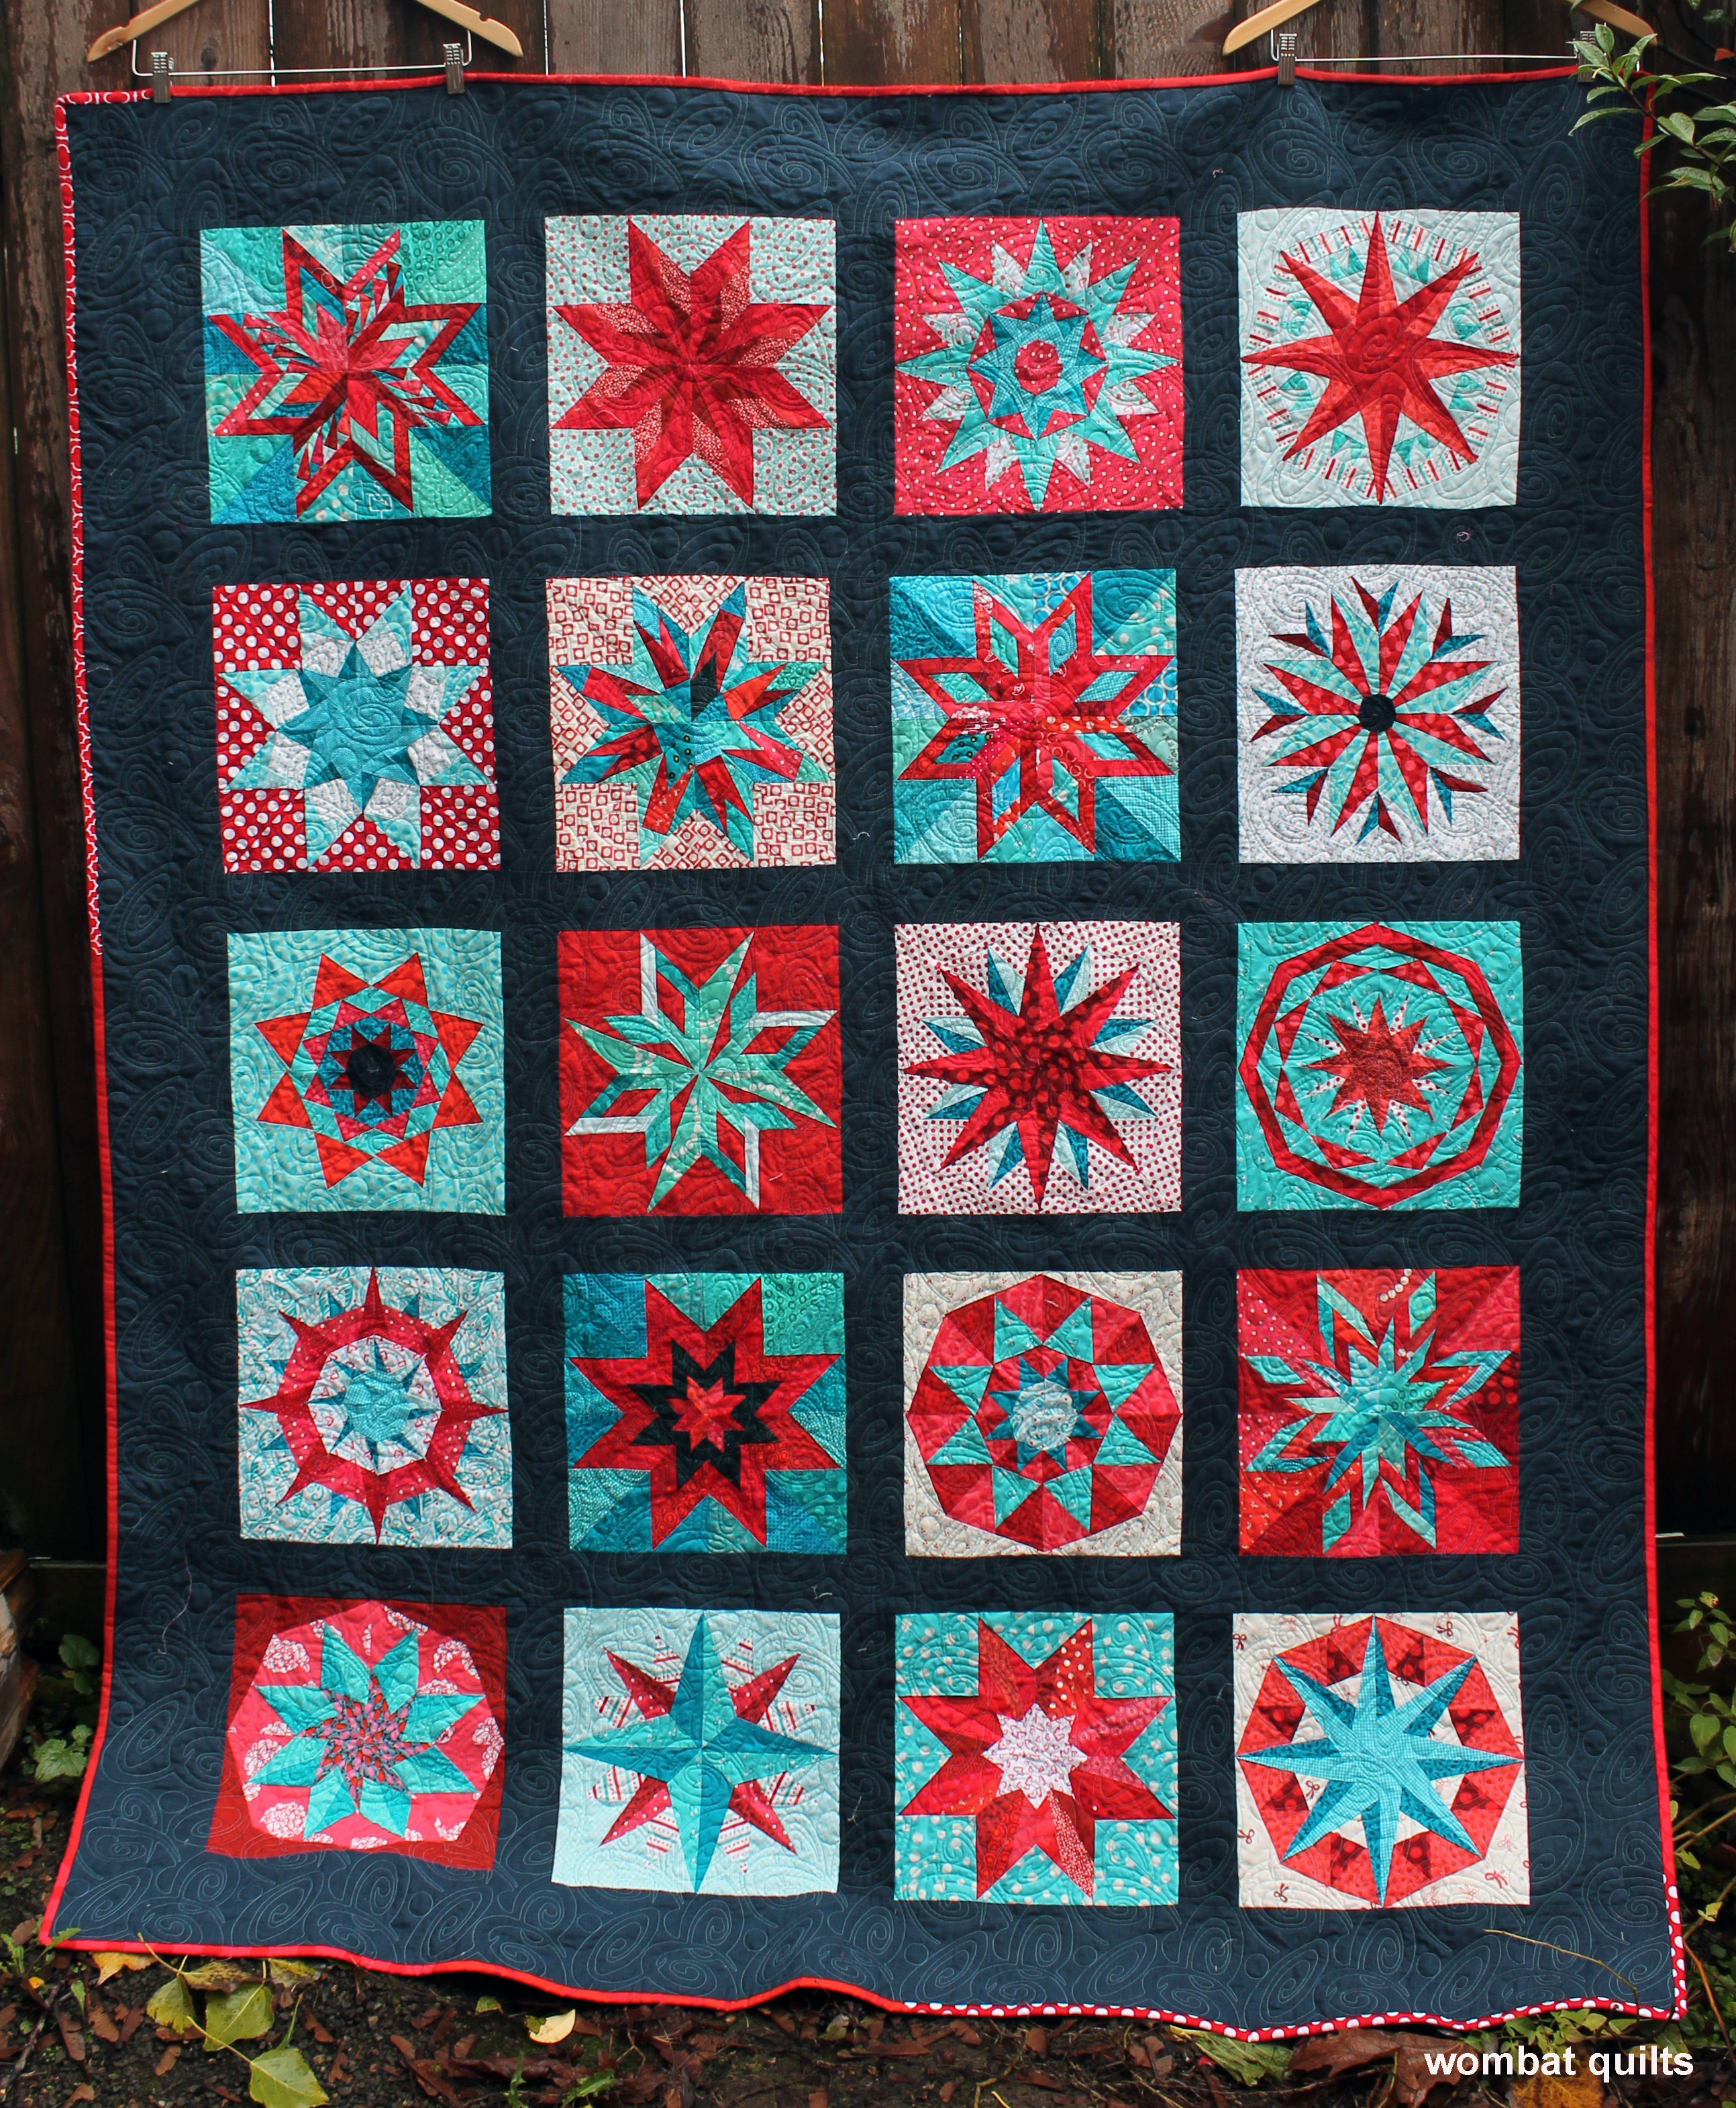
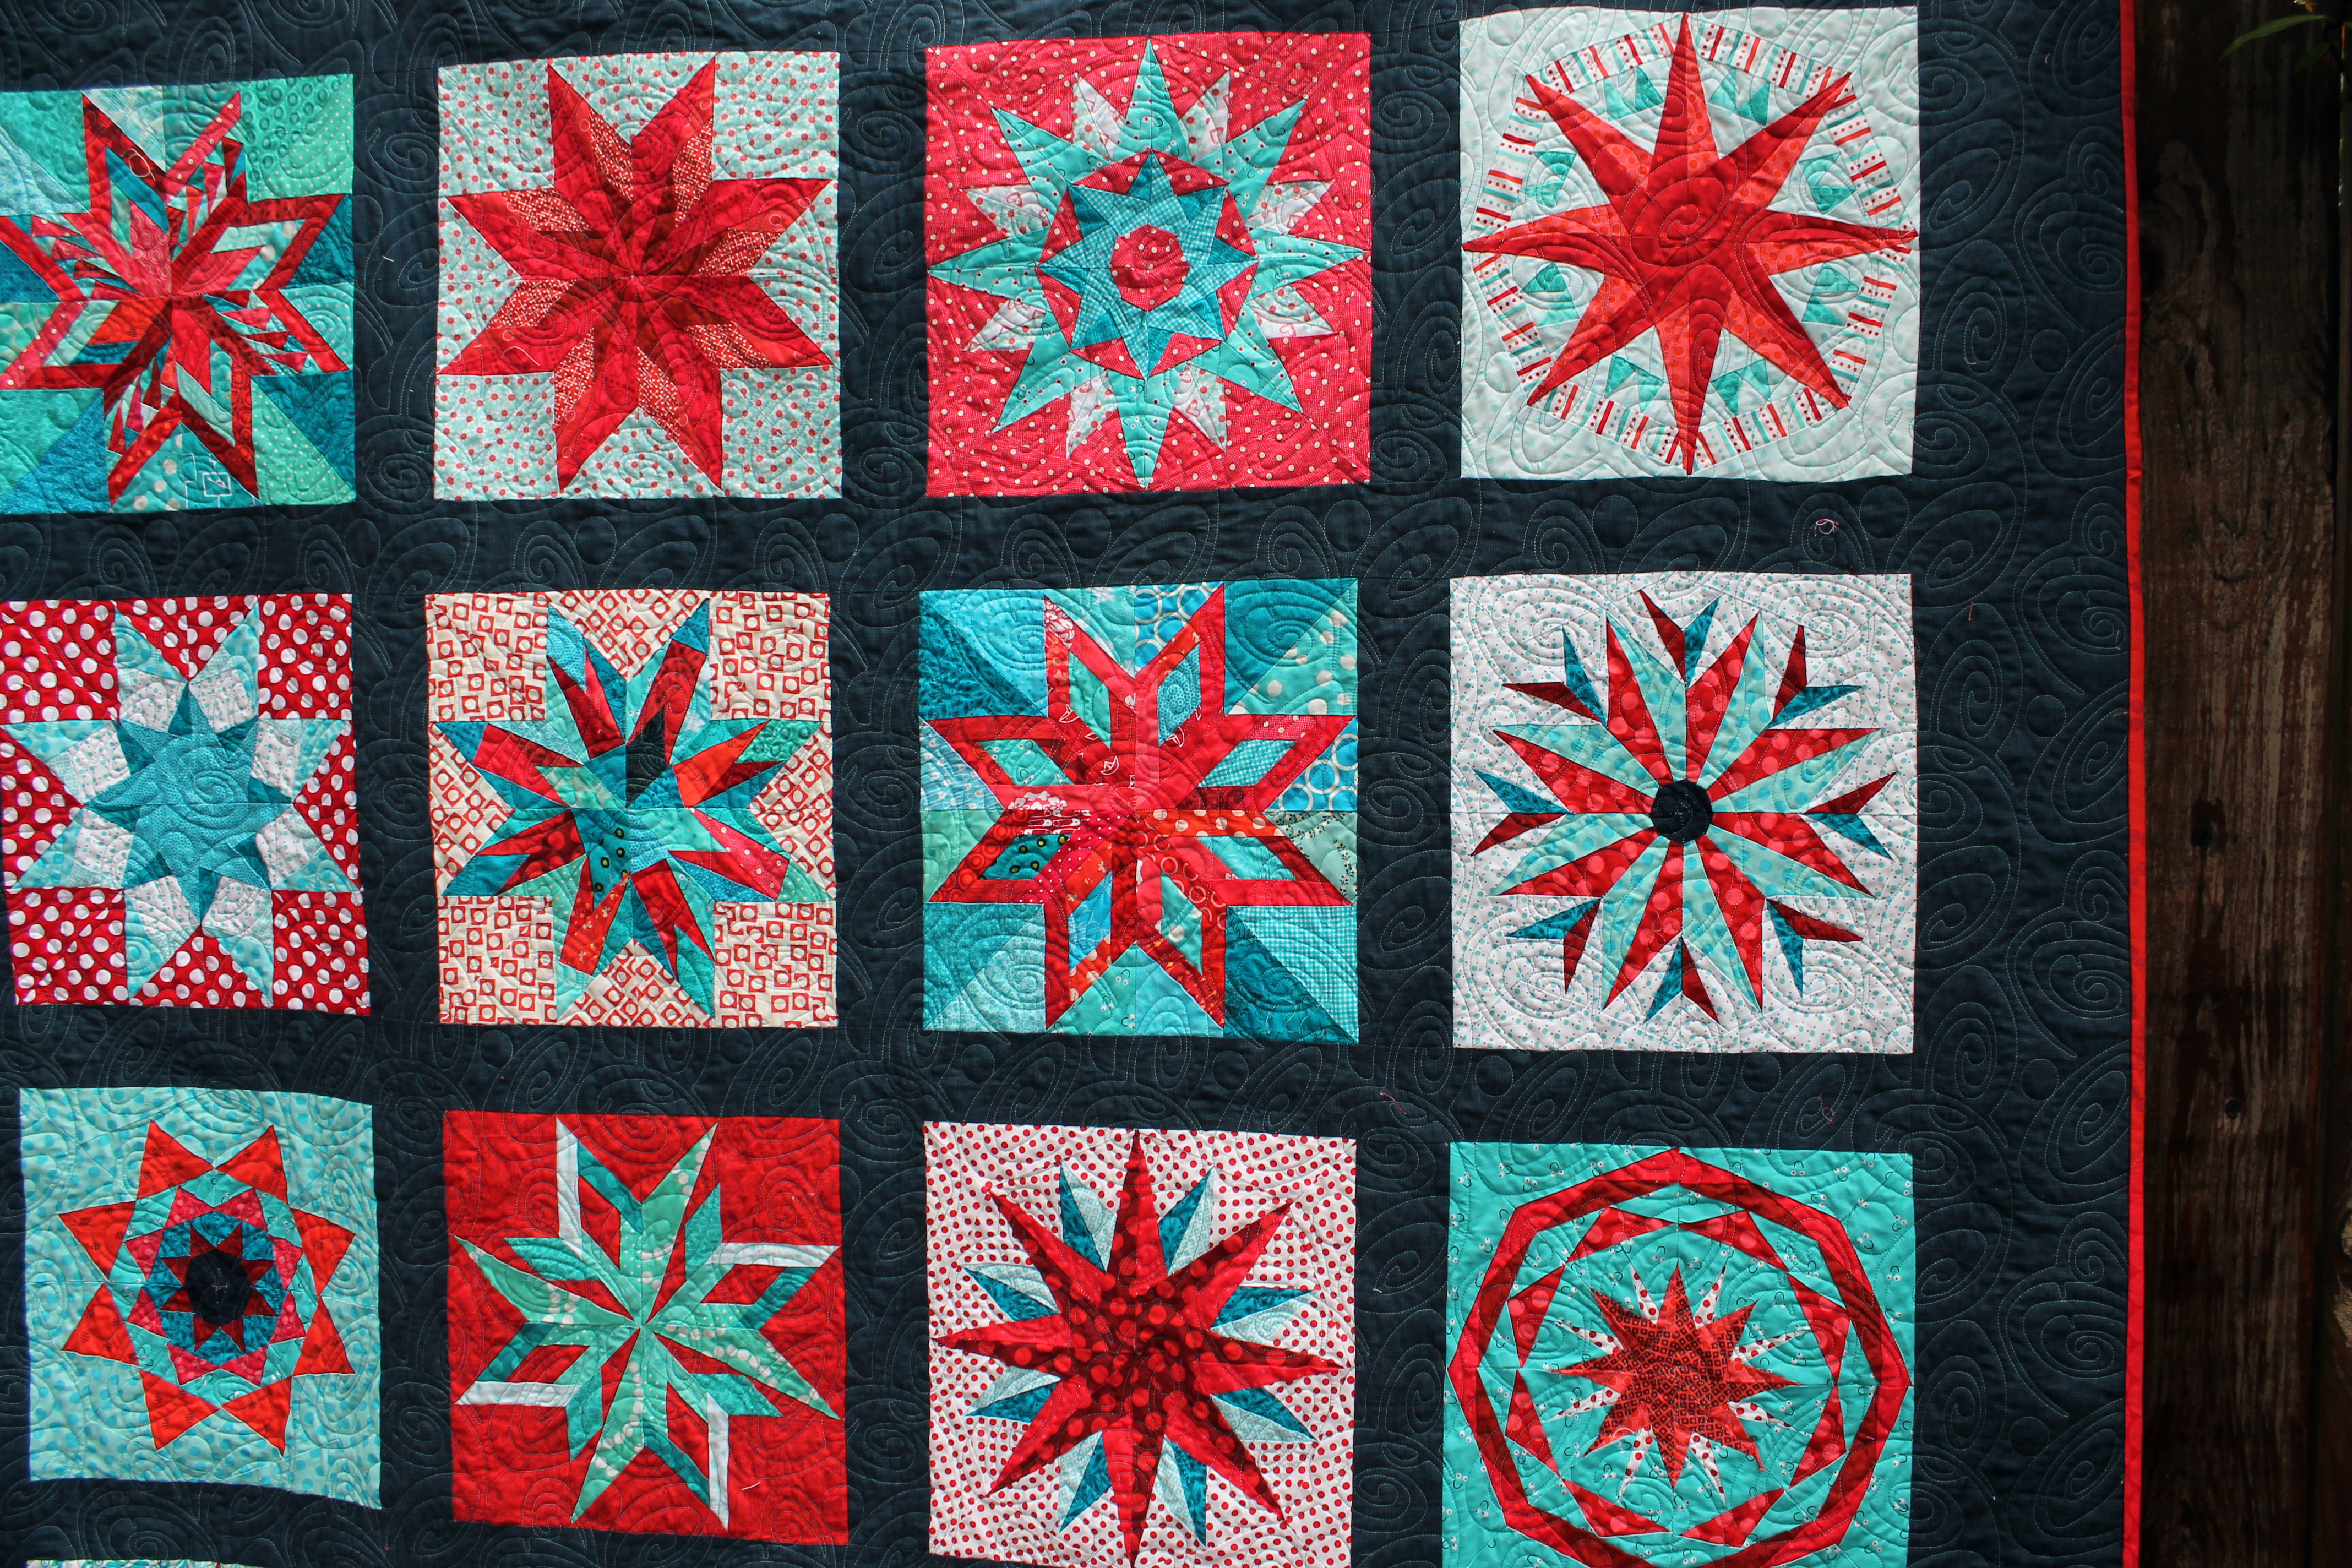
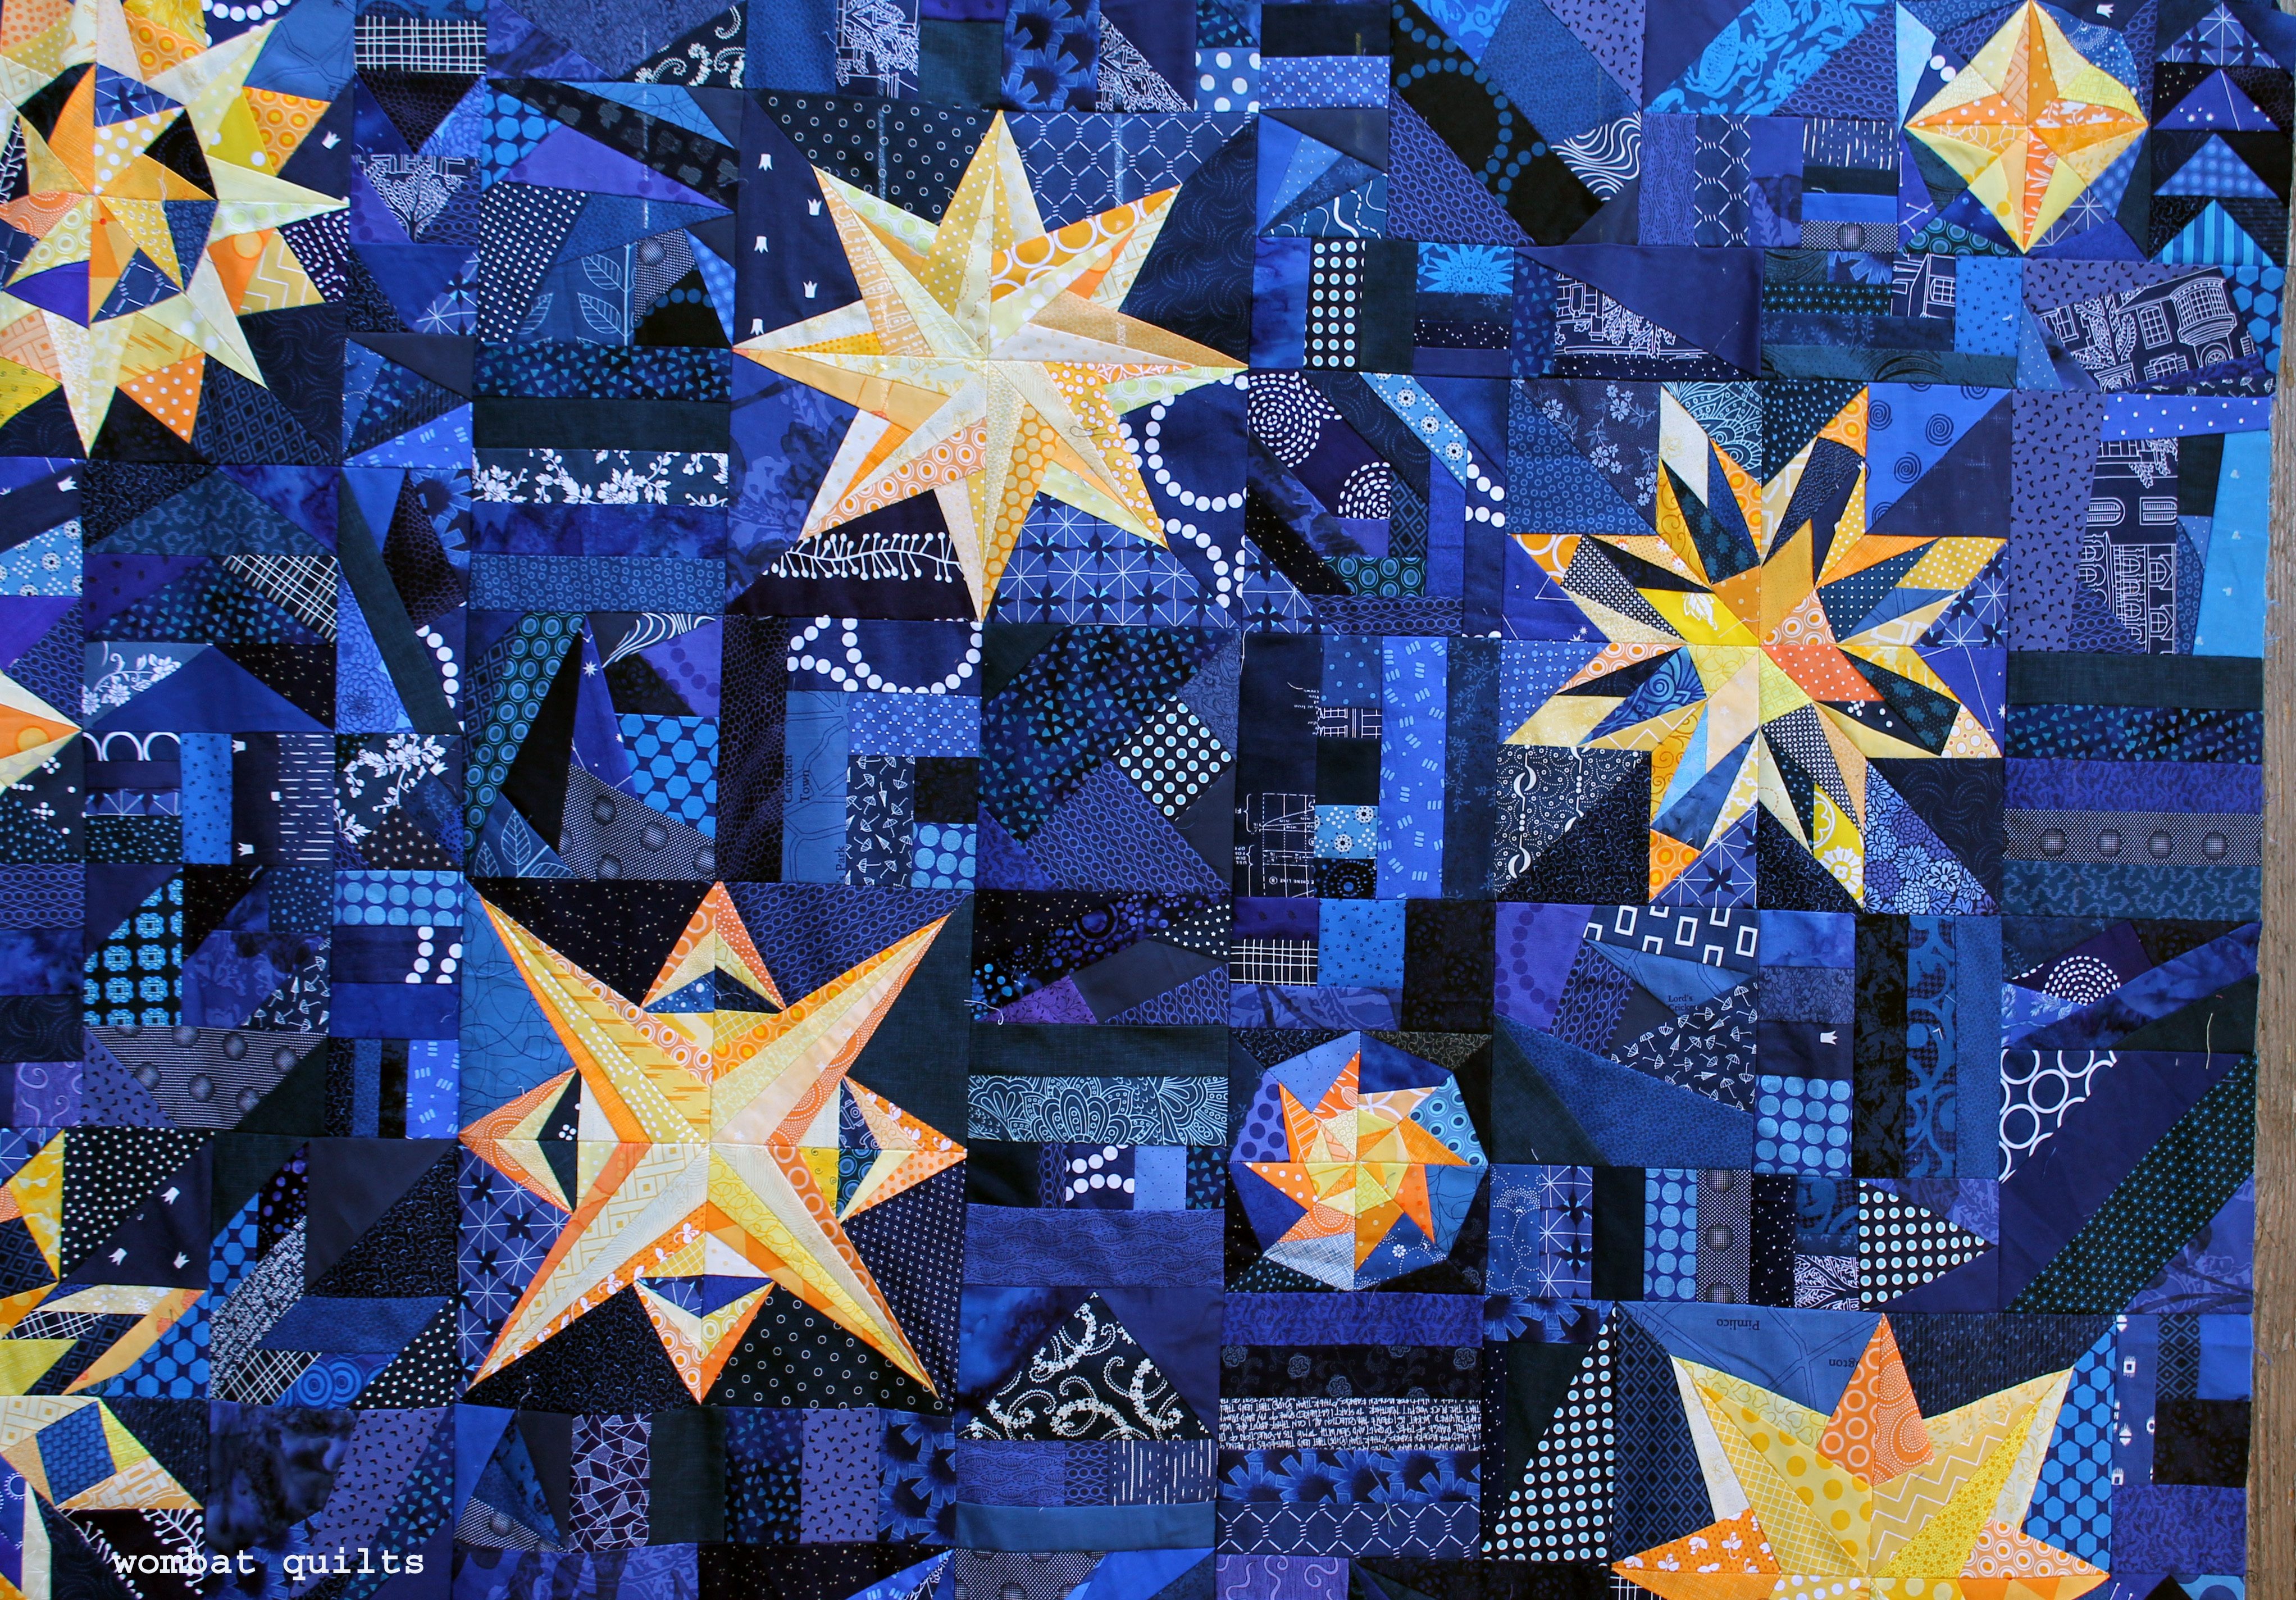
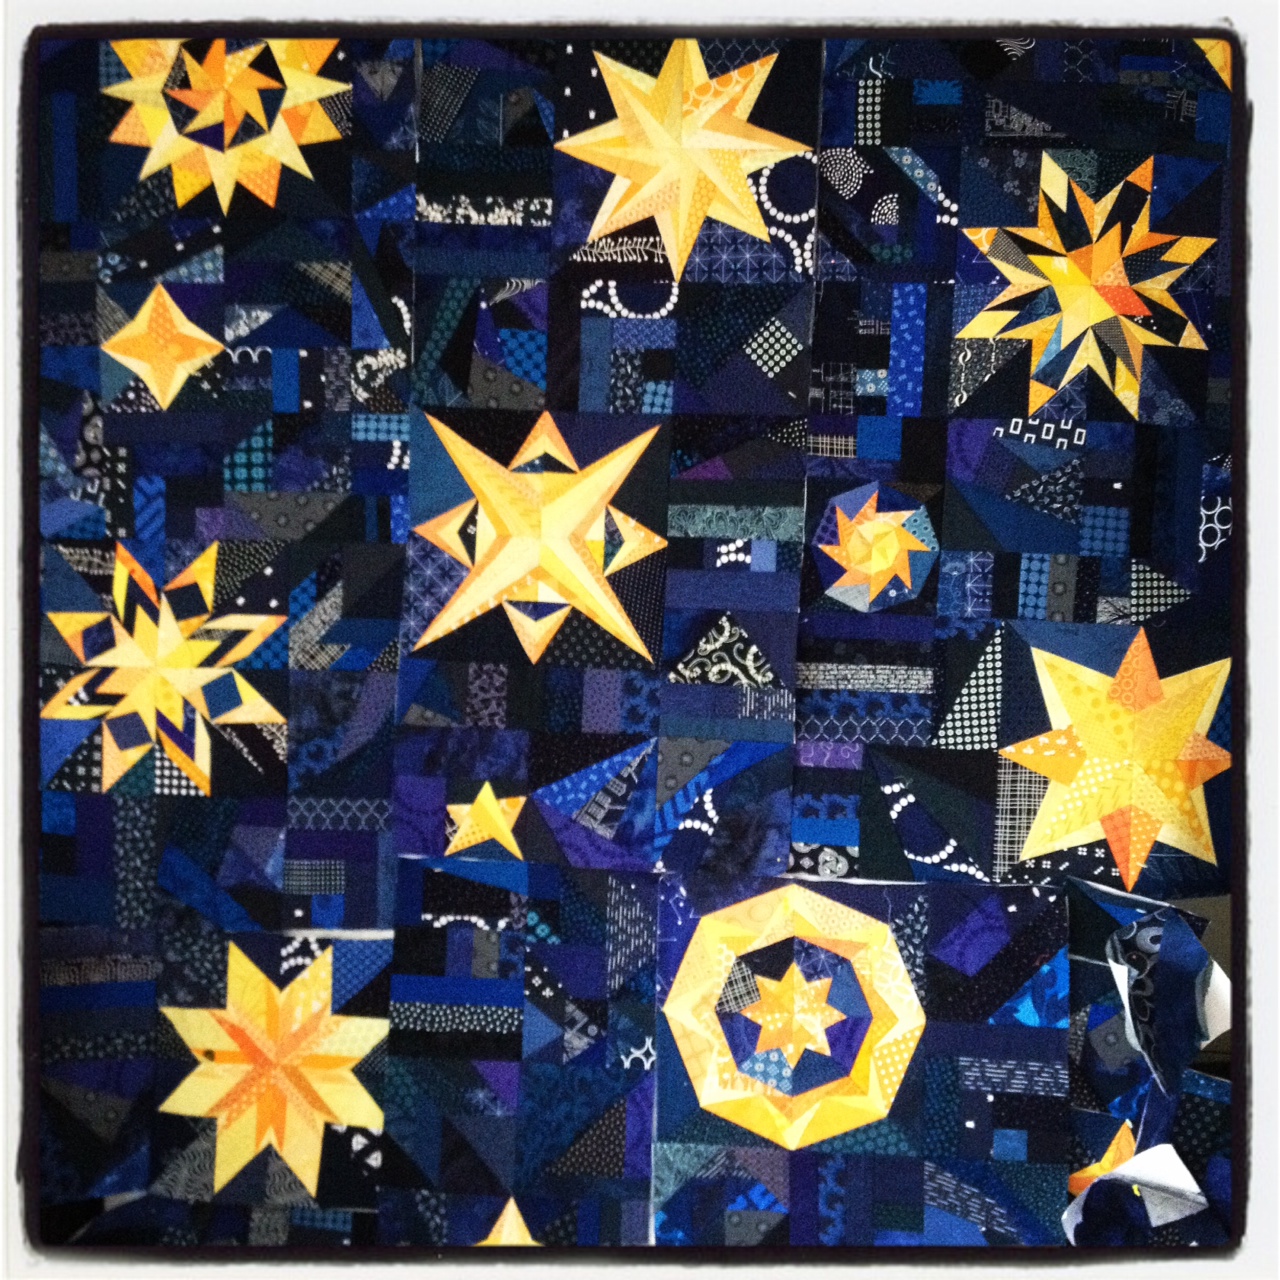
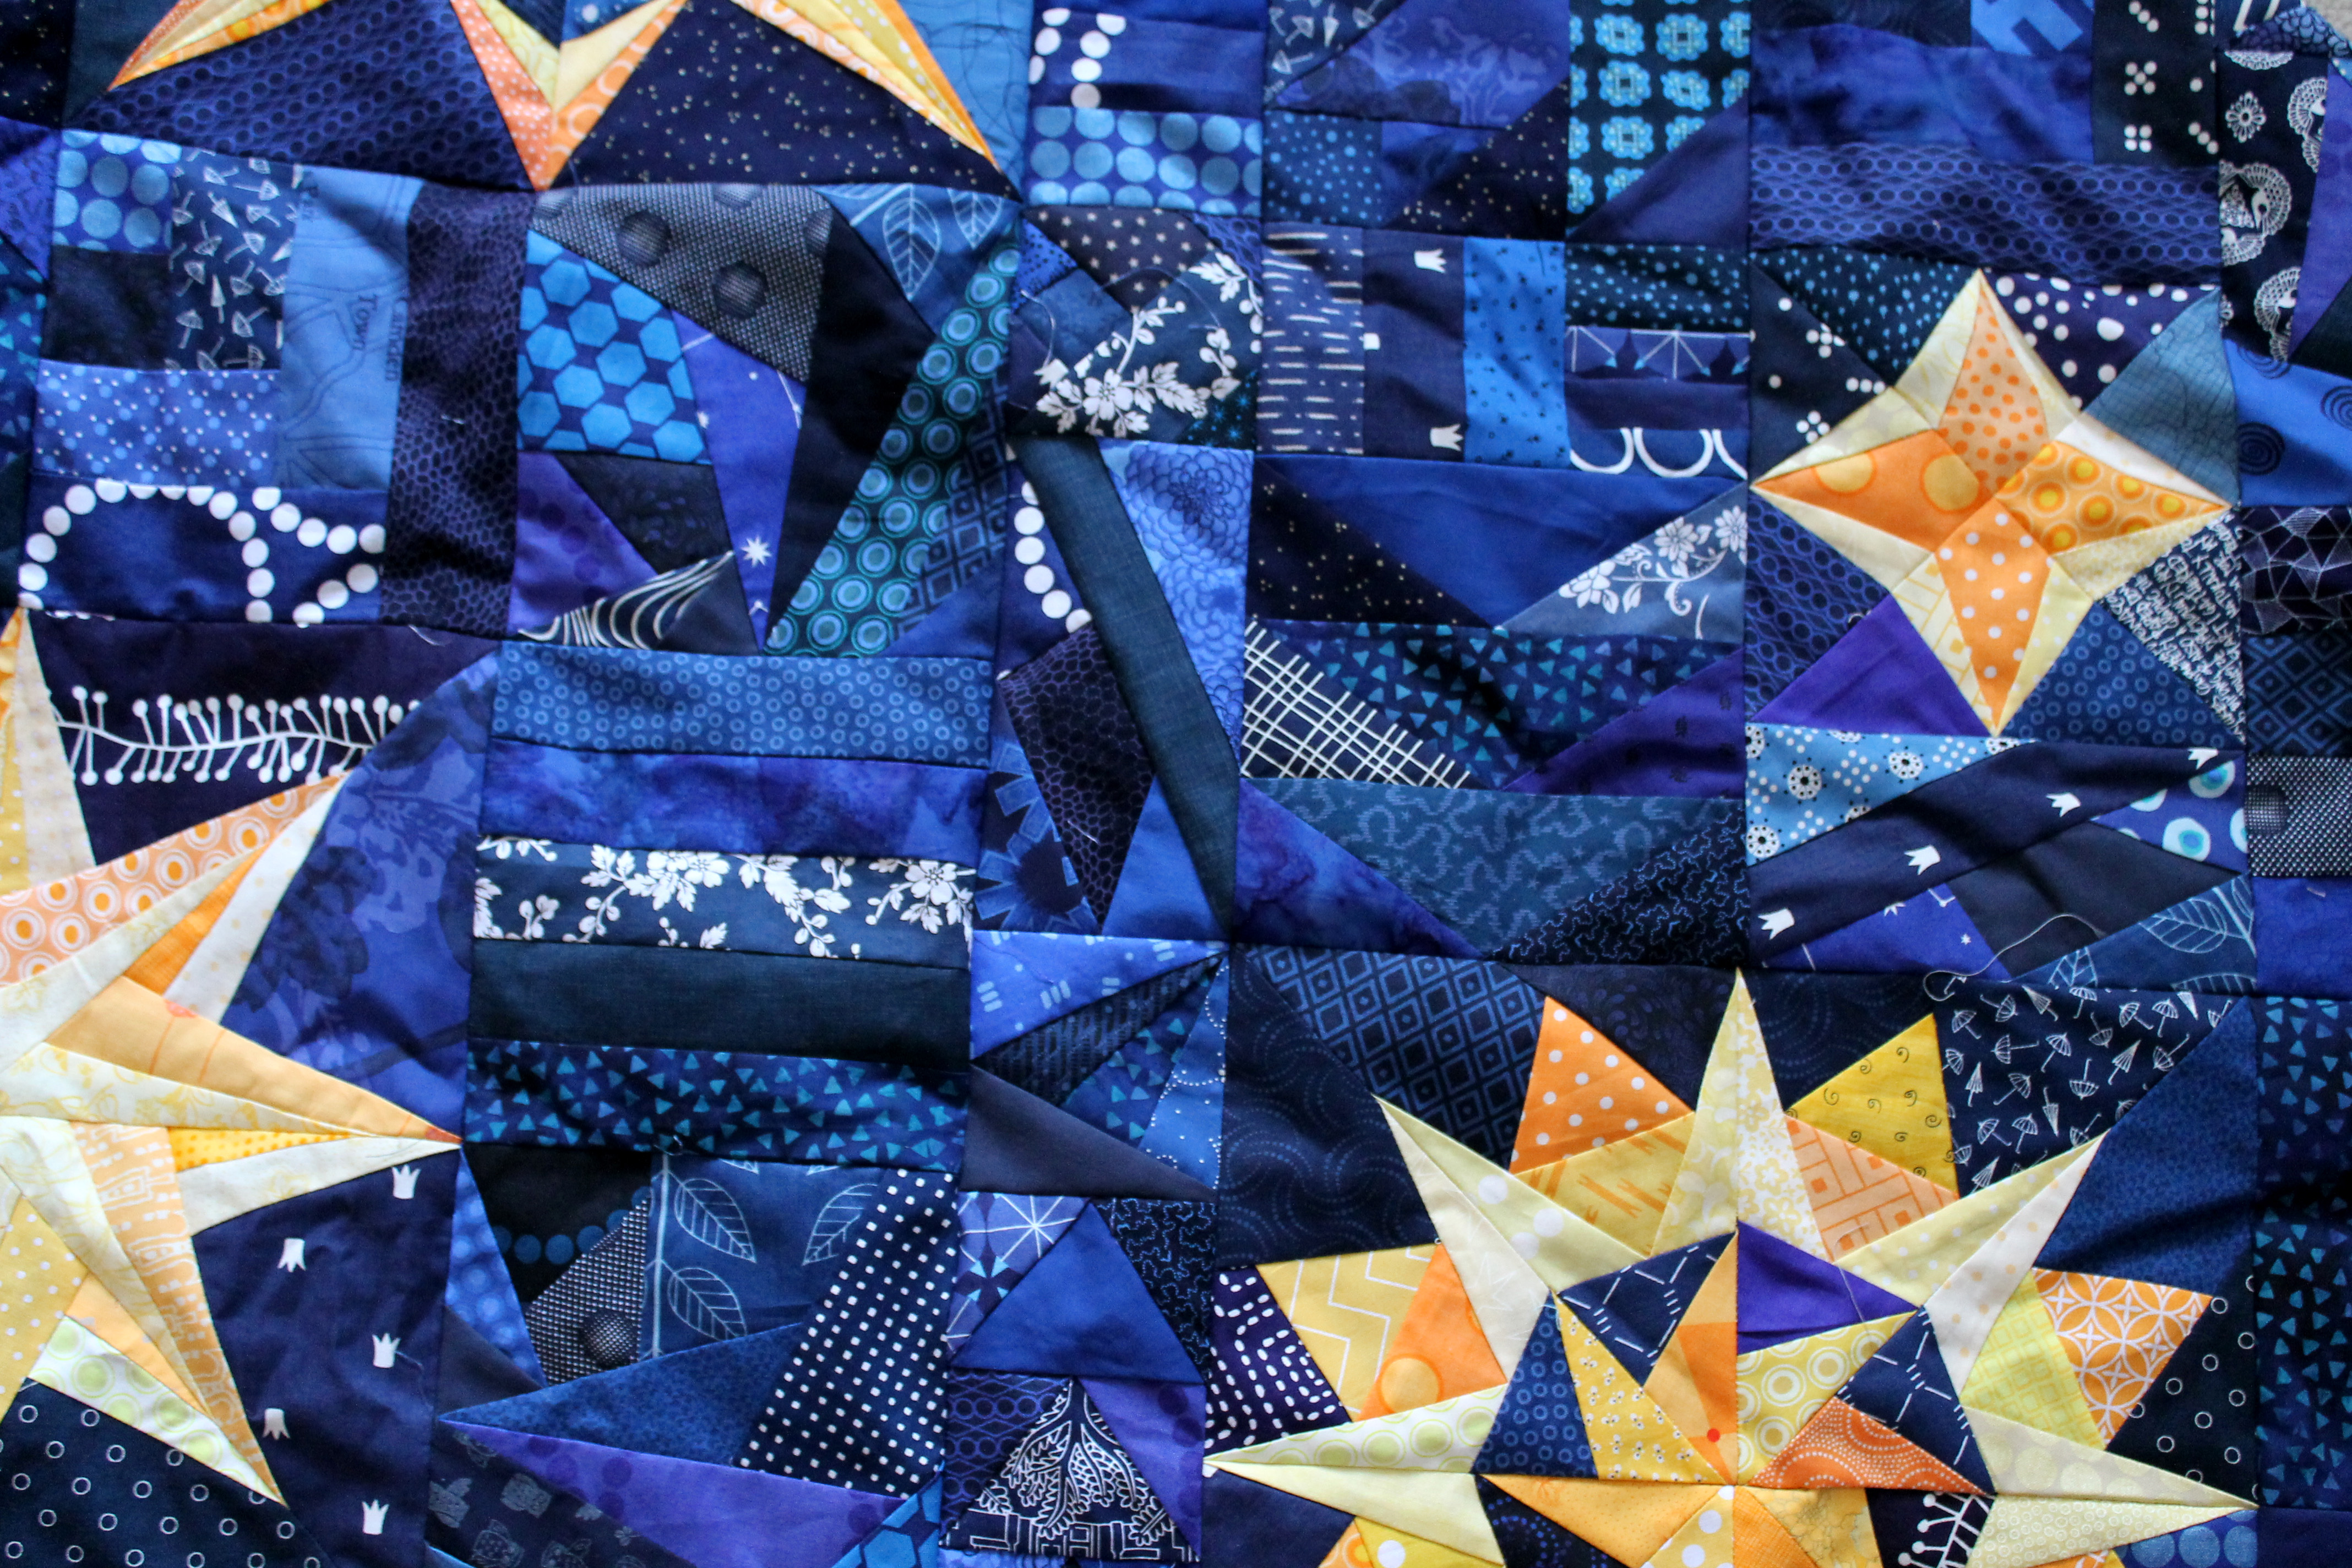
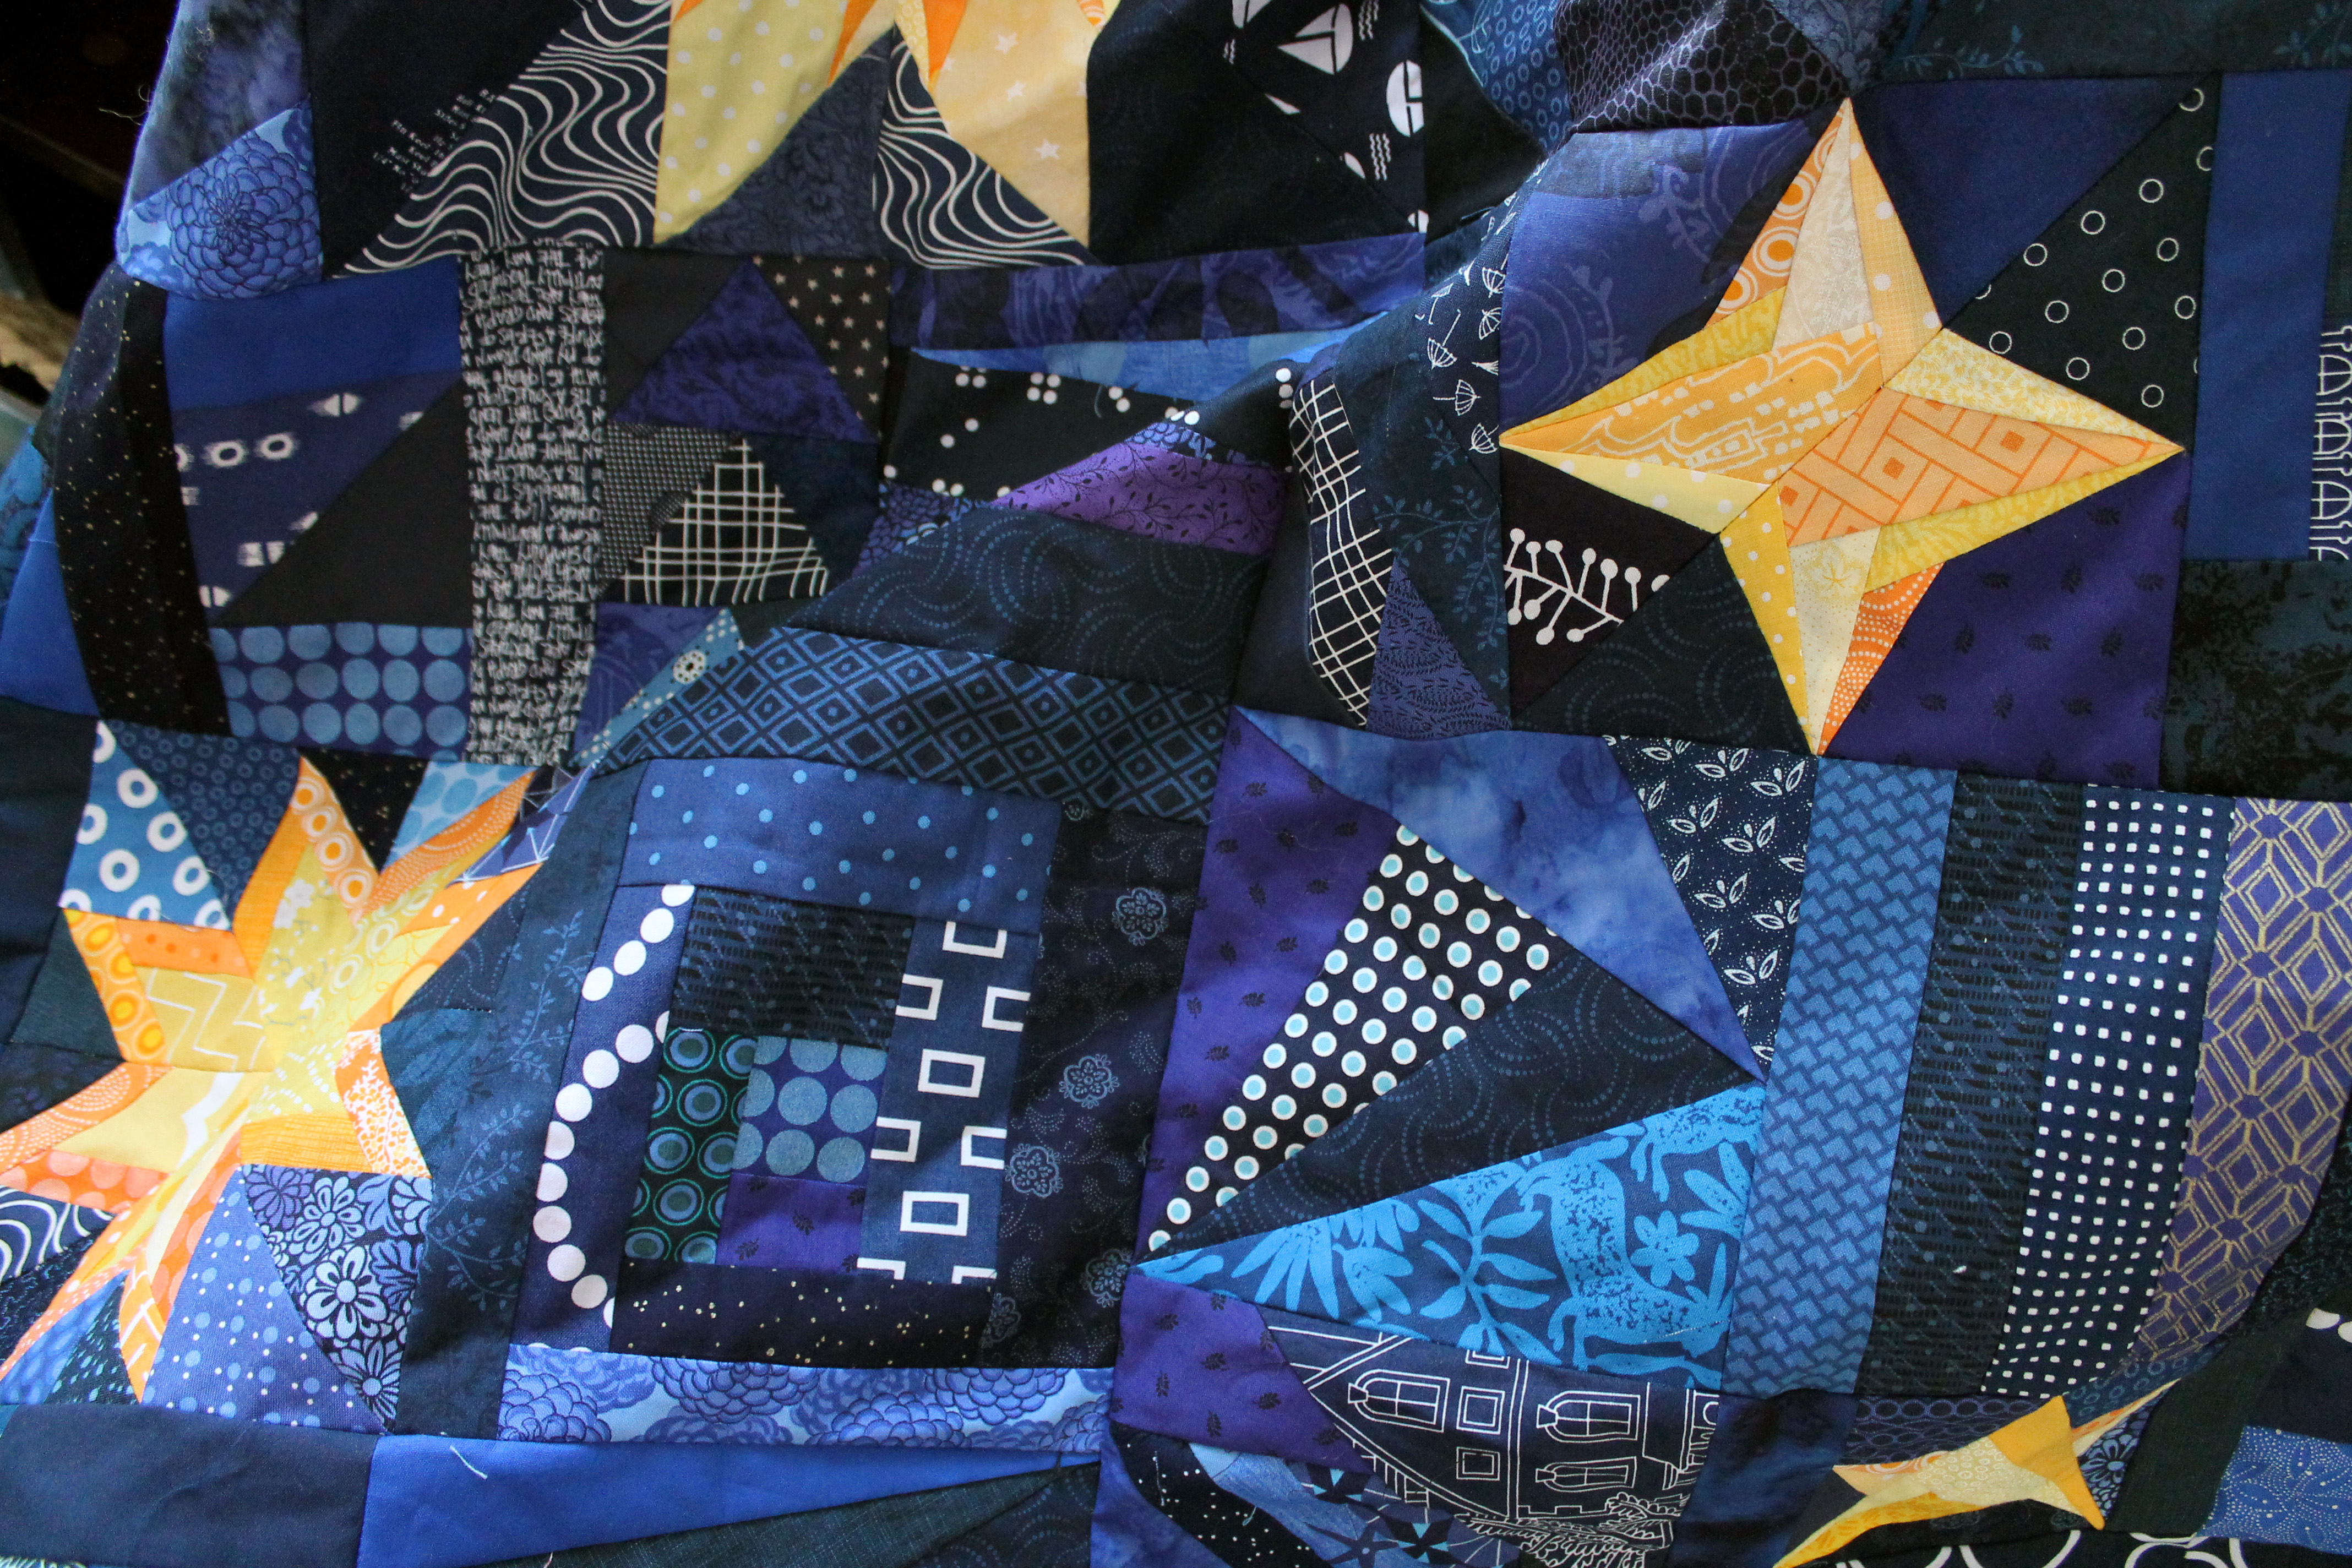
Yep my Paper Piecing Monday green star quilt is now done… thanks in part to the wonderful long arm services of Kazumi Peterson.

quilt details 5

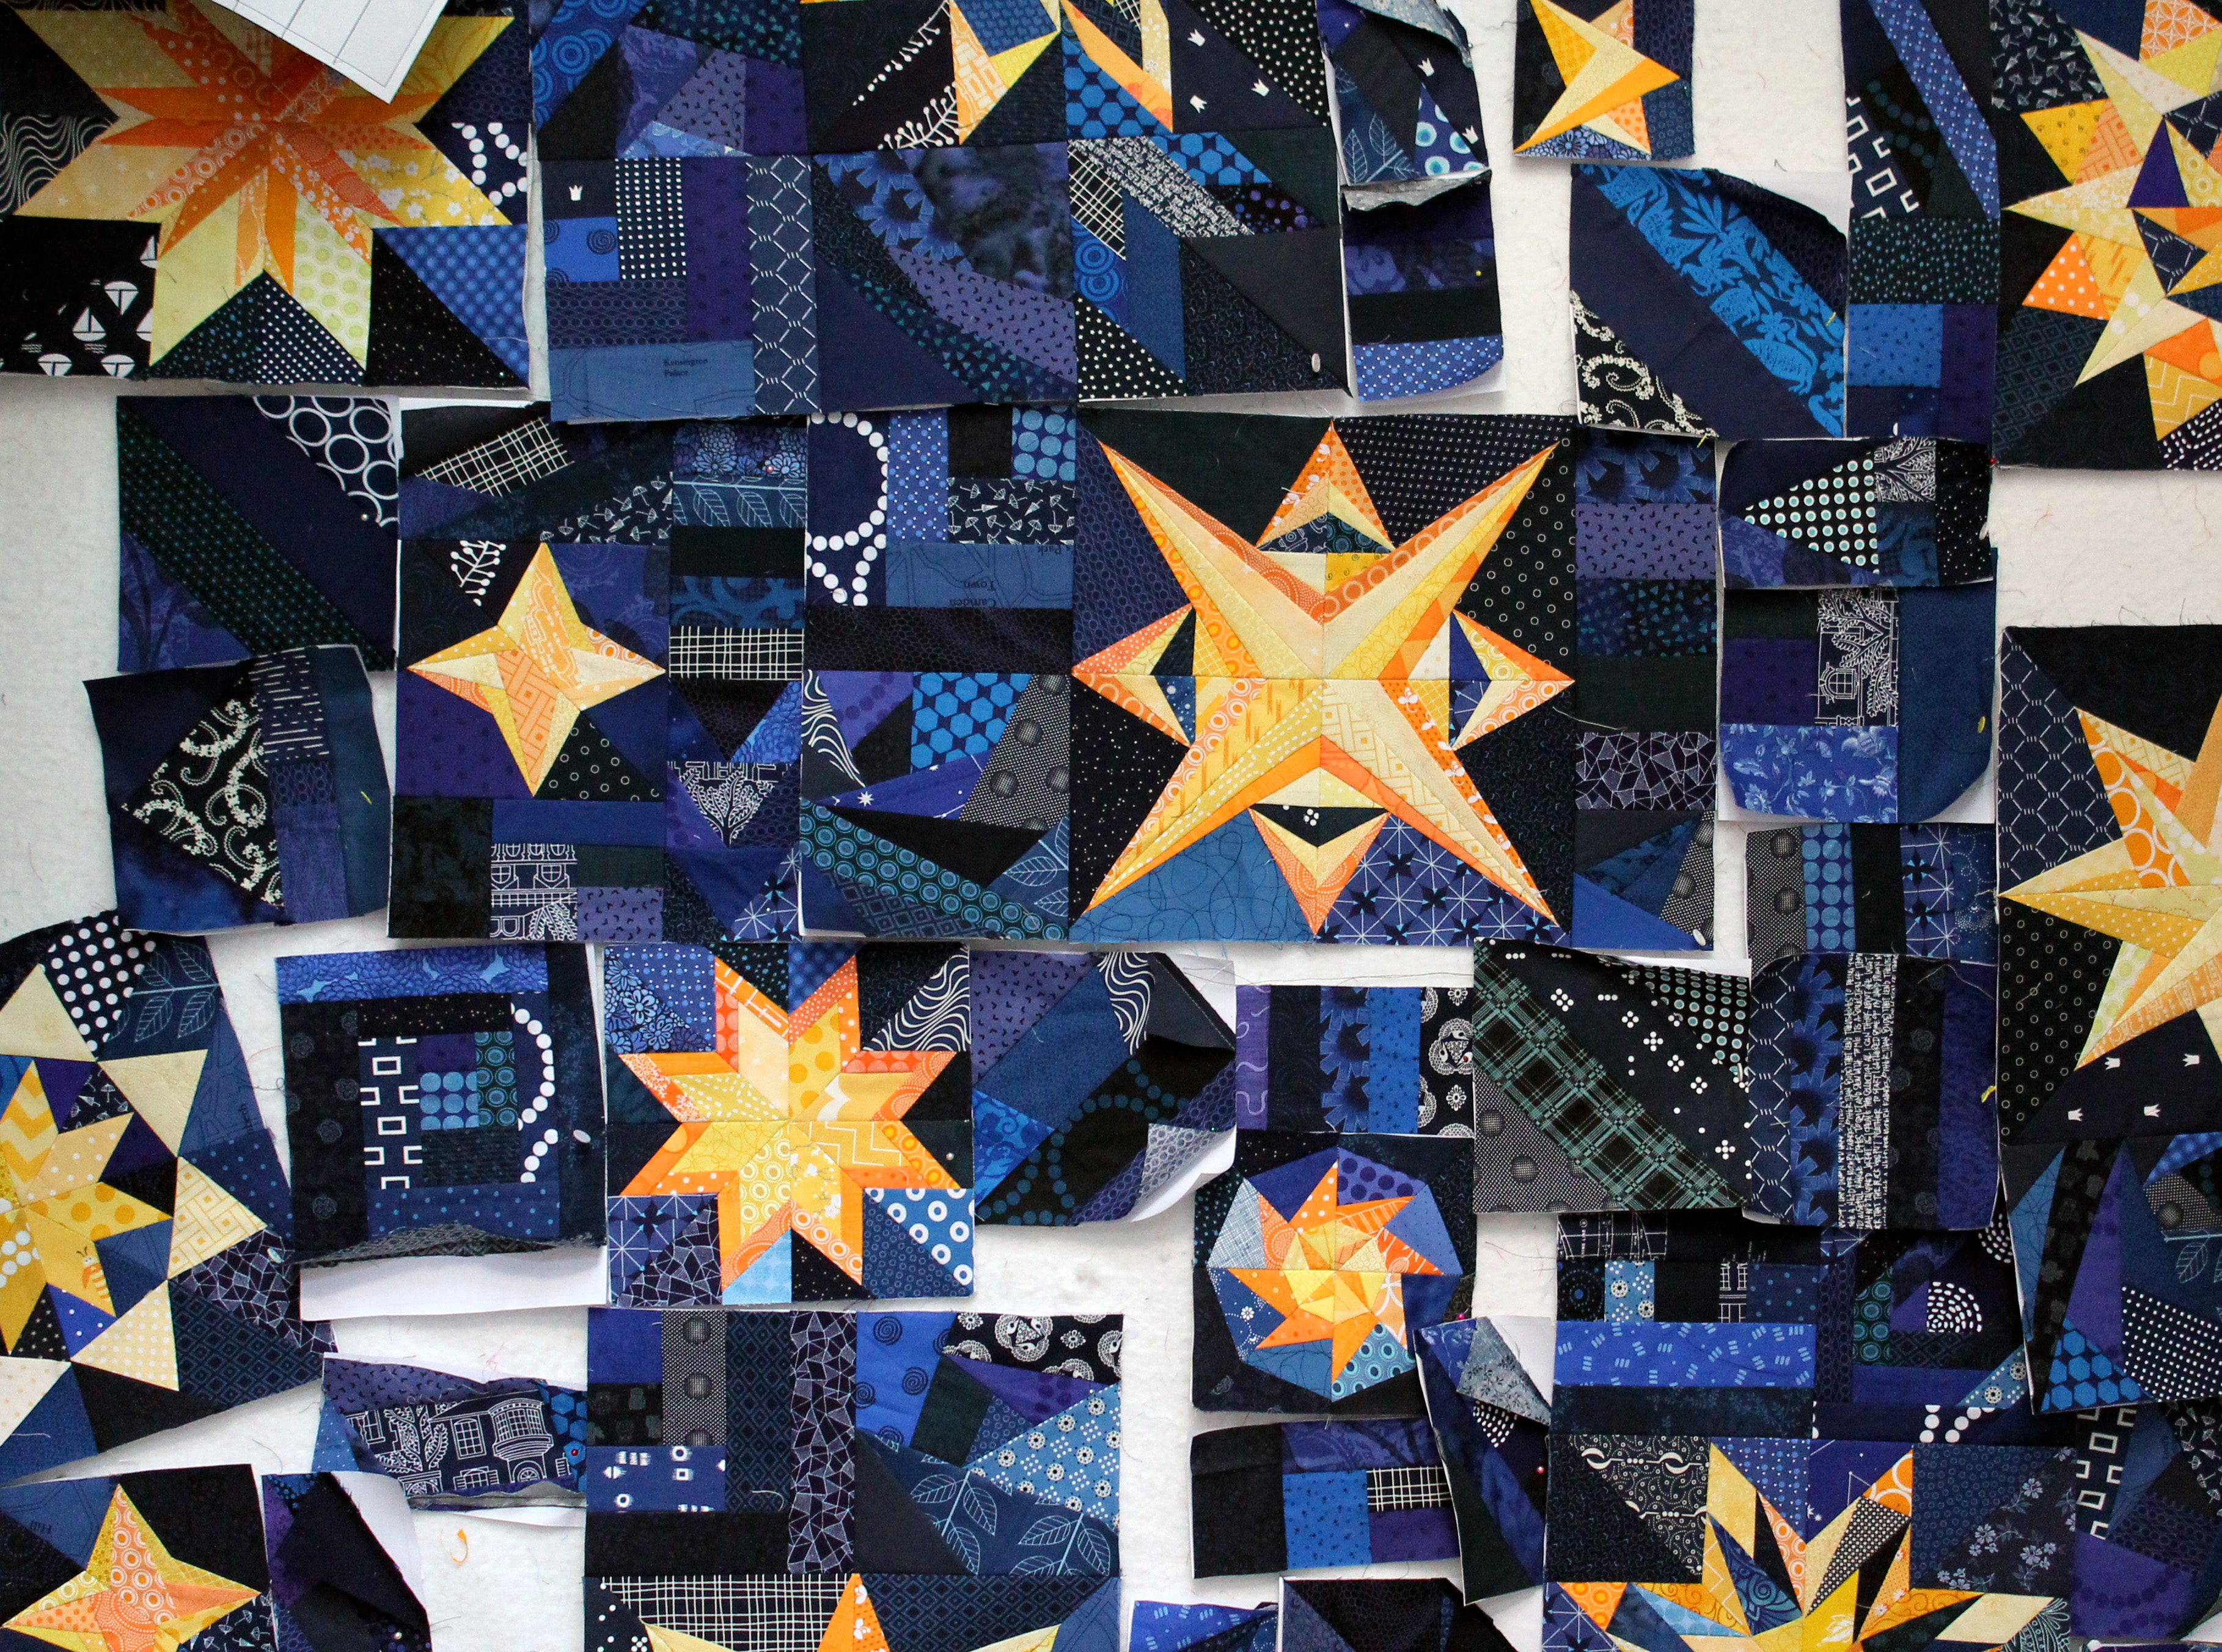
Last week I did a talk at a local Traditional quilt guild and while preparing my talk I realised that I had given away most of my quilts…. I have kept a handful but I wanted more to show.  So there was a couple of weeks of feverish activity to get some quilts done, as well as a trip or two to my local long armer.

quilt details 2

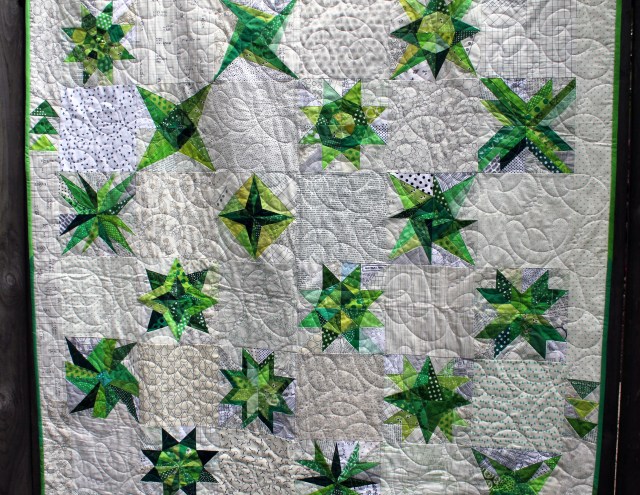
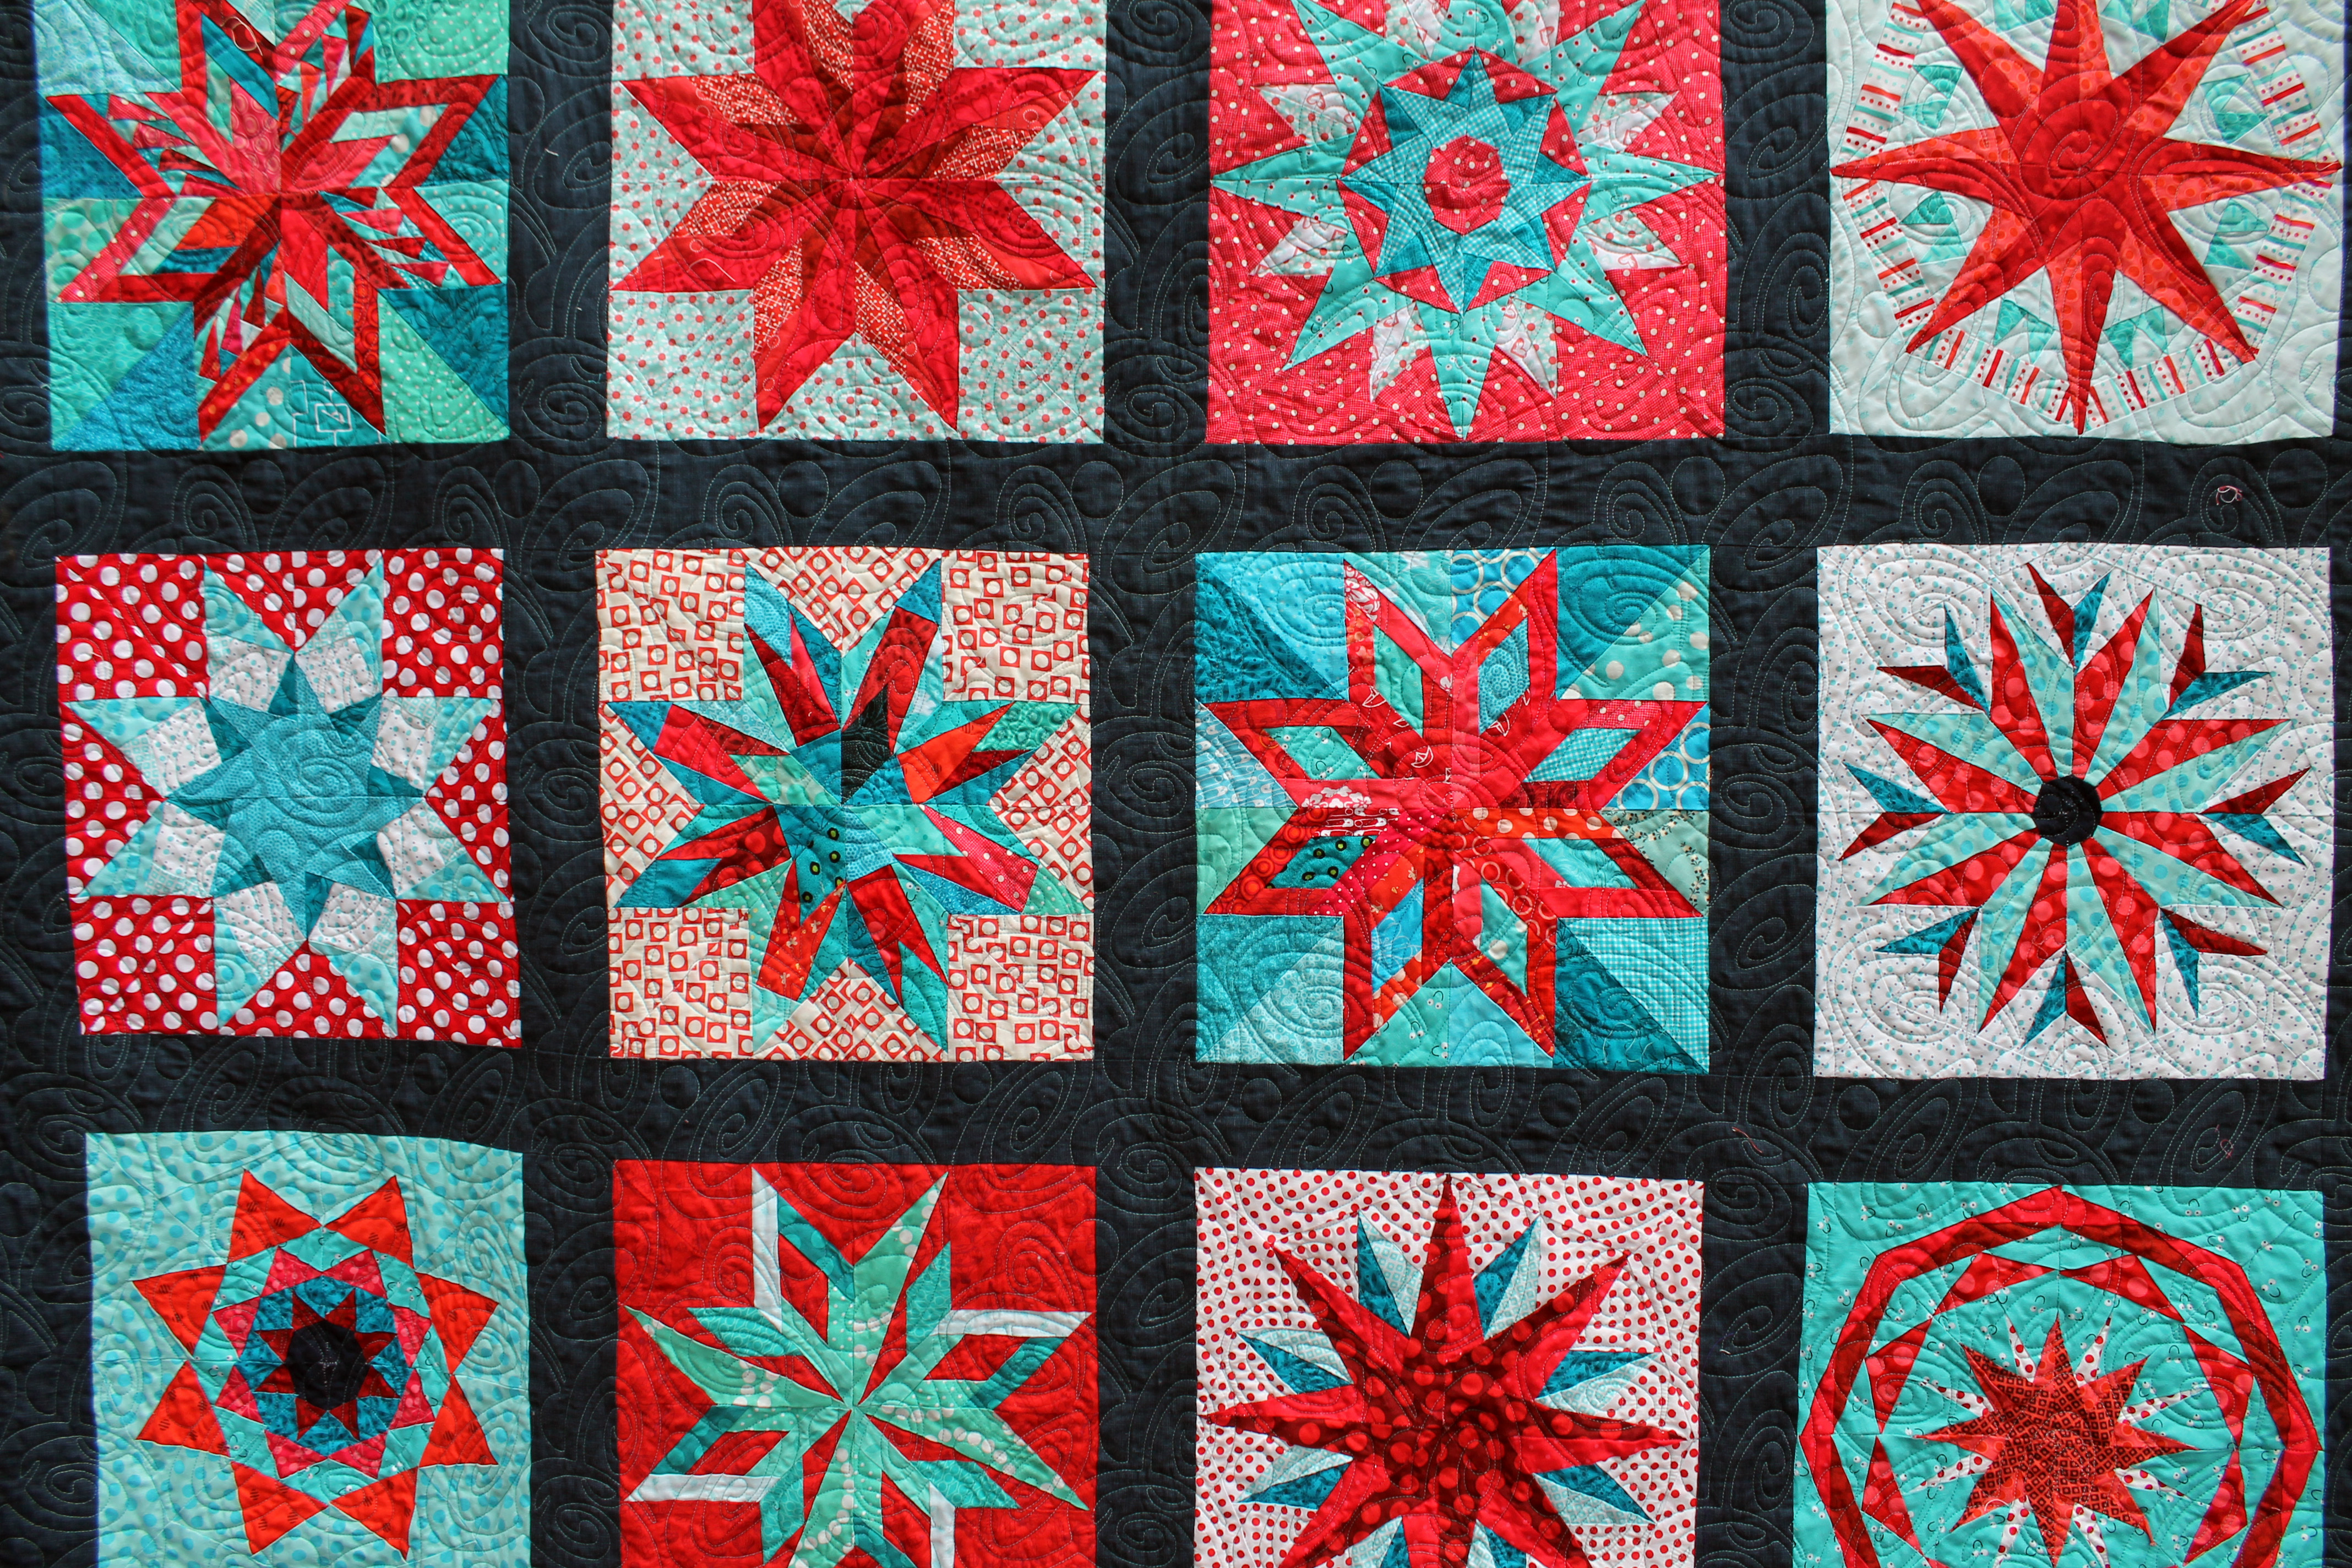
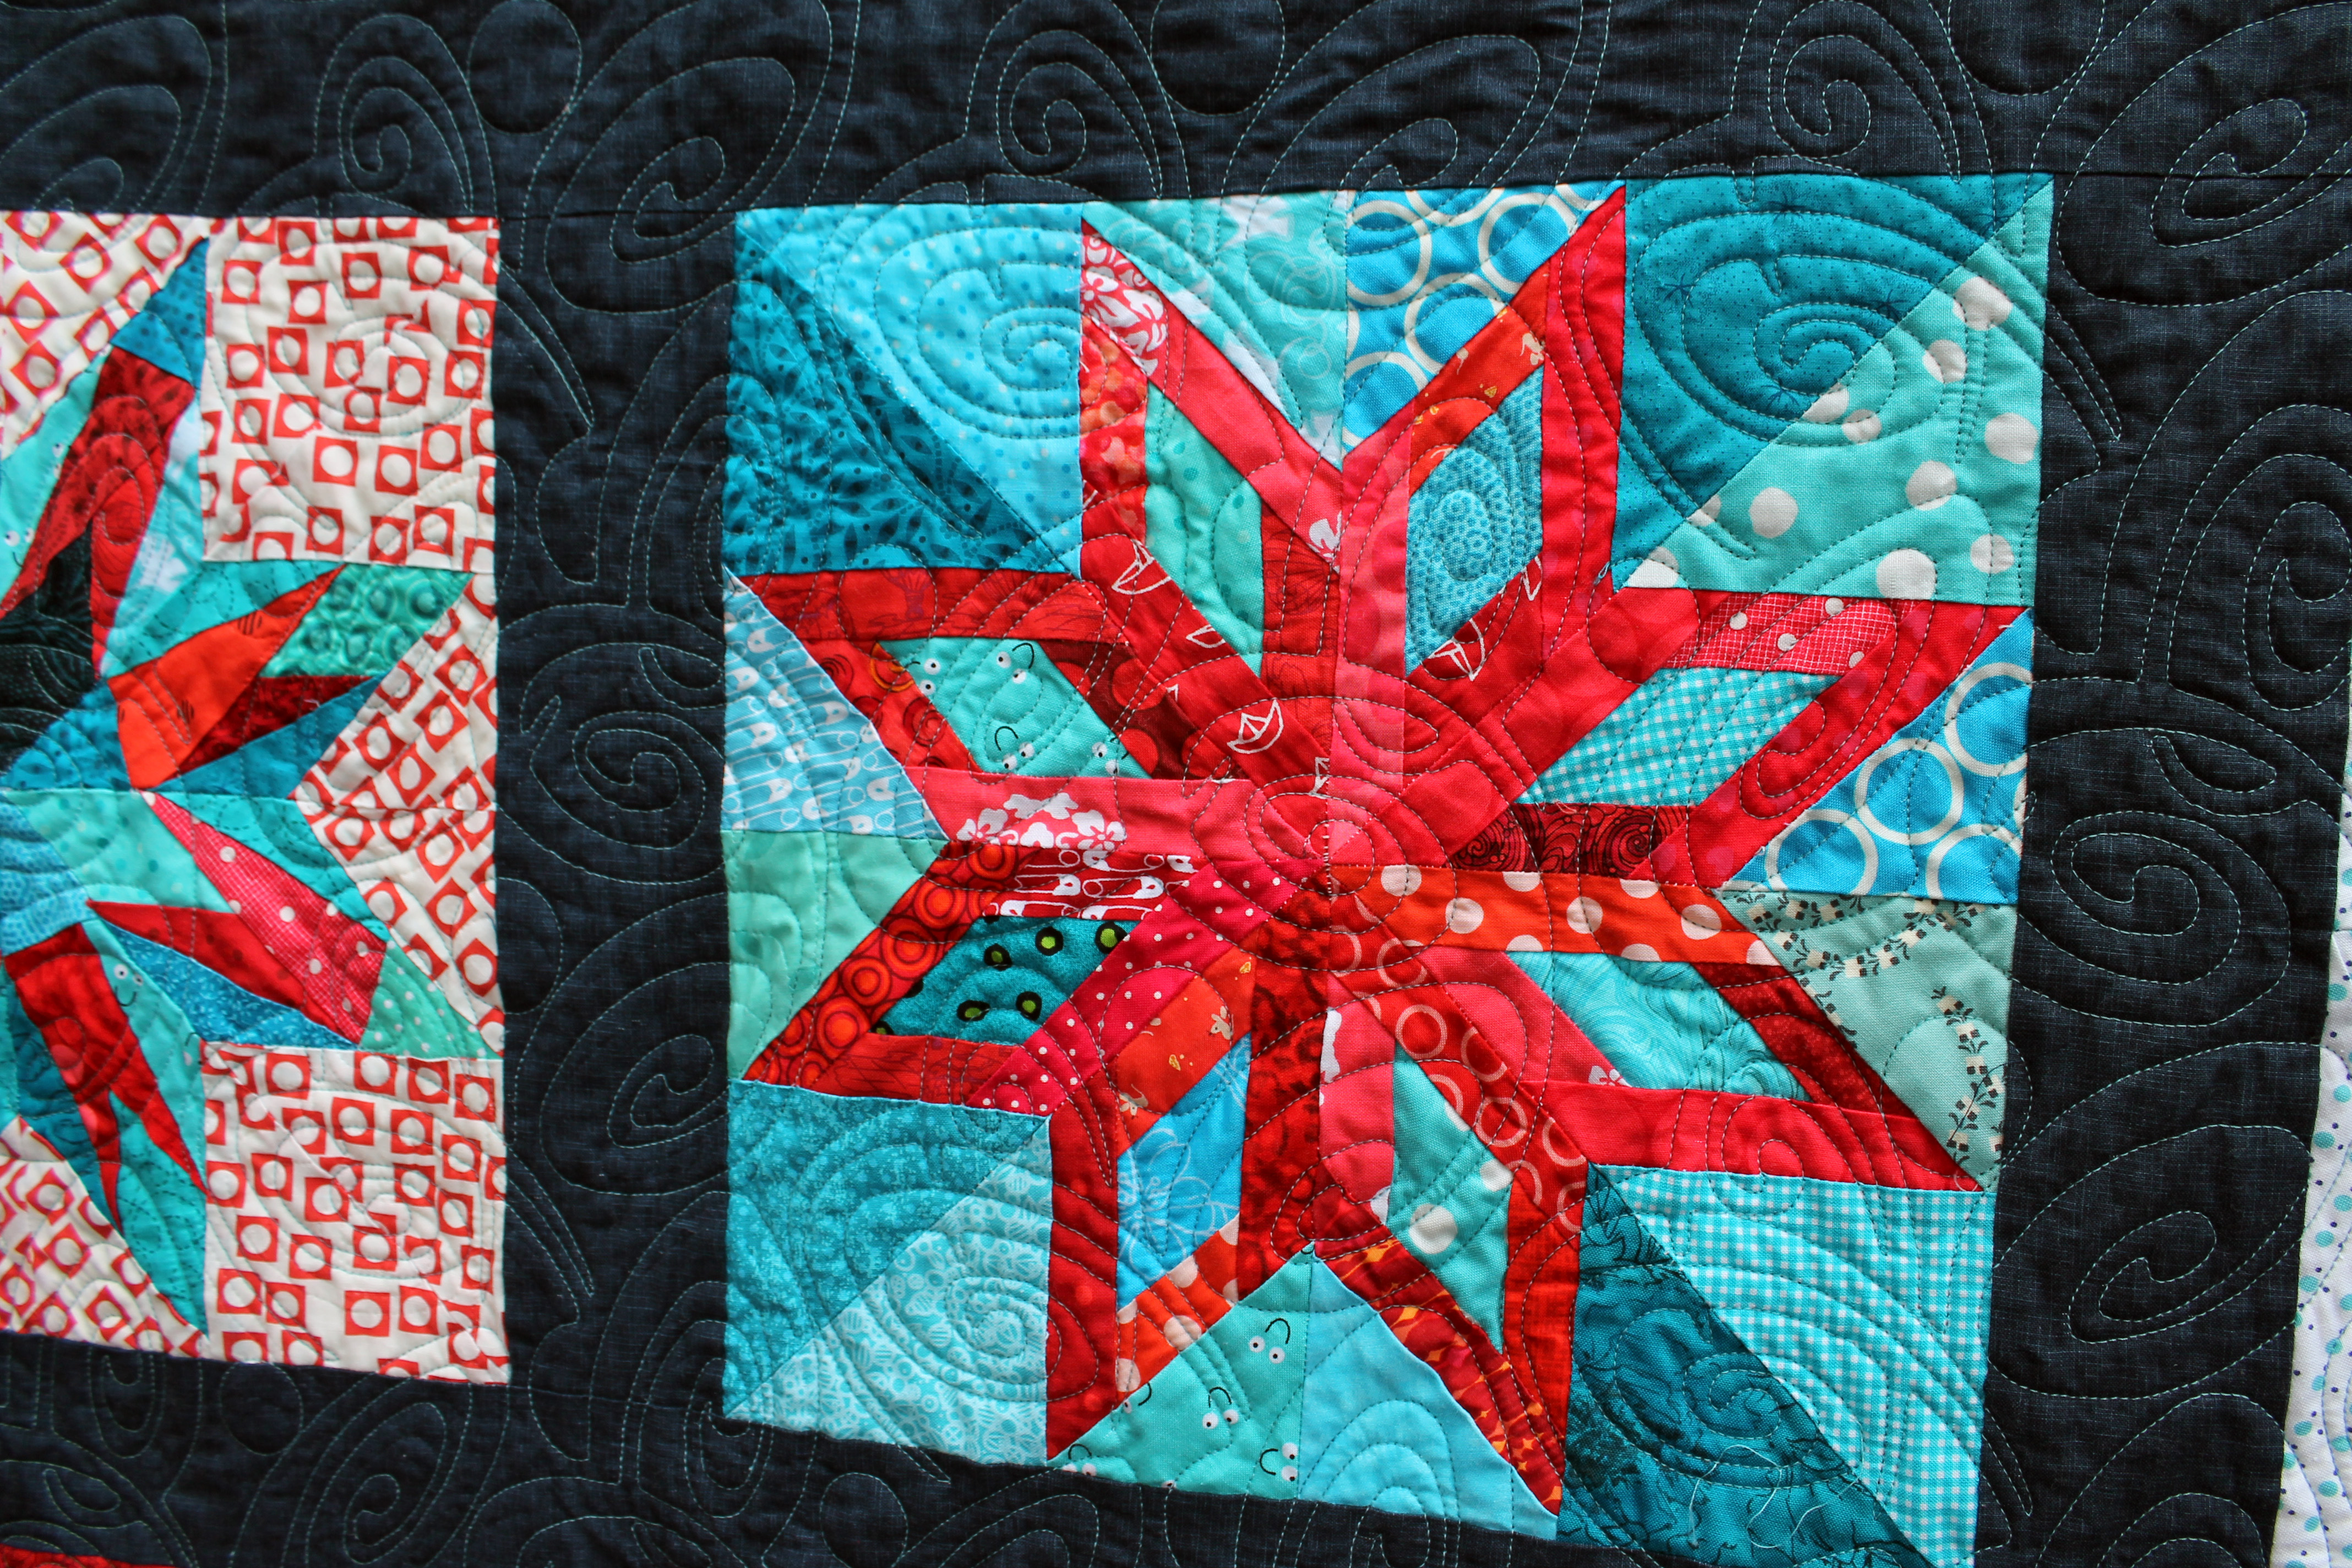
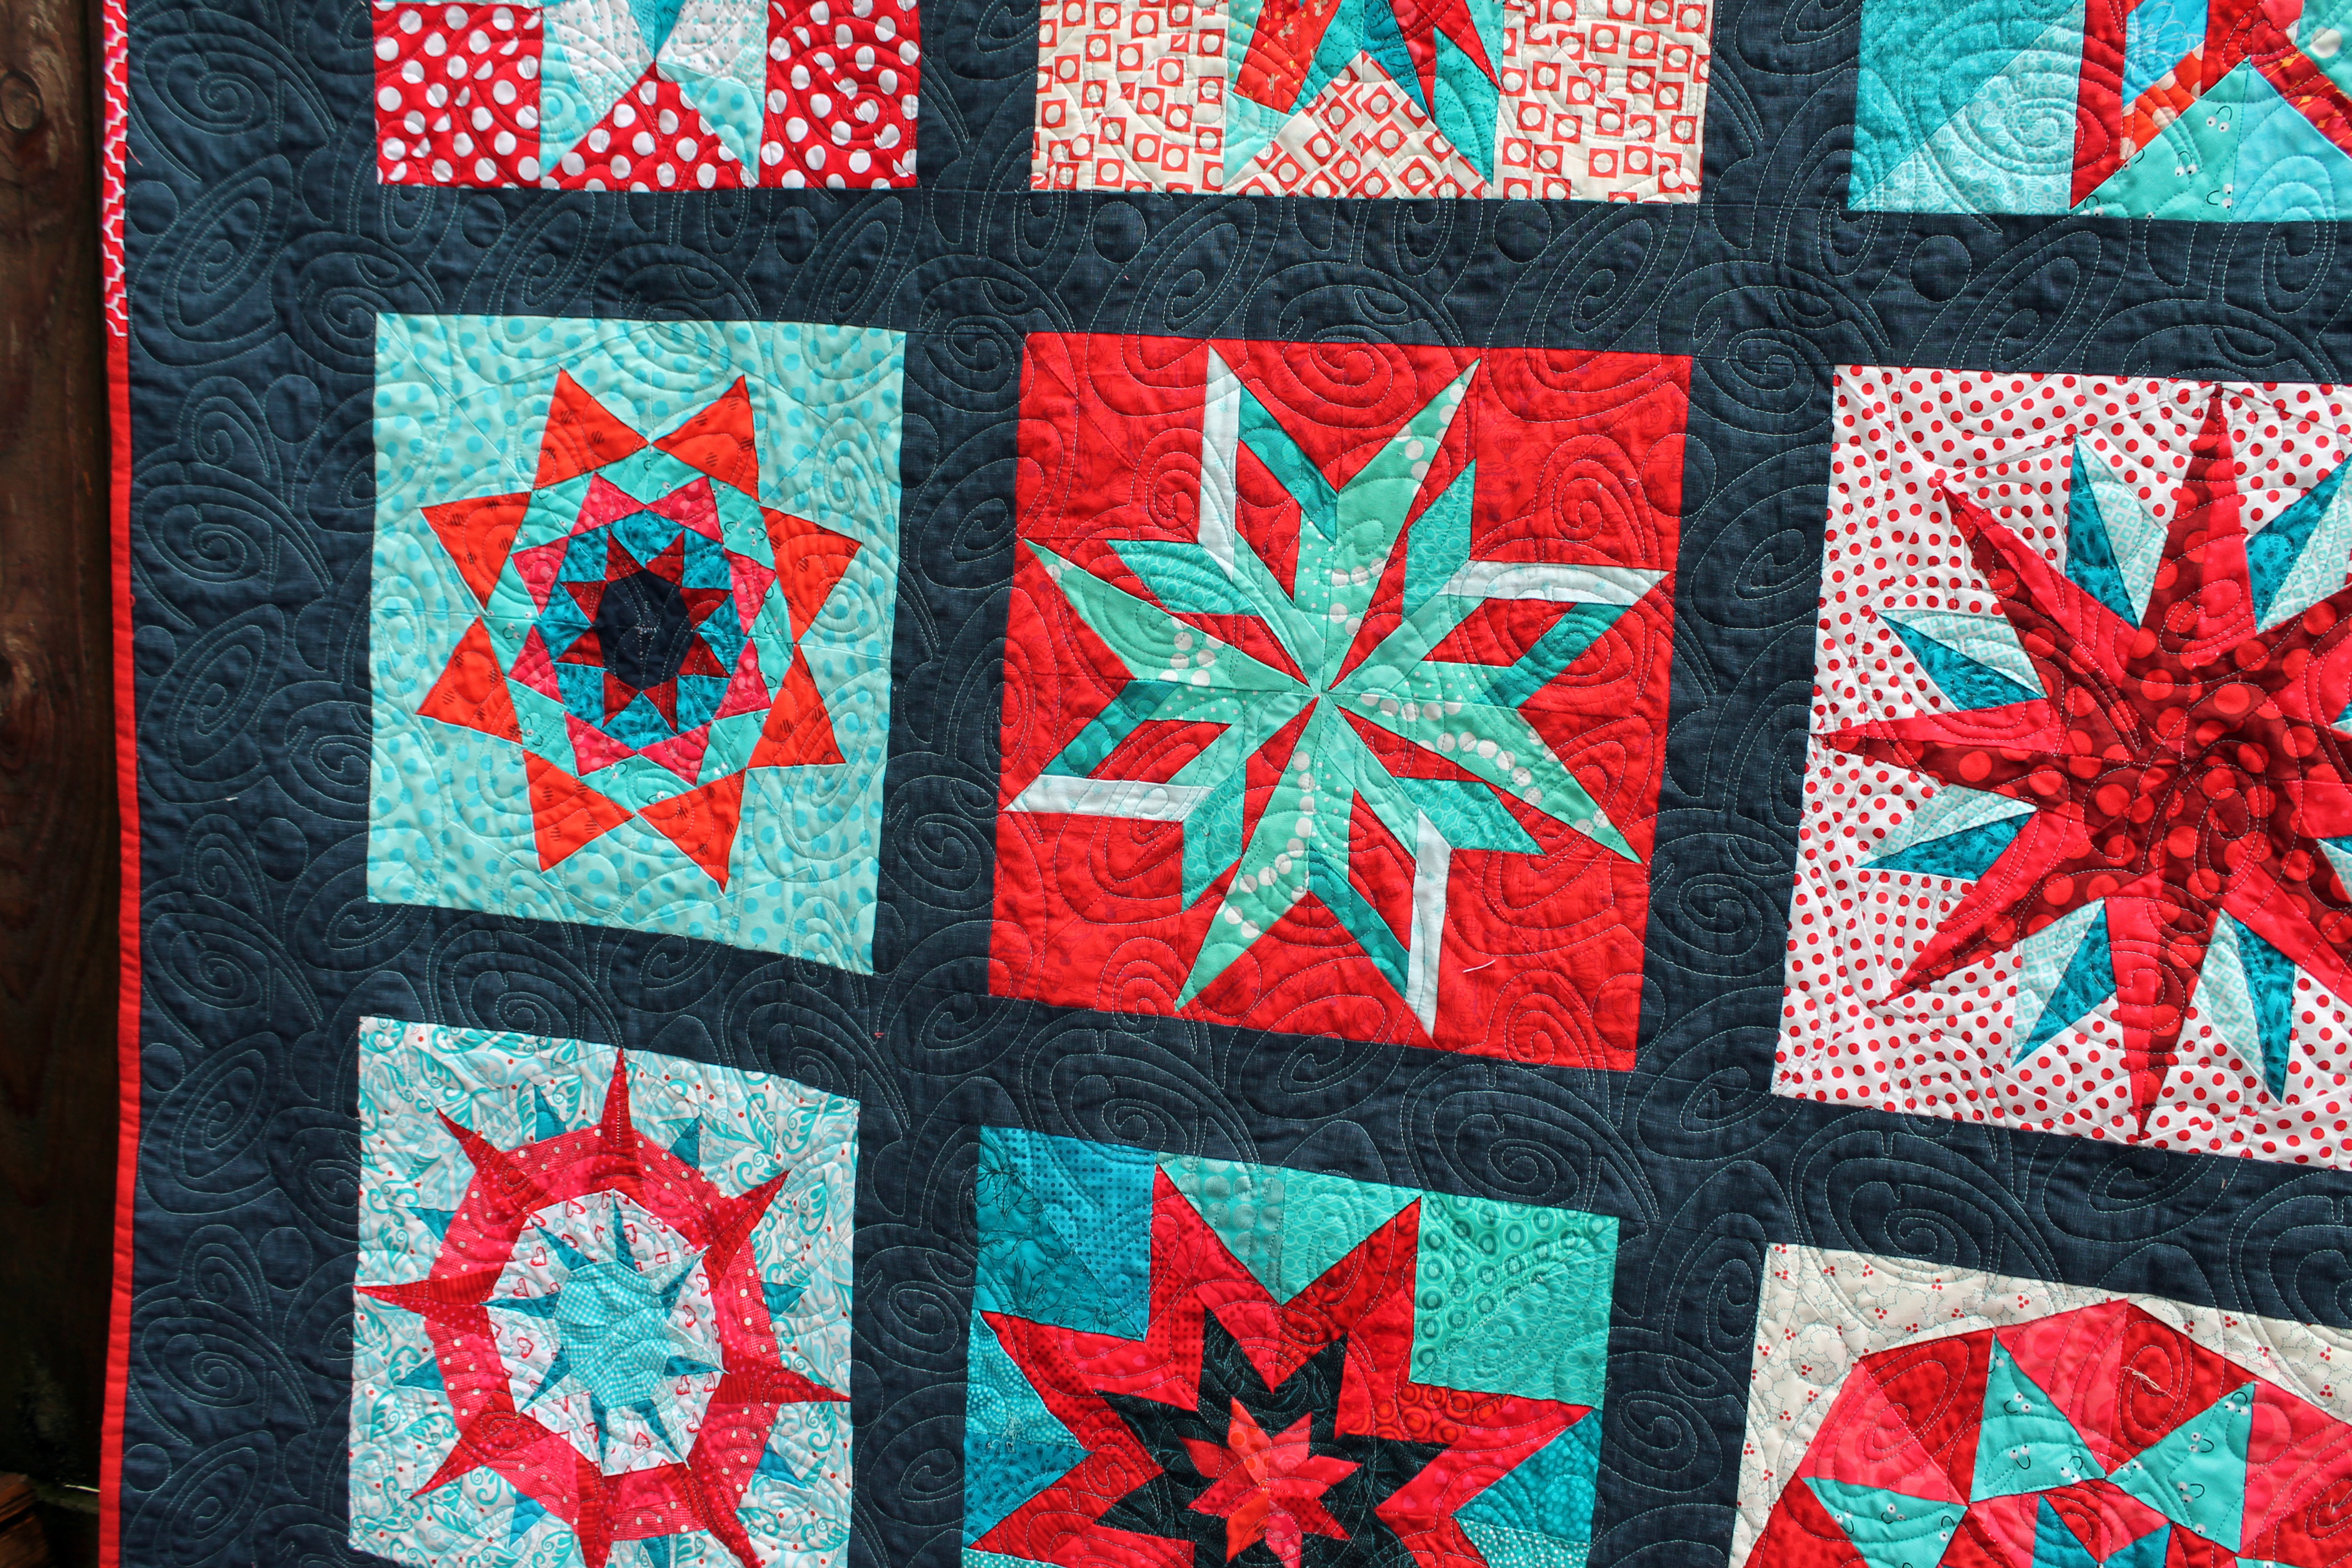
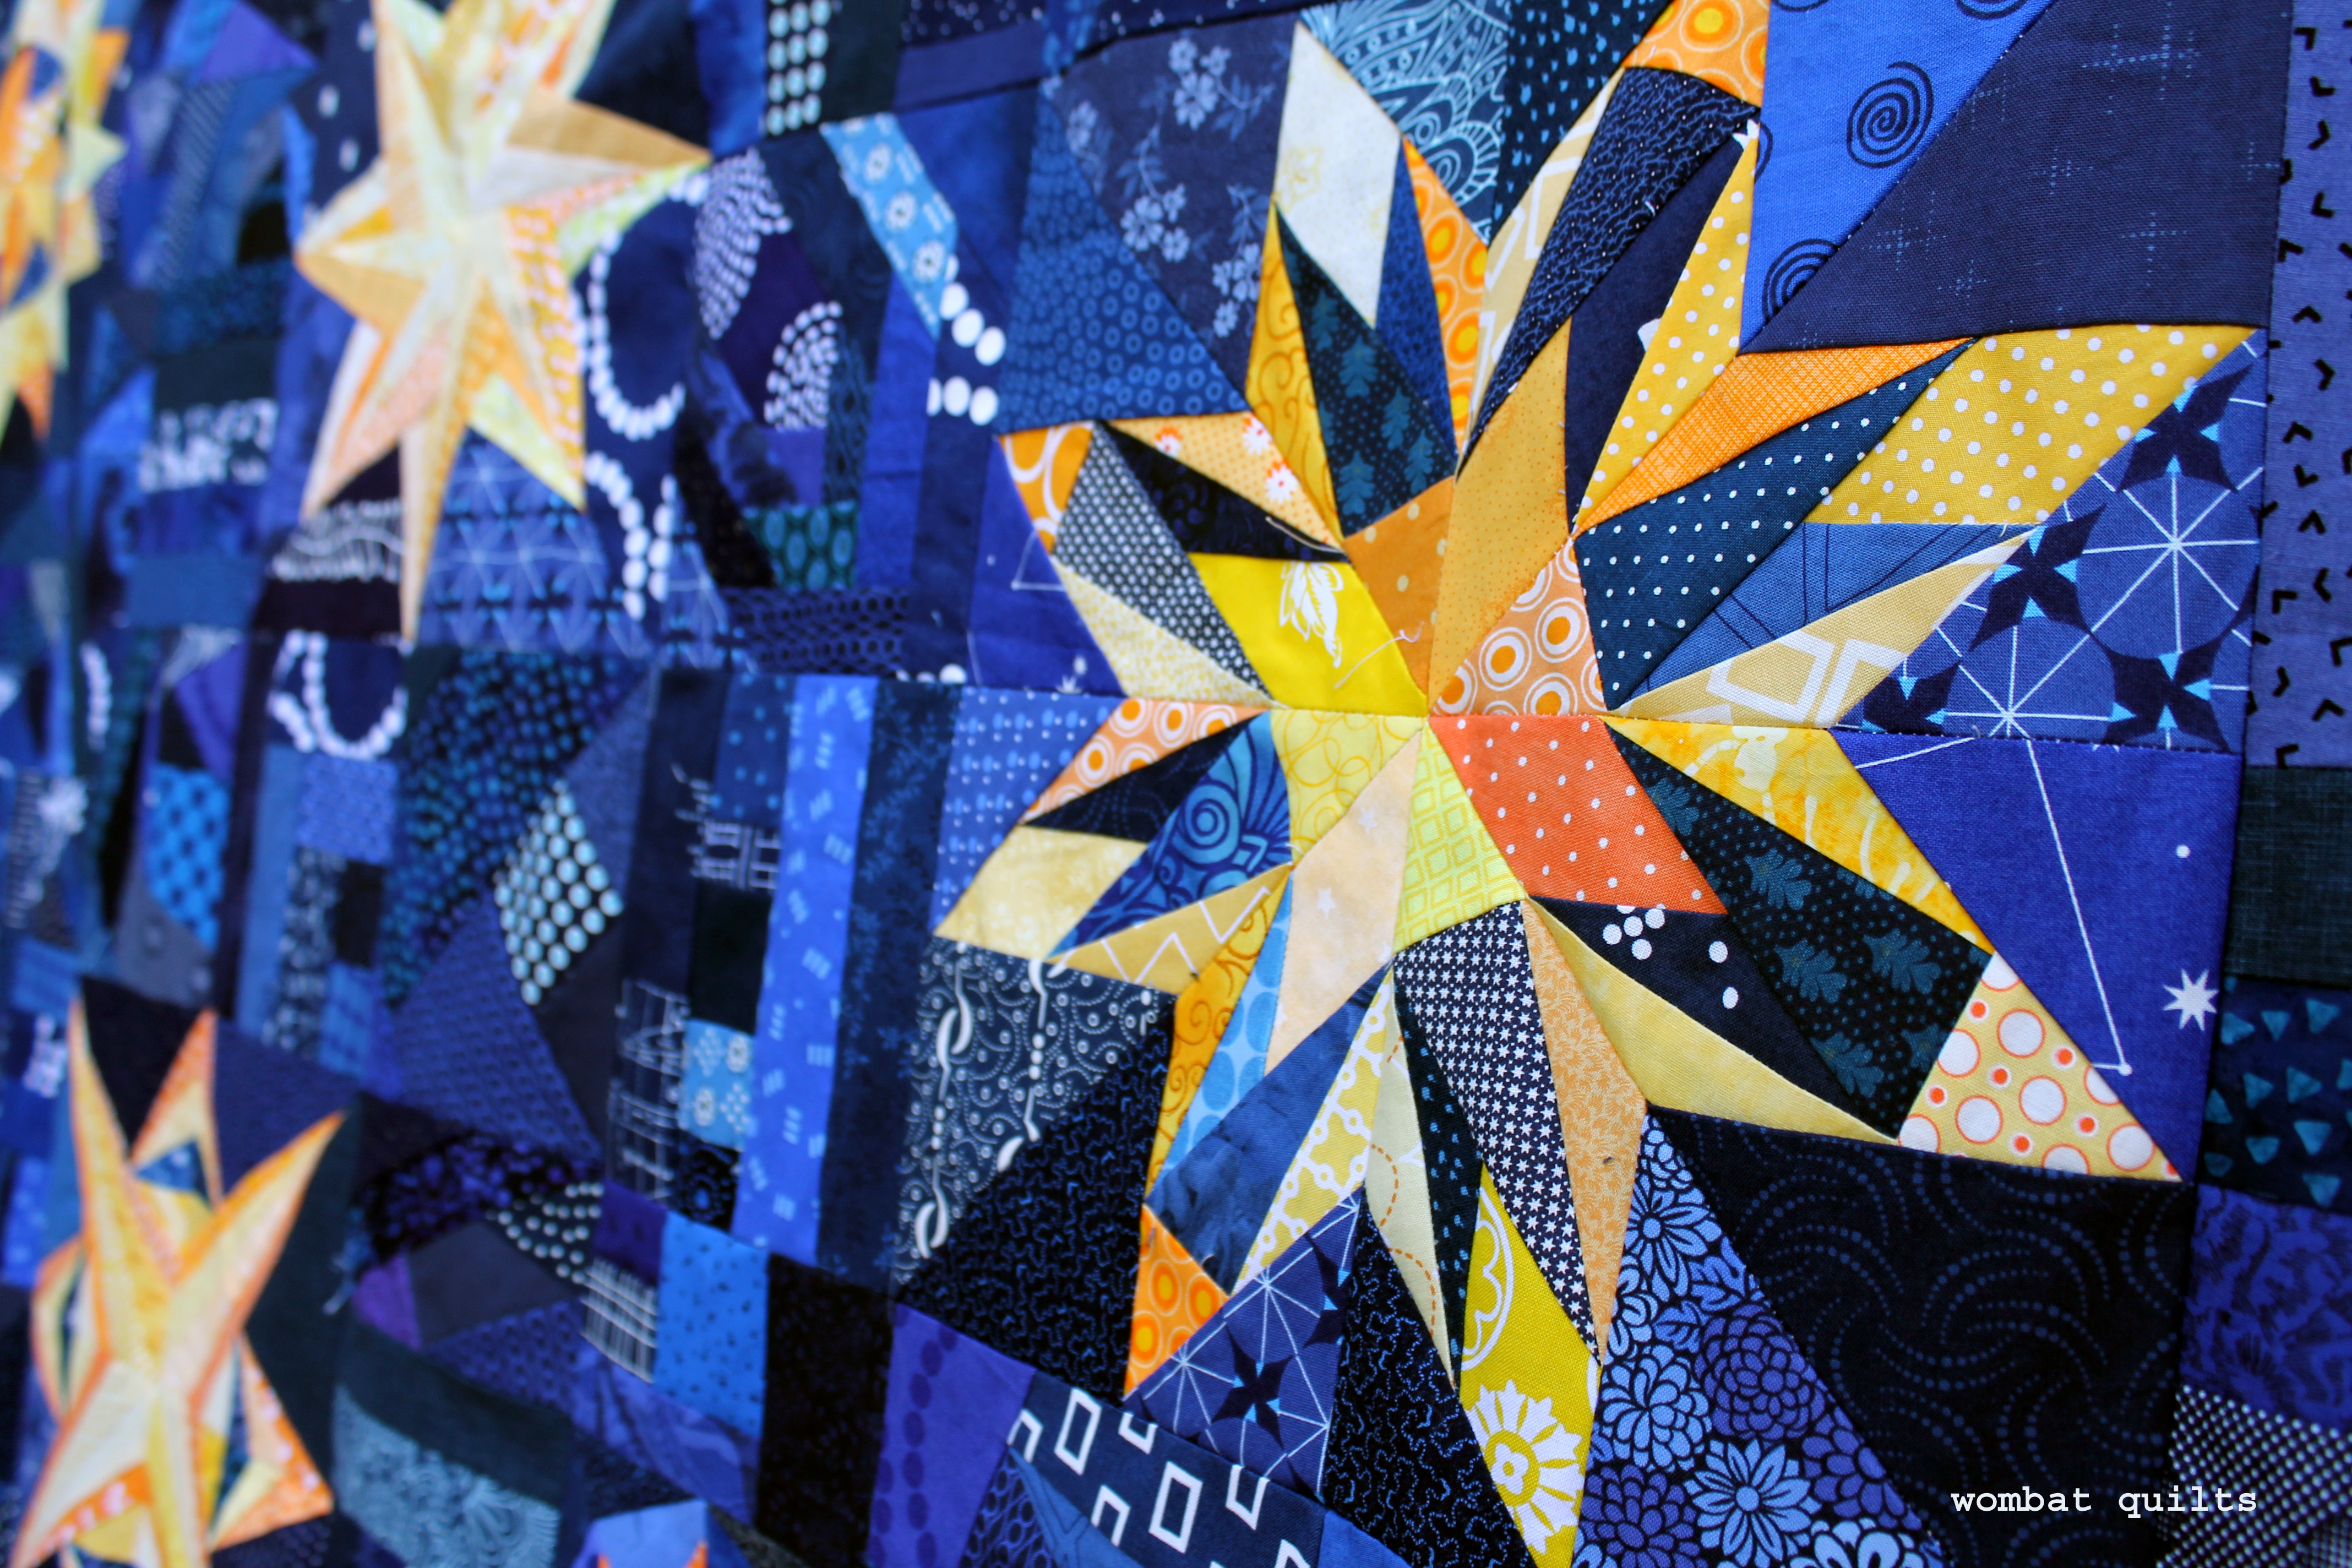
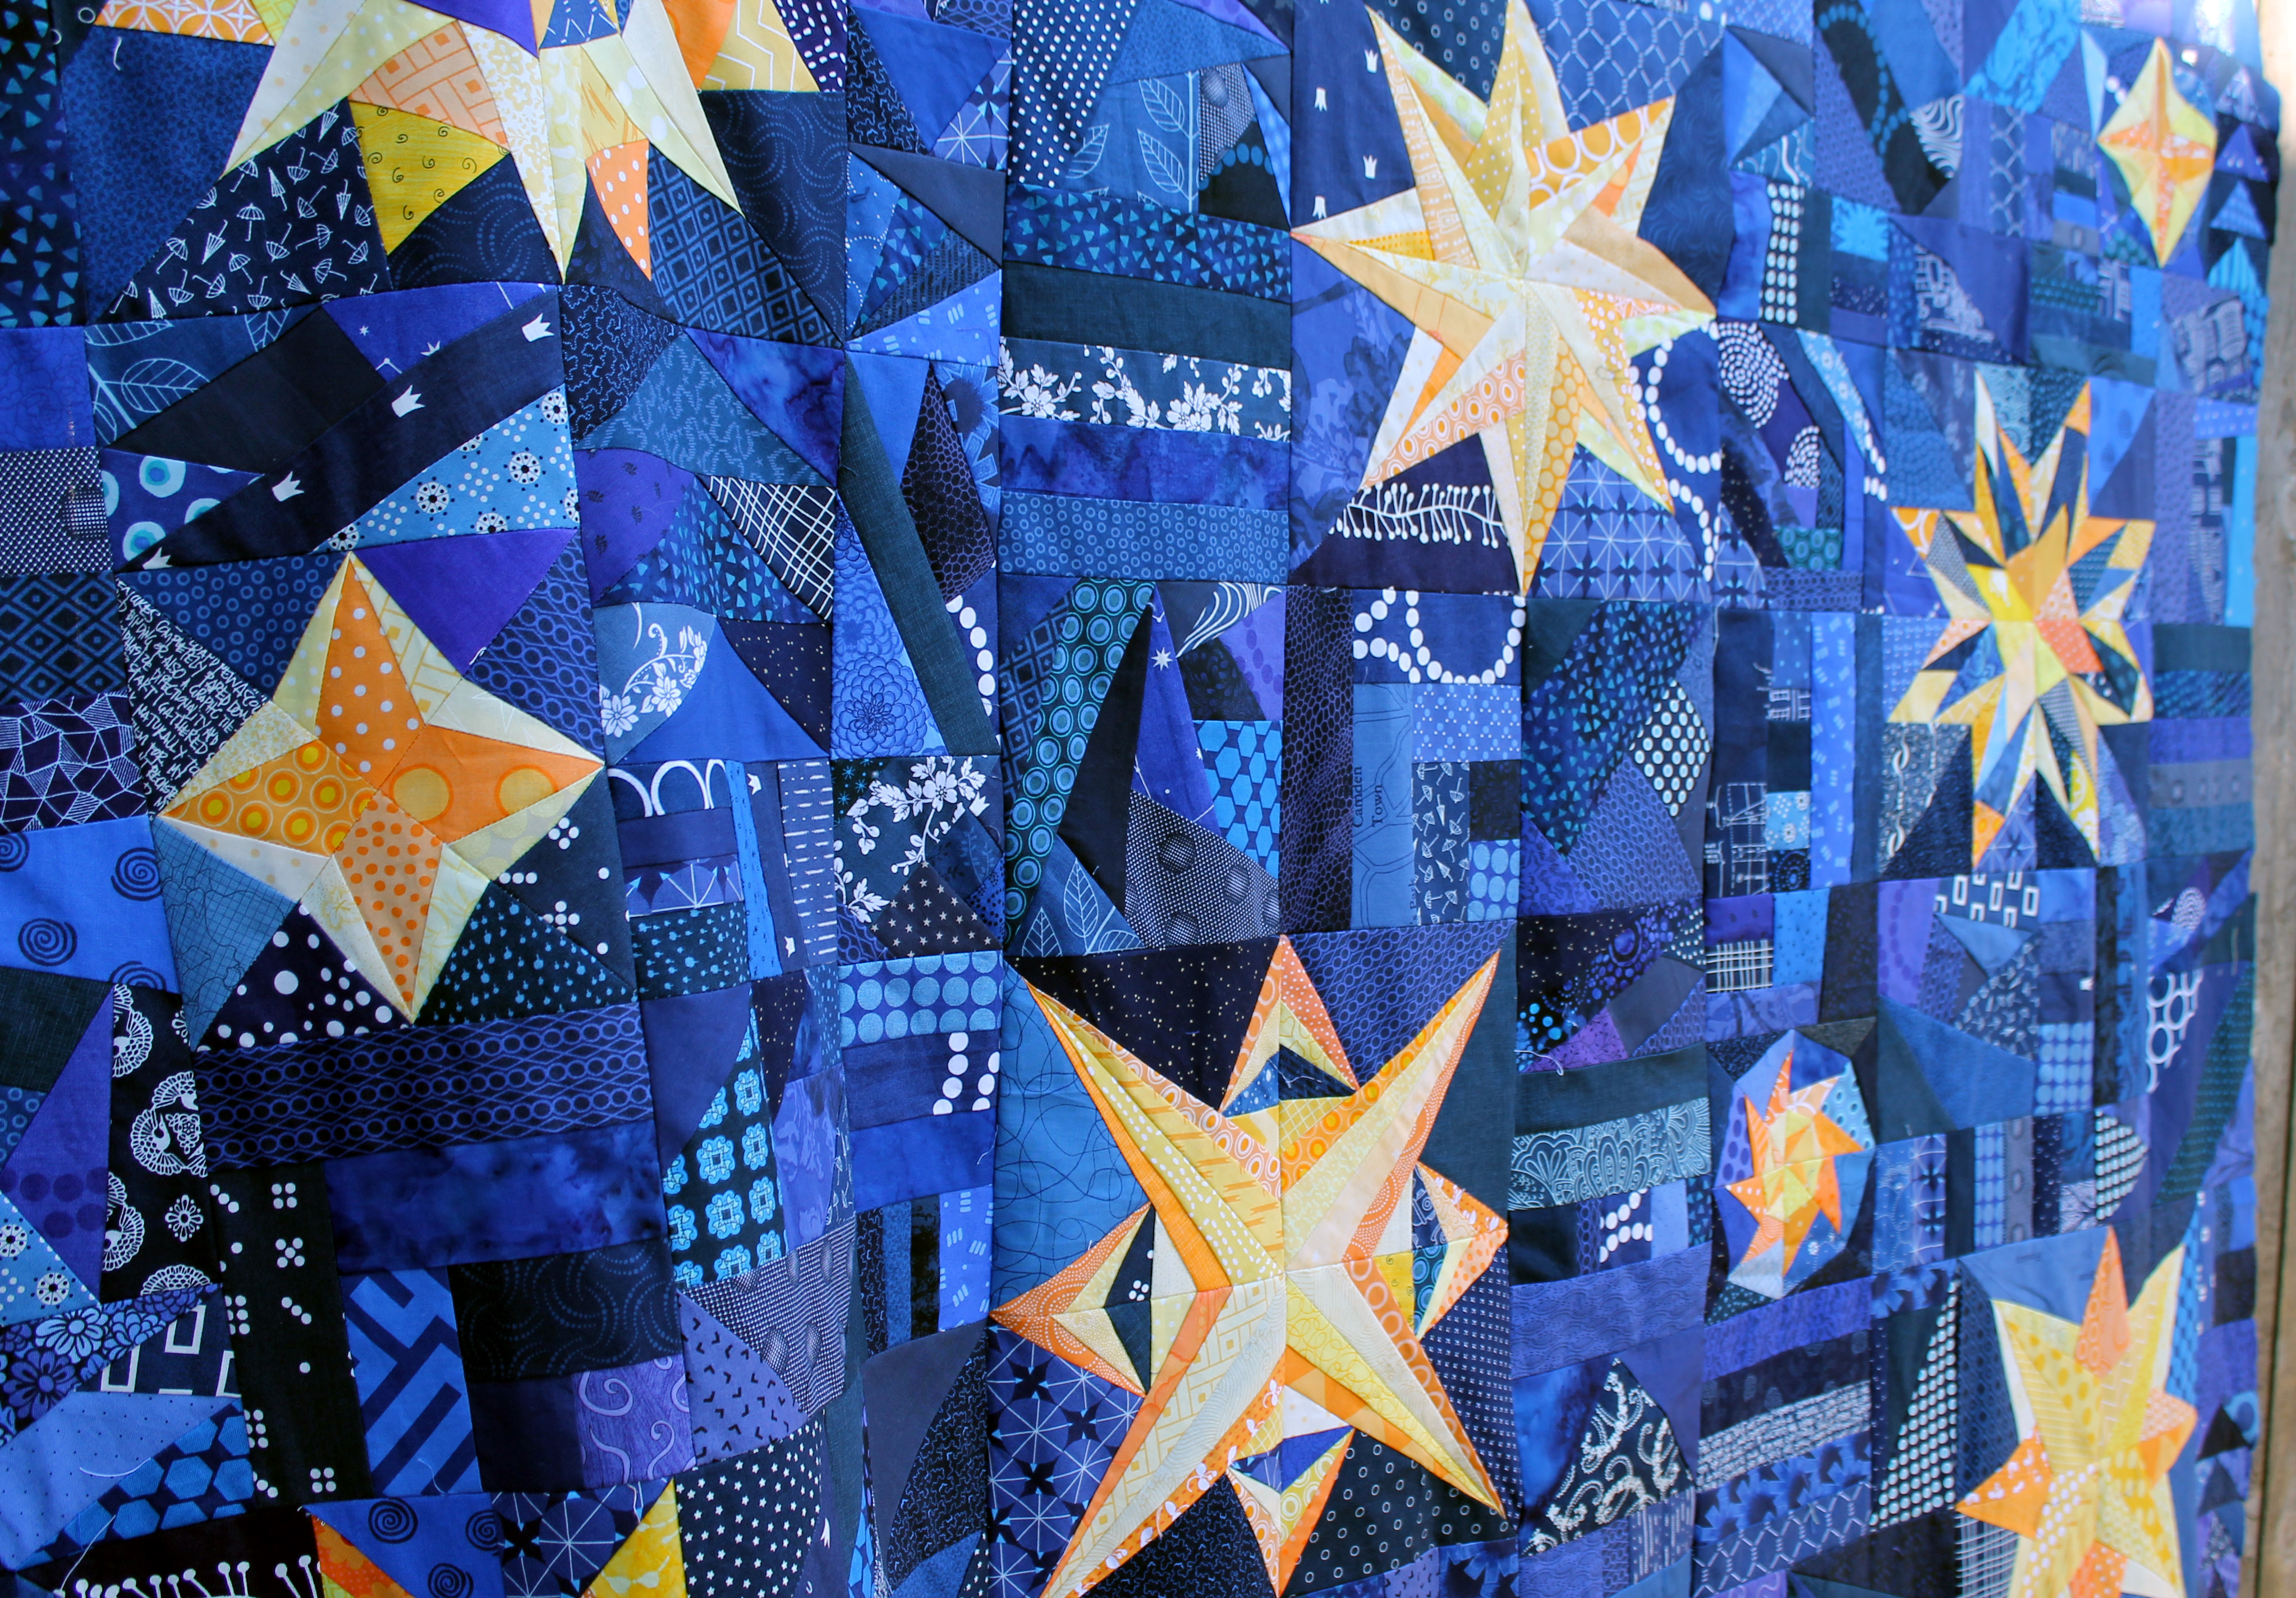
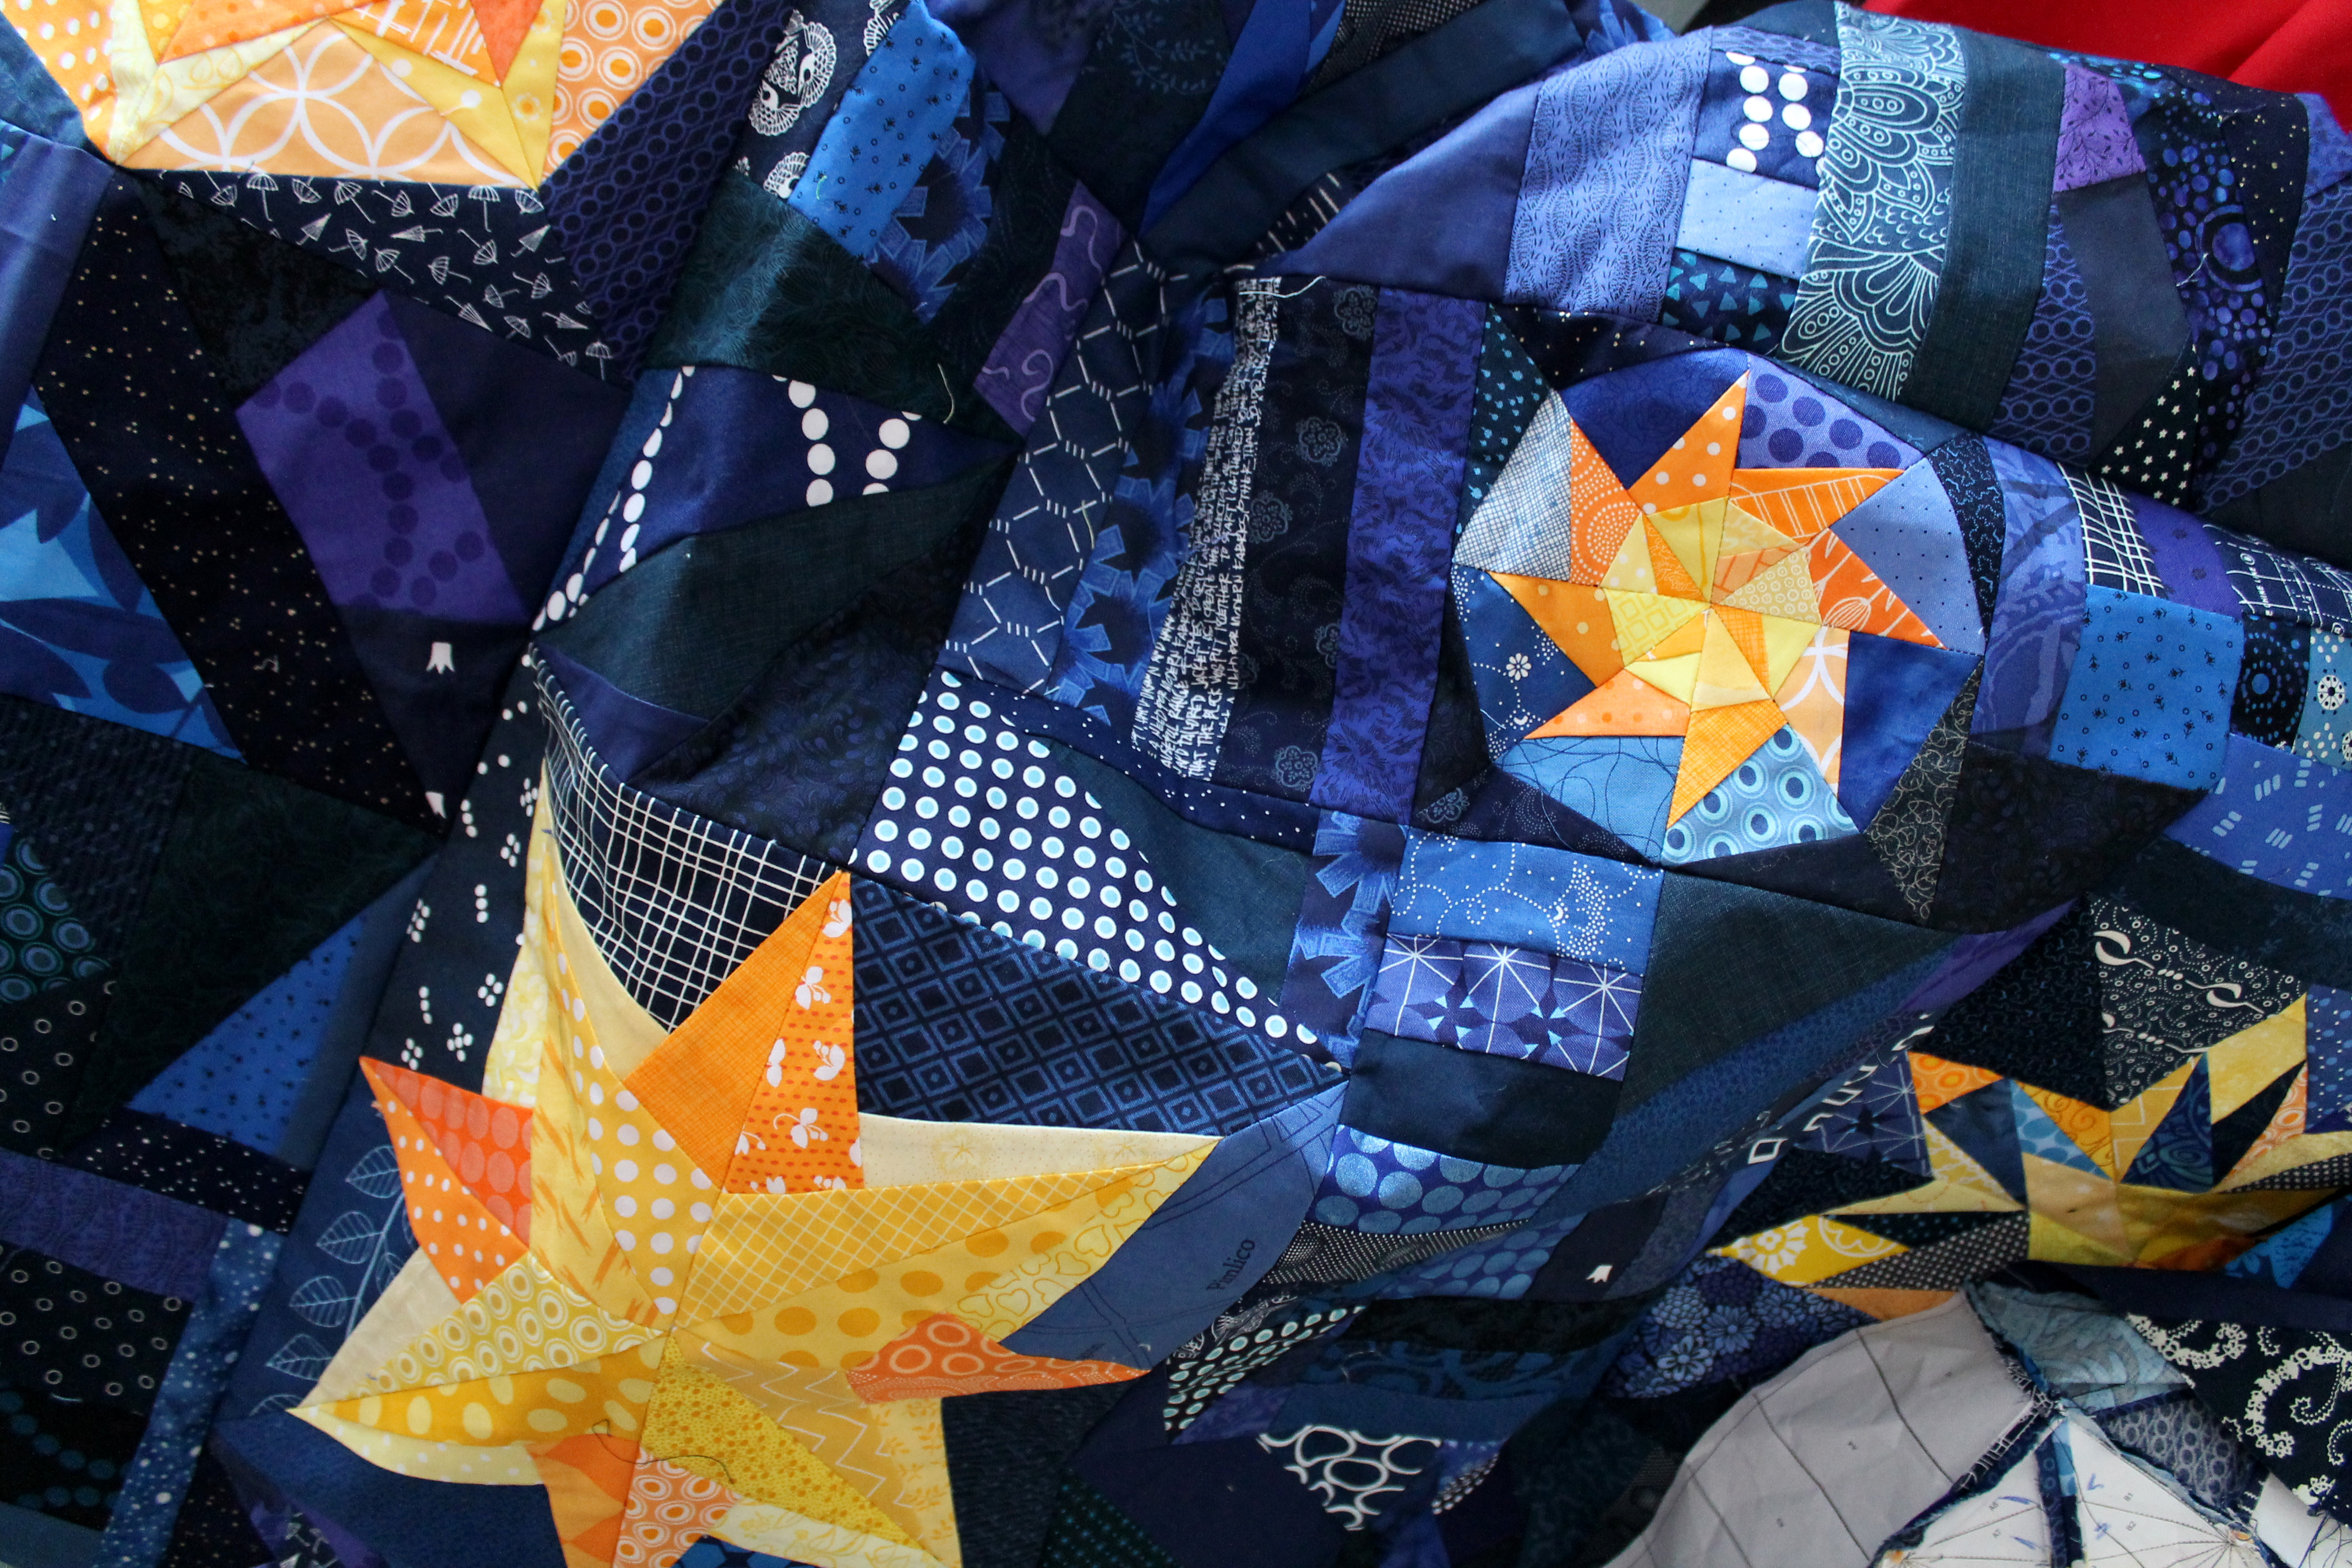
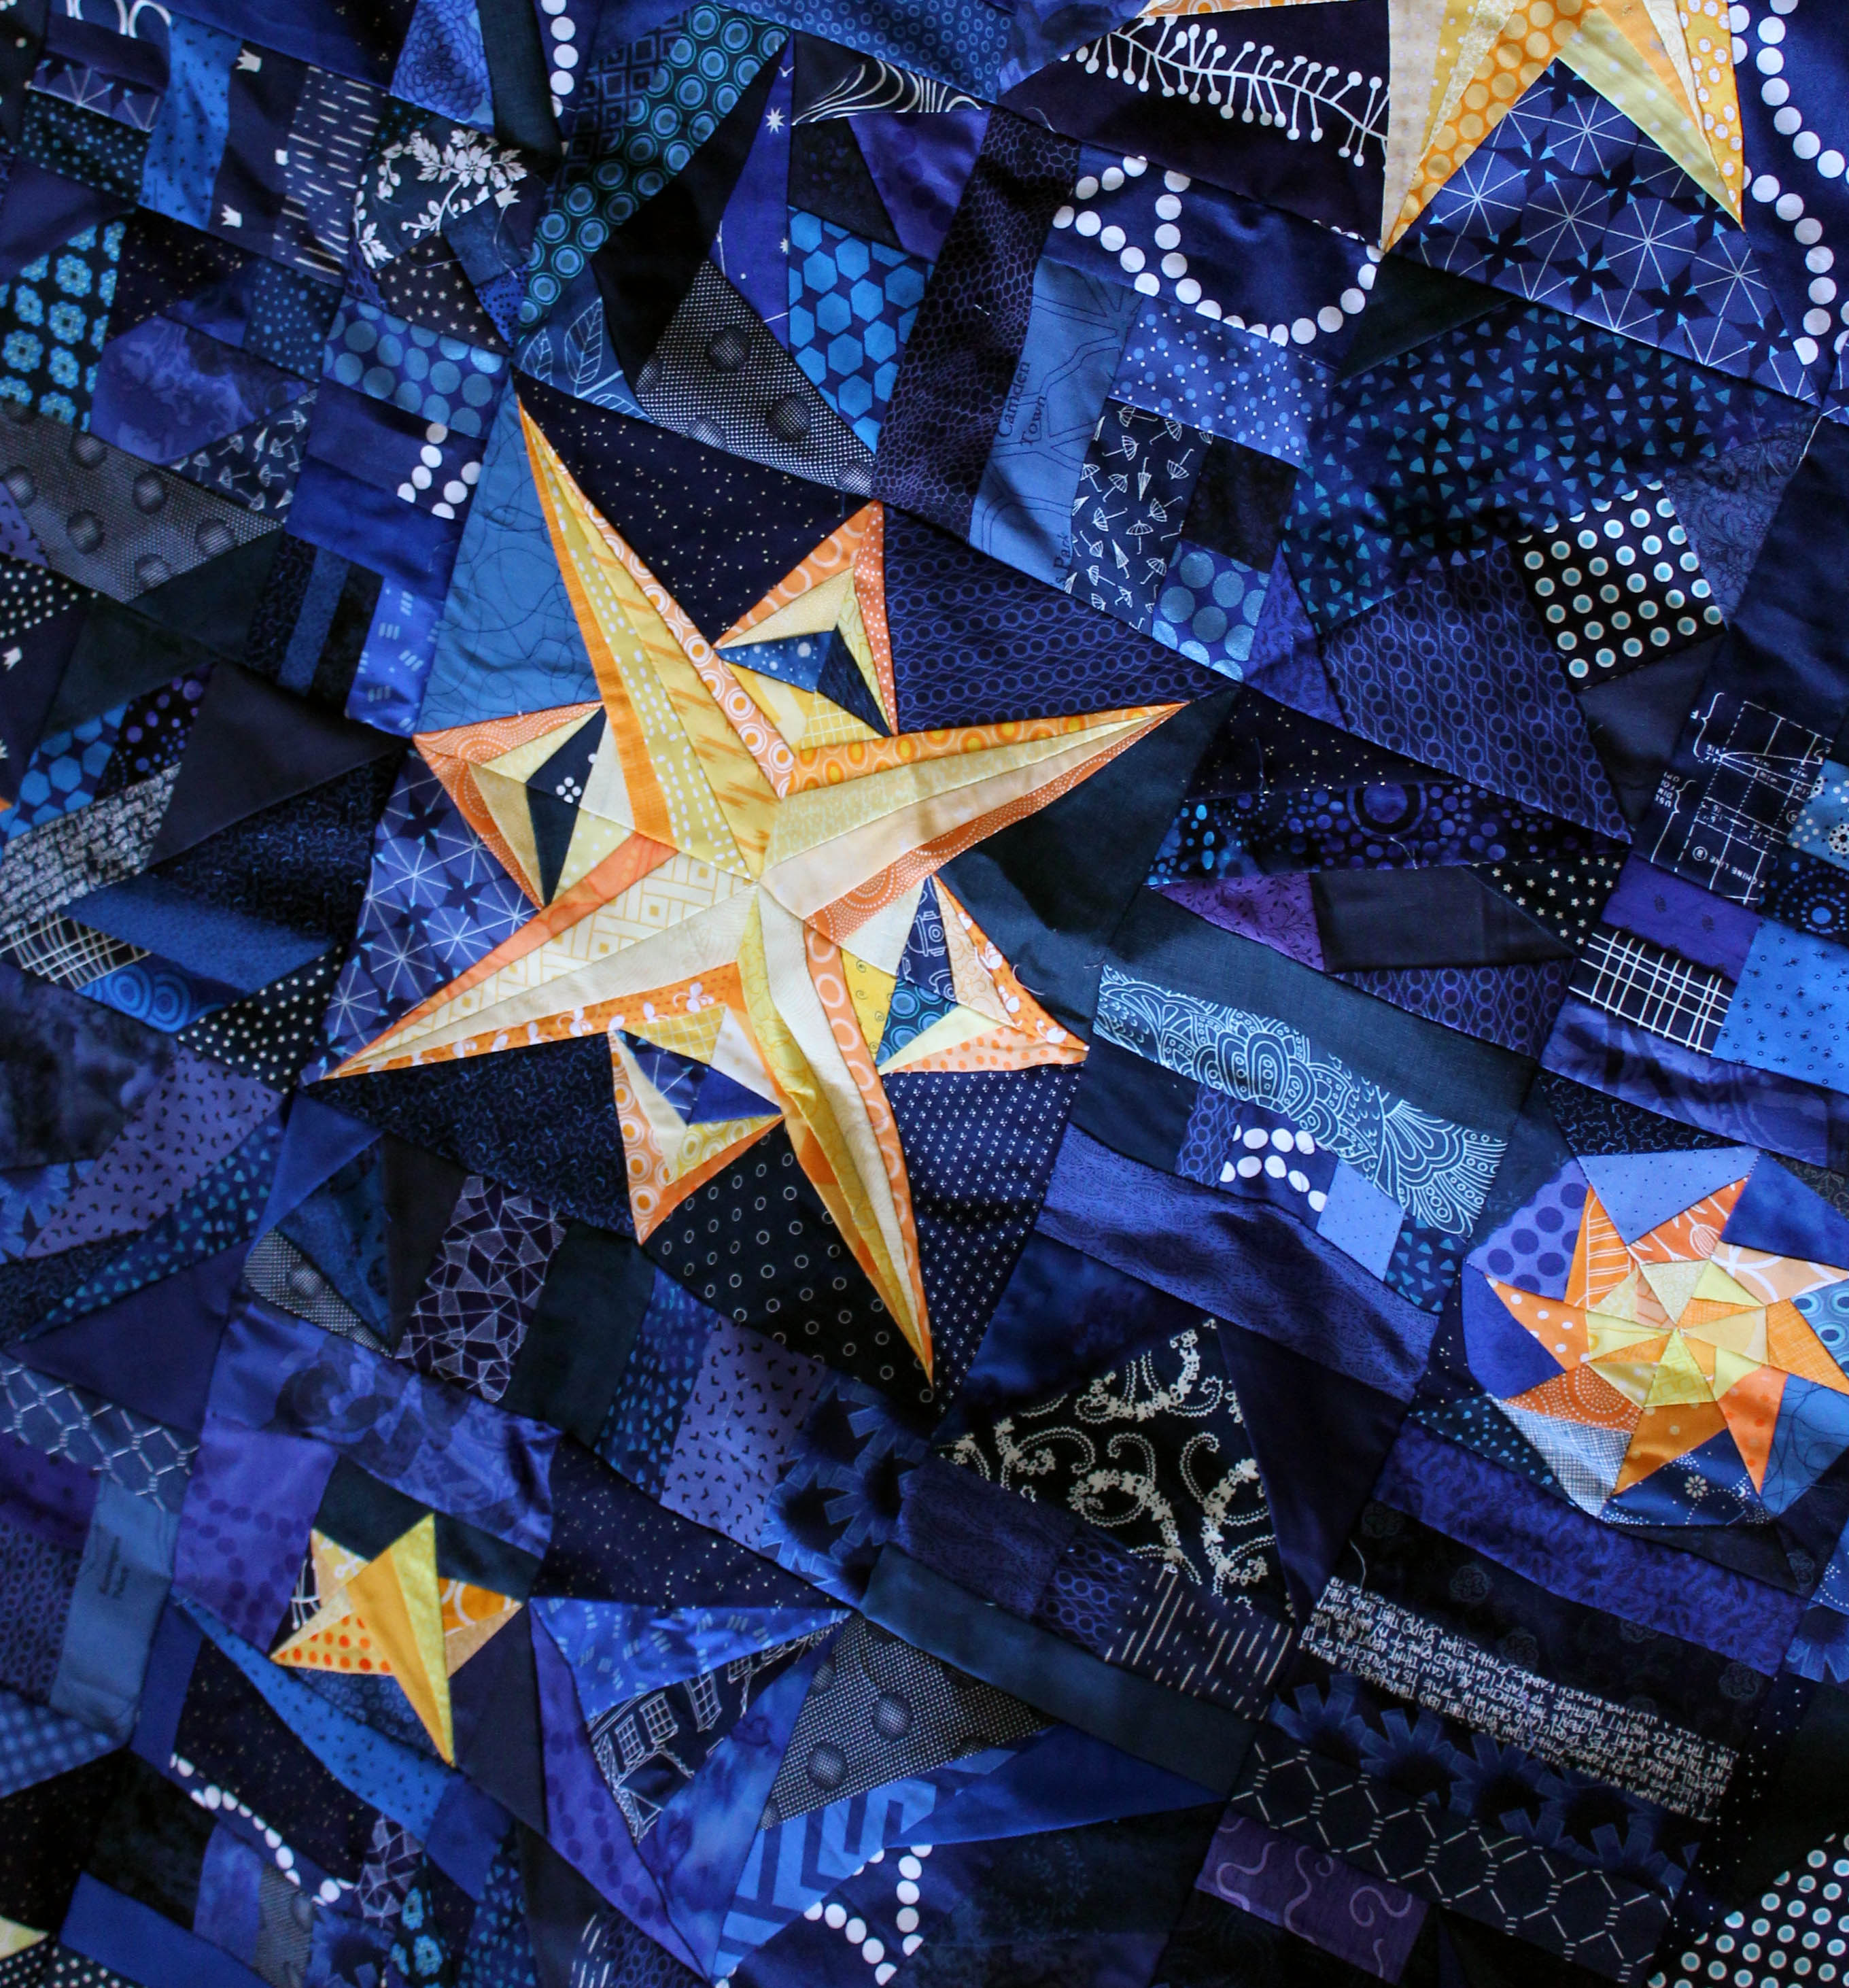
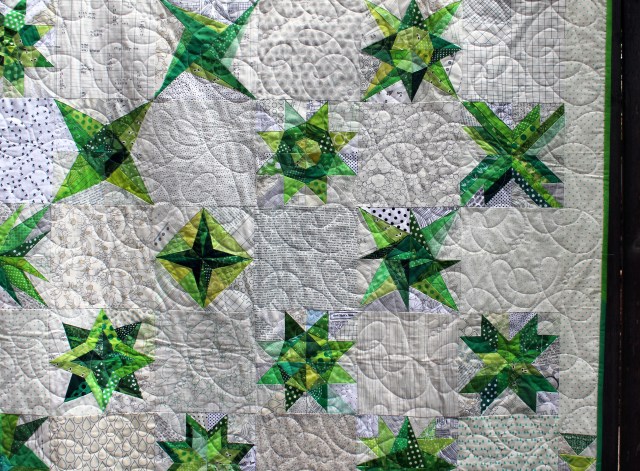
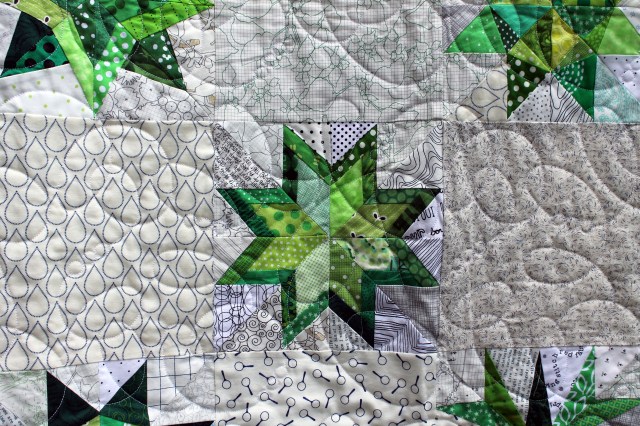
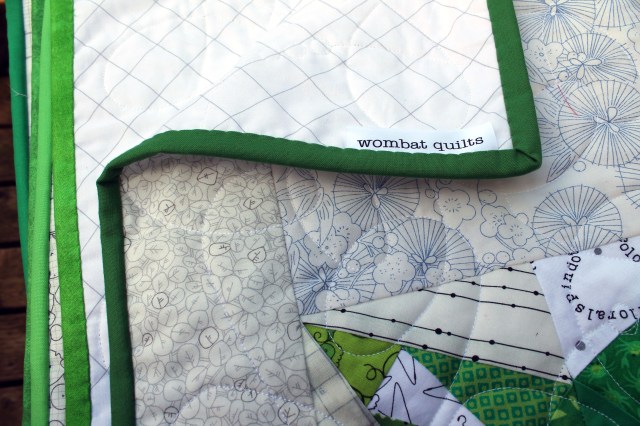
I really love how the quilt to turned out with all those lovely 8 inch stars floating about on a sea of scrappy low volume prints…

quilt detail 6

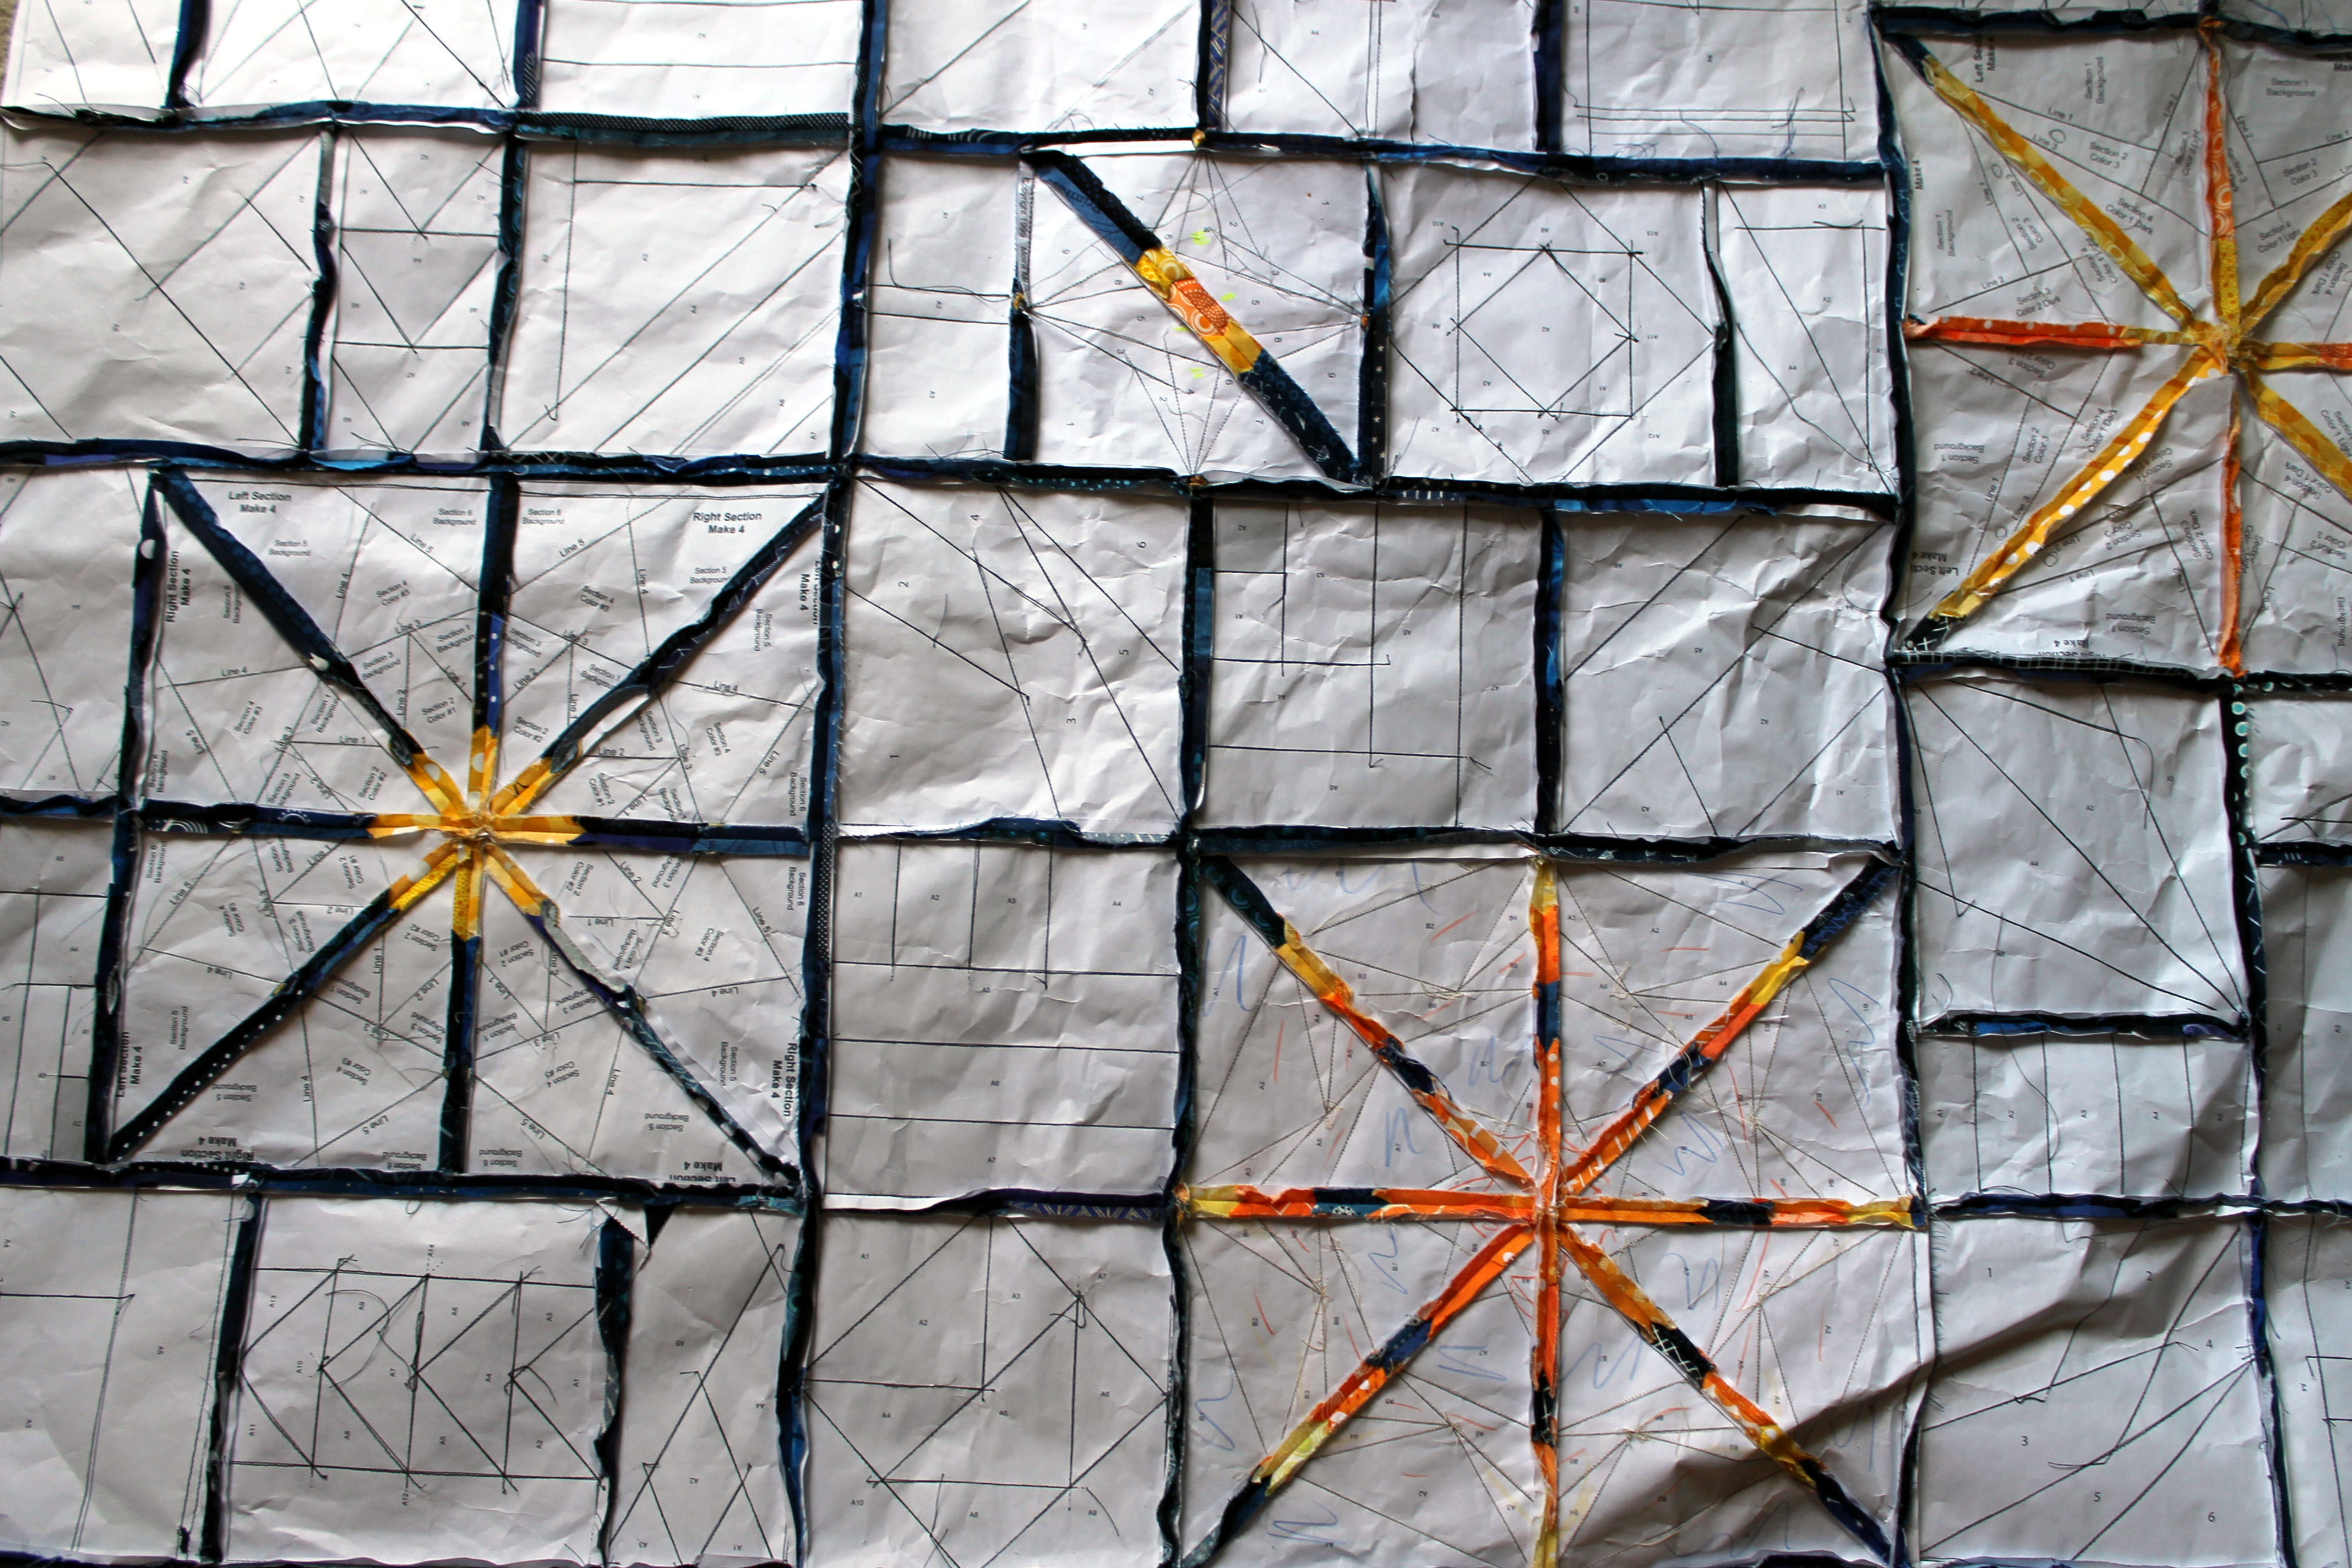
There is a lot of work in this quilt, but doing a star a week really makes the process less daunting…

star detail

If you are crazy enough to want to make your own version the patterns for all these stars are on the blog… you can find them under the “Free Paper Piecing Patterns” tab.

quilt details 4

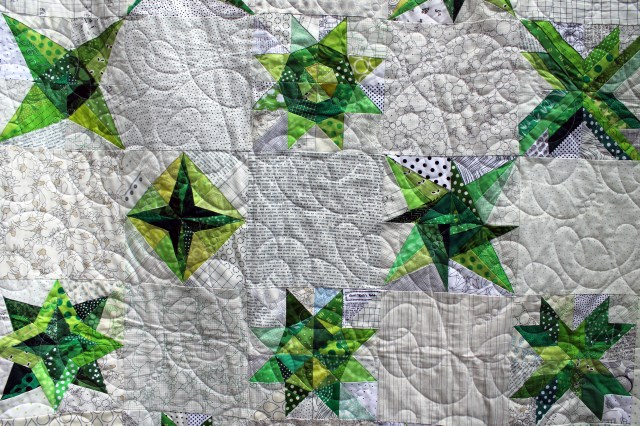
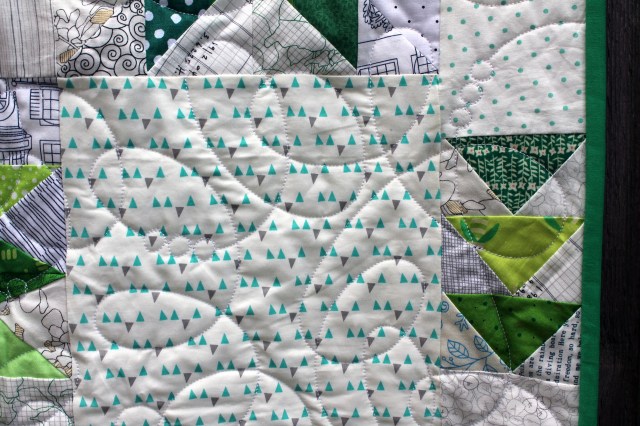
I love the movement that quilting gives the stars… it is just a simple all over pattern but it is really effective…

quilting details

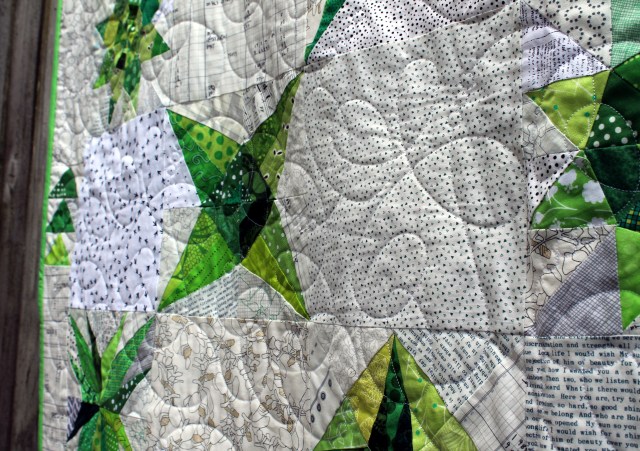
I must admit I also love the little flying geese blocks I scattered around the border of the quilt… I am not usually one for adding borders but this quilt needed some space around it, and the three little triangles on all sides made everything all right…

flying geese details

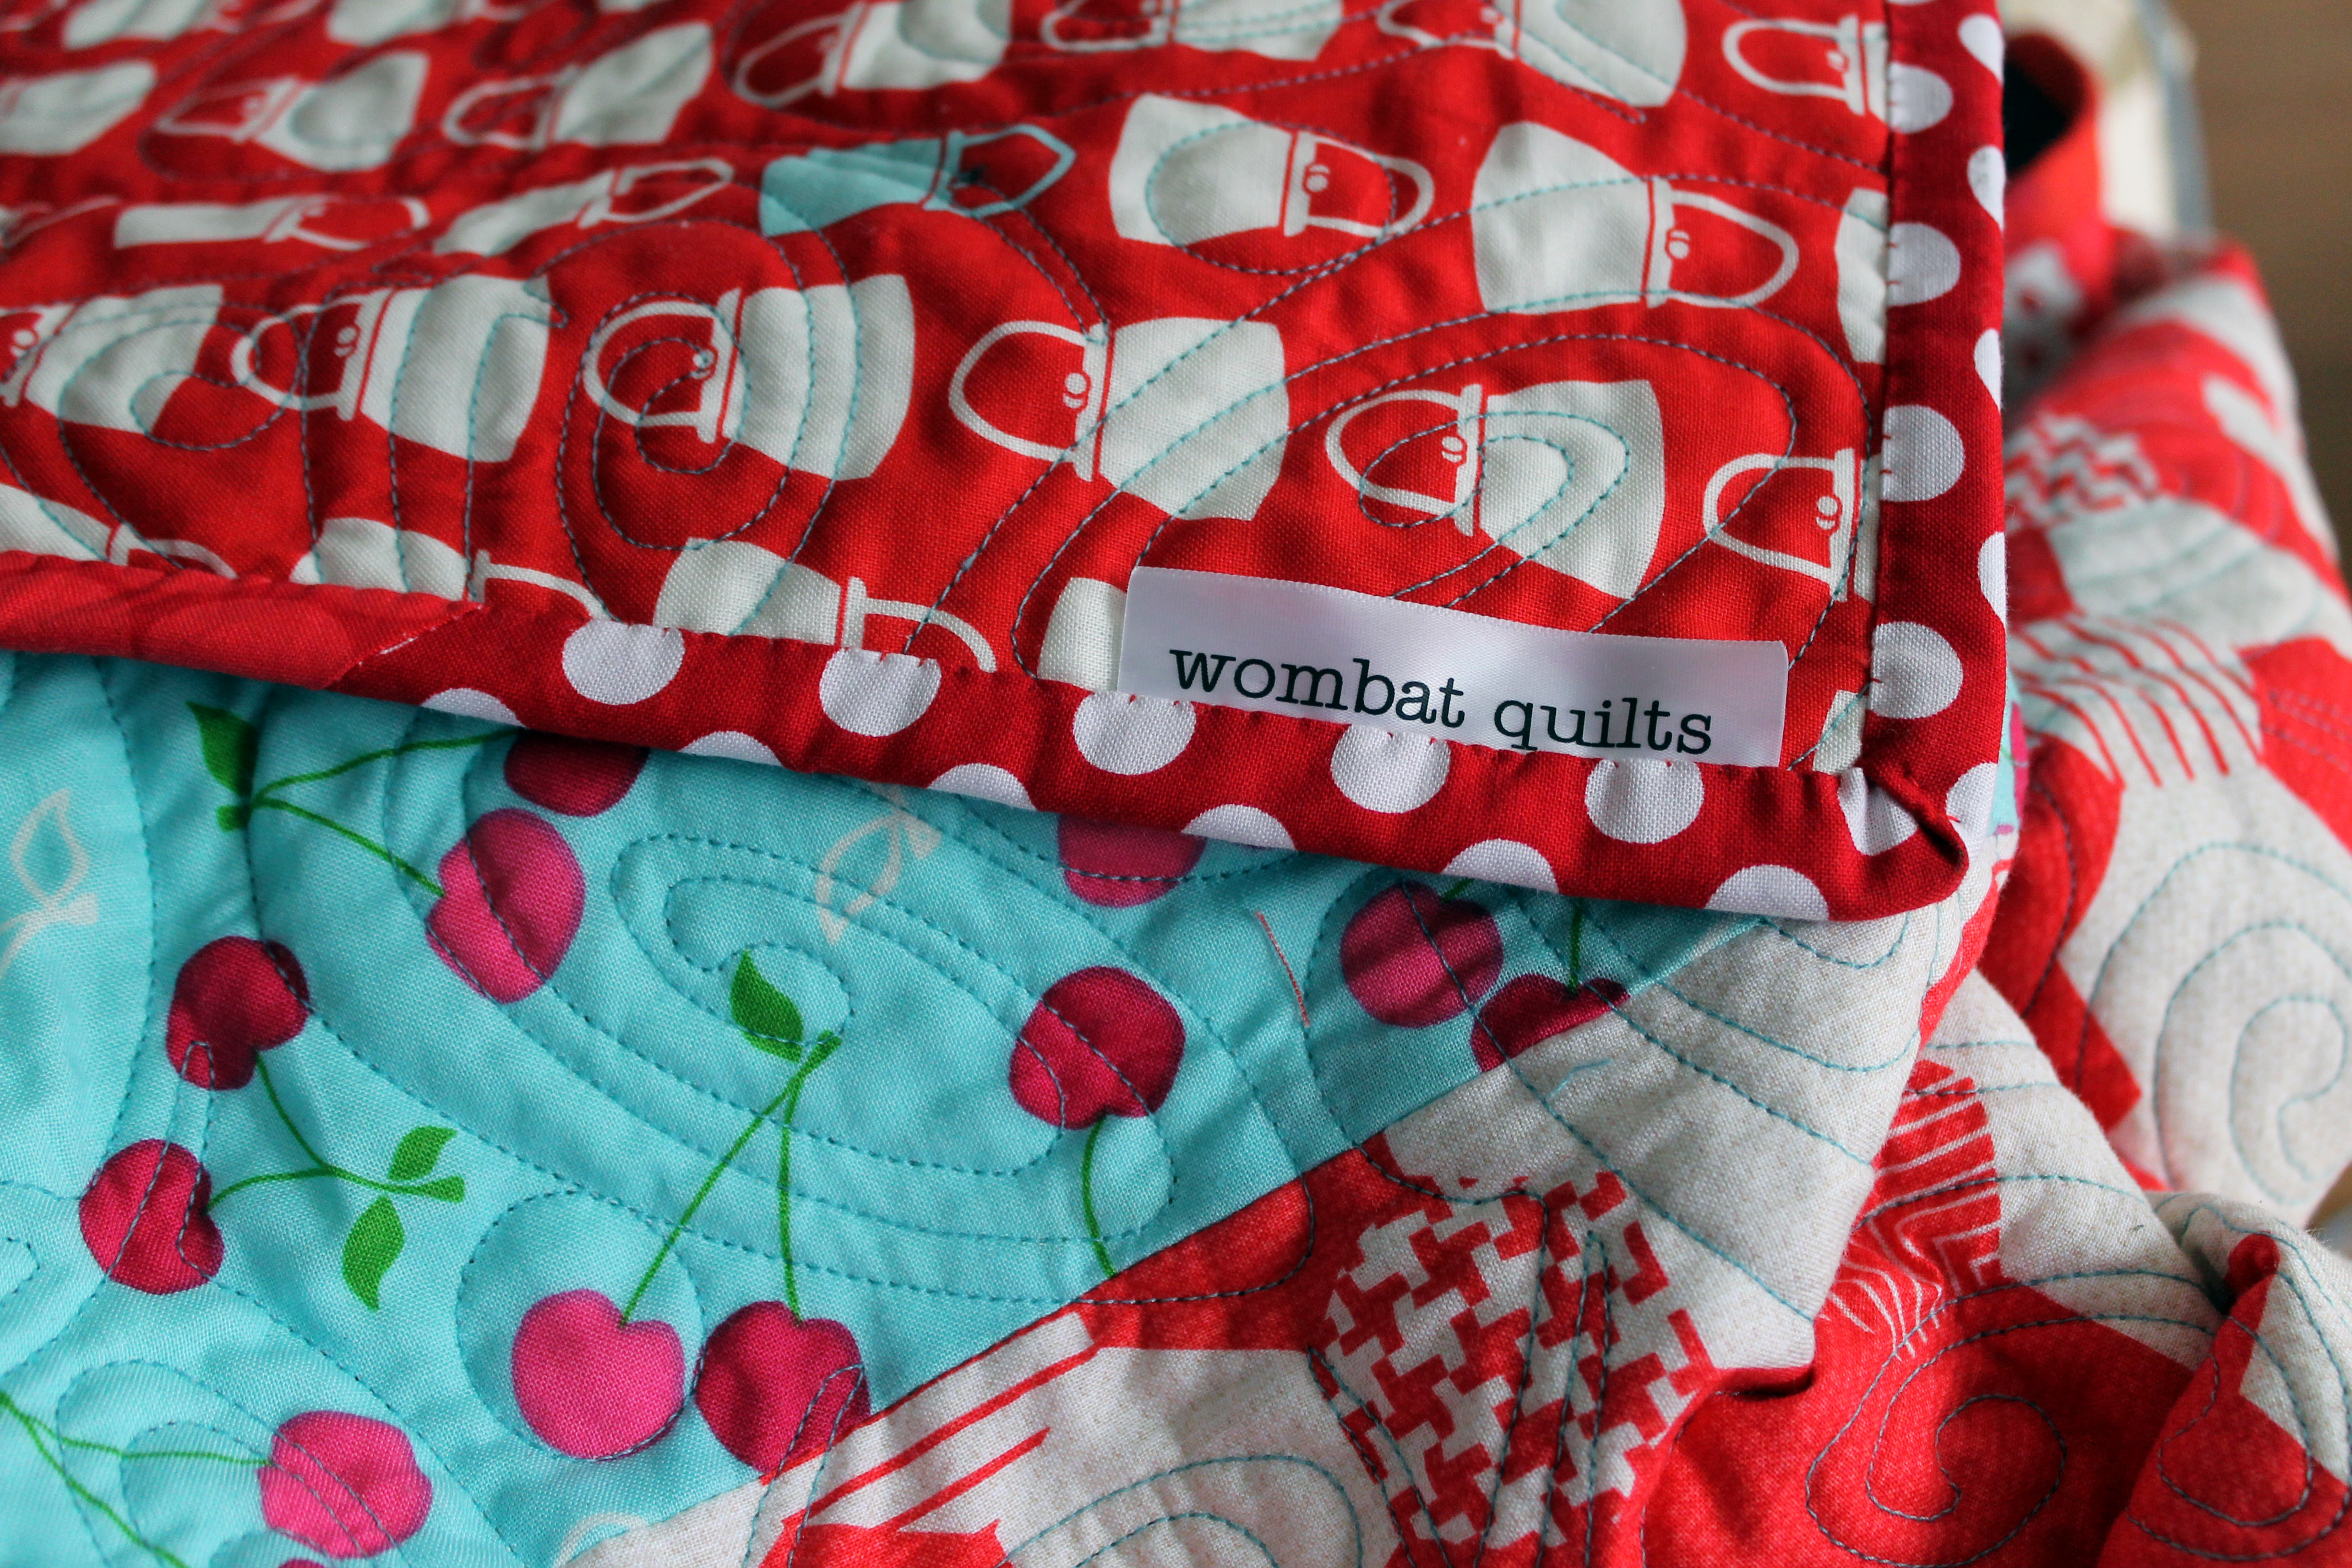
To finish everything off I hand bound the quilt using a variety of scrappy solid and marbled greens….

binding

This quilt also marks another finish for this quarters Finish-Along.  After a very slack first quarter I have taken a decent bite out of my WIP list, while adding only a handful of new projects to my slate!  If you want more information on the Finish-Along check out Debbie at A Quilter’s Table post… this quarter’s fun is already underway but you can always join in next quarter.  It really has been a wonderful way to keep myself focused on finishing stuff and not just making new WIPs!!!

A special finish….

This week I managed to finish up the second quilt I am taking home to Australia…this one is for my mum.
Red star quiltSo my Mum knows that this quilt is heading her way as a birthday present (yes she knows it is coming to her, because I am hopeless with surprises!)… her favorite colours are red and aqua so it is perfect for her…plus this quilt, with its beautiful stars and hours of work needed to go to someone special.

Red star quilt detail

20 paper pieced stars, a couple of yards of Robert Kaufman Quilters Linen, spools and spools of thread and countless yards of red and aqua fabric and we are done.

red star quilting detail

I was smart enough to send this quilt out to be quilted and the fabulous Nancy Stovall did an amazing job.  I actually left the quilting pattern decision up to Nancy and she choose a wonderful swirl that gives great movement to the stars.  I love it.

Red star quilt detail 2

For the back of the quilt I used a bunch of yard and half yard red and aqua prints from my stash. I also embraced the scrappy with the binding, using a variety of red prints to tie the quilt together.

red star binding

As I was binding the quilt I got a chance to look at every star more closely, and reflect on what I have learnt.

quilt detail 1

My first couple of stars were a little rough….I did not use small enough stitch setting on some of them which means that some stitches at the seams are visible.  I also was not as careful with the bulky joins in the some of the stars – I did not iron the seams open properly leaving a bulbous lump in the center of one or two stars.  But 20+ stars in I was a pro – I had embraced scrappy, had finessed my process and was making kick butt stars.

This quilt really does represent a wonderful journey for me… and I am thrilled that my mum will get to keep it.

Quilt Details:

Technique:   Paper piecing
Pattern:  various stars by Carol Doak and Quilting on the Square
Quilting:   Nancy Stovall of Just Quilting
Finish size:  65 x 80 inches

Starry Night… the big reveal

Okay I finally managed to wrangle the Starry Night quilt top enough to get some photos. I must admit there are a few strangling pieces of paper still attached to the back…

stain glass

but I promised a reveal today so here goes…

Starry night quilt topAs you know, if you have followed this quilts progress, I did not have a plan of how to put this together.  I just went with the flow, putting pieces up on the design wall and jigsawing the blocks into a top (a technical maneuver I do not want to attempt again!).

starry night detail 4

My design wall was too small for it, so I had pieces hanging off the wall and laying on the floor….

starry night detail 2

My first step was to arrange the star blocks in a rough layout that made sure that they were as evenly distributed and as balanced as I could get them.

starry night detail 6

I carefully placed the bigger stars around the quilt making sure that the fractured stars were separated as well as the ringed stars. I wanted the eye to move around the top exploring and I felt this was the best way to do it.

Starry night detail 7

I then I placed the smaller stars in the gaps!

starry night detail 3

Finally I just filled all the spaces with scrappy blue blocks… and voila… you have a finished quilt top.  A scrappy, random, crazy quilt top.

Lost in the infinite Starry Night…

Well that at least is what it has felt like the last couple of weeks.  My design wall has been home to just one thing…  my Starry Night quilt.  I was determined not to take it down until it was finished… and I didn’t…

design wall

Over the last weeks I have added more night sky bit by bit…

photo 3 (1)

The white bits of the design board became smaller and smaller…. and this week I finally finished all the sky blocks and wrangled all the pieces together…

completed top cu

Starry Night quilt top is now finished….It was quite a task to get this paper stiffened behemoth through my little old domestic machine but I did it… with only a few minor injuries.

completed starry night 2The most interesting view of this creation, I think is the back, with all the paper pieces still in tact.  You can see just how much variety there is in the night sky.  I had a blast playing with the EQ7 paper piecing library and I do not think this crazy would not have been possible without EQ.

completed paper back

I think if I had set out to do the sky this way in the beginning I am sure I would have found some way to talk myself out of it.

completed Starry NightAs it was I just did it bit by bit, not really fully understanding how insane I was being….

Top completed cu

Once the paper is off I will post photos of the complete top… at the moment it is just to stiff and unruly to handle…. next week I promise a full quilt top reveal.