2013 Pantone Quilt Challenge

I have just entered my Grey & Green quilt into the 2013 Pantone Quilt Challenge.  This is a first for me.

green grey quilt detail 2

For the contest the quilt had to be started in 2013 to be eligible;  the green fabric should be bright and as emerald as possible;  and the quilt can be a mini, a full quilt or just the top.  If you want more information you can find it here
2013 Emerald Quilt Challenge

I am excited to see what other quilters come up with.  I do not use green that much as I find it hard to work with as the main focus colour, but this year I have challenged myself to try and use it more.

Green & Grey finished

I finally finished the binding on my green and grey quilt yesterday.

green grey finished quilt

The quilt did not quite turn out like I envisioned it but I am pleased with the results none the less.  When I started making the blocks I thought there might be more stronger contrast between the grey and green so you could clearly see the pattern of the star, but alas it was not meant to be.  Instead I think I have a  quilt that you have to search harder to find the repeating pattern, making the whole thing more interesting.  The finished quilt is 48 inches by 48 inches, just the right size for a kids quilt if you ask me!

green grey quilt detail 2

If you are interested in the start of the process for me, and links to the pattern you can find my older post here.

At the end of the process I had an extra block (my maths is not what it used to be) so I decided to use it on the back.

green grey quilt back

I played with a couple of different bindings (scrappy, grey and green) and settled on using a Kona solid I had in my stash.  I continue to be amazed at how something as simple as a binding choice can radically change how your finished quilt looks. The solid bright green just gave the quilt an extra pop.

quilt binding

It would be interesting to hear what you think of the finished quilt.  Does it work for you or is it too muddy?  I really value the opinion of my fellow quilters/artists out there.

Postage Stamp quilt finished

I finally finished the postage stamp quilt…

postage stamp quilt finished

In the end I think it was worth the madness…. though I did not make the quilt as big as I originally planned.   I love the brightness and variety in this quilt.  Some kid is hopefully going to love exploring all the different fabric.   If you are interested in my process and a pattern link you can check out my previous post here.

postage stamp quilt detail

Because the quilt was so busy I went with simple straight line quilting and a backing of just one fabric piece.

quilt binding

I am busily trying to get some more of my quilts finished, as our chapter of Project Linus has had a huge call on blankets  in the last week.  A local school, Crestline Elementary in Vancouver WA, burned to the ground  and Project Linus is delivering 500 blankets/quilts to the kids this week.  The kids affected  are aged between 5 to 10 years old so the call is out to replenish our kids blanket/quilt stocks.   The sewing machine will be going full pelt this weekend.

Happy quilting.

Gretchen Quilt finished

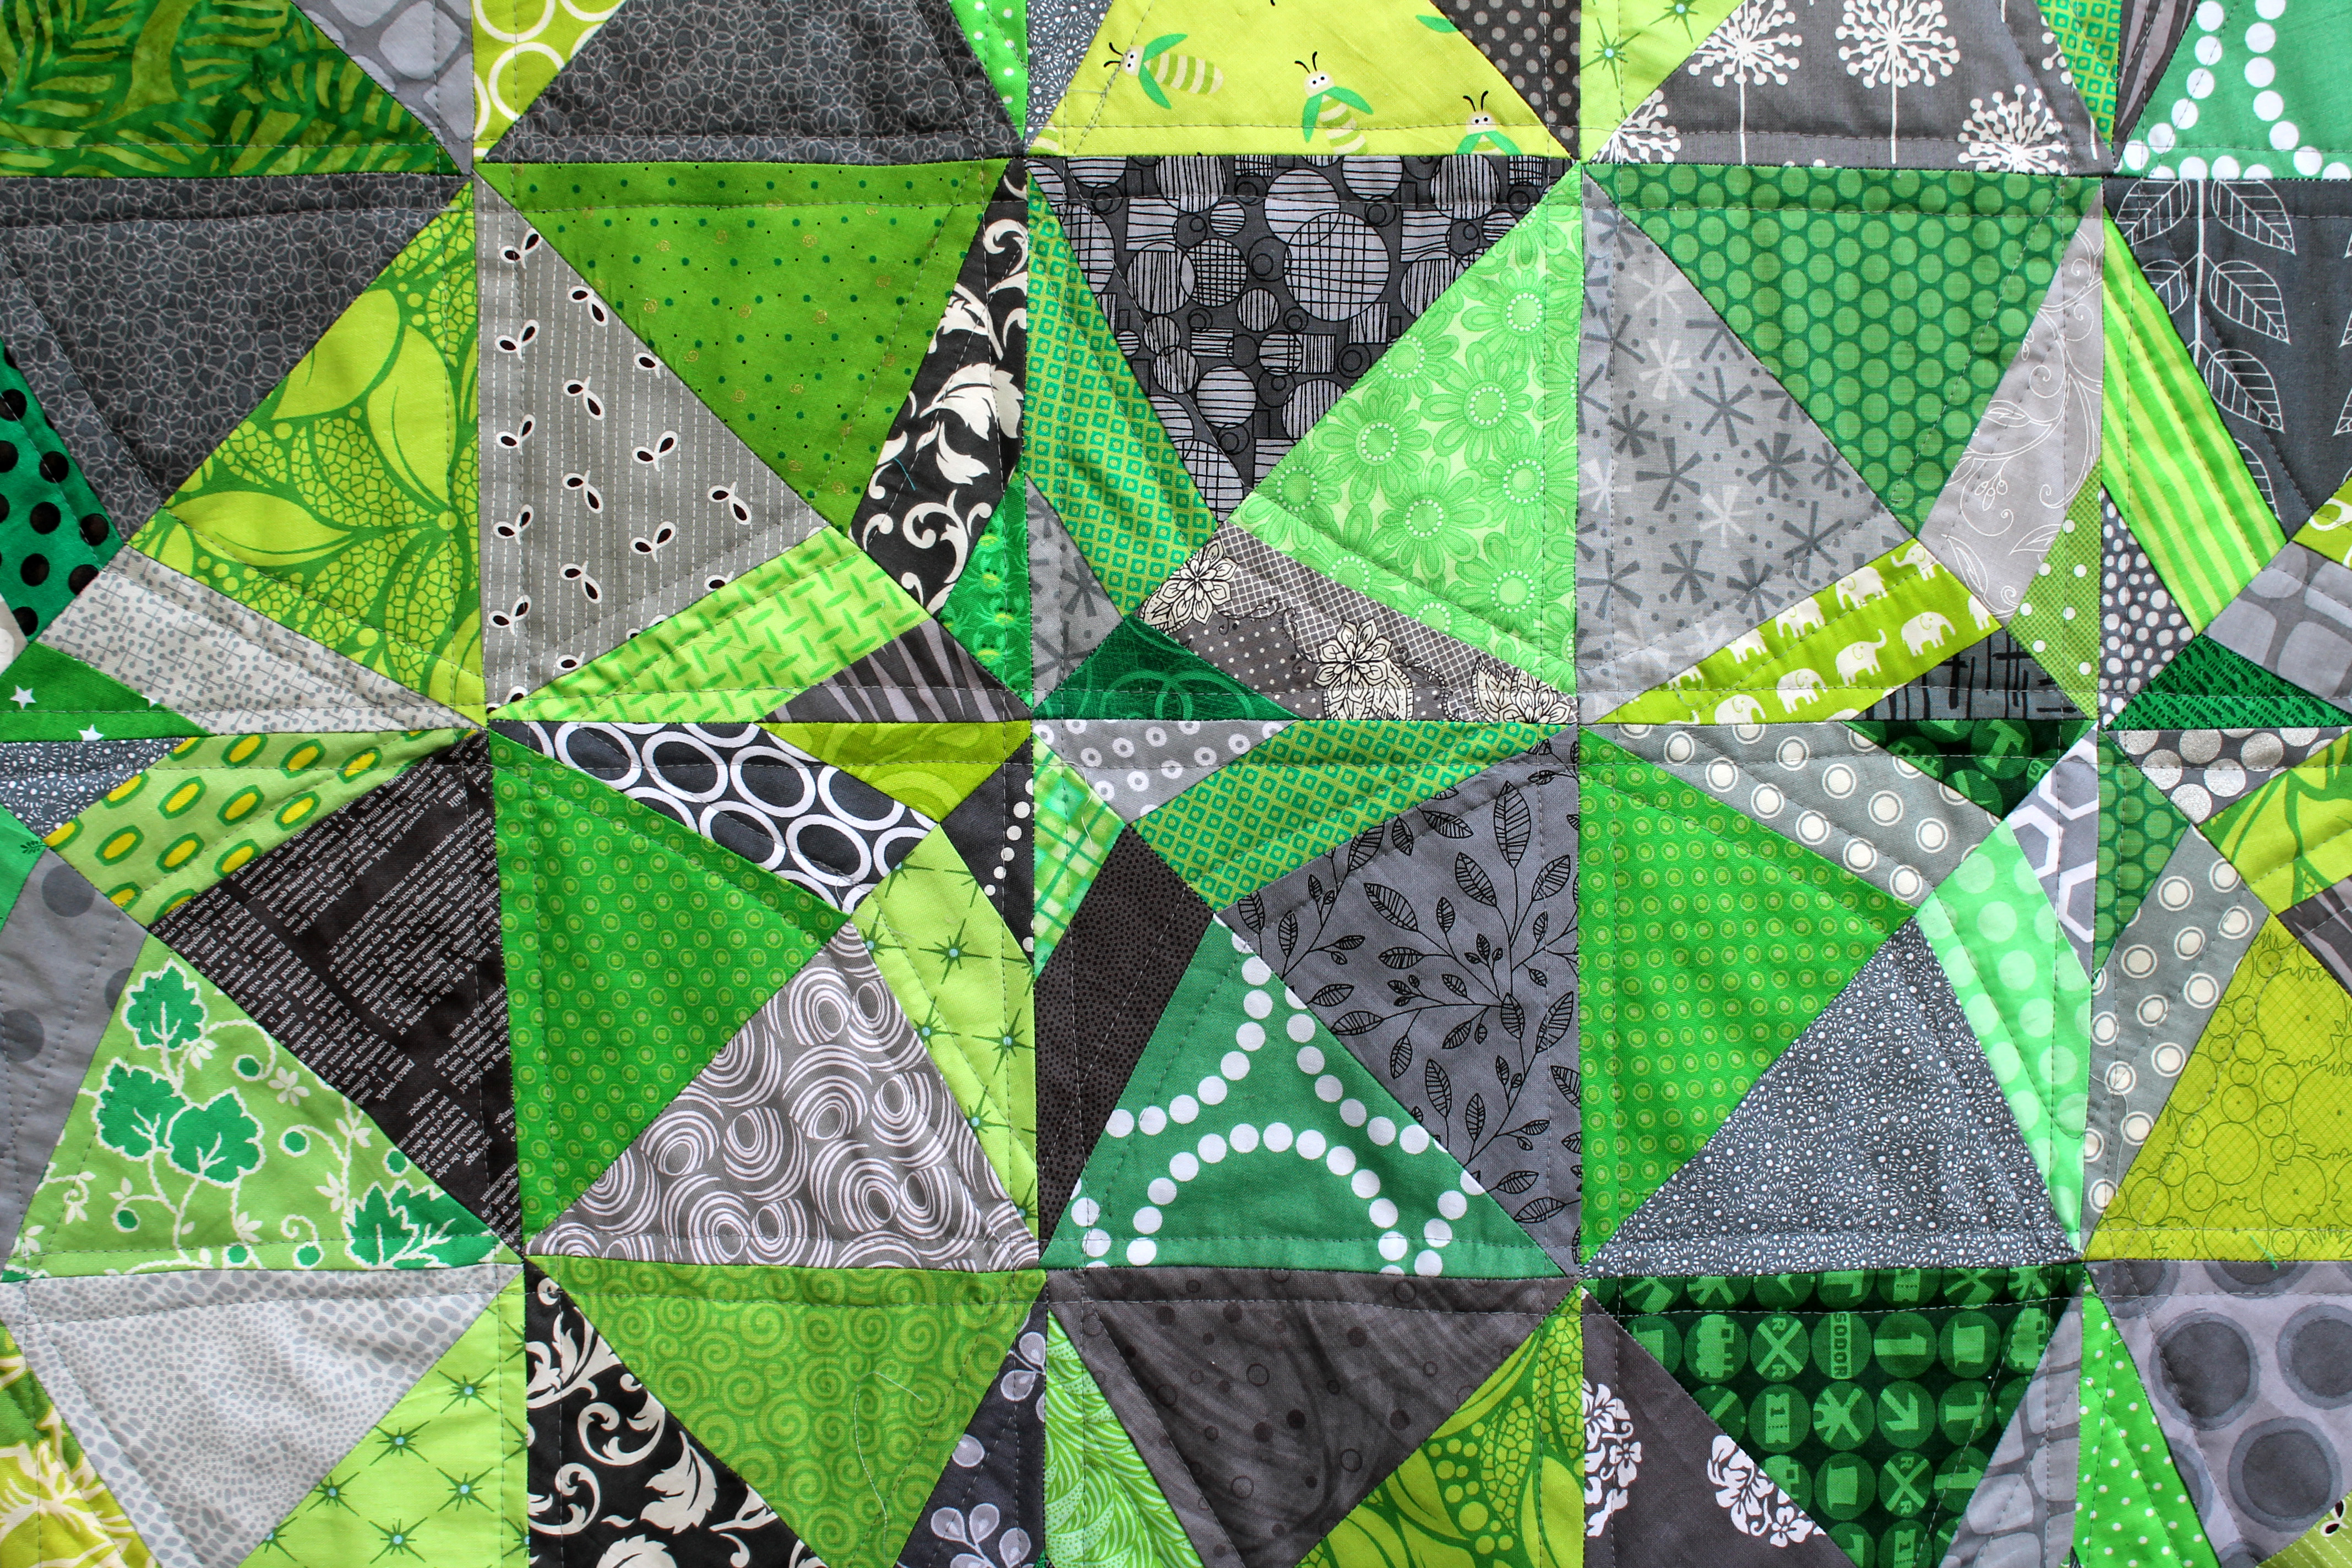
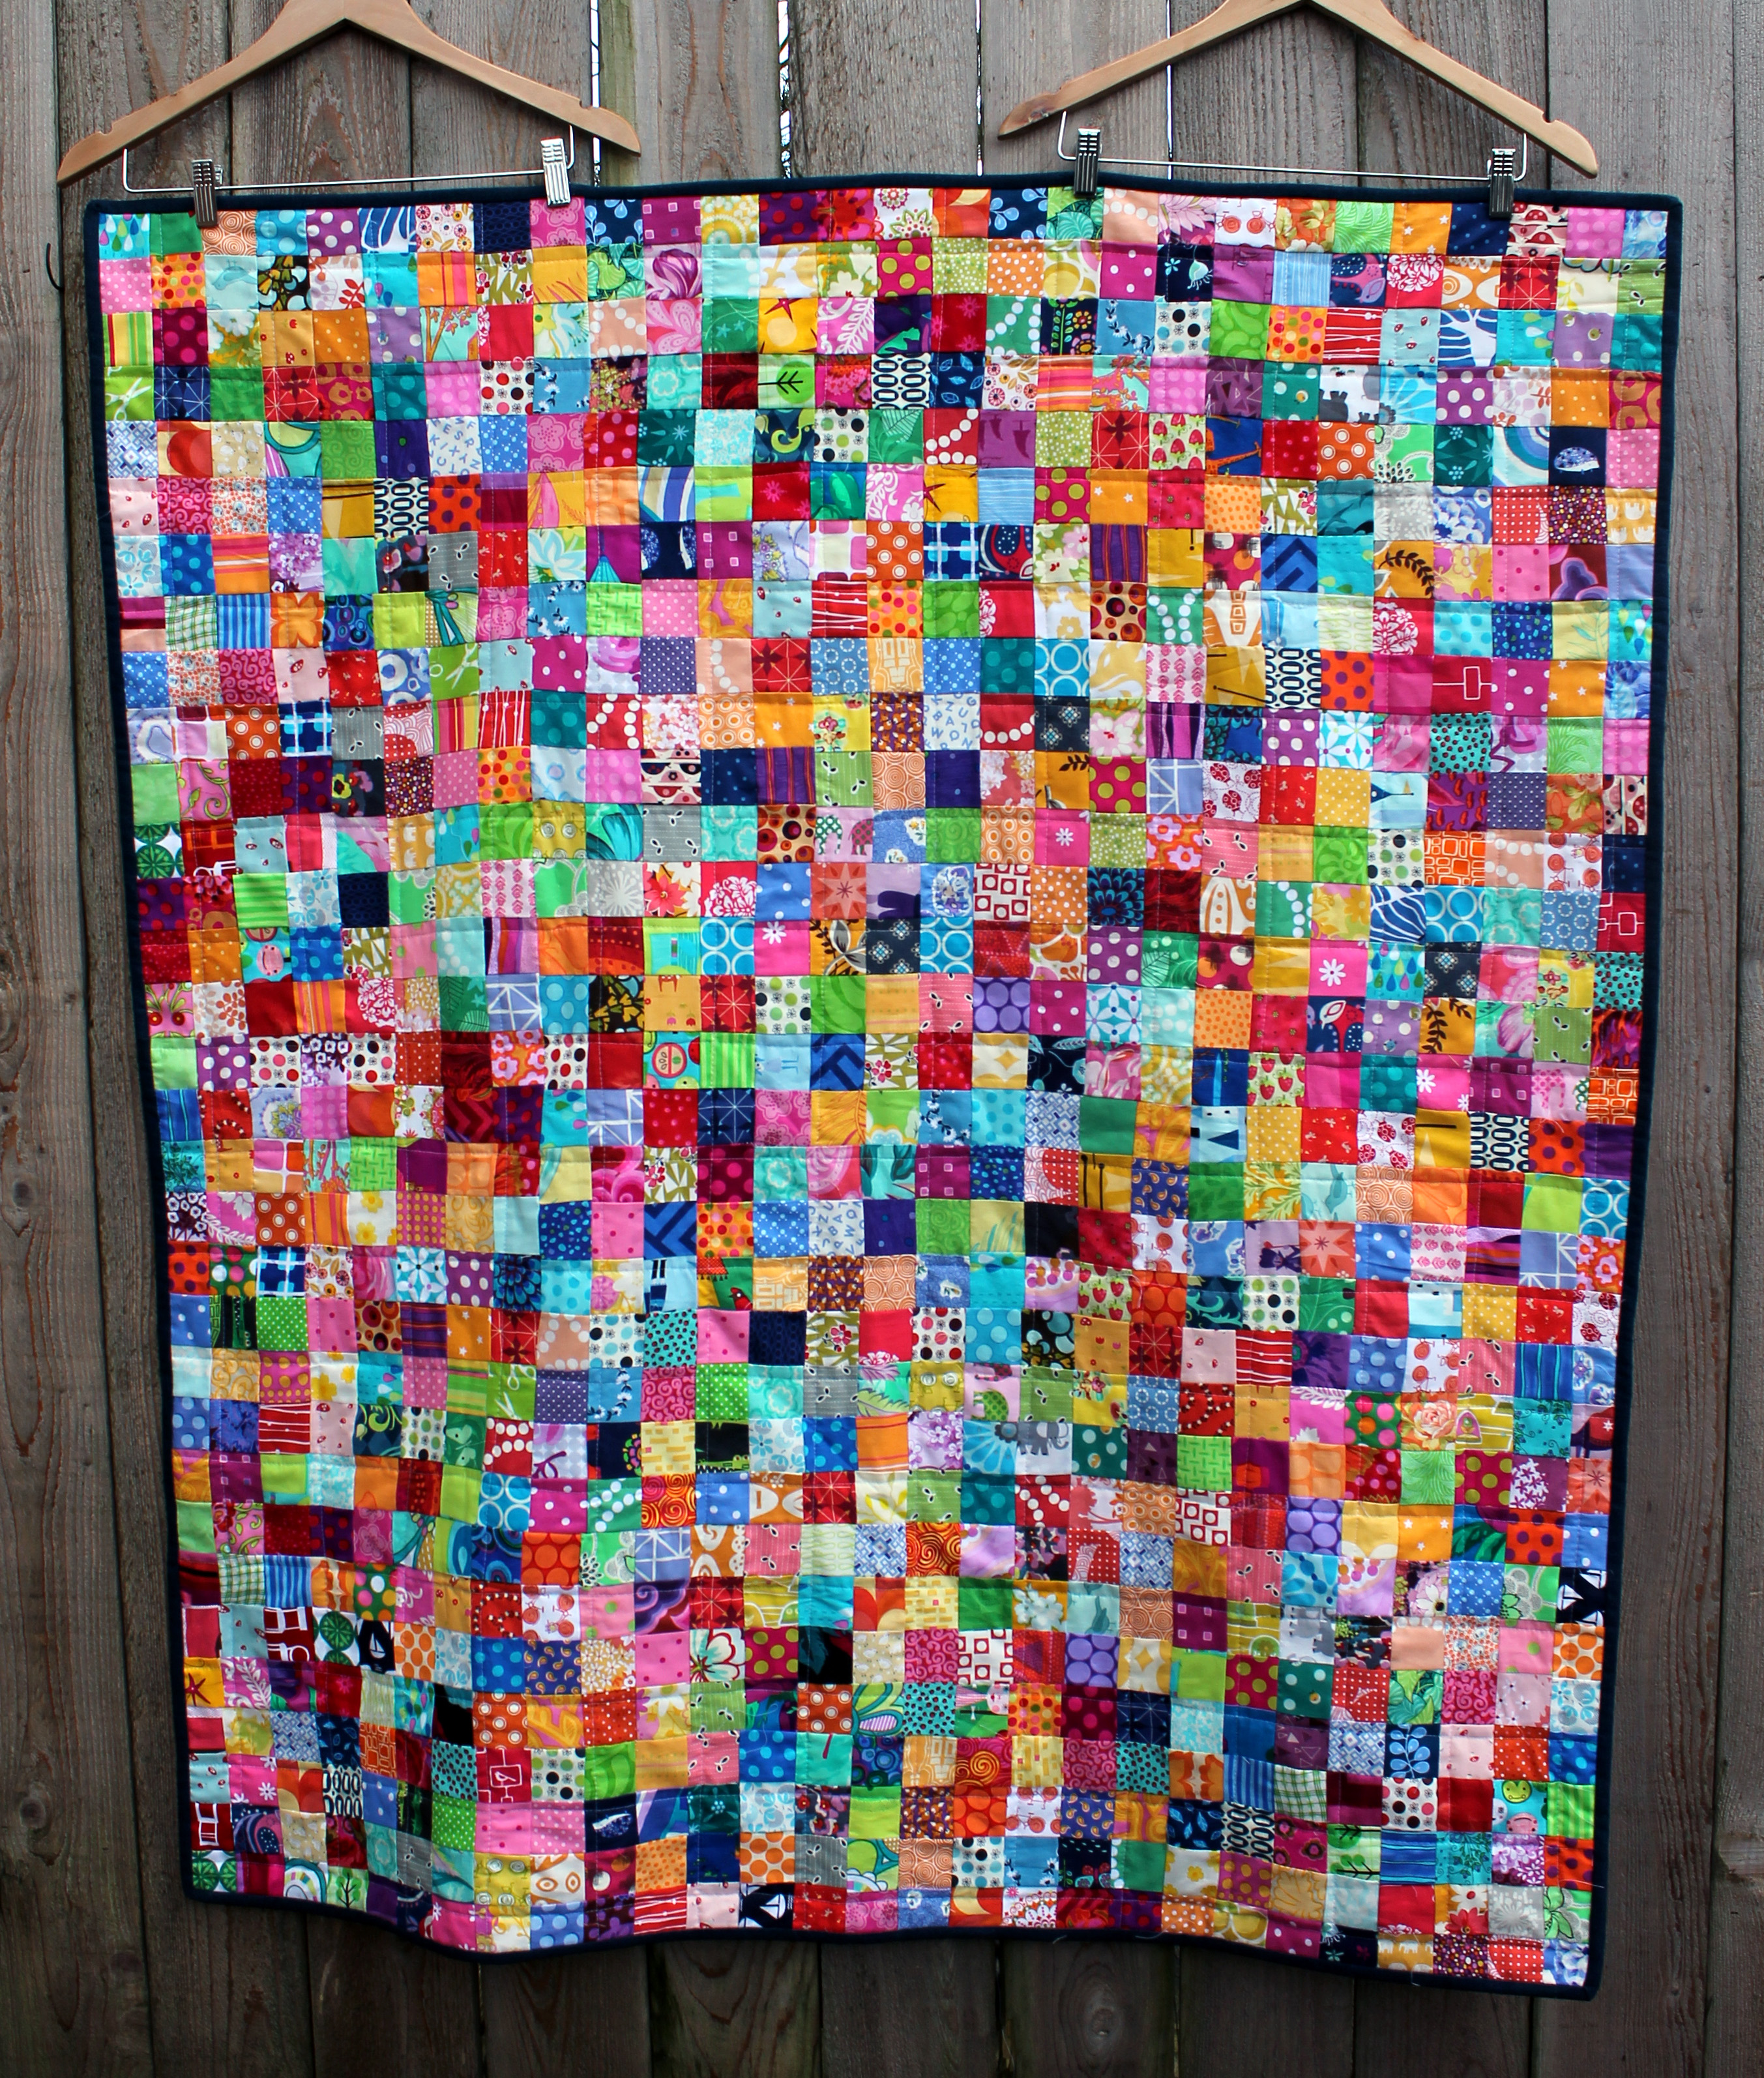
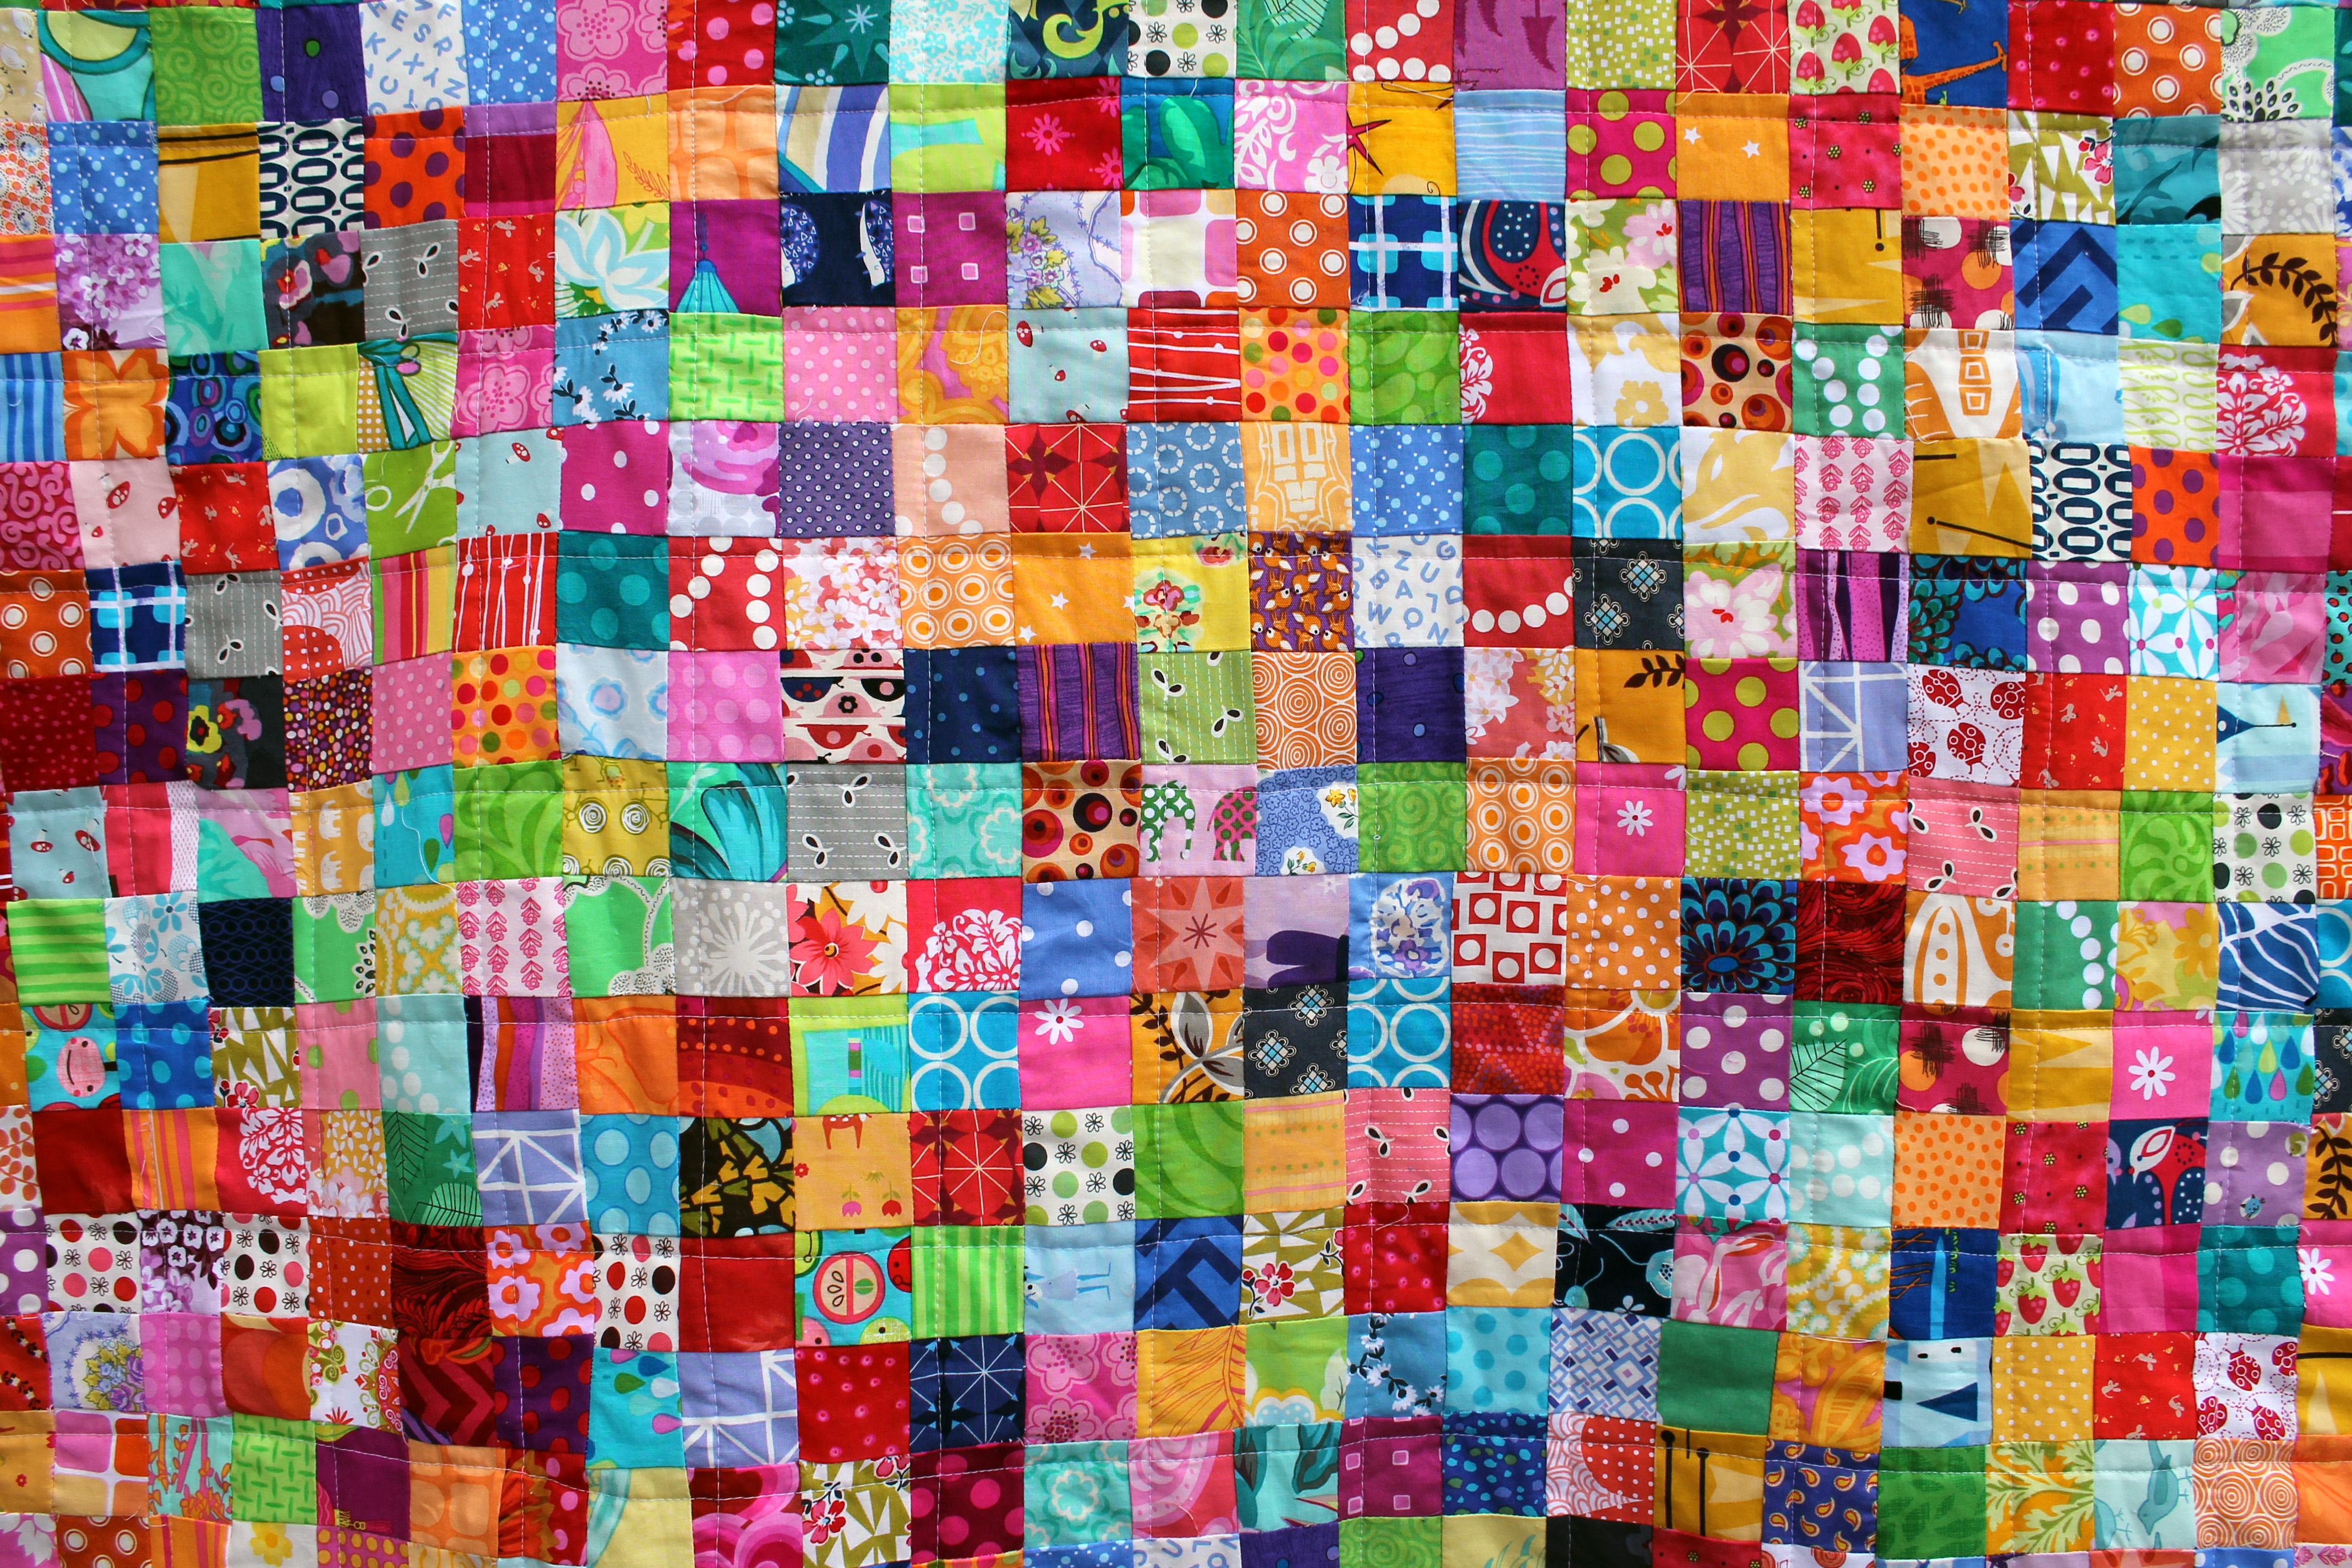
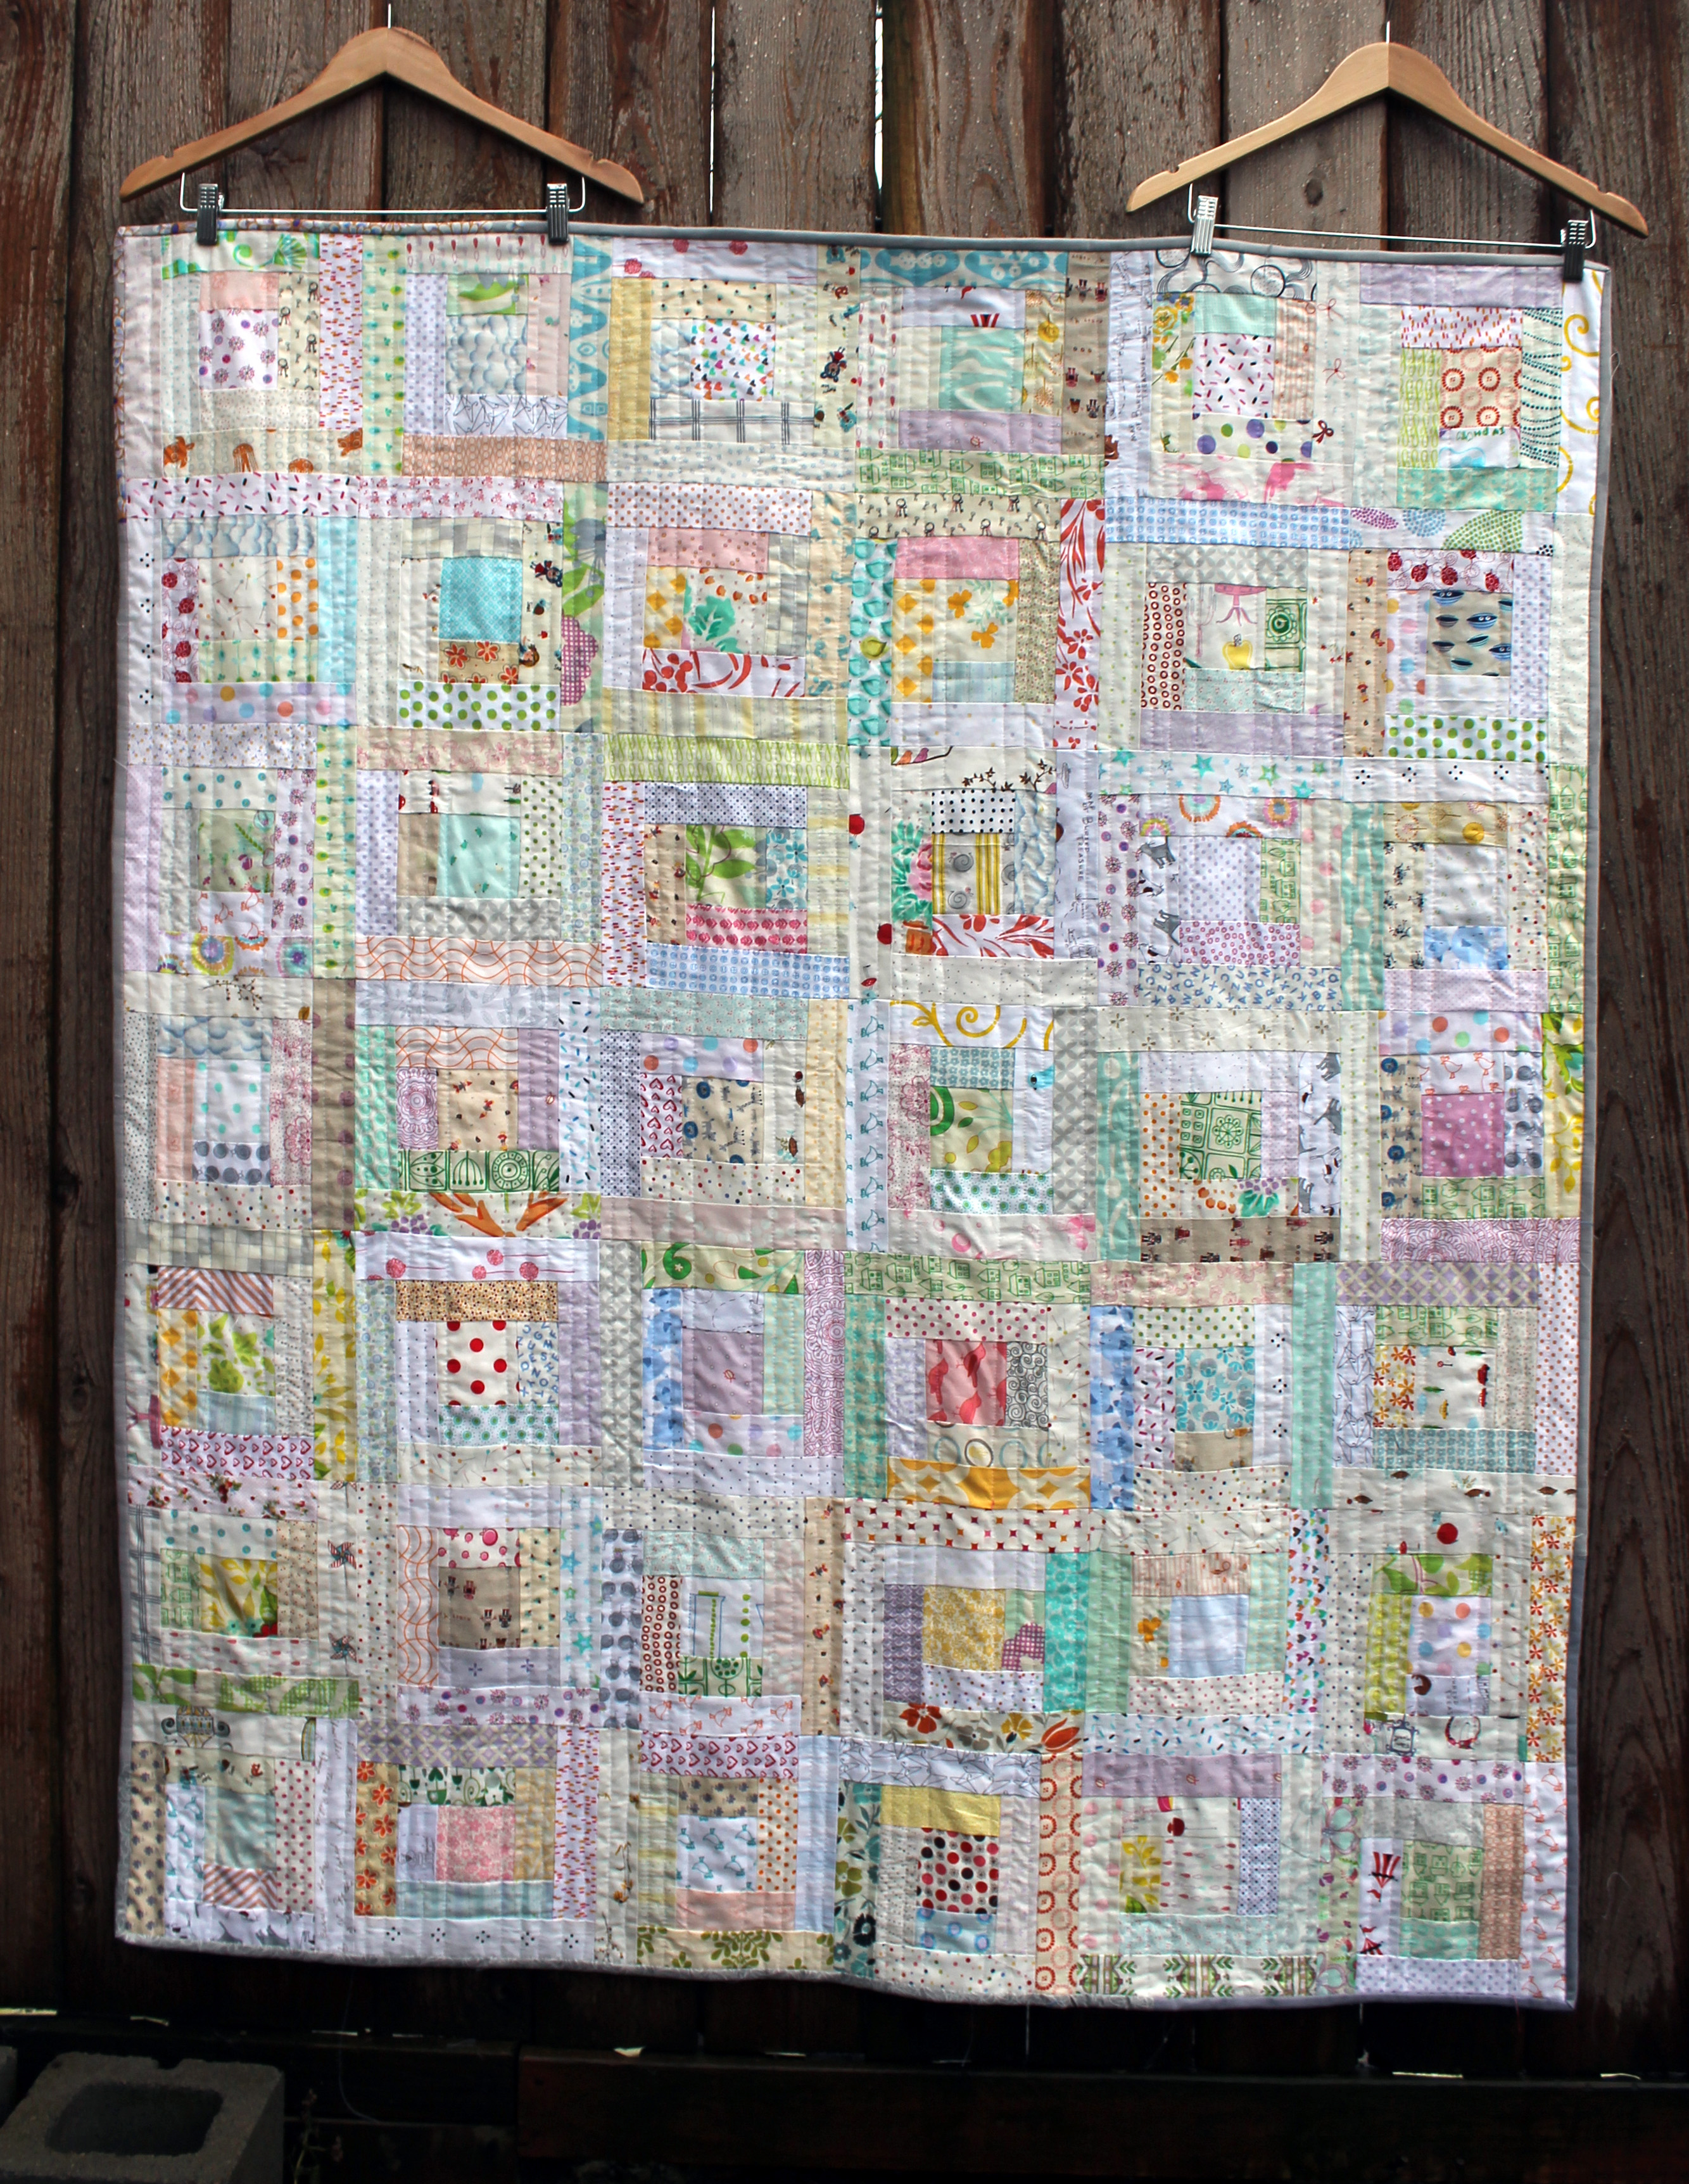
I am not sure if it is considered cheating or not, but because the majority of my quilts are kids size, the task of finishing them is not as daunting/labor intensive as an adult size quilt.  I must admit I do like the fact I can try an idea or color scheme out with out too much commitment.   With the gretchen quilt I wanted to try two things I had not done before –  the pattern, which is a very traditional quilt pattern and the orange/blue color scheme.  Here is the results….gretch quilt finished

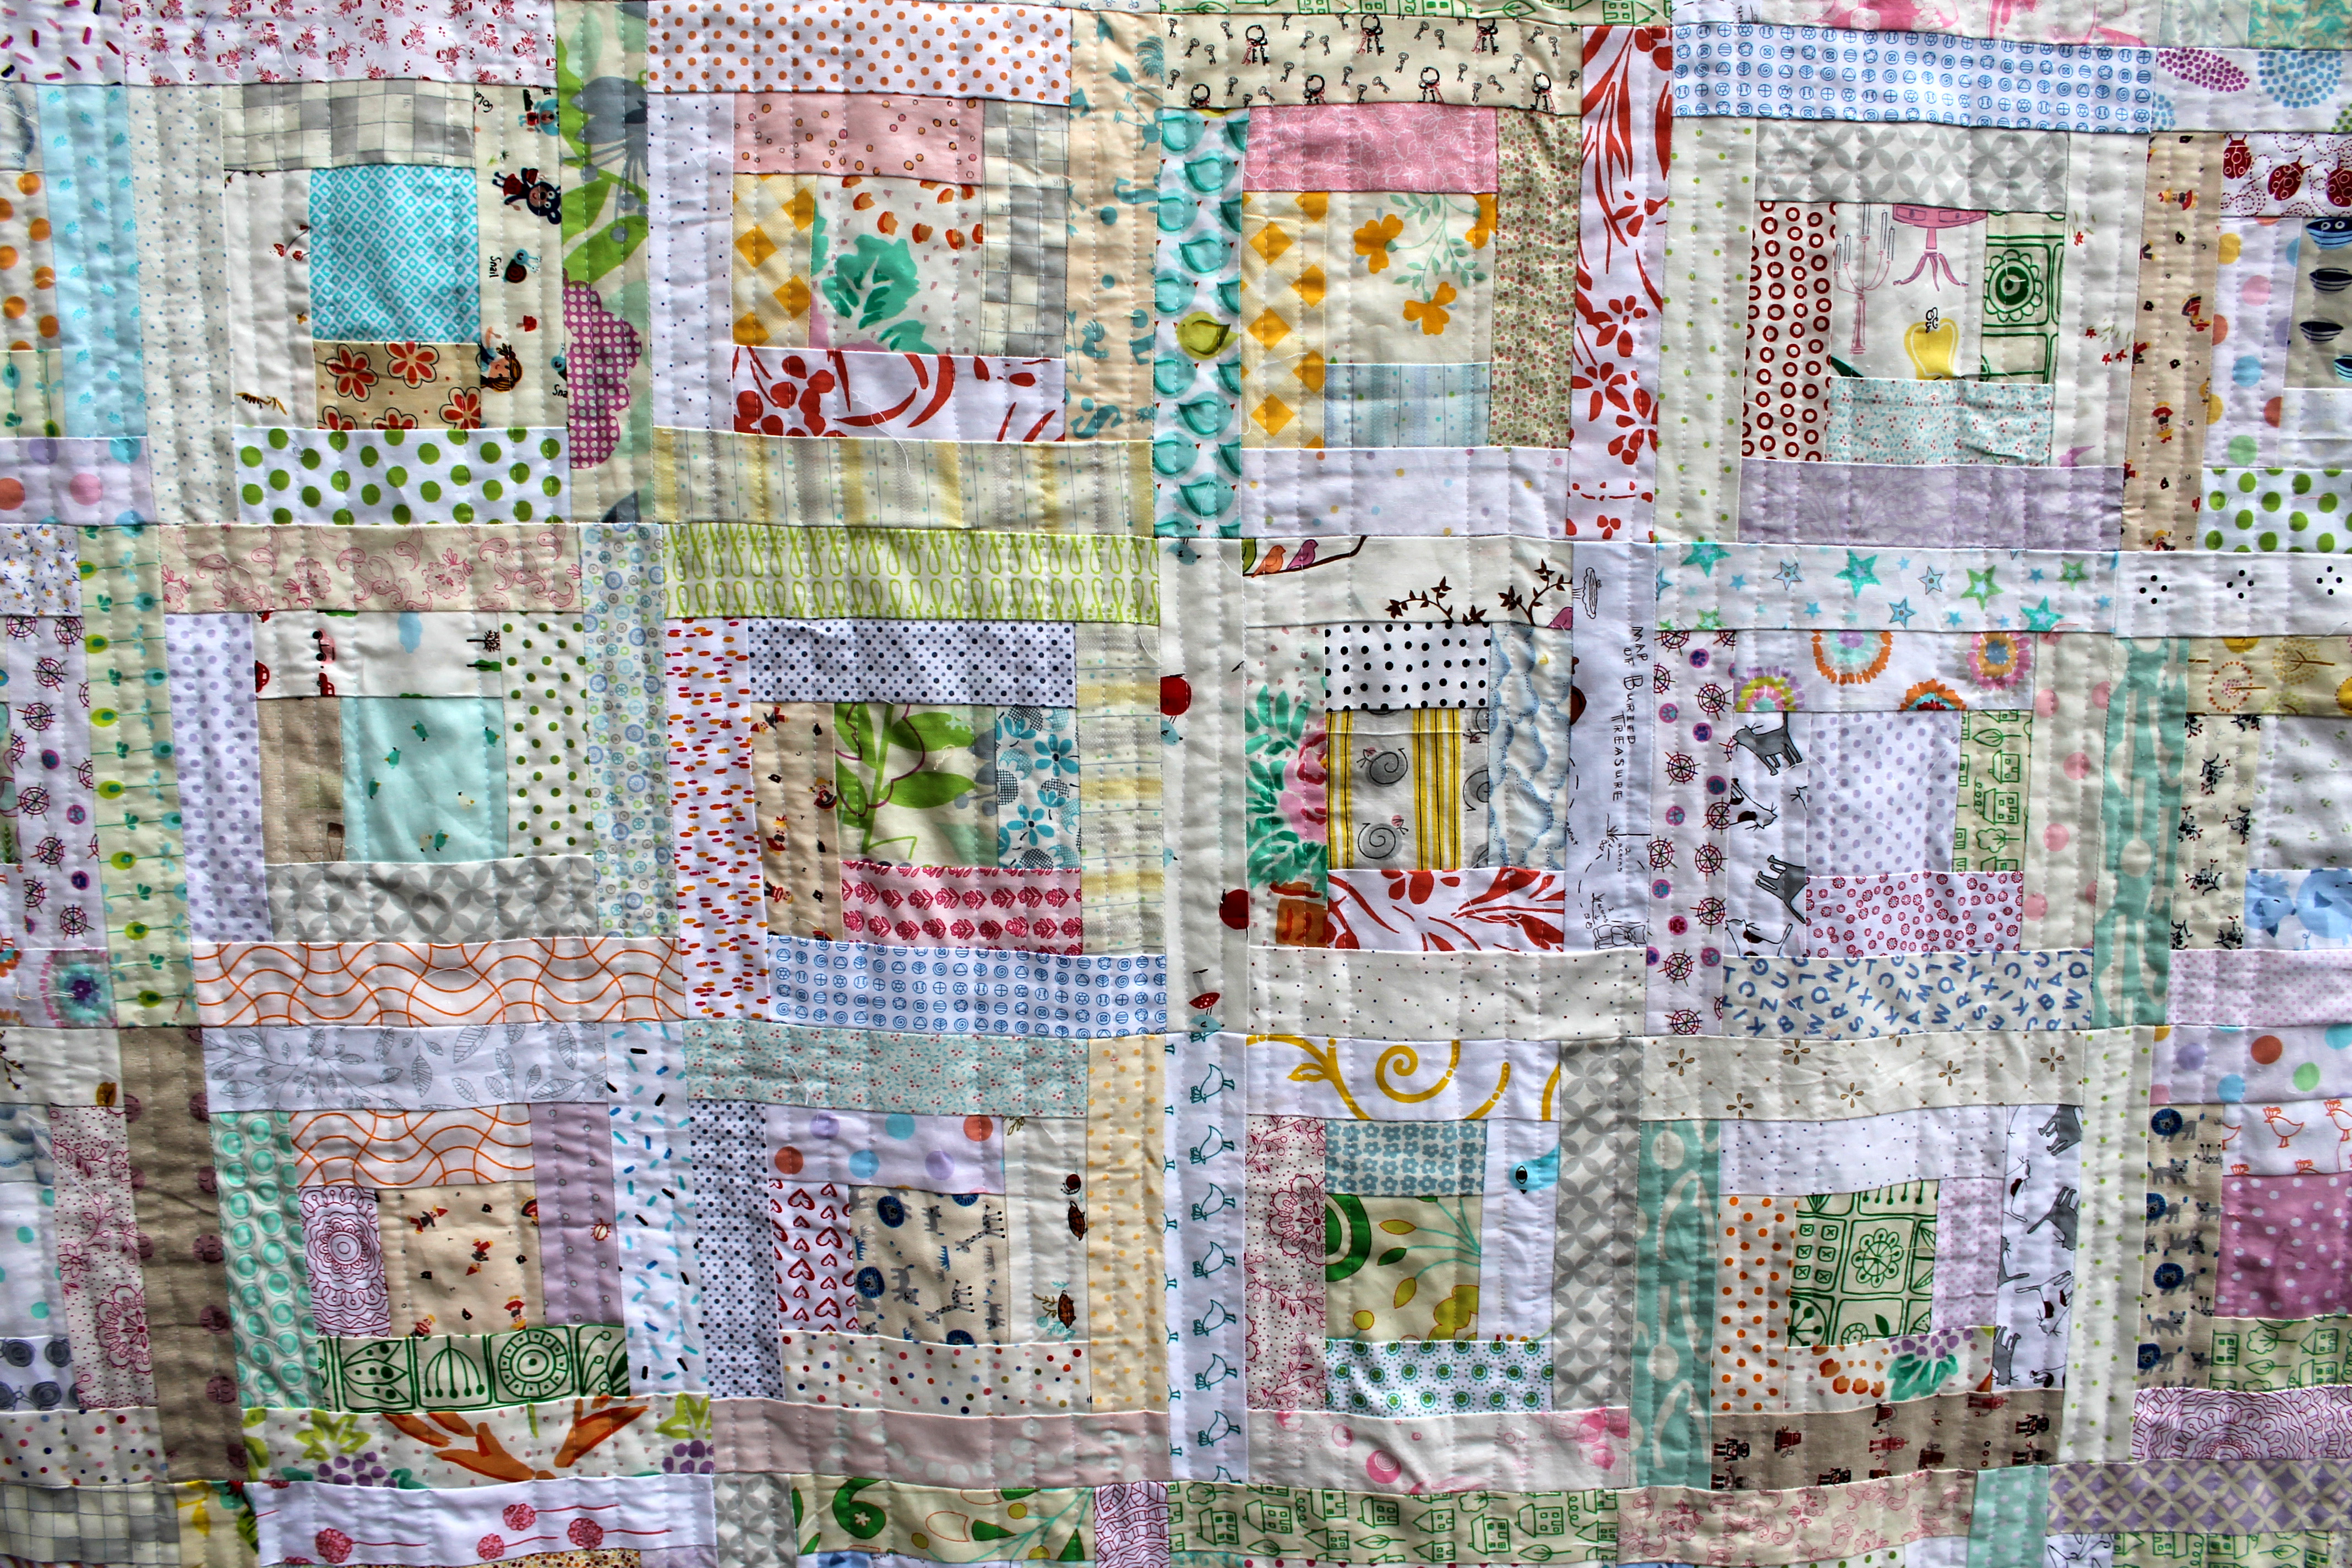
I must admit I am really pleased with how this quilt turned out.  The colours pop and the pattern looks complex but is really quite easy.  I blogged about this quilt block a couple of weeks ago, and included a couple of links to the pattern.  You can click here to find it if you are interested.  I went the paper piecing route and the only annoying thing was using the tweezers to remove the bits of paper wedged where eight corners meet.  I did learn a valuable lesson with this – if possible remove as much of the paper corners before you sew the blocks together.  I really does minimize the tweezer work and save time in the end.

gretchen quilt detail

I did simple straight line quilting, following the lines of the block and then stitched around the center of the square.  I am still traumatized by the stipple quilting I did recently and think straight lines are still the go for the next couple of quilts.  In my quilting defence (i) there is no stitching in the ditch and (2) I think the quilting compliments the piecing.

gretchen quilt block detail

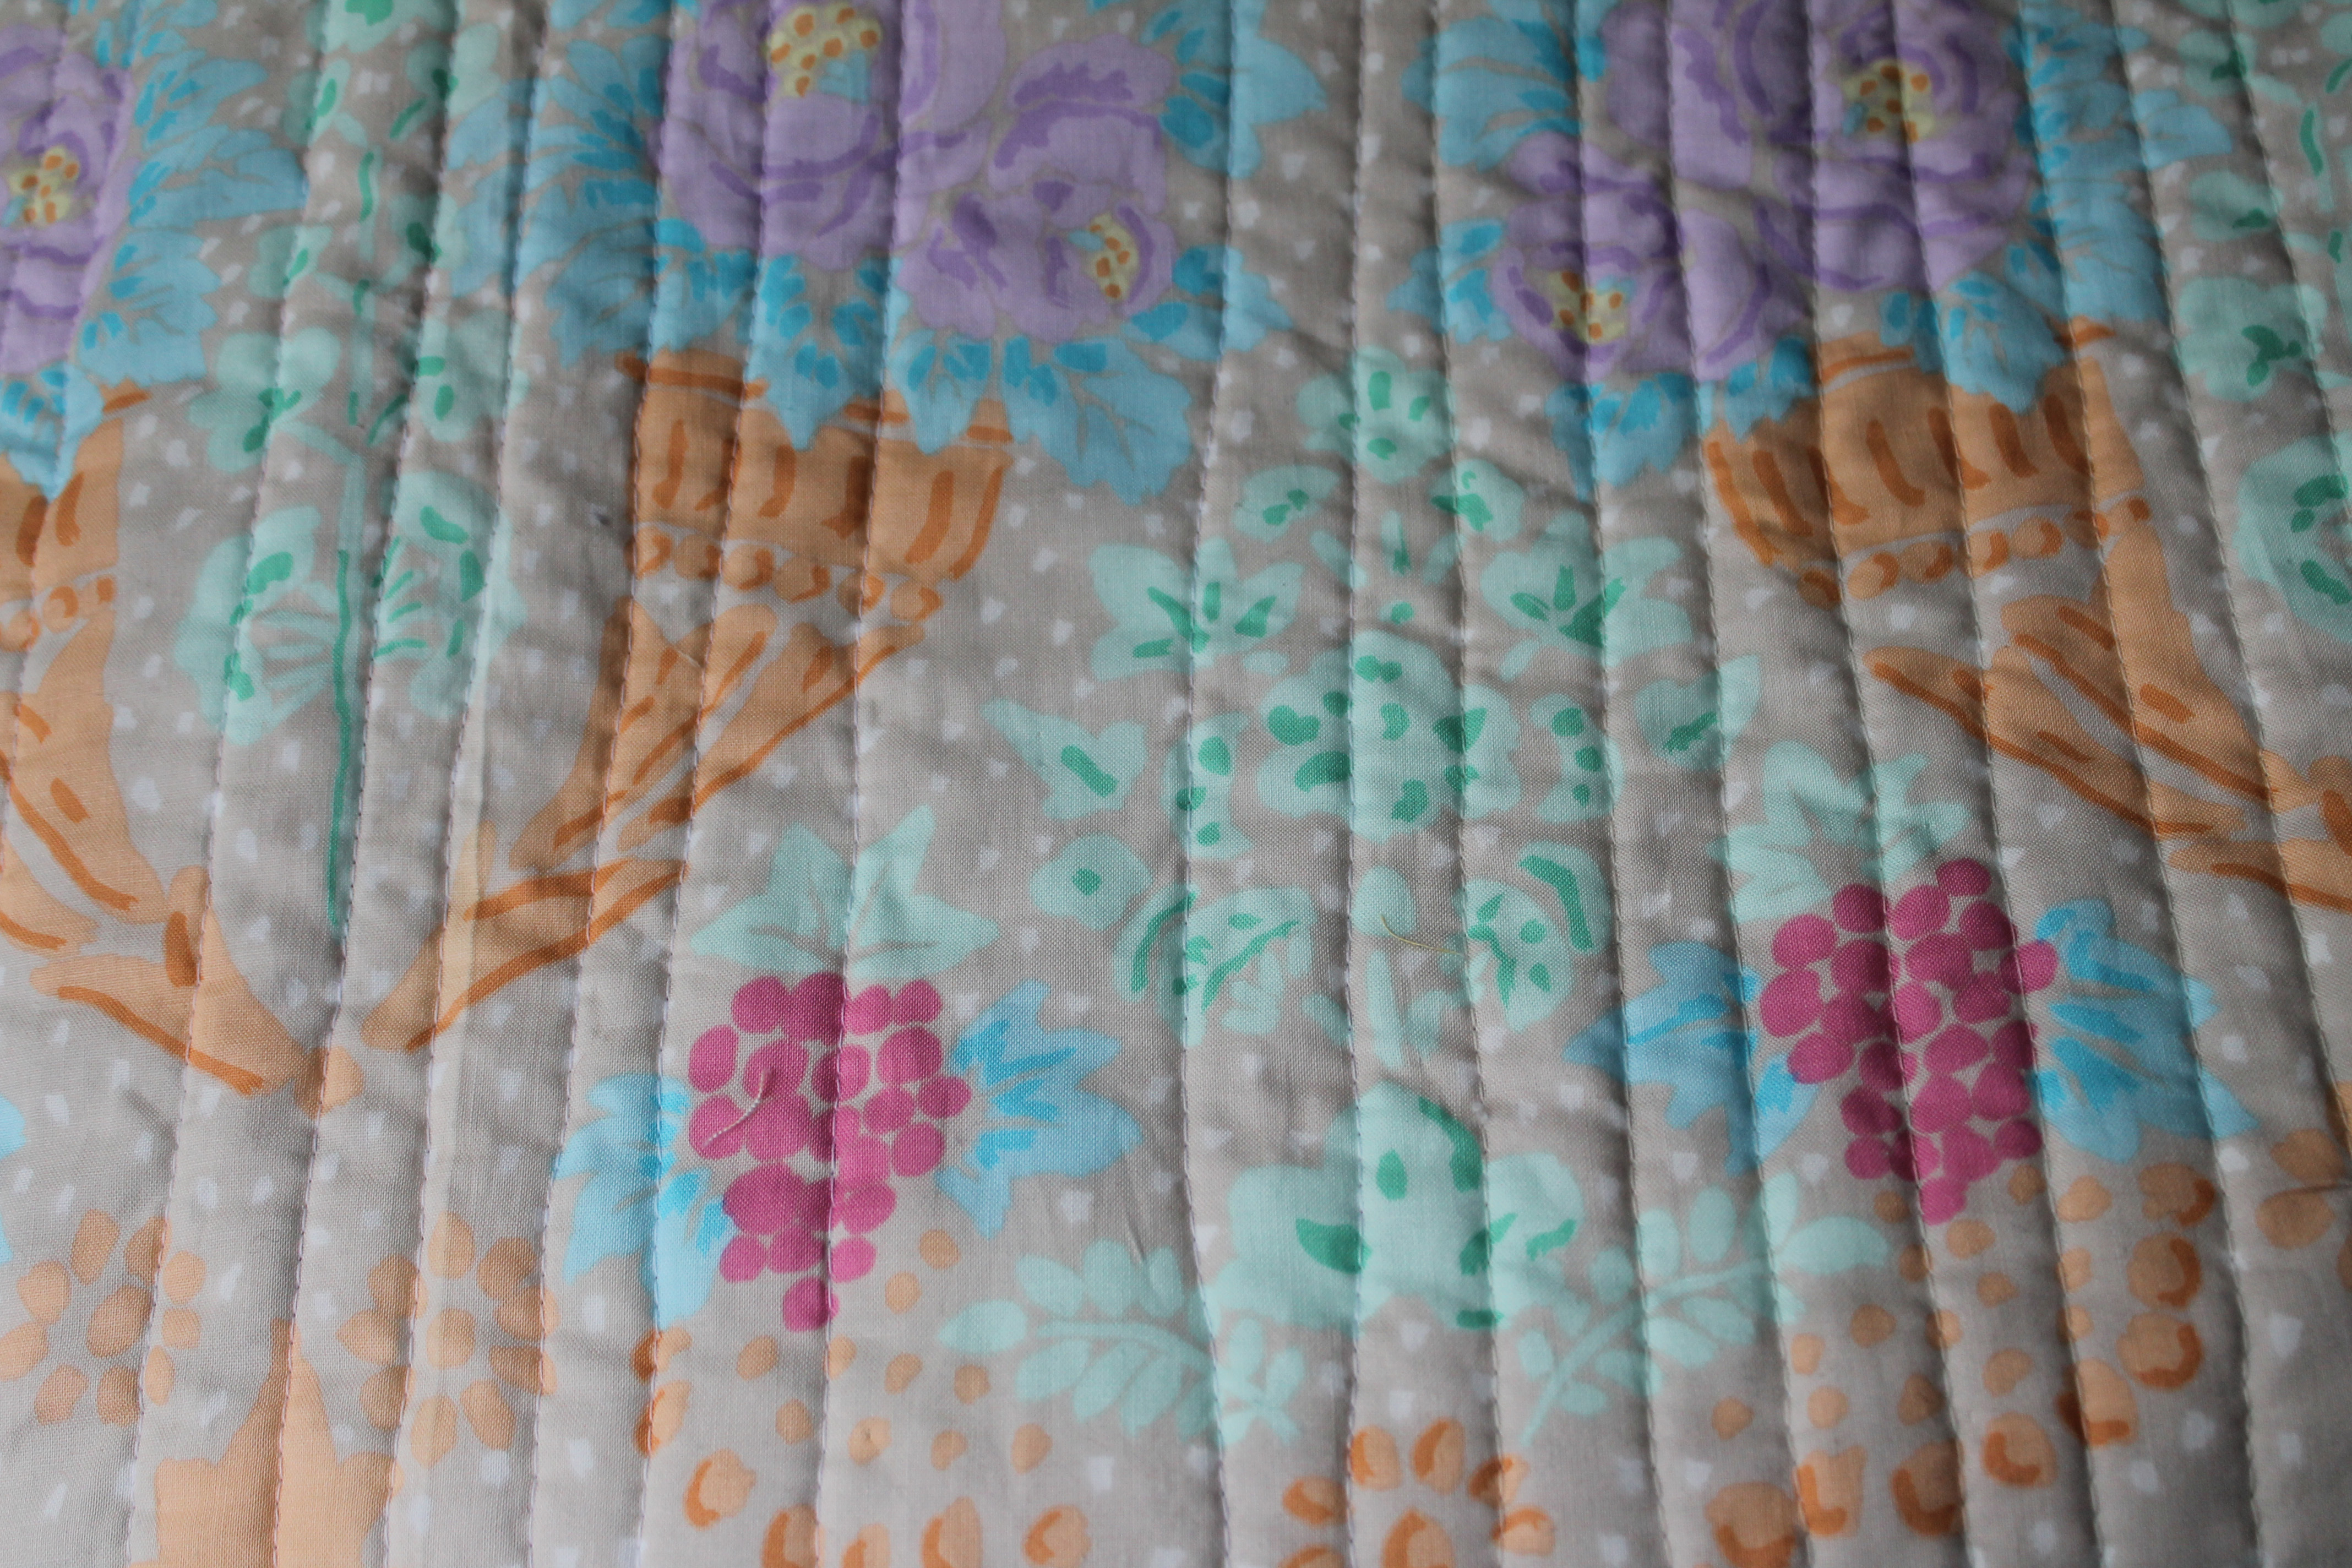
When it came time to put the back together I found in my stash the most perfect backing fabric….Ed Emberley’s Giraffes from his Happy Drawing collection.

gretchen quilt back

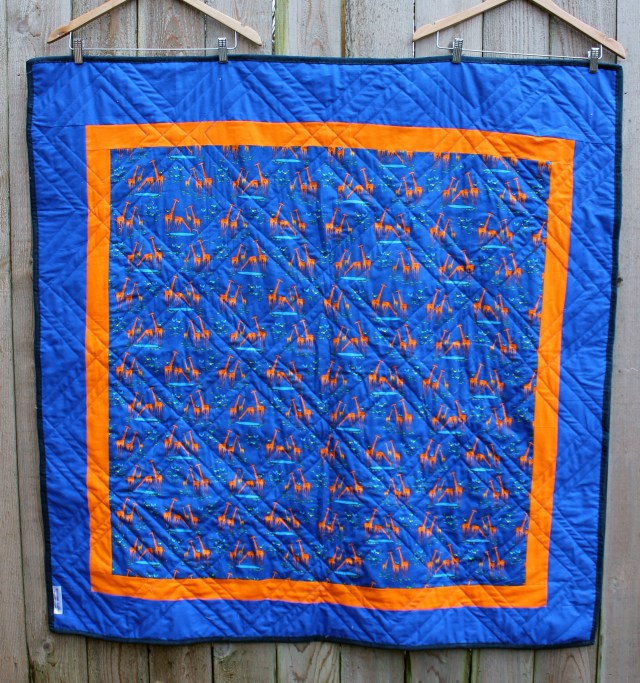
I love this print and will have to track down some more, as I used it all on the backing.  The design is fabulous and very boy appropriate.

fabric detail

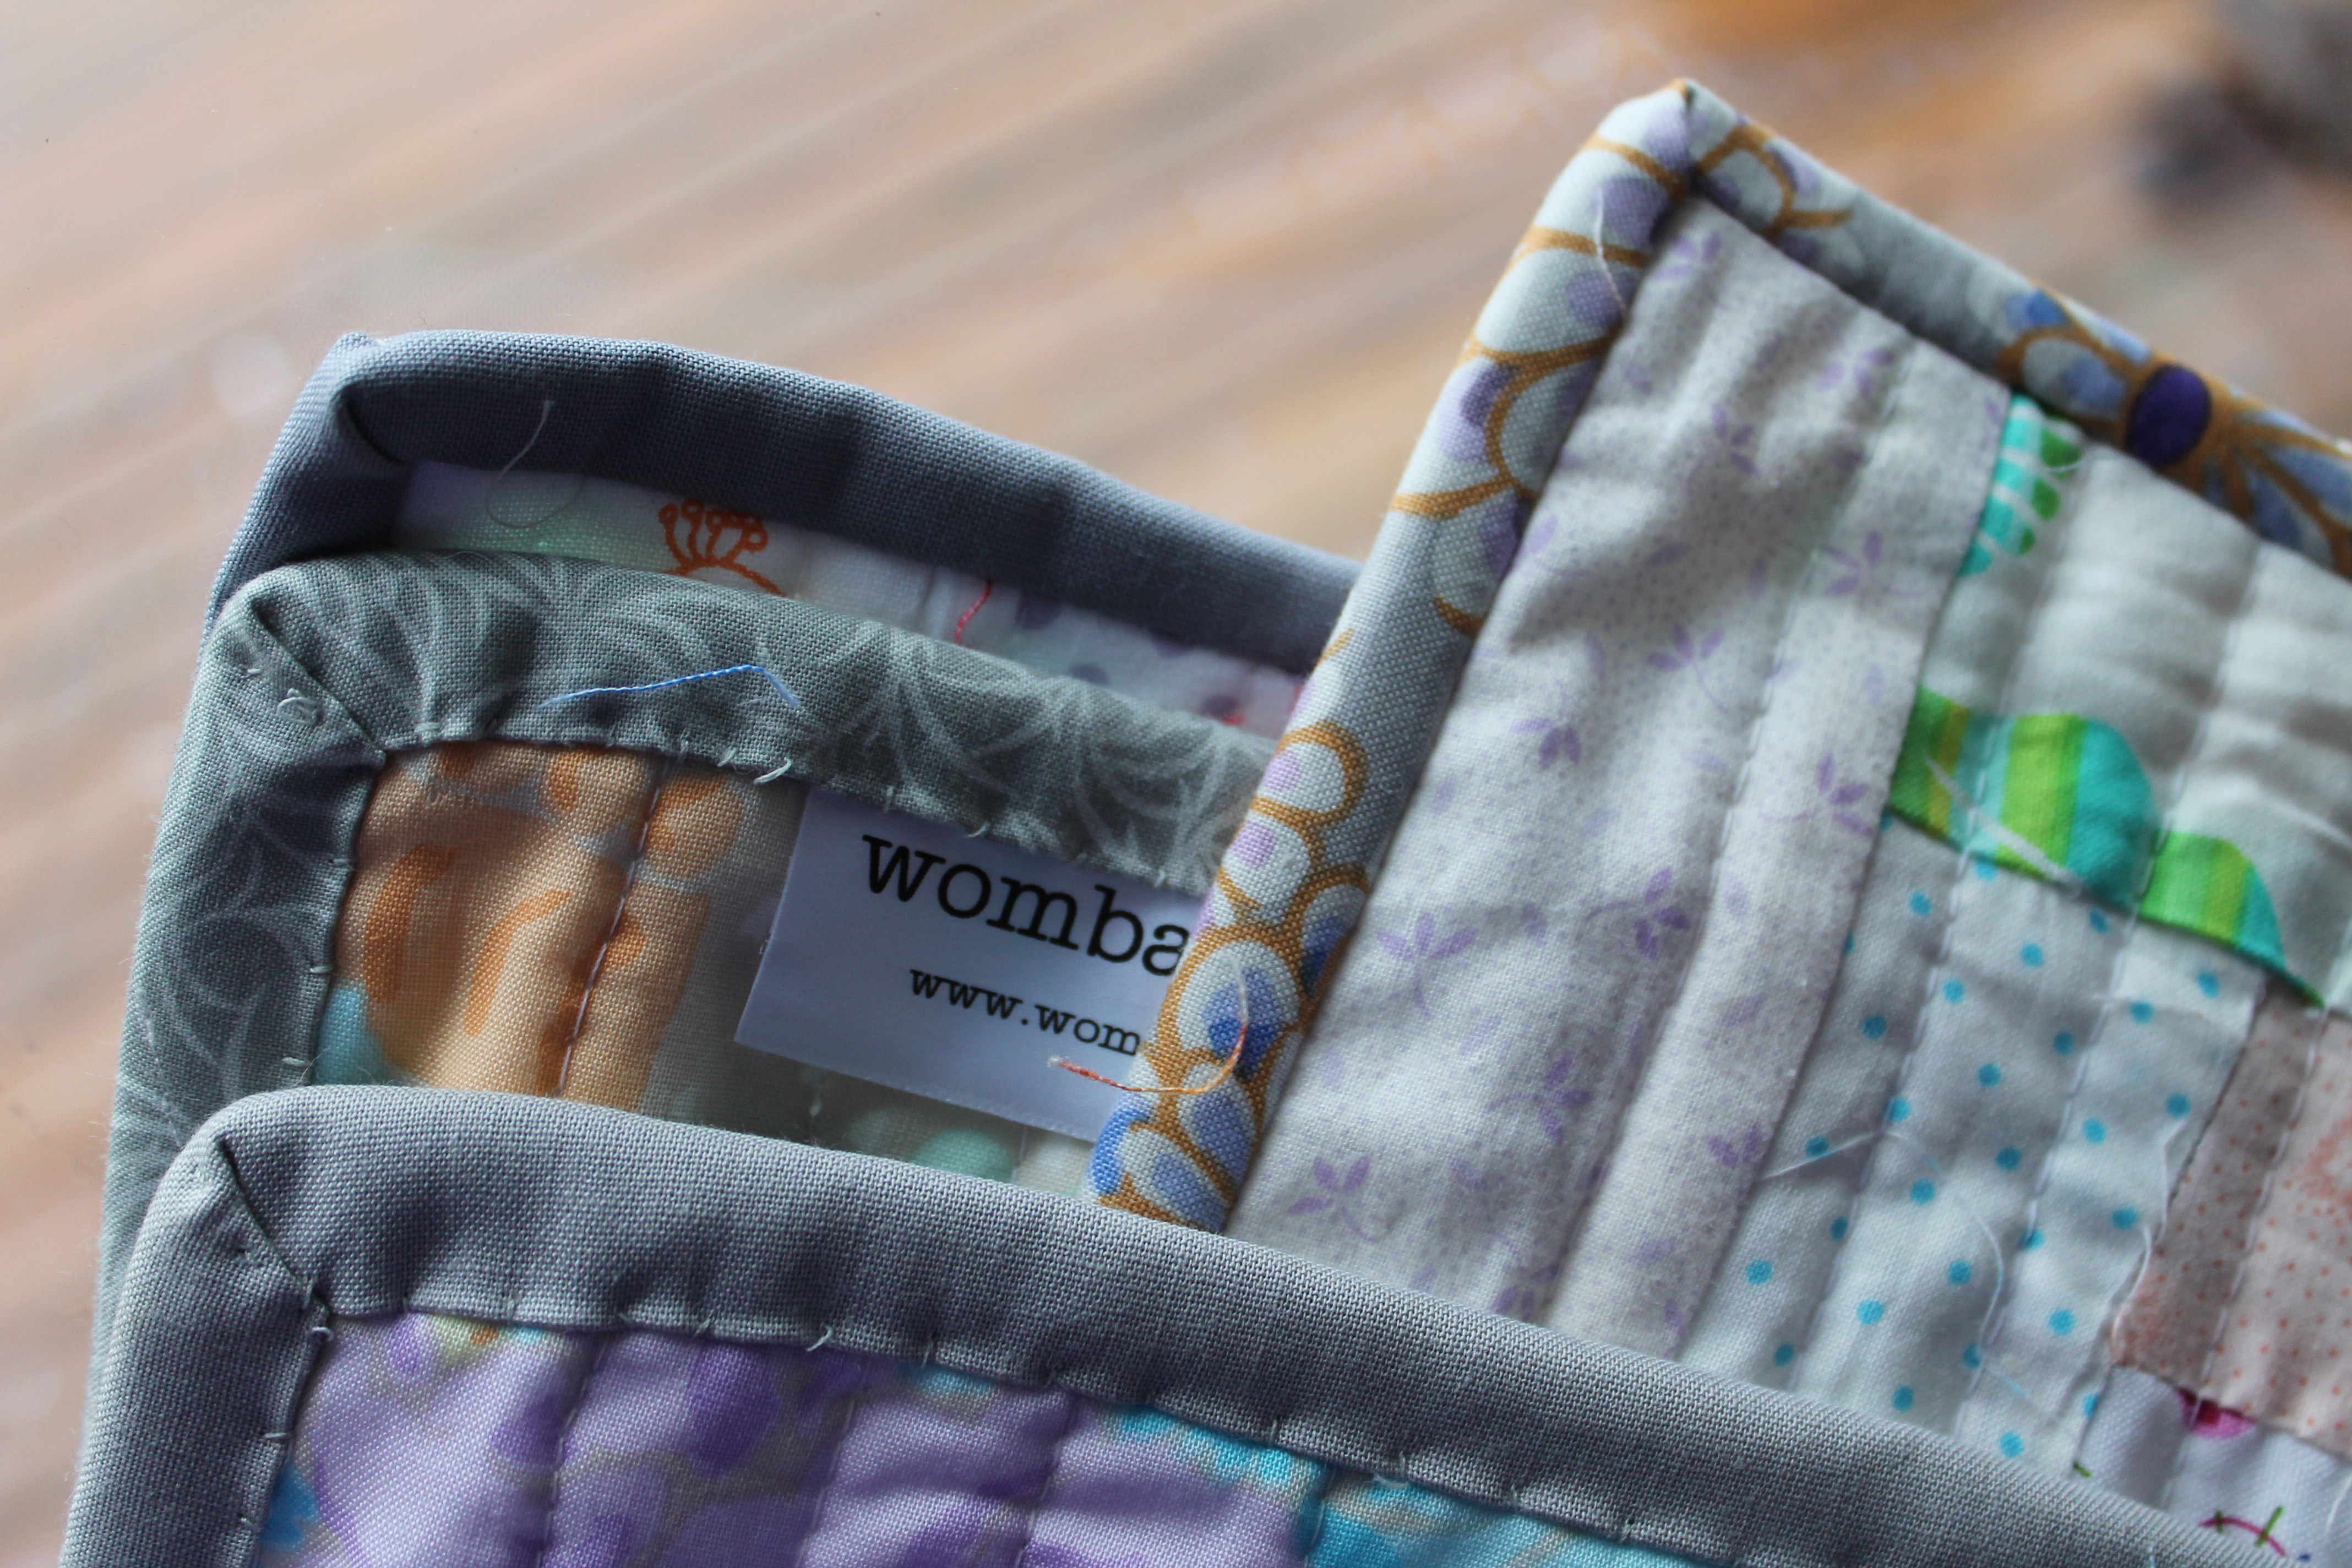
For the binding I choose a solid navy/denim cotton which seemed to work really well.  I hand stitch all my binding and the little bit of stretch in the fabric made it easy to work with.

gretchen quilt binding

Now I am heading back to my pink & yellow quilt.  After posting my work in progress this week, my niece has claimed the quilt as hers, so I am trying to get it finished fast.

Low volume Log cabin finished

Late last night, while watching fabulously trashy TV, I finally finished up my low volume log cabin quilt.  I am thrilled with the end result, even though I doubted myself a few times during the process.

low volume log cabin quiltThis is my second low volume quilt.  My first one was made up of simple square blocks, this one I decided to do a log cabin block.  My previous post can be found here and here.   I love the log cabin block and was inspired to use this traditional pattern by Susan Beal’s wonderful book Modern Log Cabin Quilting.  This pattern allowed me to really (a) raid my scraps and (b) include an amazing number of fabrics.

finished quilt detail

For this quilt I did use a paper piecing pattern and  you can find a similar one here thanks to quilterscache.com.  For non paper piercers Connecting Threads  has a great log cabin tutorial (with videos and all) which can be found here.

log cabin block detailMy two low volume quilts have been a challenge for me.  As you can tell from my other quilts I love colour and contrast and with low volume I was well and truly out of my comfort zone.   What was not a challenge, this time, was the quilting.  I decided to just run vertical lines down the quilt, using the block’s lines as a guide for my walking foot.  It was a lot  quilting/stitching (more tthan I usually do), but the end result is what makes me really love this quilt.  I can not wait to see how it puckers after washing!

quilting detail

I used a single fabric print for the backing – a charming Kaffe Fassett floral which worked nicely withe the gentle tone of the front of the quilt. I finished the quilt with some scrappy grey binding, just the right colour to bring the whole thing together.

binding detail