Rainbow Crazy

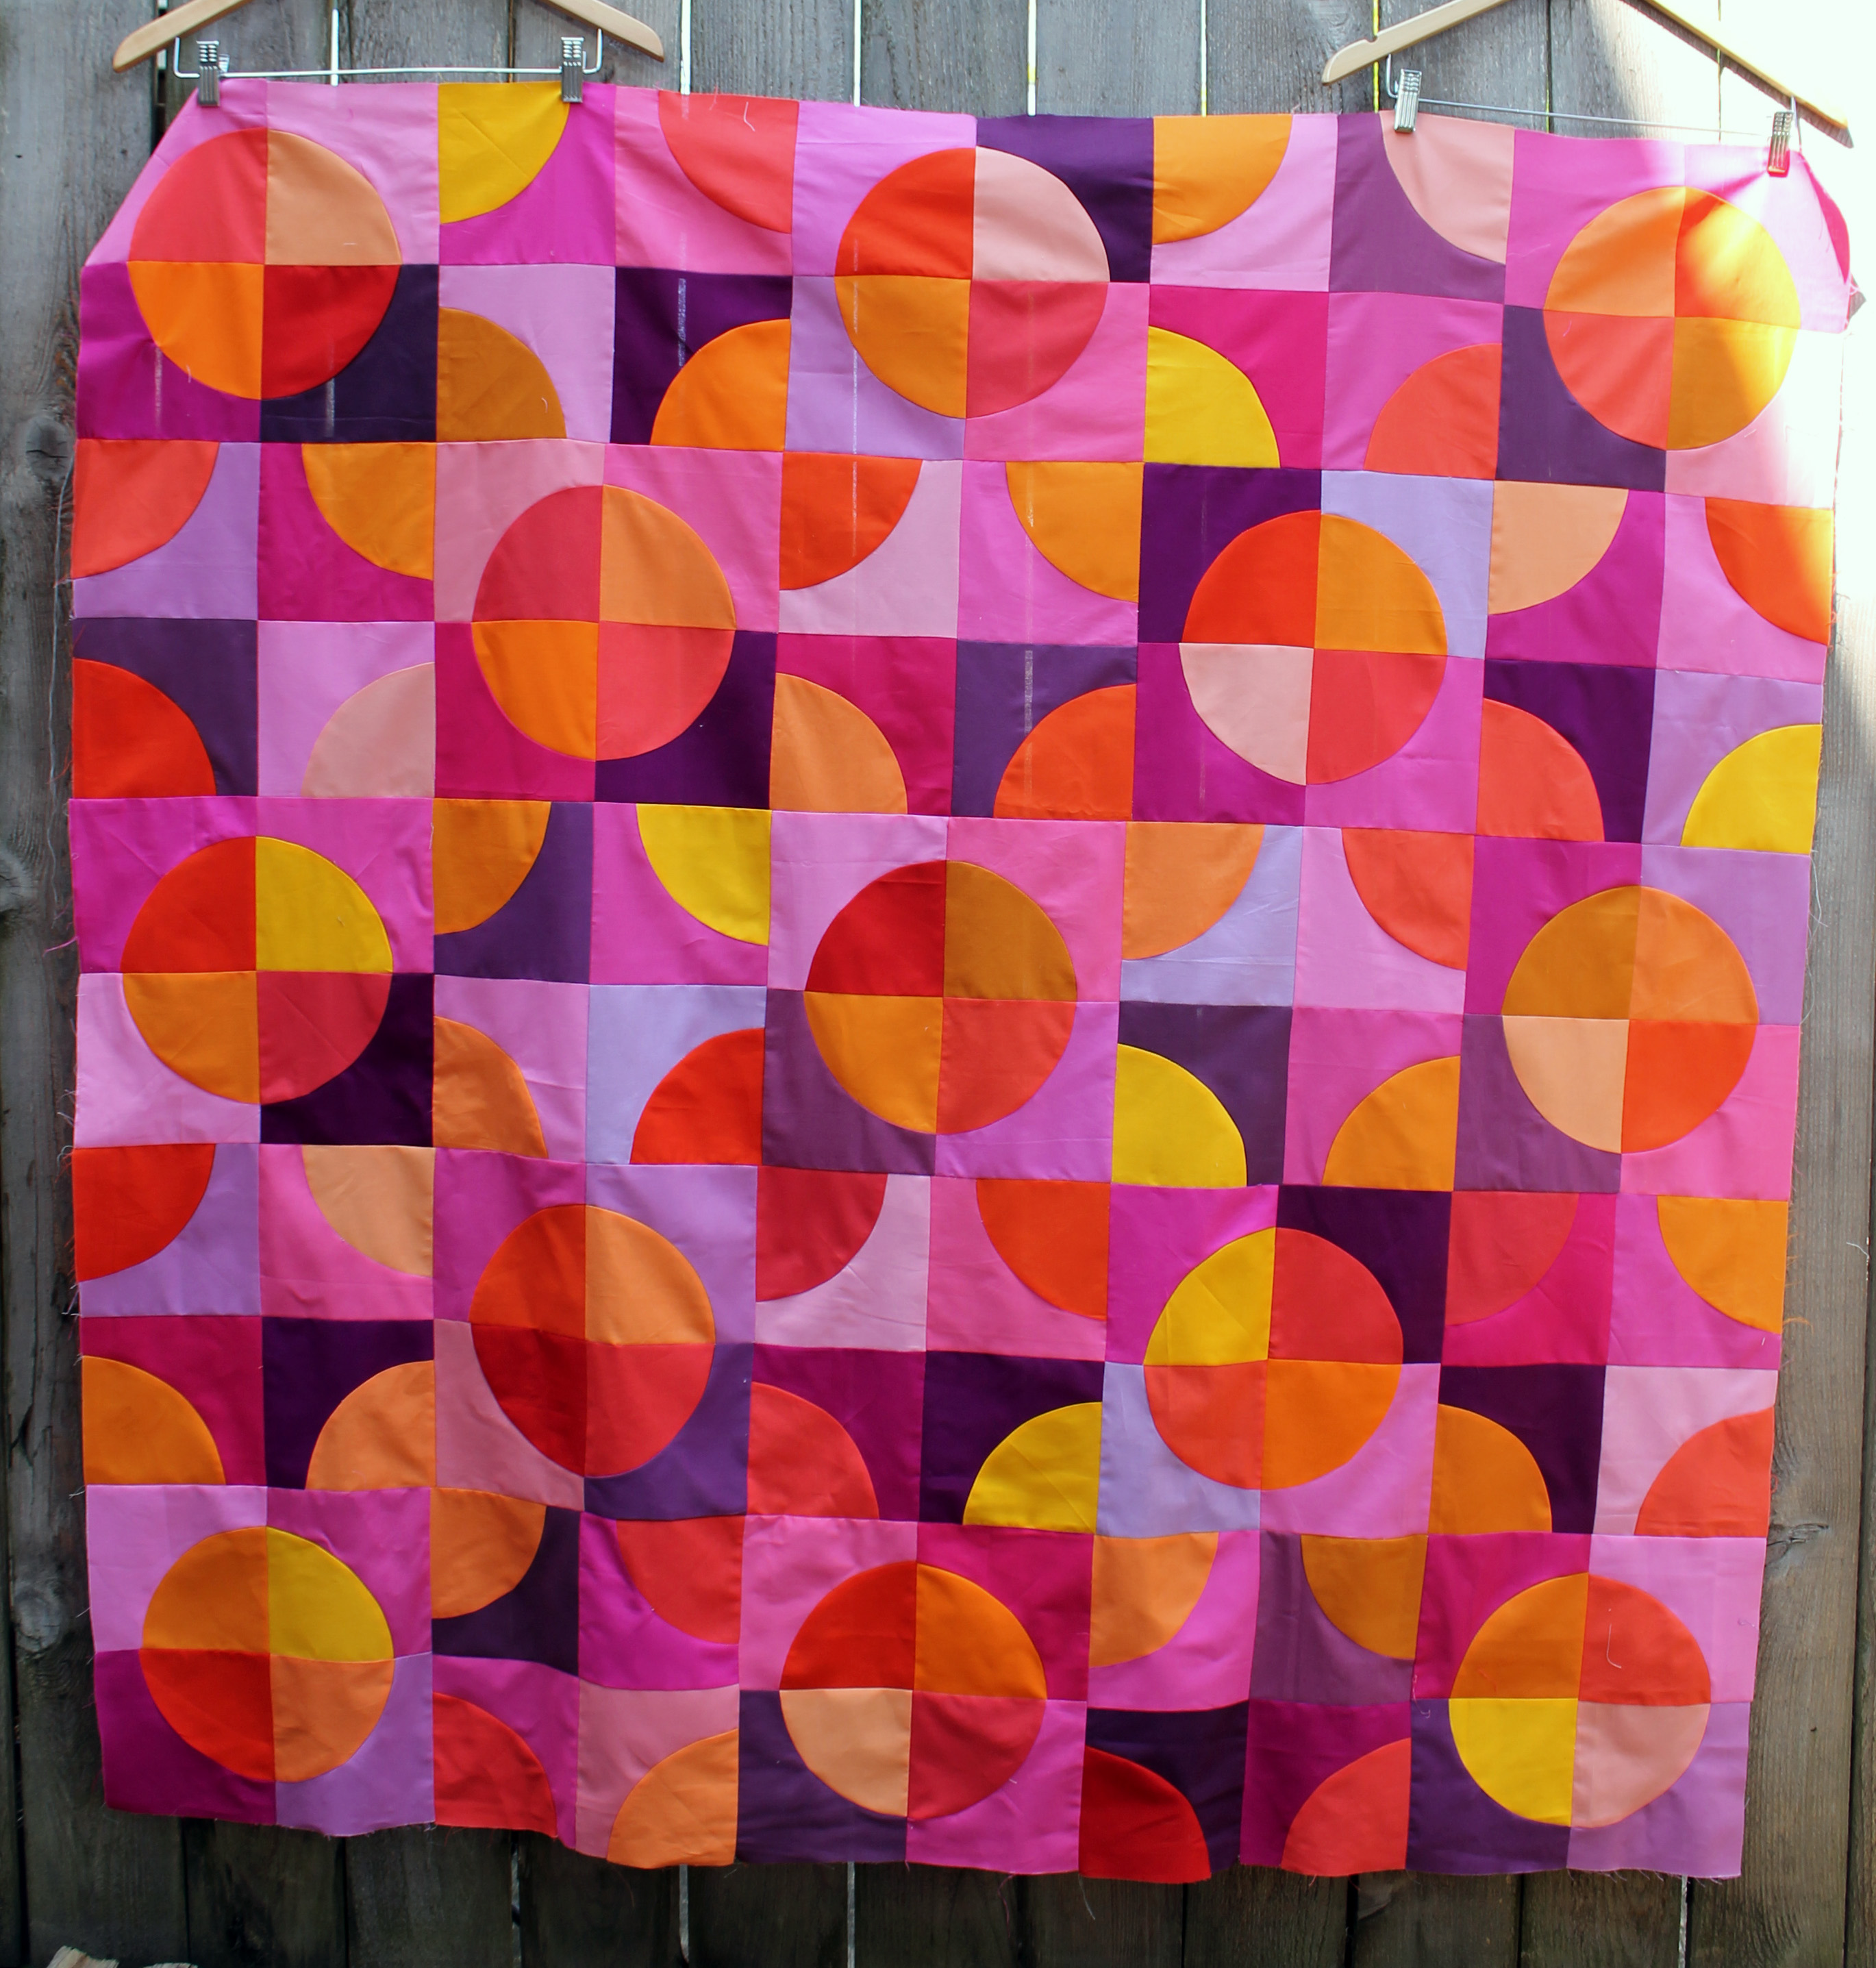
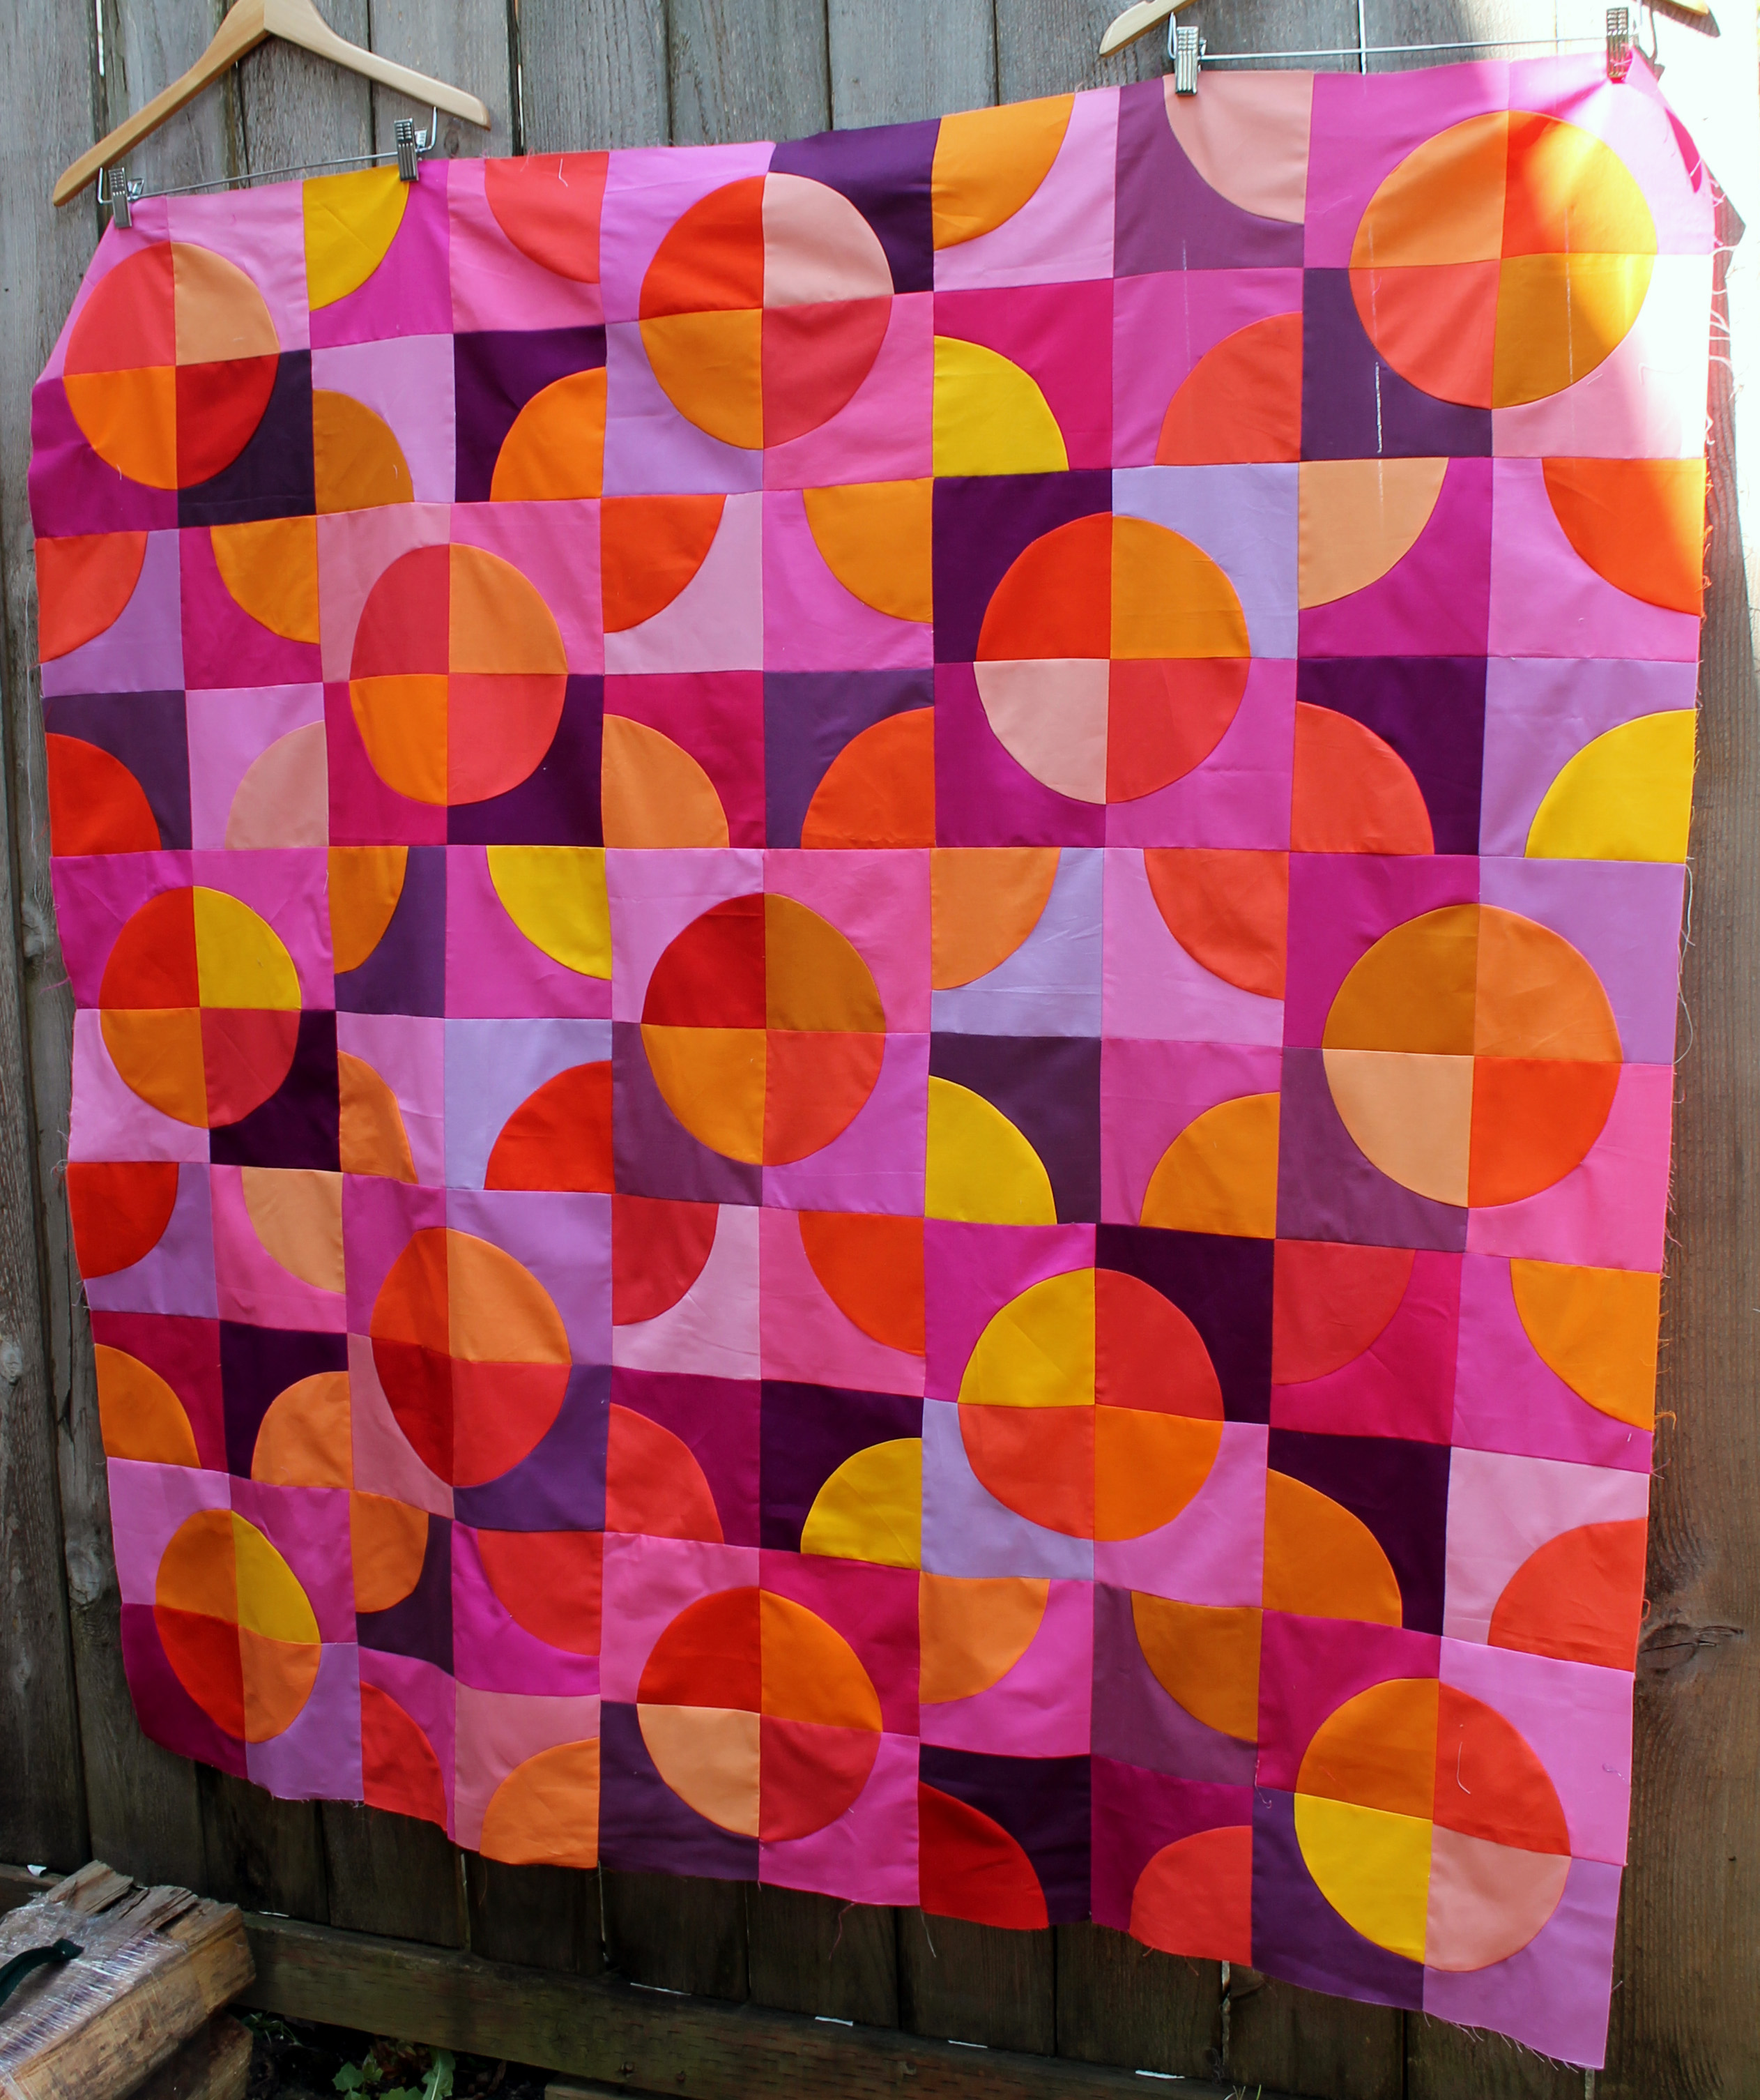
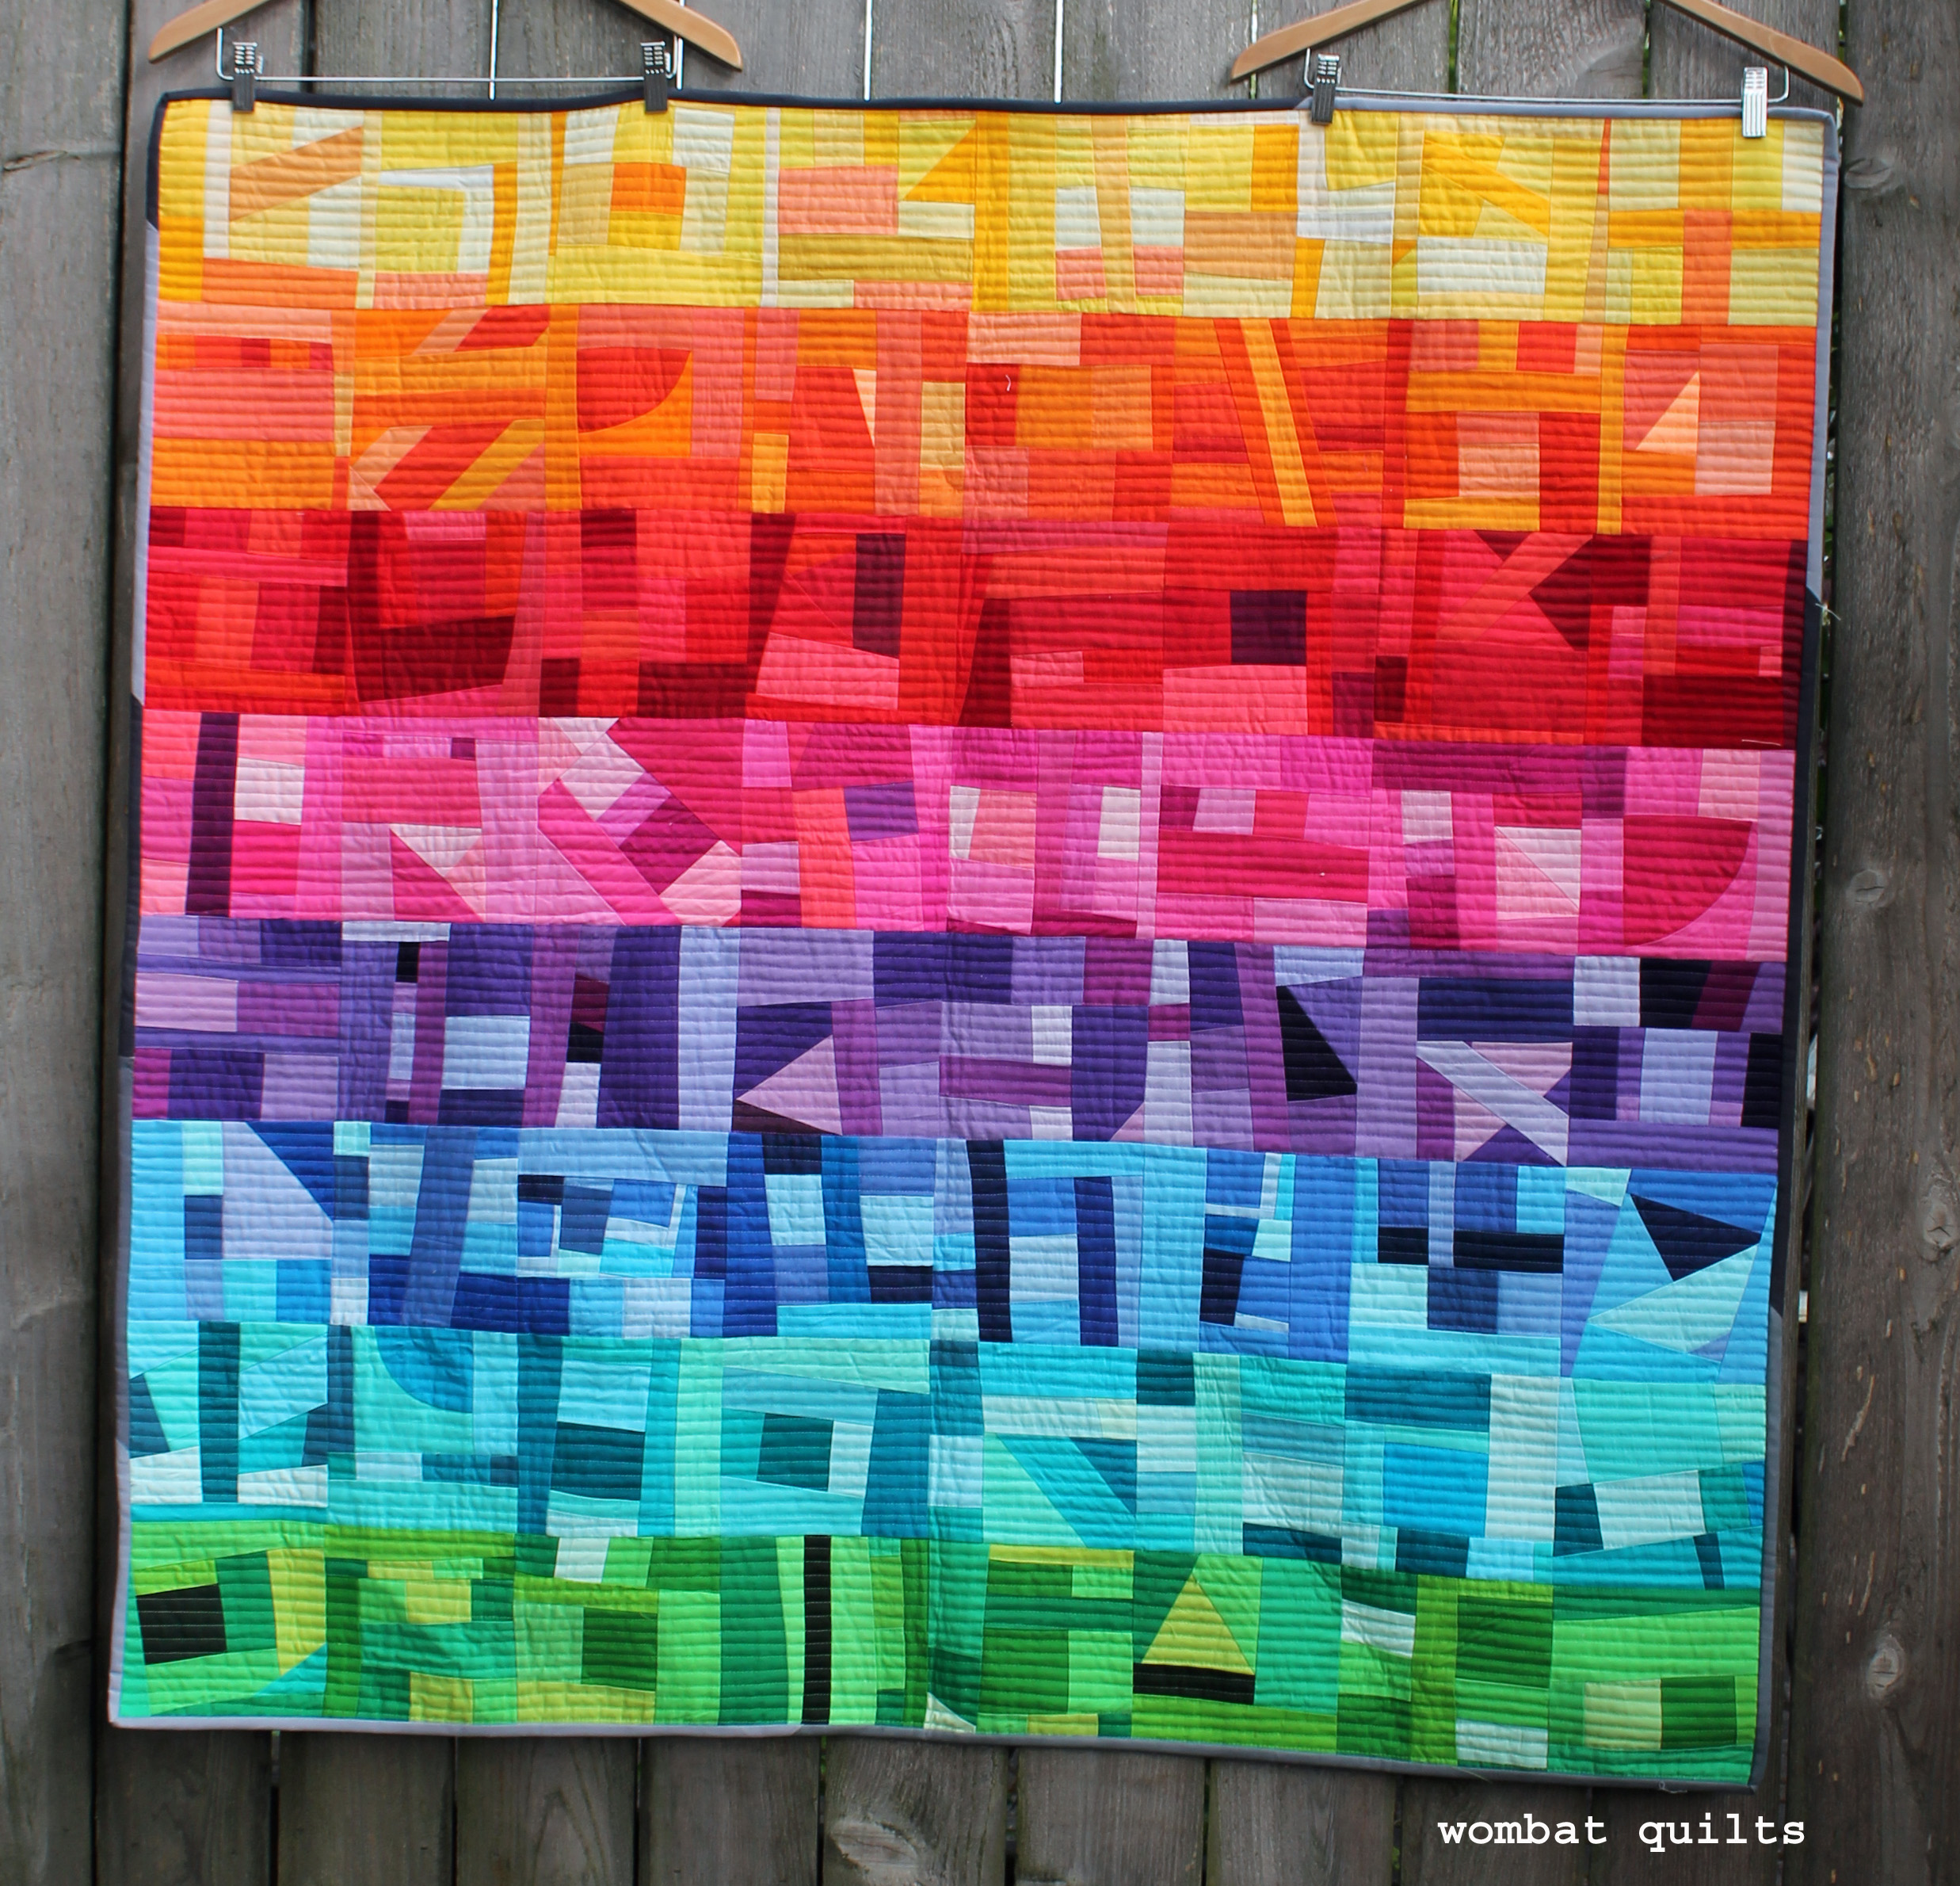
This week I finished up my Rainbow Improv quilt just in time to ship it to Sisters for their quilt show next month….there is nothing like an impending deadline to get you working hard!

rainbow improv quilt
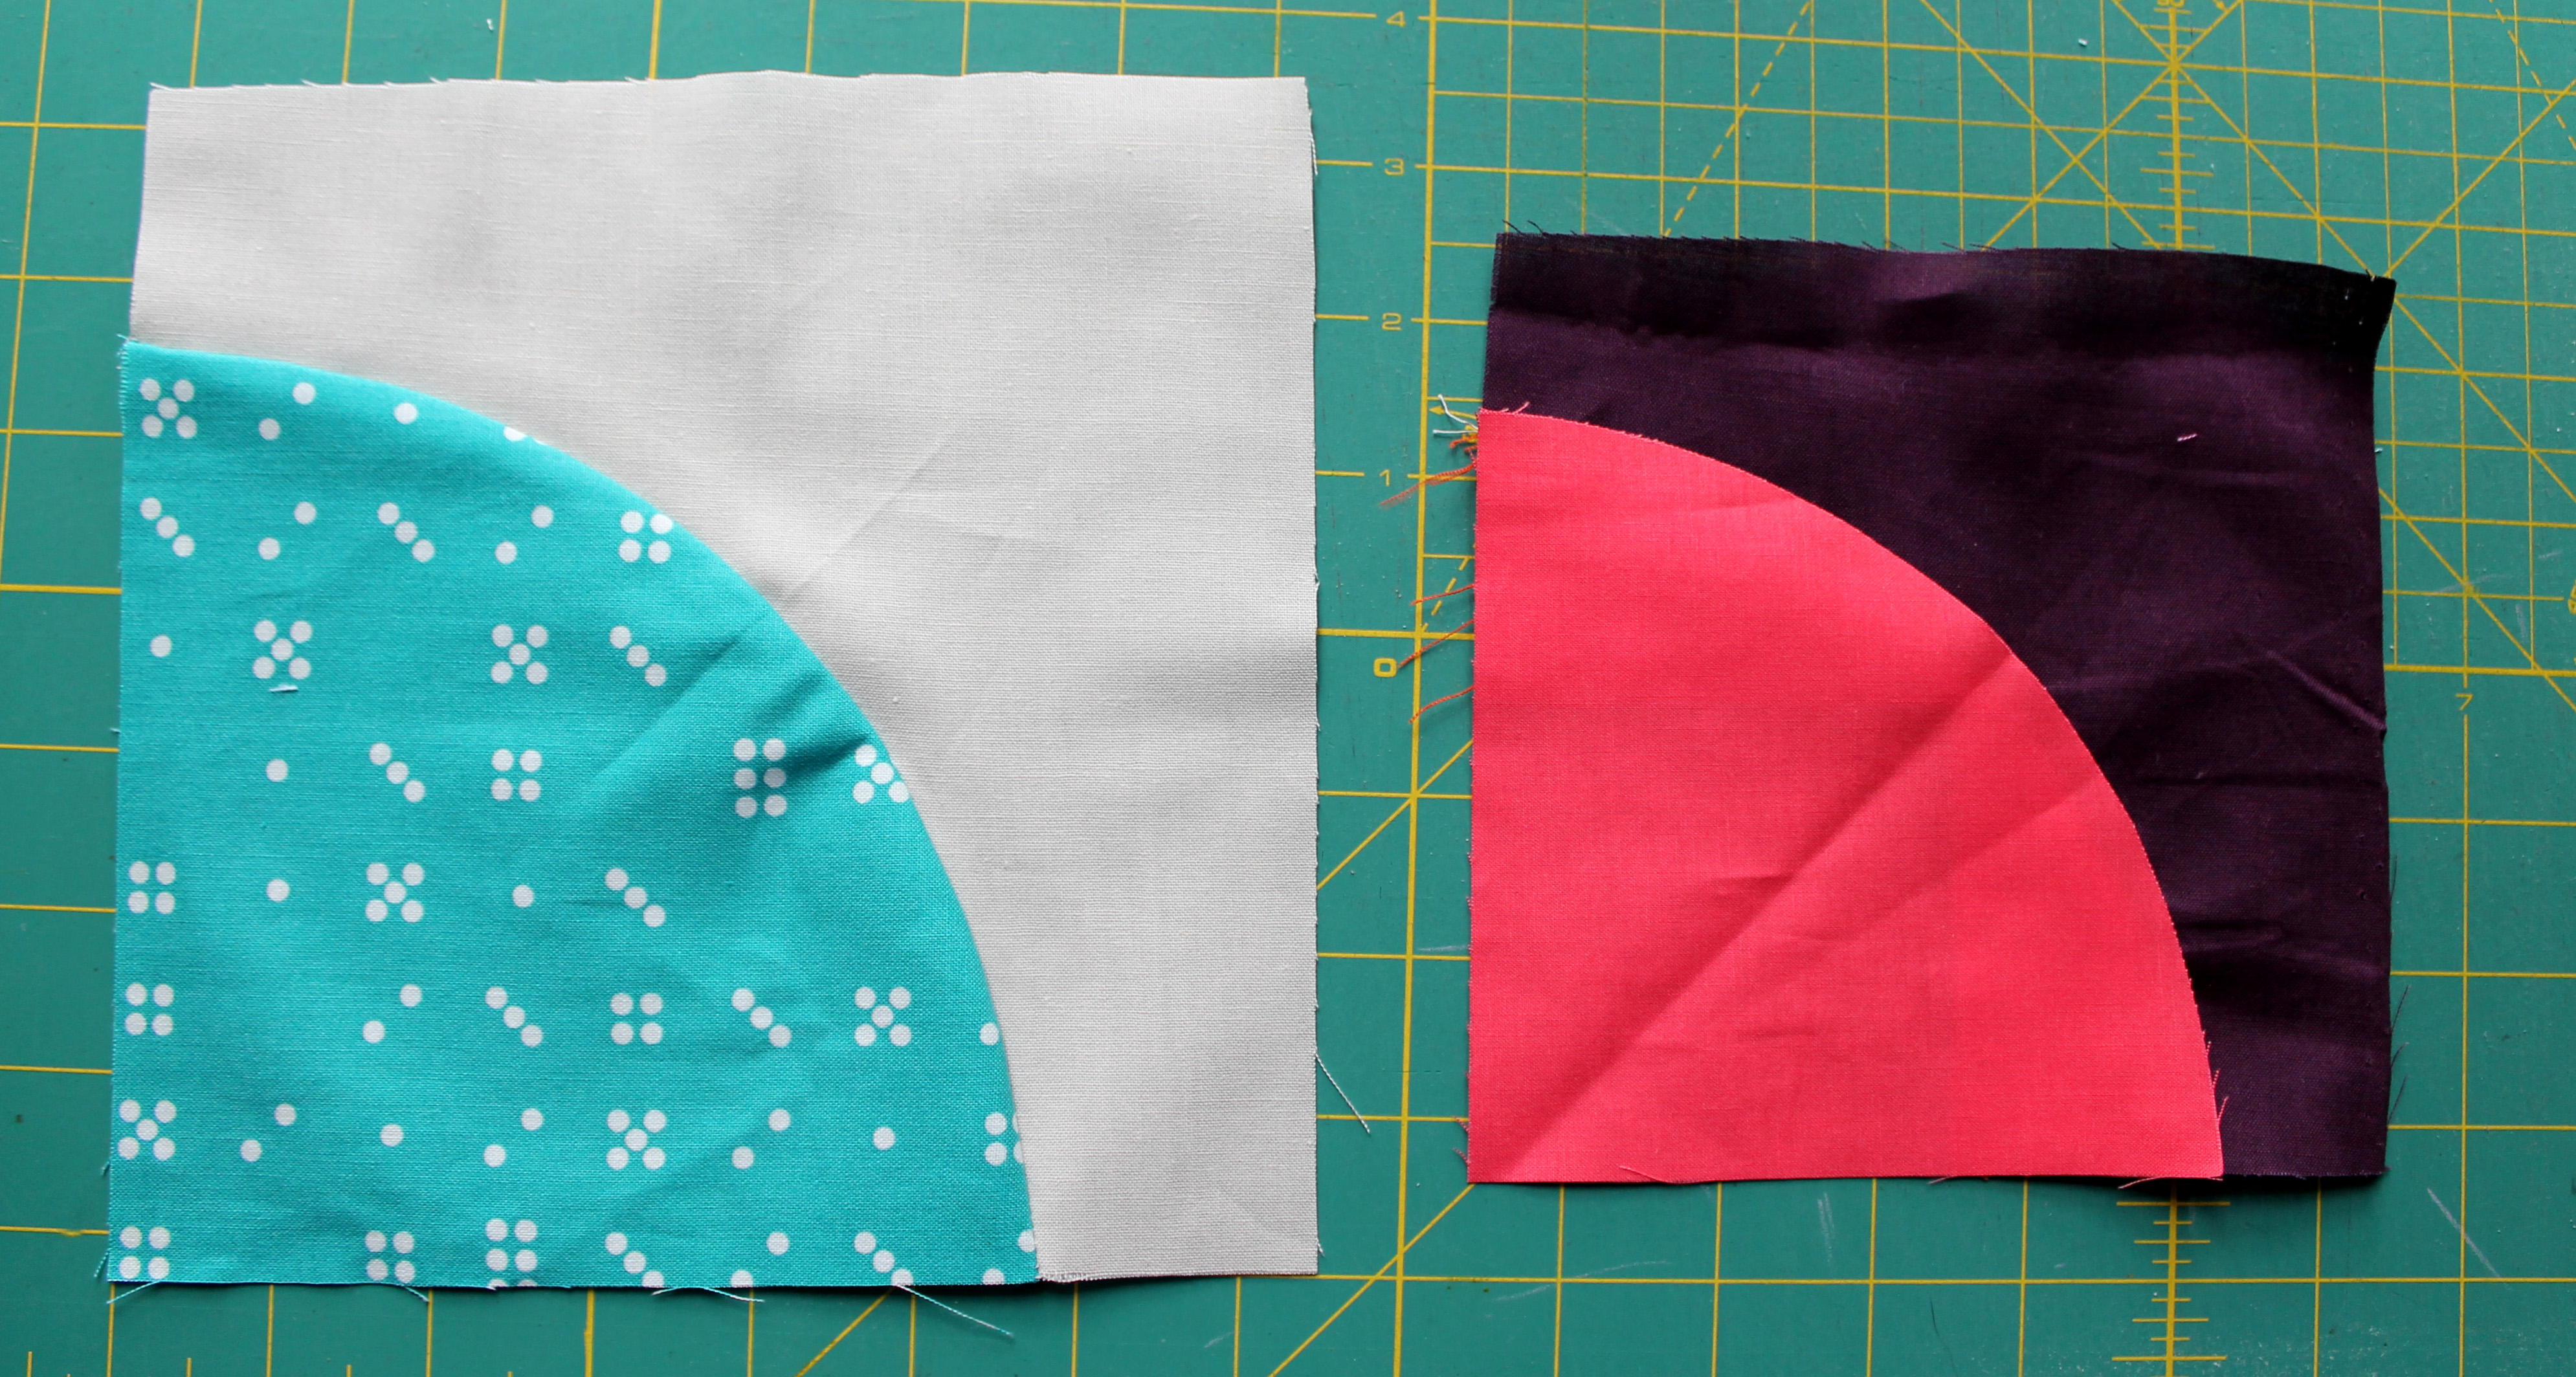
I started this quilt a little while ago, making the blocks in between some complex paper piecing projects.  It was so much fun to do something so free from rules and constraints.  You can read more about the process on my original post

quilt detail 2
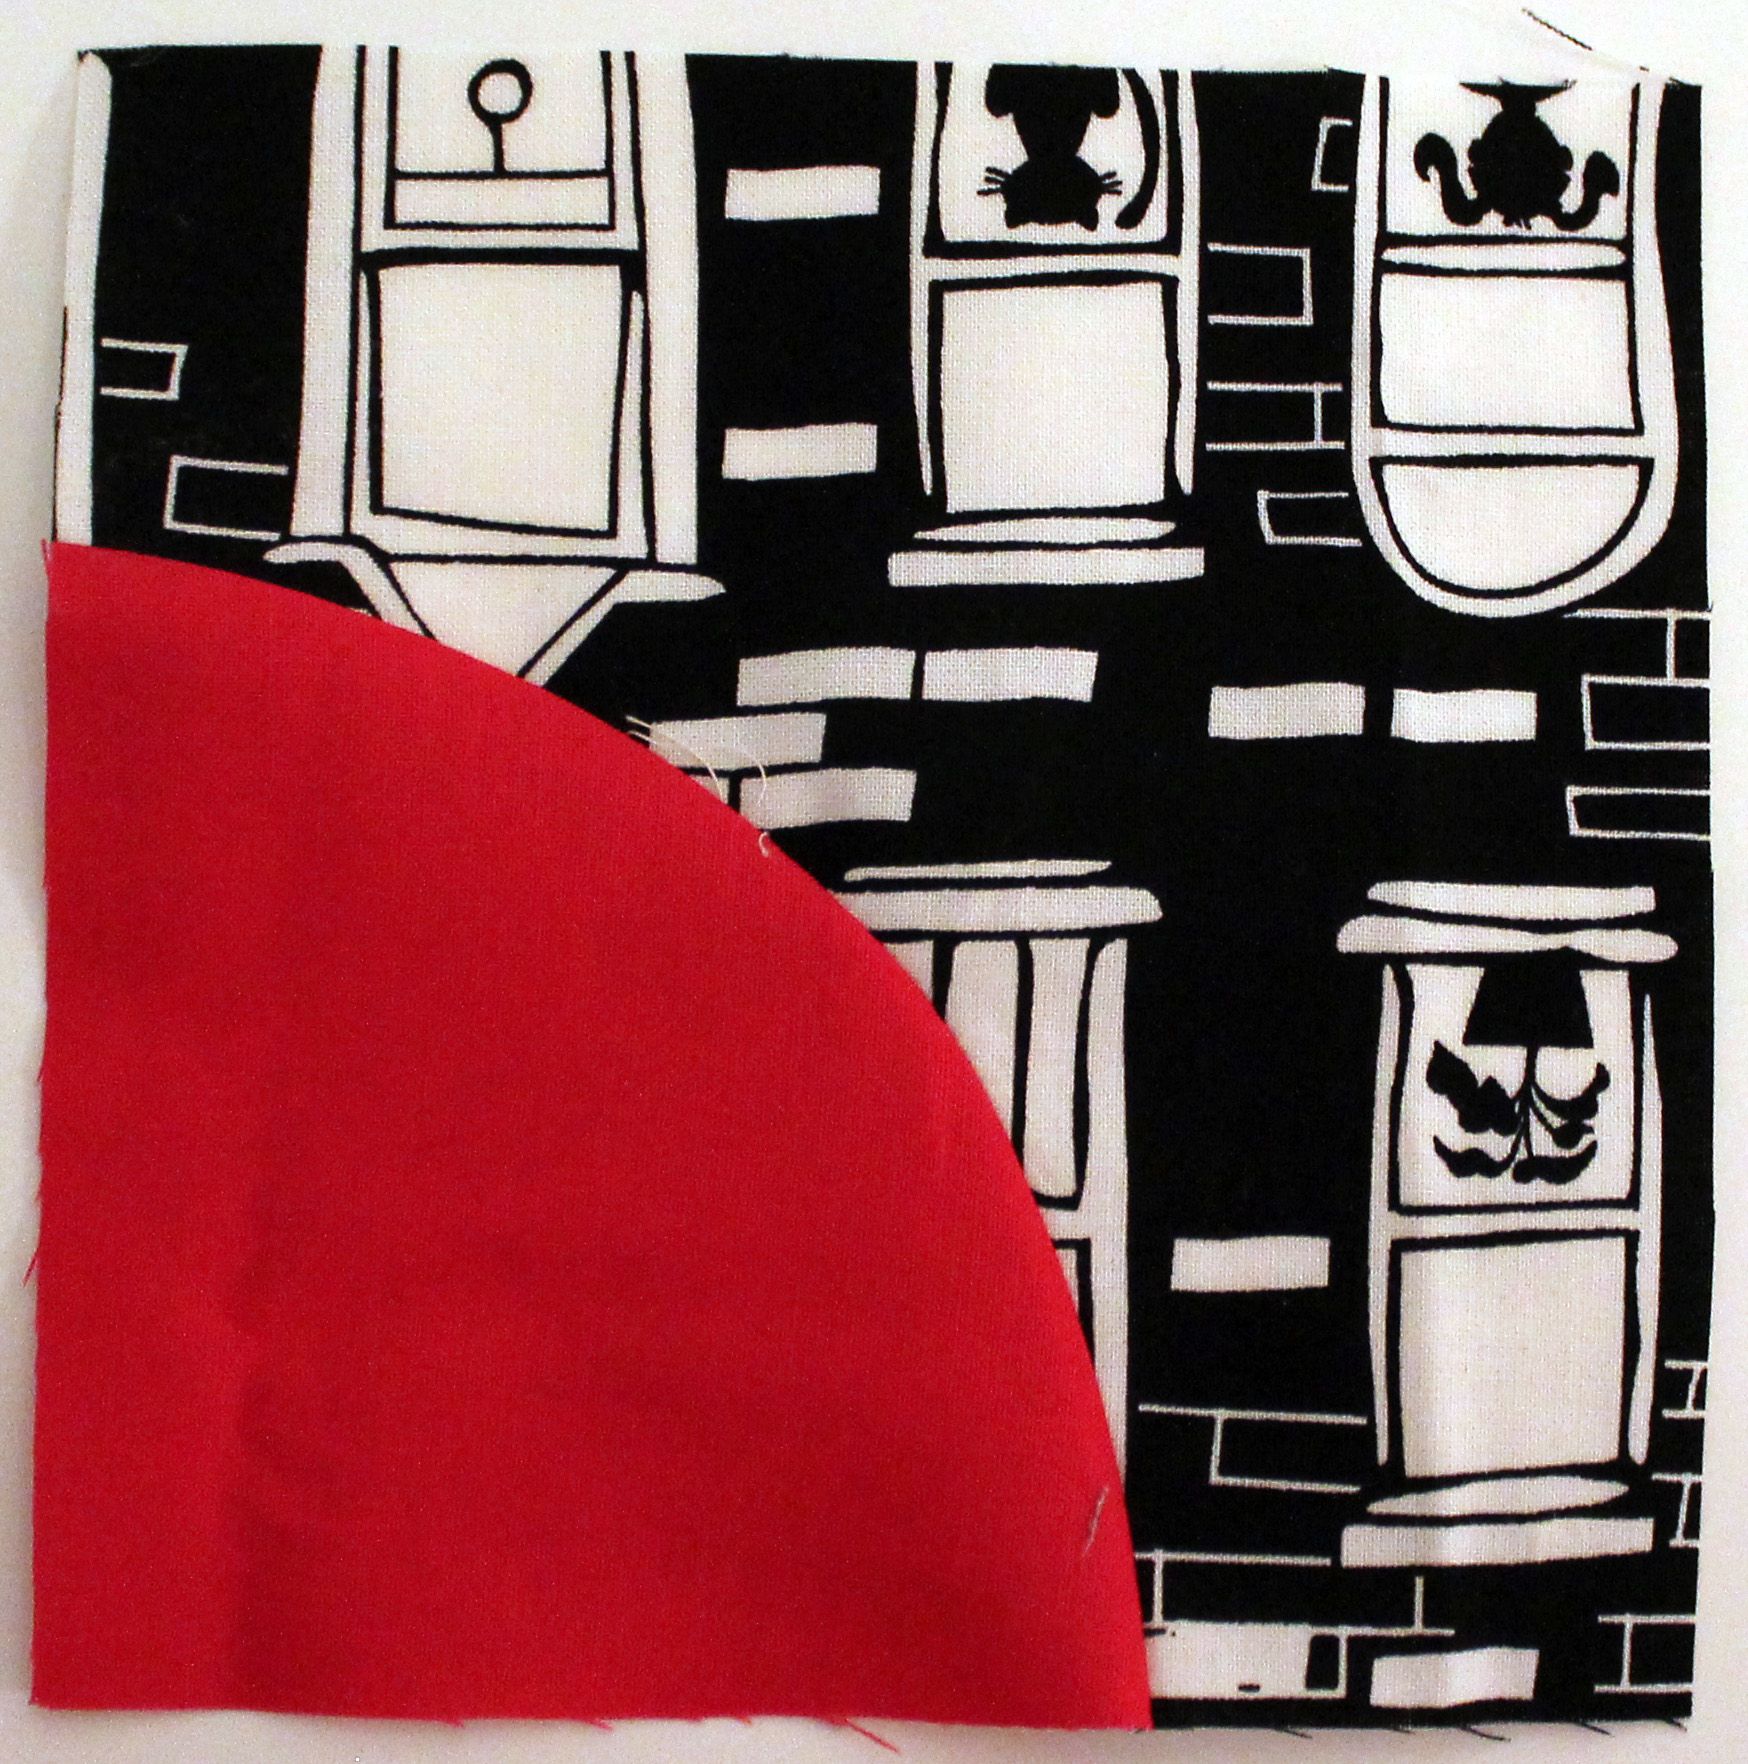
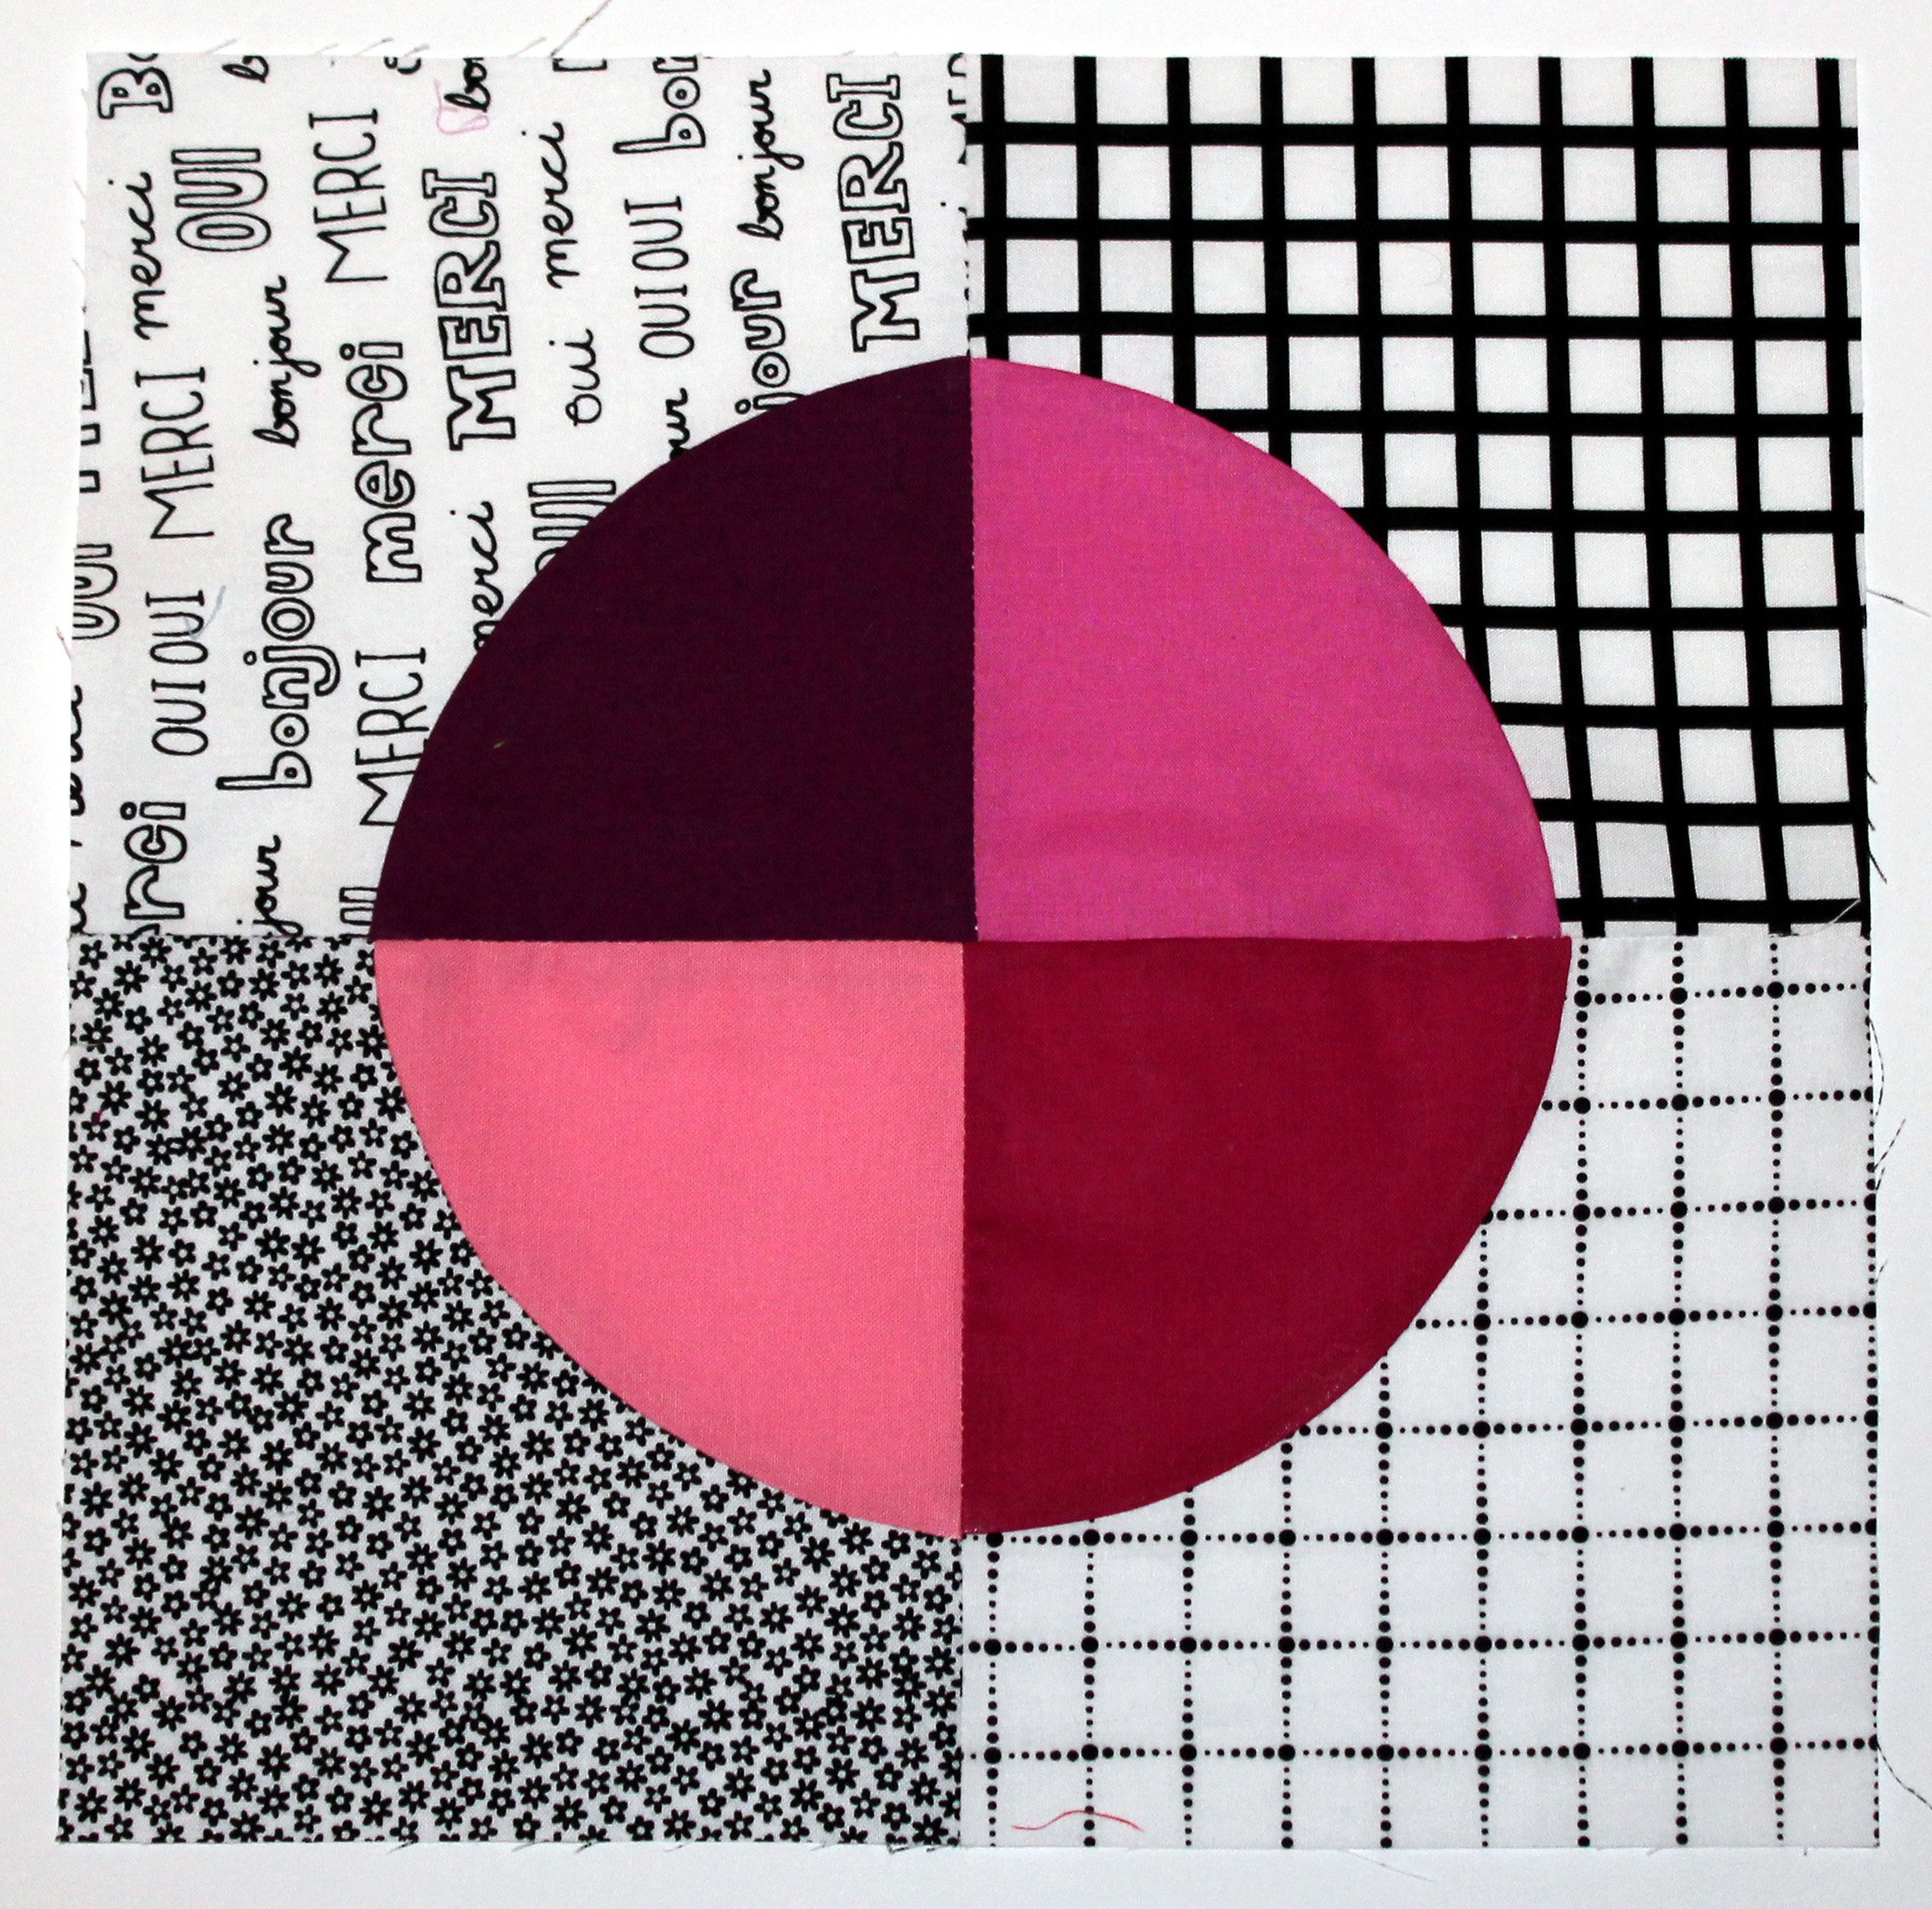
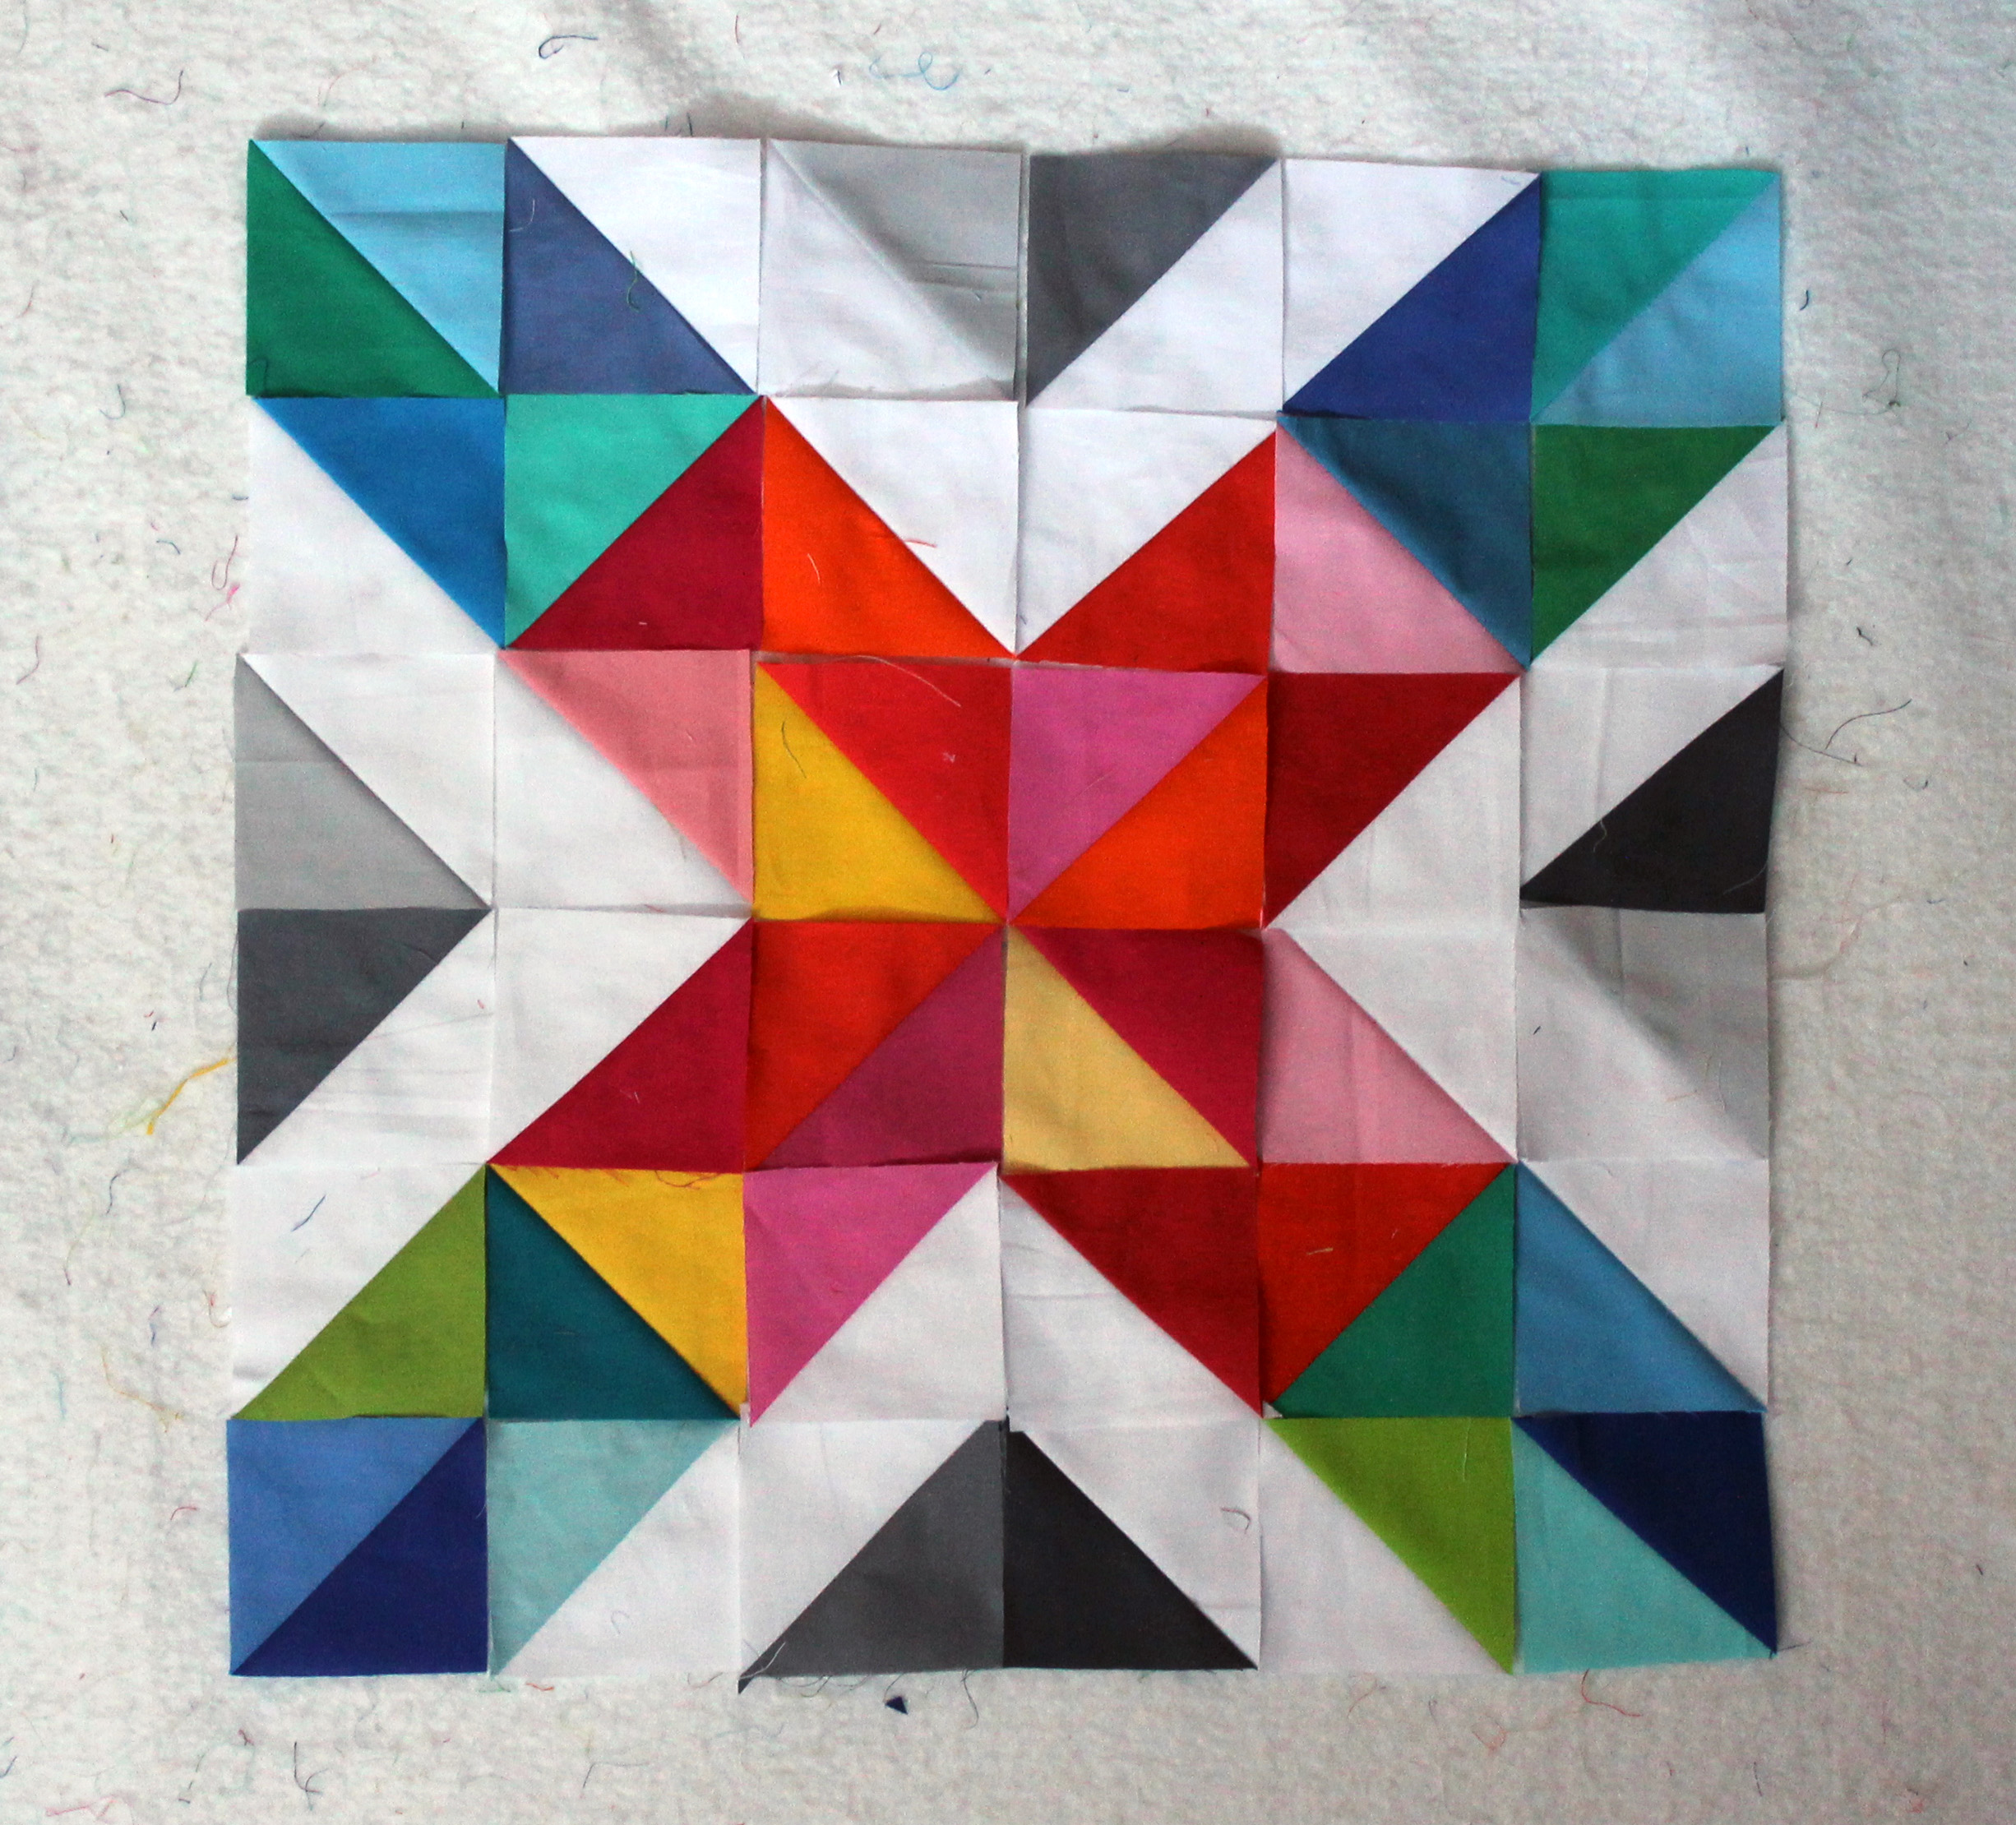
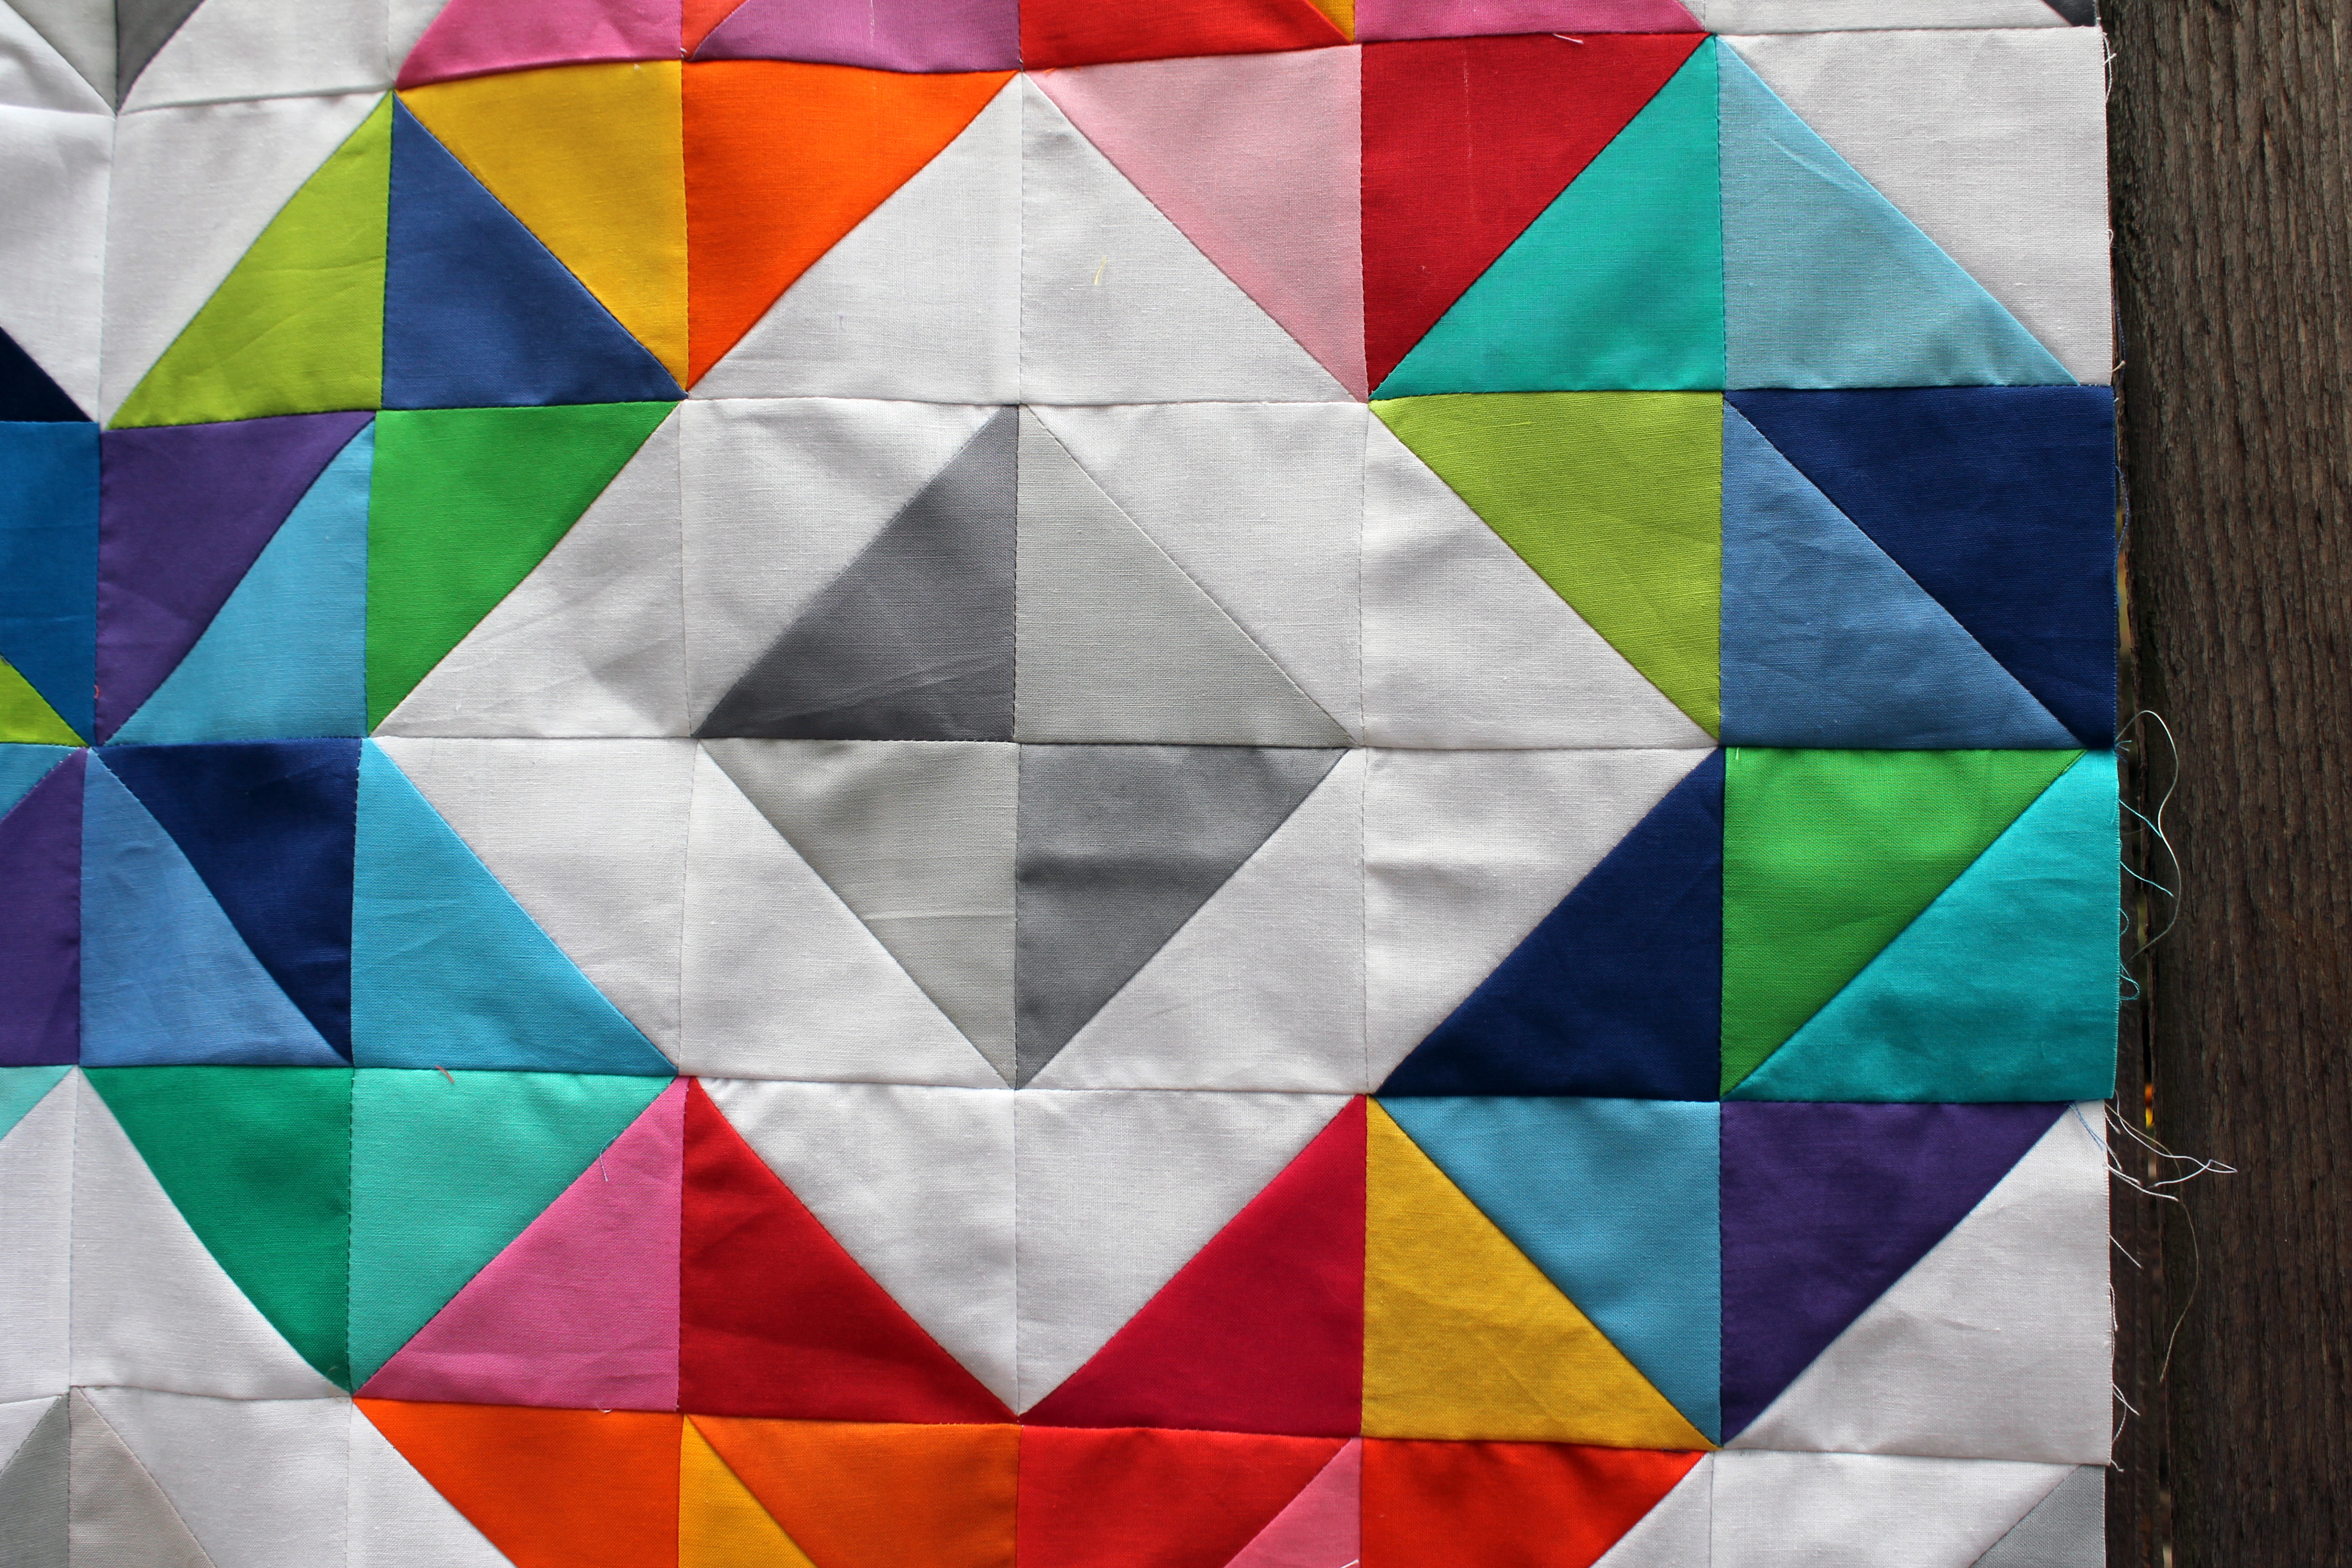
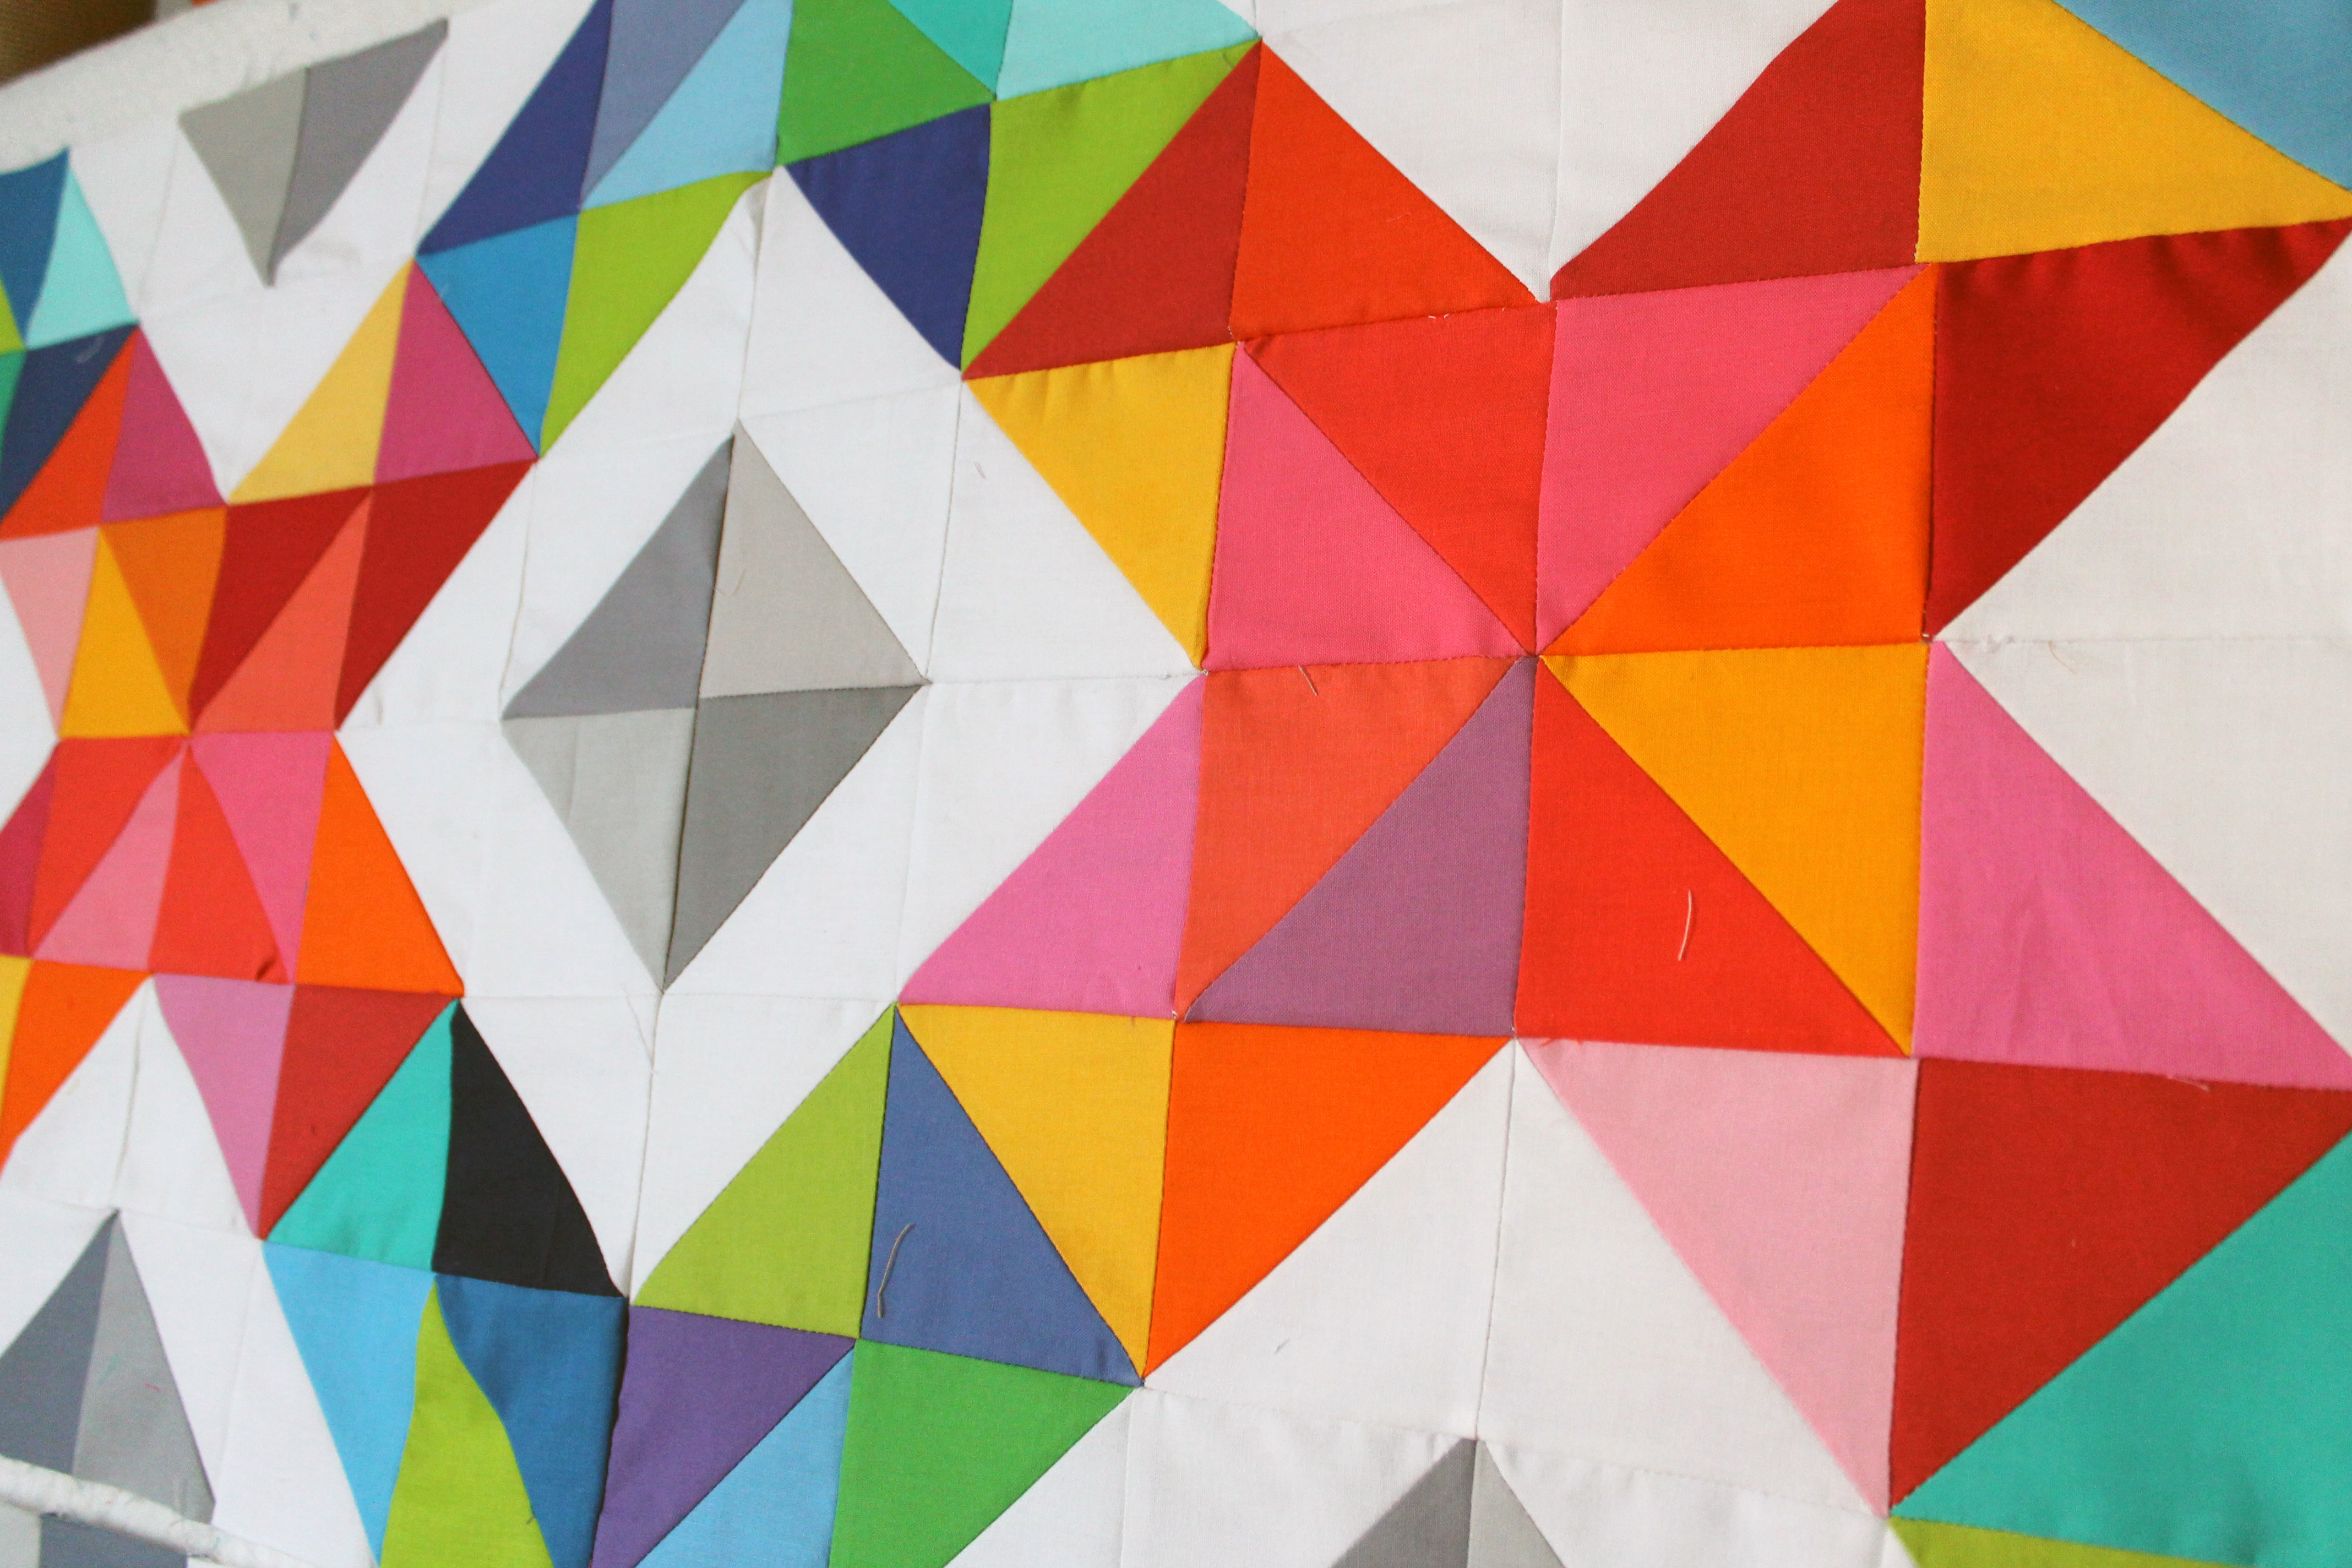
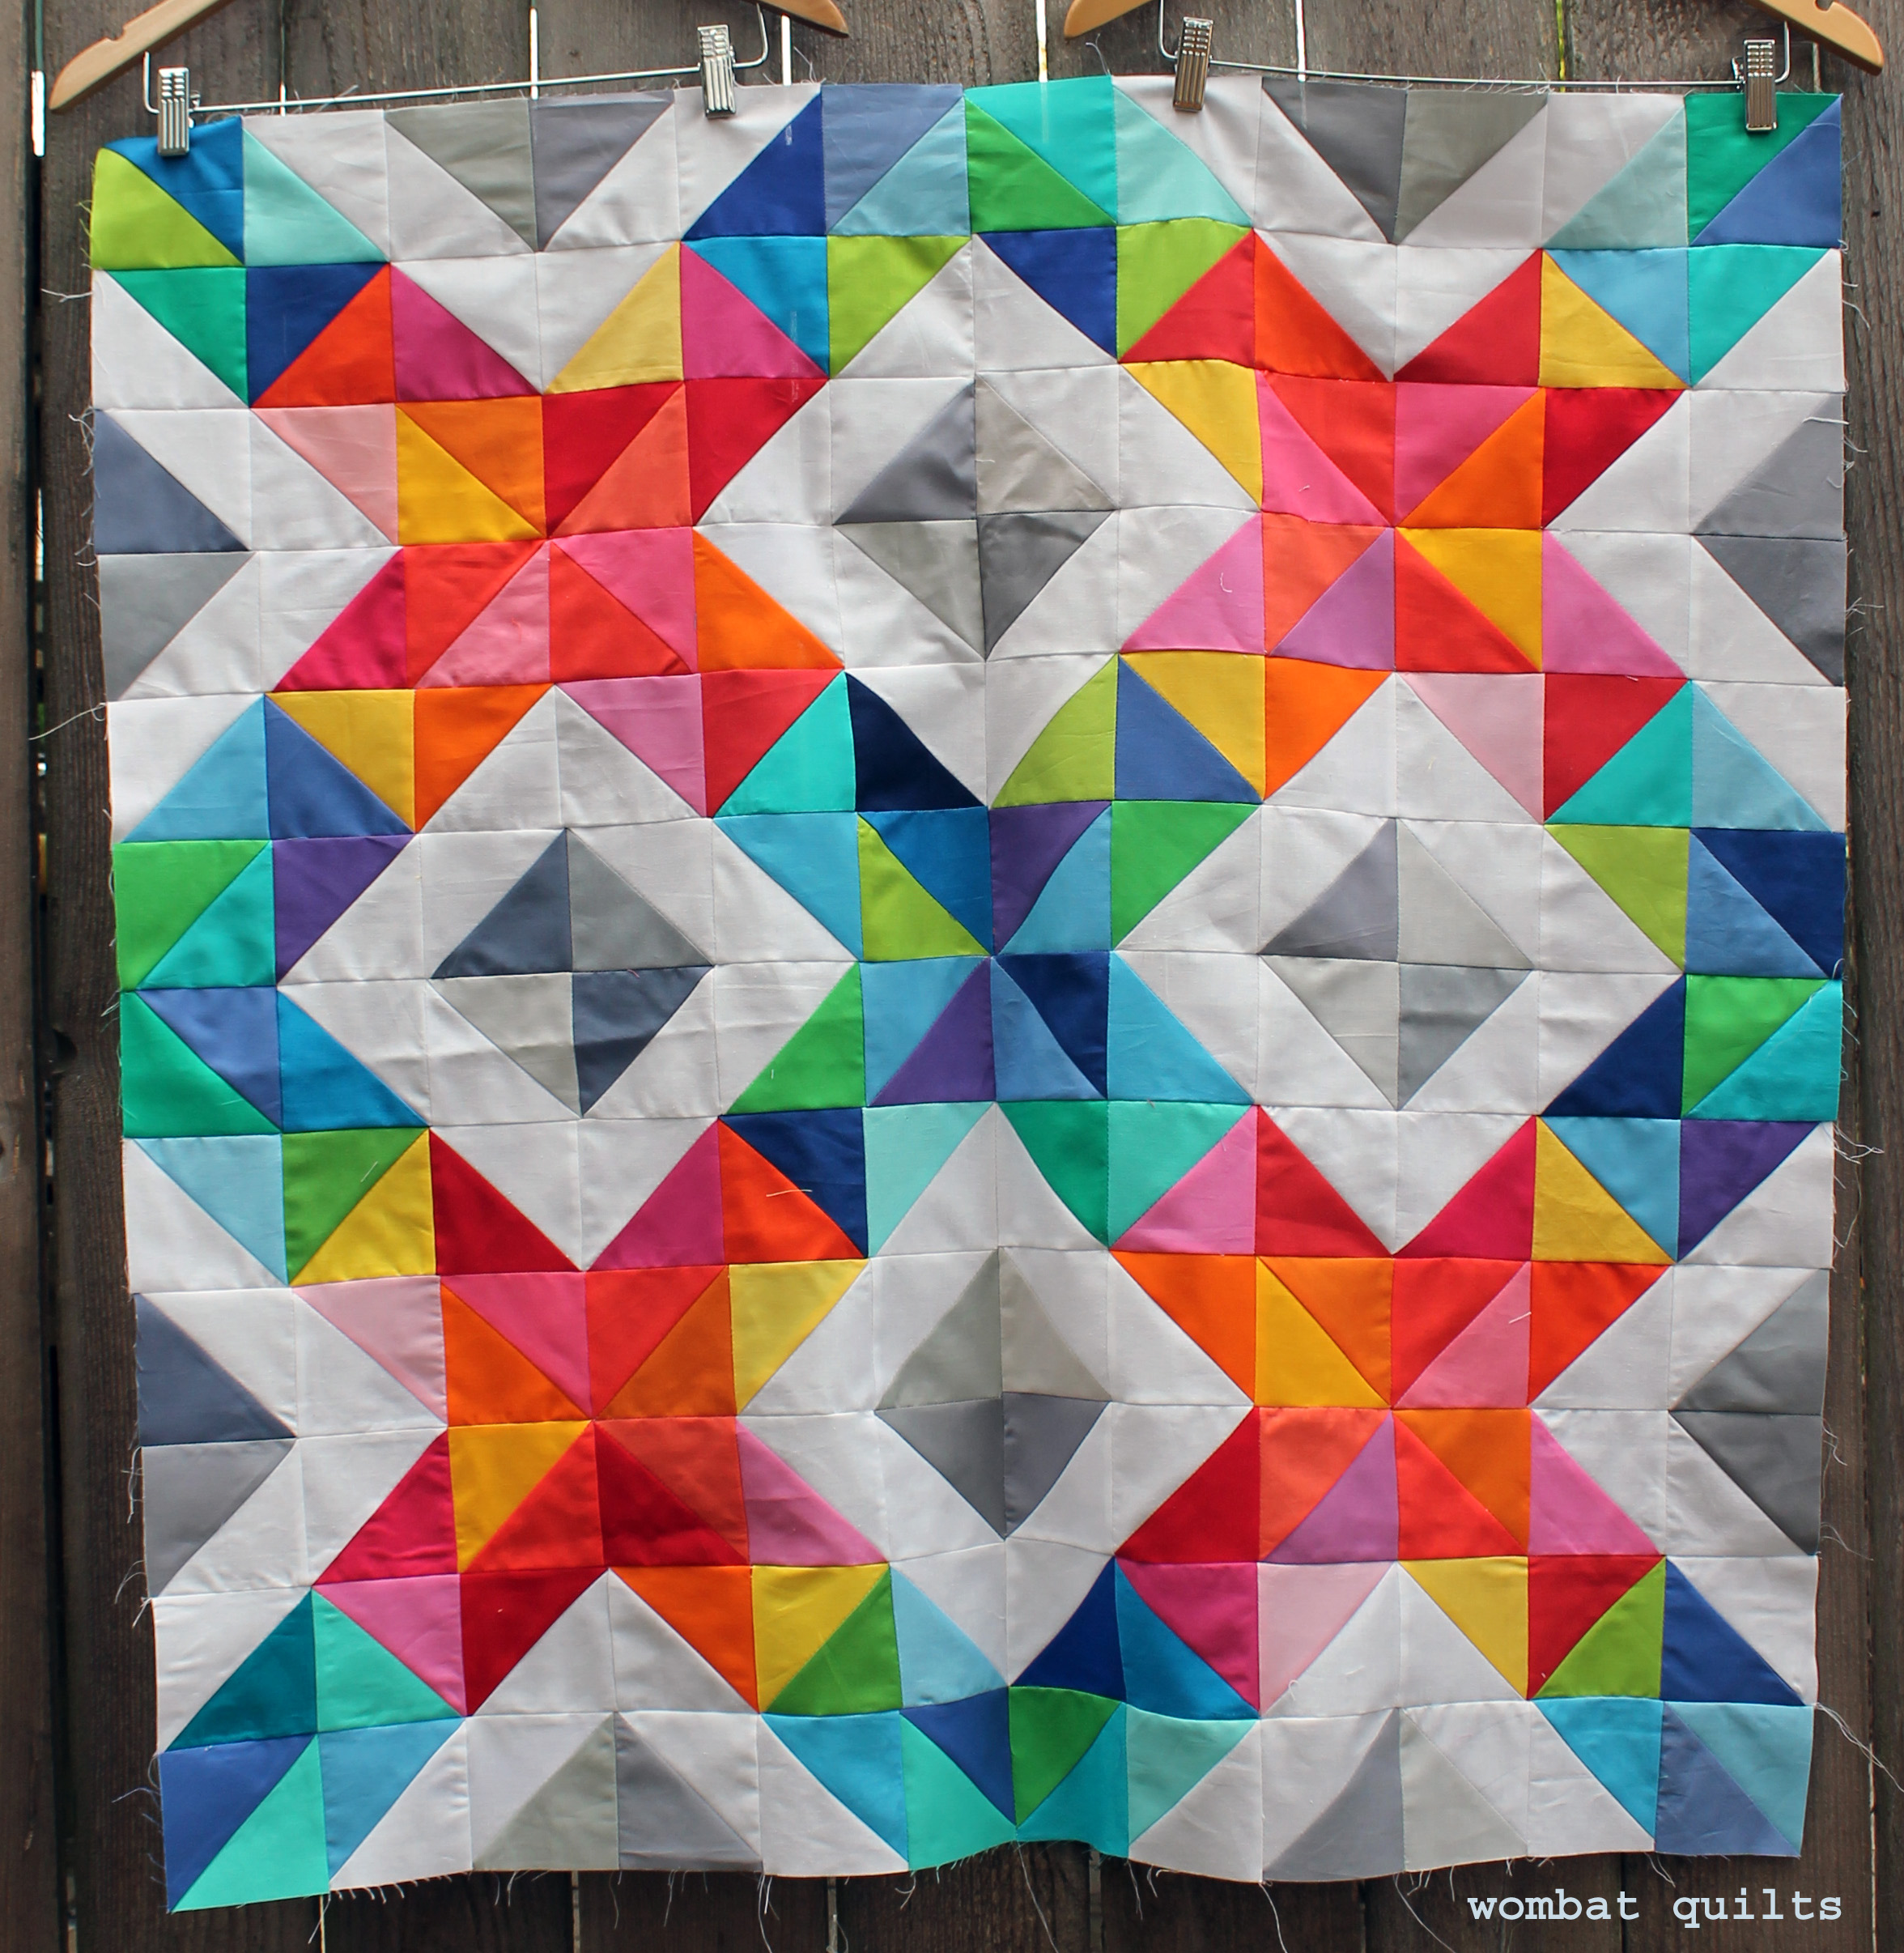
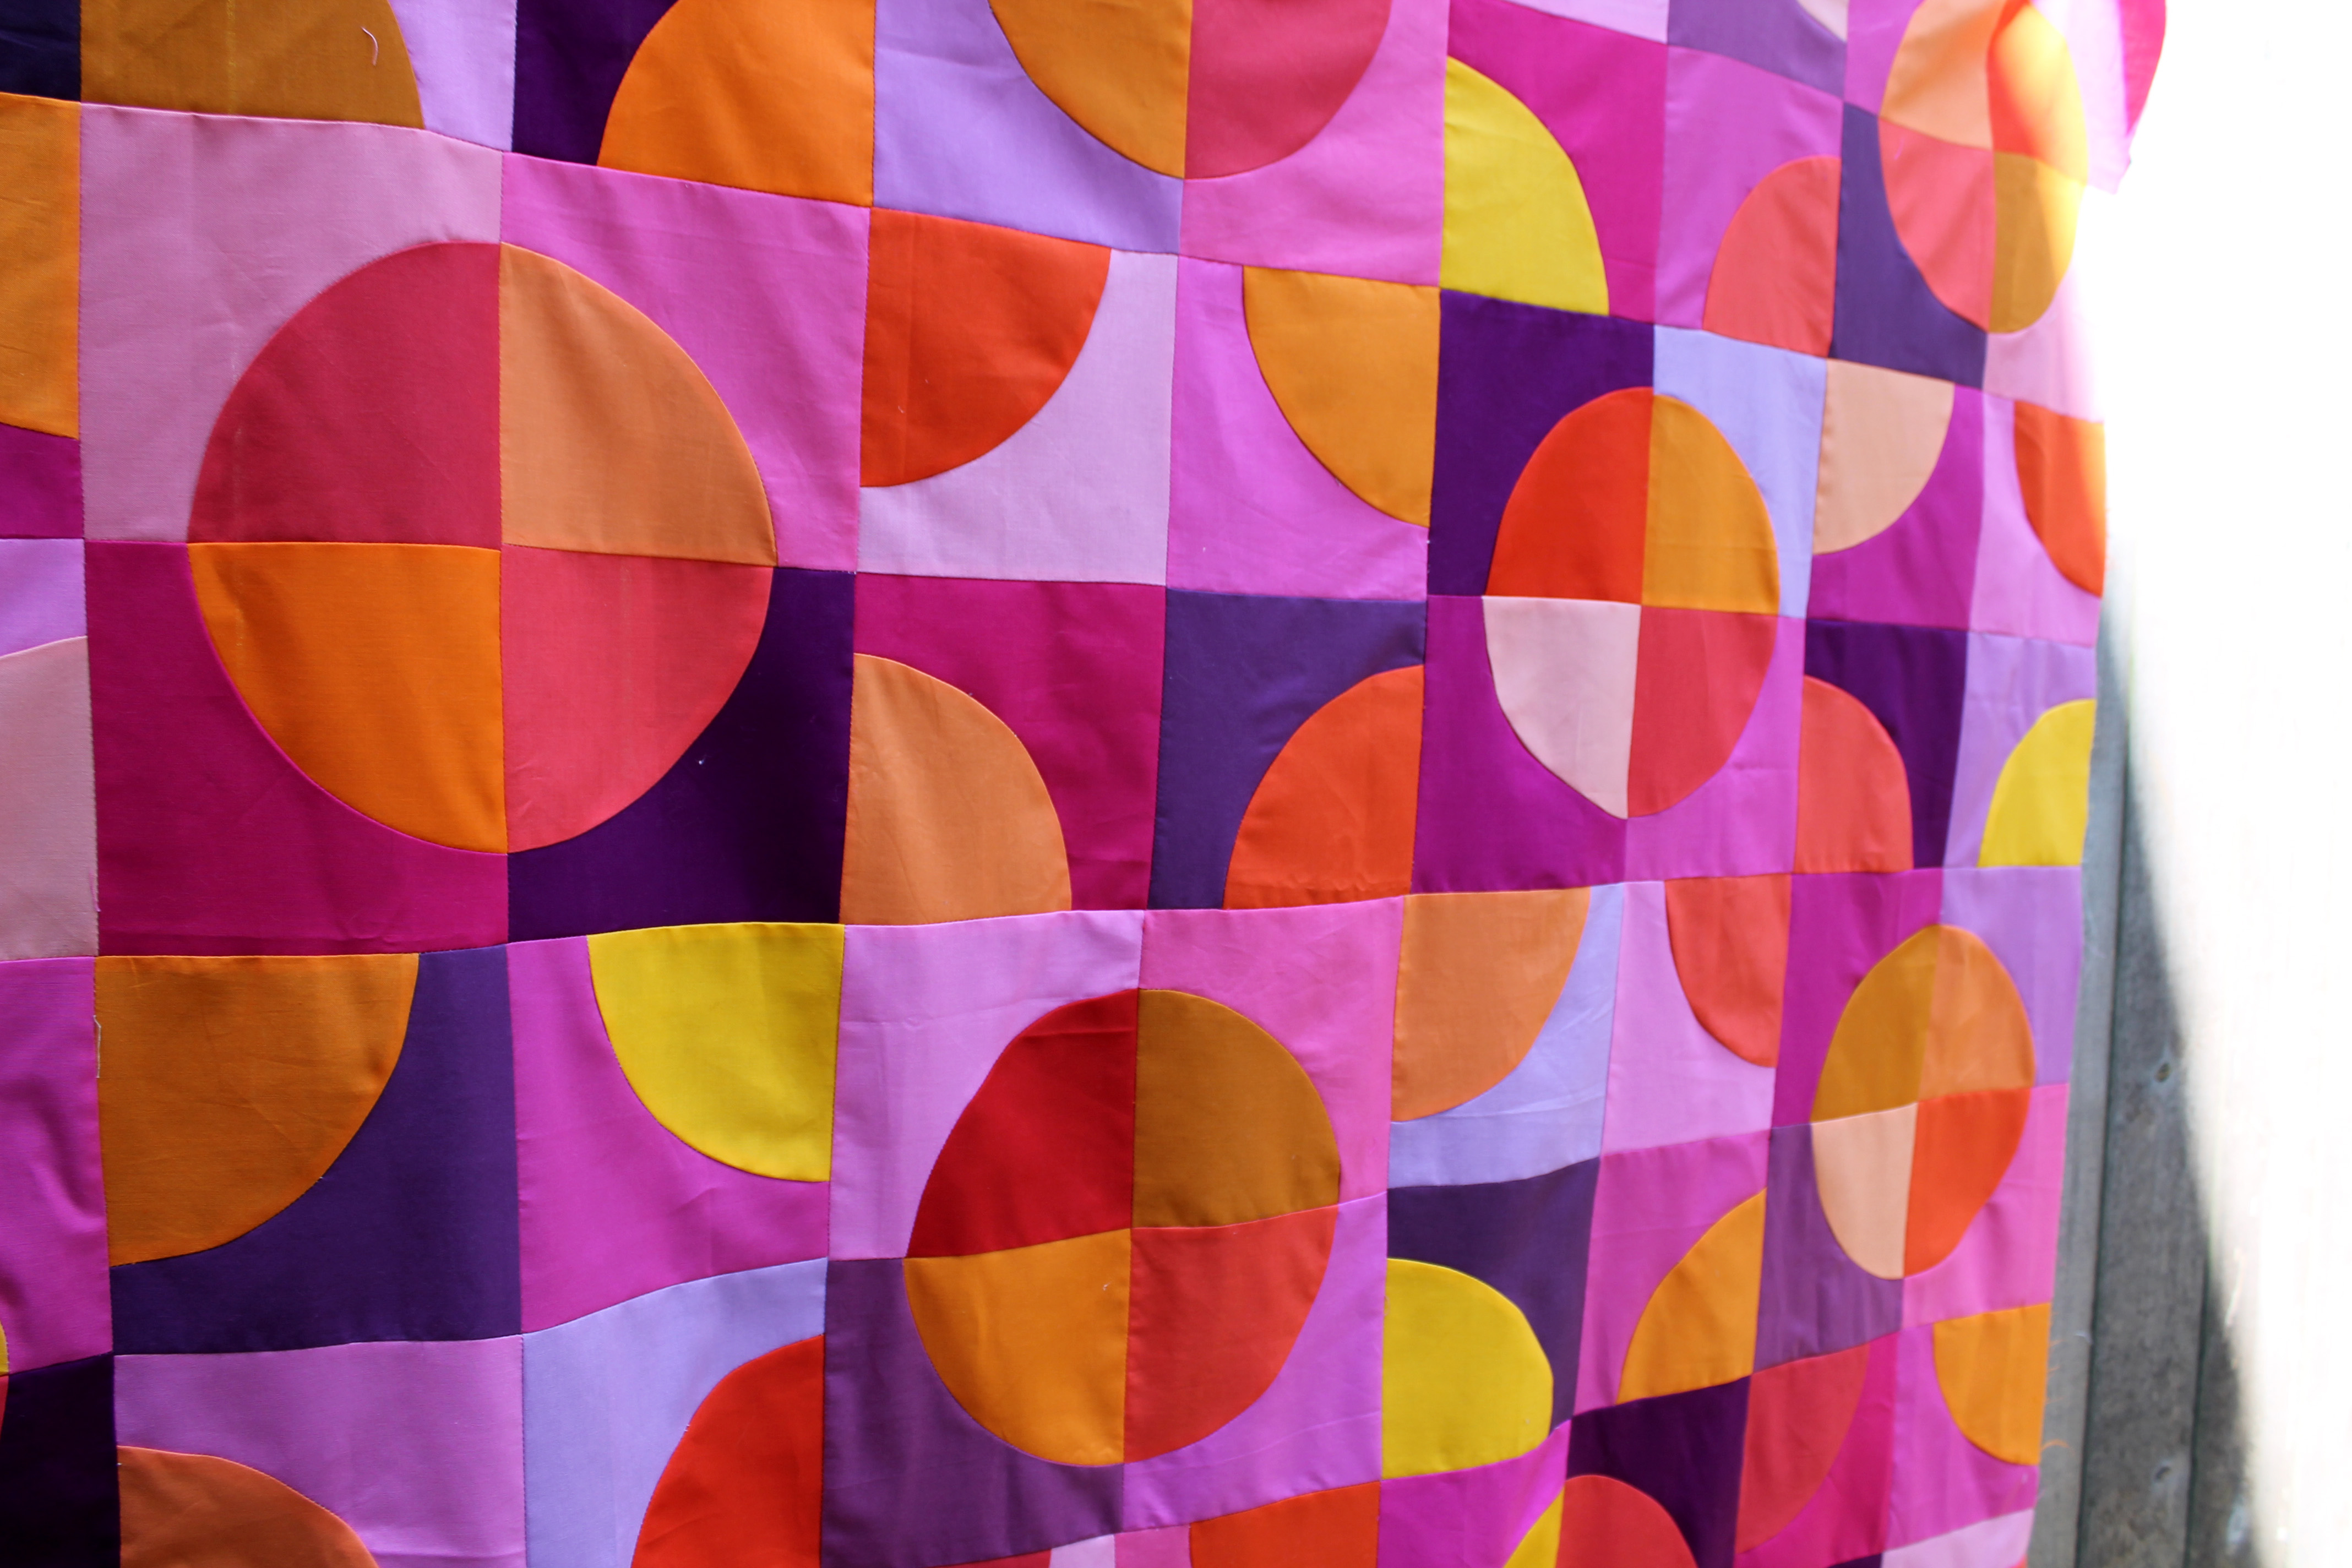
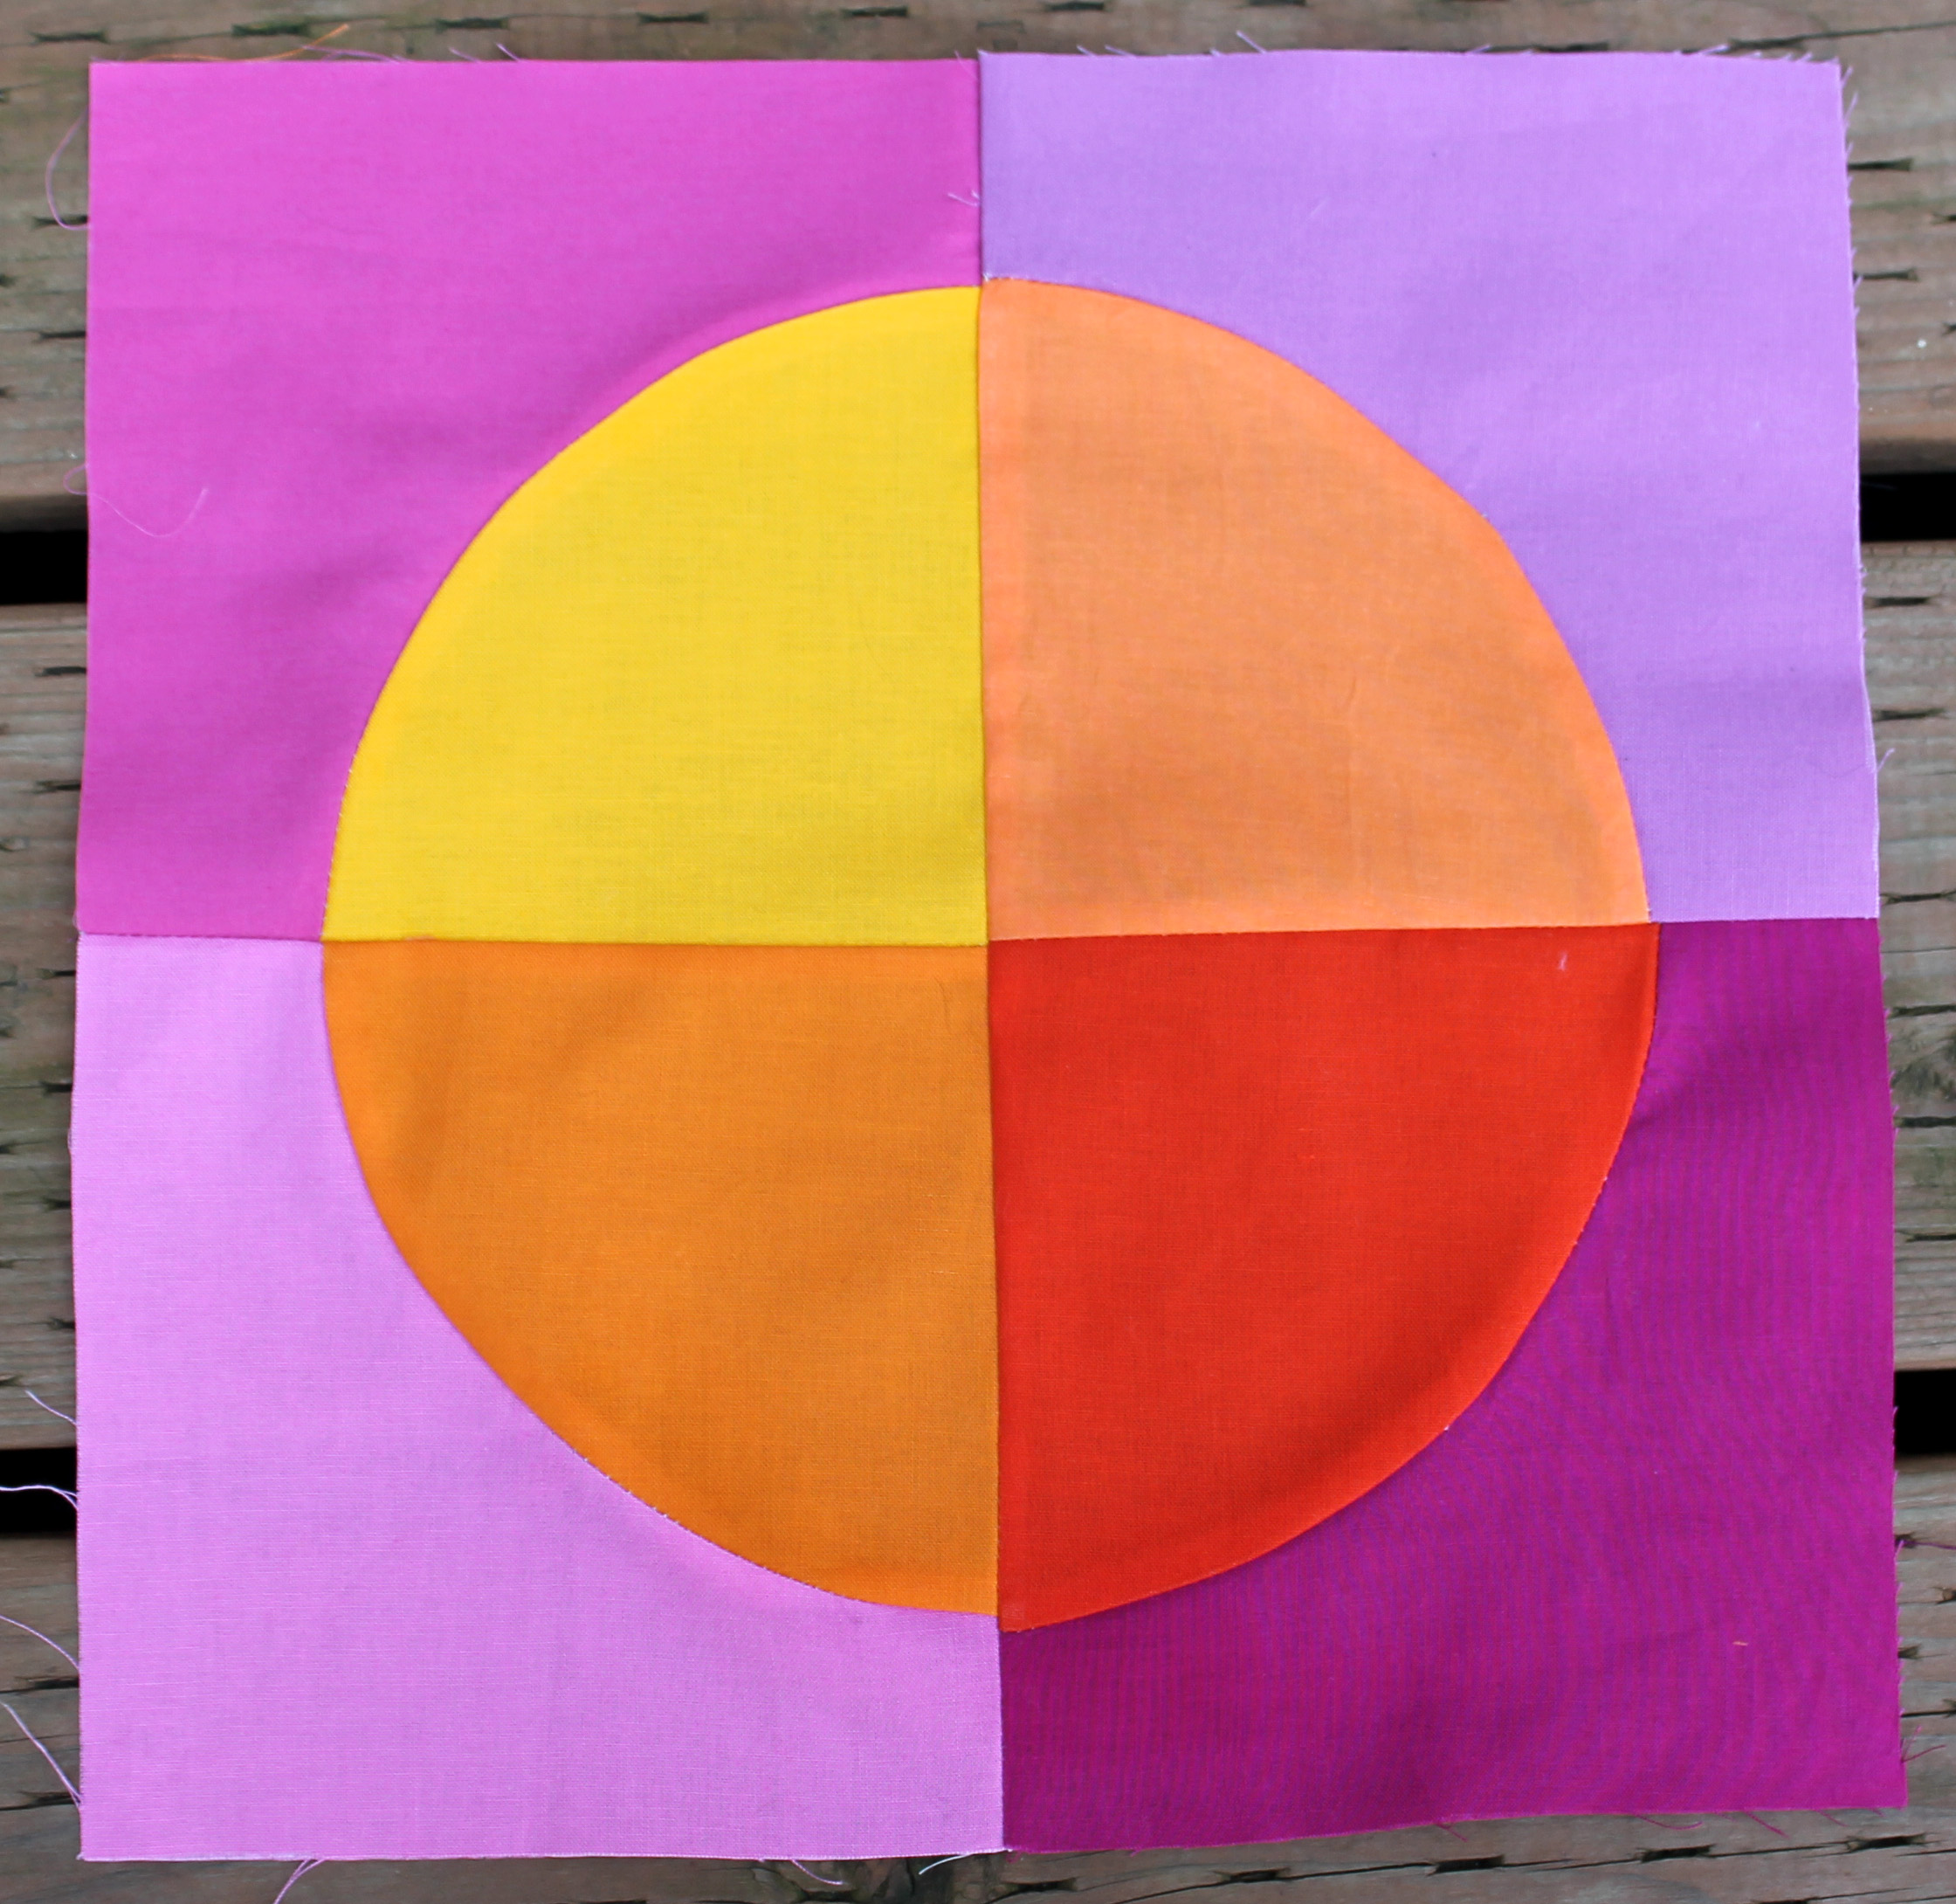
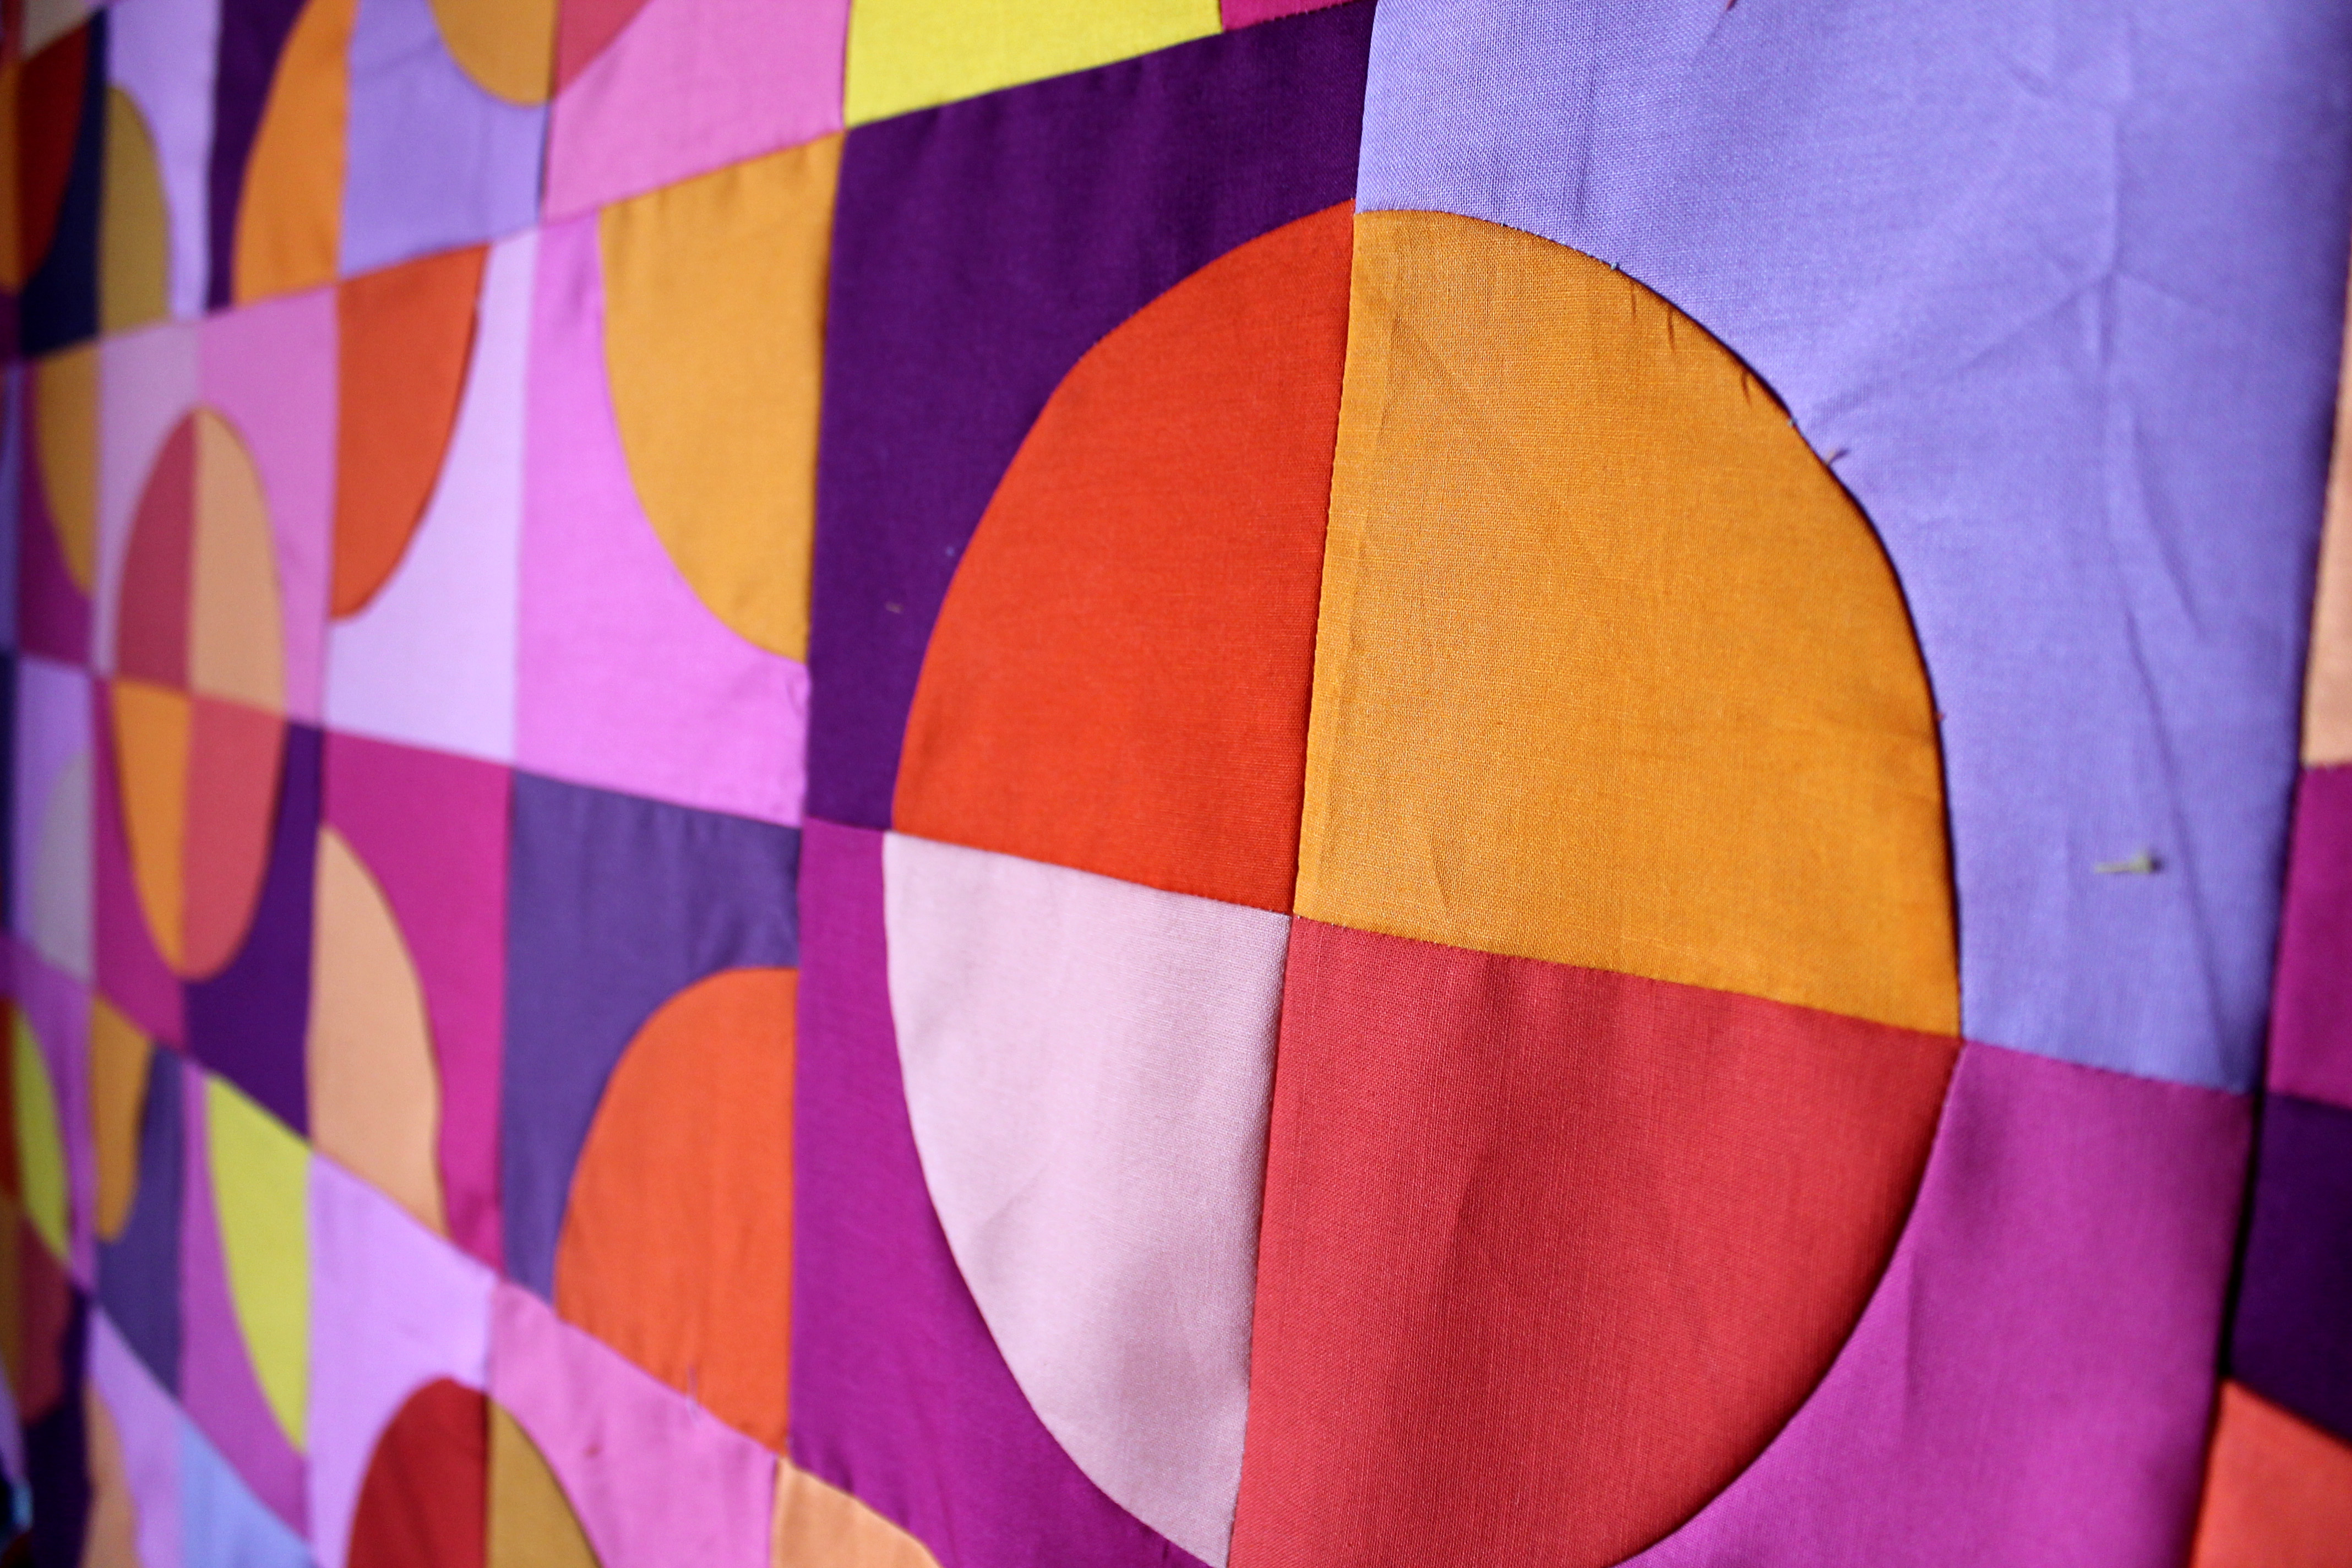
I just used a rainbow of solid fabric scraps and played with colour.  I must admit I did not know what the end product would look like, I just enjoyed the process of making the blocks.

quilt detail 3
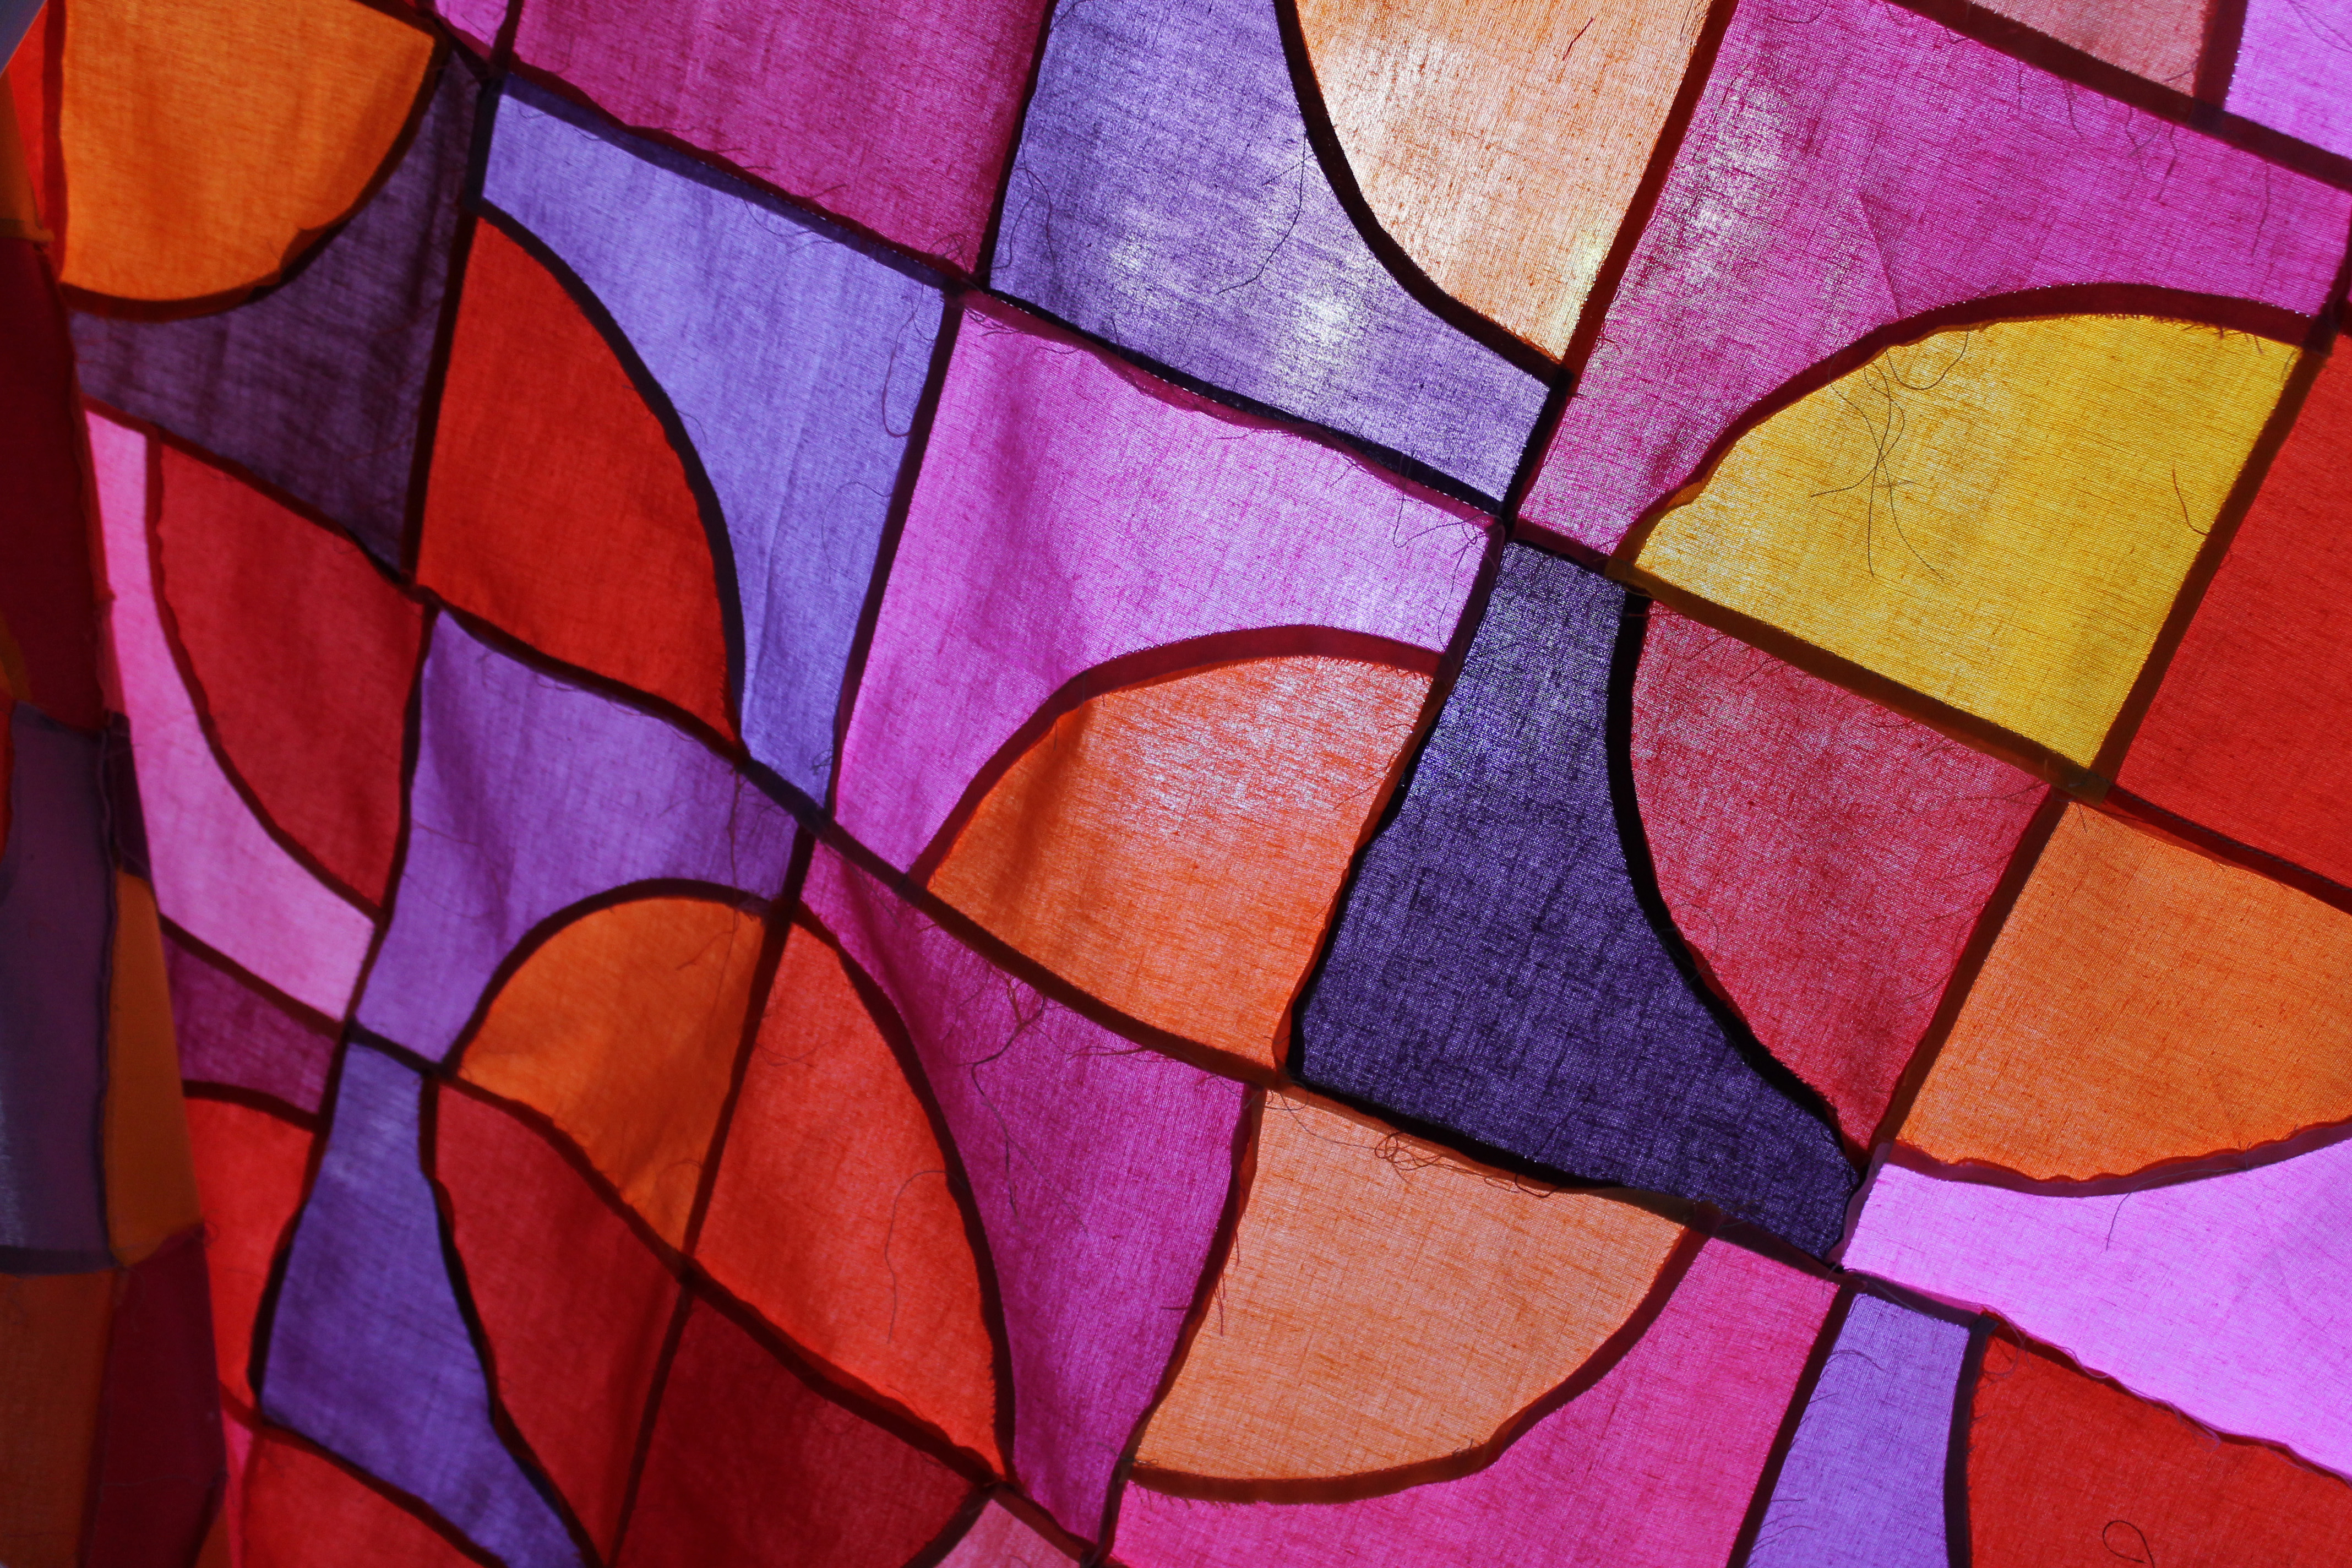
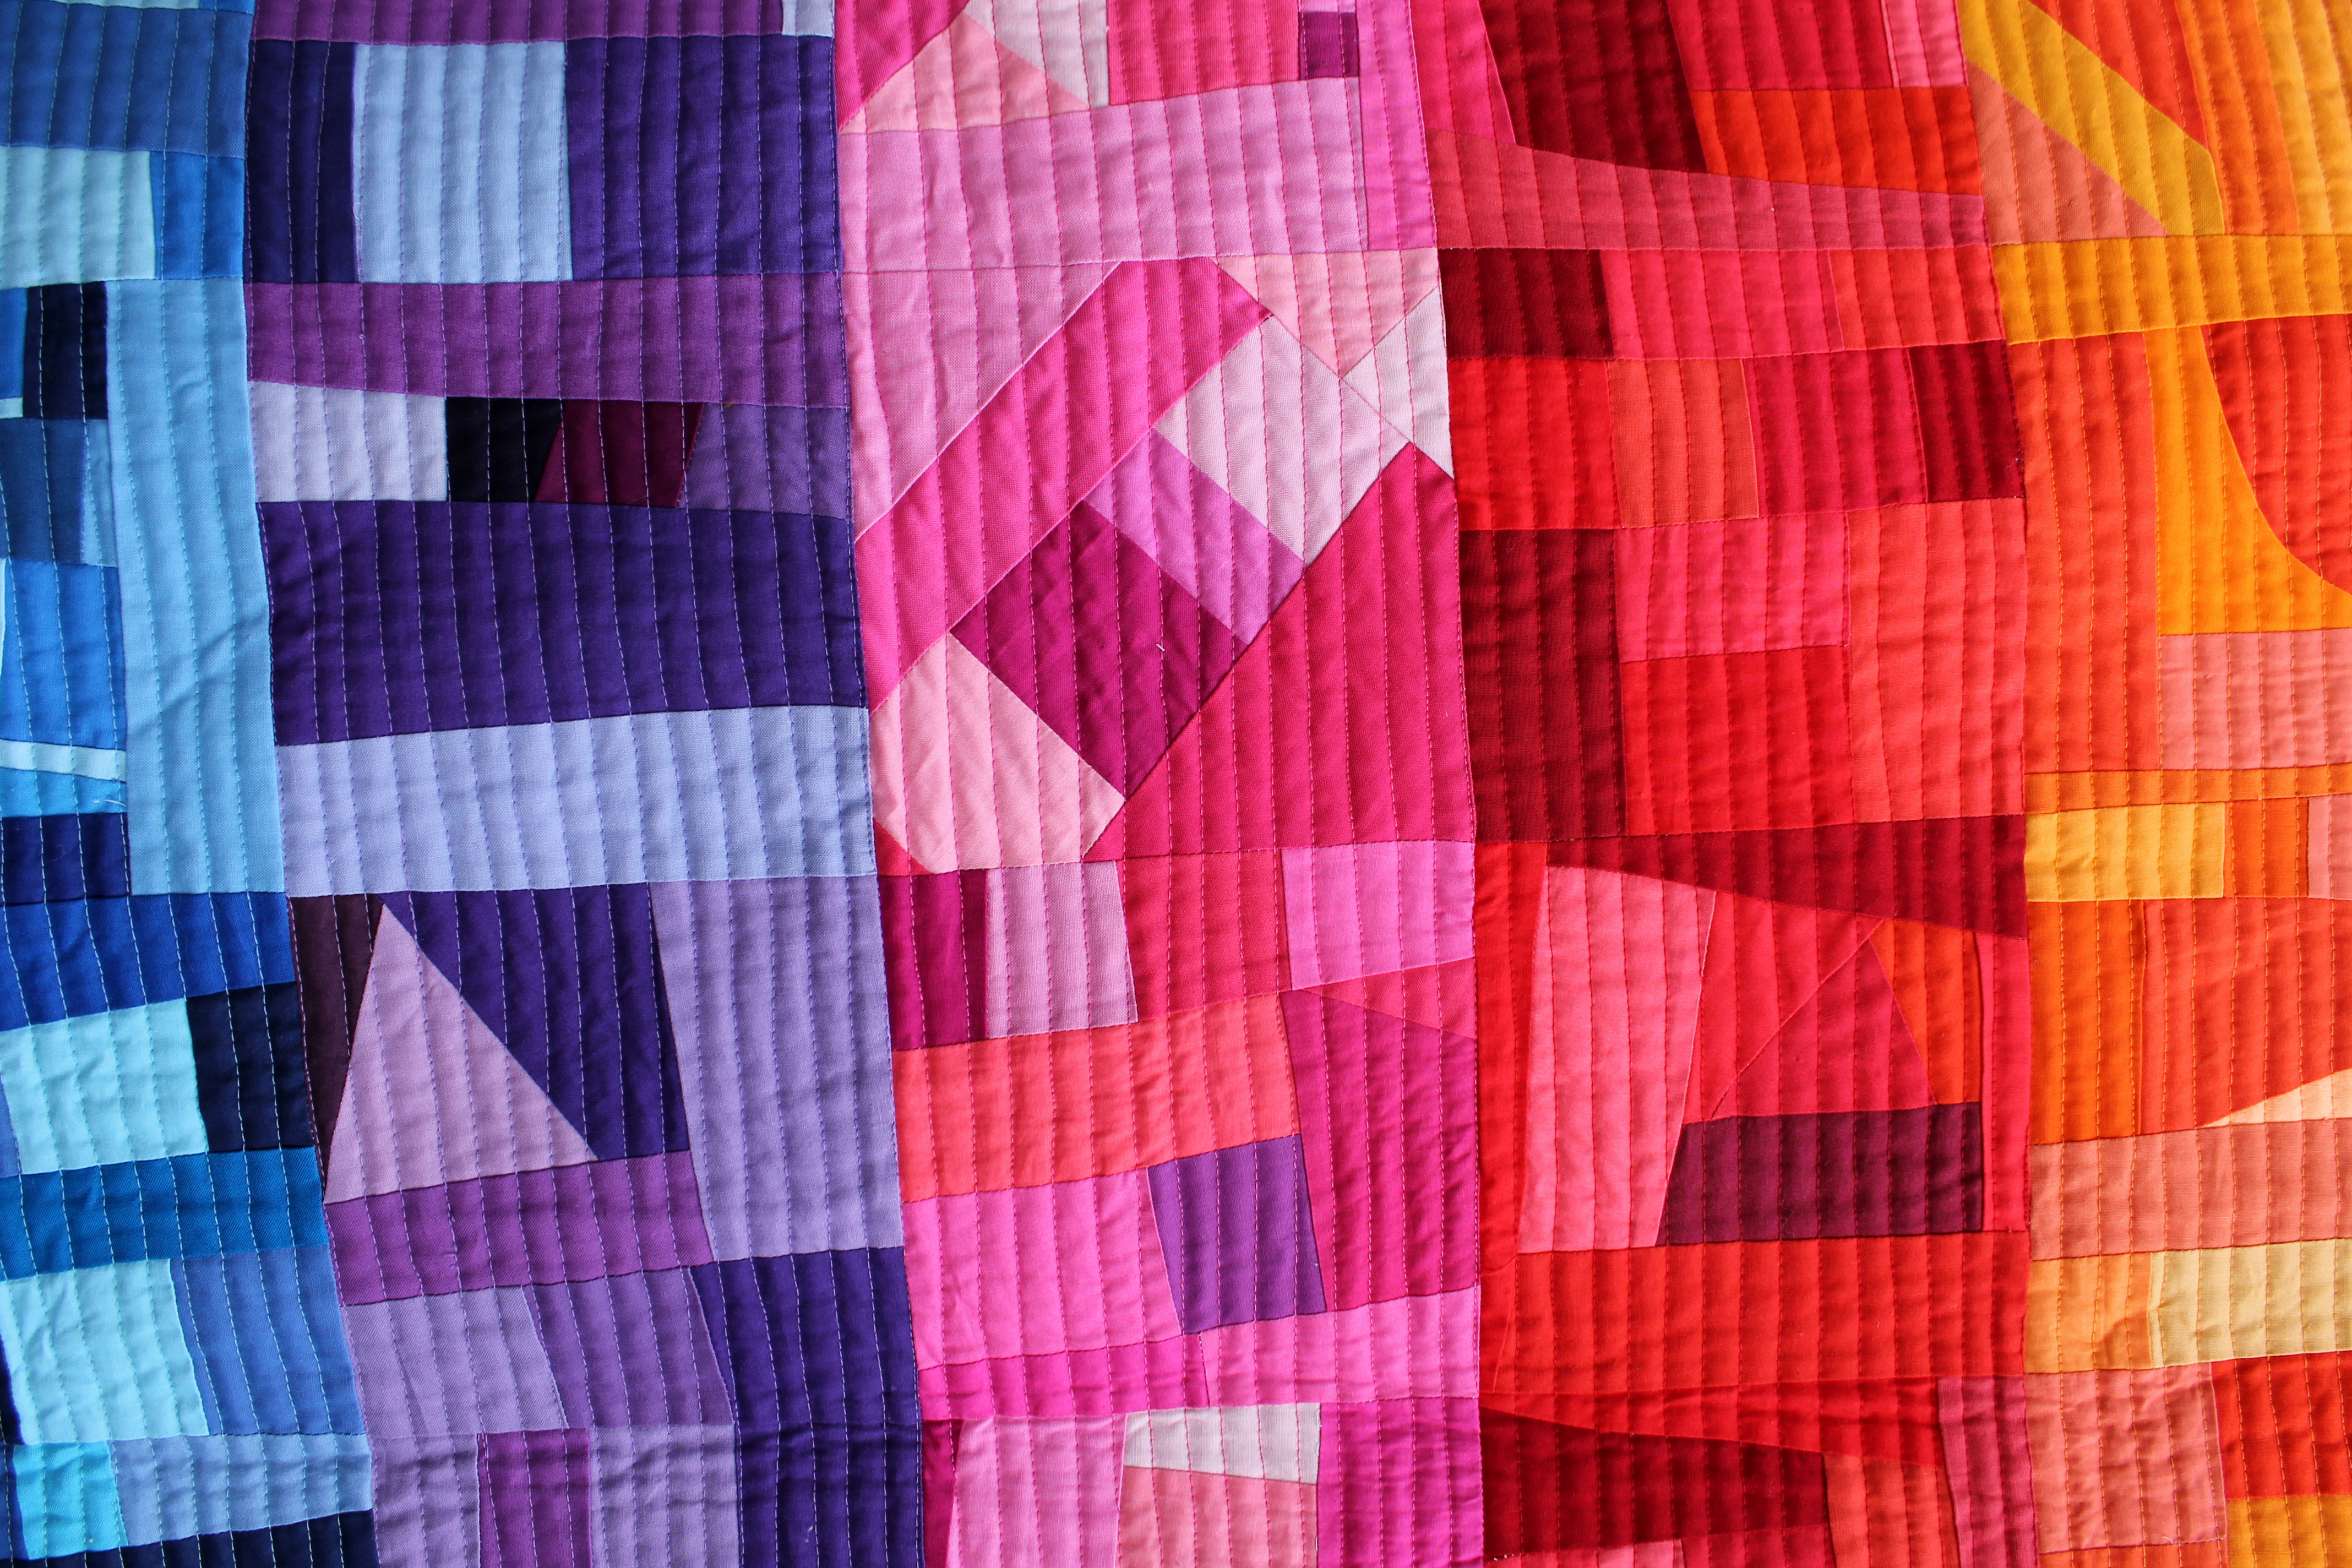
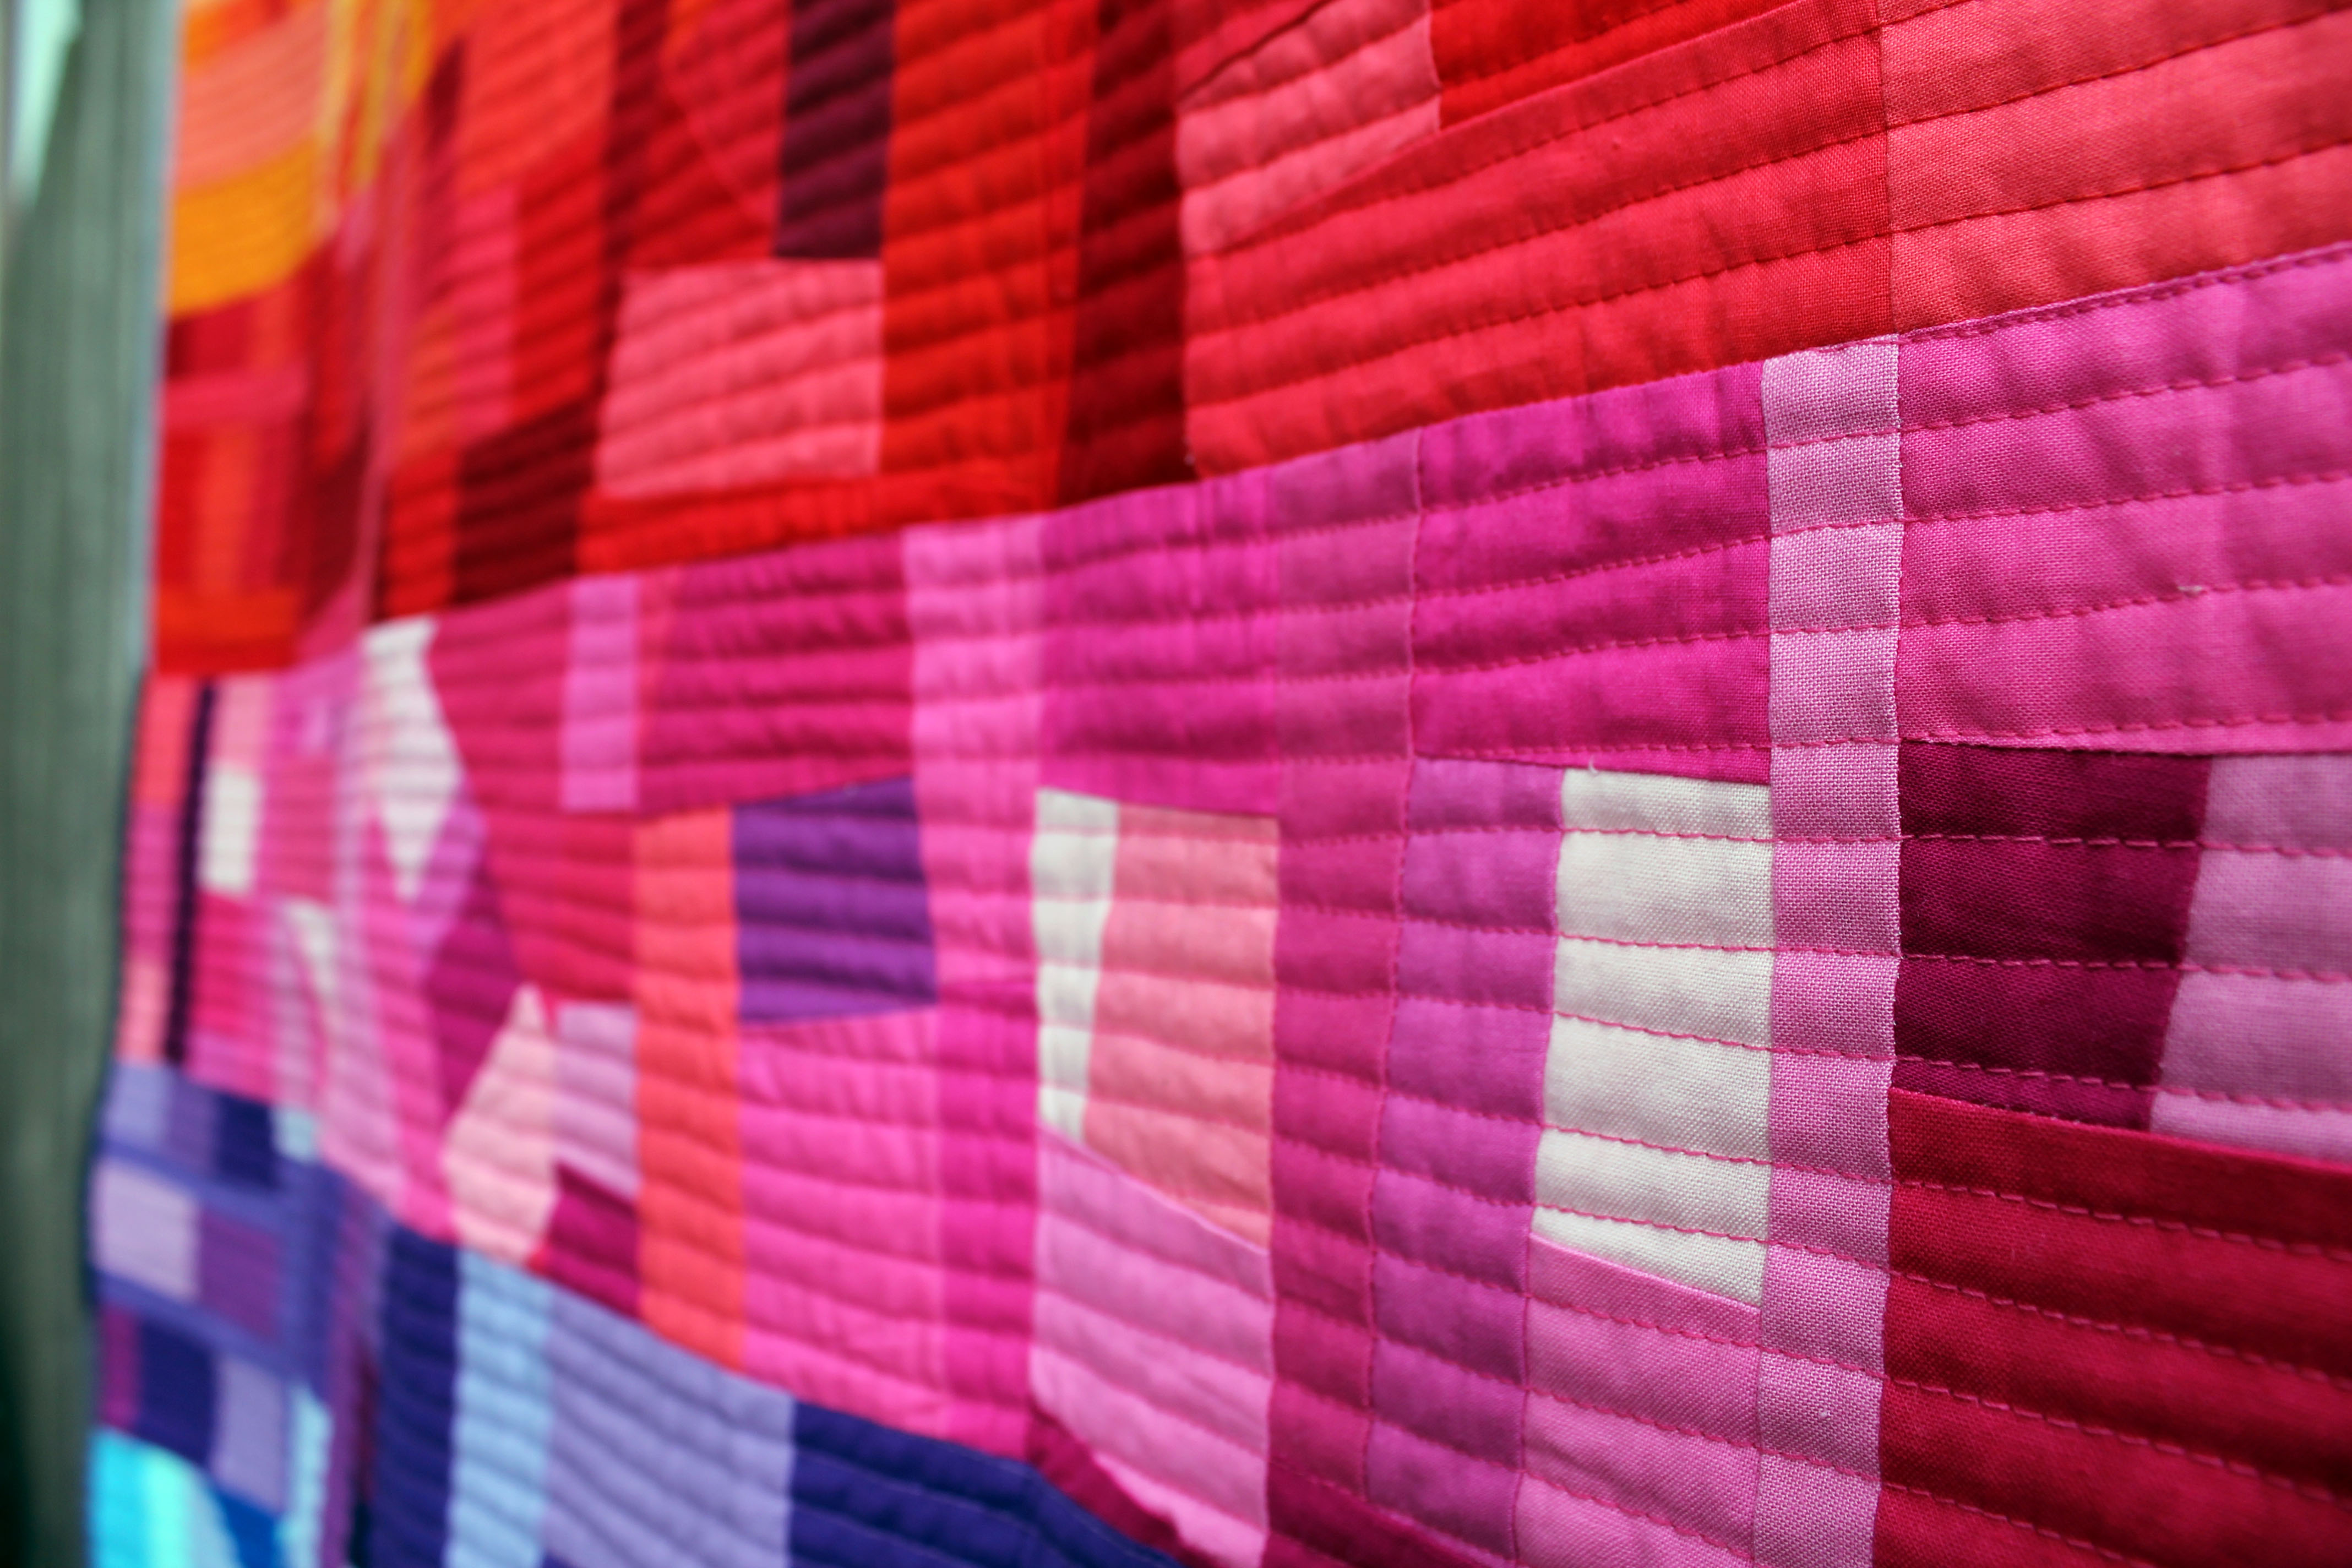
Because this quilt was going to Sister’s I wanted to do something modern for the quilting, but I did not want to distract from the blocks too much.  In the end I went with my beloved straight line stitches but used a rainbow selection of thread for the quilting.

threadEach row of blocks got their own colour, which was so much fun to do.

straight line quilting
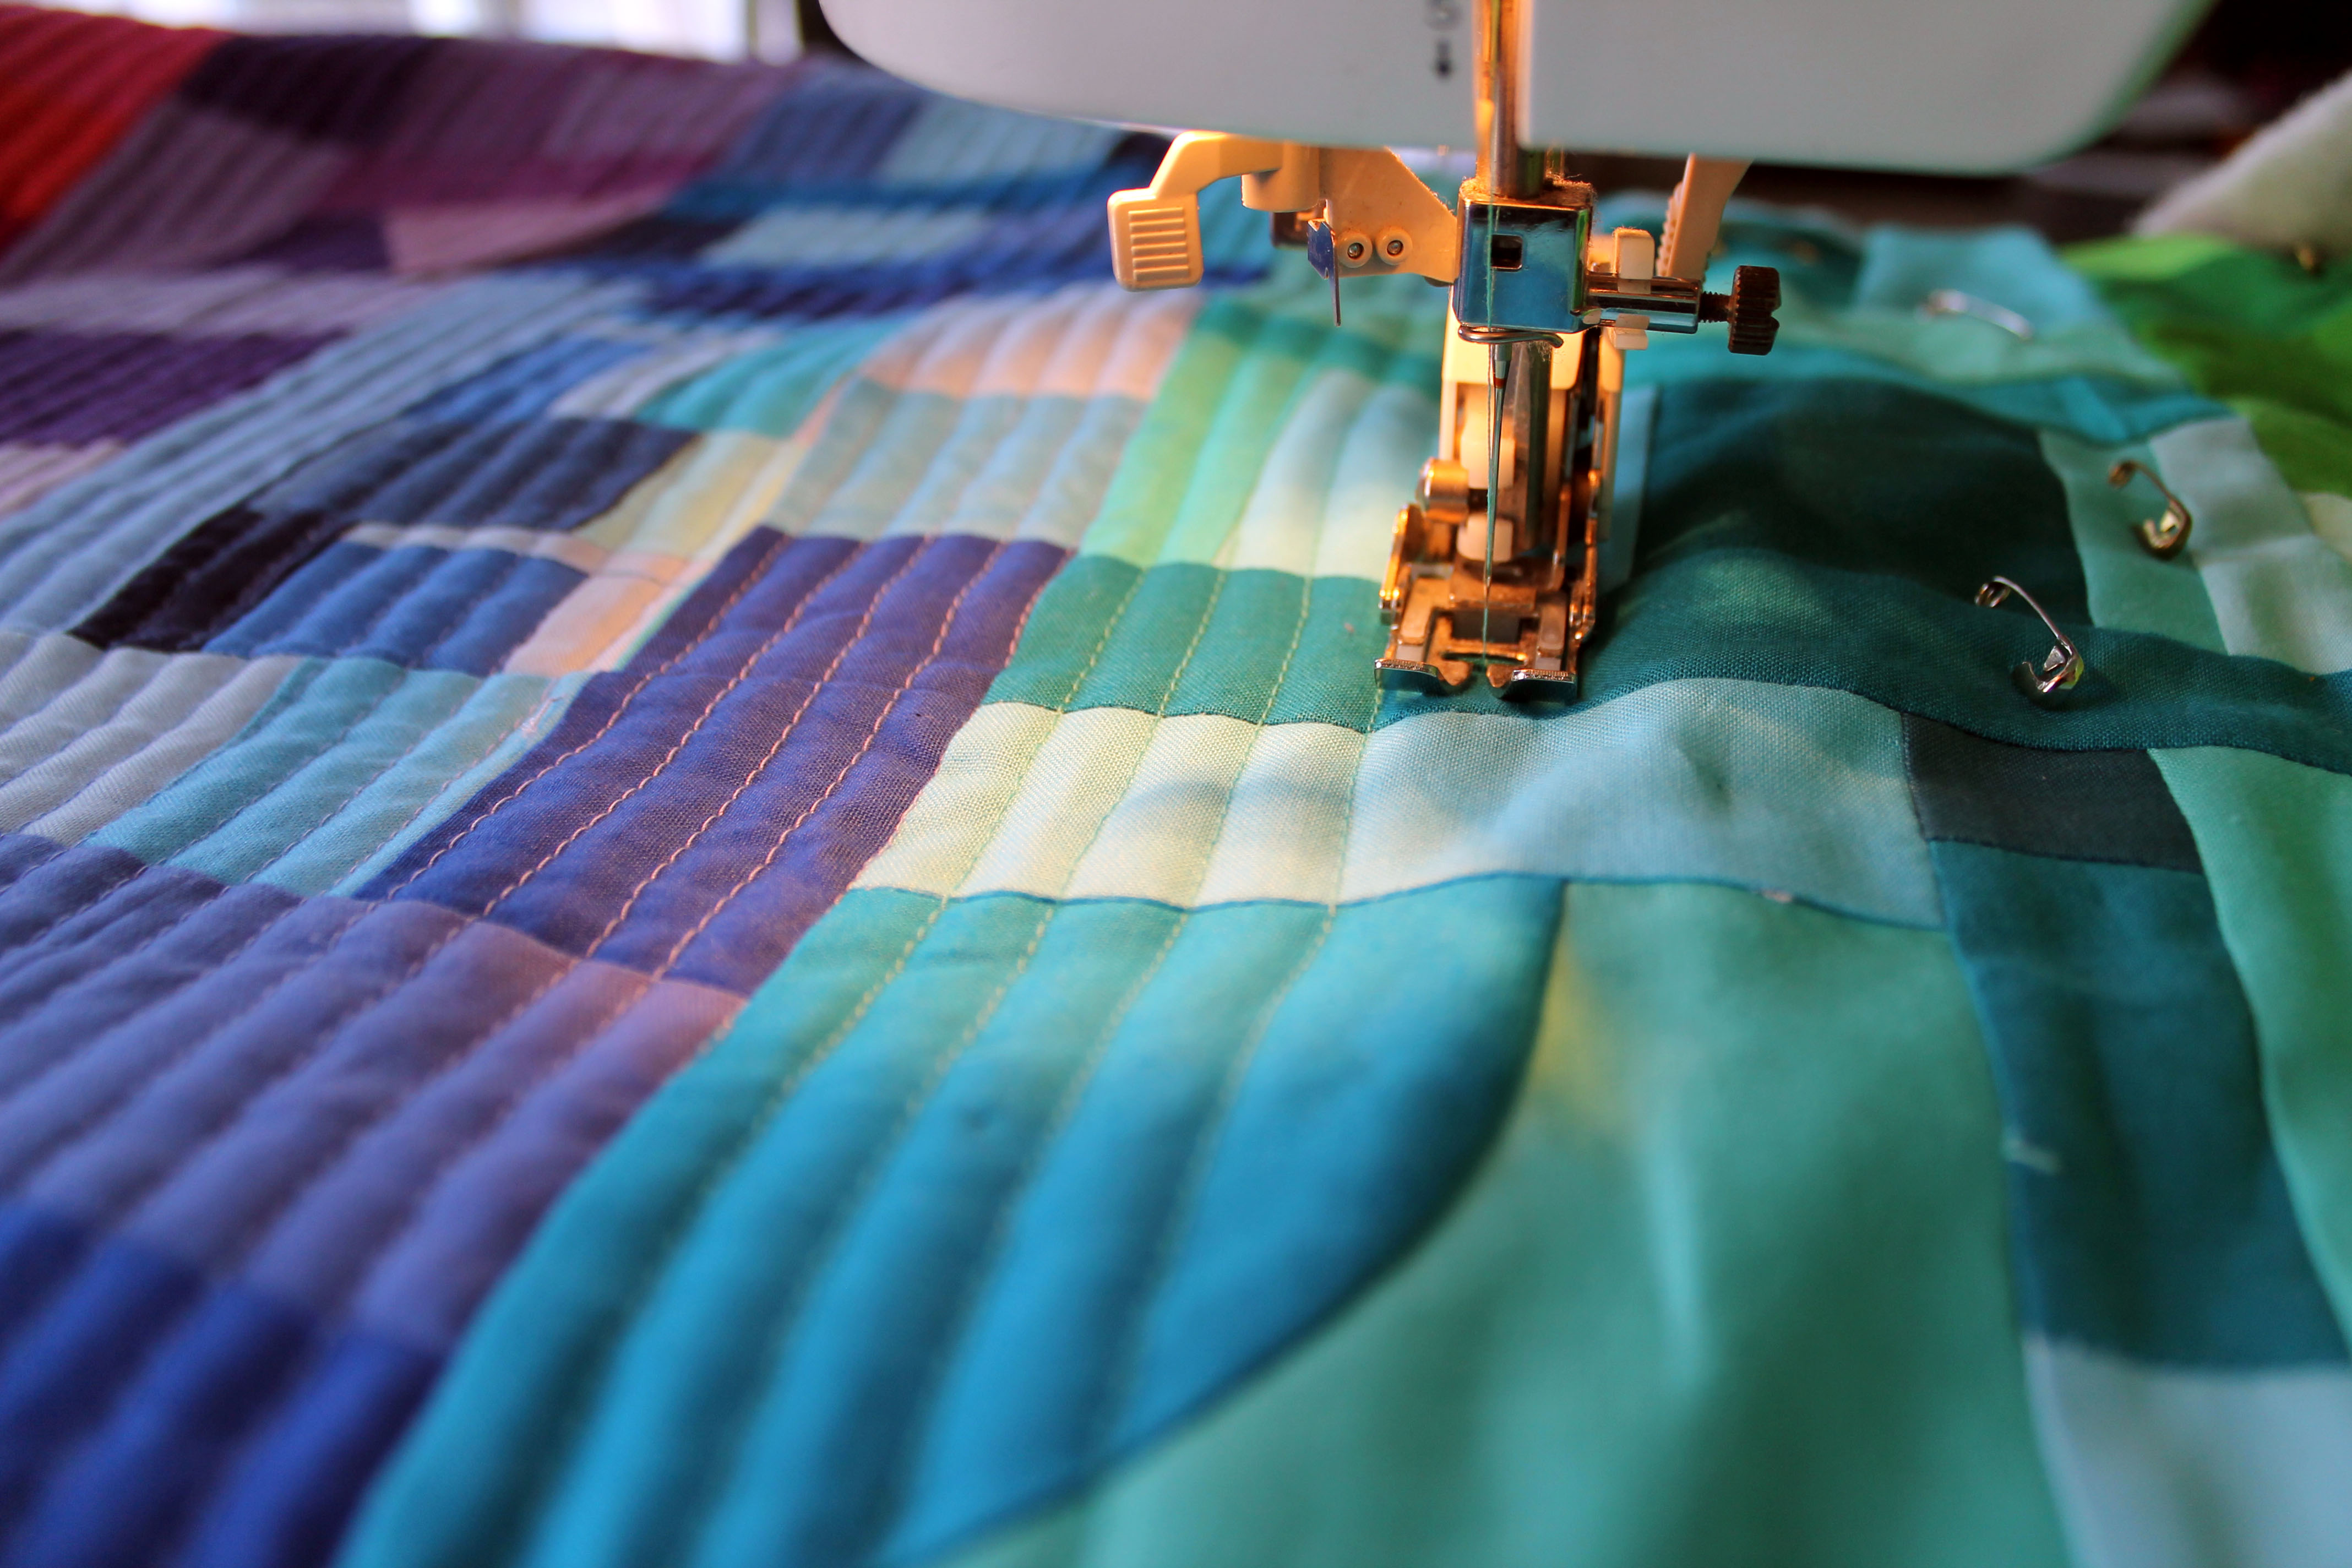
I just used my walking foot as my line guide…I did contemplate marking up the quilt top but this was so much easier and worked out perfectly… I got 16 lines of stitches per row and only went a little off course, one or two times.

improv quilt back
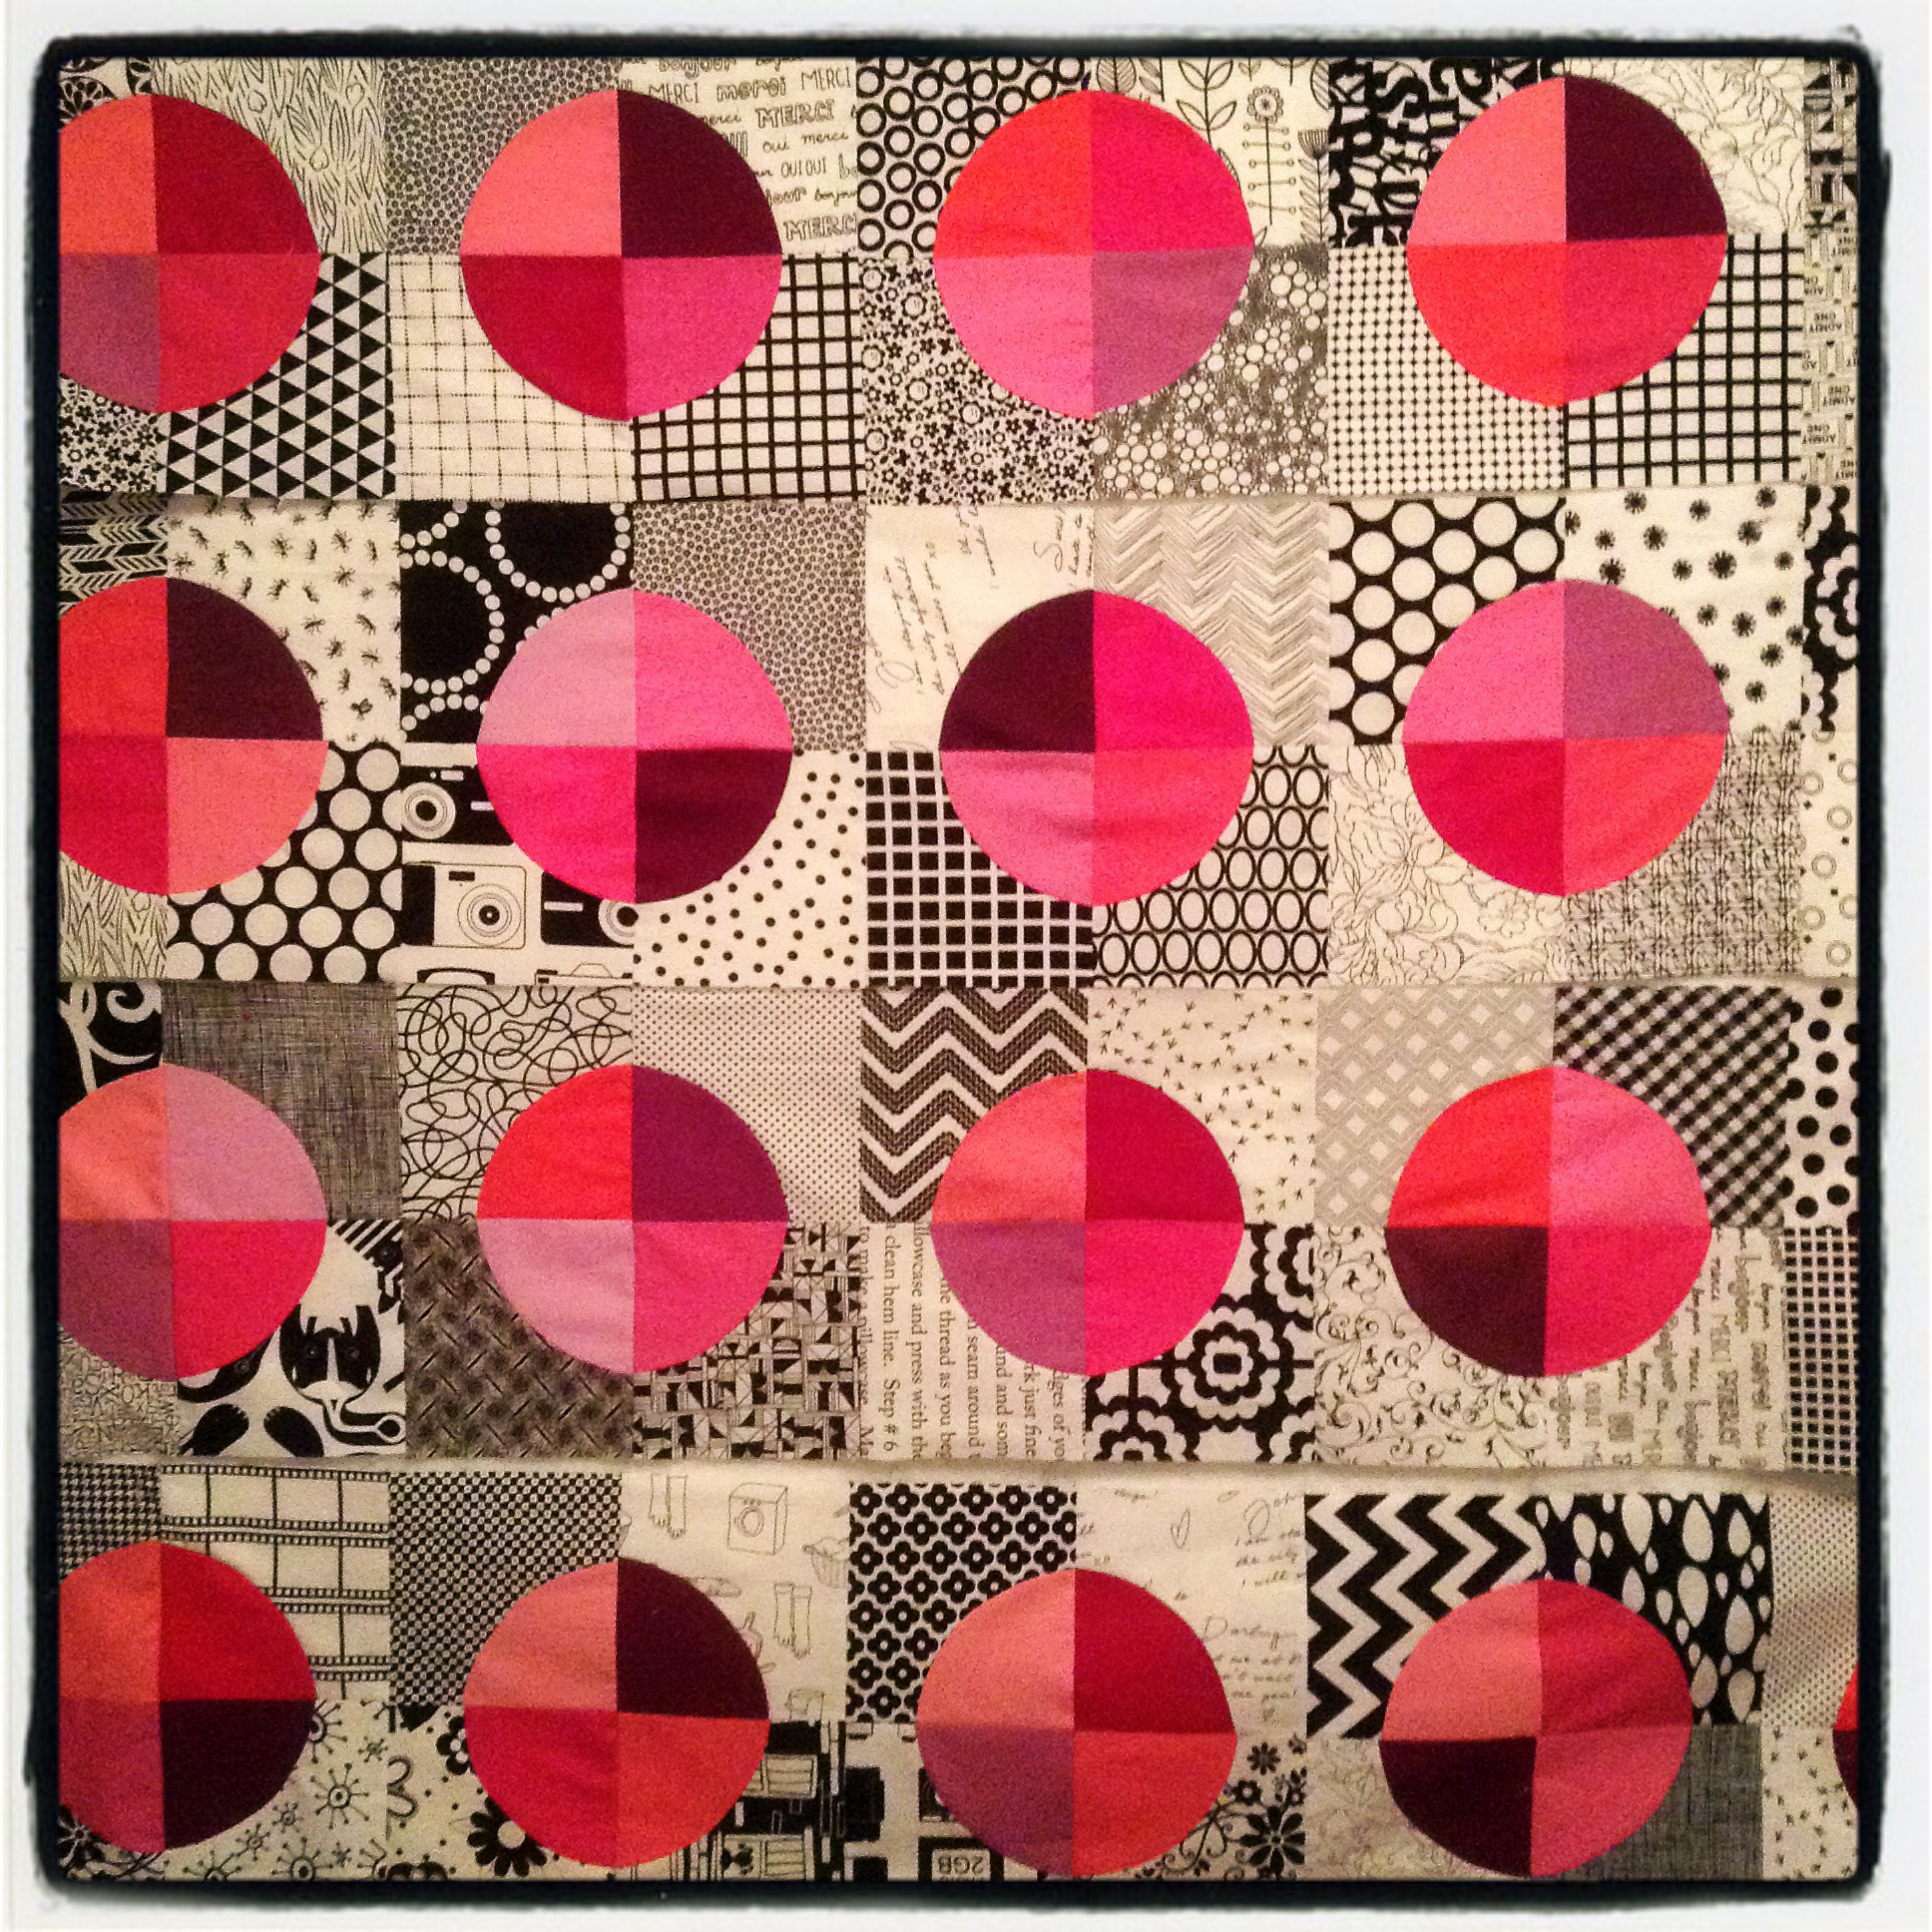
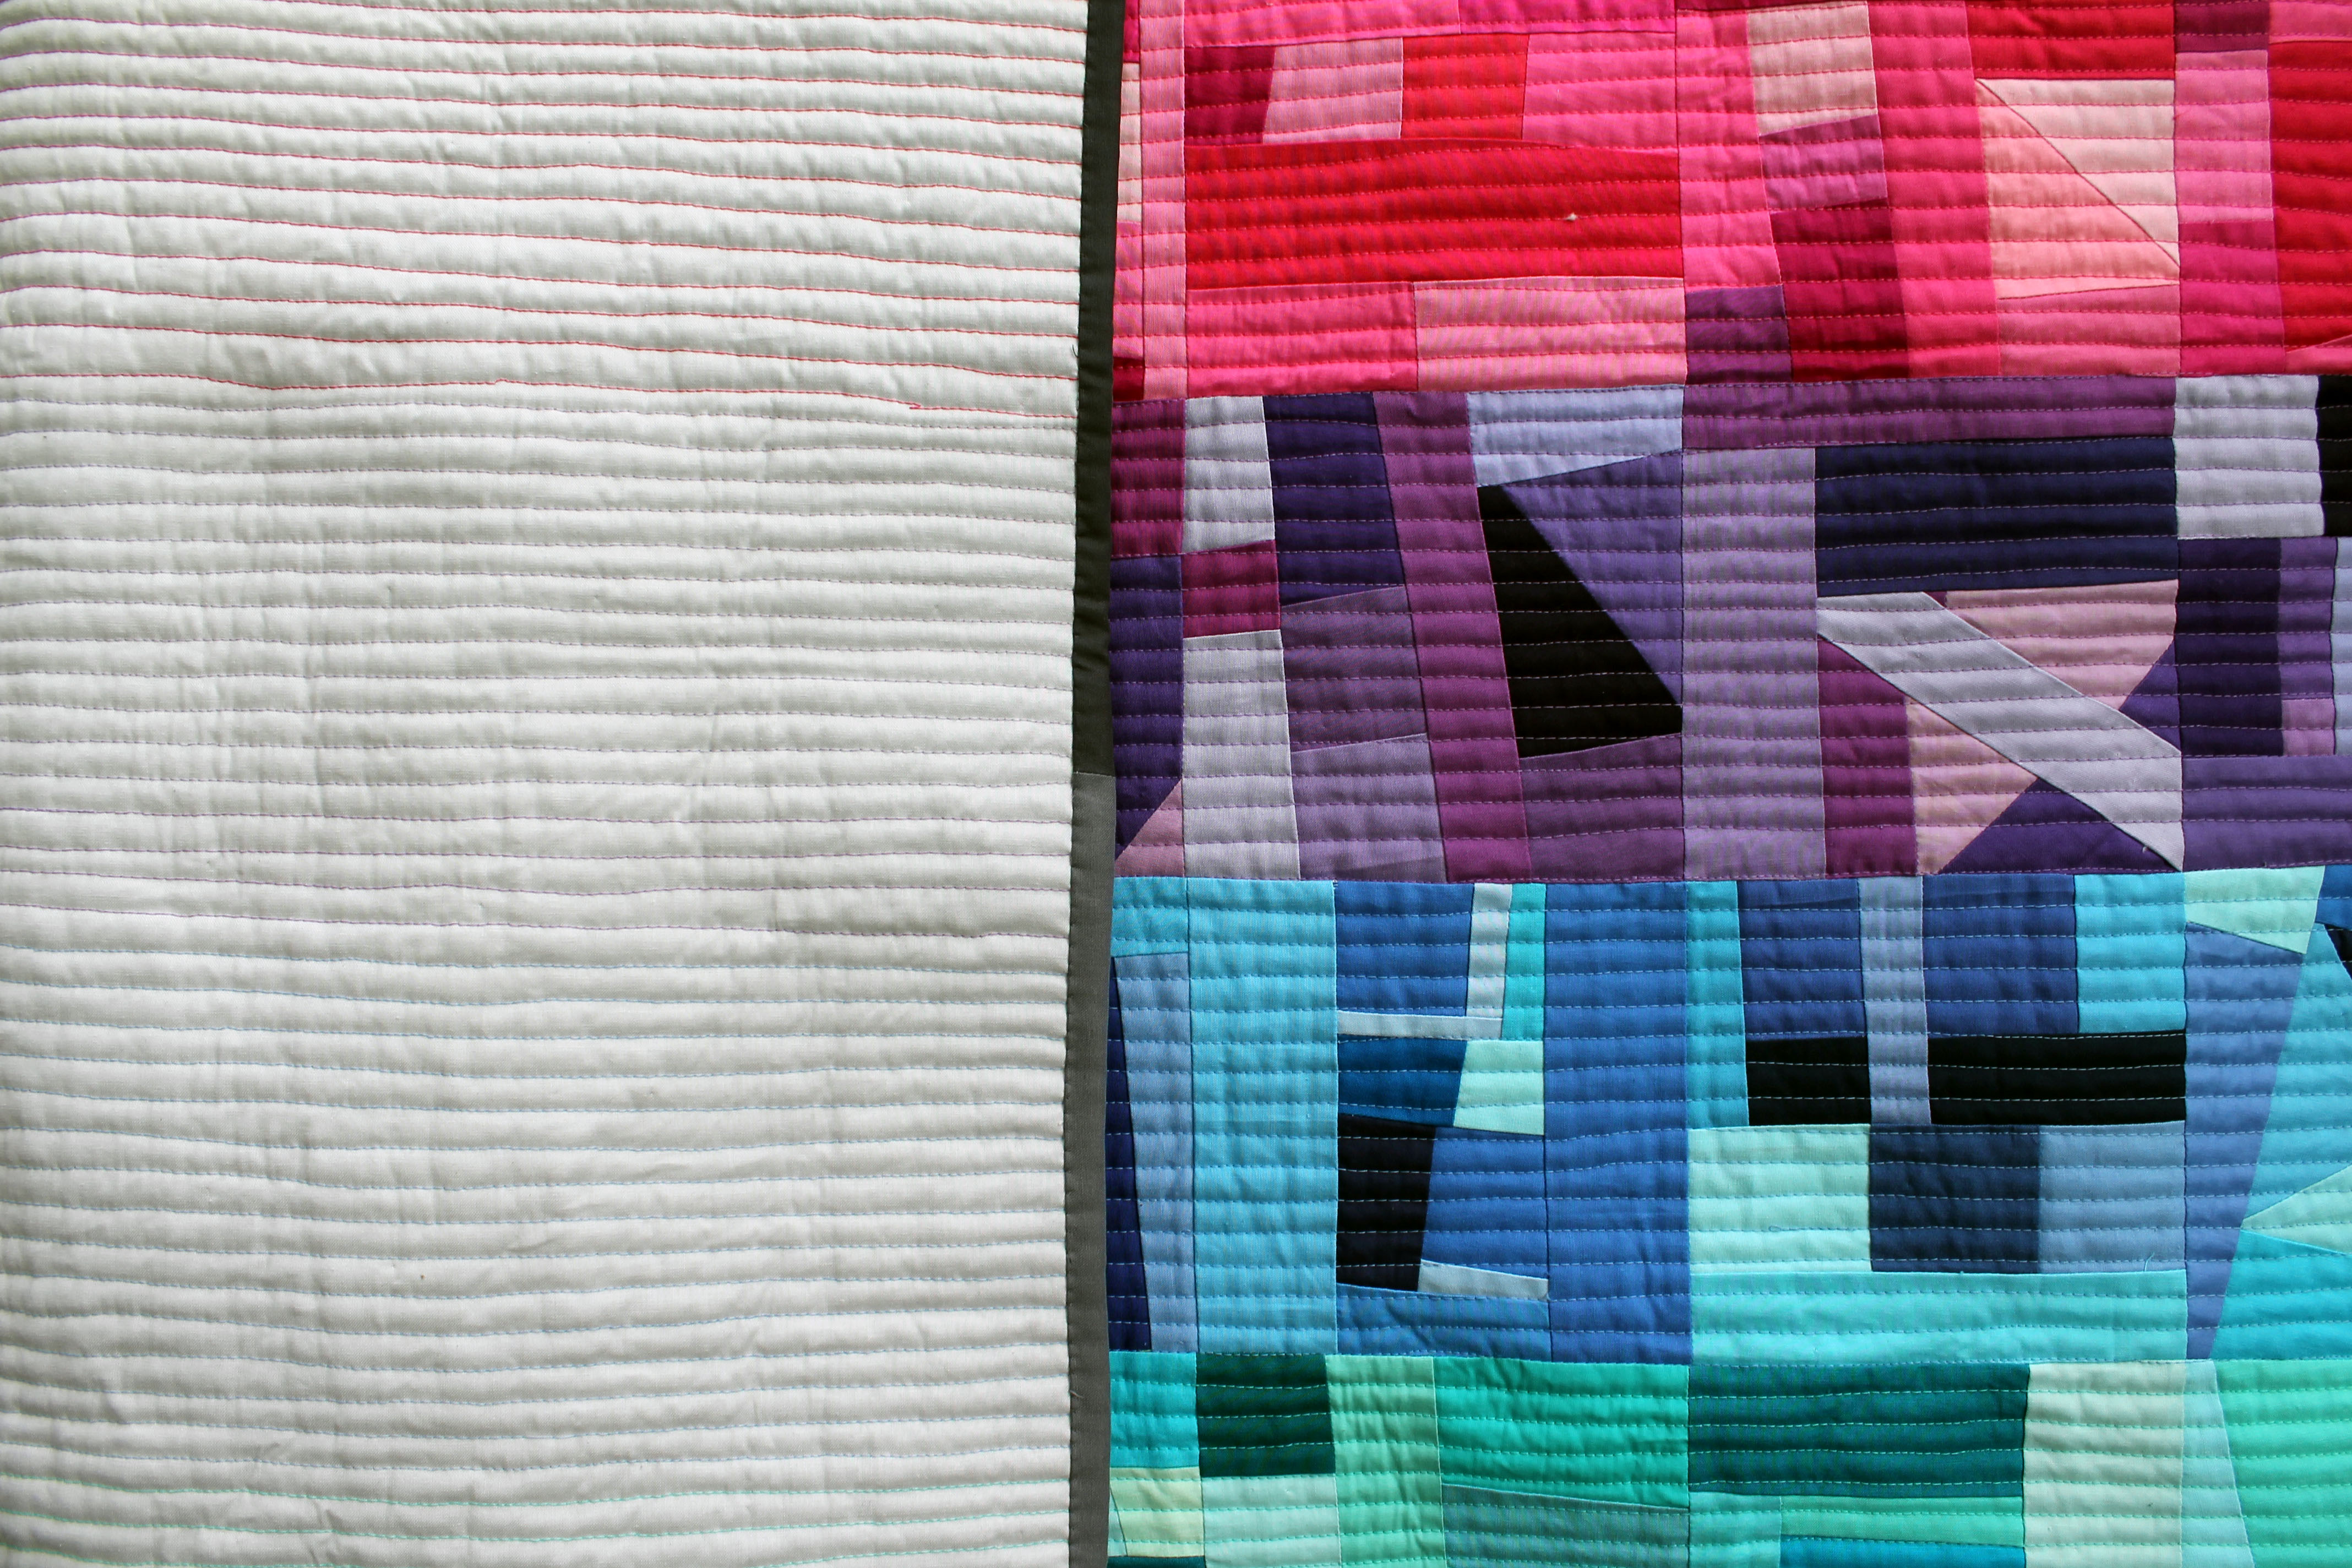
For the back of the quilt I went with a patchwork of solid Kona greys (Ash, Charcoal and Medium Grey), which was perfect for highlighting the change in the thread colour.  If you look closely you can see the rainbow effect of the quilting.

quilting detailThe final touch was some scrappy grey binding, a label and I was done.

bindingI am so thrilled with how this quilt turned out.  It is so different from what I usually do, but was just so much fun to make…

Quilt Details:

Blocks:  6 inch improv blocks
Fabric:  Variety of solids – Kona, Michael Miller, American Made and Bella.
Finished size:  48 x 48 inches

Continuing the catch up with curves

I am still playing catch up… and today’s work in progress is another project that was on my design wall before we headed to Australia… to give you a hint it all started with this…

curve quilt top

Yep I have been making more curved blocks!  It is not my fault really…you see after cutting out this quilt (you can read about the original crazy here..) I realised I had a whole collection of pink/purple quarter circles… what is a girl to do but make more blocks out of the scraps.

So I made some Drunkard paths like this…

block component

Which became blocks like this…

bw circle block

So my design wall was looking like this…

circle wip

I played a little with proportions on this block, making the black and white background blocks larger than the background blocks of the previous quilt.  I think the solid circles hold their own well against the scrappy.

I also discovered that the smaller the circles get the harder the curved sewing becomes. This curved block is 11 inches finished, with the full circle being 8 inches in diameter.

Now of course I have a pile of black and white quarter circles, which are going to  become there own quilt… yes it is a rabbit hole of curves but I already have a cunning plan for the latest scraps… I just need the time to implement it!

As it is Wednesday I am linking up with Lee at Freshly Pieced

Cross Stitch Sparkle Pattern Testing

Over the last couple of weeks I have been doing some pattern testing for the fabulous Sara at Knottygnome.  The block I have been playing with is called Cross Stitch Sparkle…

hst quilt blockIt is a block made up of half square triangles, lots and lots of HST’s.  When I got the pattern I was umming and ahhing about what colours to do and what scraps to use… you know my usual style.  In the end I decided to do something completely different for me and go with solids.

cross stitch sparkle detailI used just Kona for the white fabric but I really raided my solids stash for the rest – there is Kona and Couture Cotton and Bella Solids and who knows what else in this block.

With Sara’s pattern she gives directions on two different ways to make HST’s.  I went with the version that makes 2 at a time because I wanted the colour variety and I was not making a huge quilt.

detailSara’s other directions make 8 HST’s at a time and would be very handy if you were making a full quilt out of this pattern.  Each block is 18 inches square so I made 4 blocks and called it good…

cross stitch sparkle topI now have a fabulous wall hanging or baby quilt…. I am not sure which one it is yet!   Sara’s pattern goes live next week on her website if you are interested.  The block is really easy and the resulting quilt top is striking.

I am linking up with Lee at Freshly Pieced for WIP Wednesday.

Full circle finish…

I am pleased to finally share with you my finished circle top…

Finished circle top

I can not believe how easy this top was to put together and how much fun I had doing it.  After years and years of avoiding curves I am thrilled to be able to add a whole new list of quilts to my “must do” list.

curve top detail

In my original post about this quilt I talked about the two different templates I used to make the curved blocks. There were some of questions about the EZ circle template so I thought I would take the opportunity to talk briefly about that process a little more…

stainglass quilt

For the following example I made a 6 inch Drunkard Path block… so to start I cut out a 5 inch square of my circle fabric and a 6 1/2 inch square of my back ground fabric.

To cut the circle out I aligned my 5 inch square to the bottom line of the ruler marked “Fabric fold line” and to the middle arrows of the ruler.

EZ alignI then ran my rotary cutter along the inside of the “8” finished circle” grove.  If you want to make a complete square with this ruler you cut a 10 inch square of fabric and fold it in half length wise and width wise so you end up with a 5 inch square of folded material.  You follow the above steps, making sure that the folded sides of the material align with the “fabric fold line” marks on the ruler.

EZ circle cutYou now have your inner curve… so onto your outer piece.  For this piece I choose to cut a 6 1/2 inch square but you this ruler gives you some great creative choices here.  If you want less background in your block you could go down to a 5 1/2 inch square or if you wanted more back ground you can increase your back ground square as you want.

EZ background cutYou are aligning your background square as you did your inner circle square but this time you are cutting on the curve 1 inch less than your circle curve.  For me this meant I cut on the 7″ finished circle line.  Again if you want to make a circle using this ruler, make your background piece double the size (in this case my background piece would be 13 inches square) and fold your fabric before cutting.

EZ overlapCutting the background on the ruler curve 1 inch less than your inner circle give you the seam allowance overlap you need.  You are now ready to sew your curved pieces together.

quilt top detail 2For the blocks of my Acidic Curve quilt I cut a 9 inch curve and then had a 6 inch background block with a curve cut out using the 8″ mark on the ruler.  This gave me a finished circle block of 11 inches to work with.orange circle block Hopefully I have not confused you too much… but I can definitely recommend the EZ ruler. I am finding it is giving me great creative choices for the curved blocks I am making, though the biggest curve I can make with it is a 10 inch finished circle.

Conquering the fear of Curves

In the last week I had an amazing quilting break through.  Anyone who has followed me for a while knows I had an irrational fear of curved piecing.  Sewing curves, circles seamed unnaturally and ridiculously hard.

Well you can imagine my “delight” (note the sarcastic inverted commas)  when my fellow ScrapBeeLicous Bee member,  Michelle of Factotum of Arts set a drunkard path block as her block of the month.  To soften the blow,  Michelle very generously also sent us all this…

large_9781620331224

Angela Pingel’s “A Quilter’s Mixology”  has changed my quilting life… seriously. Armed with this book and it’s pattern sheet, Michelle’s colour directions, a sharpie pen and a sheet of Overhead Projector film I went to work.

OHP templateThe OHP film worked nicely as a sturdy template and Angela’s instructions made it all seem so simple… and it was ridiculously simple.

First circle blocks

In no time I had made the requisite blocks and then just kept going….

Little carried awayTwelve blocks later I decided I wanted to try something different… so I pulled out a circle ruler my husband had bought me recently and started cutting up more fabric…

Easy Circle Cut

The Easy Circle Cut ruler is great for making smaller circles and curves, while Angela’s book has a great selection of bigger templates.

Circle block size differenceArmed with the EZ template and a stack of solids from my stash, I produced copious amounts of curved blocks in about three days…

orange circle block

Enough to make a full quilt top actually…  there was a point on Saturday night when my husband thought he might have to do a circle intervention but I convinced him it was okay, I was nearly done…for the moment!!!

quilt detailWhat I did not tell him was that I already have another circle quilt planned, using the extra bits from this top.  Yes it is official I am now curve obsessed.   You have been warned.