It was a Do Good kind of week…

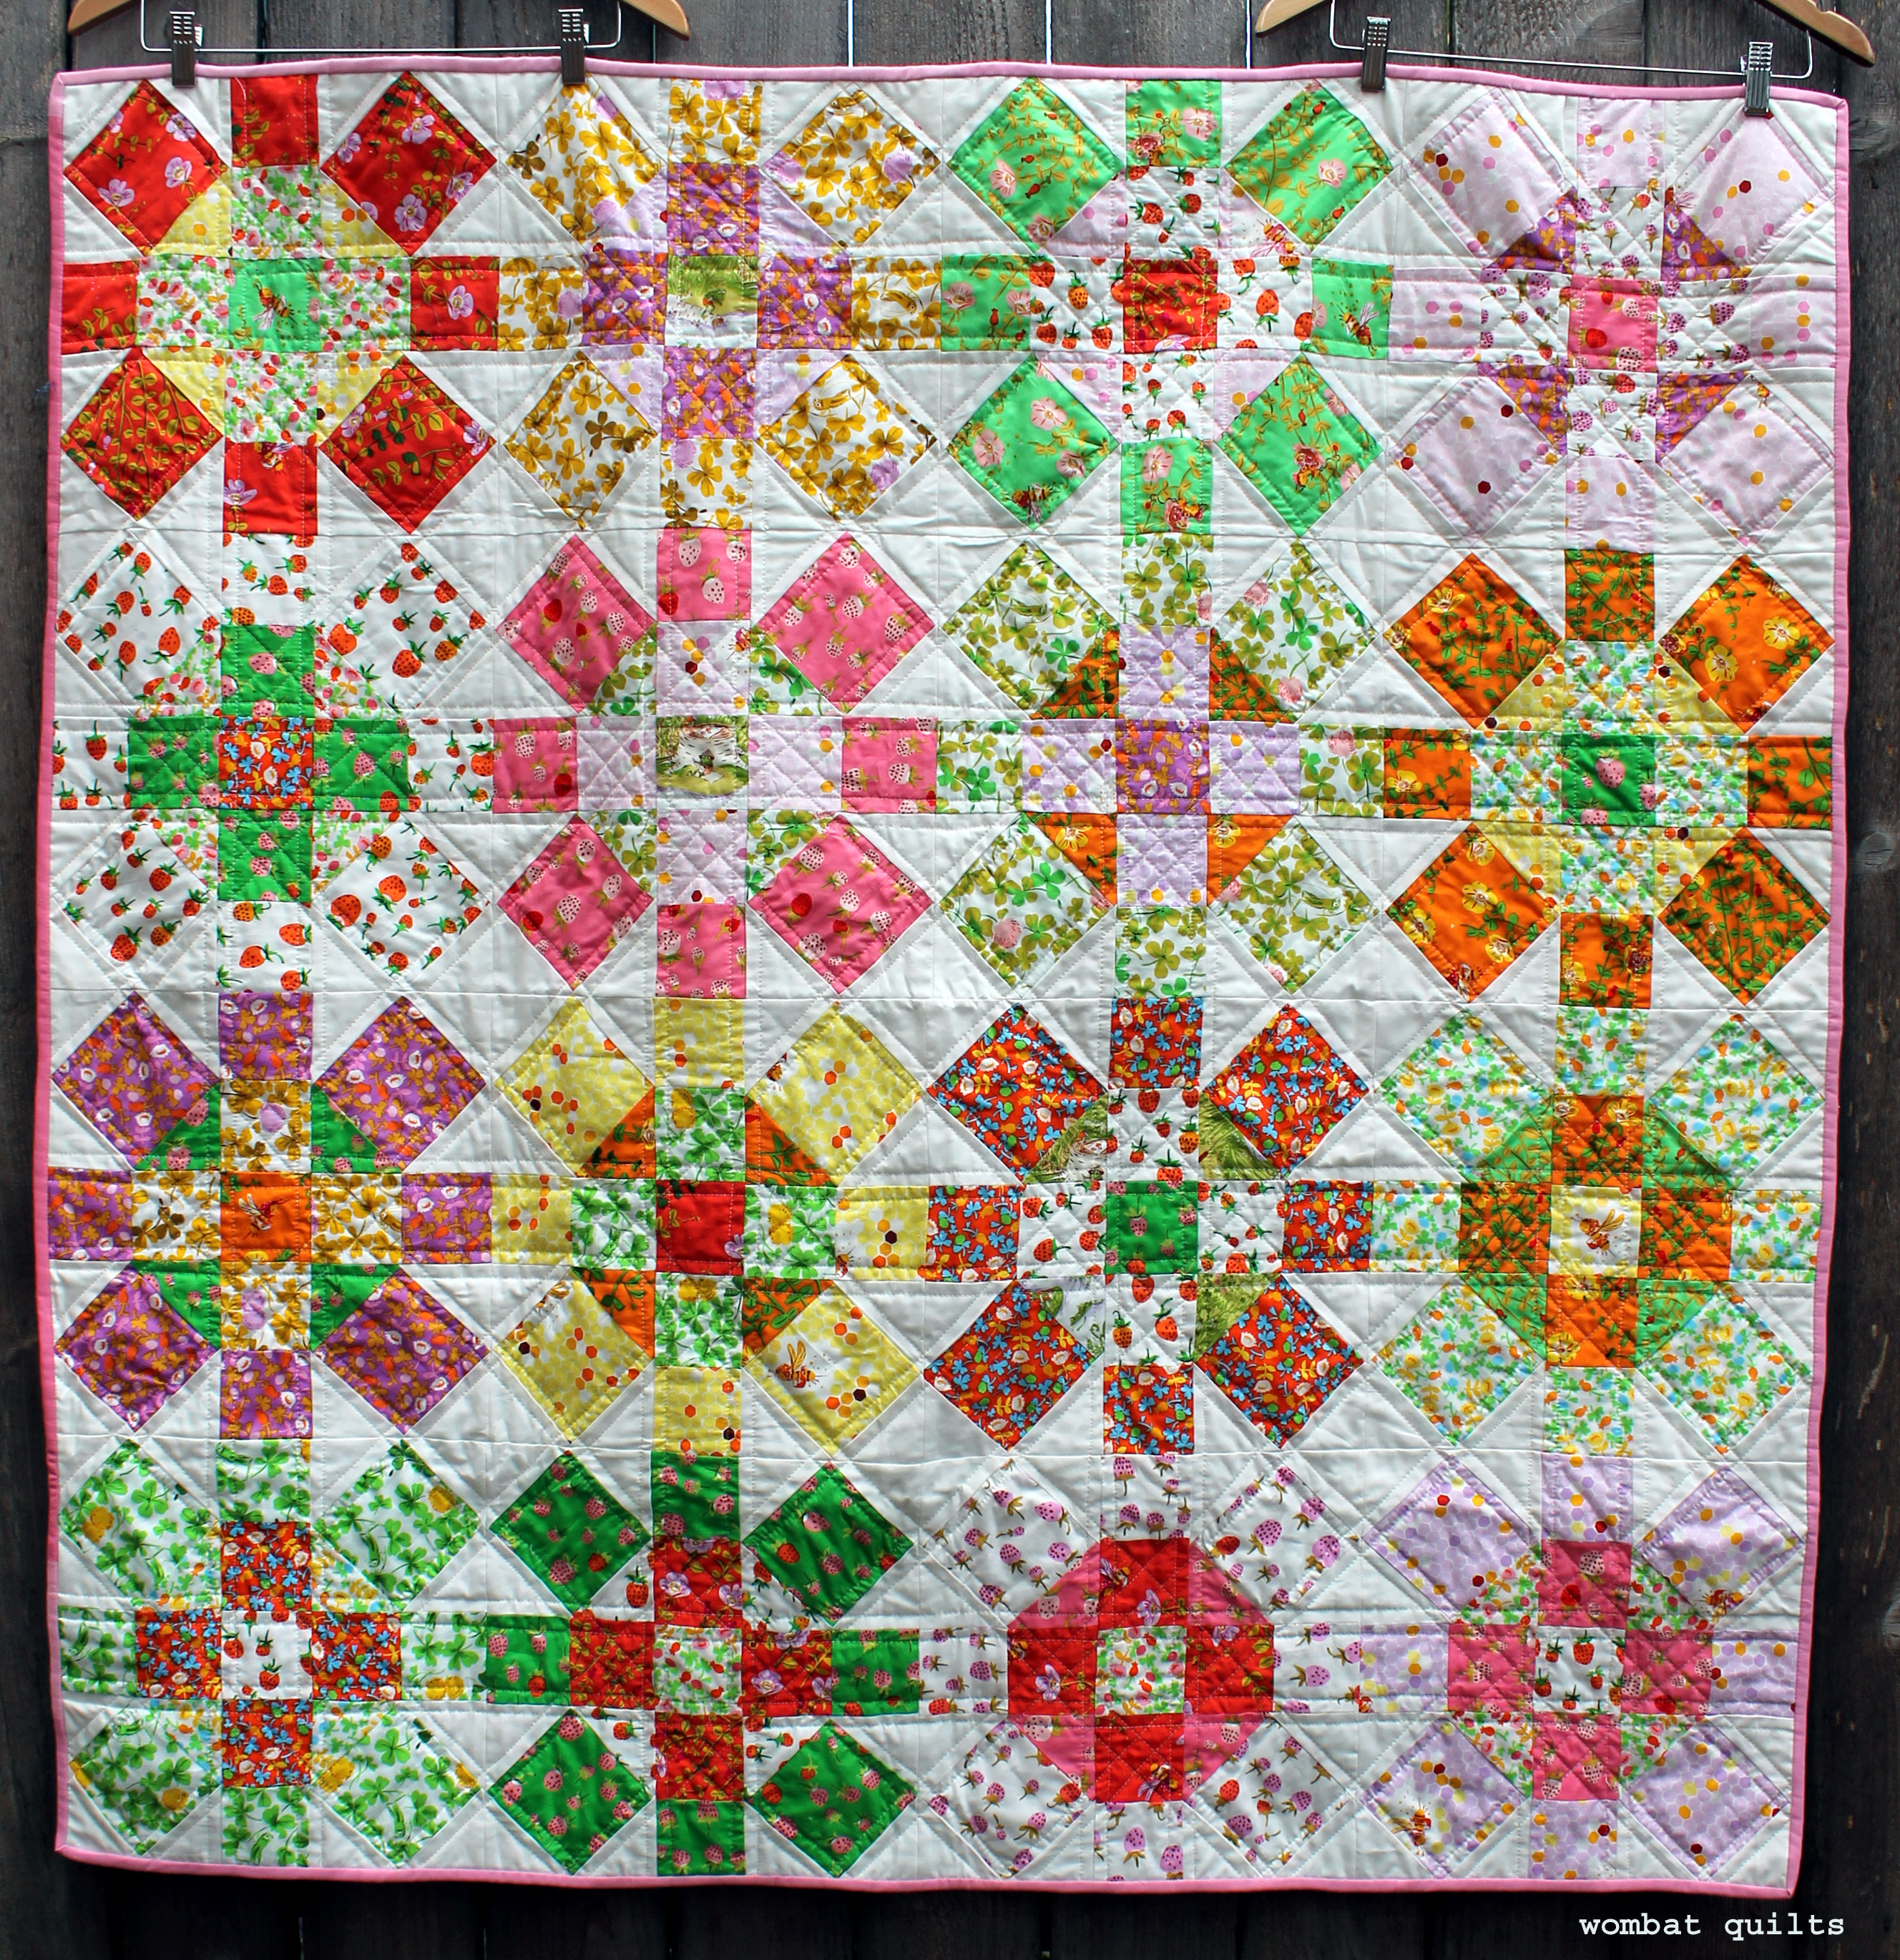
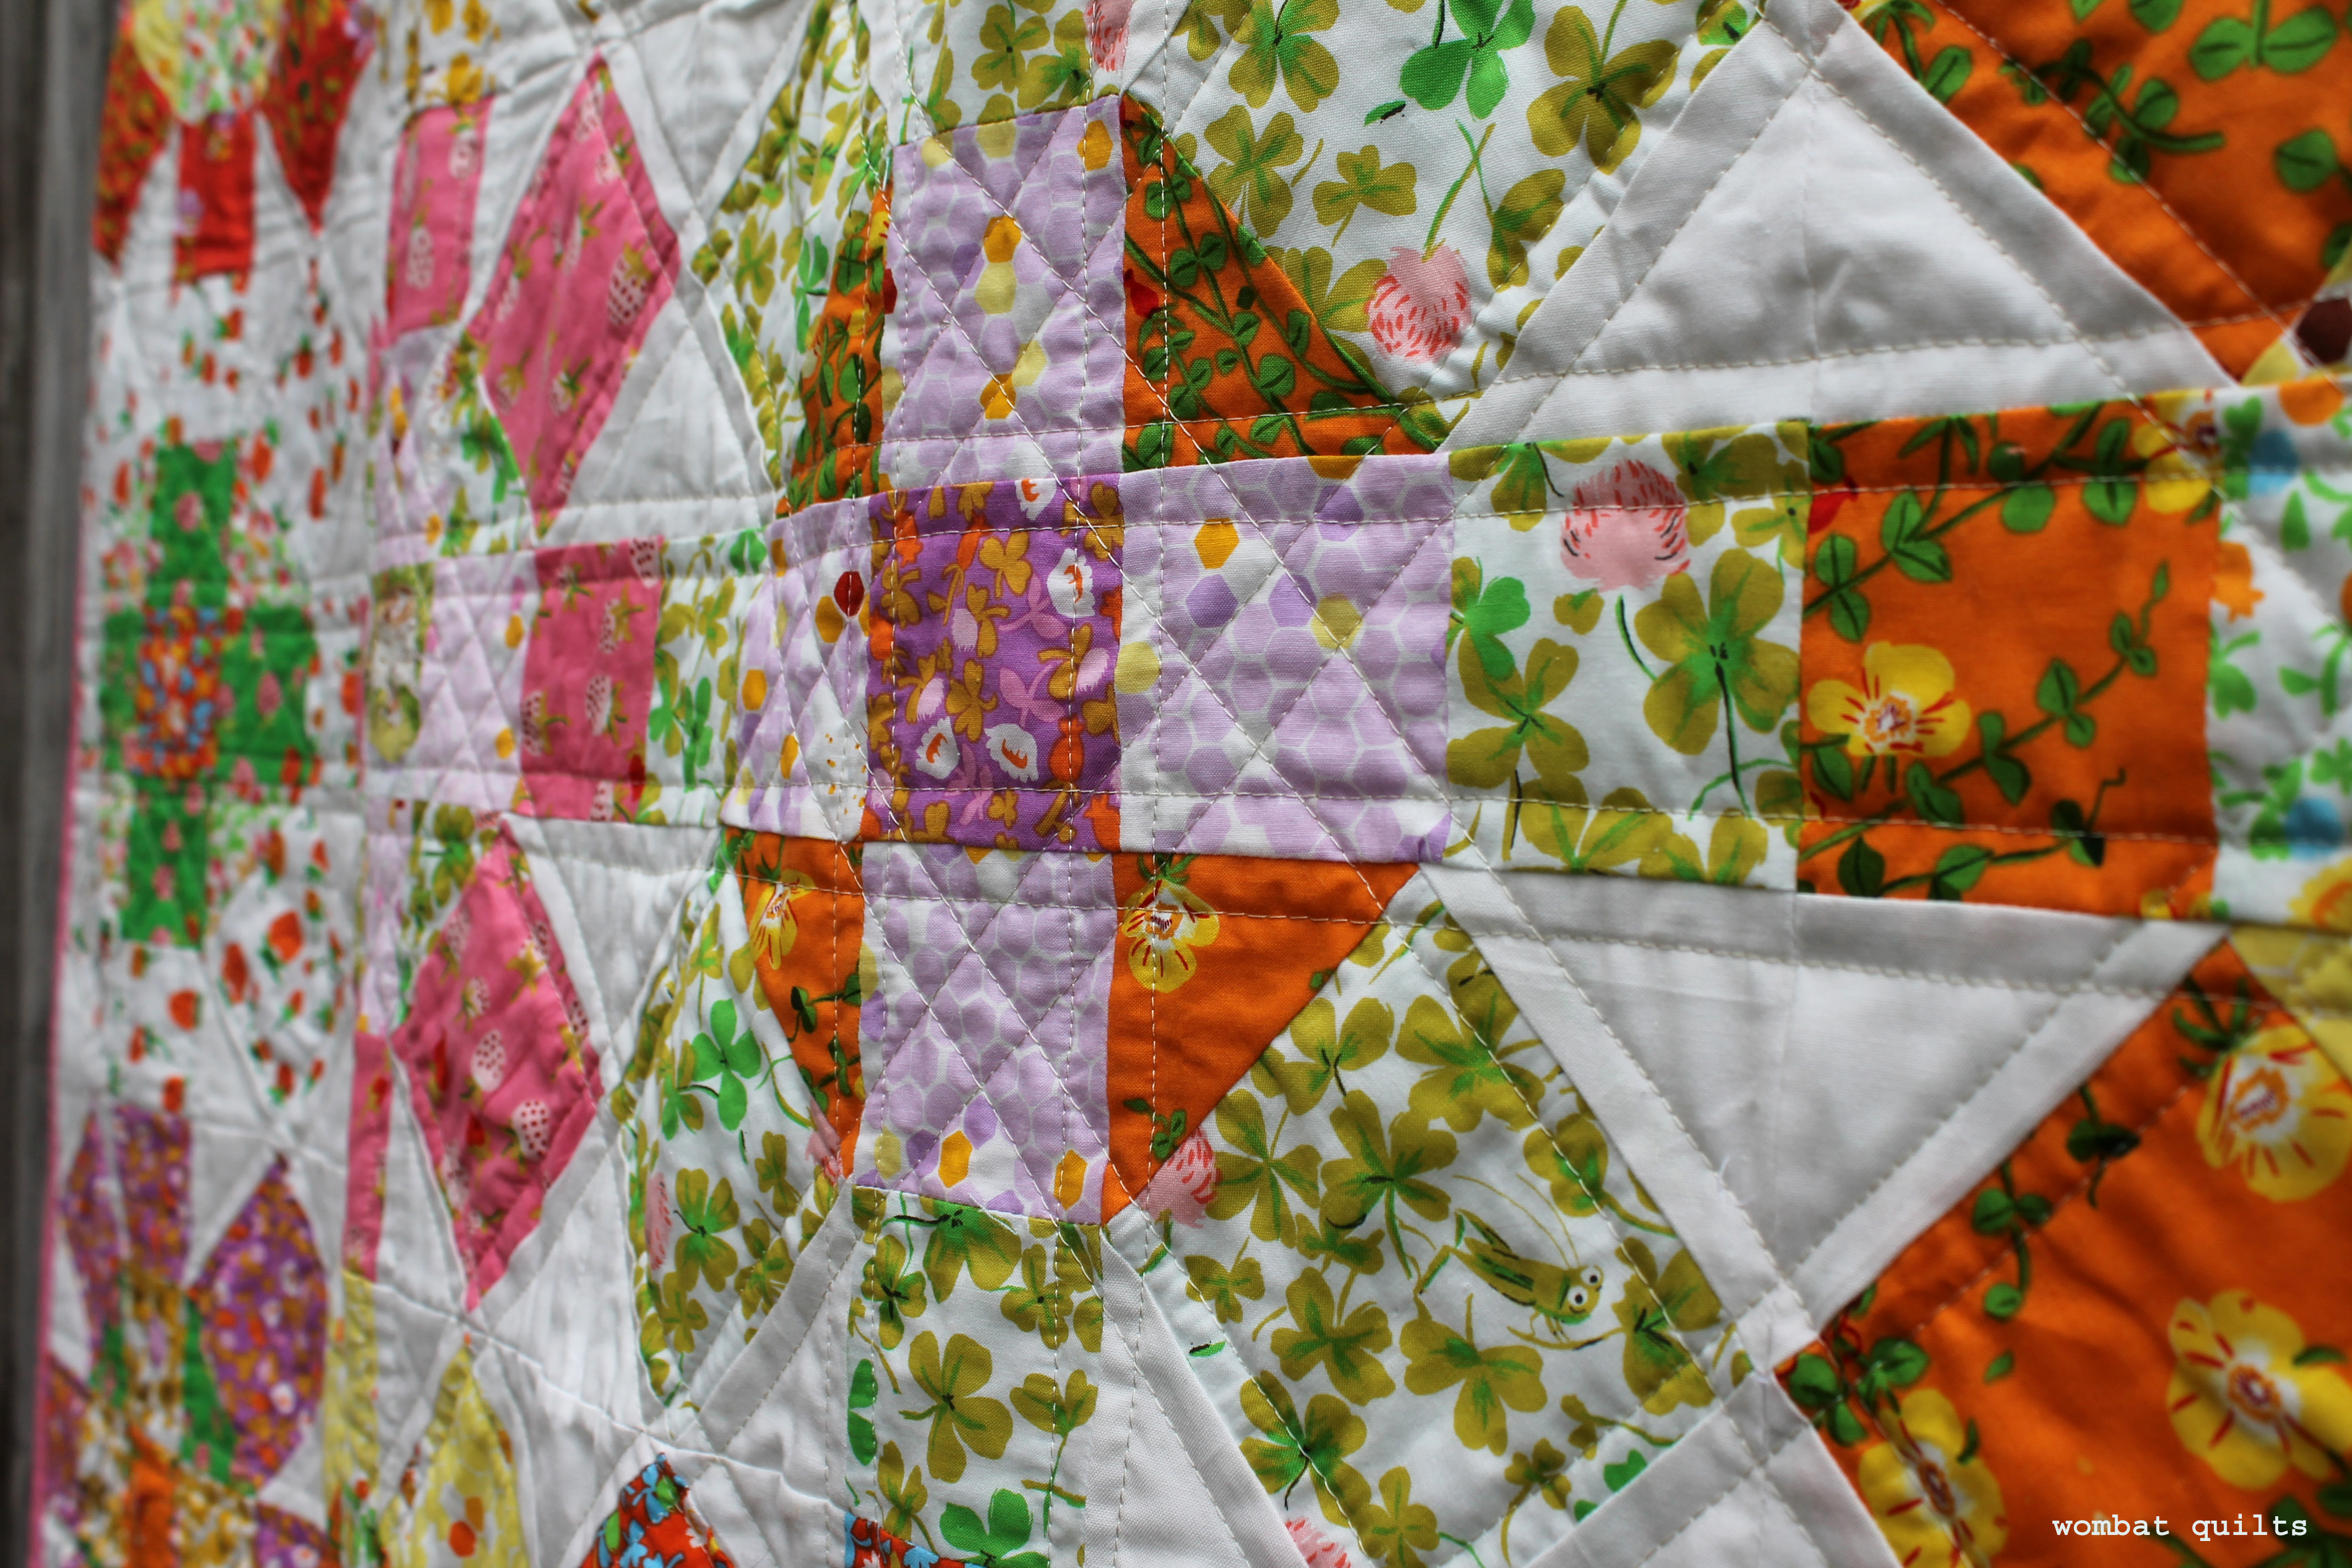
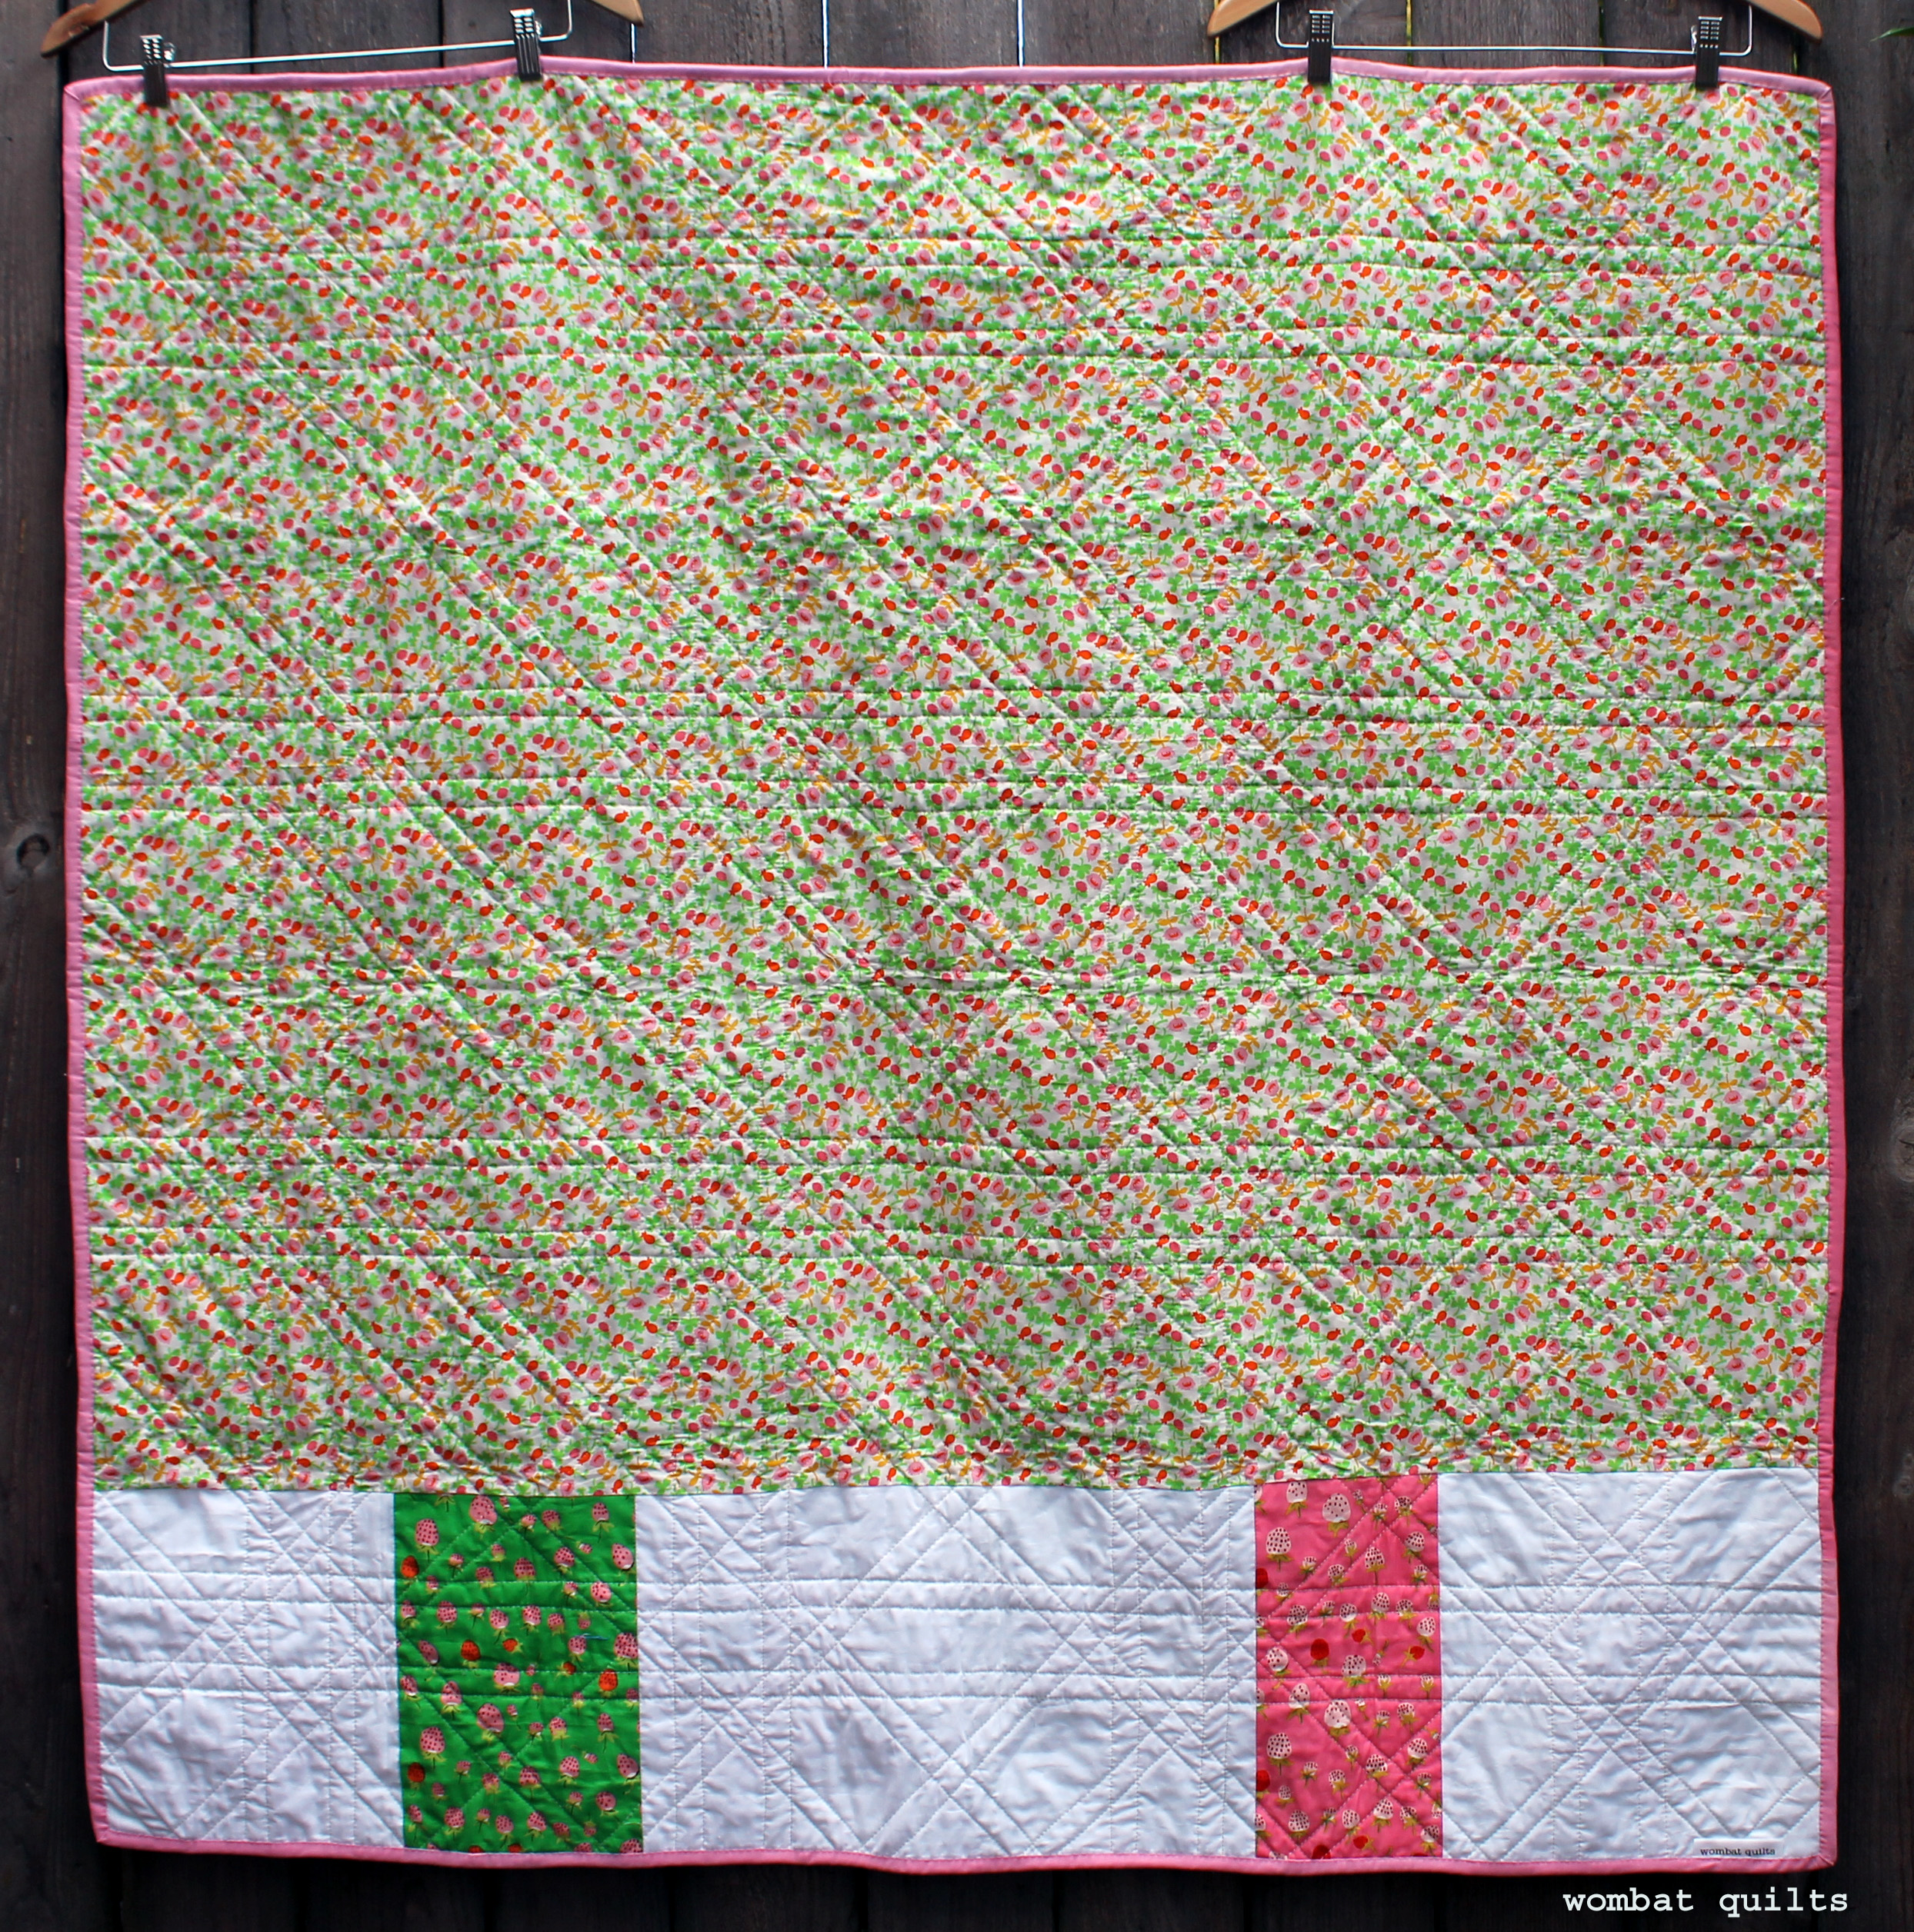
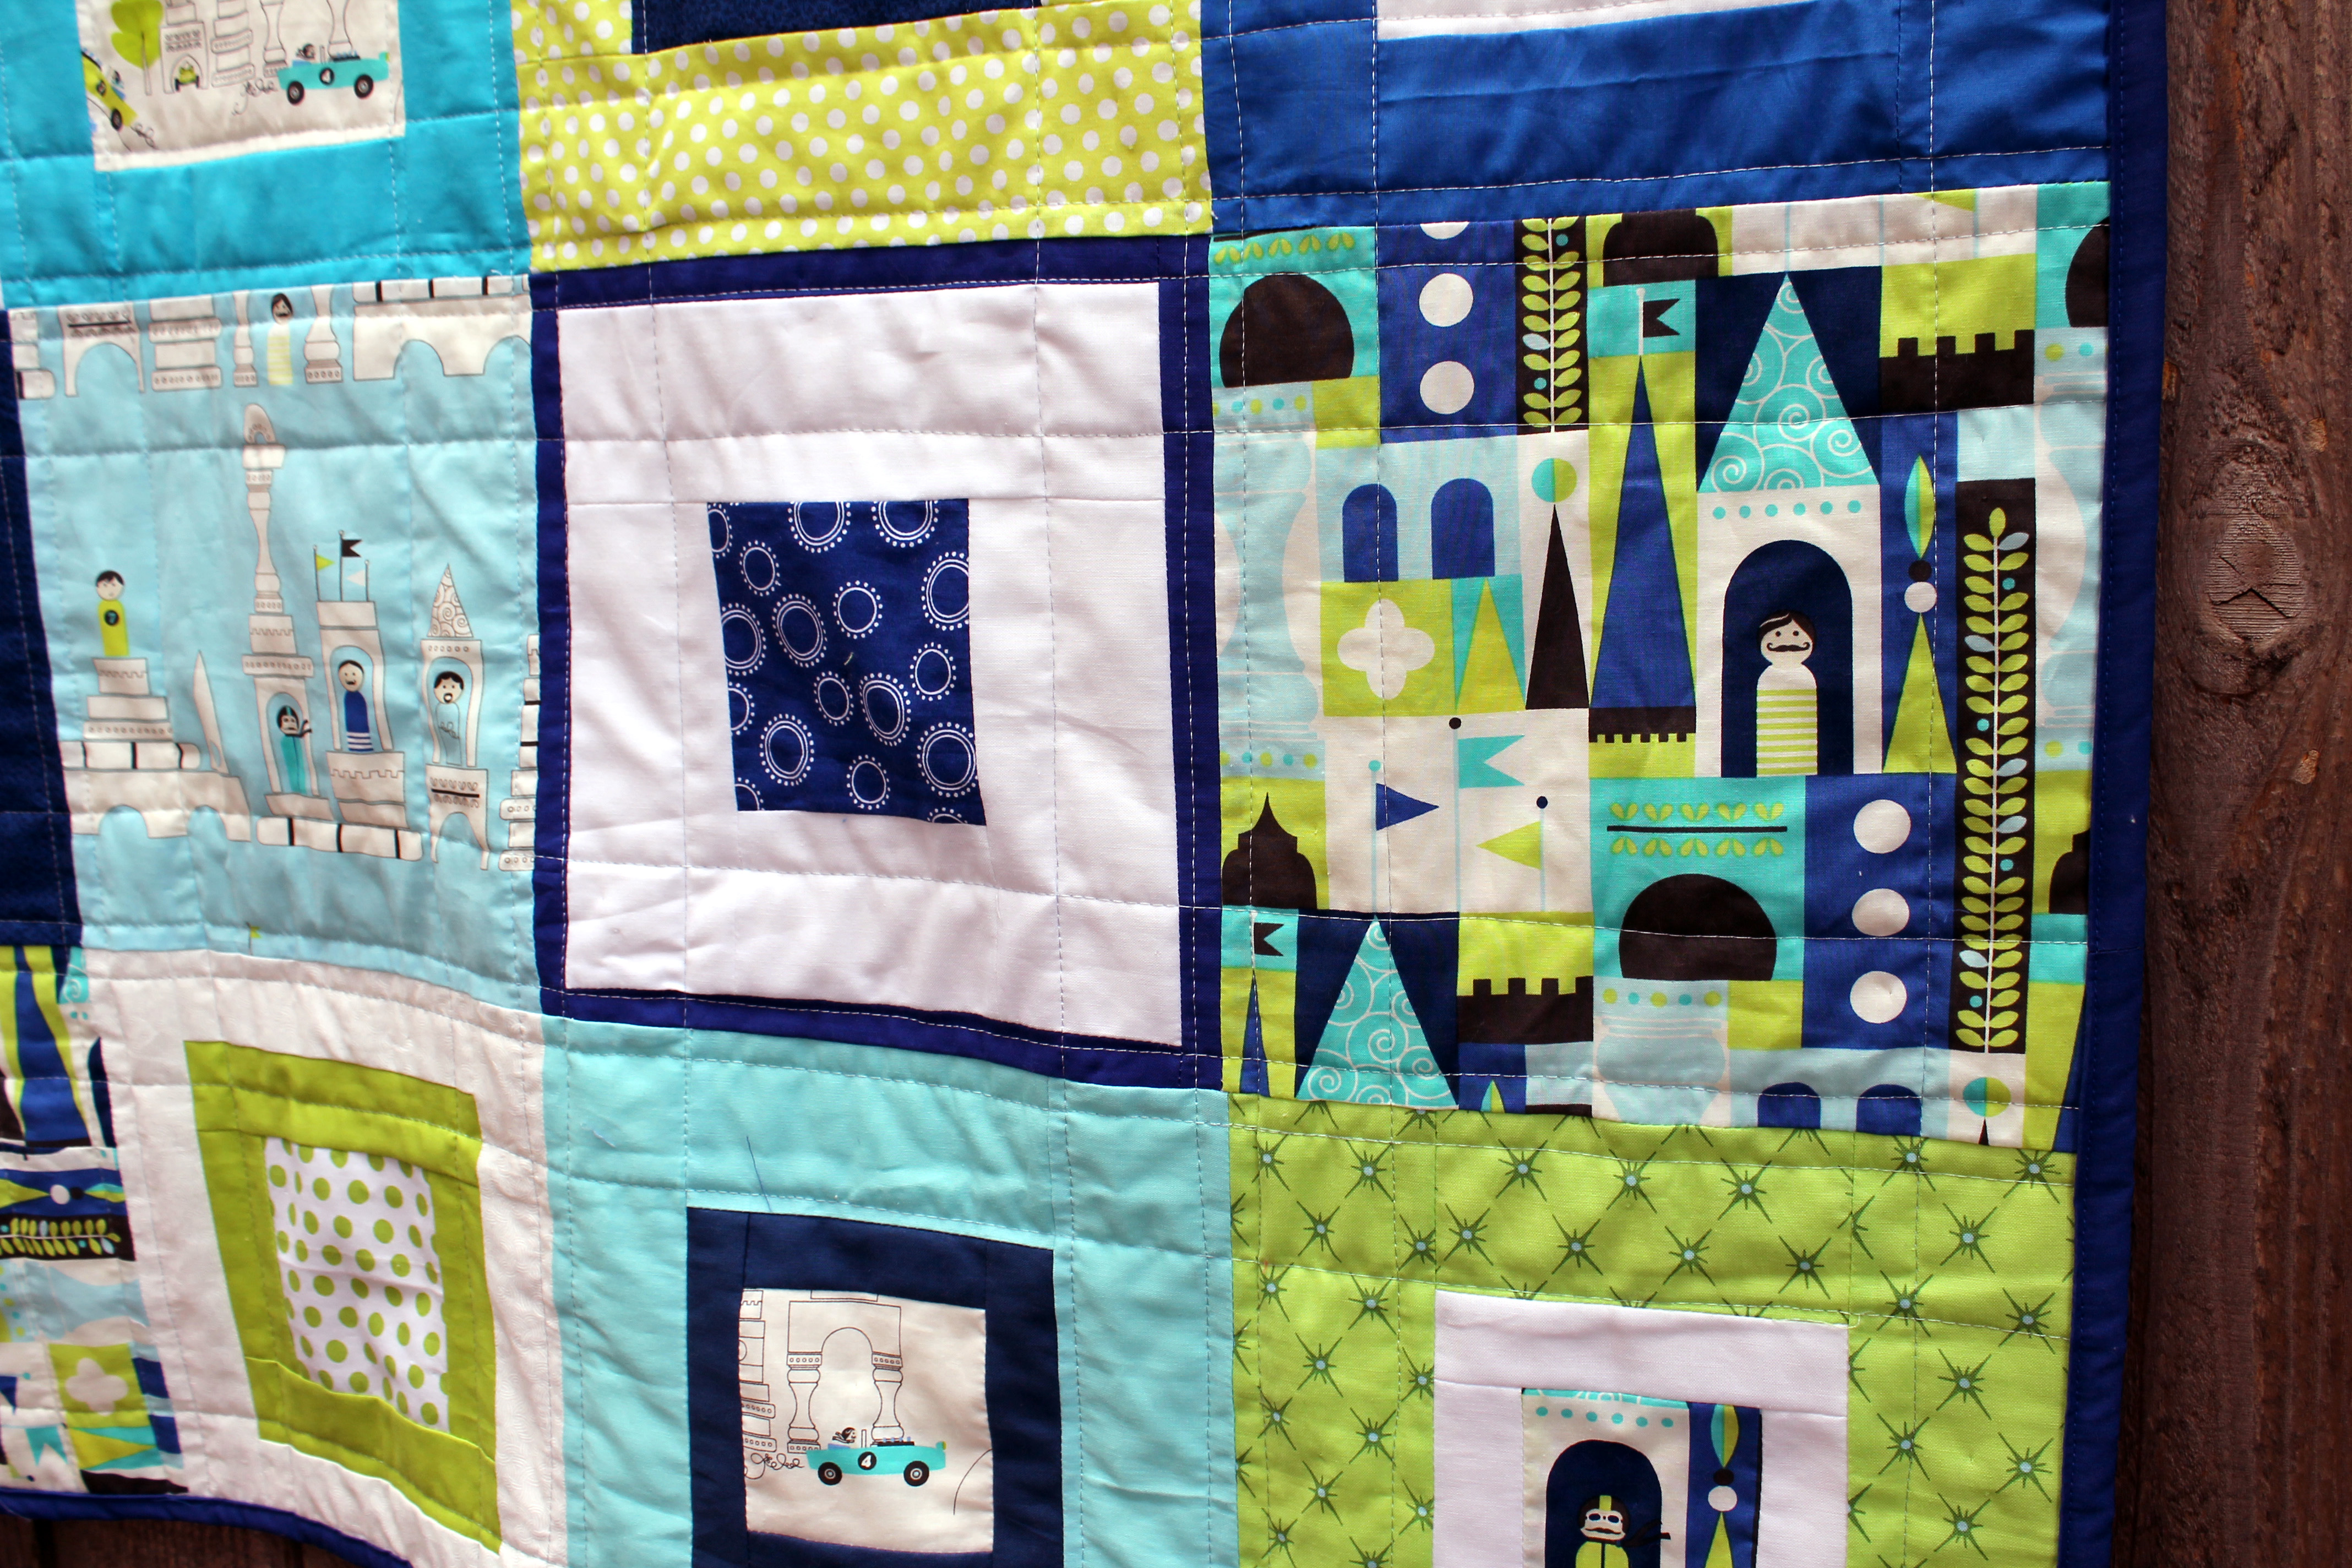
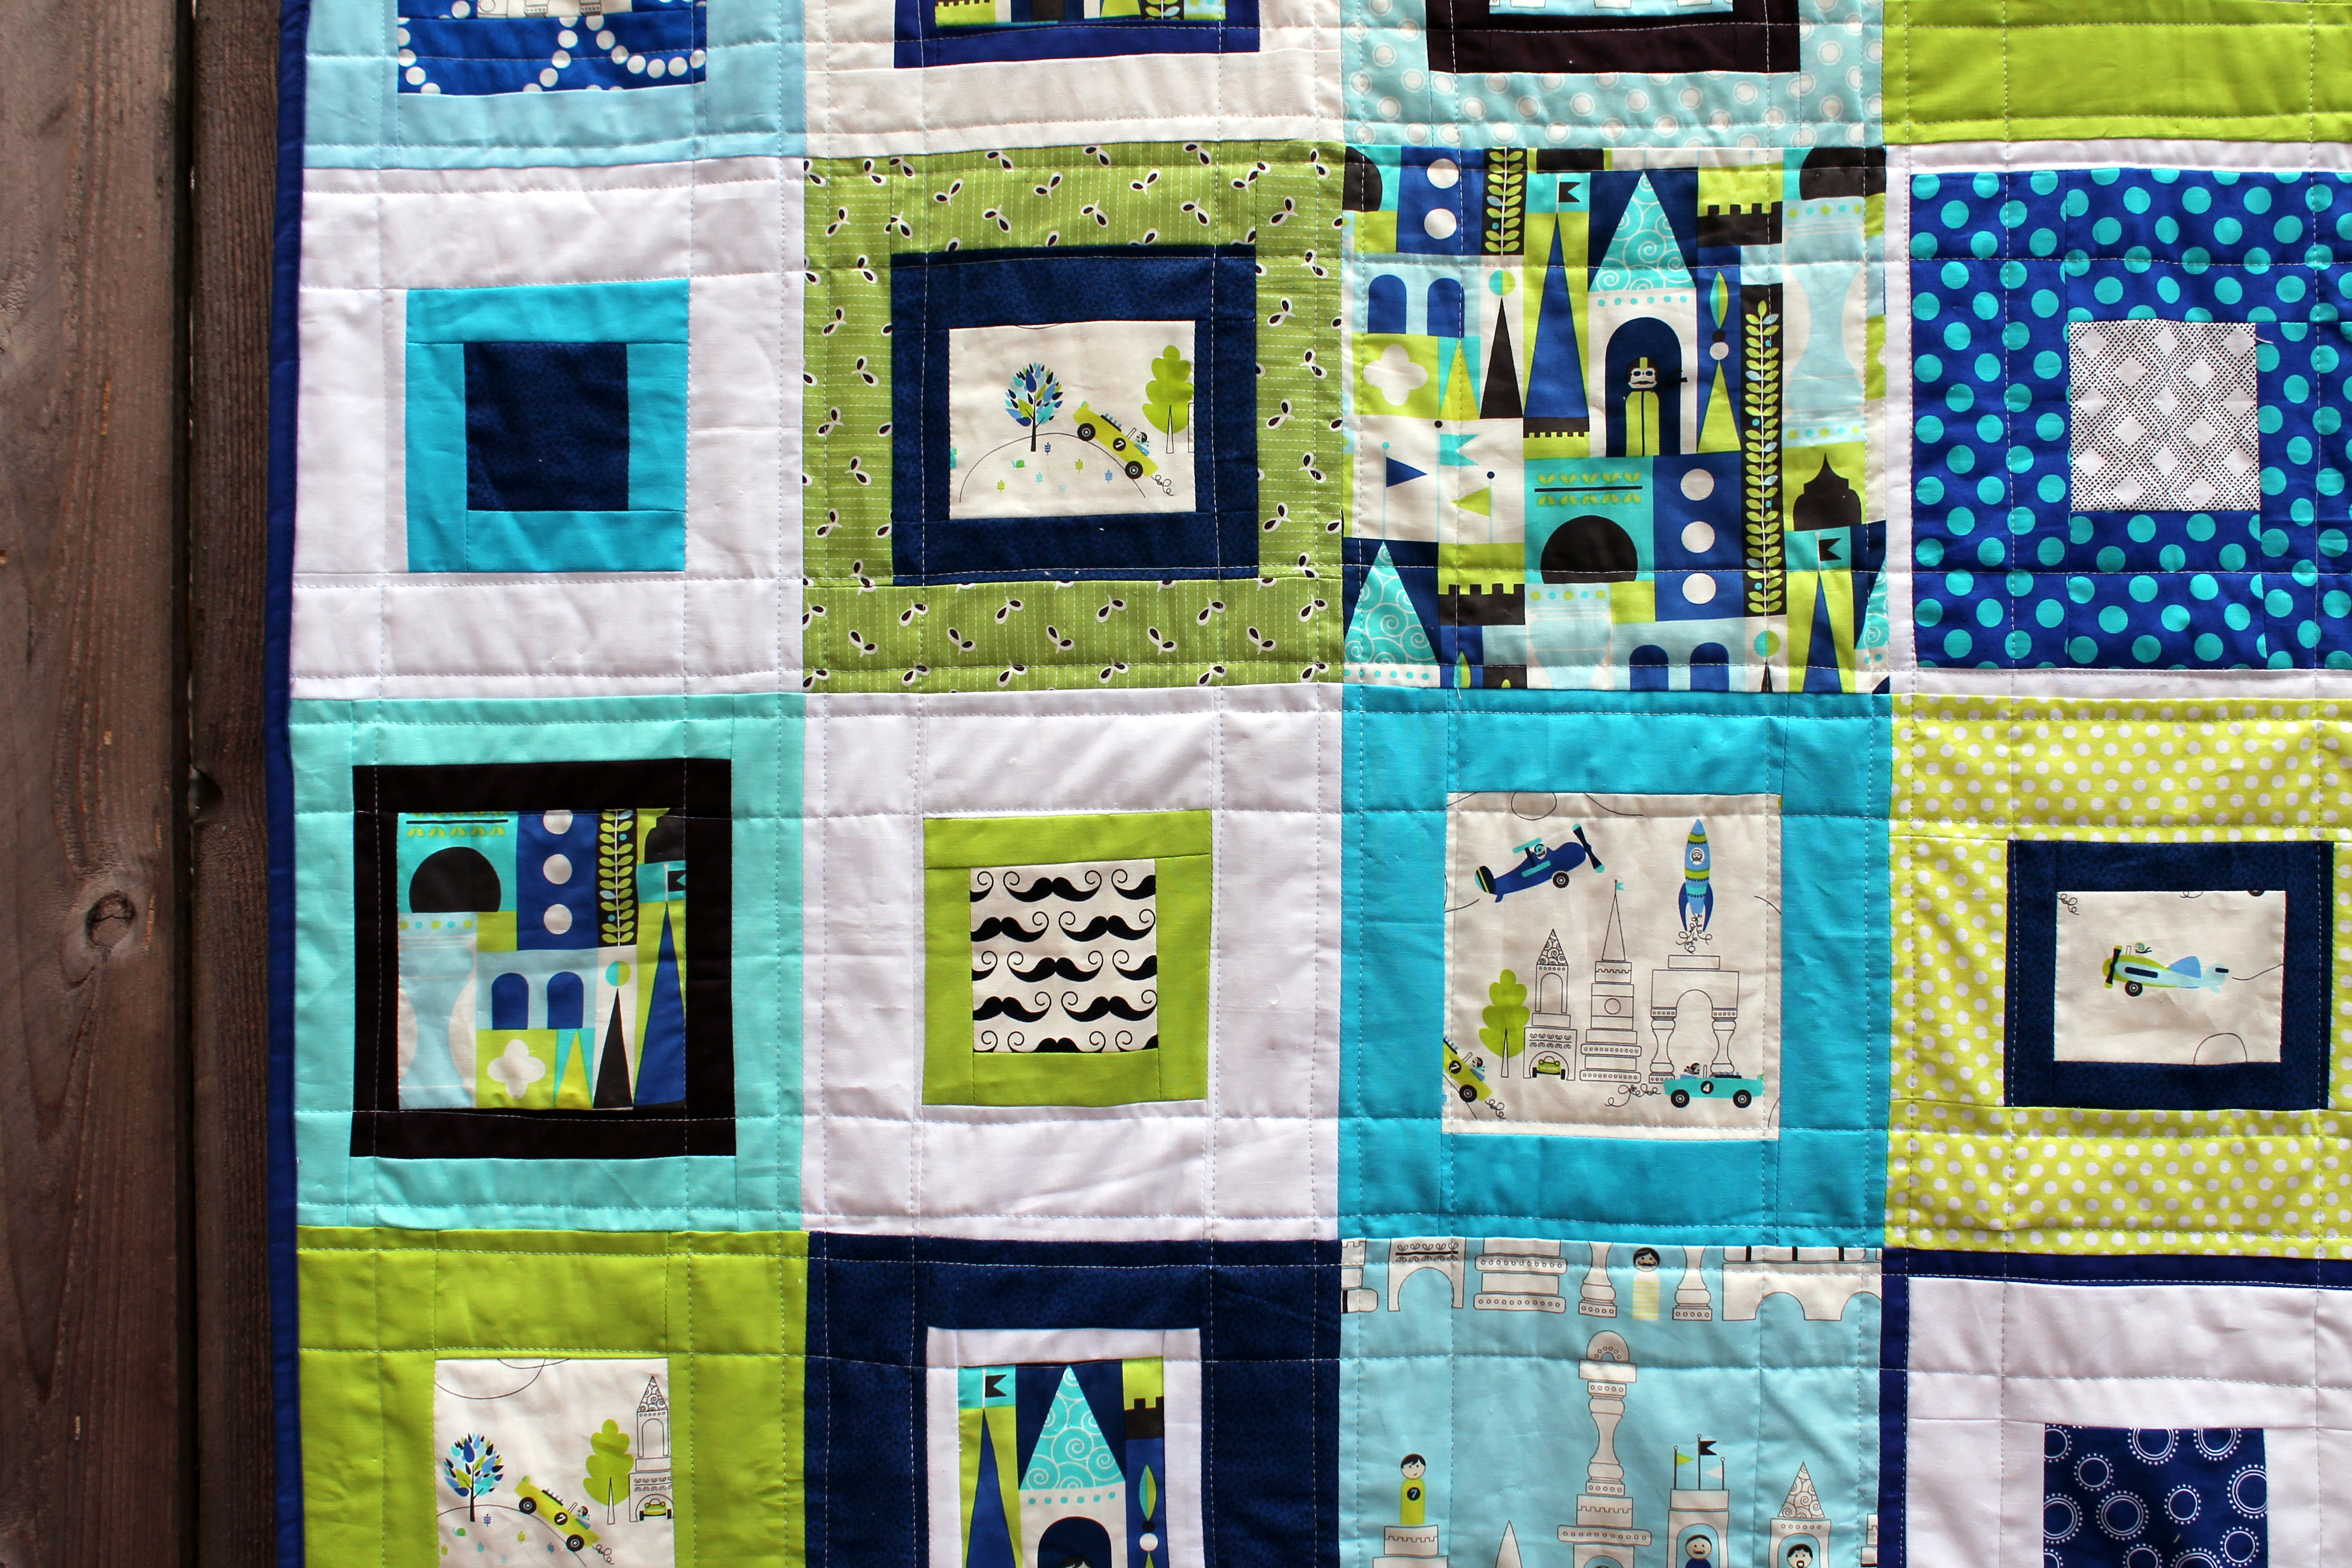
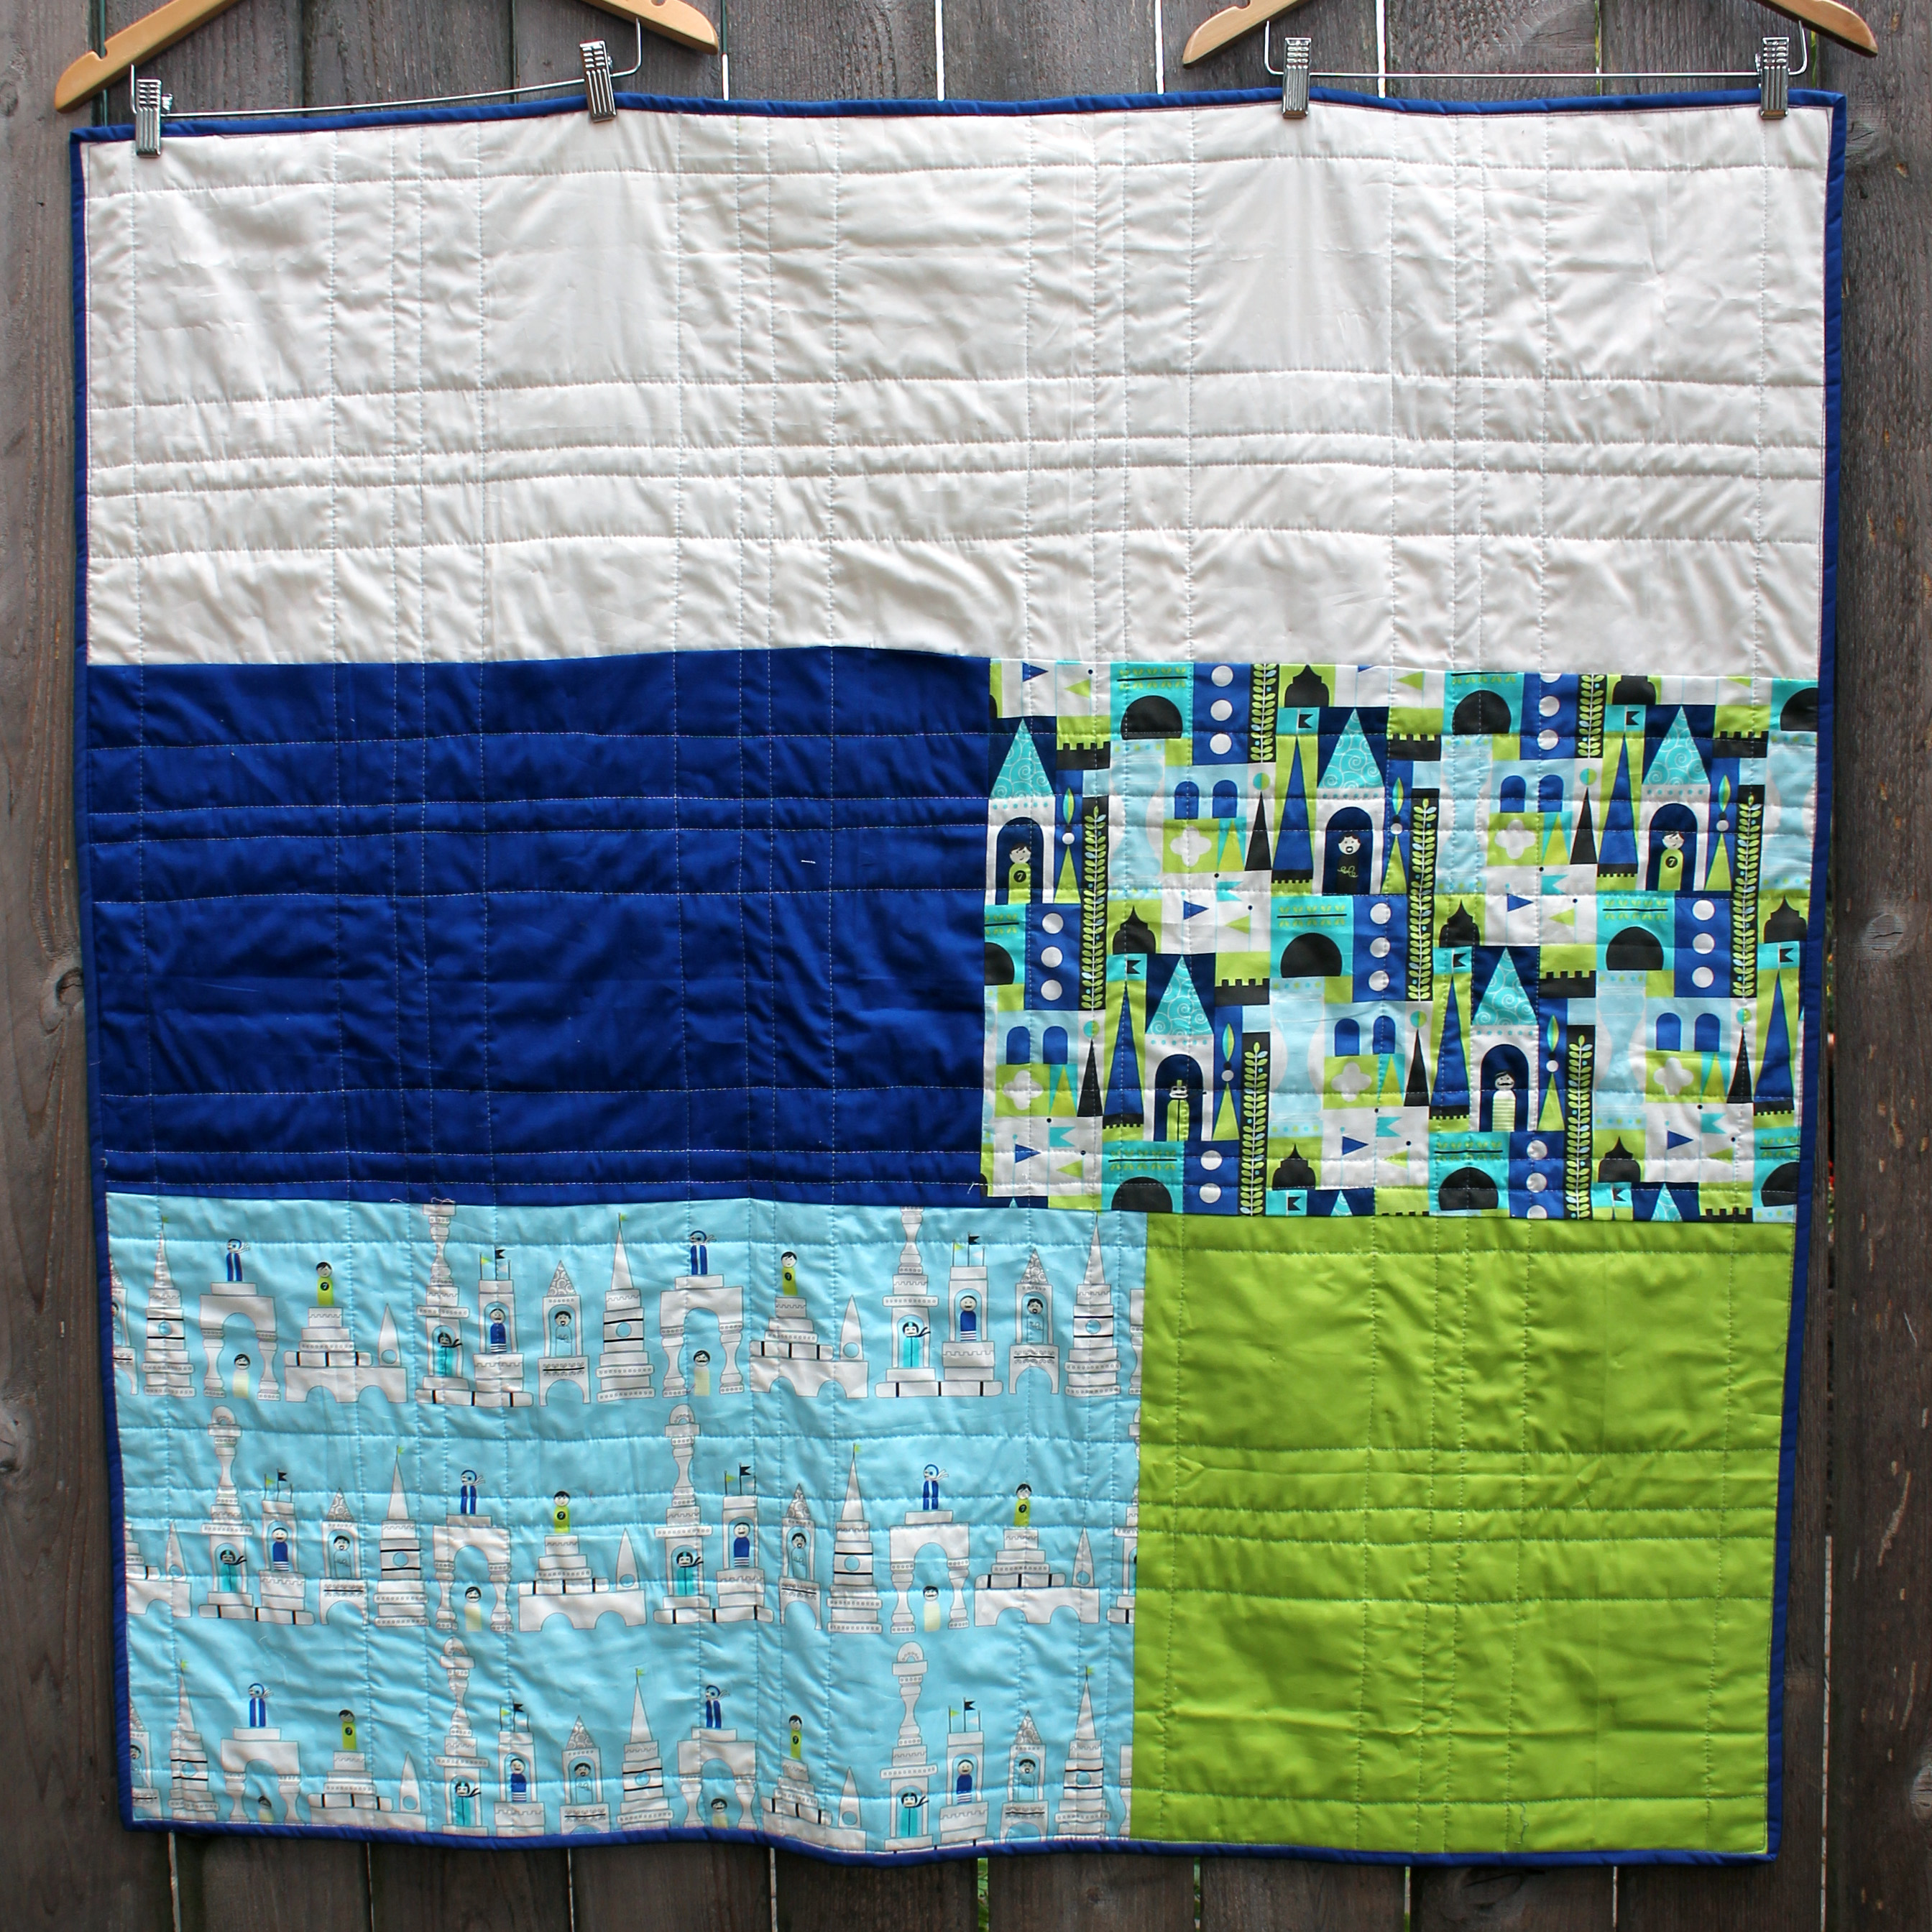
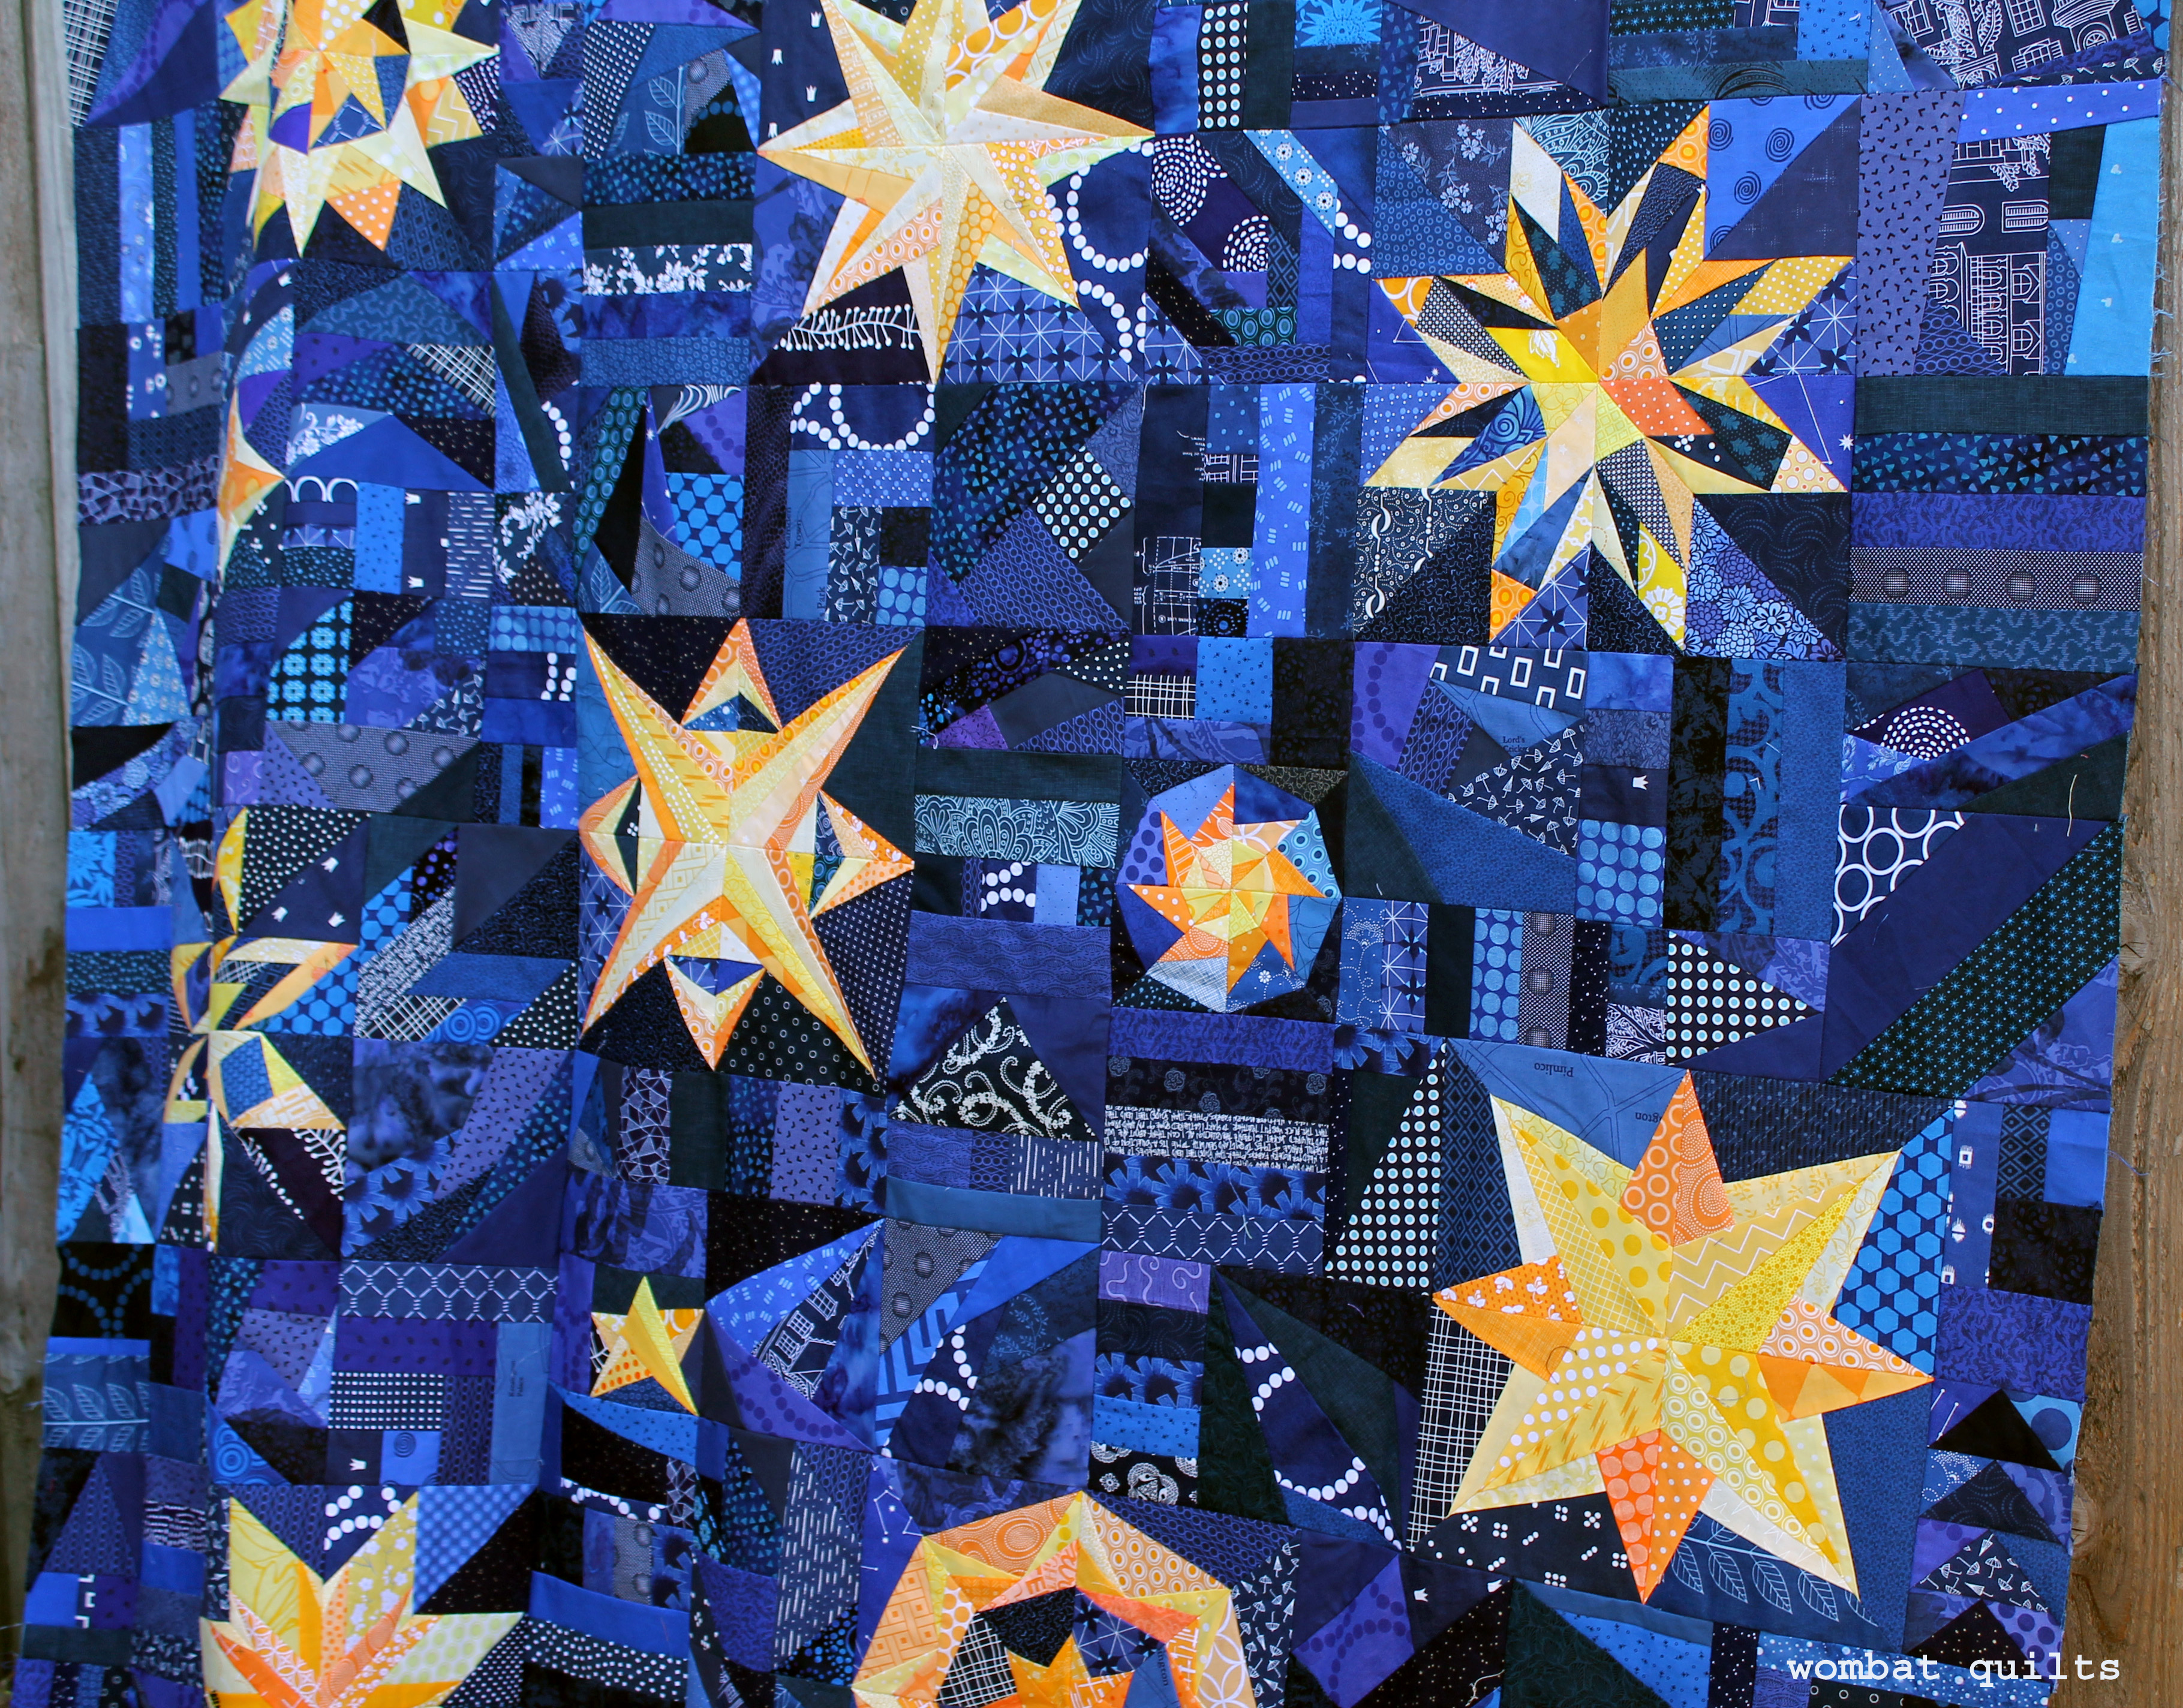
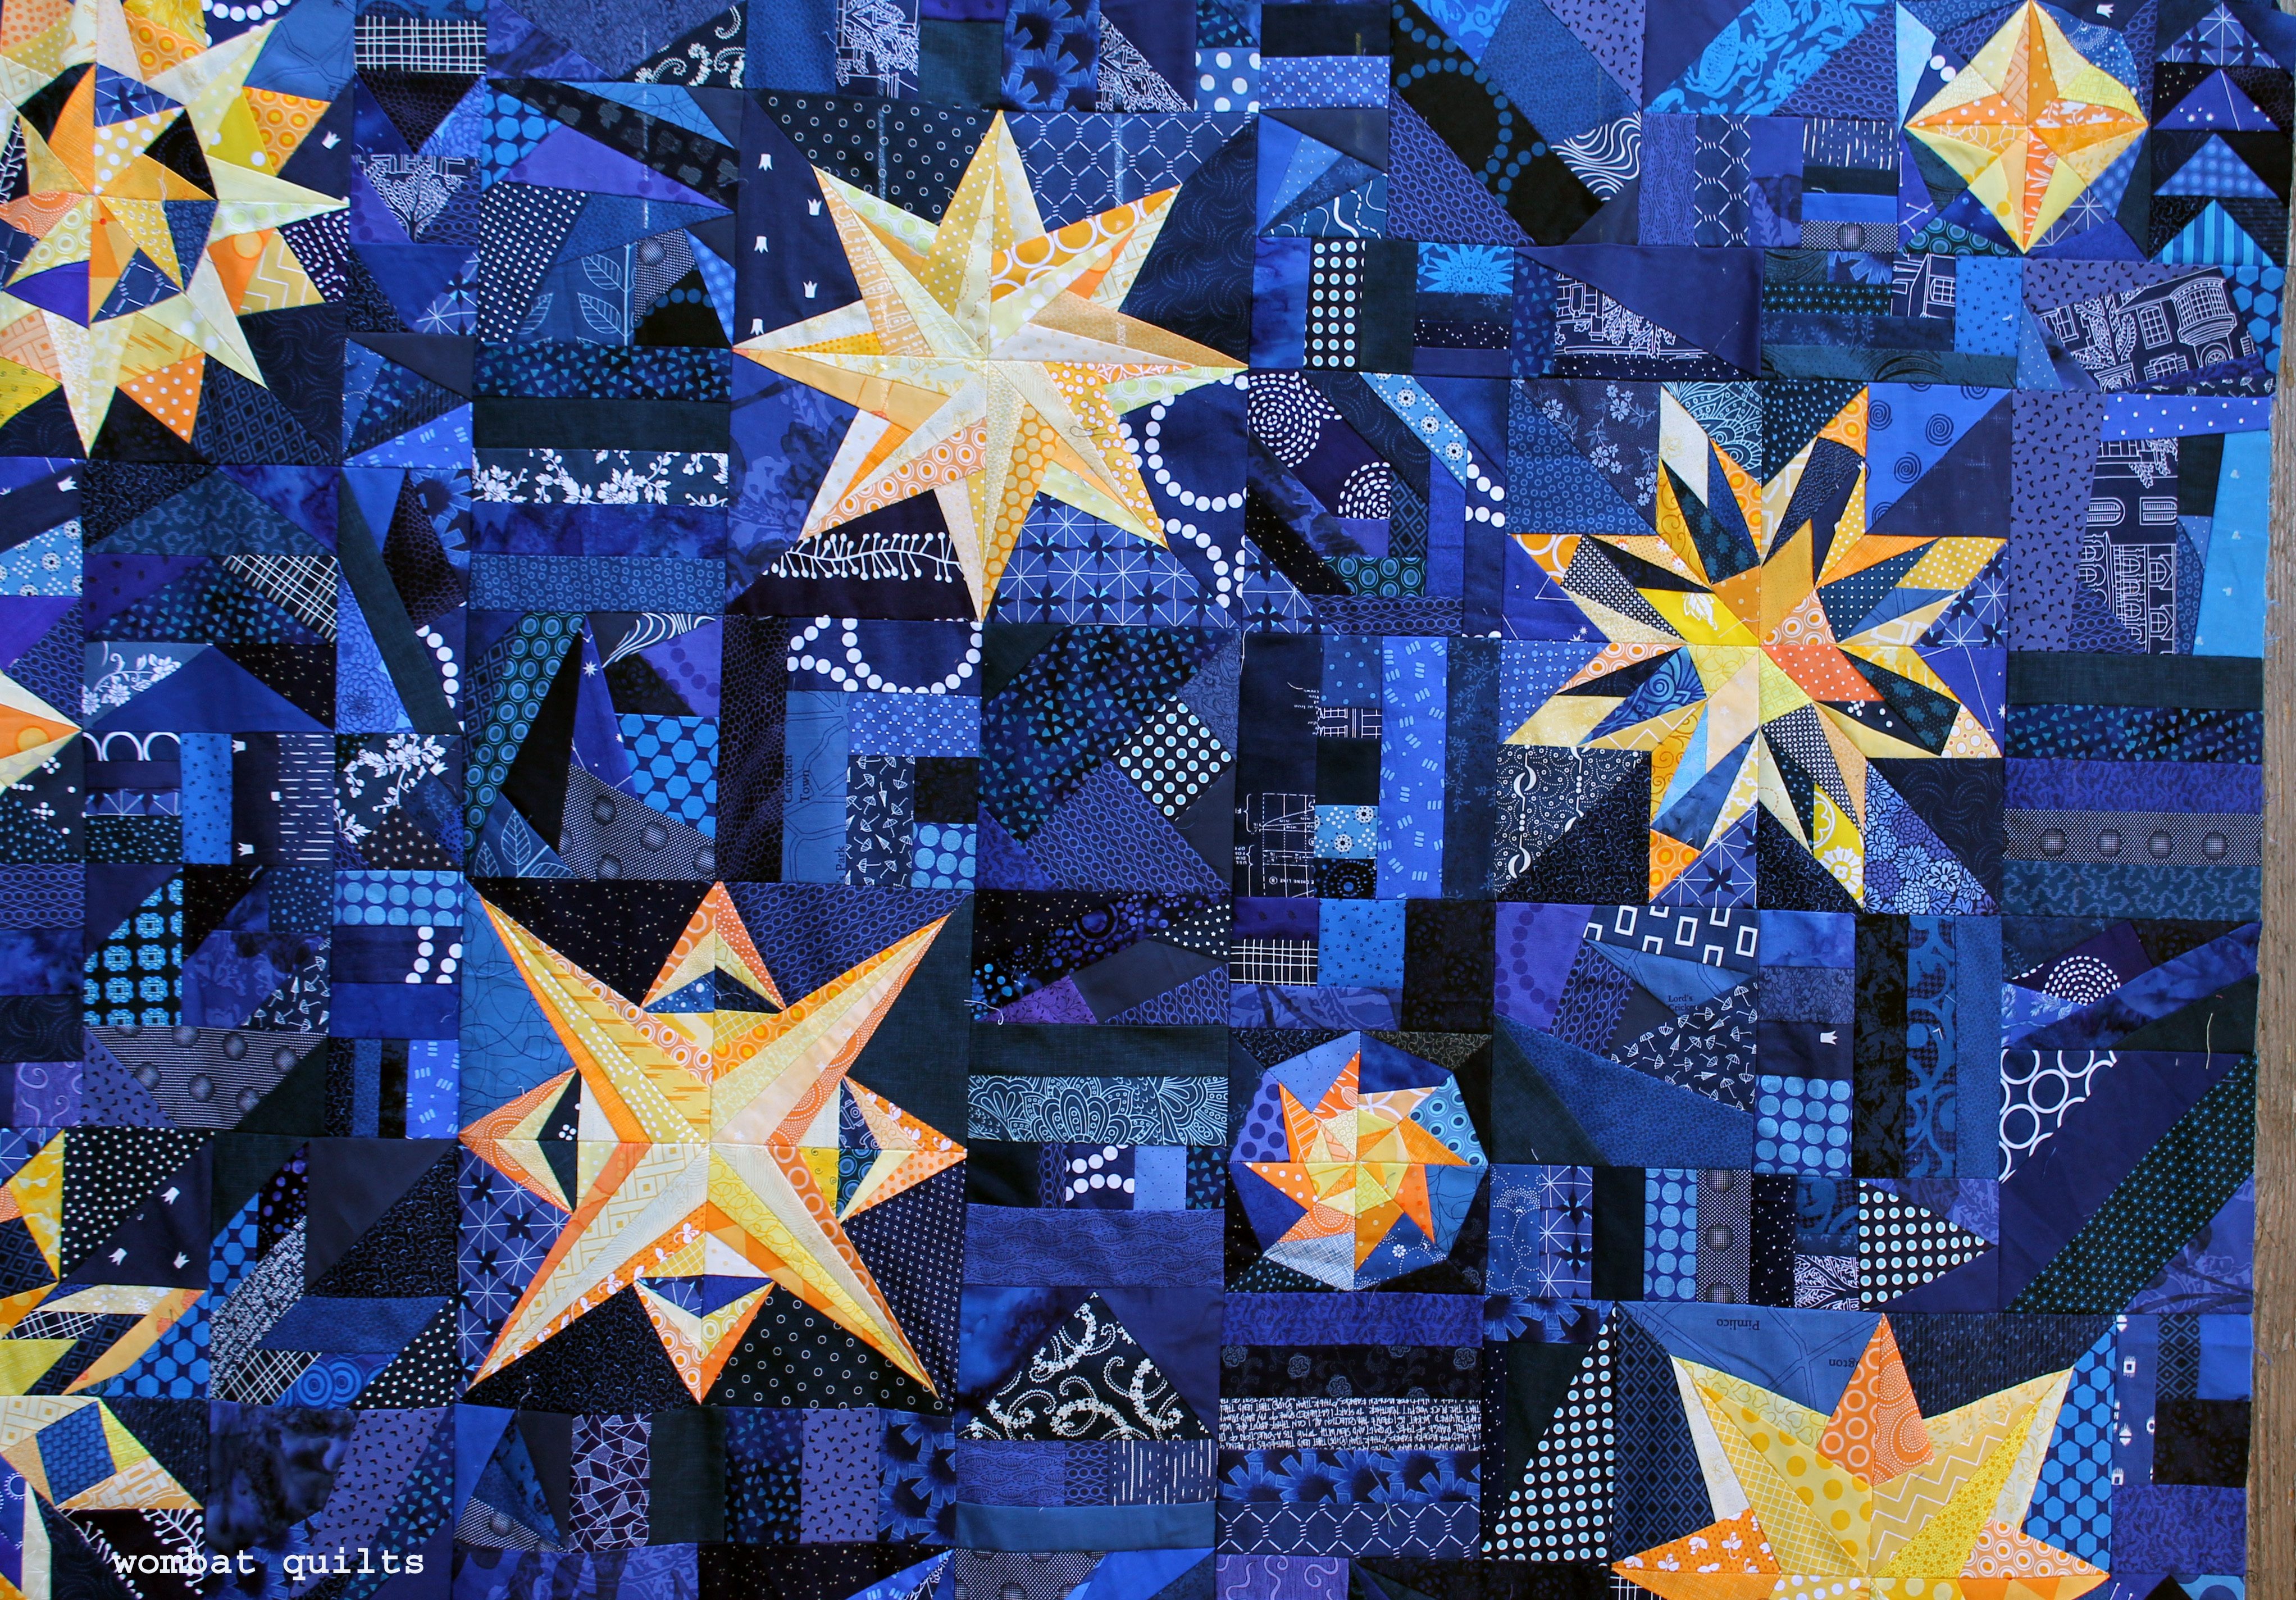
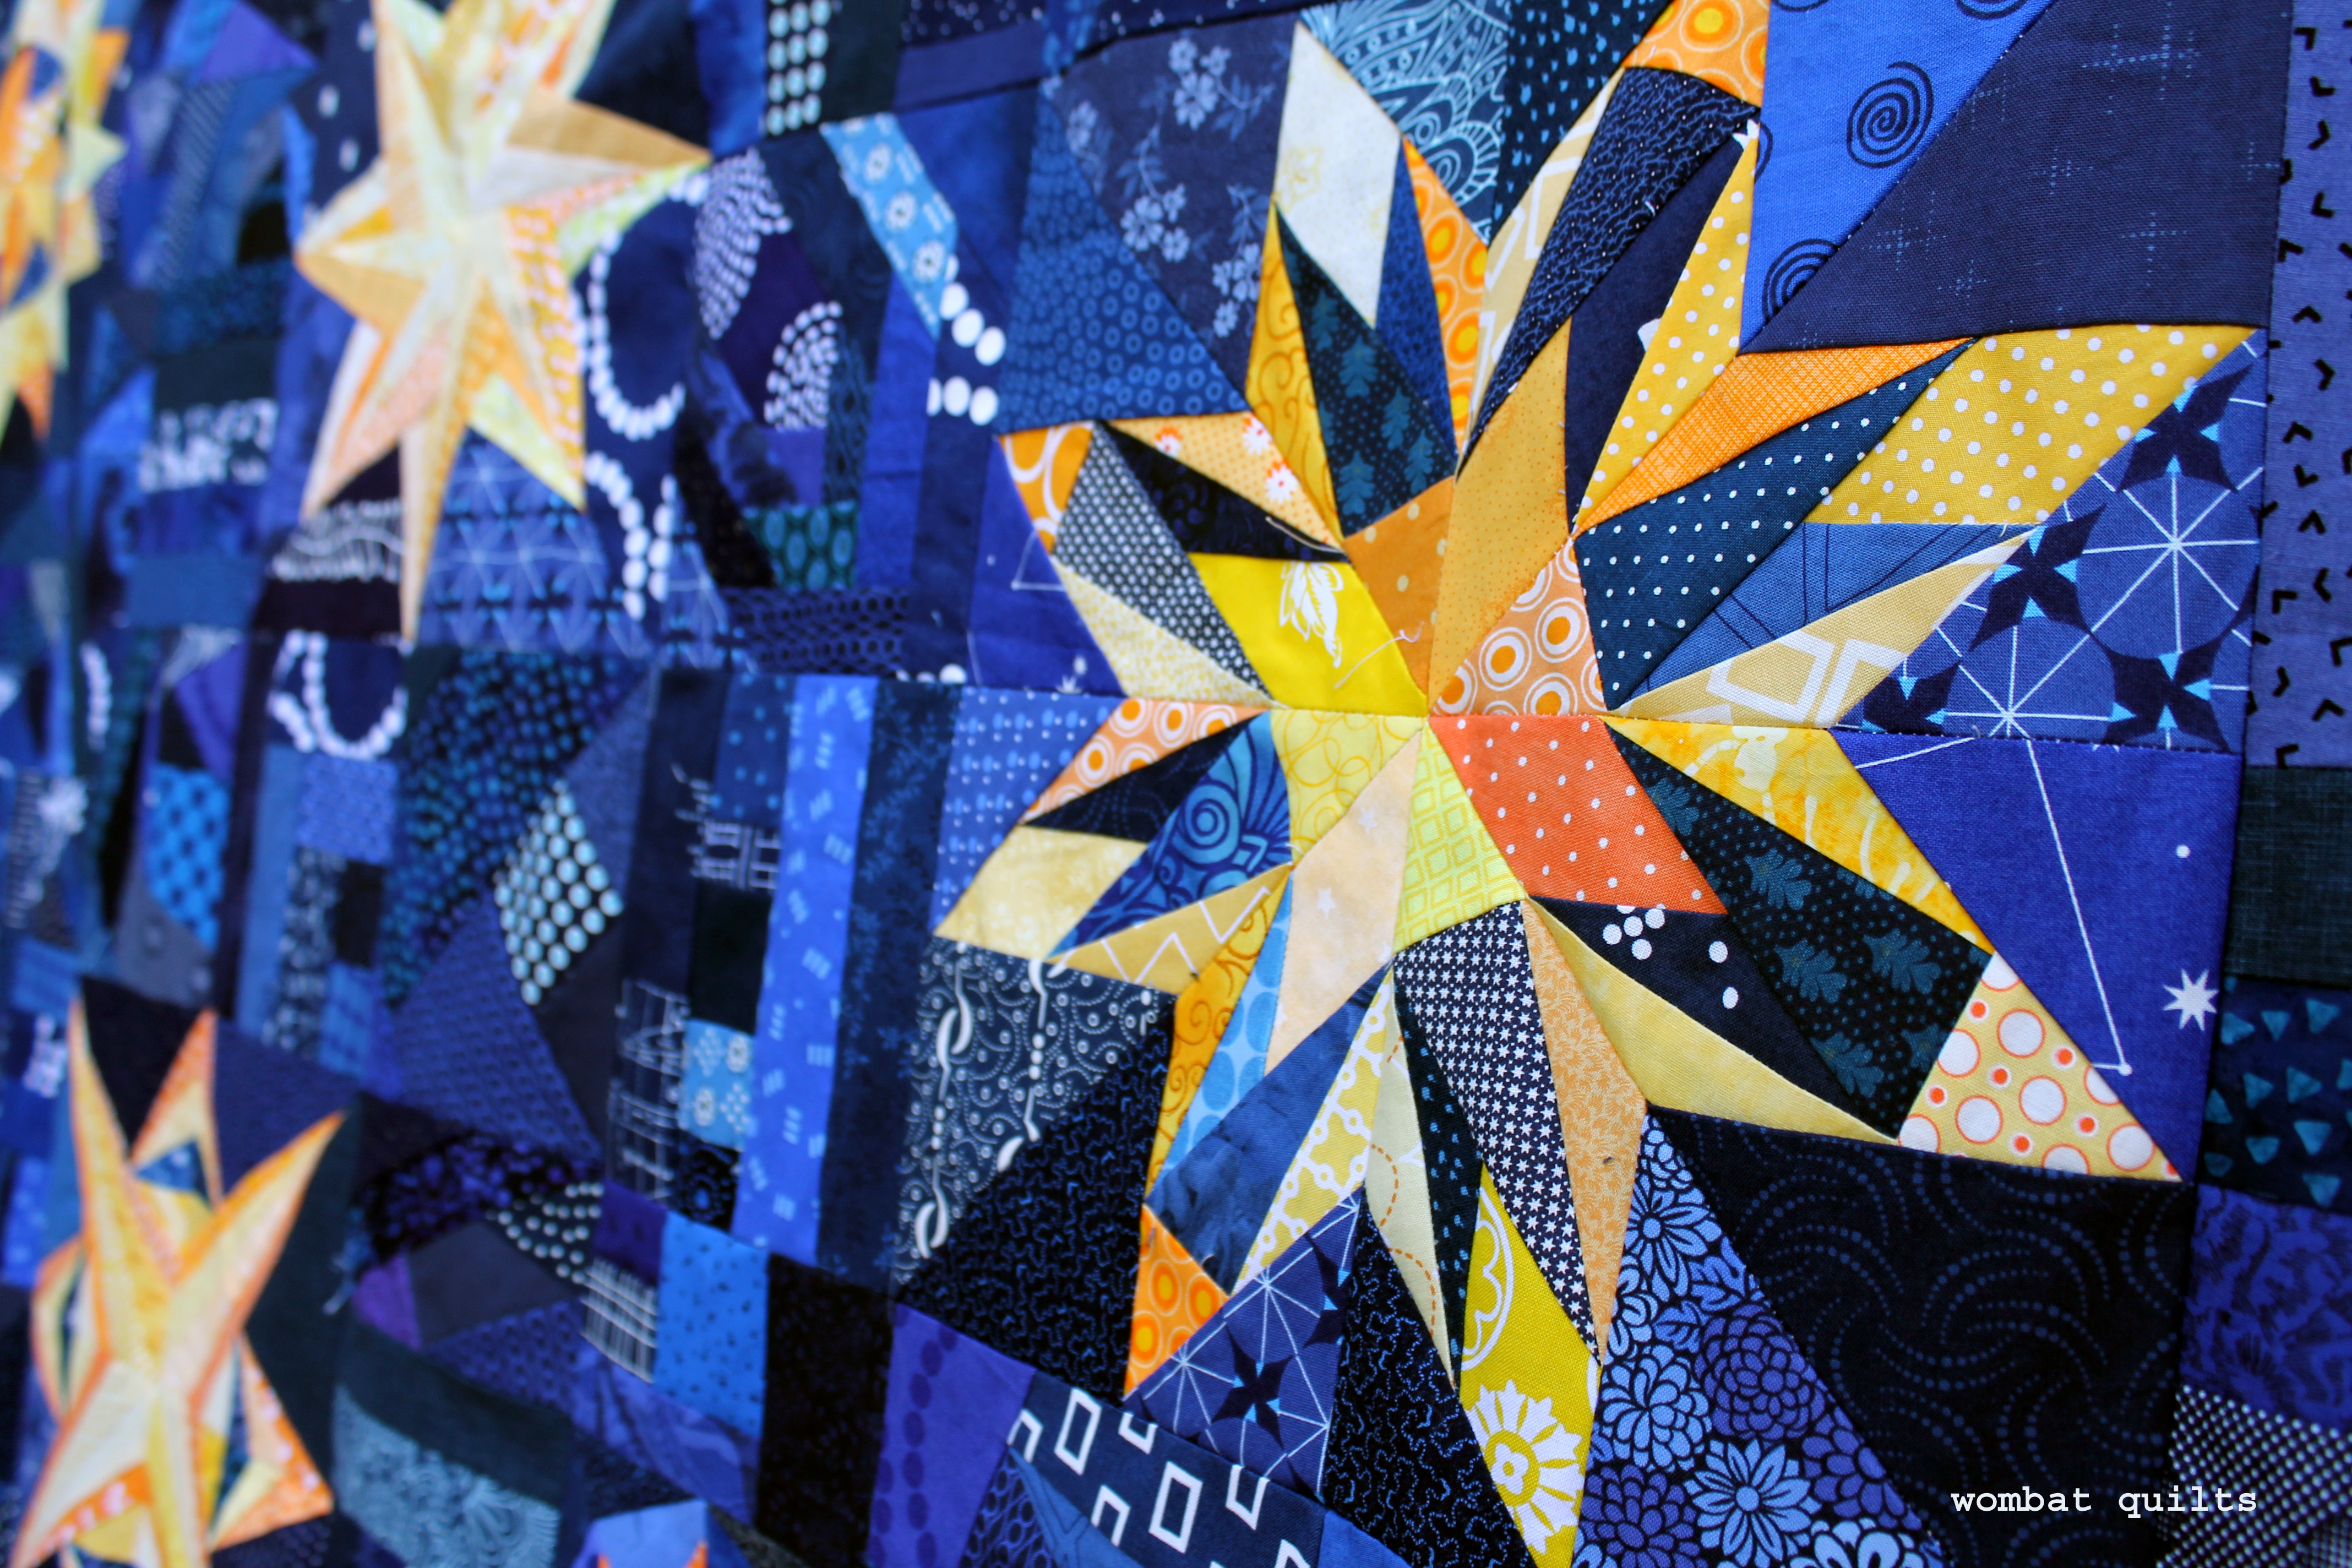
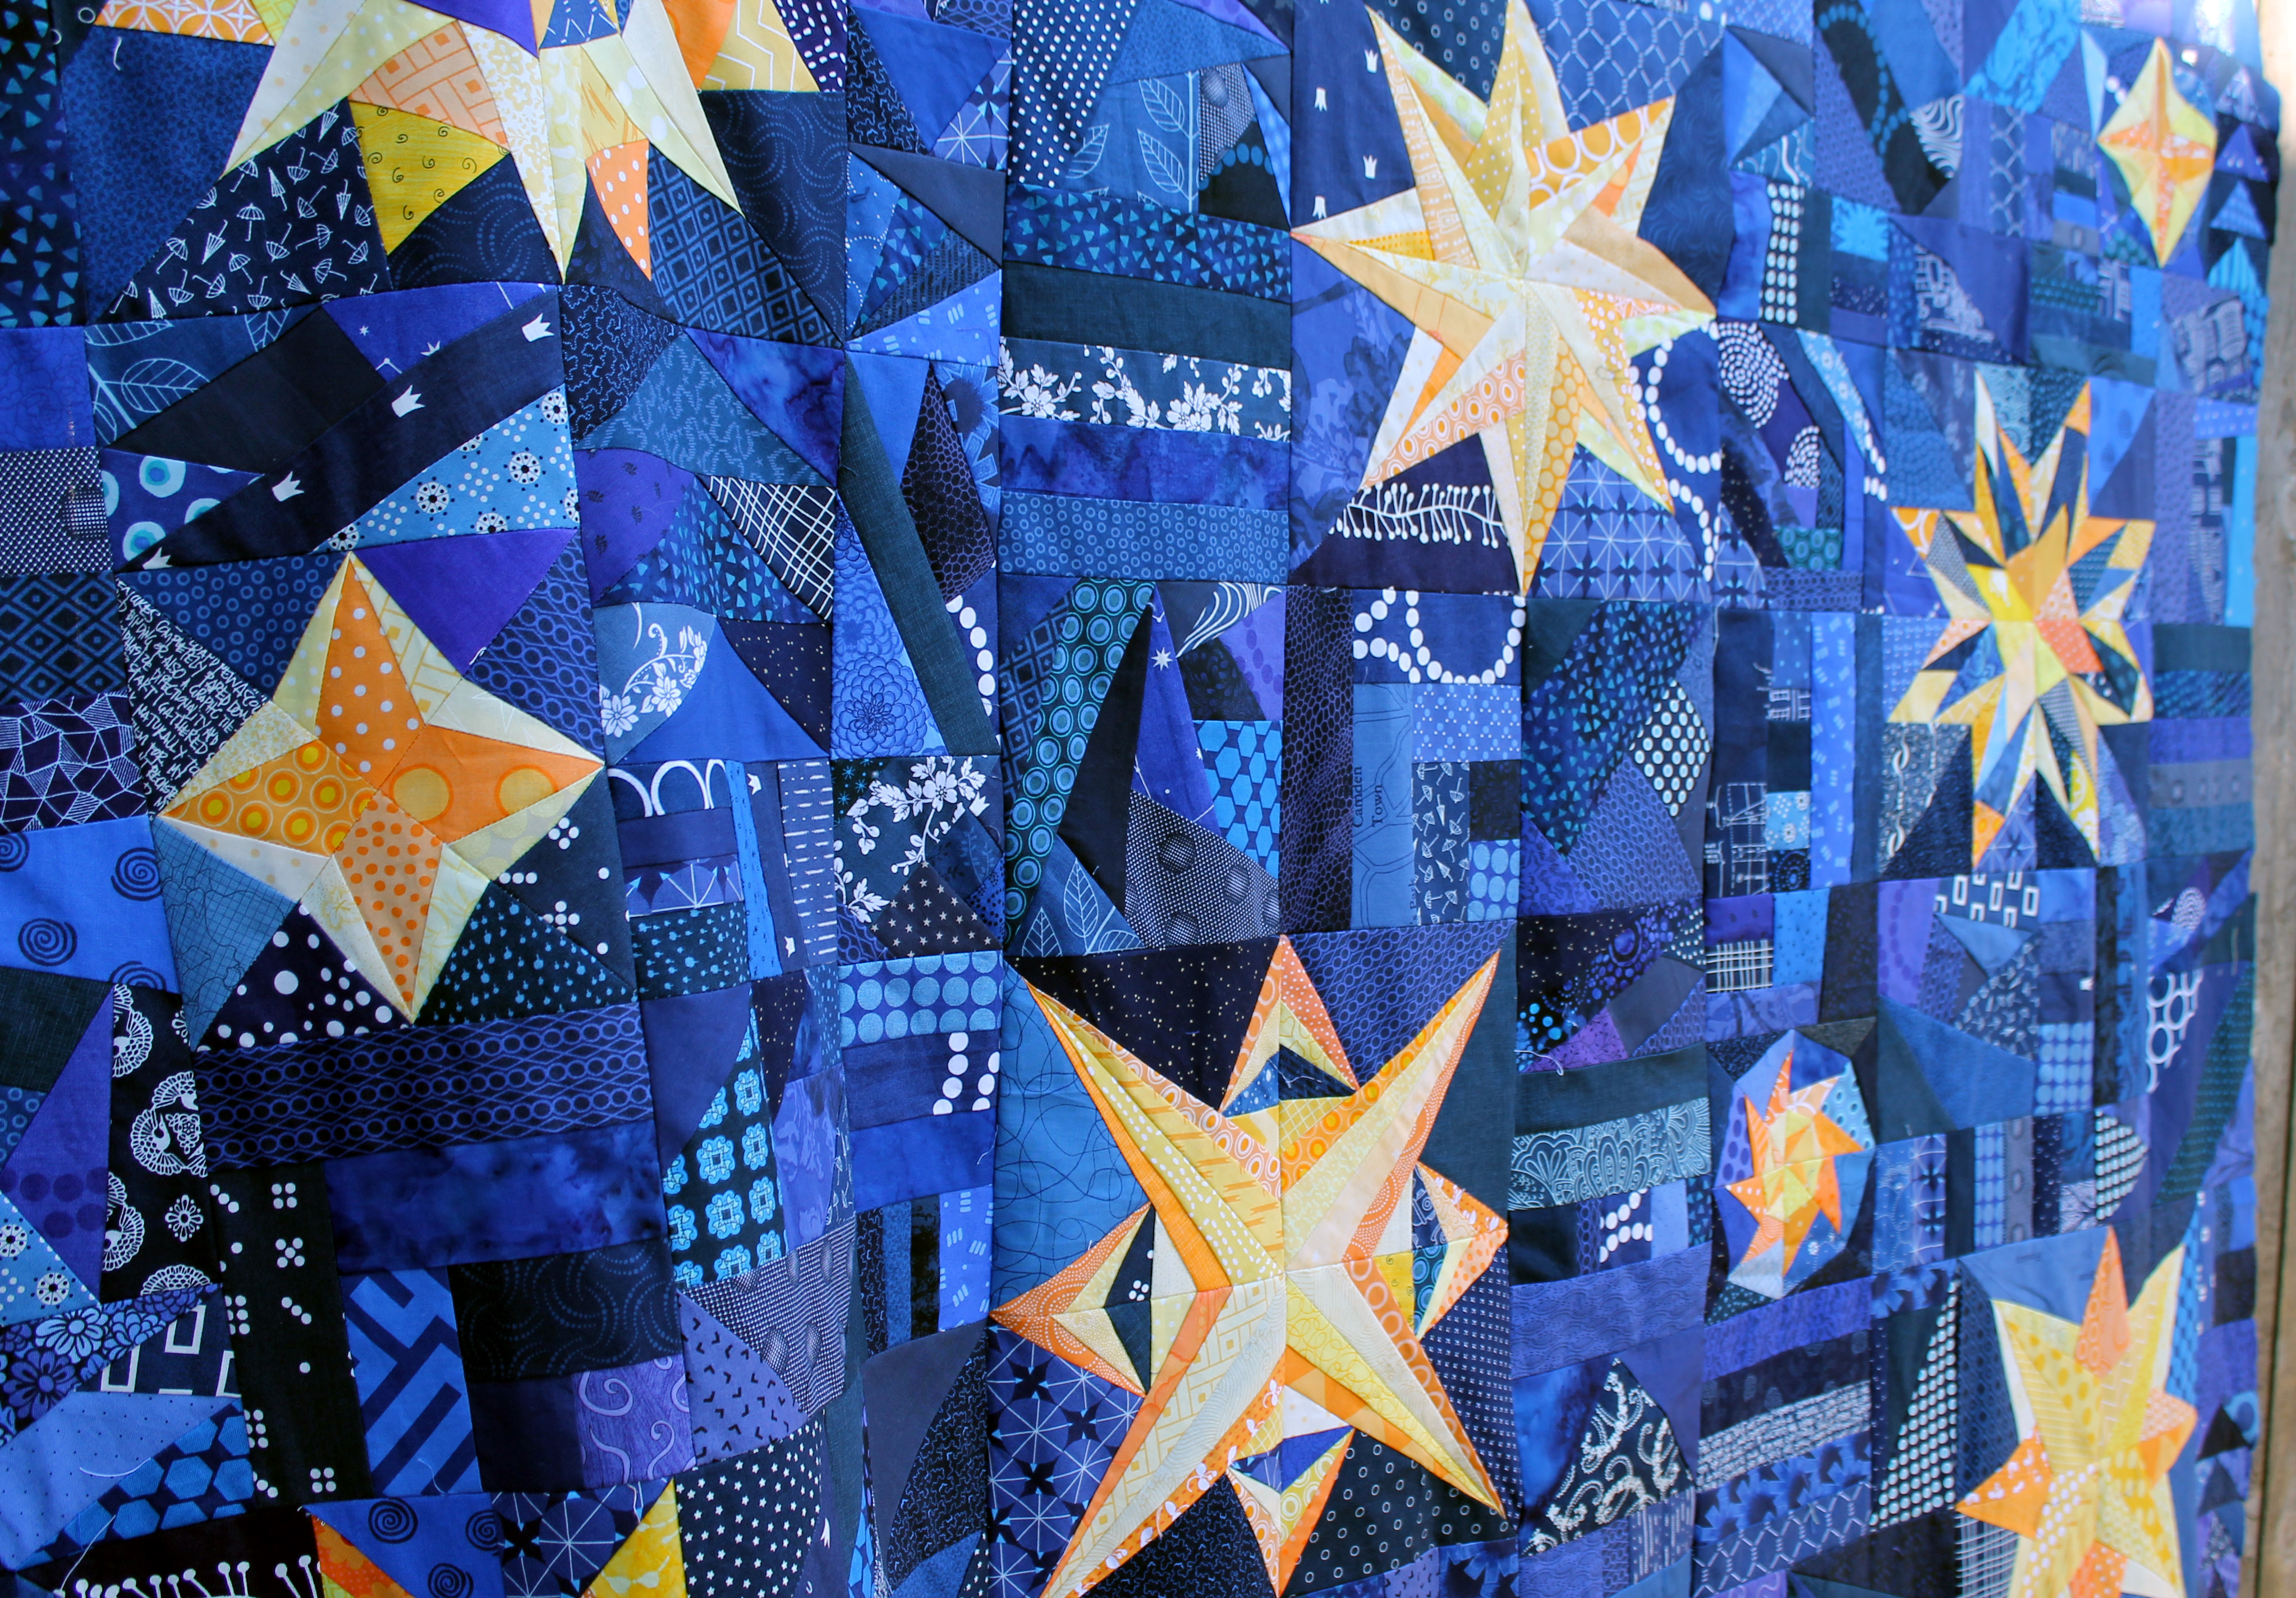
This week I managed to finish up one of the Do Good Stitches quilt tops I have in progress.  This quilt started with this wonderful block….

scrappy quilt block

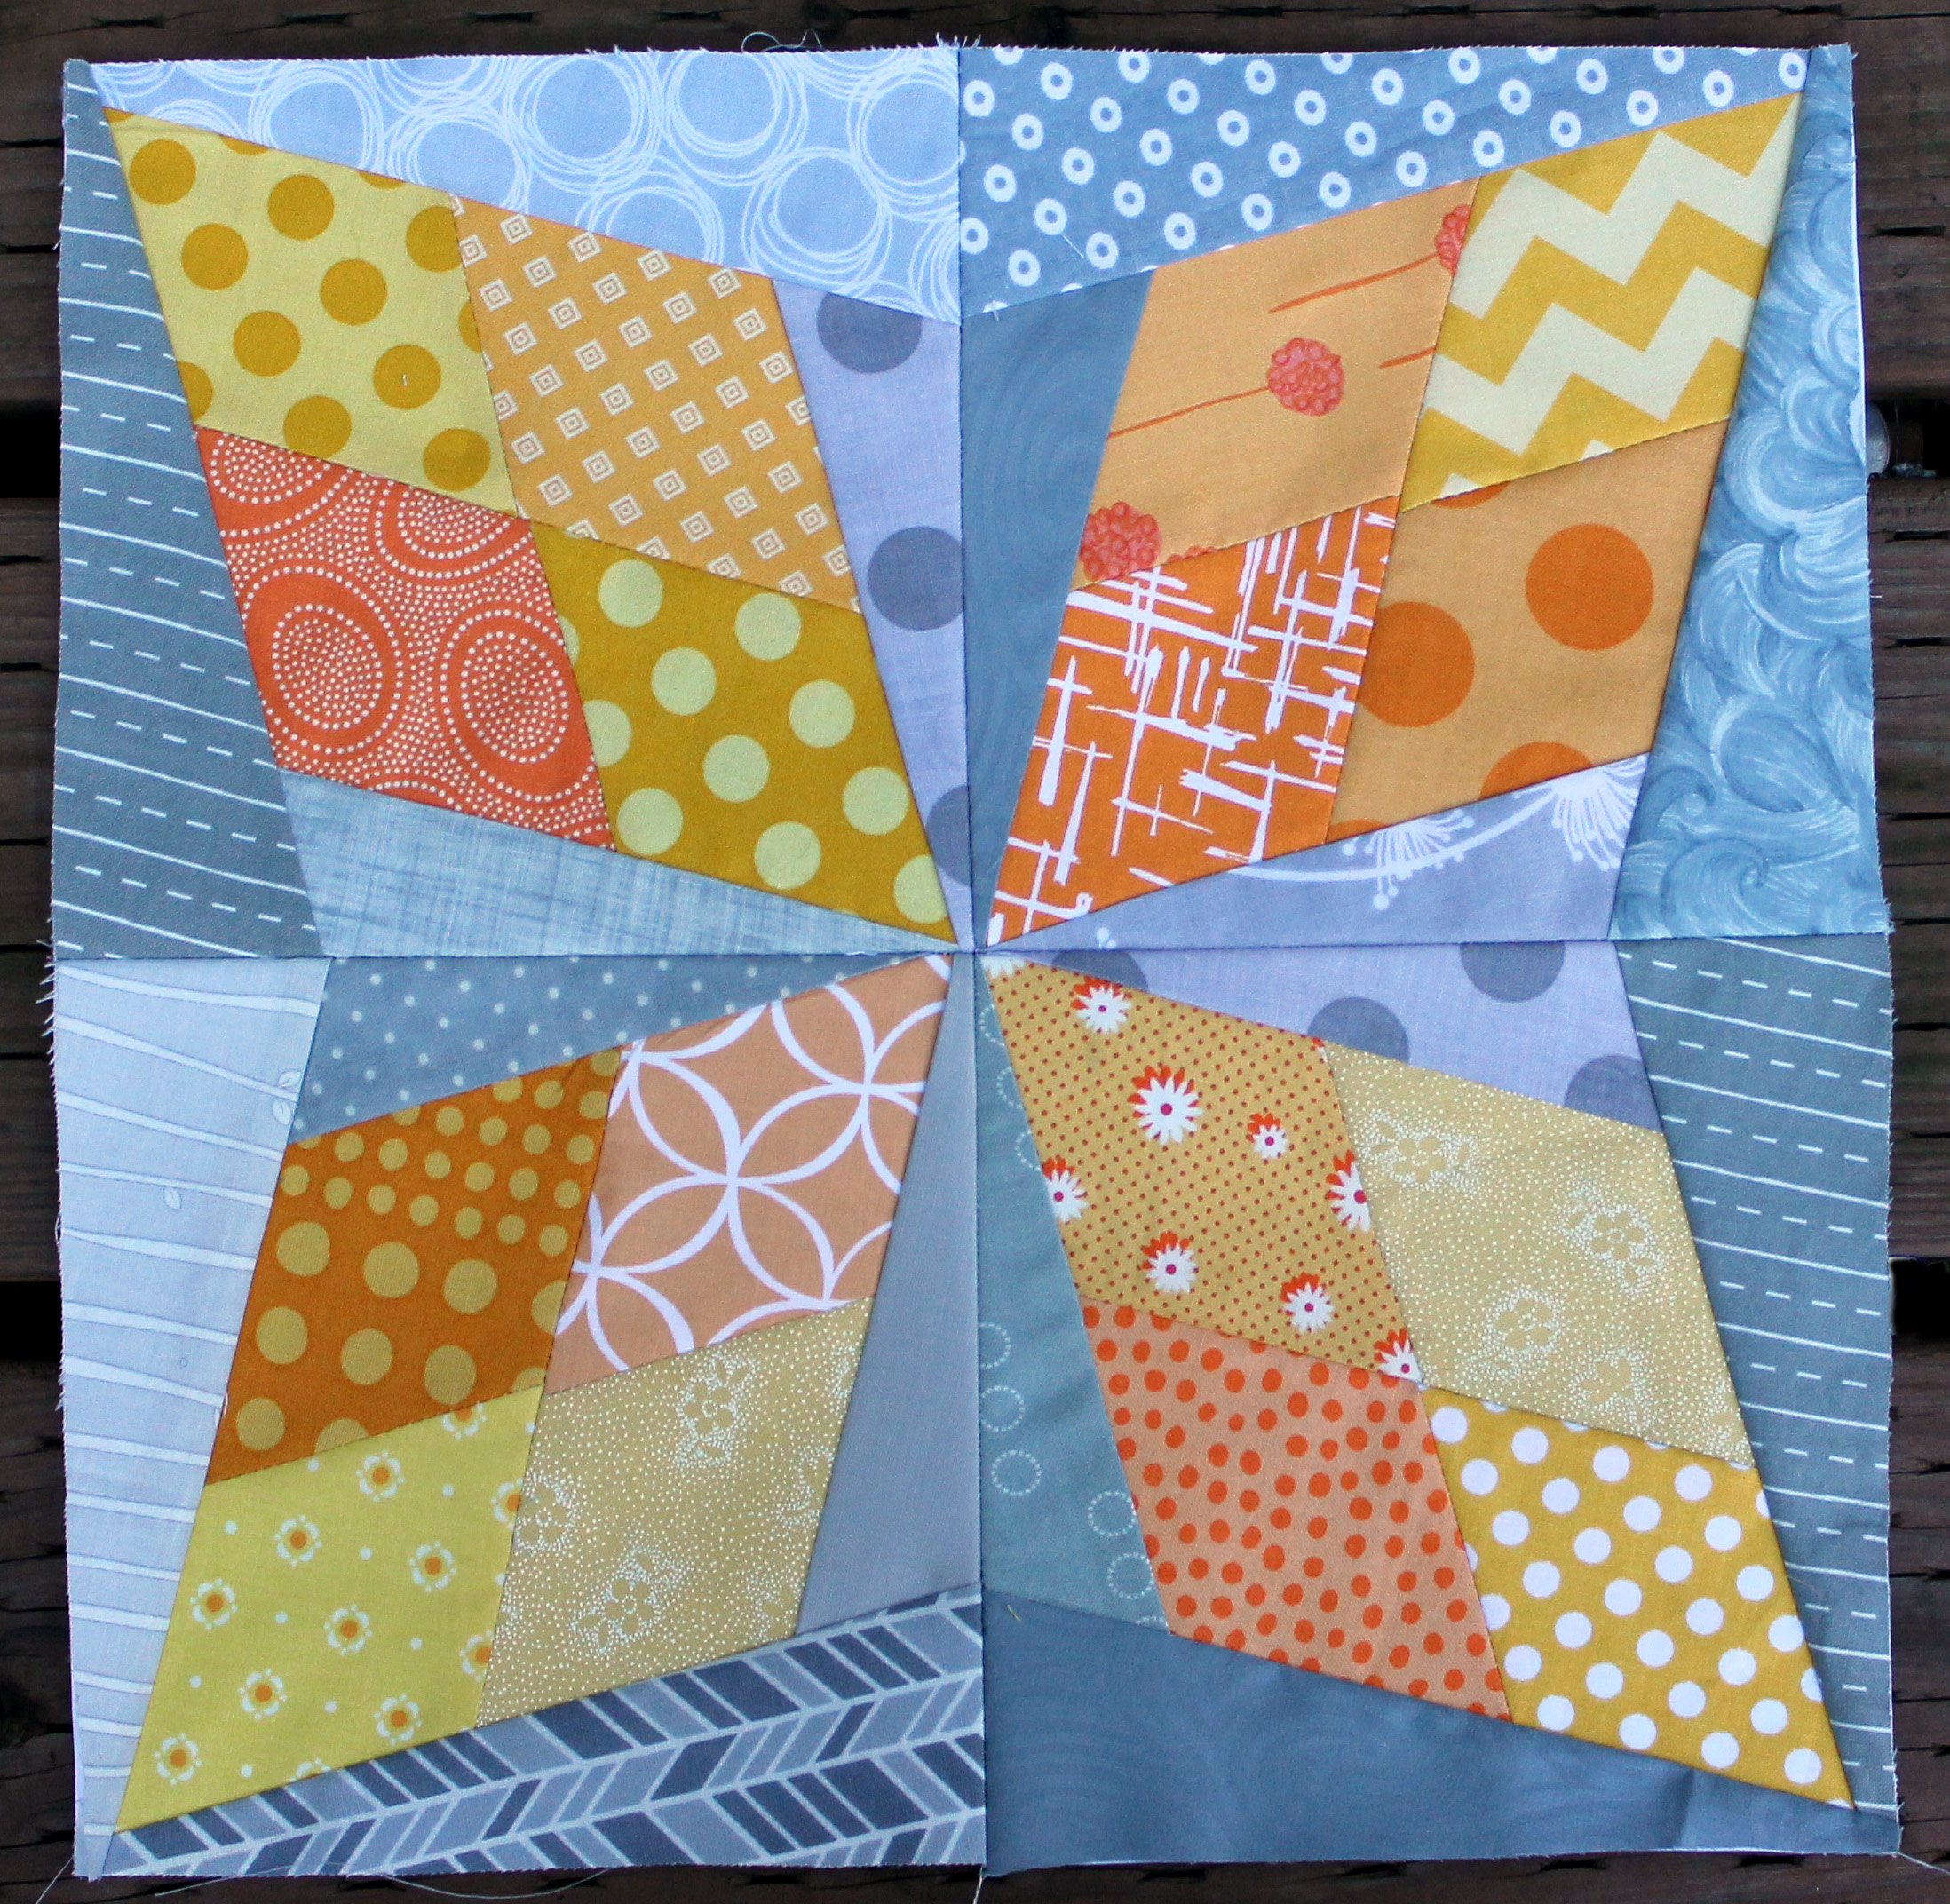
I found the paper piecing pattern at Freshly Pieced and fell in love.  I set it as my block for August and then watched with delight as my fellow Hope Circle members sent in their blocks.    A little bit of sewing and voila a quilt top was created…

scrap quilt top

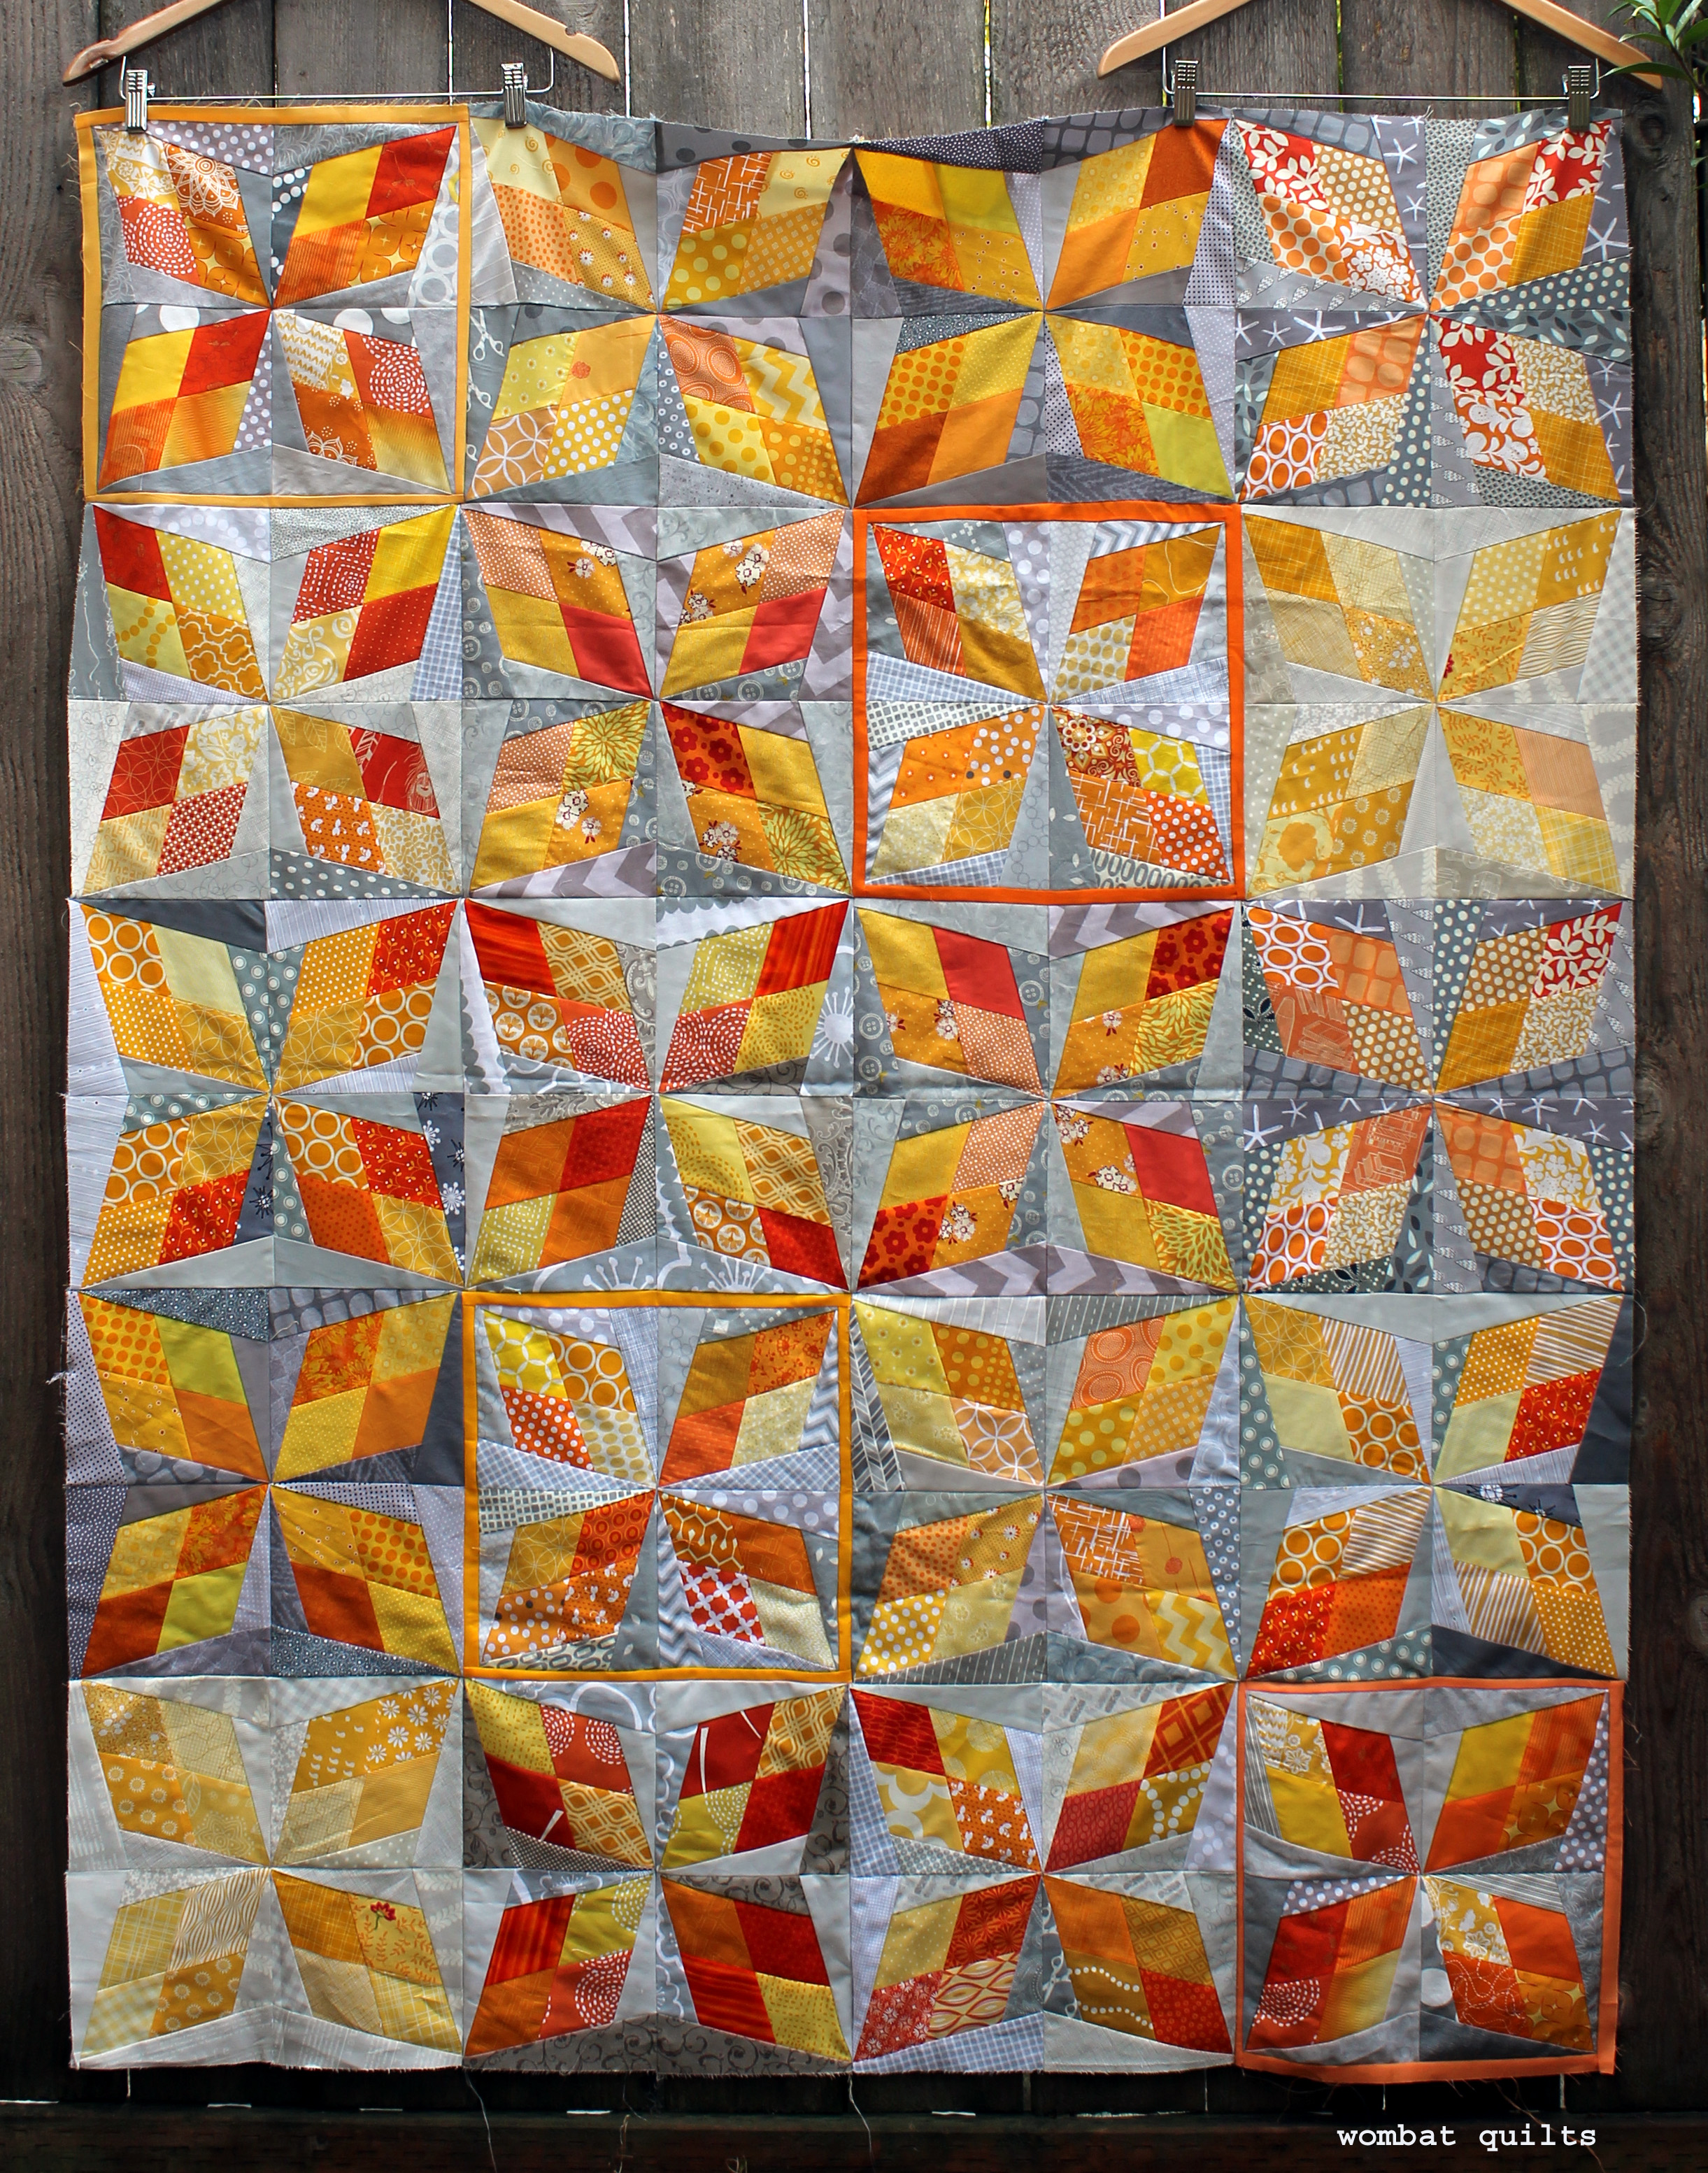
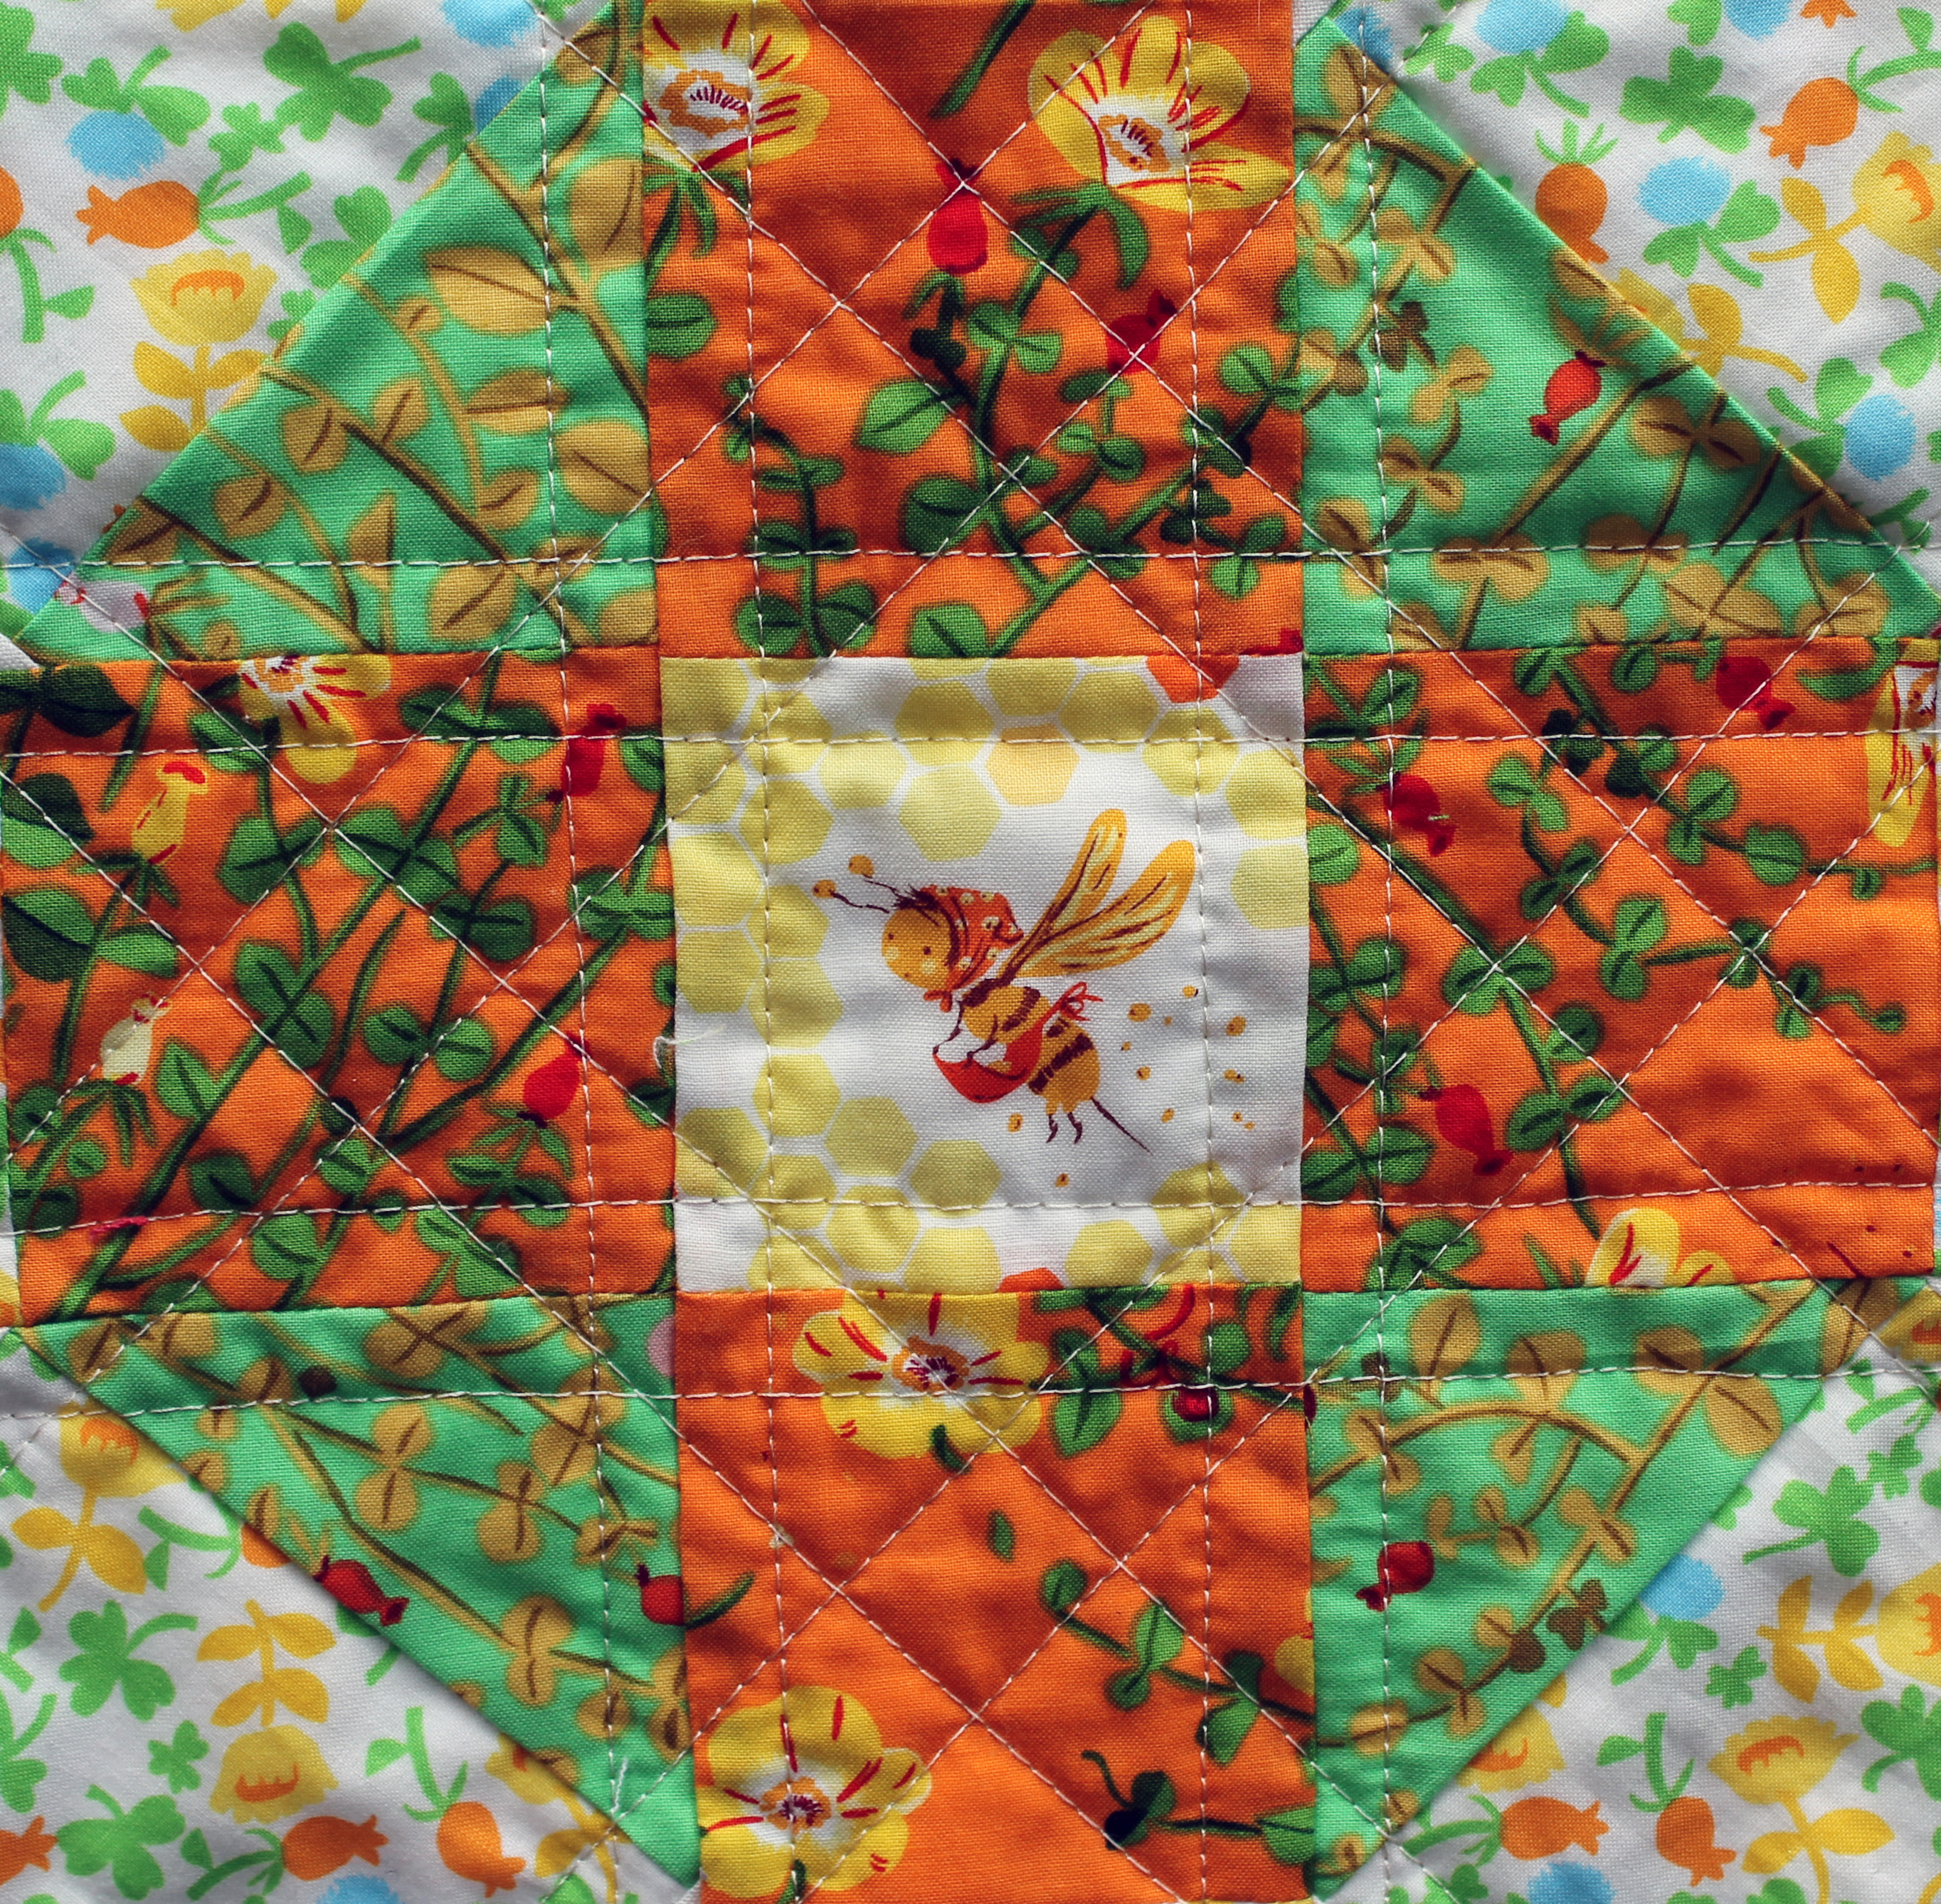
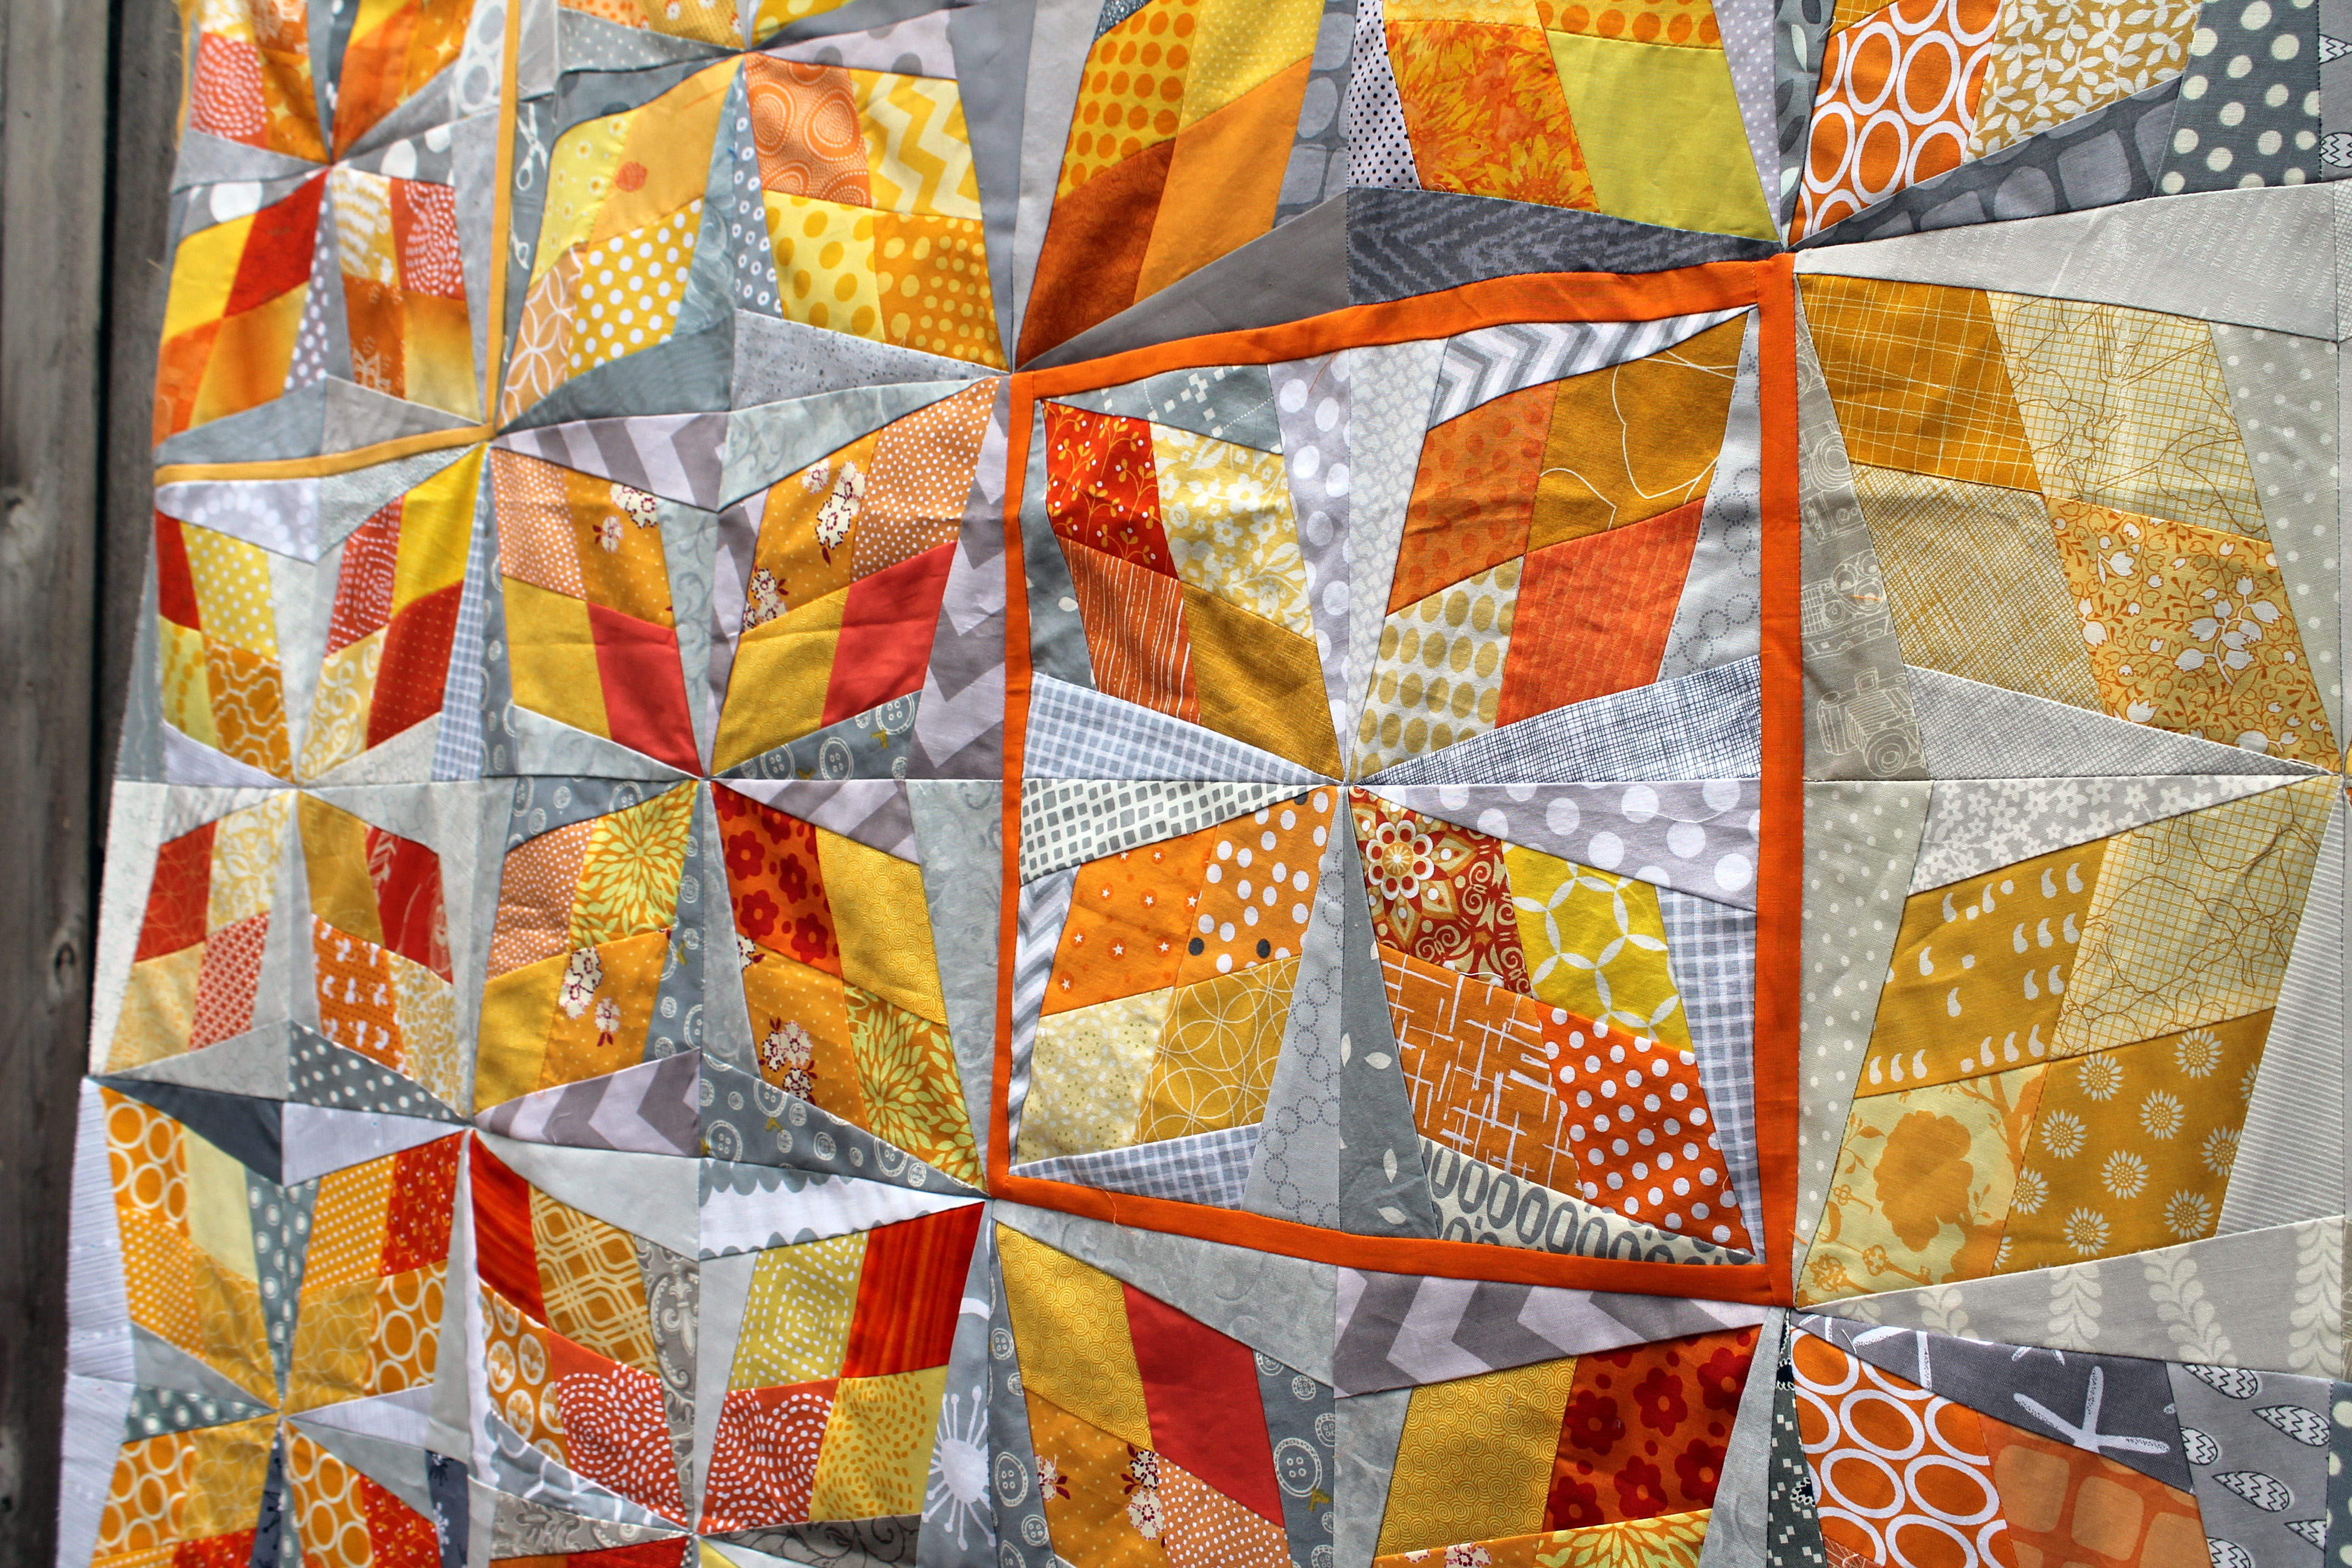
I loved the subtle variations in colour that were added by other members.  The deep orange adds such a pop and the soft quiet yellow gives the eye a resting place.

Resizing blocks

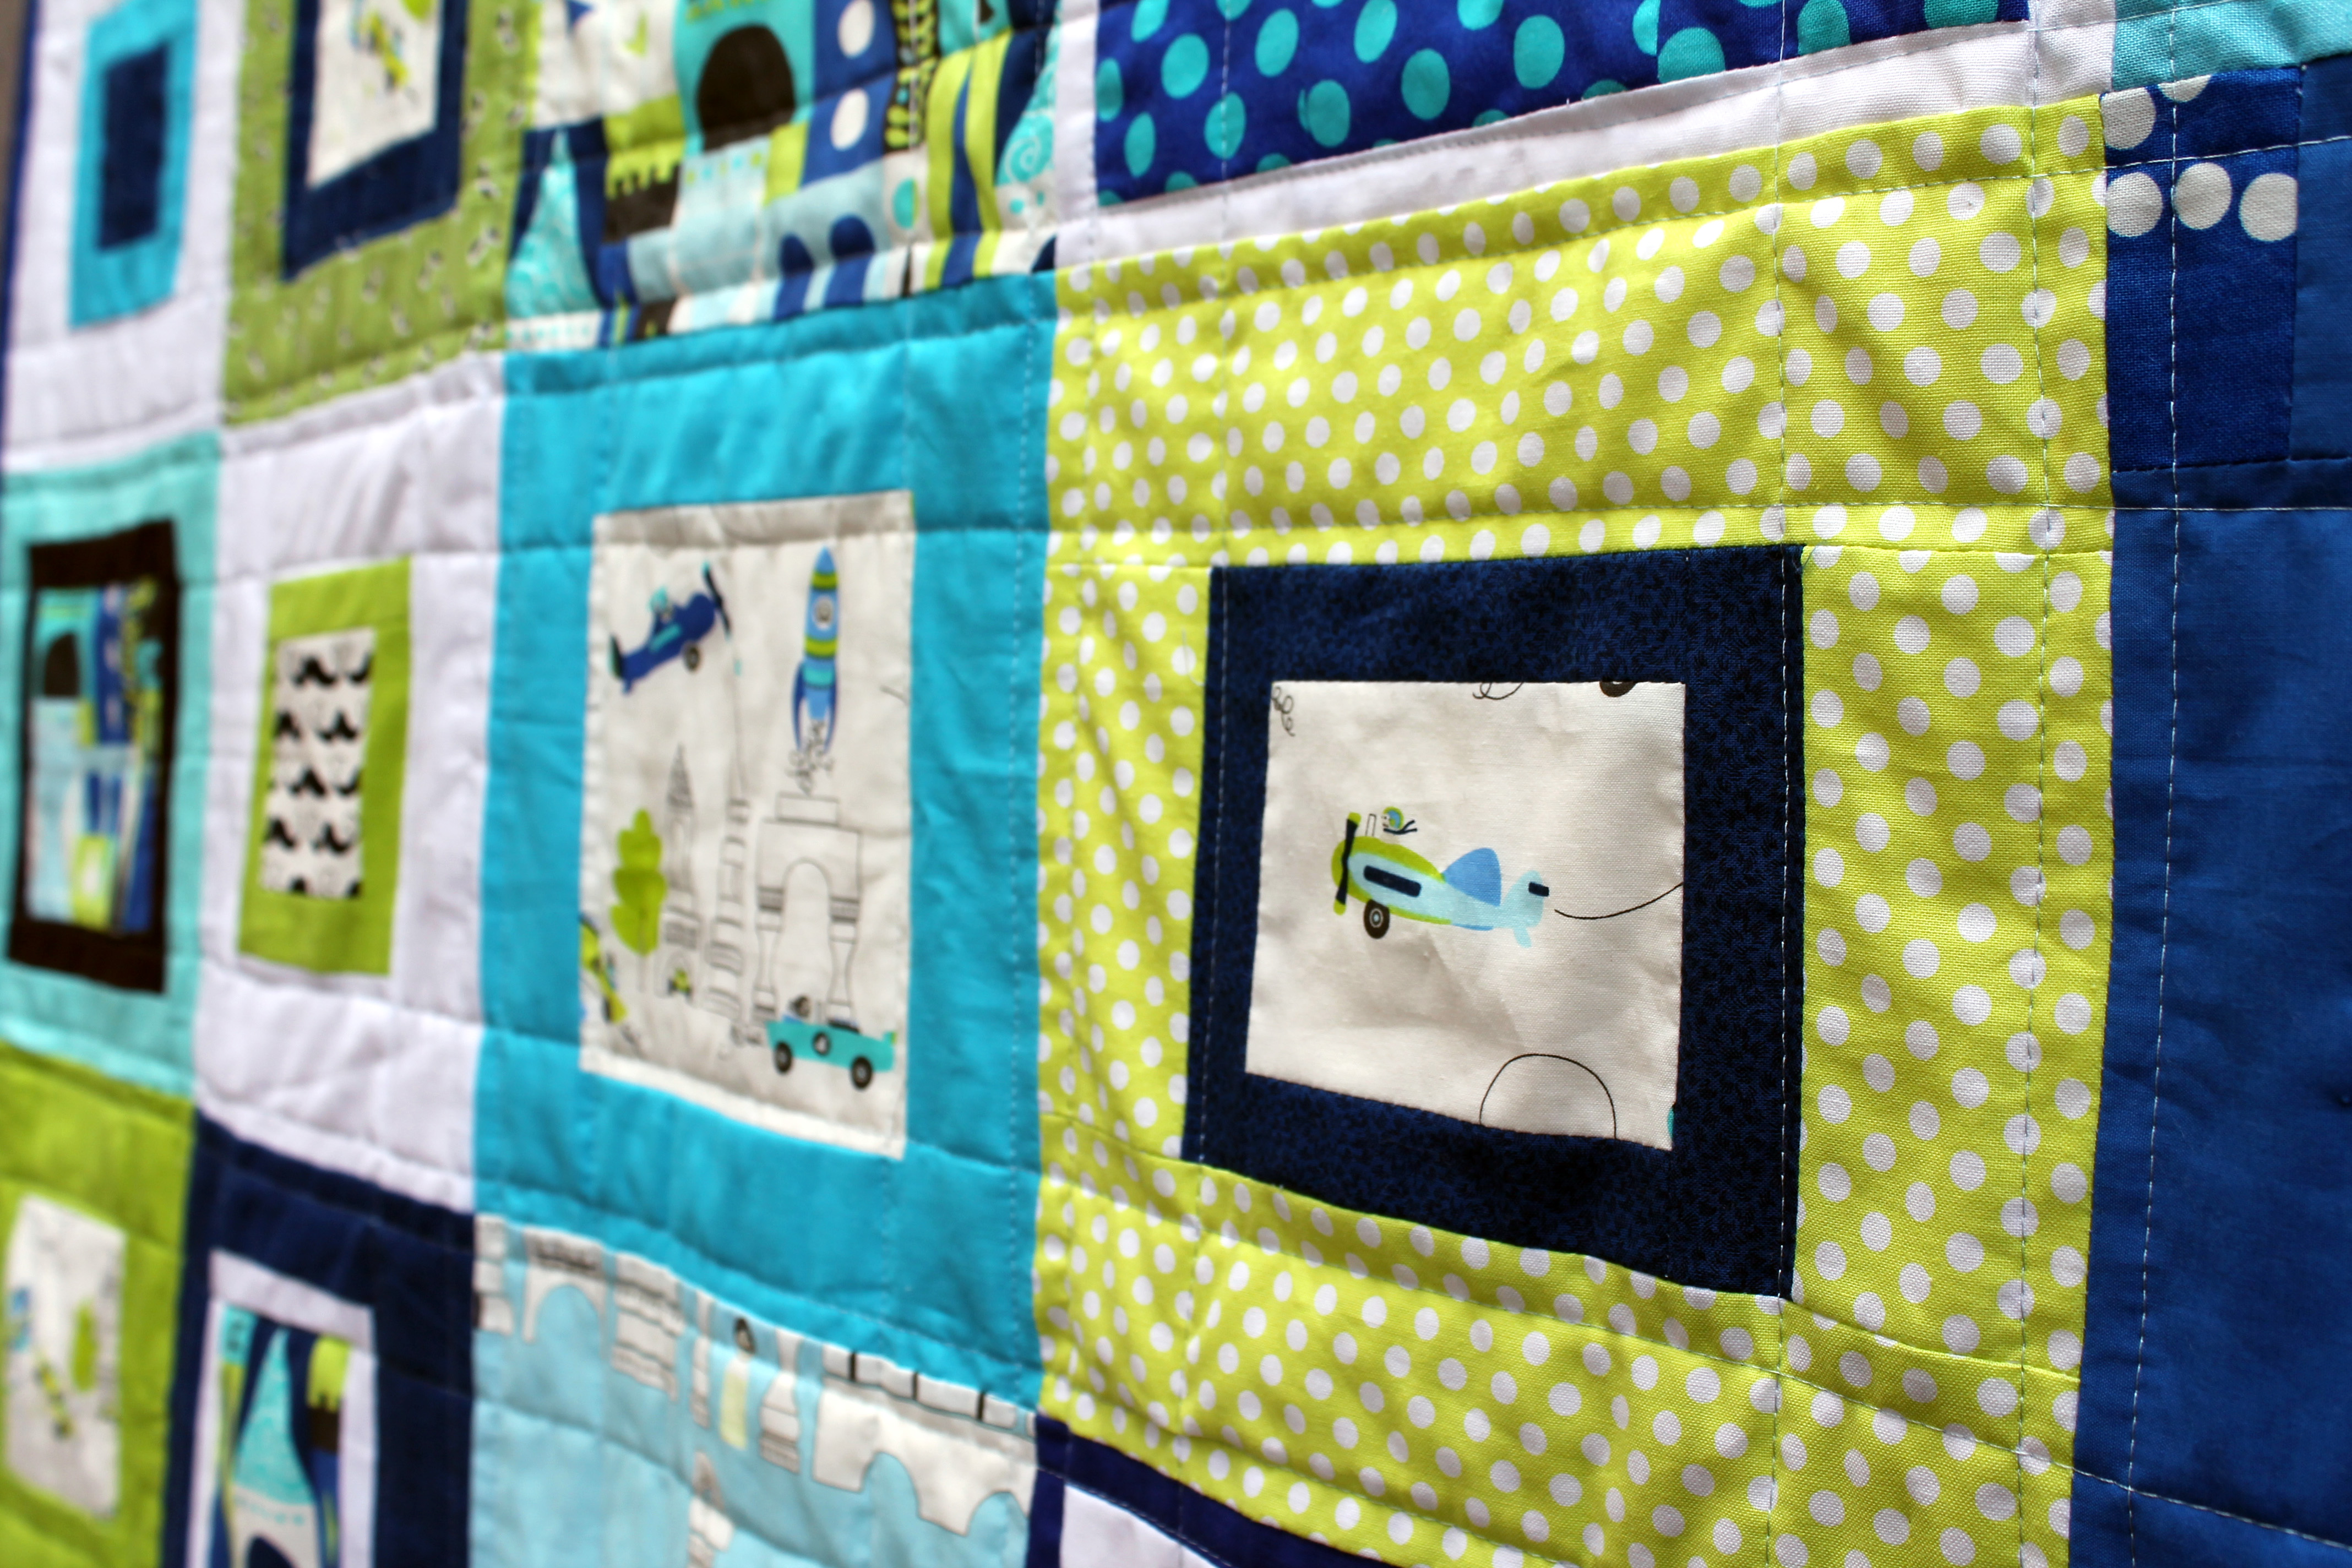
You may also have noticed some fun little sashing on the top.  I love this touch, but it was not planned.  When I set this block, I forgot that several of our Circle’s member had not done paper piecing before… and I had forgotten to give instructions on downloading the paper piecing pattern.

You see if you print a PDF straight from the website it prints out slightly smaller than standard.  You need to download the PDF to your desktop/computer and then print from the download to get accurate sizing. Arkansa quilt detail 2

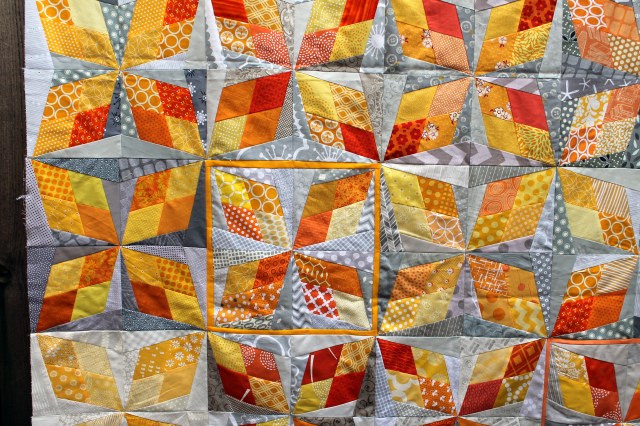
Also if you select the print dialogue box “print to fit” when you send the document to print it will also print out slightly smaller than needed.  In the end the best thing to do is measure your pattern before you start sewing it, to make sure it is the correct size.

Arkansa Quilt detail

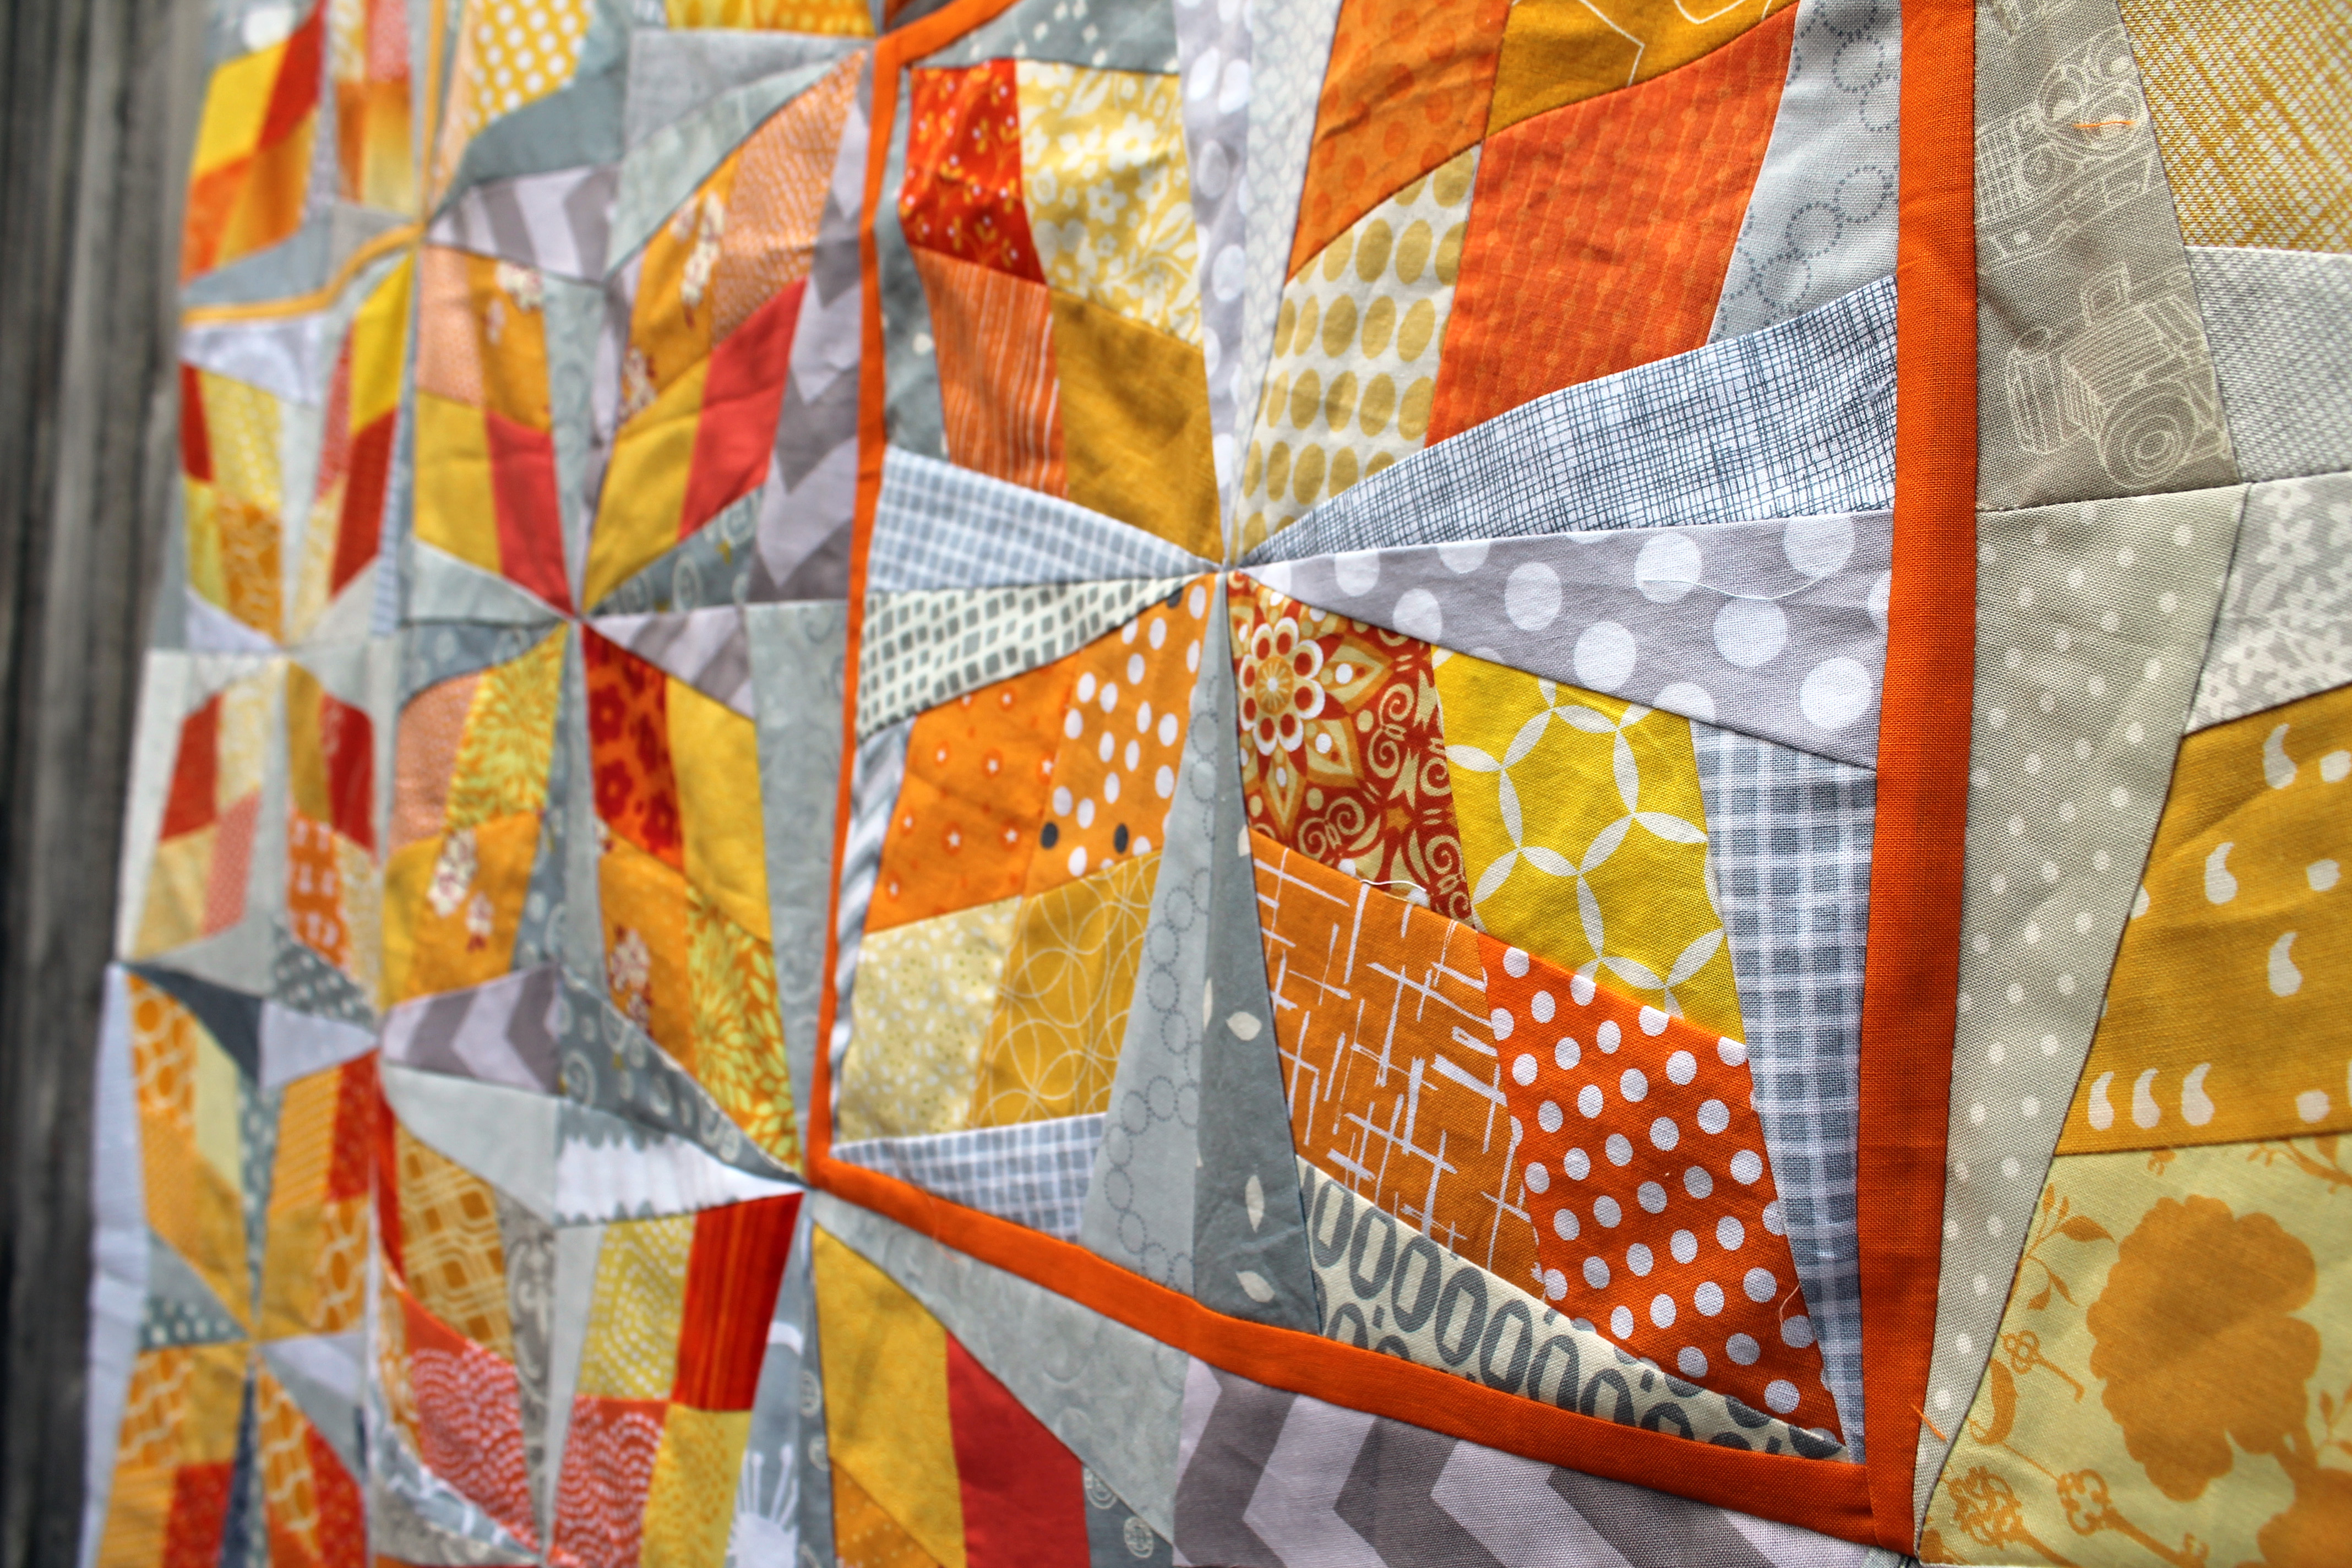
The four blocks that were slightly under size got a special border which added a wonderful pop of colour to the top.

So many times in my creative life I find little mistakes or hiccups make me think more creatively…make me rethink my original vision…force me to think outside the box.   The end results have always be so much better than my original plan.  This has been true with my painting, my film making and my quilting.

I am also linking up with Finish It up Friday over at  Crazy Mom Quilts.

The joy of a good Crossword Puzzle…

This week I have been working on a top-secret project for Quilt Market so my personal quilting has been at a minimum… but I did manage to squeeze enough personal sewing time in to get my Crossword Quilt top all done…

crossword quiltThis is a very quiet quilt and very simple, but I love it.  The subtly of the pattern is just perfect and adds just the right amount of interest to this low volume quilt.

Crossword Detail

I used white on white tonals, creams and greys for the back ground “newspaper” of the quilt and black and white/cream prints for the crossword section.

font print detailI used as many font or print patterns as I could find, which included raiding a few of my friends, stashes…. special thanks goes to MaryAnn who had some wonderful prints in her collection that she kindly shared.  Oh and of course there is some Pearl Bracelet… I can’t make a scrap quilt without surreptitiously sneaking it in somewhere!

crossword detail 2This top is a big one… 67.5 x 76.5.  I actually played with the original pattern a little to make the quilt just a smidgen smaller than the on in “A month of Sundays”.  The book actually encourages you to make up your own crossword, which is kind of fun.

So this is the point in the post where I admit I don’t understand the joy of a good crossword puzzle.  My mum does them everyday but they frustrate me no end…oh and do not get me started on the craziness that is cryptic crosswords.  Seriously they make no sense at all.

A Briar Rose finish

This week I finished the first of the quilts that I am dragging back to Australia in November.  I know I am cutting it close, but I am a girl who works well with a looming deadline…

briar rose quilt

This darling quilt, made using just Heather Ross’s Briar Rose and Kona white, is for my cousin’s daughter, Annabel.  I started it in October last year (I really am slow to finish stuff without a deadline), and you can find out more about the pattern on my original post.

briar rose quilt detail

A few years ago I made Annabel a baby quilt, but never got it to her (I am also slow to post things!).  After she was no longer a baby, I gave her quilt to Project Linus and started making this quilt… which is much more young lady appropriate.

briar rose quilt detail 2

I used about 1/4 yard of each of the fabrics in the line, which means I still have enough of the fabric in my stash to make something else.  I love these prints, but am particularly smitten by the bees…

Briar Rose bee detailFor the quilting I used some of the lines of the block as a guide and ended up with a really cool pattern of stitches, some straight and some diagonal.

Briar Rose quilt back

I pieced together a back using a large cut of one of the floral prints and some little bits of my favorite strawberry prints…. and finished it all off with some scrappy pink binding…

binding detail

So one Aussie bound quilt done, two to go!

Quilt Details:
Pattern:  Labyrinth by Red Pepper Quilts
Fabric:  Briar Rose by Windham Fabrics
Size:  52 x 52 inches


100 Quilts for Kids

This week I finally finished another quilt… I mean completely finished – quilting and binding and all.  I have been pumping out the blocks and tops but have been a little lacking on finishes… until now.  So without further ado here is my Les Monsieur quilt…

easy kids quilt

This was a fast and fun quilt to put together, I made the top in February in very little time (see my original post) but it spent months sitting in the “must finish” pile.  For this quilt, I started with a handful of the prints from Michael Miller’s fabulous Les Monsieur line and some coordinating fabrics from my stash.

Les Monseur block detail

I then spent a few hours making log cabin blocks, all 9 1/2 inches square but with random sized logs/sashing.  What I love about this type of quilt top is that it is a great way to highlight a fun novelty print line…and I always start by cutting out blocks of just the prints (giving you instantly 3 – 4 blocks to start).

quilt detail

Then I fussy cut some of the novelty prints for the center of the blocks and go to work.  It is just fun putting everything together, of course making sure that there is some lights (in this case white) and darks (navy blue and a touch of brown).

block detail 2

If there are any of the focus prints left over I tend to incorporate them into the back of the quilt.

Les Monseur quilt back

This quilt was delivered yesterday to Project Linus and is one of my entries into this years 100 Quilts for Kids drive.

For the last couple of years I have been a part of the 100 Quilts for Kids drive that Katie Blakesley of SwimBikeQuilt set up.   The idea is simple, for the months of August and September you are encouraged to make a quilt and donate it to a child/teen in your own community.

This year the quilt drive is being hosted by Quilts in the Queue and there are some beautiful quilts that have already been donated …. oh did I mention you can also win some lovely prizes by donating a quilt and then linking a photo to the 100 Quilts for Kids site?

Starry Night… the big reveal

Okay I finally managed to wrangle the Starry Night quilt top enough to get some photos. I must admit there are a few strangling pieces of paper still attached to the back…

stain glass

but I promised a reveal today so here goes…

Starry night quilt topAs you know, if you have followed this quilts progress, I did not have a plan of how to put this together.  I just went with the flow, putting pieces up on the design wall and jigsawing the blocks into a top (a technical maneuver I do not want to attempt again!).

starry night detail 4

My design wall was too small for it, so I had pieces hanging off the wall and laying on the floor….

starry night detail 2

My first step was to arrange the star blocks in a rough layout that made sure that they were as evenly distributed and as balanced as I could get them.

starry night detail 6

I carefully placed the bigger stars around the quilt making sure that the fractured stars were separated as well as the ringed stars. I wanted the eye to move around the top exploring and I felt this was the best way to do it.

Starry night detail 7

I then I placed the smaller stars in the gaps!

starry night detail 3

Finally I just filled all the spaces with scrappy blue blocks… and voila… you have a finished quilt top.  A scrappy, random, crazy quilt top.