Lost in the infinite Starry Night…

Well that at least is what it has felt like the last couple of weeks.  My design wall has been home to just one thing…  my Starry Night quilt.  I was determined not to take it down until it was finished… and I didn’t…

design wall

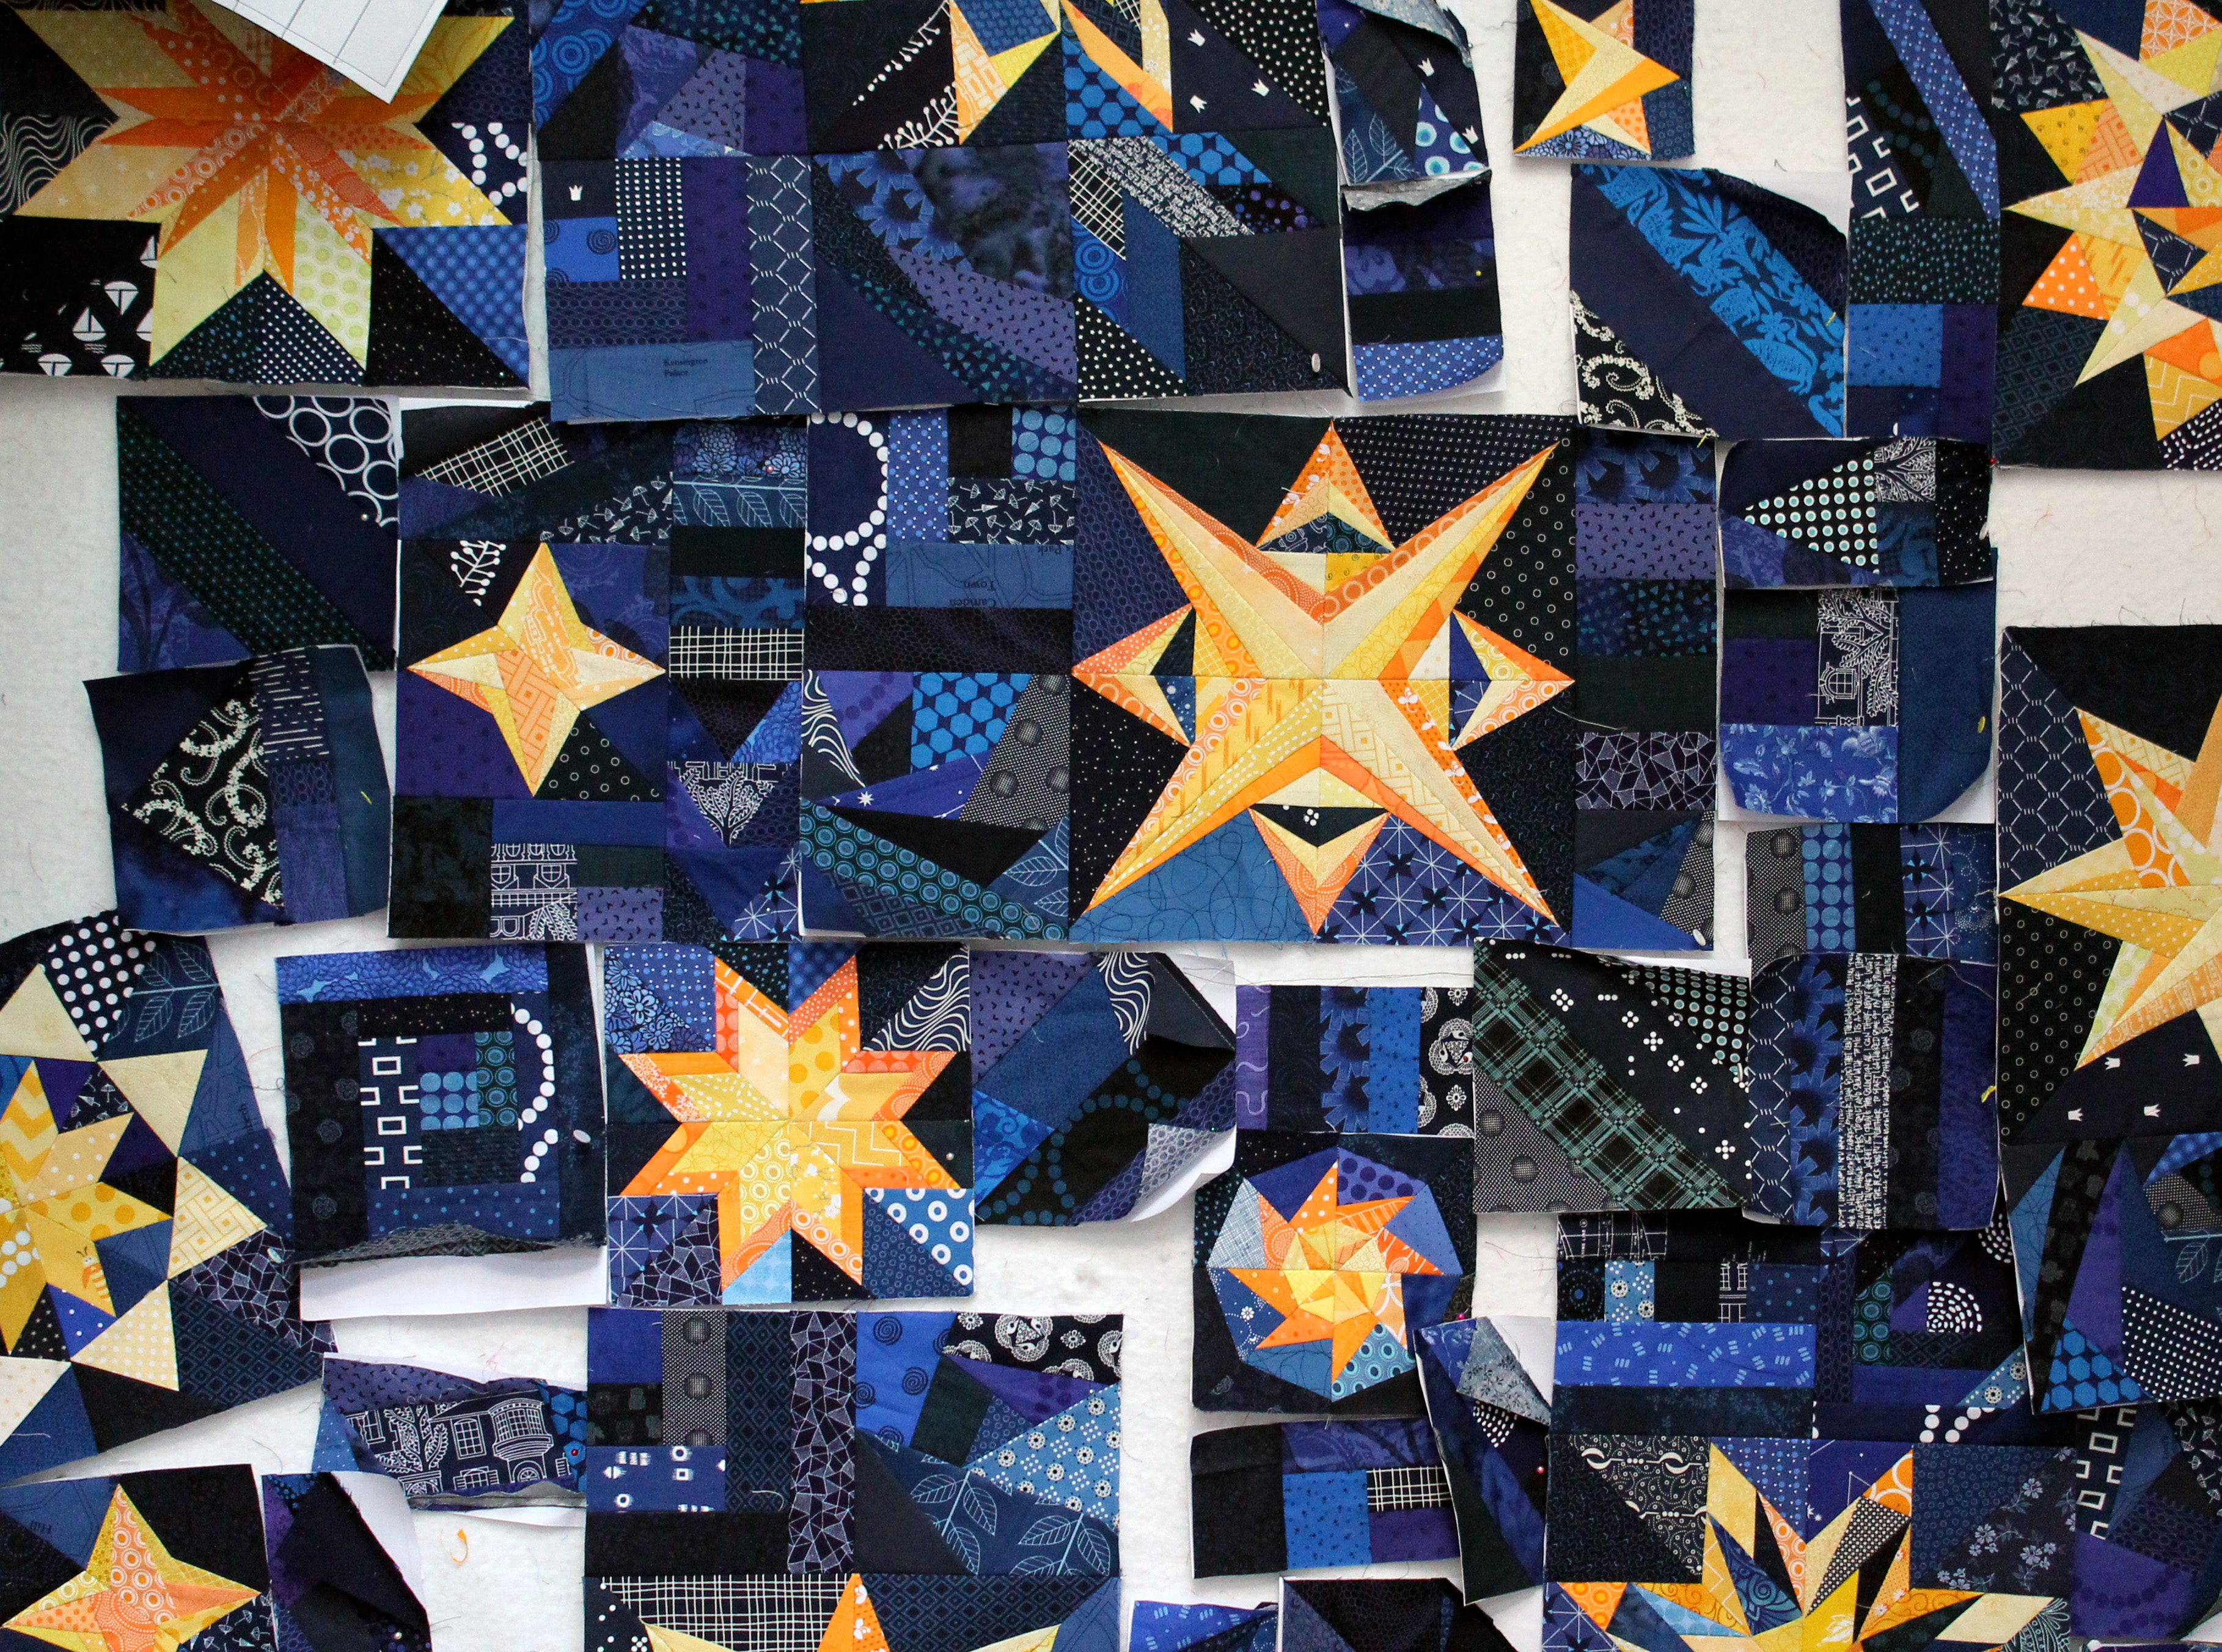
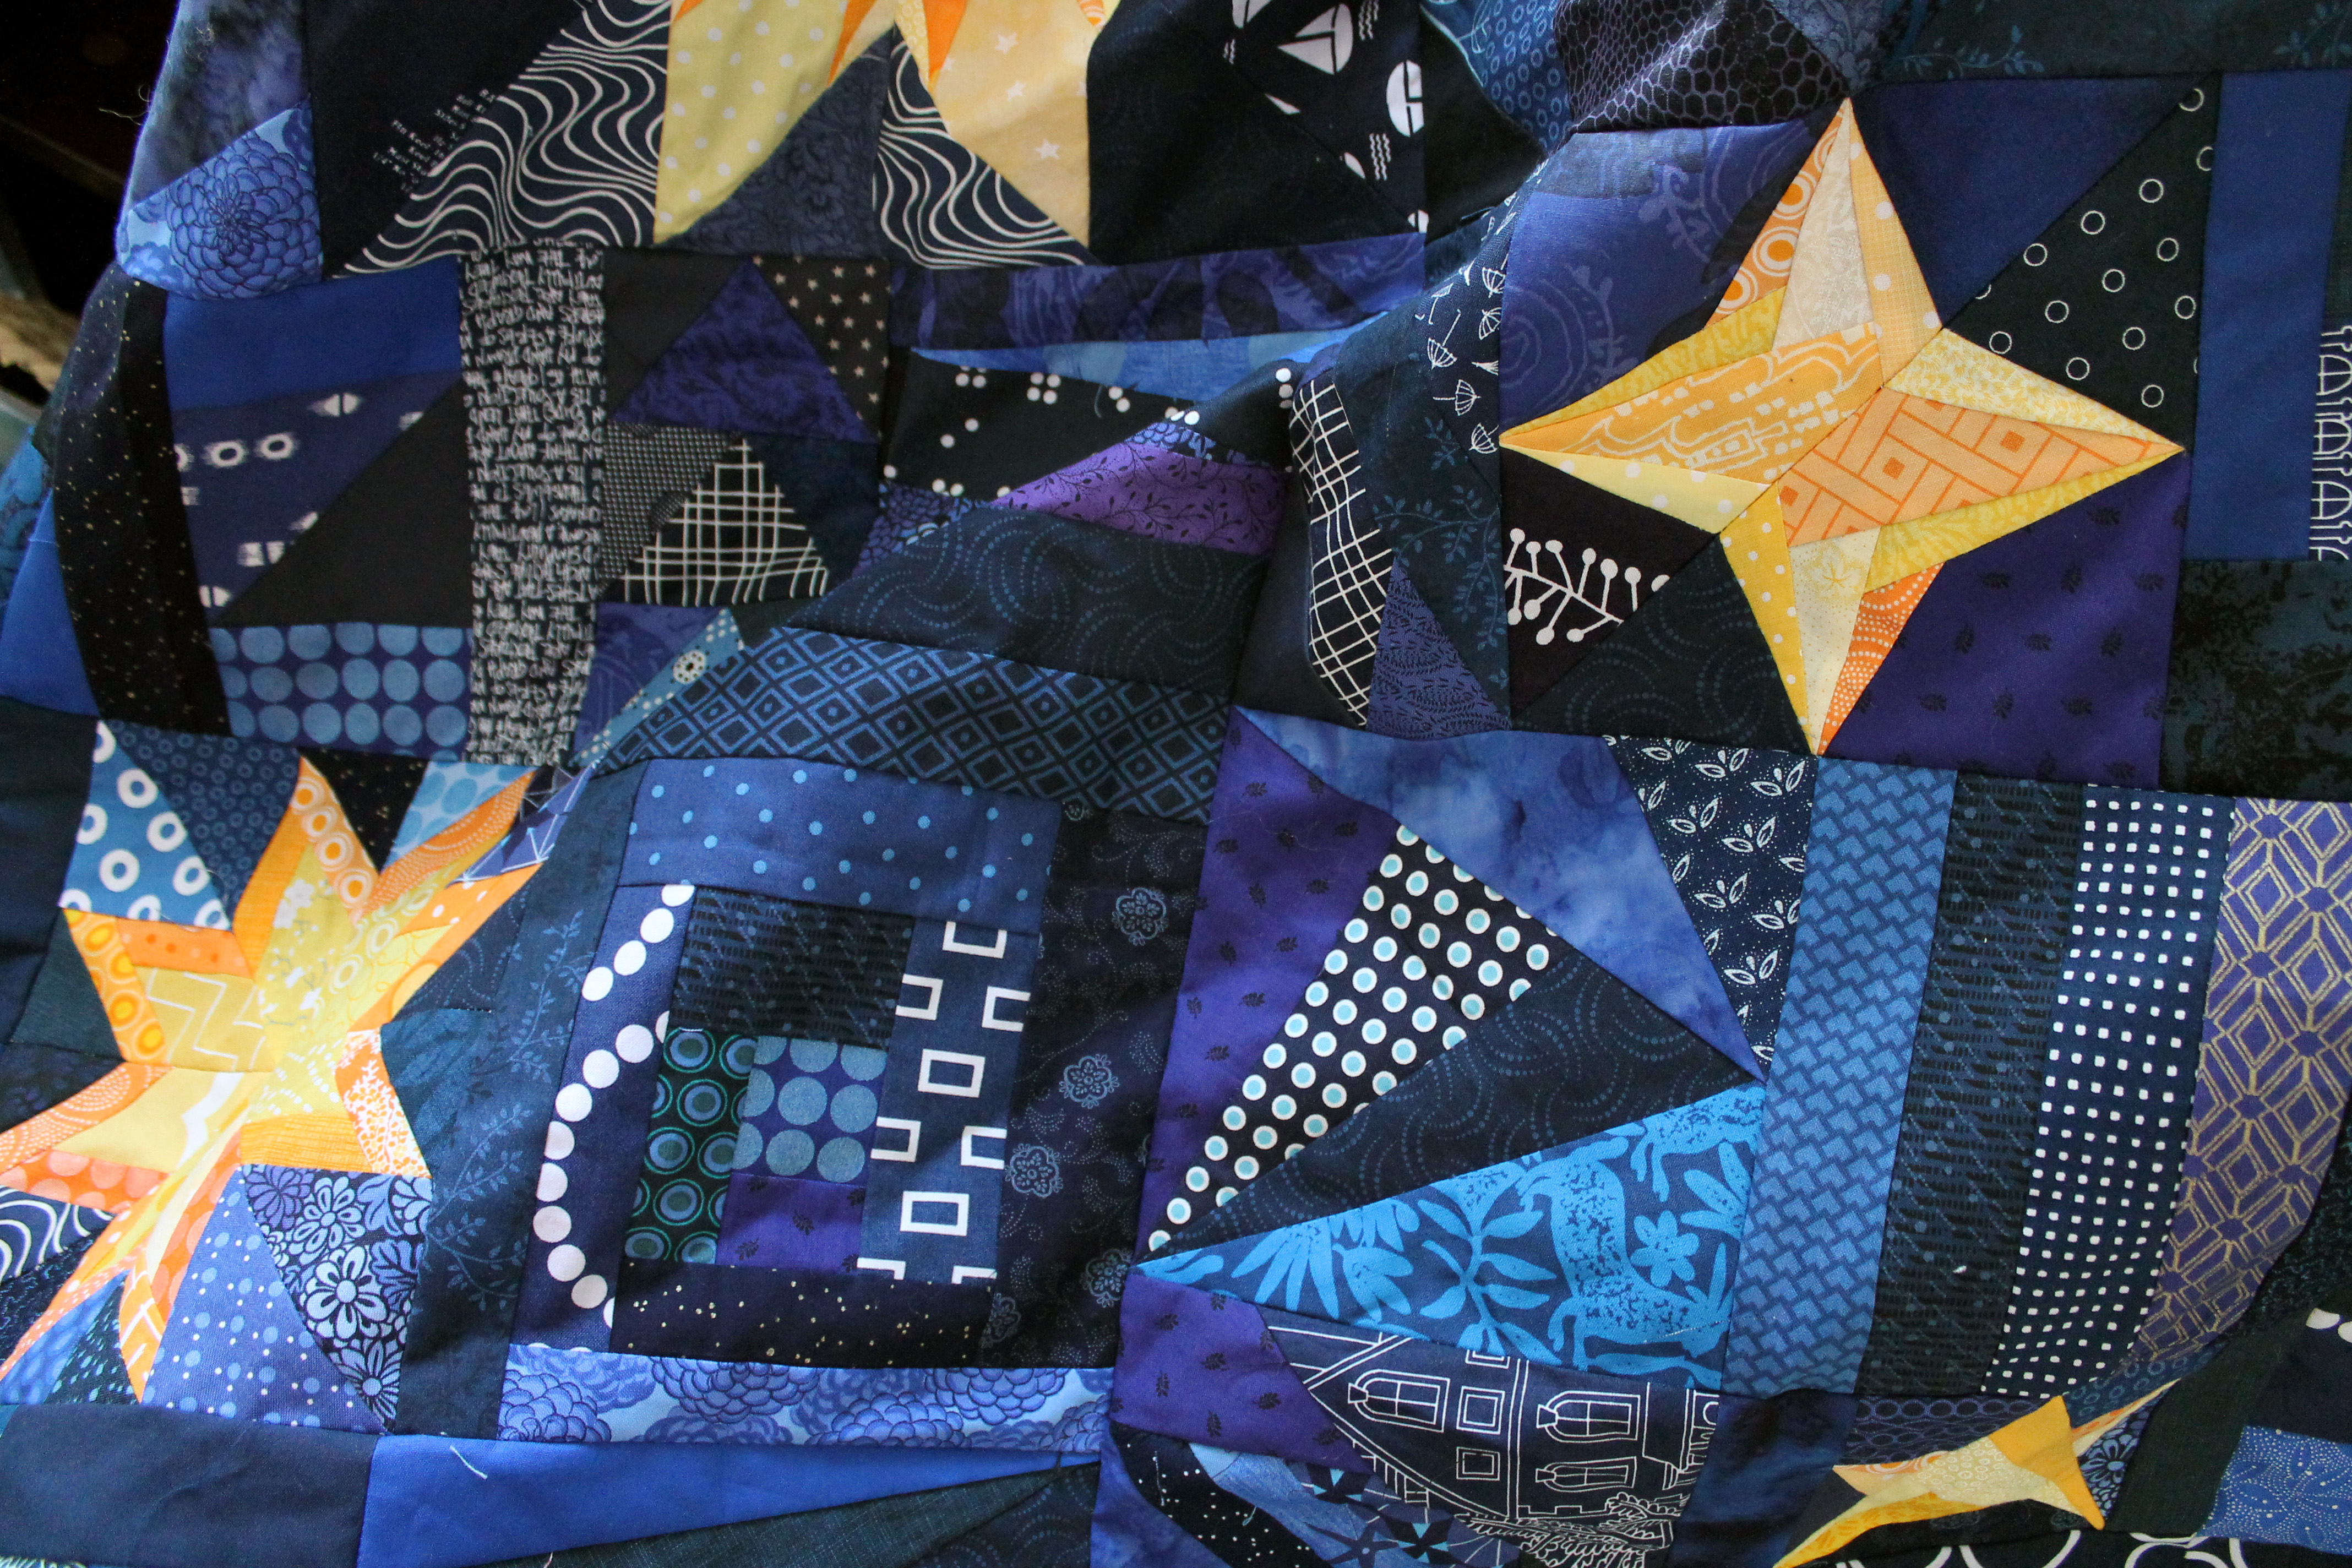
Over the last weeks I have added more night sky bit by bit…

photo 3 (1)

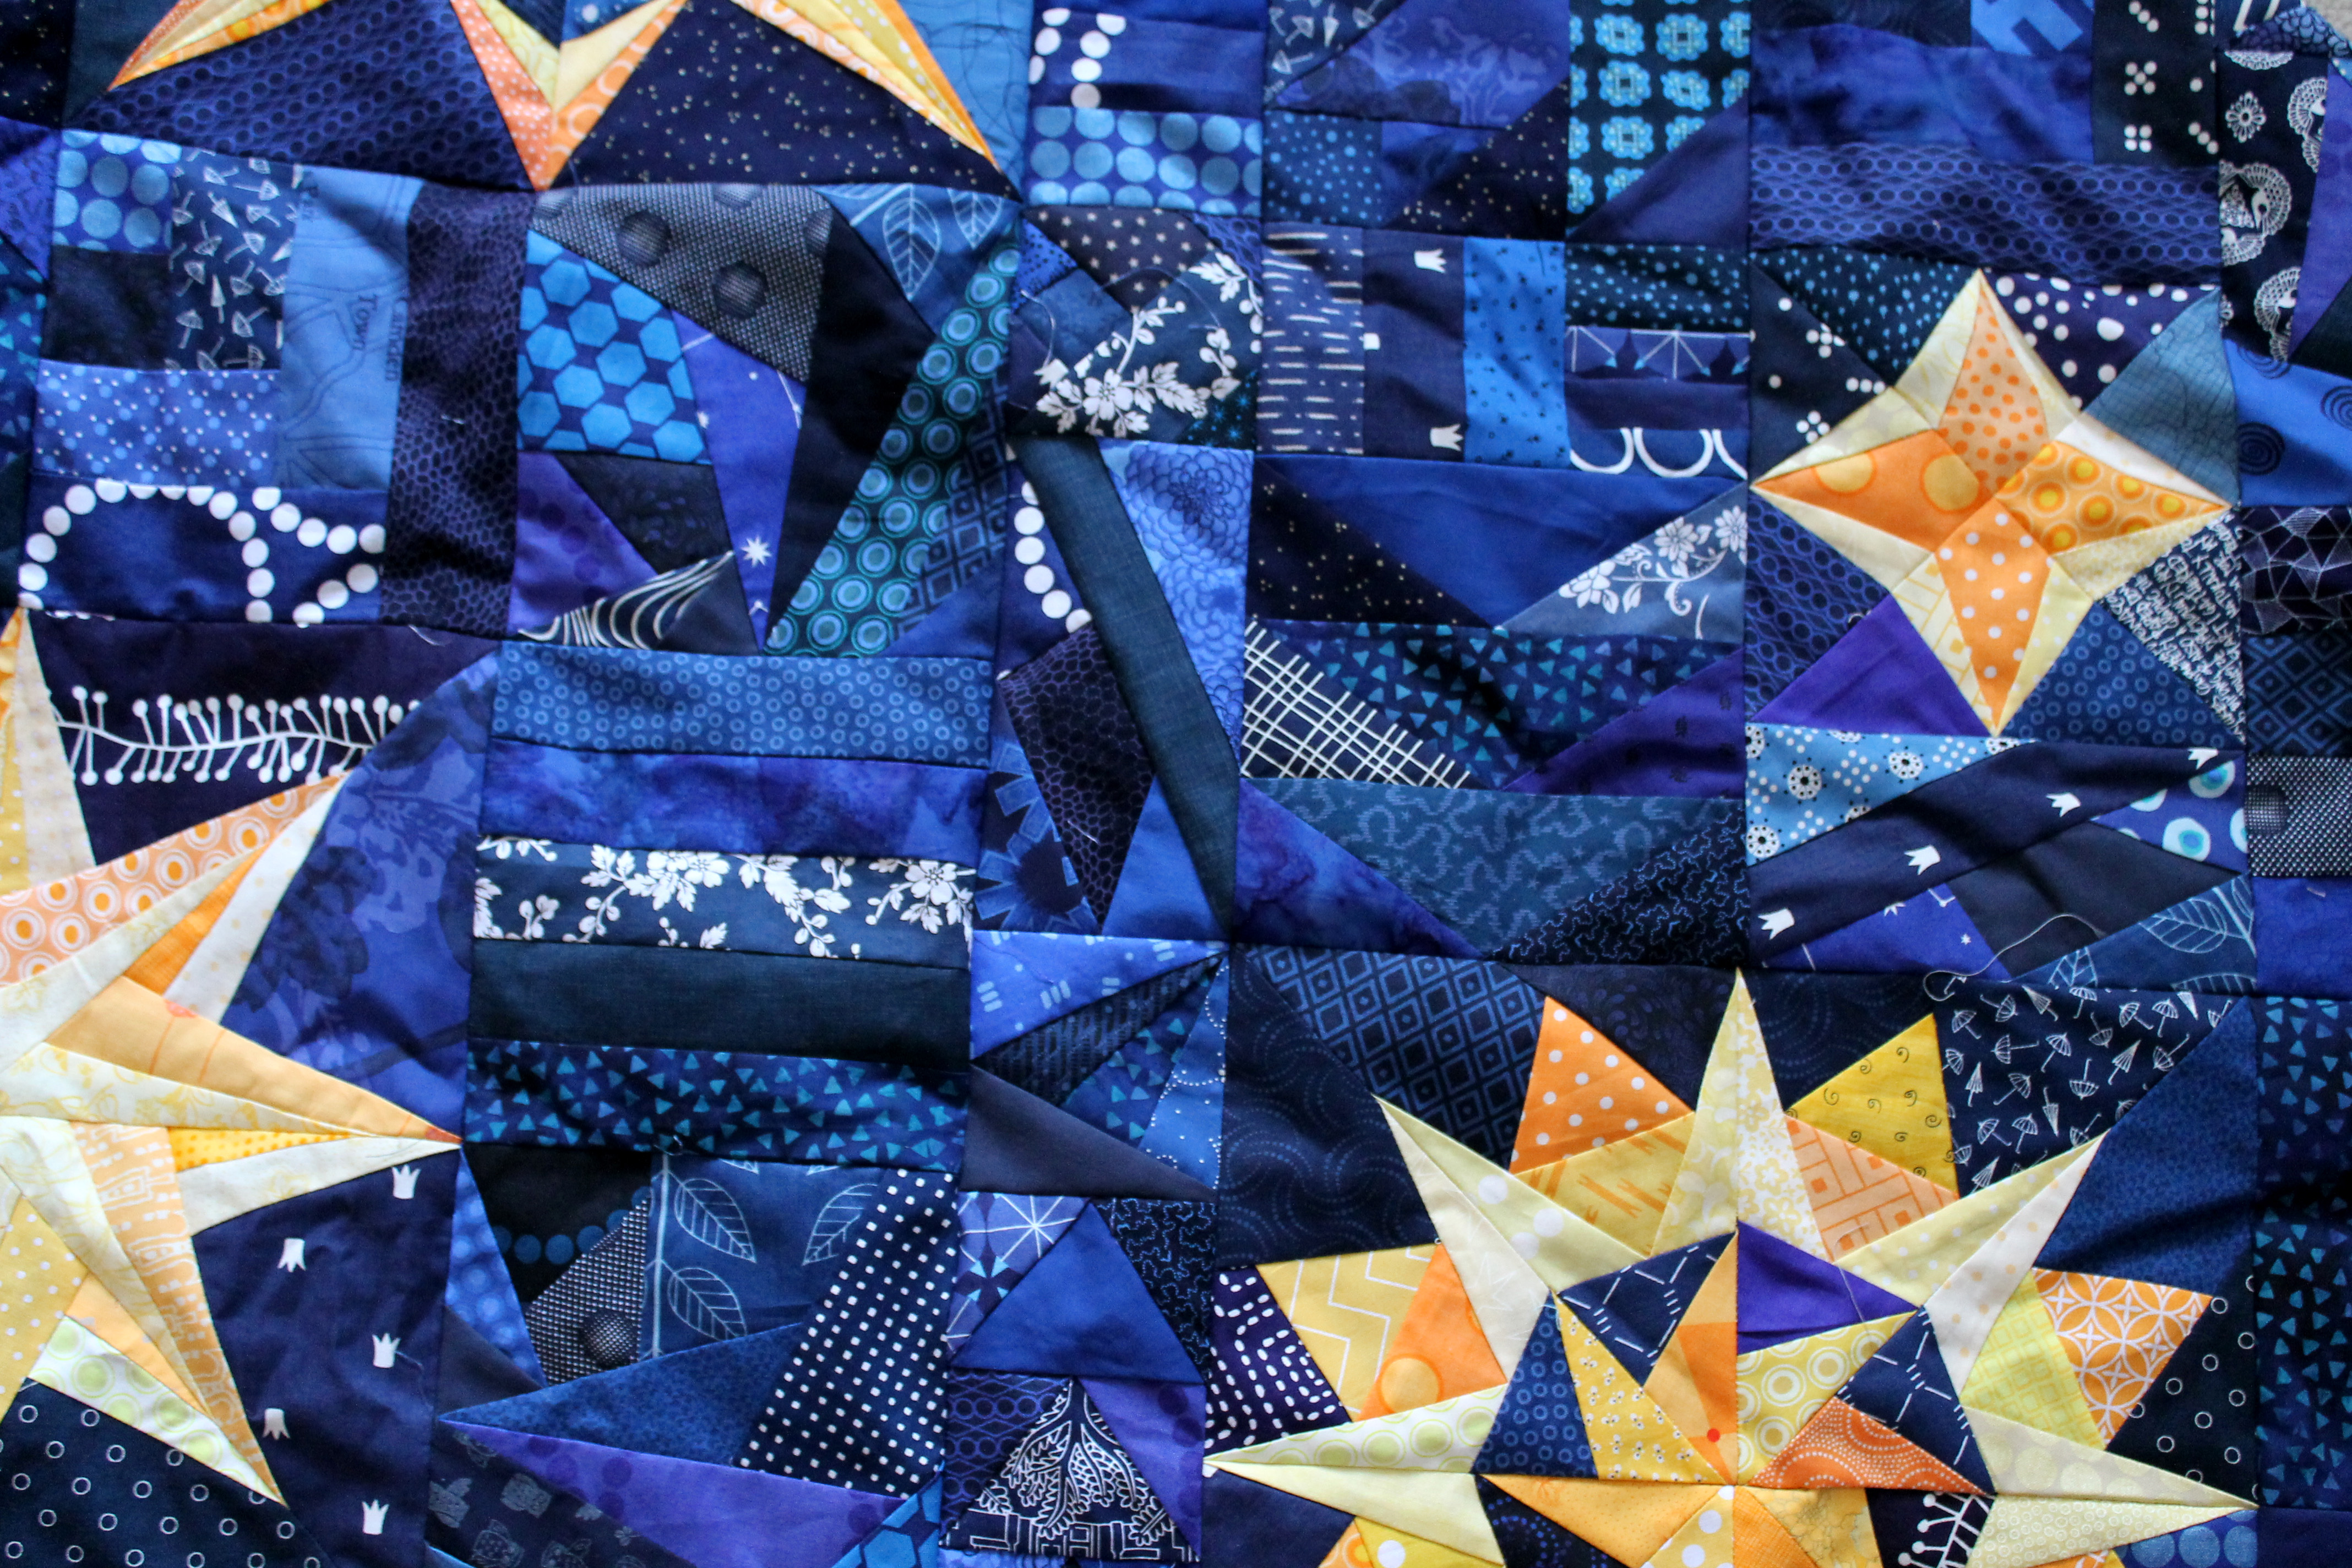
The white bits of the design board became smaller and smaller…. and this week I finally finished all the sky blocks and wrangled all the pieces together…

completed top cu

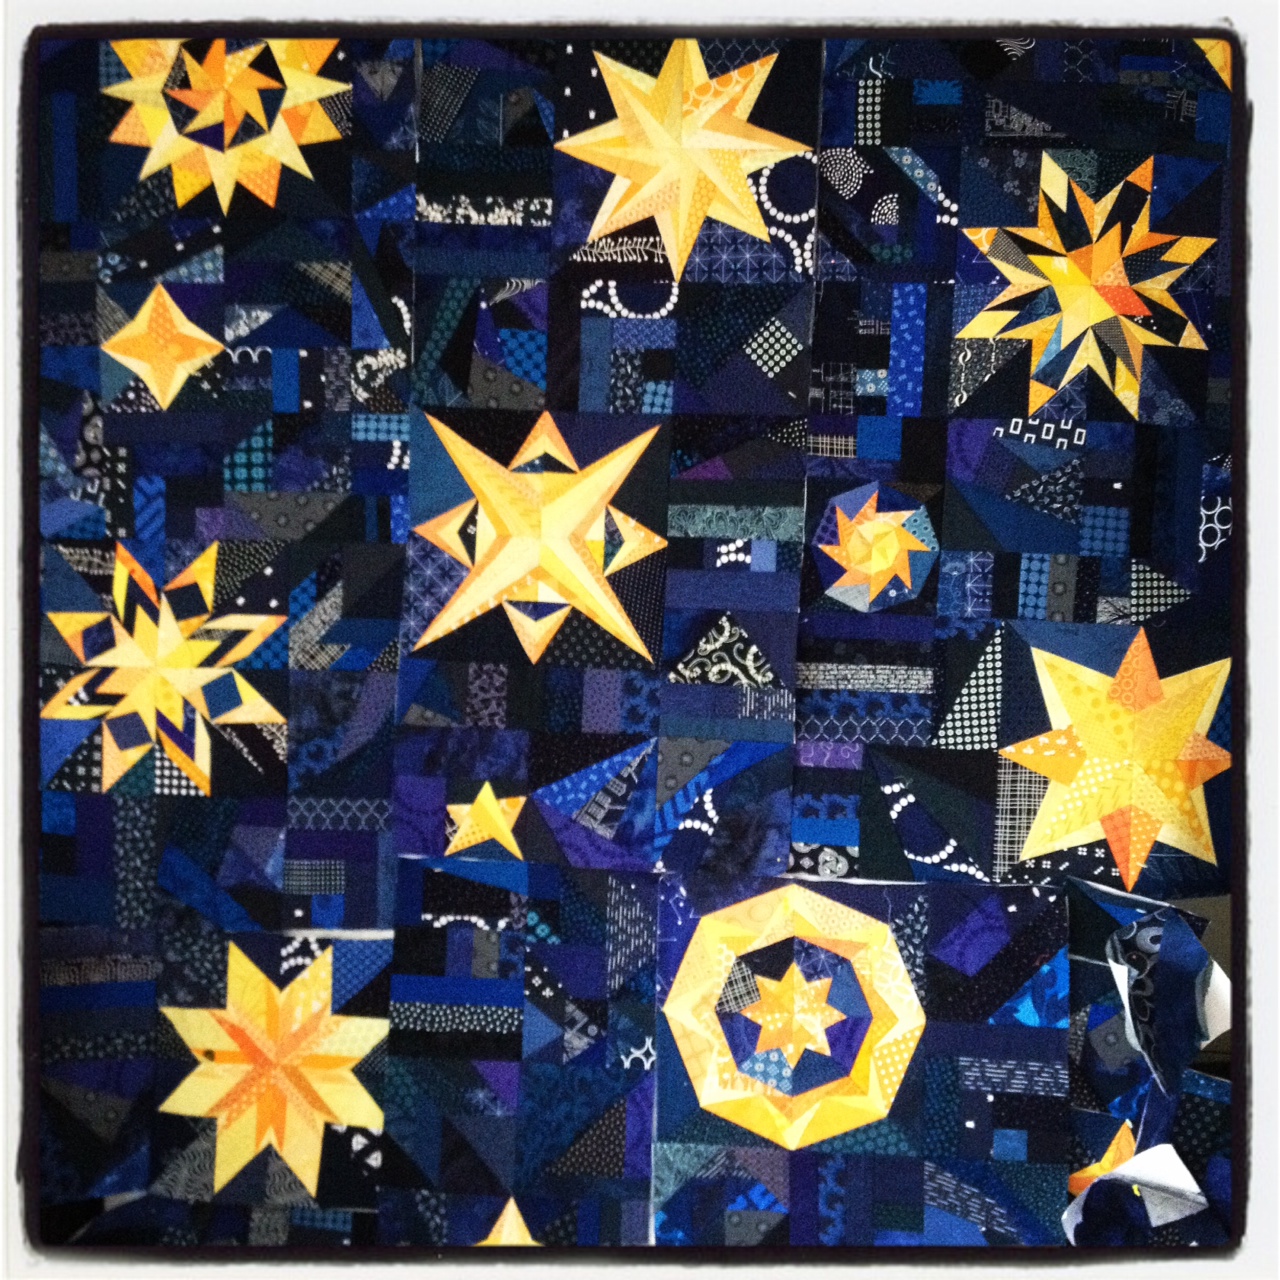
Starry Night quilt top is now finished….It was quite a task to get this paper stiffened behemoth through my little old domestic machine but I did it… with only a few minor injuries.

completed starry night 2
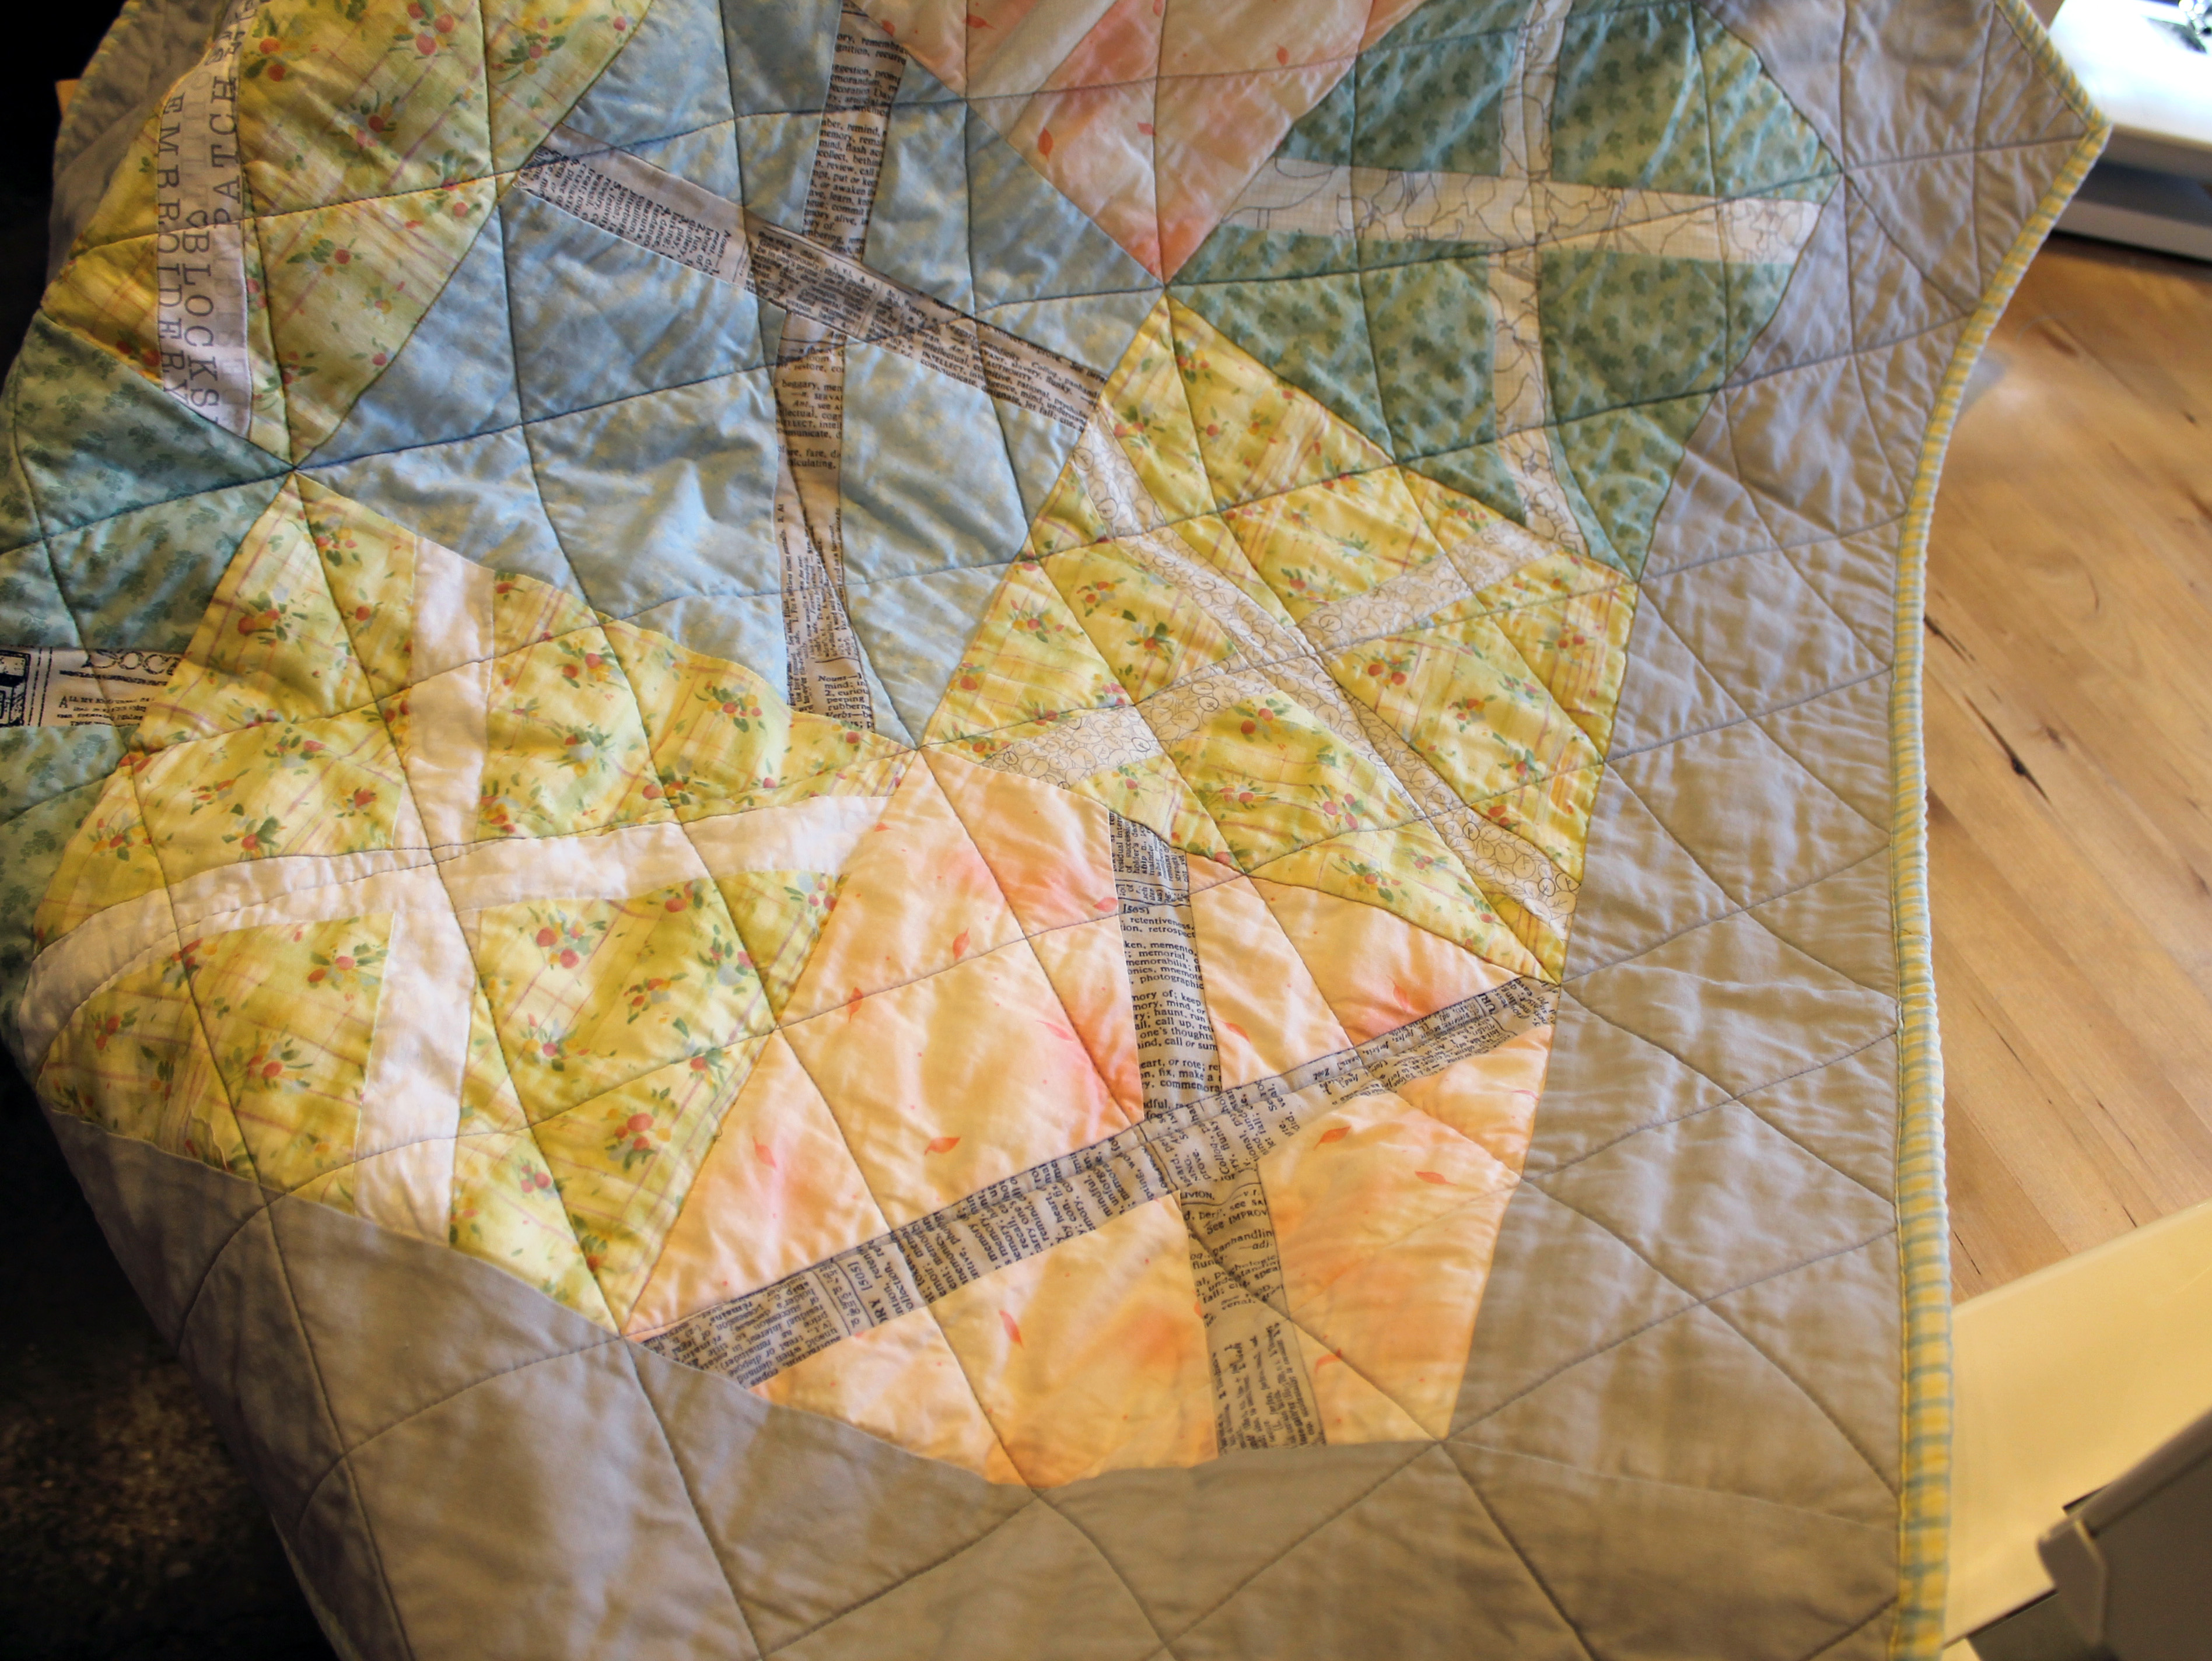
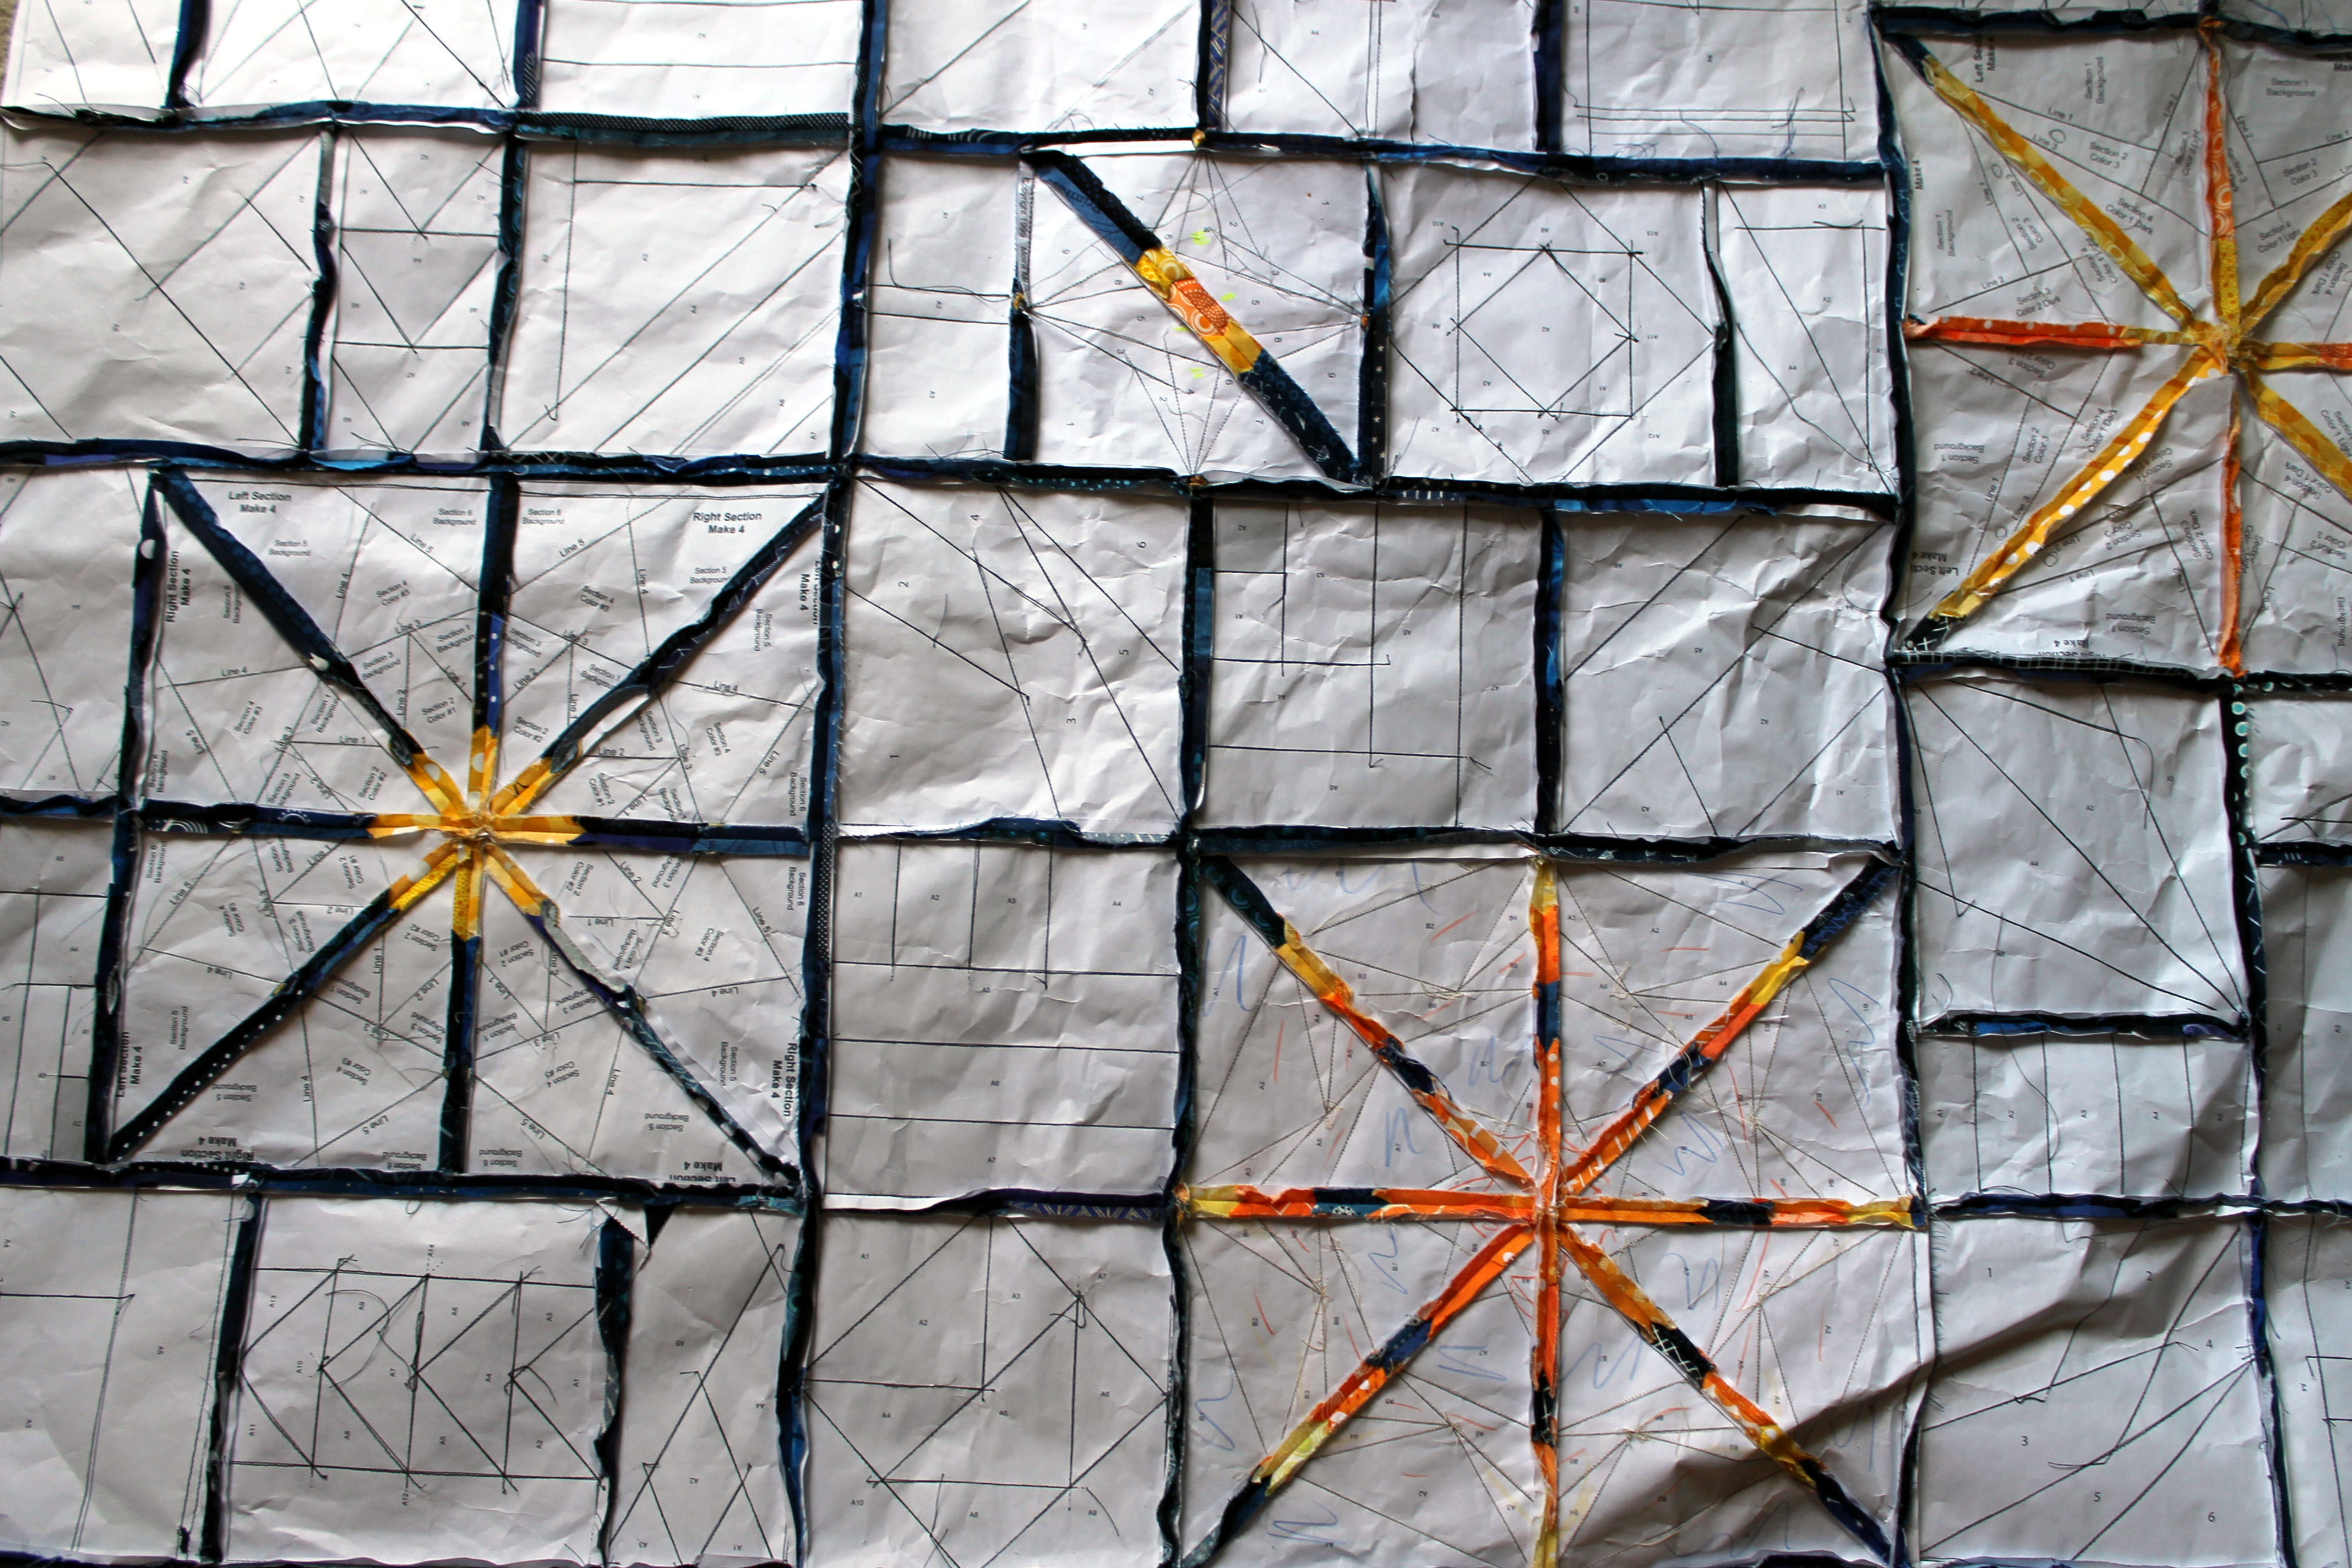
The most interesting view of this creation, I think is the back, with all the paper pieces still in tact.  You can see just how much variety there is in the night sky.  I had a blast playing with the EQ7 paper piecing library and I do not think this crazy would not have been possible without EQ.

completed paper back

I think if I had set out to do the sky this way in the beginning I am sure I would have found some way to talk myself out of it.

completed Starry NightAs it was I just did it bit by bit, not really fully understanding how insane I was being….

Top completed cu

Once the paper is off I will post photos of the complete top… at the moment it is just to stiff and unruly to handle…. next week I promise a full quilt top reveal.

Some little quilts for a good cause…

Last week Maryann, the PMQG President, and I dropped off a collection of darling little quilts for a new Neo-natal ICU unit that has just opened up locally.

We delivered nine quilts, and know that other PMQG members dropped off more during the week.  We picked the quilts up at Modern Domestic, who kindly allowed us to use their store as a backdrop for the photos.

The quilts included a couple I had made…. including a disappearing nine patch quilt using some lovely Hoffman Batiks that Sam at Hunter Design Studios had given me.

wq nine patch quiltA lovely little strip quilt I made using a Moda Scrap bag.

wq stip quilt 2

And a simple patchwork quilt using leftover Glitz fabric from Michael Miller.  I was so excited to see how well this fabric washed up.

wq glitz quiltThe fabulous Monica Solorio-Snow made two darling quilts using her Happy Mochi Yum Yum fabric.

Mochi quilt 1

Monica very kindly did up a free PDF pattern for this quilt which she shares on her website Happy Zombie.

Mochi quilt 2There were so many different techniques used to make these little quilts… Wonky low volume crosses by Mary Ann…

low volume quilt

Fussy cut bordered squares done by Susan Paris…

square quilt

Charming nine patches by Michael Ann….

nine patch quilt

And simple patchwork.

sweet quiltNot all the quilts had labels attached so please let me know if your quilt appears in this collection, so I can credit your lovely work.

The need for these quilts will be ongoing, so I already have a couple more in the works.  If you feel inspired to make a little (36 x 36)  quilt, most hospital NICU’s take quilty donations, or you can also drop a quilt off with your local Project Linus Chapter or other blanket charity.  It really is an easy way to make a difference.

So dust off those orphan blocks, pull out that novelty print you have that you do not know what to do with… go on make a quilt…you know you want to.

10 Quilty Little Secrets..

Yep I am going to do this… I am taking the 13 Spools Challenge

13 Spools

1.  I do not know the difference between pressing and ironing but I am assuming I do it the wrong way!

2.  I struggle with quilt math… it makes my brain hurt and I suck at it.  Often my paper pieced quilt blocks are a weird size – whatever size is the biggest I can fit on a sheet of paper.  My Atlantic Sea block is 13.78 inches square!

paper pieced quilt block3.  I do not understand holiday quilts… what use is a quilt that you only use once a year?

4.  I dislike the quilting part of the process… it physically hurts me and I am usually on painkiller for a couple of days after finishing a quilt!

5.  and while on the subject of quilting… I started hand quilting a quilt in 2000, got bored with the process and bound it before I finished the quilting.  I feel a little guilty every time I use this quilt.

cropped-cover.jpg

6.  I am not keen on the look and feel of machine binding but I still do it on charity quilts. Does this make me a bad person?

Scrappy binding

7.  I get annoyed by people who try to dictate what is “modern quilting” and what is not…and a lot of time the definitions seem self-serving to me.  The movement is bigger than just a few people and I think only history will be able to give us a clear definition.

8.  I do not pin my quilt blocks enough to every have the problem of sewing over the pins.

9.  I am too lazy to pre-wash my fabric.

10.  I get bored way to easily.  I have too many ideas and too many wips.  I counted 16 quilt tops last week in need of a finish.  I may have a problem…

Wow that was very therapeutic.  You should give it a go….

Full circle finish…

I am pleased to finally share with you my finished circle top…

Finished circle top

I can not believe how easy this top was to put together and how much fun I had doing it.  After years and years of avoiding curves I am thrilled to be able to add a whole new list of quilts to my “must do” list.

curve top detail

In my original post about this quilt I talked about the two different templates I used to make the curved blocks. There were some of questions about the EZ circle template so I thought I would take the opportunity to talk briefly about that process a little more…

stainglass quilt

For the following example I made a 6 inch Drunkard Path block… so to start I cut out a 5 inch square of my circle fabric and a 6 1/2 inch square of my back ground fabric.

To cut the circle out I aligned my 5 inch square to the bottom line of the ruler marked “Fabric fold line” and to the middle arrows of the ruler.

EZ alignI then ran my rotary cutter along the inside of the “8” finished circle” grove.  If you want to make a complete square with this ruler you cut a 10 inch square of fabric and fold it in half length wise and width wise so you end up with a 5 inch square of folded material.  You follow the above steps, making sure that the folded sides of the material align with the “fabric fold line” marks on the ruler.

EZ circle cutYou now have your inner curve… so onto your outer piece.  For this piece I choose to cut a 6 1/2 inch square but you this ruler gives you some great creative choices here.  If you want less background in your block you could go down to a 5 1/2 inch square or if you wanted more back ground you can increase your back ground square as you want.

EZ background cutYou are aligning your background square as you did your inner circle square but this time you are cutting on the curve 1 inch less than your circle curve.  For me this meant I cut on the 7″ finished circle line.  Again if you want to make a circle using this ruler, make your background piece double the size (in this case my background piece would be 13 inches square) and fold your fabric before cutting.

EZ overlapCutting the background on the ruler curve 1 inch less than your inner circle give you the seam allowance overlap you need.  You are now ready to sew your curved pieces together.

quilt top detail 2For the blocks of my Acidic Curve quilt I cut a 9 inch curve and then had a 6 inch background block with a curve cut out using the 8″ mark on the ruler.  This gave me a finished circle block of 11 inches to work with.orange circle block Hopefully I have not confused you too much… but I can definitely recommend the EZ ruler. I am finding it is giving me great creative choices for the curved blocks I am making, though the biggest curve I can make with it is a 10 inch finished circle.

Excuses, excuses and some paper piecing…

Okay I had another slack posting week last week, but I have some good excuses really.  Excuse One….camping.

Yep I spent four days camping last week….Four whole days without a sewing machine, a computer, cell phone connection or a shower!  Despite the limitations I did manage to get some quilting done….

photo 1

I hexied up a storm… four days of hand work produced this lovely collection finished and ready to go….

hexie flower close up

I love the flexibility and ease of English paper piecing.  Whenever I am heading out the door to an appointment or event where I think I may have some spare time I just grab my hexie kit, just in case.

photo 2

So here is a much overdue shot of my quilt top so far… it is growing slowly.

Hexie quilt top wip

I am adding flowers willy nilly, I am sure there is an easier way to put the top together but I kind of like the “stick and flower here, stick a flower there” approach.

Hexies close up

My husband declared a month or so ago that this quilt was going to be his, because (1) this would ensure that he got a quilt eventually and (2) it would also ensure that I did not give this quilt away, as I am prone to do!

HexiesThe fact that the quilt will be pretty and loud and contains flowers does not seem to bother him at all!

Hexies cu

It does not seem to bother the cat either…

Kitty approved

Excuse number two for my slack posting will be part of Wednesday’s post….